
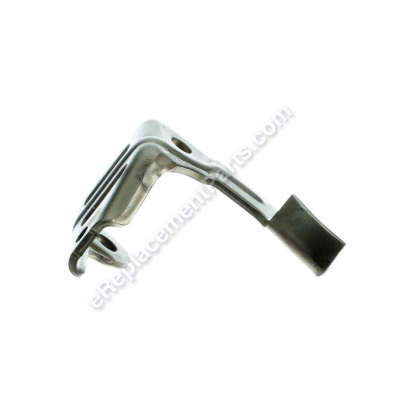
Valve Rocker Arm 14431-Z0J-000
OEM part for: Honda
Part Number: 14431-Z0J-000
Install
Videos!
Watch The
Repair Video
Repair Video
$6.93
In Stock
Jump To:
Frequently Purchased Together ?


Compatibility
This Valve Rocker Arm will fit the following 437 machines. Confirm this part works with your model, and view the detailed model diagrams and repair help we have to offer.
This item works with the following types of products:
- Engine Parts
This part replaces obsolete part #: 14431-ZOJ-000, 14431-ZL8-000
Customer Part Reviews ?
Average Rating (out of 5):
Click to filter by ratings:
5 stars
3
4 stars
0
3 stars
0
2 stars
0
1 stars
0
< PREV
- 1
great
Great condition arrive quick will do business again
ROMAN -
January 25, 2022
Verified Purchase
just what i needed
quick shipping
Guest -
June 1, 2021
Verified Purchase
Oem parts.
Oem parts from a company that makes it easy to find the parts your looking for and then maybe some you didn’t realize you needed!
Guest -
April 3, 2020
Verified Purchase
Questions & Answers ?
Our customer Service team is at the ready daily to answer your part and product questions.

Ask our Team
We have a dedicated staff with decades of collective experience in helping customers just like you purchase parts to repair their products.
Does this fit my product?Questions & Answers for Valve Rocker Arm
No questions have been asked yet
Customer Repair Instructions ?
All our customer repair instructions are solicited directly from other customers just like you who have purchased and replaced this exact part.
The Arm-Ex Valve Rocker was cracked.
Carl - February 14, 2016
👍 6 of 7 people found this instruction helpful
Tool Type
Engine
Difficulty
Medium
Time
Less than 15 minutes
Tools Used
Socket set
Remove valve cover. Remove Ex valve rocker. Replace Ex valve Rocker. Same for In Valve Rocker even though it was not damaged. Turn engine to timing marks, piston TDC.
Adjust lash at intake and exhaust rockers. Replace valve cover.
Adjust lash at intake and exhaust rockers. Replace valve cover.
Did you find this story helpful?
Thanks for voting and helping fellow customers!
Exhaust rocker arm failed
Roger - May 30, 2018
👍 1 of 1 people found this instruction helpful
Tool Type
Engine
Difficulty
Easy
Time
15-30 minutes
Tools Used
Socket set, Nutdriver, scraper, gasket material, feeler guage
Parts Used
1. remove valve cover
2.clean valve cover and matching head area using scraper (put rag down around timing sprocket to keep gasket debris from going into engine.)
3. remove spark plug and put a screw driver or socket extension into spark plug hole
4. rotate the timing sprocket by hand until the screw driver or extension raises up to the highest position = TDC Top Dead Center (mine had a red mark on the timing sprocket which made it easy)
5. remove the pin holding the rocker arm in place (you will need to take the adjustment screw off the old rocker arm and put it on the new rocker arm, leave it loose so you can adjust it later)
6. remove old rocker arm and replace with new rocker arm, put pin back in to secure the rocker arm
7. look up the valve clearance for your engine.
8. adjust both valves to the correct clearance using the adjustment screw (they will be different)
9. apply new gasket material for the valve cover
10. install the valve cover, tighten the valve cover bolts (be sure not to over tighten)
11. put spark plug back in and attache spark plug wire
12. start your engine
Did you find this story helpful?
Thanks for voting and helping fellow customers!
Valve lifter cracked
paul - August 30, 2016
👍 1 of 1 people found this instruction helpful
Tool Type
Engine
Difficulty
Easy
Time
15-30 minutes
Tools Used
Pliers, Socket set
Removed valve cover. Only 4 bolts
Removed lifter pins ( held in by the cover)
Replaced lifters with new parts and set lash.
Replaced cam pulley
Put sealant on back side on cover. Installed cover by tightening 4 bolts
Let sealant set up over night.
Added oil and gas....... Engine started on first pull!
Removed lifter pins ( held in by the cover)
Replaced lifters with new parts and set lash.
Replaced cam pulley
Put sealant on back side on cover. Installed cover by tightening 4 bolts
Let sealant set up over night.
Added oil and gas....... Engine started on first pull!
Did you find this story helpful?
Thanks for voting and helping fellow customers!
Timing belt slipped and broke rocker and camshaft
Gerald - August 3, 2016
👍 1 of 1 people found this instruction helpful
Tool Type
Engine
Difficulty
Medium
Time
1-2 hours
Tools Used
Screwdriver, Wrench Set, Nutdriver
I removed the Honda CVS160 engine from the pressure washer base after disconnecting the pump. After removing the rocker/cam cover and discovering the broken exhaust rocker arm and damage to the camshaft I surmised that the timing belt had slipped and caused the damage. I then split the upper and lower portion of the engine case and pulled out the defective timing belt. I had to remove a crankshaft coupling that was keyed to the crankshaft prior to taking the case apart. I installed the new timing belt and reassembled the lower case. I then replaced both rockers and the new camshaft/pulley and replaced the cam cover with new sealer. The engine started and ran perfectly showing that no damage had been done to the valves or piston.
Did you find this story helpful?
Thanks for voting and helping fellow customers!
Rocker arm was cracked.
Aaron - October 29, 2021
Tool Type
Engine
Difficulty
Easy
Time
Less than 15 minutes
Tools Used
Socket set, Flathead
Parts Used
Removed rocker arm cover.
Removed cracked rocker arm.
Installed new rocker arm.
Adjusted rocker arms.
Ran engine.
Job completed!
Removed cracked rocker arm.
Installed new rocker arm.
Adjusted rocker arms.
Ran engine.
Job completed!
Did you find this story helpful?
Thanks for voting and helping fellow customers!
Broken exhaust rocker arm
Frank - August 21, 2021
Tool Type
Engine
Difficulty
Medium
Time
30-60 minutes
Tools Used
Screwdriver, Socket set, Wrench Set, Cordless drill
Removed front cover and broke rocker arm, investigated the problem. Exhaust valve was hard to move, PB Blaster the valve ( problem, carbon buildup) worked it gently by hand until it spun freely. Used drill slowly spinning the valve and moving it in and out ( don’t over do it). Cleaned up the area, reinstalled the spring and rocker arm. Reassemble and pulled the starter rope to verify no problem. Be sure to set valves. Pressure washer runs like new
Did you find this story helpful?
Thanks for voting and helping fellow customers!
Rocker arm was fractured
Allen - May 28, 2021
Tool Type
Engine
Difficulty
Easy
Time
30-60 minutes
Tools Used
Pliers, Socket set, Wrench Set
Removed rocker arm cover. Removed rocker arm pins. Replaced rocker arms, installed pins. Sealed rocker arm cover.
Did you find this story helpful?
Thanks for voting and helping fellow customers!
Bent crankshaft due to hitting very hard object
Angel - October 23, 2020
Tool Type
Lawn Mower
Difficulty
Hard
Time
More than 2 hours
Tools Used
Screwdriver, Pliers, Socket set, Wrench Set, 2 and 3 jaw pullers, low and high range torque wrenches
Parts Used
- Valve Rocker Arm - 14431-Z0J-000
- Valve Rocker Arm - 14441-Z0J-000
- O-ring - 6.8x1.9 - Arai - 91301-ZM0-V31
- Seal- Valve Stem - 12209-ZM0-003
- Spring- Valve - 14751-ZL8-000
- Valve, In. - 14711-ZL8-000
- Pulley, Camshaft - 14320-Z8D-000
- Belt, Timing (84hu6 G-200) - 14400-Z8B-003
- Valve, Ex. (c8e) - 14721-ZL8-000
- Cover, Head - 12311-Z8B-000
1. Took off broken blades, blade holder and drive belt pulley. This required a two jaw puller due to bend in shaft.
2. Open up crankcase. Many steps involved. Followed youtube videos. Detailed videos exist.
3. Take out piston. Found lots of black soot on piston, crankcase and valve seats. Apparently due to mistiming from running engine with bent crankshaft since this is a pretty new engine always running smooth before accident.
4. Use carburetor cleaner and lots of work to clean piston and case. Put in new valves and use grinding compound to clean valve seats and "break in" valves.
5. Install new crankshaft (also from ereplacement) and all new parts related to timing. The old ones looked fine but did not want to have to open up again in case there was some damage not visible.
6. Assemble everything. Again lots of steps. Take pictures when disassembling, label parts and use youtube videos. A mechanic friend lent me a puller and a torque wrench.
7. New blade holder and blades.
8. Pull starter cord. Starts right off. Runs very smooth. Cuts very well. Success but it is a major project for amateurs. I am retired thus have the time and love this Honda lawnmower. Kind of expensive because of all the new parts but still cheaper than a new Honda and I have only had it a couple of years. Now it's practically new.
Did you find this story helpful?
Thanks for voting and helping fellow customers!
My rocker arm had a crack
Steven - April 8, 2020
Tool Type
Engine
Difficulty
Easy
Time
Less than 15 minutes
Tools Used
Socket set, Adjustable Wrench, Spark plug gapper
Removed the spark plug
Removed the valve cover with a 10mm
Slid the rocker pin out
Put on the new rocker covers
Put screwdriver in spark plug hole
Pulled string slowly until screwdriver reached highest point
Adjusted intake valve to .096 and exhaust valve to .008
Replaced valve cover
Replaced spark plug
Removed the valve cover with a 10mm
Slid the rocker pin out
Put on the new rocker covers
Put screwdriver in spark plug hole
Pulled string slowly until screwdriver reached highest point
Adjusted intake valve to .096 and exhaust valve to .008
Replaced valve cover
Replaced spark plug
Did you find this story helpful?
Thanks for voting and helping fellow customers!
Intake valve was stuck.
dave - July 20, 2018
Tool Type
Lawn Mower
Difficulty
Hard
Time
More than 2 hours
Tools Used
Screwdriver, Pliers, Socket set, Wrench Set, Nutdriver, Torque wrench.
Parts Used
Disassemble motor. Remove crankshaft and rod and piston. Remove stuck valve . Clean old fuel residue from guide and valve. And reassembled.
When the valve stuck it bent the cam follower. The follower was what I replaced. The stuck valve is why disassembly was required.
When the valve stuck it bent the cam follower. The follower was what I replaced. The stuck valve is why disassembly was required.
Did you find this story helpful?
Thanks for voting and helping fellow customers!
Load More Install Stories
OEM stands for Original Equipment Manufacturer and means the part you’re buying is sourced directly from the manufacturer who made your product. At eReplacementParts, we sell only genuine OEM parts, guaranteeing the part you’re purchasing is of better design and of higher quality than aftermarket parts.
Our product descriptions are a combination of data sourced directly from the manufacturers who made your product as well as content researched and curated by our content & customer service teams. This content is edited and reviewed internally before being made public to customers.
Our customer service team are at the ready daily to answer your part and product questions. We have a dedicated staff with decades of collective experience in helping customers just like you purchase parts to repair their products.
All our part reviews are solicited directly from other customers who have purchased this exact part. While we moderate these reviews for profanity, offensive language or personally identifiable information, these reviews are posted exactly as submitted and no alterations are made by our team.
All our customer repair instructions are solicited directly from other customers just like you who have purchased and replaced this exact part. While we moderate these reviews for profanity, offensive language or personally identifiable information, these reviews are posted exactly as submitted and no alterations are made by our team.
Based on data from past customer purchasing behaviors, these parts are most commonly purchased together along with the part you are viewing. These parts may be necessary or helpful to replace to complete your current repair.
All our installation videos are created and produced in collaboration with our in-house repair technician, Mark Sodja, who has helped millions of eReplacementParts customers over the last 13 years repair their products. Mark has years of experience in selling and repairing both commercial and residential products with a specialty in gas-powered equipment.
This data is collected from customers who submitted a repair instruction after replacing this exact part. Customers can rate how easy the repair was to complete and how long it took. We aggregate this data to provide a repair rating that allows customers to quickly determine the difficulty and time needed to perform their own repair.