
This is an OEM replacement part, it is sold individually.
The Throttle Trigger controls the speed of the engine of the models listed below.
The throttle cable connects to the trigger, then down to the throttle lever on the carburetor.
Because of its constant use the Throttle Trigger has a tendency to break or wear out.
Throttle Trigger 17801052130
OEM part for: Echo
Part Number: 17801052130
$5.19
In Stock
Jump To:
Product Description ?
- Classification: Part
- Weight: 0.01 lbs.
- Shipping: Ships Worldwide
Frequently Purchased Together ?


Compatibility
This Throttle Trigger will fit the following 425 machines. Confirm this part works with your model, and view the detailed model diagrams and repair help we have to offer.
This item works with the following types of products:
- Edger Parts
Repair Videos ?
Articles:
|
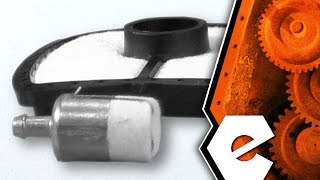
Filthy Filters? This article will show you how to install a filter kit on an Echo SRM-225 trimmer....
May 27, 2015
|

Customer Part Reviews ?
Average Rating (out of 5):
Click to filter by ratings:
5 stars
18
4 stars
2
3 stars
1
2 stars
0
1 stars
0
< PREV
- 1
- 2
- 3
Worked perfectly
The part came in about a week it was more beefy than the old throttle assembly
Runs perfectly
Guest -
August 2, 2023
Verified Purchase
Works as intended
Found an Echo weed eater on a curb. Trigger was snapped off. Unit works great now!
Guest -
June 28, 2023
Verified Purchase
Great part.
fit perfectly.
Guest -
May 23, 2023
Verified Purchase
Every time I order the parts are correct and not expensive. Thank you
Exactly what I ordered.
Benita Ball -
May 17, 2023
Verified Purchase
Great product
I just love it when a plan comes together, it arrived on time, easy to install
Guest -
June 18, 2022
Verified Purchase
This part was perfect!
The part was exactly what I needed. It took me like three tries to get the handle back together because I did not remember where all the parts went but Youtube is your friend and watching a video I figured it out and now my weed whacker works great!
Afton -
July 20, 2021
Verified Purchase
Worked as expected
Arrived on time, well packaged
Mike -
May 26, 2021
Verified Purchase
Great service - saved $$
eReplacementParts.com has ALWAYS provided reliable service to access parts for appliance and tool repair. This was no exception. The part arrived quickly (during a pandemic!) and the repair went smoothly, and my Echo trimmer works great again!
Guest -
June 19, 2020
Verified Purchase
Part was perfect
Fit exactly and my blade edger is working again.
Guest -
April 9, 2020
Verified Purchase
Weed Walker Throttle Trigger
Cost $6 shipping for a $4 part but it was worth it to save $200.
Guest -
March 9, 2020
Verified Purchase
Questions & Answers ?
Our customer Service team is at the ready daily to answer your part and product questions.

Ask our Team
We have a dedicated staff with decades of collective experience in helping customers just like you purchase parts to repair their products.
Does this fit my product?Questions & Answers for Throttle Trigger
No questions have been asked yet
Customer Repair Instructions ?
All our customer repair instructions are solicited directly from other customers just like you who have purchased and replaced this exact part.
Trigger cracked, so the throttle could not be adjusted using it.
Gary - May 4, 2016
👍 15 of 15 people found this instruction helpful
Tool Type
Trimmer
Difficulty
Easy
Time
Less than 15 minutes
Tools Used
Screwdriver
Take the bolts out of the trigger housing,
Pry open the housing without taking off the rubber grip,
Take the throttle cable off of the trigger
Replace the trigger and spring as they were originally installed
Reconnect the throttle cable to the new trigger
Reinstall the bolts
Pry open the housing without taking off the rubber grip,
Take the throttle cable off of the trigger
Replace the trigger and spring as they were originally installed
Reconnect the throttle cable to the new trigger
Reinstall the bolts
Did you find this story helpful?
Thanks for voting and helping fellow customers!
Broken throttle trigger
Chuck - April 11, 2016
👍 5 of 5 people found this instruction helpful
Tool Type
Edger
Difficulty
Easy
Time
15-30 minutes
Tools Used
Screwdriver
Parts Used
1. Remove trigger/throttle housing with hex head screw driver (Note how the spring is attached)
2. Detach throttle cable from broken trigger
3. Connect throttle cable to new trigger part reusing trigger spring
4. Reinstall trigger/throttle housing
2. Detach throttle cable from broken trigger
3. Connect throttle cable to new trigger part reusing trigger spring
4. Reinstall trigger/throttle housing
Did you find this story helpful?
Thanks for voting and helping fellow customers!
Throttle trigger lever snapped off after a fall
Gordan - November 22, 2016
👍 4 of 4 people found this instruction helpful
Tool Type
Hedge Trimmer
Difficulty
Easy
Time
15-30 minutes
Tools Used
Screwdriver
Parts Used
3 screws to take off cover encasing the trigger and then needed to remove the base of the broken trigger which has 2 locating pins and a small spring. Put new trigger in with the spring and just need to make sure that a tab on the new trigger sits properly in the safety trigger mechanism which is the top lever on the handle which needs to be depressed in order to let the throttle trigger function. It's a safety feature on the trimmer. Just had to fiddle with it a bit to get everything to stay in place as you place the cover back on and tighten down the three screws.
Did you find this story helpful?
Thanks for voting and helping fellow customers!
Trigger throttle was broken, all fuel lines frayed
Robert - November 12, 2015
👍 3 of 3 people found this instruction helpful
Tool Type
Trimmer
Difficulty
Easy
Time
15-30 minutes
Tools Used
Screwdriver
Removed the throttle trigger from handle, replace with new one, remember how the spring is attached. Removed fuel line grommet from tank. replaced both fuel lines and vent tube. Removed clip from fuel line and replace fuel filter, secured with clip. Installed grommet. Also replace the worn fuel cap and dented air filter cover
Did you find this story helpful?
Thanks for voting and helping fellow customers!
Throttle trigger broke, and genneral tune up needed.
Bartlomiej - August 3, 2017
👍 1 of 1 people found this instruction helpful
Tool Type
Trimmer
Difficulty
Easy
Time
15-30 minutes
Tools Used
Screwdriver, Socket set
Replaced, air filter, fuel grommet, spark plug and throttle trigger. Fairly easy repair, my Echo is running like a top again. Overall, good experience, I plan to come back to eReplacementParts.com for a similar tune-up on my Echo leaf blower.
Did you find this story helpful?
Thanks for voting and helping fellow customers!
Throttle trigger had broken off
Richard - July 31, 2017
👍 1 of 1 people found this instruction helpful
Tool Type
Trimmer
Difficulty
Easy
Time
15-30 minutes
Tools Used
Screwdriver, Nibble fingers
Parts Used
Took four screws out of throttle housing. Split it open and took old stub of lever out and spring out as I slid throttle cable out of slot in lever. Hardest part was keeping spring in proper orientation as I reassembled. Put throttle cable in slot on lever and reassembled lever in pivot holes. Put screws back on. And whacking away at weeds and trim!
Did you find this story helpful?
Thanks for voting and helping fellow customers!
Throttle trigger was broken
Steven - July 31, 2018
Tool Type
Trimmer
Difficulty
Hard
Time
30-60 minutes
Tools Used
Screwdriver, Pliers
Parts Used
Replacing trigger throttle was difficult as 2 bolts are easy to remove. The other one is to a clamp for the trigger assembly and is deep inside the assembly. Remember (take a picture if possible) exactly how everything is put together as you crack open the assembly as knowing where to put the spring and trigger position is not easy to figure out if you don't.
Did you find this story helpful?
Thanks for voting and helping fellow customers!
Throttle trigger broke on my trimmer
Rose - July 23, 2018
Tool Type
Trimmer
Difficulty
Medium
Time
15-30 minutes
Tools Used
Screwdriver
Parts Used
1. Got a screw driver to take out the 2 screws
2. Got my new parts laid out
3. Took out the screws on the handle of the weed eater
4. Took out the broken trigger and replaced the new trigger in its place
5. Adjusted the new part in the handle case and voila
6. Easy peasy
7. Started the trimmer and began to cut the grass.
2. Got my new parts laid out
3. Took out the screws on the handle of the weed eater
4. Took out the broken trigger and replaced the new trigger in its place
5. Adjusted the new part in the handle case and voila
6. Easy peasy
7. Started the trimmer and began to cut the grass.
Did you find this story helpful?
Thanks for voting and helping fellow customers!
Broken and missing trigger
Miles - July 6, 2018
Tool Type
Edger
Difficulty
Medium
Time
15-30 minutes
Tools Used
Screwdriver, Allen Wrench
1. Took apart the handle trigger assembly.
2. Disconnected cables running from handle to engine.
2. Removed all broken parts
3. Test fit new parts
4. Assembled handle and trigger assembly
5. Connected cables
6. Tested unit
2. Disconnected cables running from handle to engine.
2. Removed all broken parts
3. Test fit new parts
4. Assembled handle and trigger assembly
5. Connected cables
6. Tested unit
Did you find this story helpful?
Thanks for voting and helping fellow customers!
Broken throttle trigger. Worn chain, lost clamp screws. Worn sprocket.
John - April 13, 2018
Tool Type
Pruner
Difficulty
Medium
Time
1-2 hours
Tools Used
Screwdriver, Socket set, Nutdriver
Replaced lost clamp screws and nuts.
Installed new chain drive sprocket after removal of worn one by removing e-ring.
Replaced e-ring.
Replaced chain on guide bar.
Installed guide bar and sprocket cover.
Adjusted chain tension and tightened attaching nuts.
Separated halves of switch/trigger housing. (Note placement of different length screws).
Removed broken throttle trigger, watching placement of return spring.
Removed throttle cable.
Aligned mounting studs of new trigger after installing throttle cable.
Installed return spring.
Lubed cable and pivot points
Realigned housing halves and reinstalled screws.
Checked for smooth, easy operation.
Did you find this story helpful?
Thanks for voting and helping fellow customers!
Load More Install Stories
OEM stands for Original Equipment Manufacturer and means the part you’re buying is sourced directly from the manufacturer who made your product. At eReplacementParts, we sell only genuine OEM parts, guaranteeing the part you’re purchasing is of better design and of higher quality than aftermarket parts.
Our product descriptions are a combination of data sourced directly from the manufacturers who made your product as well as content researched and curated by our content & customer service teams. This content is edited and reviewed internally before being made public to customers.
Our customer service team are at the ready daily to answer your part and product questions. We have a dedicated staff with decades of collective experience in helping customers just like you purchase parts to repair their products.
All our part reviews are solicited directly from other customers who have purchased this exact part. While we moderate these reviews for profanity, offensive language or personally identifiable information, these reviews are posted exactly as submitted and no alterations are made by our team.
All our customer repair instructions are solicited directly from other customers just like you who have purchased and replaced this exact part. While we moderate these reviews for profanity, offensive language or personally identifiable information, these reviews are posted exactly as submitted and no alterations are made by our team.
Based on data from past customer purchasing behaviors, these parts are most commonly purchased together along with the part you are viewing. These parts may be necessary or helpful to replace to complete your current repair.
All our installation videos are created and produced in collaboration with our in-house repair technician, Mark Sodja, who has helped millions of eReplacementParts customers over the last 13 years repair their products. Mark has years of experience in selling and repairing both commercial and residential products with a specialty in gas-powered equipment.
This data is collected from customers who submitted a repair instruction after replacing this exact part. Customers can rate how easy the repair was to complete and how long it took. We aggregate this data to provide a repair rating that allows customers to quickly determine the difficulty and time needed to perform their own repair.