Spark Plug 791-610311B - OEM Ryobi - eReplacementParts.com
eReplacementParts.com
877-346-4814
Ryobi Parts

Spark Plug 791-610311B

OEM part for: Ryobi, Troy-Bilt, Bolens, Yard Man, MTD, Yard Machines, Craftsman, Cub Cadet, Husky

Part Number: 791-610311B


Install
Videos!
Spark Plug - 791-610311B:Ryobi 360 View
Spark Plug - 791-610311B:RyobiSpark Plug - 791-610311B:RyobiSpark Plug - 791-610311B:RyobiSpark Plug - 791-610311B:RyobiSpark Plug - 791-610311B:Ryobi 360 View
In Stock
Ships within 1 business day
Medium 30-60 minutes (11 rated repairs)?
OEM: Original Equipment Manufacturer ?
RyobiTroy-BiltBolensYard ManMTDYard MachinesCraftsmanCub CadetHusky
Does this fit my product?

Product Description ?

Genuine OEM replacement part, this item is sold individually.
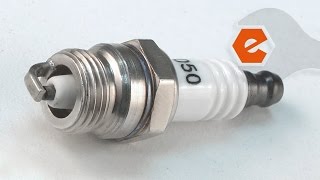
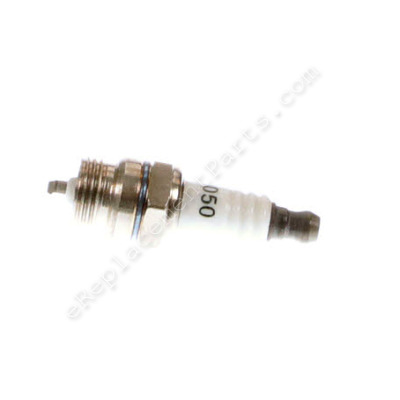
A spark plug is used to deliver electric current from an ignition system to an internal combustion engine.

After time spark plugs will become dirty or fouled.
It is a good idea to replace the spark plug once this happens.
You should gap your spark plug according to the owners manual of the outdoor product you have.

  • Classification: Part
  • Weight: 0.01 lbs.
  • Shipping: Ships Worldwide

Compatibility

This Spark Plug will fit the following 675 machines. Confirm this part works with your model, and view the detailed model diagrams and repair help we have to offer.

Ryobi

Troy-Bilt

Bolens

Yard Man

MTD

Yard Machines

Craftsman

Cub Cadet

Husky

Show More Compatible Models
Don't see yours? Try searching our site for :

This item works with the following types of products:

  • Cultivator Parts
  • Blower Parts
  • Vacuum Parts
  • Trimmer Parts
  • Edger Parts
  • Hedge Trimmer Parts
  • Pruner Parts

This part replaces obsolete part #: 147095, MC-322208-00, 791-147095, 794-00016, 753-04579, 791-610311

Repair Videos ?

Watch the Repair Video for Spark Plug
Articles:
Sparks not flying? Learn to quickly remove and install the spark plug on your Ryobi trimmer. Simple instructions show yo...
September 08, 2015

Customer Part Reviews ?

5
Average Rating (out of 5):
2 Reviews
Click to filter by ratings:
5 stars
2
4 stars
0
3 stars
0
2 stars
0
1 stars
0
  • Highest Rating
  • Most Recent
< PREV
  • 1
NEXT >
  • Right part
    Right part for my machine.
    John - July 6, 2023 Verified Purchase
    delivered on time
    The parts were delivered on time and fit just like the original parts.
    Guest - July 3, 2020 Verified Purchase

    Questions & Answers ?

    Our customer Service team is at the ready daily to answer your part and product questions.

    photo of team member
    Ask our Team

    We have a dedicated staff with decades of collective experience in helping customers just like you purchase parts to repair their products.

    Does this fit my product?

    Questions & Answers for Spark Plug


    No questions have been asked yet

    Customer Repair Instructions ?

    All our customer repair instructions are solicited directly from other customers just like you who have purchased and replaced this exact part.

    Medium 30-60 minutes (11 rated repairs)?

    Fuel line was cracked and leaking, and general tuneup needed.

    Mike - April 13, 2017
    👍 7 of 7 people found this instruction helpful
    Tool Type

    Trimmer

    Difficulty

    Medium

    Time

    15-30 minutes

    Tools Used

    Screwdriver, Pliers, Socket set, Wrench Set, drill bit

    I replaced the fuel line/filter first. Removing the old filter was a chore because of the tight fit of the barbs on the filter. Pushing it out with the pliers, little by little, worked well. The new fuel line/filter did not fit well into the hole, so i used a drill bit of the same size as the hole & carefully reamed out the inside of the hole by hand (the plastic fuel tank) so i could get it started through the hole. Tight working space. I used a flat screwdriver to push the filter down into place - inserted through the fuel tank opening - as well as gently pulling on the line & took some work to get it fully seated.
    Replacing the air cleaner filter and spark plug were simple and quick. There were 4 torx head screws to remove the cover. The screws also have a slot for a straight-blade screwdriver, but it was worth it to get the Torx set.
    Replacing the auto feed line assembly was straightforward, except there is a somewhat hidden setscrew on the inside of the shaft that must be removed. No replacement instructions came with the assembly, so I struggled with removing the old one before finding the setscrew. Once I removed it, the assembly removal and replacement was quick and easy.
    The trimmer starts, runs, and doesn't leak.
    Did you find this story helpful?
    Thanks for voting and helping fellow customers!

    Replace fuel filter in tank, replace plug and install new air filter.

    ROY - August 21, 2016
    👍 3 of 3 people found this instruction helpful
    Tool Type

    Trimmer

    Difficulty

    Medium

    Time

    30-60 minutes

    Tools Used

    Screwdriver, Socket set, Wrench Set

    Removed fuel tank and cleaned all areas of the trimmer. Installed new fuel filter and gas line. Installed new spark plug and air filter.
    Did you find this story helpful?
    Thanks for voting and helping fellow customers!

    Timmer is just old, hasn't been used for a few yeards, needed a tune up

    Michael - June 15, 2016
    👍 3 of 3 people found this instruction helpful
    Tool Type

    Trimmer

    Difficulty

    Medium

    Time

    15-30 minutes

    Tools Used

    Screwdriver

    Replaced the spark plug, leaky gas tank with hoses, and primer bulb and it worked great!
    Did you find this story helpful?
    Thanks for voting and helping fellow customers!

    The fuel bulb had broken open and was spilling gas.

    Michael - July 7, 2017
    👍 1 of 1 people found this instruction helpful
    Tool Type

    Trimmer

    Difficulty

    Easy

    Time

    15-30 minutes

    Tools Used

    Pliers, Socket set

    Pull the cover, pushed the tab in and pushed the old bulb out. Detached the fuel lines. Pushed the new bulb in and attached fuel lines. Squeezed the bulb and couple of times and the weed whacker started right up.
    Did you find this story helpful?
    Thanks for voting and helping fellow customers!

    Fuel lines deteriorated.

    Richard - May 19, 2017
    👍 1 of 1 people found this instruction helpful
    Tool Type

    Cultivator

    Difficulty

    Medium

    Time

    30-60 minutes

    Tools Used

    Screwdriver, Pliers

    Removed the old lines and replaced with the new ones.
    Did you find this story helpful?
    Thanks for voting and helping fellow customers!

    THE FUEL STARTED LEAKING FROM THE MOTOR AREA.

    JOSEPH - December 23, 2020
    Tool Type

    Trimmer

    Difficulty

    Medium

    Time

    30-60 minutes

    Tools Used

    Screwdriver, Pliers, Wrench Set, Nutdriver, Adjustable Wrench

    I REMOVED THE SCREWS TO THE FRONT OF THE MOTOR ND THE COVERS TO THE REAR OF THE MOTOR TO EXPOSE THE HOSES AND SPARK PLUG. REMOVED ALL THE HOSES, IN WHICH CASE WAS A GOOD CALL BACAUSE ALL THE HOSES WERE HARD AND SOMEWHAT BRITTLE HENCE THE LEAKAGE.
    TOOK A LITTLE TIME TO REPLACE THE HOSES BECAUSE I DID NOT WANT TO COMPLETELY REMOVE THE FUEL TANK. IN ANY CASE GOT THE HOSE THREADED AND INSTALLED THE FUEL BULB... MACHINE STARTED RIGHT UP. WELL AFTER I ADDED FUEL THAT IS.
    THANKS FOR THE PARTS AND THE SCEMATICS. i WOULD NOT HAVE BEEN ABLE TO DO THE REPAIR WITHOUT YOUR INFORMATION.
    I HAVE USED THE SITE BEFORE LOOKIING FOR SCEMATICS AND ORDERING A FEW PARTS, OR IN SOME CASES WHEN THE PARTS ARE NO LONGER AVAILBLE,WHICH IS GFREAT TO KNOW. I CAN THEN CONCENTRATE ON PURCHASING A NEW MACHINE. It IS HELPFUL, IN THAT I CAN SHOW MY WIFE THAT THE PART IS NO LONGER AVAILABLE AND SHE IS MUCH MORE RESPONSIVE IN ALLOWING A BUDGET FOR A NEW MACHINE.
    YOUR SITE SAVED MY MARRAIGE !!
    NOT SURE IF YOU HAD HEARD THAT ONE YET..
    MANY THANKS
    JOE POTCH
    Did you find this story helpful?
    Thanks for voting and helping fellow customers!

    Starter rope wouldn't recoil and the other was the engine was running ruff and stalls and only running on choke.

    Mark - August 8, 2019
    Tool Type

    Trimmer

    Difficulty

    Medium

    Time

    30-60 minutes

    Tools Used

    Screwdriver, Pliers, Socket set, Wrench Set

    Replace the whole start system and replace the whole carburator part's and for good measure I have replaced the reel and the job wet well and the trimmer is running like new condition.
    Did you find this story helpful?
    Thanks for voting and helping fellow customers!

    Shaft coupler worn out

    Henry - October 15, 2018
    Tool Type

    Edger

    Difficulty

    Medium

    Time

    30-60 minutes

    Tools Used

    Screwdriver, Power Drill, Socket set

    Remove old upper shaft from housing - keep track of which screws go where
    Insert new upper shaft
    Align the screw holes properly and insert all screws.
    Done.
    Did you find this story helpful?
    Thanks for voting and helping fellow customers!

    Daniel - September 4, 2018
    I had a Ryobi weed trimmer that i took to two shops for a tune and replace old fuel lines...both shops recommended i buy a new one as the cost of repairing the item was going to likely run $90-$120 and it was pointed out to me that i could buy a new one for $120...after figuring what parts i needed it cost under $50 and my time (1 hour).

    Watched a YouTube video on replacing fuel lines and general tune up...looked up my brand/model on ereplacementParts.com and they had all the parts listed for any repair i might have...i selected the parts mentioned in the video and paid for them in the easy check out... they were delivered within a couple days...I watched the video again and re-assembled my parts and the trimmer started right up...the next day i was trimming about an acre of weeds n grass..

    This was my first time using ereplacementParts.com. For me everything went great..i highly recommend them to anyone trying to repair your own equipment...
    Did you find this story helpful?
    Thanks for voting and helping fellow customers!

    All gas lines had gotten hard and broken

    Randall - May 10, 2017
    Tool Type

    Trimmer

    Difficulty

    Medium

    Time

    30-60 minutes

    Tools Used

    Screwdriver, Pliers, Socket set, Wrench Set, torx

    Removed choke cover.
    Removed carburetor and and all dried and cracked gas lines.
    Installed new fuel lines per online guide.
    Replaced fuel filter, air filter and spark plug.
    Pulled the starter cord until my arm fell off.....well, not that long but many times until it started. It had not been used for over 5 years.
    Works GREAT!
    Did you find this story helpful?
    Thanks for voting and helping fellow customers!

    OEM stands for Original Equipment Manufacturer and means the part you’re buying is sourced directly from the manufacturer who made your product. At eReplacementParts, we sell only genuine OEM parts, guaranteeing the part you’re purchasing is of better design and of higher quality than aftermarket parts.

    Our product descriptions are a combination of data sourced directly from the manufacturers who made your product as well as content researched and curated by our content & customer service teams. This content is edited and reviewed internally before being made public to customers.

    Our customer service team are at the ready daily to answer your part and product questions. We have a dedicated staff with decades of collective experience in helping customers just like you purchase parts to repair their products.

    All our part reviews are solicited directly from other customers who have purchased this exact part. While we moderate these reviews for profanity, offensive language or personally identifiable information, these reviews are posted exactly as submitted and no alterations are made by our team.

    All our customer repair instructions are solicited directly from other customers just like you who have purchased and replaced this exact part. While we moderate these reviews for profanity, offensive language or personally identifiable information, these reviews are posted exactly as submitted and no alterations are made by our team.

    Based on data from past customer purchasing behaviors, these parts are most commonly purchased together along with the part you are viewing. These parts may be necessary or helpful to replace to complete your current repair.

    All our installation videos are created and produced in collaboration with our in-house repair technician, Mark Sodja, who has helped millions of eReplacementParts customers over the last 13 years repair their products. Mark has years of experience in selling and repairing both commercial and residential products with a specialty in gas-powered equipment.

    This data is collected from customers who submitted a repair instruction after replacing this exact part. Customers can rate how easy the repair was to complete and how long it took. We aggregate this data to provide a repair rating that allows customers to quickly determine the difficulty and time needed to perform their own repair.

    eReplacementParts.com
    7174 South 400 West
    Suite 5
    Midvale, UT 84047
    visa mastercard discover american express PayPal