
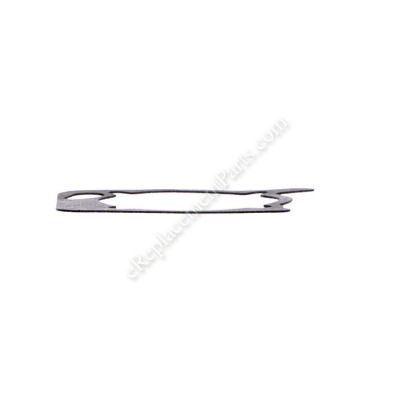


This is a genuine OEM sourced replacement part that is intended to be used with trimmers, blowers, and tillers from Ryobi, Troy-Bilt, and Bolens. The gasket is used to seal the connection between the crankcase and the carburetor mount assembly. This item is available as an individual replacement part.
Crankcase Cover Gasket 753-1208
OEM part for: Ryobi, Troy-Bilt, Bolens, Yard Man, MTD, Yard Machines
Part Number: 753-1208
$18.12
In Stock
Jump To:
Frequently Purchased Together ?


Compatibility
This Crankcase Cover Gasket will fit the following 518 machines. Confirm this part works with your model, and view the detailed model diagrams and repair help we have to offer.
Ryobi
Troy-Bilt
Bolens
Yard Man
MTD
Yard Machines
Show More Compatible ModelsThis item works with the following types of products:
- Cultivator Parts
- Blower Parts
- Vacuum Parts
- Trimmer Parts
- Edger Parts
- Pruner Parts
This part replaces obsolete part #: 791-612115
Repair Videos ?
Watch the Repair Video for
Crankcase Cover Gasket

Articles:
|
Crankcase leaking? Learn to quickly remove and install the crankcase cover gasket on a Ryobi trimmer. Simple instruction...
September 08, 2015
|

Customer Part Reviews ?
Average Rating (out of 5):
Click to filter by ratings:
5 stars
0
4 stars
3
3 stars
1
2 stars
0
1 stars
0
< PREV
- 1
Gasket fit
The gasket was different in design but fit. I was able to reassemble and start the engine.
Guest -
June 27, 2022
Verified Purchase
Old trimmer,lots of blowback from carb
Suspected leak and poor reed sealing causing fuel blowback from carb at full throttle. Now sure of diagnosis but it runs some better. Compression good.
Bruce -
July 26, 2019
Verified Purchase
part fit and worked well
part was in good condition I installed it and weed whip is running again. took a week or better to get the part.
Michael -
July 2, 2019
Verified Purchase
Expensive gasket
This little guy smaller than a playing card was 12.50 plus 6.95 freight. 20 bucks. But if u have to have it, what else can u do?
Anonymous -
February 21, 2022
Verified Purchase
Questions & Answers ?
Our customer Service team is at the ready daily to answer your part and product questions.

Ask our Team
We have a dedicated staff with decades of collective experience in helping customers just like you purchase parts to repair their products.
Does this fit my product?Questions & Answers for Crankcase Cover Gasket
No questions have been asked yet
Customer Repair Instructions ?
All our customer repair instructions are solicited directly from other customers just like you who have purchased and replaced this exact part.
Crank case gasket was broke.
marlin - May 24, 2016
👍 1 of 1 people found this instruction helpful
Tool Type
Trimmer
Difficulty
Easy
Time
15-30 minutes
Tools Used
Screwdriver
Parts Used
Remove carberator cover. Remove carberator, housing, and fuel tank. Clean the plate the crank case gasket seats on. Replace gasket, carberator and back cover. Get to trimming.
Did you find this story helpful?
Thanks for voting and helping fellow customers!
Gasket damaged
Mark - April 28, 2023
Tool Type
Trimmer
Difficulty
Easy
Time
Less than 15 minutes
Tools Used
, Torx driver
Remove old gaskets clean surfaces and install new gaskets, and test operation of the repaired tool!
Did you find this story helpful?
Thanks for voting and helping fellow customers!
Fuel tanked was cracked, primer bulb and fuel lines were deteriorated.
Ross - November 6, 2017
Tool Type
Edger
Difficulty
Easy
Time
15-30 minutes
Tools Used
Pliers, Torx Bit driver
1. Remove the rear housing / muffler cover by unscrewing the four torx screws (T-20), then center the choke lever to the middle position and slide off the housing.
2. Remove the carburetor by disconnecting the fuel lines and choke by unscrewing the two Torx screws, being careful not to tear the paper gasket.
3. Disconnect the throttle cable from the carburetor.
4. Remove the Crankcase Cover Assembly by unscrewing the four Torx screws, push the throttle cable through the opening and being careful not to tear the casket.
5. Remove and replace the old fuel tank.
6. Remove the primer bulb from the crankcase cover assy.
7. Insert the new primer bulb into the crankcase cover assy. Paying attention to the shape of the primer bulb and the opening into the crankcase cover assy.
8. Place the enclosed line on the shortest/upper nipple of the primer bulb and route it through the upper opening on crankcase cover assy.
9. Insert the new gas tank into the opening where the old fuel tank was.
10. Run the shorter of the two fuel lines to the longest/bottom nipple on the primer bulb.
11. Run the longer of the two fuel line through the bottom opening on the crankcase cover assy.
12 Replace the crankcase cover gasket (there is a correct side up).
13. Run the throttle cable through the opening on the opposite side of the crankcase cover.
14. Replace the four Torx screws in the crankcase cover.
15. Reattach the throttle cable to the carburetor.
16. Attach the fuel line that comes from the fuel tank to the lower carburetor nipple.
17. Attach the line that comes from the primer bulb to the top of the carburetor nipple.
18. Place the carburetor gasket on to the backside of the carburetor.
19. Run both screws through the carburetor and gasket and attach and use the bottom screw of the carburetor to hold it loosely to the machine.
20. Reattach the choke and choke spring to the top screw hole on the carburetor, as you are tightening this screw ensure that the choke and choke spring are centered on the protrusion on the crab. Misalignment will cause the choke to perform poorly.
21. Replace the rear muffler housing and secure it with the four Torx screws.
22. Gas and go.
Did you find this story helpful?
Thanks for voting and helping fellow customers!
Fuel lines cracked.
Ricky - June 14, 2017
Tool Type
Trimmer
Difficulty
Medium
Time
15-30 minutes
Tools Used
Screwdriver, Pliers, Nutdriver
1. Removed carb mount to remove gas tank.
2. Removed muffler to inspect for carbine.
3. Put return lin in gas tank.
4. Put filter and fuel line in gas tank (goes from the inside out) had hard time getting the filter pulled thru the tank very tight fit.
5. Put gas in and started it up.
2. Removed muffler to inspect for carbine.
3. Put return lin in gas tank.
4. Put filter and fuel line in gas tank (goes from the inside out) had hard time getting the filter pulled thru the tank very tight fit.
5. Put gas in and started it up.
Did you find this story helpful?
Thanks for voting and helping fellow customers!
Rototiller would start but would not run for more than 10 seconds.
DW - June 10, 2017
Tool Type
Cultivator
Difficulty
Medium
Time
1-2 hours
Tools Used
Screwdriver, Wrench Set, Nutdriver, Putty knife
Removed old carburator and replaced it with new one and also replaced the old damaged gaskets.
All somewhat simple and did not require extensive troubleshooting.
All somewhat simple and did not require extensive troubleshooting.
Did you find this story helpful?
Thanks for voting and helping fellow customers!
All gas lines had gotten hard and broken
Randall - May 10, 2017
Tool Type
Trimmer
Difficulty
Medium
Time
30-60 minutes
Tools Used
Screwdriver, Pliers, Socket set, Wrench Set, torx
Removed choke cover.
Removed carburetor and and all dried and cracked gas lines.
Installed new fuel lines per online guide.
Replaced fuel filter, air filter and spark plug.
Pulled the starter cord until my arm fell off.....well, not that long but many times until it started. It had not been used for over 5 years.
Works GREAT!
Did you find this story helpful?
Thanks for voting and helping fellow customers!
The carburetor did not work
Roger - June 30, 2016
Tool Type
Trimmer
Difficulty
Easy
Time
15-30 minutes
Tools Used
Screwdriver, Nutdriver
I removed the cover, and air cleaner. Removed the fuel lines, and removed the carburetor. Installed the new carburetor, then put the fuel lines on and put the cover back. When I was in there I wanted to make sure the piston and cylinder were good, they were so I bought a gasket to seal that up.
Did you find this story helpful?
Thanks for voting and helping fellow customers!
OEM stands for Original Equipment Manufacturer and means the part you’re buying is sourced directly from the manufacturer who made your product. At eReplacementParts, we sell only genuine OEM parts, guaranteeing the part you’re purchasing is of better design and of higher quality than aftermarket parts.
Our product descriptions are a combination of data sourced directly from the manufacturers who made your product as well as content researched and curated by our content & customer service teams. This content is edited and reviewed internally before being made public to customers.
Our customer service team are at the ready daily to answer your part and product questions. We have a dedicated staff with decades of collective experience in helping customers just like you purchase parts to repair their products.
All our part reviews are solicited directly from other customers who have purchased this exact part. While we moderate these reviews for profanity, offensive language or personally identifiable information, these reviews are posted exactly as submitted and no alterations are made by our team.
All our customer repair instructions are solicited directly from other customers just like you who have purchased and replaced this exact part. While we moderate these reviews for profanity, offensive language or personally identifiable information, these reviews are posted exactly as submitted and no alterations are made by our team.
Based on data from past customer purchasing behaviors, these parts are most commonly purchased together along with the part you are viewing. These parts may be necessary or helpful to replace to complete your current repair.
All our installation videos are created and produced in collaboration with our in-house repair technician, Mark Sodja, who has helped millions of eReplacementParts customers over the last 13 years repair their products. Mark has years of experience in selling and repairing both commercial and residential products with a specialty in gas-powered equipment.
This data is collected from customers who submitted a repair instruction after replacing this exact part. Customers can rate how easy the repair was to complete and how long it took. We aggregate this data to provide a repair rating that allows customers to quickly determine the difficulty and time needed to perform their own repair.