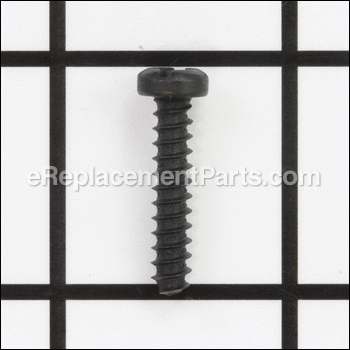
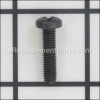
This is a Genuine Manufacturer Sourced replacement part used on a variety of Power Tools. This part is made out of Metal and it is Sold Individually. It helps fasten and hold different parts together. This is a round-head Phillips Screw.
Screw 330019-32
OEM part for: DeWALT, Black and Decker, Porter Cable, Stanley
Part Number: 330019-32
Jump To:
Frequently Purchased Together ?
Compatibility
This Screw will fit the following 392 machines. Confirm this part works with your model, and view the detailed model diagrams and repair help we have to offer.
DeWALT
Black and Decker
Porter Cable
Stanley
Show More Compatible ModelsThis item works with the following types of products:
- Miter Saw Parts
- Saw Parts
- Drill Parts
- Electric Drill Parts
- Grinder Parts
- Sander Parts
- Chop Saw Parts
- Reciprocating Saw Parts
Customer Part Reviews ?
- 1
Questions & Answers ?
Our customer Service team is at the ready daily to answer your part and product questions.

Ask our Team
We have a dedicated staff with decades of collective experience in helping customers just like you purchase parts to repair their products.
Does this fit my product?Questions & Answers for Screw
Customer Repair Instructions ?
All our customer repair instructions are solicited directly from other customers just like you who have purchased and replaced this exact part.
Nothing
Tool Type
Chop Saw
Difficulty
Easy
Time
30-60 minutes
Tools Used
Screwdriver
Replaced with new
the feet on my chop saw stand wore out
Tool Type
Chop Saw
Difficulty
Easy
Time
15-30 minutes
Tools Used
Power Drill, impact gun
Parts Used
The handle crumbled in my hands when carrying
Tool Type
Chop Saw
Difficulty
Easy
Time
Less than 15 minutes
Tools Used
Screwdriver
2- removed all old screws and mapped them out to what spots they went to. Make sure you make note of where they come from. There are 7 different screws to do this. Used a #15 star bit.
3- disconnect wires from trigger assembly and remove wire clamp
4- remove bottom piece of handle assembly
5- route all wires from the saw through the base of new handle
6-place power cord at back and reconnect the trigger assembly and route all wires according to the picture or wire diagram
7- screw it all back together using the map you made of where the screws go-note: screw handle to saw first before screwing the handle together
Dropped my saw and the handle shattered into a bunch of pieces
Tool Type
Chop Saw
Difficulty
Medium
Time
15-30 minutes
Tools Used
Screwdriver, Pliers
DeWalt Miter Saw trigger, clamshell, carrying handle broken.
Tool Type
Miter Saw
Difficulty
Easy
Time
15-30 minutes
Tools Used
Screwdriver, Star bit/driver
Many parts were damaged or missing due to over 10 years of professional use.
Tool Type
Miter Saw
Difficulty
Medium
Time
30-60 minutes
Tools Used
Screwdriver, Power Drill, Socket set, Wrench Set
Parts Used
- Compression Spring 28 - 233165-5
- Stopper Pin - 322317-4
- O-ring 5 - 213021-5
- Hex. Lock Nut M6-10 - 252014-7
- Sub Fence - 150710-0
- Flat Washer 6 - 253715-0
- Countersunk Head Screw M6x35 - 912357-6
- Miter Scale Plate - 816326-8
- Socket Wrench 13 - 782232-8
- Fluorescent Light Set - 193595-1
- Strain Reliever - 901266
- Screw - 330019-32
- Light Assembly - 125337-5
- Dust Cap A&m4931 3579 87 - 45-12-0525
- Plastic Shoe Cover - 48-08-0533
- Foot - N074647
Broken Handle
Tool Type
Miter Saw
Difficulty
Medium
Time
15-30 minutes
Tools Used
Screwdriver, Nutdriver
Parts Used
The feet were missing
Tool Type
Chop Saw
Difficulty
Medium
Time
15-30 minutes
Tools Used
Screwdriver, Power Drill, Drill bit
Parts Used
2. Measure where you need to drill holes for the new style of feet. (Measure from center hole to the low place on the outside of the foot. Then add 1/32” so the foot will be tight on the leg.)
3. Find the centerline on the leg and mark a cross on the centerline and your measured distance.
4. Use a punch or drill bit that will not walk on the aluminum. Use a drill bit that is just bigger than the screw threads. The threads are meant to grab the plastic feet and spin free on the aluminum legs.
5.Slide on new feet. You will see the new feet are angled. Place the taller side to the outside.
6. Install new screw by hand. (No power tools) Threads are in plastic. Be gentle!
OEM stands for Original Equipment Manufacturer and means the part you’re buying is sourced directly from the manufacturer who made your product. At eReplacementParts, we sell only genuine OEM parts, guaranteeing the part you’re purchasing is of better design and of higher quality than aftermarket parts.
Our product descriptions are a combination of data sourced directly from the manufacturers who made your product as well as content researched and curated by our content & customer service teams. This content is edited and reviewed internally before being made public to customers.
Our customer service team are at the ready daily to answer your part and product questions. We have a dedicated staff with decades of collective experience in helping customers just like you purchase parts to repair their products.
All our part reviews are solicited directly from other customers who have purchased this exact part. While we moderate these reviews for profanity, offensive language or personally identifiable information, these reviews are posted exactly as submitted and no alterations are made by our team.
All our customer repair instructions are solicited directly from other customers just like you who have purchased and replaced this exact part. While we moderate these reviews for profanity, offensive language or personally identifiable information, these reviews are posted exactly as submitted and no alterations are made by our team.
Based on data from past customer purchasing behaviors, these parts are most commonly purchased together along with the part you are viewing. These parts may be necessary or helpful to replace to complete your current repair.
All our installation videos are created and produced in collaboration with our in-house repair technician, Mark Sodja, who has helped millions of eReplacementParts customers over the last 13 years repair their products. Mark has years of experience in selling and repairing both commercial and residential products with a specialty in gas-powered equipment.
This data is collected from customers who submitted a repair instruction after replacing this exact part. Customers can rate how easy the repair was to complete and how long it took. We aggregate this data to provide a repair rating that allows customers to quickly determine the difficulty and time needed to perform their own repair.

