This is a genuine OEM replacement part, it is sold individually. The purpose of this filter is to help eliminate dirt, dust and debris from contaminating the carburetor and damaging the engine. A dirty air filter can cause the engine from operating properly. This filter can be cleaned a time or two by using an air supply. But it is advised to replace it once it becomes dirty.
Sorry, we couldn't find any existing answers that matched. Try using some different or simpler keywords, or submit your new question by using the "Ask a Question" button above!
What is the part number for the replacement air filter?
Carol
For model number 917.370410 - March 24, 2023
Hello Carol, We are glad you asked! The Air Filter is part 491588B. We are pleased to have been able to help.
eReplacementParts Team
March 24, 2023
Did this question help you?
Thank you for voting!
looking for air filter part number or what filter looks like send picture in email
Eric
For model number 7800884 - May 6, 2023
Hello Eric, thank you for your question. The Air Filter Cartridge 491588B. Good luck with this repair.
eReplacementParts Team
May 6, 2023
Did this question help you?
Thank you for voting!
What is the number for a filter?
Judith
For model number 20334 - October 14, 2022
Hello Judith, Thank you for contacting us. We have researched the model you have provided and have found the part you are looking for is Part Number: 491588B. Thank you for your inquiry, good luck with this repair!
eReplacementParts Team
October 14, 2022
Did this question help you?
Thank you for voting!
Looking for air filter that will fit this model lawn mower. Is there a model number for the air filter?
Laurie
For model number 917.370433 - March 22, 2022
Hi Laurie,
Thank you for your question. The part number listed under your engine model number for the air filter cartridge is 491588B. If you need help placing an order for it, customer service is open 7 days a week and anyone will be happy to assist you. Please feel free to give us a call. We look forward to hearing from you!
eReplacementParts Team
March 22, 2022
Did this question help you?
Thank you for voting!
Why my pressure washer runs for about 5 minutes and dies out
Ronald
For model number EXWGV2121 - March 28, 2023
Hi Ronald,
Thank you for your question. If your pressure washer has not been used for awhile and it runs for a few minutes and stops, it may be clogged. If fuel has been sitting in the pressure washer for a long time, it becomes thicker. Once the compressor is turned and fuel starts to go through the carburetor, it becomes clogged. If it is clogged. the carburetor will need to be cleaned or replaced. We would also recommend checking the fuel cap, the fuel filter to see if they are also clogged with fuel and check the air filter, the pre cleaner and the spark arrestor as well to see if they are clogged and need replacing. Once you have determined the part you need, please call customer service. We look forward to hearing from you!
eReplacementParts Team
March 28, 2023
Did this question help you?
Thank you for voting!
Customer Repair Instructions
All our customer repair instructions are solicited directly from other customers just like you who have purchased and replaced this exact part.
Easy
30 - 60 mins
(102 rated repairs)?
< Prev
1
2
3
Next >
Sort by:
Sorry, we couldn't find any existing installation instruction that matched.
Any successful do it yourself begins with the correct parts. Thank you eReplacements for stocking just what I needed. Just remove the air cleaner cover, then remove the old filter and install the new one and replace the cover.
Did you find this story helpful?
Thank you for voting!
Rear drive transmission was grinding and slipping
Anson from Arlington Heights, Illinois
26 of 26 peoplefound this instruction helpful.
Difficulty Level:
A Bit Difficult
Total Repair Time:
More than 2 hours
Tools:
Nutdriver, Pliers, Screw drivers, Socket set, Wrench set
Place the mower on a pair of work stands so the the wheels are free to spin.
(I took pictures of all assemblies prior to removing for reassembly reference)
Remove the spark plug for safety.
Remove the blade from underneath using a socket or wrench.
Remove drive belt guard bolts from underneath and on top, remove g
... Read moreuard.
Remove the mulching door assembly from the mower deck.
Remove plastic grass clipping shield from the back of mower.
Remove the rear wheel assemblies using a socket.
Disassemble the rear drive gears from the axles, (Take pictures!) retaining all clips and shims in correct order. Drive gears are marked with an \"R\" on one side and are reversed from left and right side. Note the direction of free rotation and locked rotation!
Capture the ratchet pawl and spring from the axle as the gear is slid off.
Clean and re-grease all parts.
Remove 3 bolts each side that hold the rear drive axle side plates and slide off.
Lower the drive transmission/axle assembly and remove the metal belt retainer bolts from the transmission case after removing the torque spring. Remove belt and pull the transmission off of mower.
The tricky part now is to remove the pulley from the old transmission drive pinion. Its a self-locking nut and there is no easy place to grab the shaft to keep it from turning as the nut is removed. I removed the gearbox cover and held the drive gear.
Reverse the assembly procedure after cleaning and re-greasing all components.
This is also a great time to change oil, air filter and grease the front wheel axles.
1. removed air filter and cover.
2. removed primer base.
3. removed carburetor and gaskets
4. cleaned old gaskets from engine.
5. Installed new carburetor and gasket.
6. Installed new primer base, replaced because I wanted all new parts.
7. Installed new air filter and cover.
8. Primed and pulled
... Read morerope, started on 2nd pull ran like new.
Read less
Did you find this story helpful?
Thank you for voting!
Hard starting and poor performance once finally running
Removed old spark plug, correctly gapped and re-installed new spark plug purchased from e-replacementparts.com.
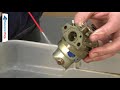
Removed old, dirty air filter, airbox assy. and gummed-up carburetor from engine. Dis-assembled airbox and carb completely - cleaning all the parts thoroughly with carb cleaner spray.
Re-assembled freshly cleaned car
... Read moreb with new carb overhaul kit from e-replacementparts.com.
Re-installed overhauled carb and airbox assy. back onto engine. Re-installed new air filter purchased from e-replacementparts.com and adjusted carb to specs.
Lawnmower engine now starts easily and has plenty of power!
Read less
Did you find this story helpful?
Thank you for voting!
Air vane was missing when I purchased the used mower
Removed starter rope from handle
Removed side discharge chute
Removed the gas tank
Removed the metal shroud
Installed and adjusted air vane
Reinstalled metal shroud
Reinstalled the gas tank
Installed the cover
Replaced the spark plug and air filter
Reinstalled side discharge chute
... Read more />Reinstalled starter rope
Read less
Did you find this story helpful?
Thank you for voting!
Transmission was stripped and made a grinding sound when being pushed.
Remove old axle assy. remove and install rear wheels on the correct side being sure to take a picture of the order of washers and thrust washers. You have to be sure to get the slip parts in the wheels on the right side. The biggest problem I encountered was a bolt broke on the belt guide. This is also one of the bolts securing the engine
... Read more to the frame.Tried several eze-outs and managed to break a couple. Finally went ahead and drilled the hole out and installed a 3/8 bolt with a nylon lock nut. Start and test ran mower. Trans worked as designed.
I removed the air filter housing cover with screwdriver. Removed air filter and removed air filter housing by unscrewing two mounting bolts. Using a 13mm socket I loosened carburetor mounting bolts and removed carburetor. Mounted choke plate in new carburetor and mounted new carburetor with new gasket to engine. Connected throttle linkage
... Read more, replaced air filter housing and airfilter. Put air filter housing cover on. Set choke lever to choke, pulled pulley rope and engine started. Has been running great ever since.
Cleaned carburetor and installed the carburetor overhaul kit. While I was in there I replace the air filter and spark plug. Runs like new now.
Did you find this story helpful?
Thank you for voting!
< Prev
1
2
3
Next >
✖
Stock Status
This part is in stock in our warehouse and will ship out within 1 business day of the order being placed.
New stock is on the way! On order parts usually ship within 7 business days.
Item is not in stock and usually ships 10-15 business days from the time you place your order.
This item is no longer being made by the manufacturer, and cannot be added to your shopping cart.
✖
Mail-In Recycling Rebate
Some of the parts we sell are eligible for mail-in rebates since we can recycle them. We will display any applicable rebates in your shopping cart. To redeem your rebate, contact Customer Service after you have received your part.


 – Part Number: 131-4547-03")


