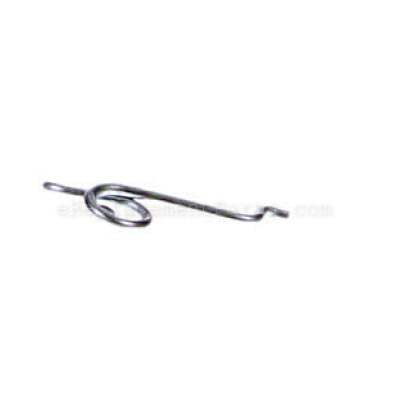


Link-air Vane 690347
OEM part for: Briggs and Stratton
Part Number: 690347
$5.99
In Stock
Jump To:
Frequently Purchased Together ?


Compatibility
This Link-air Vane will fit the following 1934 machines. Confirm this part works with your model, and view the detailed model diagrams and repair help we have to offer.
Briggs and Stratton
Show More Compatible ModelsThis item works with the following types of products:
- Engine Parts
This part replaces obsolete part #: 262753
Customer Part Reviews ?
Average Rating (out of 5):
Click to filter by ratings:
5 stars
2
4 stars
0
3 stars
0
2 stars
0
1 stars
0
< PREV
- 1
Good service
It worked great.
Guest -
August 13, 2020
Verified Purchase
Just what I needed
Parts were perfectly packaged and were just what I needed to get my mower up and running.
Guest -
August 14, 2019
Verified Purchase
Questions & Answers ?
Our customer Service team is at the ready daily to answer your part and product questions.

Ask our Team
We have a dedicated staff with decades of collective experience in helping customers just like you purchase parts to repair their products.
Does this fit my product?Questions & Answers for Link-air Vane
No questions have been asked yet
Customer Repair Instructions ?
All our customer repair instructions are solicited directly from other customers just like you who have purchased and replaced this exact part.
The blade driver assembly split where the key was welded in the assembly and the mower blade was just spinning on tjhe shaft
William - June 18, 2019
Tool Type
Lawn Mower
Difficulty
Medium
Time
15-30 minutes
Tools Used
Screwdriver, Pliers, Socket set
Parts Used
First i used pliers to get what was left of the key out and removed the blade driver assembly, then removed the belt guard to make it easier to work on. Then i ordered a new blade driver assembly and spacer driver from ereplacementparts.com, when the parts arrived i put a little dab of grease in the bottom of the blade driver assembly to help hold the spacer driver in place then slipped the assembly on the shaft, put the belt on the pulley and replaced the guard, put the mower blade back on, tightened the blade and then mowed the yard, everything fine so far.
Did you find this story helpful?
Thanks for voting and helping fellow customers!
link-air missing and oil seal was leaking
Randell - December 19, 2017
Tool Type
Lawn Mower
Difficulty
Medium
Time
More than 2 hours
Tools Used
Screwdriver, Socket set, Wrench Set, Seal installing tool & small hammer
Parts Used
Removed carb. and installed link-air and it was bottom oil seal leaking.I removed engine (4-bolts) and bottom pulley, removed old seal,installed new one.Bolted engine back on mower,replaced bottom pulley and belt.I changed the oil,and that was it. wasn't hard at all.
Did you find this story helpful?
Thanks for voting and helping fellow customers!
governed idle spring broke
Curt - April 29, 2019
👍 0 of 1 people found this instruction helpful
Tool Type
Lawn Mower
Difficulty
Medium
Time
15-30 minutes
Tools Used
Pliers, Socket set, paint brush and kerosene, thread locking gel
1. remove the shroud, three small bolts
2. remove the air cleaner
3. gently clean all the external parts of the tank and carburetor with solvent or kerosene and a brush
4a. image or note all the positions of the existing parts
4b. compare the existing position to the images in the parts diagram
5. take off the air vane from the magneto, one small bolt, take off the old link- air
6. take off the old link and spring remnants from the linkage, mark the holes with a sharpie
7. put the new link on, and test assemble the air vane, if it works freely, assemble with thread locker
8. put the new yellow spring on, the long end threads like a needle
9. put the smaller governed idle spring on, pay attention to which way the coil lays, it matters
10. put the shroud back on, the bolts don't need thread locker
11. carefully check start the engine, if it doesn't sound like your neighbors' it isn't right
12. if it does sound like your neighbors put on the air cleaner and happy mowing!
13. the new link-air is better than the old, so replace all three even if just one is broken or defective
Did you find this story helpful?
Thanks for voting and helping fellow customers!
OEM stands for Original Equipment Manufacturer and means the part you’re buying is sourced directly from the manufacturer who made your product. At eReplacementParts, we sell only genuine OEM parts, guaranteeing the part you’re purchasing is of better design and of higher quality than aftermarket parts.
Our product descriptions are a combination of data sourced directly from the manufacturers who made your product as well as content researched and curated by our content & customer service teams. This content is edited and reviewed internally before being made public to customers.
Our customer service team are at the ready daily to answer your part and product questions. We have a dedicated staff with decades of collective experience in helping customers just like you purchase parts to repair their products.
All our part reviews are solicited directly from other customers who have purchased this exact part. While we moderate these reviews for profanity, offensive language or personally identifiable information, these reviews are posted exactly as submitted and no alterations are made by our team.
All our customer repair instructions are solicited directly from other customers just like you who have purchased and replaced this exact part. While we moderate these reviews for profanity, offensive language or personally identifiable information, these reviews are posted exactly as submitted and no alterations are made by our team.
Based on data from past customer purchasing behaviors, these parts are most commonly purchased together along with the part you are viewing. These parts may be necessary or helpful to replace to complete your current repair.
All our installation videos are created and produced in collaboration with our in-house repair technician, Mark Sodja, who has helped millions of eReplacementParts customers over the last 13 years repair their products. Mark has years of experience in selling and repairing both commercial and residential products with a specialty in gas-powered equipment.
This data is collected from customers who submitted a repair instruction after replacing this exact part. Customers can rate how easy the repair was to complete and how long it took. We aggregate this data to provide a repair rating that allows customers to quickly determine the difficulty and time needed to perform their own repair.