eReplacementParts.com
877-346-4814
Ridgid Parts
Repair Parts Home
  
Power Tool Parts
  
Ridgid Parts
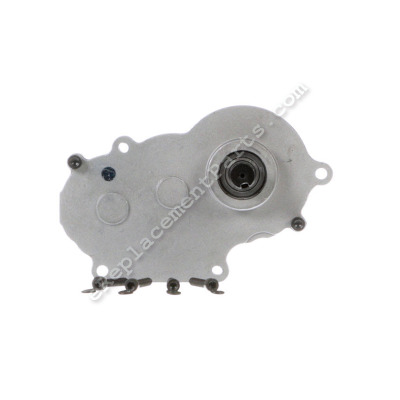
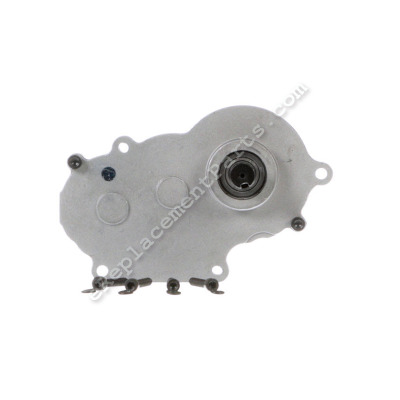
  089170109706 Gearbox Assembly

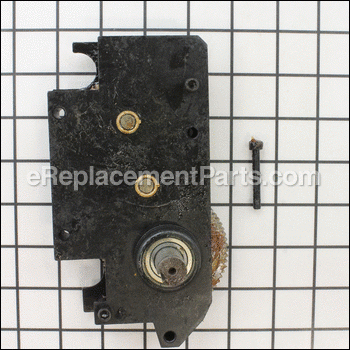
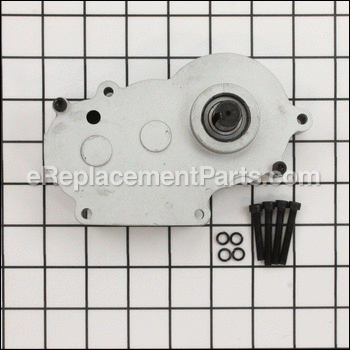
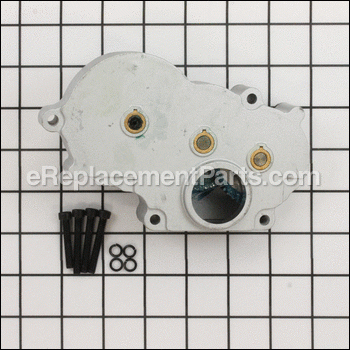
Gearbox Assembly 089170109706

OEM part for: Ridgid

Part Number: 089170109706


Install
Videos!
Gearbox Assembly - 089170109706:Ridgid 360 View
Gearbox Assembly - 089170109706:RidgidGearbox Assembly - 089170109706:RidgidGearbox Assembly - 089170109706:RidgidGearbox Assembly - 089170109706:RidgidGearbox Assembly - 089170109706:RidgidGearbox Assembly - 089170109706:Ridgid 360 View
$130.56
In Stock
Ships within 1 business day
Easy 15-30 minutes (9 rated repairs)?
OEM: Original Equipment Manufacturer ?
Ridgid
Does this d-block d-md-none fit my product?

Product Description ?

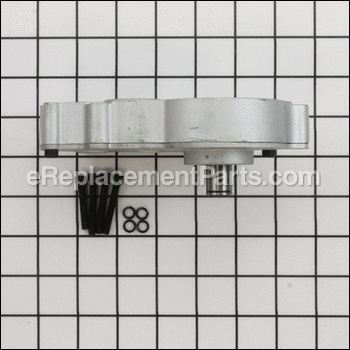
Keep in mind that this high-quality part is sold individually but includes four hex screws and four rings. The gearbox assembly attaches to the pinion. It may require an allen wrench and socket set during installation. It is made of metal and will need to be replaced if it becomes broken. This part is an OEM sourced directly from the manufacturer for use in Ridgid planers.

  • Classification: Part
  • Weight: 2.15 lbs.
  • Shipping: Ships Worldwide

Frequently Purchased Together ?

Compatibility

This part will fit the following 1 machine

Ridgid

R4331 13 In. Thickness Planer View Diagrams & Manuals
Don't see yours? Try searching our site for :

This item works with the following types of products:

  • Planer Parts

This part replaces obsolete part #: 089170109701

Customer Part Reviews ?

5
Average Rating (out of 5):
3 Reviews
Click to filter by ratings:
5 stars
3
4 stars
0
3 stars
0
2 stars
0
1 stars
0
  • Highest Rating
  • Most Recent
< PREV
  • 1
NEXT >
  • Promptness
    The part arrived as expected and their service was great
    Guest - April 10, 2022 Verified Purchase
    Great parts, easy fix
    My parts for my Rigid planer came the next day and I was up and running in 10 minutes. Saved me over $300 to fix my planer rather than buying a new one. I have purchased parts here before and will in the future.
    Guest - June 4, 2020 Verified Purchase
    Super easy replacement
    This replacement part was way better than the original equipment simply bolted in and works perfectly
    Guest - April 18, 2019 Verified Purchase
    t
    t
    t - t days ago Verified Purchase
    eReplacementParts Team
    t

    Questions & Answers ?

    Our customer Service team is at the ready daily to answer your part and product questions.

    photo of team member
    Ask our Team

    We have a dedicated staff with decades of collective experience in helping customers just like you purchase parts to repair their products.

    Does this fit my product?

    Questions & Answers for Gearbox Assembly


    The rollers will not turn. I have only planed about 8 to 10 boards. It was doing fine and just stopped feeding the boards.
    Mike for model number R4331 asked on 2023-11-01
    Hello Mike, Thank you for your inquiry. We would recommend checking the gearbox assembly, the sprocket and the chain. We have included a link to our article on the planer binding up: https://www.ereplacementparts.com/repair-center/power-tool/planer/won't-adjust-up-and-down-or-binds/ We hope this helps.
    eReplacementParts Team November 01, 2023

    Customer Repair Instructions ?

    All our customer repair instructions are solicited directly from other customers just like you who have purchased and replaced this exact part.

    Easy 15-30 minutes (9 rated repairs)?

    Feed rollers didn't turn - blade did

    David - March 19, 2016
    👍 8 of 8 people found this instruction helpful
    Tool Type

    Planer

    Difficulty

    Easy

    Time

    30-60 minutes

    Tools Used

    Screwdriver, Pliers, torx/allen wrench

    Took top and sides off a Rigid R4331 planer when it wouldn't pull a board into the blades. saw drive sprocket on outfeed roller was split in half (not sure how that could have happened). Drive gear in gearbox was ruined and gearbox actually was bent and gear teeth were all around. One chain seemed to have some problems from bent links as well. Outfeed roller was replaced because I filed out the key way a bit to pull the sprockets off and decided the key way then had too much play for sprockets. Most work was done with the on-board torx driver that came with the planer. Aside from spending too much time trying to make sure the outfeed roller was installed right, the whole repair took about 30 minutes. I made sure everything turned by hand after putting new roller, gearbox, sprockets and chains back on. Tightened everything up, plugged it in and stood slightly back in case it blew up. Works like a charm now. I bought the planer as a returned item from an online surplus dealer for 150. spent about 100 on parts..and it seems I now have a pretty much "new" planer.
    Did you find this story helpful?
    Thanks for voting and helping fellow customers!

    The planer would no longer move boards through it. The gear box broke and I thought the pinion gear was bad, it wasn't just looked odd.

    Daniel - November 17, 2017
    👍 1 of 1 people found this instruction helpful
    Tool Type

    Planer

    Difficulty

    Easy

    Time

    15-30 minutes

    Tools Used

    , Allen wrench and socket set were used.

    Took the top of the planer off 4 bolts on top. The hard part was the repeat a cut dial. There is a ball bearing that pops out and a spring under it. Remove the grease tray from under the gear box. Remove the old box. Put the new gear box on. The screws look like they had loctite on them, so I added some to mine. Put everything back together. The only tricky part is putting the repeat a cut back on. Use a small screw driver to hold down the spring and ball into the hole then slide the shaft of the repeat a cut over the screwdriver and into the slot.
    Did you find this story helpful?
    Thanks for voting and helping fellow customers!

    Bushing had slack in feed roller

    Frank - March 12, 2023
    Tool Type

    Planer

    Difficulty

    Easy

    Time

    Less than 15 minutes

    Tools Used

    , Snap ring pliers. allen wrench

    Got piece of alumimun. Drilled and made new bushing. Machinie shop made bushings for transmission and i replaced. Saved new tranmission for future problems
    Did you find this story helpful?
    Thanks for voting and helping fellow customers!

    Out feed roller wasn’t working

    Mark - January 21, 2023
    Tool Type

    Planer

    Difficulty

    Easy

    Time

    15-30 minutes

    Tools Used

    , Torx drivers

    Replaced gearbox and both belts due to showing signs of cracking.
    Did you find this story helpful?
    Thanks for voting and helping fellow customers!

    Inconsistent feed rate of boards through planer (chugging)

    James - January 31, 2019
    Tool Type

    Planer

    Difficulty

    Easy

    Time

    15-30 minutes

    Tools Used

    , Allen wrench, retaining ring pliers

    Upon inspection of the gearbox, I noticed the brass bushings were worn unevenly from years of use. Those bushings are not available for purchase so I had to buy the whole gearbox assembly. I was glad I did! The gearbox I received was enclosed, where the first gearbox was sandwiched between two plates. The old gearbox allowed contaminants to enter the mechanism where the new gearbox would not. Powered it back up and the planer ran like new. Note: do not bother memorizing the disassembly of the original gearbox, the new gearbox only requires 3 screws with no subassembly. While the machine is open, take the opportunity to clean the chains and sprockets.
    Did you find this story helpful?
    Thanks for voting and helping fellow customers!

    Feed rollers quit working. Noise in gearbox

    Daniel - September 27, 2018
    Tool Type

    Planer

    Difficulty

    Easy

    Time

    15-30 minutes

    Tools Used

    Screwdriver, Allen wrenches,snap ring pliers.

    1. Remove, adjustment handle, repeat cut knob, and cover of planer
    2. Adjust to maximum height.
    3. Remove retaining rings for drive sprockets.
    4. Remove old gear box screws and gear box.
    5. Replace and secure new gear box.
    6. Replace drive sprockets and install retaining clips
    7. Replace planer cover, adjustment handle, and repeat cut knob.
    Did you find this story helpful?
    Thanks for voting and helping fellow customers!

    Gear box ate itself up.

    Martin - May 21, 2017
    Tool Type

    Planer

    Difficulty

    Easy

    Time

    15-30 minutes

    Tools Used

    Pliers

    Removed the bad gear box and installed the new one.
    Did you find this story helpful?
    Thanks for voting and helping fellow customers!

    The gears were stripped

    Henry - May 15, 2017
    Tool Type

    Planer

    Difficulty

    Easy

    Time

    15-30 minutes

    Tools Used

    Wrench Set, Snap ring pliers

    Removed the side panel.
    Removed the retaining ring sprocket and washer.
    Remove the gearbox from the planer.
    Reassembled in reverse order
    Did you find this story helpful?
    Thanks for voting and helping fellow customers!

    Gear box assembly

    Ronald - April 5, 2017
    Tool Type

    Planer

    Difficulty

    Easy

    Time

    Less than 15 minutes

    Tools Used

    , Alan wrenches

    Removed the cover and saw the gear box assembly washers were wore out ordered a new piece and now it runs better and quieter than it did when it was new.
    Did you find this story helpful?
    Thanks for voting and helping fellow customers!

    OEM stands for Original Equipment Manufacturer and means the part you’re buying is sourced directly from the manufacturer who made your product. At eReplacementParts, we sell only genuine OEM parts, guaranteeing the part you’re purchasing is of better design and of higher quality than aftermarket parts.

    Our product descriptions are a combination of data sourced directly from the manufacturers who made your product as well as content researched and curated by our content & customer service teams. This content is edited and reviewed internally before being made public to customers.

    Our customer service team are at the ready daily to answer your part and product questions. We have a dedicated staff with decades of collective experience in helping customers just like you purchase parts to repair their products.

    All our part reviews are solicited directly from other customers who have purchased this exact part. While we moderate these reviews for profanity, offensive language or personally identifiable information, these reviews are posted exactly as submitted and no alterations are made by our team.

    All our customer repair instructions are solicited directly from other customers just like you who have purchased and replaced this exact part. While we moderate these reviews for profanity, offensive language or personally identifiable information, these reviews are posted exactly as submitted and no alterations are made by our team.

    Based on data from past customer purchasing behaviors, these parts are most commonly purchased together along with the part you are viewing. These parts may be necessary or helpful to replace to complete your current repair.

    All our installation videos are created and produced in collaboration with our in-house repair technician, Mark Sodja, who has helped millions of eReplacementParts customers over the last 13 years repair their products. Mark has years of experience in selling and repairing both commercial and residential products with a specialty in gas-powered equipment.

    This data is collected from customers who submitted a repair instruction after replacing this exact part. Customers can rate how easy the repair was to complete and how long it took. We aggregate this data to provide a repair rating that allows customers to quickly determine the difficulty and time needed to perform their own repair.

    eReplacementParts.com
    7174 South 400 West
    Suite 5
    Midvale, UT 84047
    visa mastercard discover american express PayPal