eReplacementParts.com
877-346-4814
Honda Parts
Repair Parts Home
  
Lawn Equipment Parts
  
Honda Parts
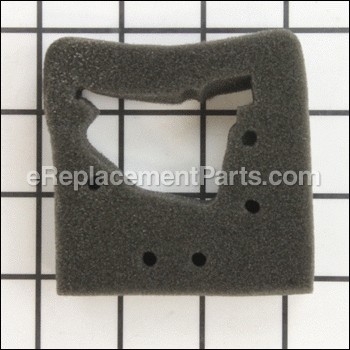
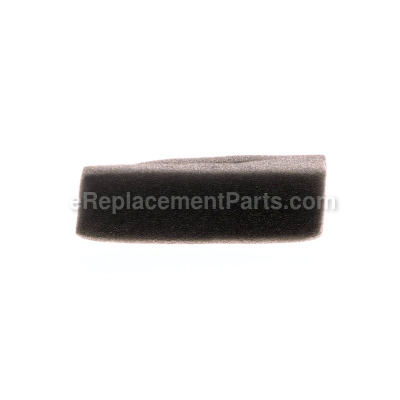
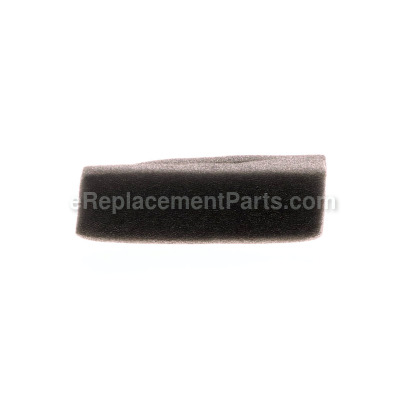
  17211-ZM3-800 Element- Air Cleaner

Element- Air Cleaner 17211-ZM3-800

OEM part for: Honda

Part Number: 17211-ZM3-800


Install
Videos!
Element- Air Cleaner - 17211-ZM3-800:Honda 360 View
Element- Air Cleaner - 17211-ZM3-800:HondaElement- Air Cleaner - 17211-ZM3-800:HondaElement- Air Cleaner - 17211-ZM3-800:Honda 360 View
In Stock
Order within the next 8 hours and your part ships today!
Easy 15-30 minutes (11 rated repairs)?
OEM: Original Equipment Manufacturer ?
Honda
Does this d-block d-md-none fit my product?

Product Description ?

This is an OEM sourced replacement part used on Honda engines. Its purpose is to filter out dust and debris from contaminating the carburetor. Over time it may get dirty and clogged, this would restrict the air flow and will eventually require replacement. It is a high quality foam filter that is sold individually.

  • Classification: Part
  • Weight: 0.02 lbs.
  • Shipping: Ships Worldwide

Frequently Purchased Together ?

Compatibility

This part will fit the following 12 machines

Honda

GX31 (Type SCMS/A)(VIN# GCAG-2100001-9999999) Small Engine View Diagrams & Manuals
GX31 (Type TA2)(VIN# GCAG-1000001-2099999) Small Engine View Diagrams & Manuals
GX31 (Type TA2/A)(VIN# GCAG-2100001-9999999) Small Engine View Diagrams & Manuals
GX31 (Type SCMS)(VIN# GCAG-1000001-2099999) Small Engine View Diagrams & Manuals
GX31 (Type TAP)(VIN# GCAG-1000001-2099999) Small Engine View Diagrams & Manuals
GX31 (Type TAP/A)(VIN# GCAG-2100001-9999999) Small Engine View Diagrams & Manuals
GX22 (Type TA)(VIN# GCAF-1000001-1399999) Small Engine View Diagrams & Manuals
GX22 (Type TA2)(VIN# GCAF-1000001-1399999) Small Engine View Diagrams & Manuals
GX22 (Type TA2/A)(VIN# GCAF-1400001-9999999) Small Engine View Diagrams & Manuals
FG100 (Type A)(VIN# FZCV-6000001 to FZCV-9999999) Rototiller View Diagrams & Manuals
FG100 (Type A1)(VIN# FZCV-6000001 to FZCV-9999999) Rototiller View Diagrams & Manuals
FG100 (Type A1/A)(VIN# FZCV-6000001 to FZCV-9999999) Rototiller View Diagrams & Manuals
Show More Compatible Models
Don't see yours? Try searching our site for :

This item works with the following types of products:

  • Engine Parts

Customer Part Reviews ?

5
Average Rating (out of 5):
7 Reviews
Click to filter by ratings:
5 stars
7
4 stars
0
3 stars
0
2 stars
0
1 stars
0
  • Highest Rating
  • Most Recent
< PREV
  • 1
NEXT >
  • PART AS DESCRIBED FAST SHIPPIUNG
    PACKAGED WELL SHIPPED PROMPTLY PART FIT PERFECTLY
    Guest - November 24, 2022 Verified Purchase
    Honda Tiller teplacement
    Exact one replacement at a reasonable price
    Guest - January 3, 2022 Verified Purchase
    great part
    easy ordering, fast delivery. parts fit perfectly.
    Guest - September 5, 2019 Verified Purchase
    air cleaner
    replacement parts worked well, service great
    Guest - August 9, 2019 Verified Purchase
    honda parts
    replacement parts worked well
    Guest - August 9, 2019 Verified Purchase
    Just What I WasLlooking For
    Ordered the filter for Honda Small Engine. This is the only place I could find a filter to replace my old one. It arrived in a short time and fits perfectly. Great service and quick response!
    Lorri - June 29, 2019 Verified Purchase
    Part was as advertised
    Part fit perfectly
    Guest - May 28, 2019 Verified Purchase
    t
    t
    t - t days ago Verified Purchase
    eReplacementParts Team
    t

    Questions & Answers ?

    Our customer Service team is at the ready daily to answer your part and product questions.

    photo of team member
    Ask our Team

    We have a dedicated staff with decades of collective experience in helping customers just like you purchase parts to repair their products.

    Does this fit my product?

    Questions & Answers for Element- Air Cleaner


    No questions have been asked yet

    Customer Repair Instructions ?

    All our customer repair instructions are solicited directly from other customers just like you who have purchased and replaced this exact part.

    Easy 15-30 minutes (11 rated repairs)?

    Air Filter was bad

    Richard - March 23, 2018
    👍 1 of 1 people found this instruction helpful
    Tool Type

    Engine

    Difficulty

    Easy

    Time

    Less than 15 minutes

    Tools Used

    Screwdriver

    Replaced air filter
    Did you find this story helpful?
    Thanks for voting and helping fellow customers!

    Fuel bulb and diaframs old/stiff

    Chuck - February 22, 2023
    Rebuilt carb
    Did you find this story helpful?
    Thanks for voting and helping fellow customers!

    Filter housing warped

    Tony - May 21, 2021
    Tool Type

    Engine

    Difficulty

    Easy

    Time

    15-30 minutes

    Tools Used

    Socket set

    Removed top filter housing
    Removed filter
    Removed bottom filter housing
    Reassembled in reverse order
    New filter came pre-oiled
    Did you find this story helpful?
    Thanks for voting and helping fellow customers!

    primer bulb cracked due to age

    dennis - June 6, 2020
    Tool Type

    Engine

    Difficulty

    Easy

    Time

    15-30 minutes

    Tools Used

    Screwdriver, Nutdriver

    1.Removed air cleaner cover.
    2.Removed screws holding primer bulb in place.
    3. Installed new primer bulb and air cleaner.
    Did you find this story helpful?
    Thanks for voting and helping fellow customers!

    Rebuilt a Honda Harmony Rototiller Transmission.

    Joel - May 31, 2020
    Tool Type

    Engine

    Difficulty

    Medium

    Time

    More than 2 hours

    Tools Used

    Screwdriver, Pliers, Socket set, Wrench Set, Adjustable Wrench, Ultra Black Gasket material, SAE and Metric sockets

    This is a 19 year old Honda Harmony Rototiller,they don't make them like this anymore so a repair is a no-brainer if you have the capabilities to do the repair. This is a fairly complicated repair, mostly due to the fact that the entire rototiller needs to be disassembled from the tubular frame. I removed the tines from the drive spindle and then the transmission from the engine. At this point the entire engine is now off the frame. As all repairs go I also found that the clutch should be replaced and the air cleaner was deteriorating. When I removed the dust covers from the spindle I also found that the felt that's used to keep dust out should also be replaced. To remove the clutch you need to remove the spark plug and with a screwdriver make sure the piston is in the down position. Then you insert a piece of clean rope to jamb the piston so you can remove the clutch. Now back to the transmission. All I did was open the transmission and paid very close attention to how everything was assembled. I took everything out cleaned the very little grease that remained and removed the old gasket material. I coated all of the gears with a good quality grease including the transfer shaft. I carefully replaced the transmission . Now the gasket material. I carefully coated the top bearing area with a small amount of Ultra Black Gasket material and placed a small bead around the entire face of one side of the transmission housing. Carefully place the 2 halves together and hand tighten the bolts and let it sit for 24 hours. The next day tighten the transmission bolts and trim all of the excess gasket material and reassemble the rototiller. After I received all of the parts from eReplacement parts I'd estimate that the entire repair start to finish including the time to clean everything was an easy 5 to 6 hours.
    Did you find this story helpful?
    Thanks for voting and helping fellow customers!

    Sitting for more than eight years, all hoses were cracked and fuel tank had bad gas in it. Would not start.

    Mike - April 22, 2020
    1. Removed air cleaner assembly.
    2. Removed throttle cable from carb.
    3, Removed rope pull start and fuel tank.
    4. Removed fuel lines from tank, making sure to mark where they go.
    5. Removed fuel tank grommet and filter and replaced with new ones.
    6. Removed carb and replaced with new one.
    7. Install fuel tank, rope start, hook up fuel lines, attach throttle cable and air filter assy, fill with fuel, prime carb and start engine, done.
    (Fuel tank grommet very hard to get out, you will need strong hands. When re-installing fuel tank grommet make sure both plastic through tubes are in the grommet and use a little dielectric grease on the grommet to insert it back into the tank. Very hard to insert it so be careful.)
    Did you find this story helpful?
    Thanks for voting and helping fellow customers!

    The fuel filter tube was rotted and the filter was clogged

    Dennis - June 13, 2019
    The repair was simple enough. One problem solved and another created.
    The machine runs well for a time and then stalls out because the fuel supply dries up. I then have to re-prime the carburetor with the bulb.
    Starting the machine when it's cold sometimes requires that I pull the plug and inject some fuel into the chamber. Then it will start and run.

    Not enough vacuum on the intake stroke? Clogged line or filter? Clogged Jet or damaged diaphragm? Don't know. Thought I replaced everything that needed replacing.
    Did you find this story helpful?
    Thanks for voting and helping fellow customers!

    Primer bulb was old and stiff, could not prime carb. to start.

    Murriel - July 5, 2018
    Tool Type

    Engine

    Difficulty

    Easy

    Time

    15-30 minutes

    Tools Used

    Socket set, Wrench Set

    I removed the throttle cable, removed the nuts that secure the carb. to the engine, removed the 4 screws that secure the primer bulb to the carb. replaced the primer bulb and reinstalled in reverse order. I also replaced the air filter element.
    Did you find this story helpful?
    Thanks for voting and helping fellow customers!

    Needed a new air filter.

    john - April 23, 2018
    Tool Type

    Engine

    Difficulty

    Easy

    Time

    Less than 15 minutes

    Tools Used

    Replaced the old air filter. No tools needed.
    Did you find this story helpful?
    Thanks for voting and helping fellow customers!

    Element-air cleaner was dry rot

    richard - February 13, 2017
    Tool Type

    Engine

    Difficulty

    Medium

    Time

    15-30 minutes

    Tools Used

    Removed the air cleaner housing then removed the old filter and placed the new filter in its place. Then replace the air cleaner housing
    Did you find this story helpful?
    Thanks for voting and helping fellow customers!

    OEM stands for Original Equipment Manufacturer and means the part you’re buying is sourced directly from the manufacturer who made your product. At eReplacementParts, we sell only genuine OEM parts, guaranteeing the part you’re purchasing is of better design and of higher quality than aftermarket parts.

    Our product descriptions are a combination of data sourced directly from the manufacturers who made your product as well as content researched and curated by our content & customer service teams. This content is edited and reviewed internally before being made public to customers.

    Our customer service team are at the ready daily to answer your part and product questions. We have a dedicated staff with decades of collective experience in helping customers just like you purchase parts to repair their products.

    All our part reviews are solicited directly from other customers who have purchased this exact part. While we moderate these reviews for profanity, offensive language or personally identifiable information, these reviews are posted exactly as submitted and no alterations are made by our team.

    All our customer repair instructions are solicited directly from other customers just like you who have purchased and replaced this exact part. While we moderate these reviews for profanity, offensive language or personally identifiable information, these reviews are posted exactly as submitted and no alterations are made by our team.

    Based on data from past customer purchasing behaviors, these parts are most commonly purchased together along with the part you are viewing. These parts may be necessary or helpful to replace to complete your current repair.

    All our installation videos are created and produced in collaboration with our in-house repair technician, Mark Sodja, who has helped millions of eReplacementParts customers over the last 13 years repair their products. Mark has years of experience in selling and repairing both commercial and residential products with a specialty in gas-powered equipment.

    This data is collected from customers who submitted a repair instruction after replacing this exact part. Customers can rate how easy the repair was to complete and how long it took. We aggregate this data to provide a repair rating that allows customers to quickly determine the difficulty and time needed to perform their own repair.

    eReplacementParts.com
    7174 South 400 West
    Suite 5
    Midvale, UT 84047
    visa mastercard discover american express PayPal