
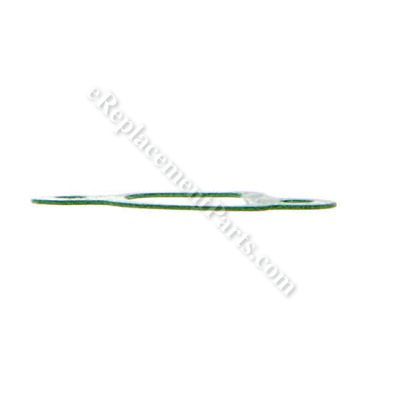


This is a genuine manufacturer-sourced replacement part which is specially designed for use with lawn and garden equipment. It provides an air-tight seal for the carburetor, over time the material may wear out and begin to crack eventually requiring a replacement. This part is made of high-quality composite material and is sold individually.
Carburetor Insulator Gasket 751P11567B
OEM part for: MTD, Yard Machines, Troy-Bilt, Yard Man, Cub Cadet, Bolens, Husky
Part Number: 751P11567B
$4.99
In Stock
Jump To:
Frequently Purchased Together ?


Compatibility
This Carburetor Insulator Gasket will fit the following 614 machines. Confirm this part works with your model, and view the detailed model diagrams and repair help we have to offer.
MTD
Yard Machines
Troy-Bilt
Yard Man
Cub Cadet
Bolens
Husky
Show More Compatible ModelsThis item works with the following types of products:
- Chipper / Shredder Parts
- Snowblower Parts
- Engine Parts
- Lawn Mower Parts
- Log Splitter Parts
This part replaces obsolete part #: 951-11567 (Also Available in Kit Below), 751P11567A, 951-11567, 751-11567
Customer Part Reviews ?
Average Rating (out of 5):
Click to filter by ratings:
5 stars
4
4 stars
0
3 stars
0
2 stars
0
1 stars
0
< PREV
- 1
OEM parts are the best!!!!
The OEM carb and gaskets fit and worked perfectly. Troy Bilt 2410 snowblower started and it runs like a brand new machine!! GREAT parts!!!
Mark A -
October 30, 2023
Verified Purchase
Easy repair, had item in stock
Initially ordered from another company. After 2 months without the part, reordered from eRplcementParts. Had the part within a couple days.
Guest -
December 29, 2021
Verified Purchase
Worked great, easy repai
Arrived in good condition, snowblower running well.
Guest -
September 29, 2021
Verified Purchase
Carburetor Problems
I ended up replacing the carburetor. The parts were right and shipped very quickly. Definitely will order from ereplacementparts.com again.
Guest -
January 8, 2021
Verified Purchase
Questions & Answers ?
Our customer Service team is at the ready daily to answer your part and product questions.

Ask our Team
We have a dedicated staff with decades of collective experience in helping customers just like you purchase parts to repair their products.
Does this fit my product?Questions & Answers for Carburetor Insulator Gasket
No questions have been asked yet
Customer Repair Instructions ?
All our customer repair instructions are solicited directly from other customers just like you who have purchased and replaced this exact part.
Engine was surging and choke was ineffective,
Robert - March 22, 2018
👍 1 of 1 people found this instruction helpful
Tool Type
Snowblower
Difficulty
Easy
Time
15-30 minutes
Tools Used
Screwdriver, Pliers, Socket set, Wrench Set
The Yard Man never seemed to work quite right since the day I bought it but over the course of the winter it had gotten worse and after Googling, I figured it was a bad carb. I was right.
The hardest part was getting at it, but I found two good YouTube videos. One on taking the carb off (that took about two hours). And one on putting things back together.
https://www.youtube.com/watch?v=gVimAoSqaP4
https://www.youtube.com/watch?v=JkF-kawbzp0
It now works better than it ever has. Just in time for summer!
Did you find this story helpful?
Thanks for voting and helping fellow customers!
Engine surging
Michael - December 29, 2023
Tool Type
Snowblower
Difficulty
Medium
Time
More than 2 hours
Tools Used
Screwdriver, Pliers, Socket set, Wrench Set, Liquid carburetor parts cleaner
1. Remove engine control dials and buttons.
2. Remove unit drive belt cover (necessary for access of 1heat panel bolt.
3. Remove 2 screws from electric starter control (necessary for panel removal).
4. Remove all bolts for muffler heat panel and remove panel.
5. Loosen and remove 2 carburetor acorn nuts and carefully remove panel being mindful of
ignition control wires, choke control linkage and bracket, crankcase recirculating hose
and carb primer hose.
6. With panel removed, fuel can be drained from tank using upper bolt on on carb drain
bowl or disconnecting fuel tank feed line.
7. Carefully remove carburetor being mindful of throttle and governor spring linkage and
gasket location.
8. Disassemble carb fuel bowl, float/valve assembly and immerse carb in cleaner for an
overnight soak.
9. Remove carb from cleaner, rinse and inspect. If engine was surging, the most likely
cause is a clogged jet/flow manifold located in the central column of the bowl area.
Compressed air will be necessary for this cleaning process.
10. After confirmation of a clear jet, reassemble carb and re- install in reverse order.
Did you find this story helpful?
Thanks for voting and helping fellow customers!
Fuel bowl gasket missing, carb gaskets torn.
John - January 23, 2023
Tool Type
Snowblower
Difficulty
Easy
Time
30-60 minutes
Tools Used
Screwdriver, Pliers, Socket set
The exact right parts for the job! Runs like new.
Did you find this story helpful?
Thanks for voting and helping fellow customers!
Carburetor leaking
Paul - January 7, 2023
Tool Type
Blower
Difficulty
Medium
Time
1-2 hours
Tools Used
Screwdriver, Pliers, Socket set, Wrench Set, Nutdriver, Flashlight, inspection mirror, hose pliers
Pinch off fuel line, disconnect spark plug wire, remove heat shields, and belt covers, disconnect fuel line and primer tube. Removed old carburetor, and gaskets. Replaced with new parts. Replaced covers etc. Fresh fuel and test. Works perfect.
Did you find this story helpful?
Thanks for voting and helping fellow customers!
Getting old ND needed some TLC
Steven - November 12, 2021
Tool Type
Snowblower
Difficulty
Medium
Time
1-2 hours
Tools Used
Screwdriver, Pliers, Socket set, Wrench Set, Nutdriver
I cleaned the Engine, changed the Oil, replaced the Spark Plug replaced the coil assembly and replaced the Carb that was in bad shape. It went pretty smooth. You just have to lay out your parts and take your time.
Did you find this story helpful?
Thanks for voting and helping fellow customers!
The ignition coil’s wire to the spark plug became so corroded at the spark plug it separated.
Richard - December 24, 2020
Tool Type
Snowblower
Difficulty
Easy
Time
More than 2 hours
Tools Used
Screwdriver, Socket set, Wrench Set, Feeler gauges and spark plug gapping tool to test spark plug
The ignition coil needed to be replaced. The following removal gave access to the coil for replacement.
1. Remove the top muffler cover, carburetor covering, and engine cover with engine rope starter which exposes the ignition coil.
Since the removal of the carburetor cover releases the pressure held onto the carburetor, thus possibly cause a carburetor gasket to leak I also slid the carburetor off and replaced the three gaskets in place between the engine head, carburetor, linkage bracket and air inlet. It is also required to remove the snow exit shoot to be able to access the two bolts that hold on the top engine cover.
2. Check gap of existing coil to flywheel magnet before detaching the coil. The coil detached with just one wire disconnected and two mounting bolts removed.
3. Cleaned the magnets on the flywheel.
4. Install the new coil and gapped it to approximately 20 thousands with a feeler gauge.
5. Install remaining removed items in reverse order. Test run.
Did you find this story helpful?
Thanks for voting and helping fellow customers!
carberator float needal valve need changing out
Jay - December 1, 2019
Tool Type
Snowblower
Difficulty
Easy
Time
Less than 15 minutes
Tools Used
Pliers, Socket set, Wrench Set
pulled carburetor and put new parts in and reinstalled it
Did you find this story helpful?
Thanks for voting and helping fellow customers!
Fuel leak
BRADLEY - November 28, 2019
Tool Type
Snowblower
Difficulty
Easy
Time
15-30 minutes
Tools Used
Pliers, Socket set
removed carburetor and replaced gaskets
Did you find this story helpful?
Thanks for voting and helping fellow customers!
Cracked gasket.
Phil - November 13, 2017
Tool Type
Snowblower
Difficulty
Easy
Time
Less than 15 minutes
Tools Used
Screwdriver, Pliers, Socket set, Wrench Set
Parts Used
Removed the carburetor and replaced the insulator gasket. Reassembled.
Did you find this story helpful?
Thanks for voting and helping fellow customers!
Carb was gunked up
keith - March 27, 2017
Tool Type
Snowblower
Difficulty
Easy
Time
1-2 hours
Tools Used
Pliers, Socket set
Replaced the old carb with the new one. The engine runs great now!
Did you find this story helpful?
Thanks for voting and helping fellow customers!
Load More Install Stories
OEM stands for Original Equipment Manufacturer and means the part you’re buying is sourced directly from the manufacturer who made your product. At eReplacementParts, we sell only genuine OEM parts, guaranteeing the part you’re purchasing is of better design and of higher quality than aftermarket parts.
Our product descriptions are a combination of data sourced directly from the manufacturers who made your product as well as content researched and curated by our content & customer service teams. This content is edited and reviewed internally before being made public to customers.
Our customer service team are at the ready daily to answer your part and product questions. We have a dedicated staff with decades of collective experience in helping customers just like you purchase parts to repair their products.
All our part reviews are solicited directly from other customers who have purchased this exact part. While we moderate these reviews for profanity, offensive language or personally identifiable information, these reviews are posted exactly as submitted and no alterations are made by our team.
All our customer repair instructions are solicited directly from other customers just like you who have purchased and replaced this exact part. While we moderate these reviews for profanity, offensive language or personally identifiable information, these reviews are posted exactly as submitted and no alterations are made by our team.
Based on data from past customer purchasing behaviors, these parts are most commonly purchased together along with the part you are viewing. These parts may be necessary or helpful to replace to complete your current repair.
All our installation videos are created and produced in collaboration with our in-house repair technician, Mark Sodja, who has helped millions of eReplacementParts customers over the last 13 years repair their products. Mark has years of experience in selling and repairing both commercial and residential products with a specialty in gas-powered equipment.
This data is collected from customers who submitted a repair instruction after replacing this exact part. Customers can rate how easy the repair was to complete and how long it took. We aggregate this data to provide a repair rating that allows customers to quickly determine the difficulty and time needed to perform their own repair.