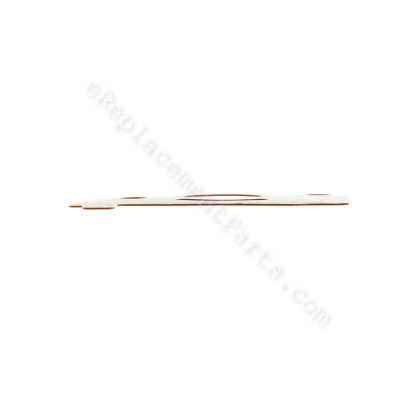


This is a genuine manufacturer-sourced replacement component which is specially designed for use with Honda engines commonly installed on lawn and garden equipment. Its purpose is to provide an air-tight seal for the carburetor. Over time gaskets tend to wear out and crack eventually requiring replacement to maintain peak performance. This part is made of high-quality composite material and it is sold individually.
Carburetor Gasket 16221-ZG0-801
OEM part for: Honda
Part Number: 16221-ZG0-801
$4.99
In Stock
Jump To:
Frequently Purchased Together ?


Compatibility
This Carburetor Gasket will fit the following 2348 machines. Confirm this part works with your model, and view the detailed model diagrams and repair help we have to offer.
This item works with the following types of products:
- Engine Parts
This part replaces obsolete part #: 16221-ZG0-000
Customer Part Reviews ?
Average Rating (out of 5):
Click to filter by ratings:
5 stars
4
4 stars
1
3 stars
0
2 stars
0
1 stars
0
< PREV
- 1
Honda f210 Carb Gasket Repair
Perfect fit!
Dave -
May 4, 2021
Verified Purchase
Perfect! correct part!
Arrived on time and intact.
Jose -
January 8, 2021
Verified Purchase
Right part and fast shipment
Received part in quick time and got my ground pounder back running like new
Guest -
December 9, 2020
Verified Purchase
Easy repair. Exact Honda replacement part.
Part was the perfect fit. My generator is running great!
Guest -
August 26, 2020
Verified Purchase
Prompt delivery!
Website was easy to work with. Found my part and ordered it. Was delivered promptly. Only drawback was that a few items were not in stock, but that is all.
Guest -
August 24, 2020
Verified Purchase
Questions & Answers ?
Our customer Service team is at the ready daily to answer your part and product questions.

Ask our Team
We have a dedicated staff with decades of collective experience in helping customers just like you purchase parts to repair their products.
Does this fit my product?Questions & Answers for Carburetor Gasket
No questions have been asked yet
Customer Repair Instructions ?
All our customer repair instructions are solicited directly from other customers just like you who have purchased and replaced this exact part.
My generator would not stay running
Robert - September 28, 2017
👍 2 of 2 people found this instruction helpful
Tool Type
Engine
Difficulty
Medium
Time
30-60 minutes
Tools Used
Screwdriver, Pliers, Wrench Set
I removed and cleaned the carburetor and you need to replace the gaskets when you do that.
Turn the lever to off on the gas cap
Remove the side cover
Remove the air cleaner housing
Remove the fuel line, you can use fuel line clamp pliers prior to removing the line if you have them.
Drain the fuel from the carb via the screw at the bottom of the carb. Put a container under the drain hose which protrudes slightly out of the bottom of the generator housing
Loosen the bolts and nuts securing the carb and it will slide out on the studs
Remove the white cap at the top of the carb and the wire connector that's under the cap
Carefully remove the carb and the lines that are attached.
Remove the carb, the float, then the fuel bowl and observe the condition. Clean with Carb Cleaner and air if you have it.
I will try my best to list the repair process from memory. Please do your research
The O-ring that is between the fuel bowl and carb housing needs to be replaced.
Locate the Carb jet and remove it with a small bladed screwdriver. Clean it and use air
Remove the Carb Jet seat that is just below the jet and clean that. NOTE: Make sure you know which way it goes back in as it has to be put back in the same way.
Clean the whole carb with carb cleaner and air.
Now put it all back together in reverse order. DO NOT over tighten the jet and basically any carb bolt as you may damage the carb.
Once done, start the generator using fresh fuel and make sure that you don't have any leaks. Good Luck
Did you find this story helpful?
Thanks for voting and helping fellow customers!
Carburetor gummed up and wouldn't start
HUGH - March 29, 2018
👍 1 of 1 people found this instruction helpful
Tool Type
Engine
Difficulty
Easy
Time
30-60 minutes
Tools Used
Screwdriver, Socket set, Wrench Set
Cleaned jets and bowl and replaced the two gaskets on the carb and the rotten air filters. Worked perfectly and runs great again. Thanks.
Did you find this story helpful?
Thanks for voting and helping fellow customers!
Bad gasket
Allan - July 22, 2016
👍 1 of 1 people found this instruction helpful
Tool Type
Lawn Mower
Difficulty
Easy
Time
15-30 minutes
Tools Used
Wrench Set
Parts Used
Remove the air cleaner assembly , then the carburetor. Remove the old gasket clean the area then install the new gasket, carburetor and air cleaner.
Did you find this story helpful?
Thanks for voting and helping fellow customers!
Swap out the old clogged carb for a new one.
Dave - May 6, 2021
Tool Type
Engine
Difficulty
Medium
Time
30-60 minutes
Tools Used
Screwdriver, Pliers, Socket set, Wrench Set, cellphone camera, parts cleaning brush and some gasoline in
1. Loosened and bolts and nuts. Sprayed penetrant on those that were stubborn.
2. Take pictures of all connecting springs and rods.
3. Remove intake manifold and clean.
4. Remove carb and clean behind the carb.
5. Reconnect spring and rod linkage to new carb and slide it into position,
6. Slip in new gaskets and heat-break.
7. Retighten all bolts and clamps.
8. Gas her up and start rototilling!
Did you find this story helpful?
Thanks for voting and helping fellow customers!
Carb gummed up from bad gas
Mike - July 2, 2019
Tool Type
Engine
Difficulty
Easy
Time
15-30 minutes
Tools Used
Screwdriver, Klein 10-in-1 screwdriver
videos are your friend. Many videos with Honda EUU2000i carb overhaul. I was in a hurry and also bought a replacement carb to get the generator up and running, but have since overhauled the original carburetor and it runs fine now. You will be time and money ahead ordering the pilot jet set. If you get the original unplugged you will have a spare. Many people say the screw over the pilot jet just holds the jet in. Not true it is a throttle stop screw and has a specific setting that may change with each jet. The setting is described in the EU2000i service manual, free from many sources. Great parts and great service. My new go to small engine parts house.
Did you find this story helpful?
Thanks for voting and helping fellow customers!
starter rope replacement
Leonard - March 9, 2019
Tool Type
Engine
Difficulty
Medium
Time
More than 2 hours
Tools Used
Screwdriver, Pliers, Socket set, Nutdriver, none
The Eu2000i generator has to be nearly completely disassembled in order to remove the recoil starter to replace the cord. If you do this, it's a good idea to disassemble it in advance of ordering parts as you may uncover other items you'd like to replace as you go into the disassembly.
Did you find this story helpful?
Thanks for voting and helping fellow customers!
Carburetor repair,replace fuel filter.
Bob - September 22, 2018
Tool Type
Engine
Difficulty
Easy
Time
30-60 minutes
Tools Used
Screwdriver, Pliers, Power Drill, Socket set, Wrench Set, Nutdriver
Watched several YouTube videos, ordered replacement parts, Honda generator back in business.
Did you find this story helpful?
Thanks for voting and helping fellow customers!
Would only run with choke closed.
Anthony - October 25, 2017
Tool Type
Engine
Difficulty
Easy
Time
1-2 hours
Tools Used
Screwdriver, Socket set, Wrench Set, Adjustable Wrench
Took the carburetor apart, cleaned the jets and reassembled. Put in the fuel filter and the gasket. Works like it did when it was new.
Did you find this story helpful?
Thanks for voting and helping fellow customers!
Would not start
Christopher - June 20, 2017
Tool Type
Engine
Difficulty
Easy
Time
Less than 15 minutes
Tools Used
Screwdriver, Socket set
1- Clean engine
2- Remove air filter housing
3- Remove carb assembly
4- Put on new carb gasket
5- Put on new carb assembly
6- Reinstall air filter housing
7- Start motor!!
8- Motor runs great
2- Remove air filter housing
3- Remove carb assembly
4- Put on new carb gasket
5- Put on new carb assembly
6- Reinstall air filter housing
7- Start motor!!
8- Motor runs great
Did you find this story helpful?
Thanks for voting and helping fellow customers!
OEM stands for Original Equipment Manufacturer and means the part you’re buying is sourced directly from the manufacturer who made your product. At eReplacementParts, we sell only genuine OEM parts, guaranteeing the part you’re purchasing is of better design and of higher quality than aftermarket parts.
Our product descriptions are a combination of data sourced directly from the manufacturers who made your product as well as content researched and curated by our content & customer service teams. This content is edited and reviewed internally before being made public to customers.
Our customer service team are at the ready daily to answer your part and product questions. We have a dedicated staff with decades of collective experience in helping customers just like you purchase parts to repair their products.
All our part reviews are solicited directly from other customers who have purchased this exact part. While we moderate these reviews for profanity, offensive language or personally identifiable information, these reviews are posted exactly as submitted and no alterations are made by our team.
All our customer repair instructions are solicited directly from other customers just like you who have purchased and replaced this exact part. While we moderate these reviews for profanity, offensive language or personally identifiable information, these reviews are posted exactly as submitted and no alterations are made by our team.
Based on data from past customer purchasing behaviors, these parts are most commonly purchased together along with the part you are viewing. These parts may be necessary or helpful to replace to complete your current repair.
All our installation videos are created and produced in collaboration with our in-house repair technician, Mark Sodja, who has helped millions of eReplacementParts customers over the last 13 years repair their products. Mark has years of experience in selling and repairing both commercial and residential products with a specialty in gas-powered equipment.
This data is collected from customers who submitted a repair instruction after replacing this exact part. Customers can rate how easy the repair was to complete and how long it took. We aggregate this data to provide a repair rating that allows customers to quickly determine the difficulty and time needed to perform their own repair.