
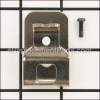
This is a genuine DeWalt replacement part, sold individually. Includes 2 brushes and holder.
Worn brushes are a common causes of intermittent motor function, reduced electric braking and reduced motor power. A worn-out brush will often be worn down near to the wire lead and can be cracked, pitted, or burned.
It is recommended to take note of how the wire leads connect to the assembly, and reconnect the same way.
Compatible with the tools listed below.
Carbon Brush And Holder N093746
OEM part for: DeWALT
Part Number: N093746
$11.93
In Stock
Jump To:
Product Description ?
- Classification: Part
- Weight: 0.01 lbs.
- Shipping: Ships Worldwide
Frequently Purchased Together ?


Compatibility
This part will fit the following 25 machines
DeWALT
DCF885C2 Type 1 20V Impact Driver View Diagrams & Manuals
DCF885L2 Type 1 20V Impact Driver View Diagrams & Manuals
DC820KA Type 3 18V Compact Impact Wrench View Diagrams & Manuals
DC823KA Type 3 18V Compact Impact Wrench View Diagrams & Manuals
DC825KA Type 3 18V Compact Impact Wrench View Diagrams & Manuals
DC825B Type 3 18V Impact Driver View Diagrams & Manuals
DC820B Type 3 18V Impact Wrench View Diagrams & Manuals
DC823B (Type 3) 18v Impact Wrench View Diagrams & Manuals
DC827KL (Type 3) 18v Compact Impact Driver View Diagrams & Manuals
DC830KA (Type 3) 1/2-In. Cordless Impact Wrench View Diagrams & Manuals
DC833KA (Type 3) 14.4v Impact Wrench View Diagrams & Manuals
DC835KA (Type 3) 1/4-In. Cordless Impact Wrench View Diagrams & Manuals
DC841KA (Type 3) 1/2-In. Cordless Impact Wrench View Diagrams & Manuals
DC845KA (Type 3) 1/4-In. Cordless Impact Wrench View Diagrams & Manuals
DCF885B (Type 1) 20v Impact Driver View Diagrams & Manuals
DCF885B (Type 2) 20v Impact Driver View Diagrams & Manuals
DC820K (Type 3) 18v Impact Wrench View Diagrams & Manuals
DCF885M2 (Type 2) 20v Impact Driver View Diagrams & Manuals
DC825K (Type 3) 18v Imp Driver View Diagrams & Manuals
DC825KA (Type 4) Impact Driver Power Tool View Diagrams & Manuals
DC825B (Type 4) Impact Driver Power Tool View Diagrams & Manuals
DC845KA-AR (Type 3) Impact Driver Power Tool View Diagrams & Manuals
DCF885B-B3 (Type 1) Impact Driver Power Tool View Diagrams & Manuals
DCF885B-B3 (Type 2) Impact Driver Power Tool View Diagrams & Manuals
DCF885C2 (Type 2) Impact Driver Power Tool View Diagrams & Manuals
Show More Compatible Models
This item works with the following types of products:
- Impact Driver Parts
- Impact Wrench Parts
This part replaces obsolete part #: N039820, N039819
Repair Videos ?
Watch the Repair Video for
Carbon Brush And Holder

Customer Part Reviews ?
Average Rating (out of 5):
Click to filter by ratings:
5 stars
6
4 stars
0
3 stars
1
2 stars
0
1 stars
0
< PREV
- 1
The suggested part was the fix and easy to install.
A small suggested part saved me from buying another expensive tool.
Lawton -
July 26, 2023
Verified Purchase
You always have the right parts
prefect fit. Great parts fast shipping. Never had a problem with parts from you. Thanks Jim
Jim -
November 4, 2020
Verified Purchase
Looks and works perfect
This is a great prized unit and it was shipped fast. Its cheaper to build my unit with the parts yall carry than to buy a new one.
Kenny -
November 11, 2019
Verified Purchase
Easy Repair,
arrived on time and in good condition , and everything working again.
iGlobal -
September 12, 2019
Verified Purchase
saved me money from having to buy new 20 volt inpack
received very quick . exact what i ordered
Guest -
August 12, 2019
Verified Purchase
Easy fix.
Easy replacement and it’s like having a new impact again. Just make sure you don’t mix up it will run opposite to the switch.
Guest -
July 30, 2019
Verified Purchase
Great part, terrable service
This was a factory DeWalt part and it was excellent. However the parts took over 1 1/2 weeks to arrive and that is not acceptable. I had to call and was told the parts were ready to be shipped but were sitting on a pallet. This and other parts were to repair customer's tools and my customers were getting upset over the slow service which reflects badly on me. There are many other places to purchase parts and unless I am assured this will not happen again I will buy my parts elsewhere.
Guest -
October 30, 2019
Verified Purchase
t
t
t -
t days ago
Verified Purchase
eReplacementParts Team
t
Questions & Answers ?
Our customer Service team is at the ready daily to answer your part and product questions.

Ask our Team
We have a dedicated staff with decades of collective experience in helping customers just like you purchase parts to repair their products.
Does this fit my product?Questions & Answers for Carbon Brush And Holder
No questions have been asked yet
Customer Repair Instructions ?
All our customer repair instructions are solicited directly from other customers just like you who have purchased and replaced this exact part.
We use the DeWalts for continuous use. We wear them out.
Kevin - January 31, 2016
👍 12 of 12 people found this instruction helpful
Tool Type
Impact Driver
Difficulty
Easy
Time
15-30 minutes
Tools Used
, torx #10, small screw driver
Pull the case apart disconnect wires from brush assy, replace brush assy attach wires.
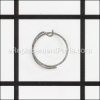
Pop the C clip remove the washer, sleeve and spring. The ball is gone by now. replace ball, spring, washer and C clip. I take the opportunity while appart to clean the inside of the case of old dirt and grease. I re grease the gear assy in the nose cone.
Pop the C clip remove the washer, sleeve and spring. The ball is gone by now. replace ball, spring, washer and C clip. I take the opportunity while appart to clean the inside of the case of old dirt and grease. I re grease the gear assy in the nose cone.
Did you find this story helpful?
Thanks for voting and helping fellow customers!
Brush assembly broke
Greg - August 31, 2016
👍 6 of 7 people found this instruction helpful
Tool Type
Impact Driver
Difficulty
Easy
Time
Less than 15 minutes
Tools Used
Screwdriver, Socket set, Nutdriver
Parts Used
1 Split Case
2. Removed broken brush assembly
3. Installed new Brush assembly
4. Put Case back togeather
2. Removed broken brush assembly
3. Installed new Brush assembly
4. Put Case back togeather
Did you find this story helpful?
Thanks for voting and helping fellow customers!
Sparking and smoking from Impact Driver
Michael - August 20, 2017
👍 3 of 3 people found this instruction helpful
Tool Type
Impact Driver
Difficulty
Easy
Time
Less than 15 minutes
Tools Used
Screwdriver
Parts Used
Removed the seven screws on the one side of the impact driver.
Carefully pried up on cover.
Disconnected the two wire leads to brush and holder assembly.
Carefully pried up on impact and brush assembly at the same time together.
Slide off brush and holder assembly and hold open new copper brushes and slide over armature and reverse steps on reassembly.
Carefully pried up on cover.
Disconnected the two wire leads to brush and holder assembly.
Carefully pried up on impact and brush assembly at the same time together.
Slide off brush and holder assembly and hold open new copper brushes and slide over armature and reverse steps on reassembly.
Did you find this story helpful?
Thanks for voting and helping fellow customers!
My driver had lost power and was heating up
Dale - December 5, 2018
👍 1 of 1 people found this instruction helpful
Tool Type
Impact Driver
Difficulty
Medium
Time
15-30 minutes
Tools Used
Screwdriver, Pliers
1. Remove all screws from the body of the driver
2. Remove one side cover from the driver.
3. Remove motor/ transmission an brush assembly as one unit. Note alignment of electric motor parts.
4. Unplug remove old brush assembly and reinstall new brush assembly.
4a. If ou are replacing the light ring, now is the time to unplug and remove and replace it.
5. Put brush assembly, motor and transmission together and put back into body of driver.
6.Put other side of driver on and reinstall screws.
Put battery in and test the fix.
Did you find this story helpful?
Thanks for voting and helping fellow customers!
One of the Brushes got stuck
Justin - January 9, 2023
Tool Type
Impact Driver
Difficulty
Easy
Time
Less than 15 minutes
Tools Used
Screwdriver, Nutdriver, Torx driver
Parts Used
Dropped impact in the mud than the motor started sparking when you press the trigger so thought motor was bad replaced brushes now it works like brand new
Did you find this story helpful?
Thanks for voting and helping fellow customers!
Losing power
Genesis - June 1, 2020
Tool Type
Impact Wrench
Difficulty
Easy
Time
15-30 minutes
Tools Used
Screwdriver, Torx driver
Parts Used
Remove cover and replace carbon brush
Did you find this story helpful?
Thanks for voting and helping fellow customers!
Brushes worn out
steve - May 17, 2018
Tool Type
Impact Driver
Difficulty
Medium
Time
30-60 minutes
Tools Used
Screwdriver, Torx driver
Parts Used
Remove screws from clam shell assy. and separate, remove motor and impact assy. Separate motor from impact drive and clean all parts. Unplug brush assy. and replace with new one. Resurfaced commutator and reinstalled motor and impact assy. Reinstall clam shell install battery and get back to work!!
Did you find this story helpful?
Thanks for voting and helping fellow customers!
Impact drill would not turn.
Melvin - May 11, 2018
Tool Type
Impact Driver
Difficulty
Easy
Time
15-30 minutes
Tools Used
1. Take the screws out.
2. Pry the two halves apart.
3. Pull the wires off the brush holder. Note which color wire goes where.
4. Disconnect the wires for the lights.
5. Pull the brush holder, ring, armature, and gear housing out but note how the ring is sitting in the housing.
6. Install the new ring, brush holder, and armature.
7. Install the ring in the same orientation as the old magnet ring.
8. Connect the lights
9. Connect the wires the the brush holder.
10. Put the two halves back together.
11. Put the screws back in and tighten.
Did you find this story helpful?
Thanks for voting and helping fellow customers!
Switch was bad
Gary - August 2, 2016
Tool Type
Impact Driver
Difficulty
Easy
Time
Less than 15 minutes
Tools Used
, Torx bit
1. Took case apart
2. Removed both switch and brush set
3. Reinstalled new switch and brush set
4 Reassembled case
2. Removed both switch and brush set
3. Reinstalled new switch and brush set
4 Reassembled case
Did you find this story helpful?
Thanks for voting and helping fellow customers!
Brushes went bad
bryon - February 9, 2016
Tool Type
Impact Driver
Difficulty
Easy
Time
Less than 15 minutes
Tools Used
Screwdriver
Parts Used
Take out all the screws, I believe it was a t-10 or t-15 star bit, pull apart plastic casing without disassembling the inner parts, take out old brush and holder assembly and install new bushes and holder, make sure everything goes back together the same way you took it apart and make sure the forward reverse switch is still in the right position and it's wire is not in a pinch zone then put the plastic case back together and put screws in, test drill out
Did you find this story helpful?
Thanks for voting and helping fellow customers!
Load More Install Stories
OEM stands for Original Equipment Manufacturer and means the part you’re buying is sourced directly from the manufacturer who made your product. At eReplacementParts, we sell only genuine OEM parts, guaranteeing the part you’re purchasing is of better design and of higher quality than aftermarket parts.
Our product descriptions are a combination of data sourced directly from the manufacturers who made your product as well as content researched and curated by our content & customer service teams. This content is edited and reviewed internally before being made public to customers.
Our customer service team are at the ready daily to answer your part and product questions. We have a dedicated staff with decades of collective experience in helping customers just like you purchase parts to repair their products.
All our part reviews are solicited directly from other customers who have purchased this exact part. While we moderate these reviews for profanity, offensive language or personally identifiable information, these reviews are posted exactly as submitted and no alterations are made by our team.
All our customer repair instructions are solicited directly from other customers just like you who have purchased and replaced this exact part. While we moderate these reviews for profanity, offensive language or personally identifiable information, these reviews are posted exactly as submitted and no alterations are made by our team.
Based on data from past customer purchasing behaviors, these parts are most commonly purchased together along with the part you are viewing. These parts may be necessary or helpful to replace to complete your current repair.
All our installation videos are created and produced in collaboration with our in-house repair technician, Mark Sodja, who has helped millions of eReplacementParts customers over the last 13 years repair their products. Mark has years of experience in selling and repairing both commercial and residential products with a specialty in gas-powered equipment.
This data is collected from customers who submitted a repair instruction after replacing this exact part. Customers can rate how easy the repair was to complete and how long it took. We aggregate this data to provide a repair rating that allows customers to quickly determine the difficulty and time needed to perform their own repair.