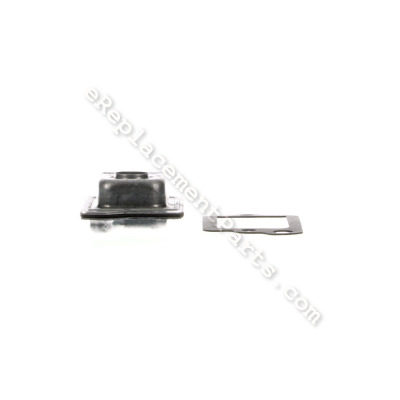


This item has been sourced from the original manufacturer to ensure quality. The breather assembly is intended to be used with lawnmower engines from Briggs & Stratton and Toro. The breather assembly attaches to the crankcase. This item is used to allow gasses to escape the crankcase while retaining oil. This assembly includes the breather and the gasket.
Breather Assembly 791781
OEM part for: Briggs and Stratton, Toro
Part Number: 791781
$14.91
In Stock
Jump To:
Frequently Purchased Together ?
Compatibility
This Breather Assembly will fit the following 8761 machines. Confirm this part works with your model, and view the detailed model diagrams and repair help we have to offer.
Briggs and Stratton
Toro
Show More Compatible ModelsThis item works with the following types of products:
- Engine Parts
- Lawn Mower Parts
This part replaces obsolete part #: 699640, 495785, 298383
Customer Part Reviews ?
Average Rating (out of 5):
Click to filter by ratings:
5 stars
2
4 stars
0
3 stars
0
2 stars
0
1 stars
0
< PREV
- 1
Fixed white smoke issue from my lawn mower
Had an issue with my lawn mower blowing white smoke from excessive oil from the crankcase vent. This fixed my issue and I now longer have the white smoke from the mower. Note, the exterior of this piece is not painted, so it will not match the painted crankcase unless you paint it yourself. I personally did not care about the color.
Guest -
September 21, 2023
Verified Purchase
A perfect match for the original part
The part arrived a day early, a perfect match. It took all of 5 minutes to install and the mower started on the third pull. Thanks for the great service. If I ever need mower parts again, your company will be my first call. Thanks again.
Guest -
February 13, 2020
Verified Purchase
Questions & Answers ?
Our customer Service team is at the ready daily to answer your part and product questions.

Ask our Team
We have a dedicated staff with decades of collective experience in helping customers just like you purchase parts to repair their products.
Does this fit my product?Questions & Answers for Breather Assembly
No questions have been asked yet
Customer Repair Instructions ?
All our customer repair instructions are solicited directly from other customers just like you who have purchased and replaced this exact part.
Starter string and rewind spring was missing on an engine restoration
james - March 10, 2017
Tool Type
Engine
Difficulty
Medium
Time
1-2 hours
Tools Used
Screwdriver, Pliers, Socket set, twine, lighter, scotch tape, light lubricating oil, needle n
1. Removed engine cowling,
2. Opened or unbend starter tangs
3. Removed starter pulley
4. Unwound new starter spring,
5. Installed each end of the spring to its hole and wound on the starter pulley
6. Using twine tied the wound starter spring in place in three separate areas with the knots on the bottom side of the pulley (or engine side) with the end of the spring out that attaches to the cowling.
7. Sprayed a small amount of oil on the wound spring and with a twist put that protruding part of the spring in the slot for the cowling and placed the wound spring and pulley in the cowling
8 While holding down the assembly re-bent the tangs that retain the starter assembly checked for free rotation of the pulley.
9 Cut the twine that holds the wound spring and pull the twine out.
10. Rewind the pulley to allow the starter string to be retracted and align the holes to feed the string through while holding with a small screwdriver.
11. Used scotch tape to wrap the end of the string that is going to be fed and melted the tape with the lighter.
12. Cut a portion of the string/melted tape only to leave about 1/8" on the string.
13 feed the string through both holes and tie a knot.
allow the string to be retracted into the cowling and check for free operation.
14. Oil starter spindle on flywheel with the small hole with 30w non detergent oil check for free operation.
15. Reinstall cowling/starter assembly and check for proper operation.
Did you find this story helpful?
Thanks for voting and helping fellow customers!
OEM stands for Original Equipment Manufacturer and means the part you’re buying is sourced directly from the manufacturer who made your product. At eReplacementParts, we sell only genuine OEM parts, guaranteeing the part you’re purchasing is of better design and of higher quality than aftermarket parts.
Our product descriptions are a combination of data sourced directly from the manufacturers who made your product as well as content researched and curated by our content & customer service teams. This content is edited and reviewed internally before being made public to customers.
Our customer service team are at the ready daily to answer your part and product questions. We have a dedicated staff with decades of collective experience in helping customers just like you purchase parts to repair their products.
All our part reviews are solicited directly from other customers who have purchased this exact part. While we moderate these reviews for profanity, offensive language or personally identifiable information, these reviews are posted exactly as submitted and no alterations are made by our team.
All our customer repair instructions are solicited directly from other customers just like you who have purchased and replaced this exact part. While we moderate these reviews for profanity, offensive language or personally identifiable information, these reviews are posted exactly as submitted and no alterations are made by our team.
Based on data from past customer purchasing behaviors, these parts are most commonly purchased together along with the part you are viewing. These parts may be necessary or helpful to replace to complete your current repair.
All our installation videos are created and produced in collaboration with our in-house repair technician, Mark Sodja, who has helped millions of eReplacementParts customers over the last 13 years repair their products. Mark has years of experience in selling and repairing both commercial and residential products with a specialty in gas-powered equipment.
This data is collected from customers who submitted a repair instruction after replacing this exact part. Customers can rate how easy the repair was to complete and how long it took. We aggregate this data to provide a repair rating that allows customers to quickly determine the difficulty and time needed to perform their own repair.