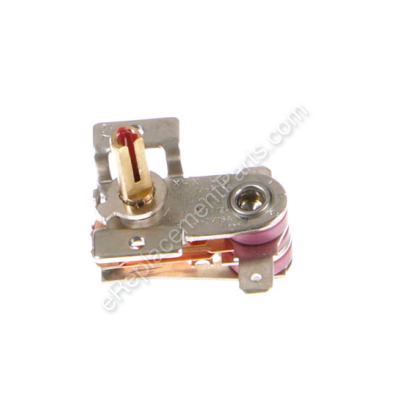
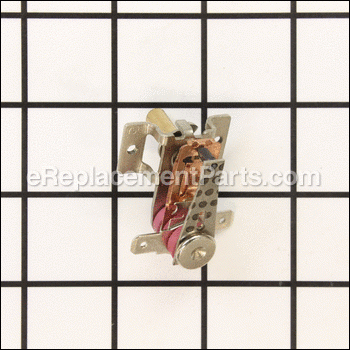
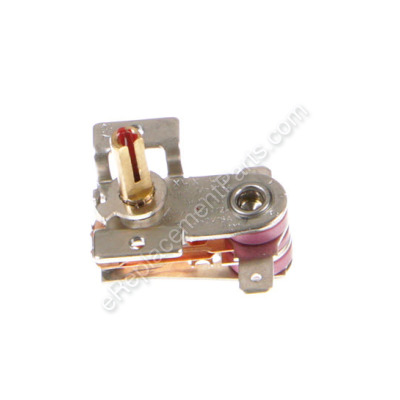
This is an authentic OEM sourced replacement part which is specially designed for DeLonghi equipment. The thermostat is used to monitor the heat level in the machine, unfortunately, over time it may wear out or get damaged eventually requiring a replacement. Keep in mind this high-quality item is made of durable materials and is sold individually.
Thermostat 5210810031
OEM part for: DeLonghi
Part Number: 5210810031
Jump To:
Frequently Purchased Together ?
Compatibility
This part will fit the following 70 machines
DeLonghi
This item works with the following types of products:
- Heater Parts
- Range Parts
This part replaces obsolete part #: 521228, 5208000500
Customer Part Reviews ?
- 1
Questions & Answers ?
Our customer Service team is at the ready daily to answer your part and product questions.

Ask our Team
We have a dedicated staff with decades of collective experience in helping customers just like you purchase parts to repair their products.
Does this fit my product?Questions & Answers for Thermostat
Customer Repair Instructions ?
All our customer repair instructions are solicited directly from other customers just like you who have purchased and replaced this exact part.
fried thermostat in DeLonghi heater
Tool Type
Heater
Difficulty
Easy
Time
Less than 15 minutes
Tools Used
Screwdriver
Parts Used
The thermostat points were burned up beyond use
Tool Type
Heater
Difficulty
Medium
Time
30-60 minutes
Tools Used
Screwdriver, Power Drill
Parts Used
Part #: 5210810031 (Thermostat)
Replacing the part was not too difficult; the hardest part was getting to the metal tab that secures the metal heater front panel containing the controls to the oil filled radiator. The tab is part of the sealed radiator portion of the heater and not easily accessible, even if you pry off the dark grey plastic cover over the controls. Prying off this plastic control cover will break the tabs that secure it in place and possibly break the cover itself. This will not allow you easier access to the metal tab because the control mounting plate is screwed to the front heater panel from the inside.
The steps to take are as follows;
1. Lay the heater on its side and remove the 2 screws on the bottom of the metal front cover that houses the controls. With the screws removed, pull out on the bottom of the front panel far enough to disconnect the 3 wires attached to the radiator heating element.
2. Here is the hardest part. While pulling out on the bottom of the cover, use a long thin screw driver or something similar to pry down the metal tab until it is nearly straight out so you can remove the front panel of the heater. For reference, there is a similar tab at the rear of the heater but does not need to be removed.
3. After removing the front panel, remove the 2 wire connectors from the thermostat. Then remove the 3 screws that hold the control mounting plate to the inside of the front panel in order to access the 2 screws that hold the thermostat to the control panel.
4. Remove the red control knob from the thermostat and then remove the 2 screws holding the thermostat to the panel and replace it with the new part #5210810031. Reposition the new thermostat and replace the mounting screws. Align the control knob to the flat side on the thermostat adjustment shaft and push it back on.
5. Reposition the control mounting plate on the heater front panel and replace the 3 securing screws then reconnect the wires to the terminals on the thermostat.
6. At this point you can place the front heater panel onto the metal tab that held the top secure and try to bend the tab back up. If you find it too difficult to bend the tab back up enough to securely hold the top of the front panel here is a suggestion.
(Straighten and flatten the metal tab so it points directly toward the front of the heater and aligns well with the slot in the flange of the front panel. Reconnect the wires to the heating element then position the front panel over the tab and firmly against the front of the radiator. While holding the panel in place, replace the 2 screws on the bottom of the panel and stand the heater up on its casters. While pressing firmly against the top of the panel drill a 3/32" hole through the top center of the panel just inside the rear flange and directly over and through the tab. Use a self tapping sheet metal screw to secure it.)
7. If you removed the dark grey plastic control cover you likely broke the plastic tabs that hold the cover in place. The heater will still function fine without the plastic cover but it will leave sharp screws and metal edges exposed. If this is the case you can order a new one from www.eReplacementParts.com.
Have fun "Do-It-Yourselfers"
Gregory Synarski
12 year old heater had a termostat that stopped working. Unit was running hot and could not be adjusted .
Tool Type
Heater
Difficulty
Easy
Time
15-30 minutes
Tools Used
Screwdriver, Pliers
Parts Used
bad thermostat
Tool Type
Heater
Difficulty
Easy
Time
15-30 minutes
Tools Used
Screwdriver
Parts Used
thermostat contacts were burnt, not maintaining temperature properly
Tool Type
Heater
Difficulty
Easy
Time
15-30 minutes
Tools Used
Screwdriver, Pliers
Parts Used
2 heaters. Broken rocker switch on one and broken thermostat on the other.
Tool Type
Heater
Difficulty
Medium
Time
30-60 minutes
Tools Used
Screwdriver
2. Removed the plastic covers. Had to break most of the plastic wings to get them off.
3. Disconnected the wires and found it interesting that each was wired a bit differently.
4. Removed old parts.
5. Replaced with new parts.
6. Reconnected wiring.
7. Replaced plastic covers.
8. Replaced side panel with screw.
Thermostat and switch were bad and showed heat damage. Some of the internal wire connectors and power cord plug show heat damage.
Tool Type
Heater
Difficulty
Easy
Time
30-60 minutes
Tools Used
Screwdriver, Wire cutter, wire stripper, wire connector crimp tool
Parts Used
2. Installed new Thermostat and switch.
3. Replace old power cord plug.
4. Replaced crimp connectors on the wires at the thermostat and switch.
These oil filled radiator heaters are the easiest heaters to repair, service and clean. They have very few parts, easy access to the internal components and no fan or motor to deal with.
Original thermostat failed, thus the unit would not heat up
Tool Type
Heater
Difficulty
Easy
Time
15-30 minutes
Tools Used
Screwdriver
Parts Used
Plugged it in, turned the knob and felt heat immediately - like new.
Thermostat contact points welded together.
Tool Type
Heater
Difficulty
Easy
Time
15-30 minutes
Tools Used
Screwdriver
Parts Used
Then I disconnected the 2 wires from the thermostat and unscrewed the thermostat from the housing. To install the thermostat do the steps in the reverse order.
OEM stands for Original Equipment Manufacturer and means the part you’re buying is sourced directly from the manufacturer who made your product. At eReplacementParts, we sell only genuine OEM parts, guaranteeing the part you’re purchasing is of better design and of higher quality than aftermarket parts.
Our product descriptions are a combination of data sourced directly from the manufacturers who made your product as well as content researched and curated by our content & customer service teams. This content is edited and reviewed internally before being made public to customers.
Our customer service team are at the ready daily to answer your part and product questions. We have a dedicated staff with decades of collective experience in helping customers just like you purchase parts to repair their products.
All our part reviews are solicited directly from other customers who have purchased this exact part. While we moderate these reviews for profanity, offensive language or personally identifiable information, these reviews are posted exactly as submitted and no alterations are made by our team.
All our customer repair instructions are solicited directly from other customers just like you who have purchased and replaced this exact part. While we moderate these reviews for profanity, offensive language or personally identifiable information, these reviews are posted exactly as submitted and no alterations are made by our team.
Based on data from past customer purchasing behaviors, these parts are most commonly purchased together along with the part you are viewing. These parts may be necessary or helpful to replace to complete your current repair.
All our installation videos are created and produced in collaboration with our in-house repair technician, Mark Sodja, who has helped millions of eReplacementParts customers over the last 13 years repair their products. Mark has years of experience in selling and repairing both commercial and residential products with a specialty in gas-powered equipment.
This data is collected from customers who submitted a repair instruction after replacing this exact part. Customers can rate how easy the repair was to complete and how long it took. We aggregate this data to provide a repair rating that allows customers to quickly determine the difficulty and time needed to perform their own repair.


