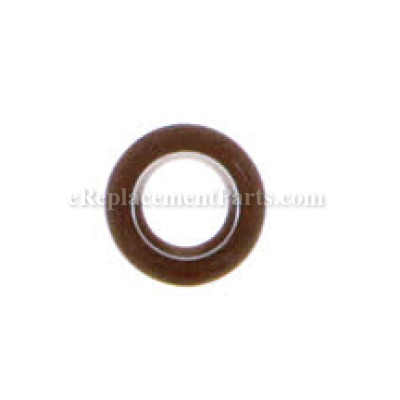
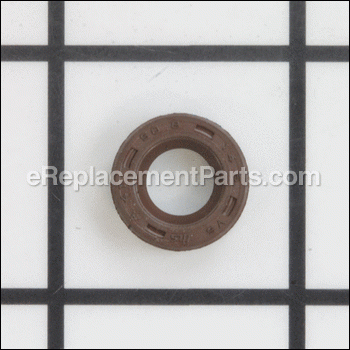
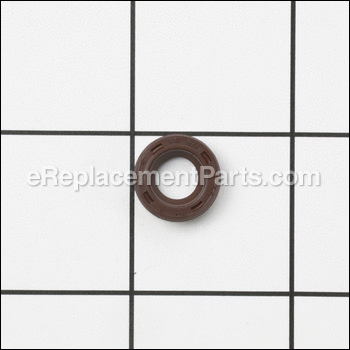


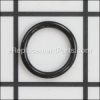
It is a genuine item that is supplied by the original equipment manufacturer for Kawasaki engines commonly installed on a variety of lawn and garden equipment. This is a special component that provides a tight seal around the governor shaft. Over time it may wear out and begin to crack eventually requiring a replacement. One durable rubber part is included. Check the appropriate diagrams for your specific model to ensure the correct installation of the new seal-oil. To perform this repair you will need a variety of tools such as a screwdriver, a wrench set, pliers and a tool to pick out the old seal. Make sure to drain the oil before starting this repair.
Oil Seal 92049-7019
OEM part for: Kawasaki, Toro, Lawn Boy
Part Number: 92049-7019
$4.99
In Stock
Jump To:
Frequently Purchased Together ?


Compatibility
This Oil Seal will fit the following 4755 machines. Confirm this part works with your model, and view the detailed model diagrams and repair help we have to offer.
Kawasaki
Toro
30033 (280000001-280999999) Commercial Walk-behind Traction Unit, 17hp Pistol-grip Hydro Drive, 2008
30033 (290000001-290999999) Commercial Walk-behind Traction Unit, 17hp Pistol-grip Hydro Drive, 2009
30033 (310000001-310999999) Commercial Walk-behind Traction Unit, 17hp Pistol-grip Hydro Drive, 2010
30524 (220000001-220999999) Mid-size Mower, Proline Pistol Grip Hydro 15 Hp W/ 36-in. Sd Mower, 2002
30524 (230000001-230999999) Mid-size Mower, Proline Pistol Grip Hydro 15 Hp W/ 36-in. Sd Mower, 2003
30526 (220000001-220999999) Mid-size Mower, Proline Pistol Grip Hydro 15 Hp W/ 48-in. Sd Mower, 2002
30526 (230000001-230999999) Mid-size Mower, Proline Pistol Grip Hydro 15 Hp W/ 48-in. Sd Mower, 2003
Lawn Boy
Show More Compatible ModelsThis item works with the following types of products:
- Engine Parts
- Lawn Tractor Parts
- Lawn Mower Parts
This part replaces obsolete part #: 92049-7005
Customer Part Reviews ?
Average Rating (out of 5):
Click to filter by ratings:
5 stars
4
4 stars
1
3 stars
0
2 stars
0
1 stars
0
< PREV
- 1
Part came quickly
Quick arrival, hard to change part needing small pic-like strong tool. Instructions on how-to. fantastic !
Guest -
November 25, 2021
Verified Purchase
Thanks for the great service my mower is working again the seal stopped the oil leak. Thanks
Part was in good condition oil leak stopped. Thanks for your help.
Guest -
August 28, 2021
Verified Purchase
Easy part look up
Great service, easy process
Guest -
September 4, 2020
Verified Purchase
Right Part
We had a hard time finding this part, until we checked your website. Thank you.
Guest -
April 22, 2020
Verified Purchase
ease of shopping
The part was easy to find and order! Received the part in 4 days.
Guest -
November 4, 2020
Verified Purchase
Questions & Answers ?
Our customer Service team is at the ready daily to answer your part and product questions.

Ask our Team
We have a dedicated staff with decades of collective experience in helping customers just like you purchase parts to repair their products.
Does this fit my product?Questions & Answers for Oil Seal
No questions have been asked yet
Customer Repair Instructions ?
All our customer repair instructions are solicited directly from other customers just like you who have purchased and replaced this exact part.
Engine leaking oil from around governor shaft seal
Rick - March 15, 2017
👍 10 of 10 people found this instruction helpful
Tool Type
Engine
Difficulty
Easy
Time
15-30 minutes
Tools Used
Screwdriver, Pliers, Socket set, Curved pick tool
Parts Used
Snapper Pro S150X
Kawasaki FX651V 22HP motor
1-Drained oil
2-Removed rear of mower body (4 bolts)
3-Loosened bolt holding governor shaft bracket on
4-Used screwdriver (flathead) to spread bracket open and then slid bracket off to the side
5-Used curved pick tool to remove old seal
6-Cleaned area around seal of debris and oil residue
7-Installed new seal and used deep socket to seat it in place
8-Reversed steps 1-4 to put mower back together
Did you find this story helpful?
Thanks for voting and helping fellow customers!
Governor shaft seal leaking, replaced 1 valve cover gasket, replaced o ring on oil dipstick tube as prevention
Robert - July 20, 2018
👍 4 of 4 people found this instruction helpful
Tool Type
Engine
Difficulty
Easy
Time
15-30 minutes
Tools Used
Screwdriver, Pliers, Socket set
1. Removed governor arm with wrench to loosen bolt
2. Spread arm with regular screw driver
3. Removed arm from shaft
4. With small but sturdy regular screw driver I slid it down governor shot into seal and prying carefully not to get anything but the seal.
5. Clean shaft and surrounding area with clean dry rag.
6. Using deep well socket tapped new seal in place
7. Replaced governor arm.
Did NOT have to remove intake, not in the way.
Did you find this story helpful?
Thanks for voting and helping fellow customers!
Oil leaking around governor
W - July 11, 2022
Tool Type
Lawn Mower
Difficulty
Medium
Time
1-2 hours
Tools Used
Screwdriver, Pliers, Socket set, Wrench Set
Pulled carb and throttle plate. Removed governor. Used a pick and pliers to remove seal. The seal was difficult to get out. Replaced governor and all hardware. Adjusted governor and throttle.
Did you find this story helpful?
Thanks for voting and helping fellow customers!
Oil leak on governor shaft.
David - January 25, 2021
Tool Type
Lawn Mower
Difficulty
Medium
Time
30-60 minutes
Tools Used
Screwdriver, Pliers, Wrench Set, Pick
Parts Used
Removed throttle connection on governor shaft. Used pick to remove old seal. Cleaned shaft apply small amount of oil to new seal. Slid oil seal on to shaft and seated it into recess with deep well socket.
Did you find this story helpful?
Thanks for voting and helping fellow customers!
Leak around the govenor shaft
Gene - November 6, 2020
Tool Type
Engine
Difficulty
Easy
Time
15-30 minutes
Tools Used
, Rivet popper
Parts Used
Removed govenor shaft linkage, then with the rivet popper pulled the seal out and replaced with the new one.
Did you find this story helpful?
Thanks for voting and helping fellow customers!
The engine doest started
Mario - January 30, 2020
Tool Type
Lawn Tractor
Difficulty
Easy
Time
More than 2 hours
Tools Used
Screwdriver, Pliers, Power Drill, Socket set, Wrench Set, Nutdriver, Adjustable Wrench
I removed the head comp.cylinder.also the valve.guide they were broke and put all new parts again.everything were easy.thank you
Did you find this story helpful?
Thanks for voting and helping fellow customers!
OEM stands for Original Equipment Manufacturer and means the part you’re buying is sourced directly from the manufacturer who made your product. At eReplacementParts, we sell only genuine OEM parts, guaranteeing the part you’re purchasing is of better design and of higher quality than aftermarket parts.
Our product descriptions are a combination of data sourced directly from the manufacturers who made your product as well as content researched and curated by our content & customer service teams. This content is edited and reviewed internally before being made public to customers.
Our customer service team are at the ready daily to answer your part and product questions. We have a dedicated staff with decades of collective experience in helping customers just like you purchase parts to repair their products.
All our part reviews are solicited directly from other customers who have purchased this exact part. While we moderate these reviews for profanity, offensive language or personally identifiable information, these reviews are posted exactly as submitted and no alterations are made by our team.
All our customer repair instructions are solicited directly from other customers just like you who have purchased and replaced this exact part. While we moderate these reviews for profanity, offensive language or personally identifiable information, these reviews are posted exactly as submitted and no alterations are made by our team.
Based on data from past customer purchasing behaviors, these parts are most commonly purchased together along with the part you are viewing. These parts may be necessary or helpful to replace to complete your current repair.
All our installation videos are created and produced in collaboration with our in-house repair technician, Mark Sodja, who has helped millions of eReplacementParts customers over the last 13 years repair their products. Mark has years of experience in selling and repairing both commercial and residential products with a specialty in gas-powered equipment.
This data is collected from customers who submitted a repair instruction after replacing this exact part. Customers can rate how easy the repair was to complete and how long it took. We aggregate this data to provide a repair rating that allows customers to quickly determine the difficulty and time needed to perform their own repair.