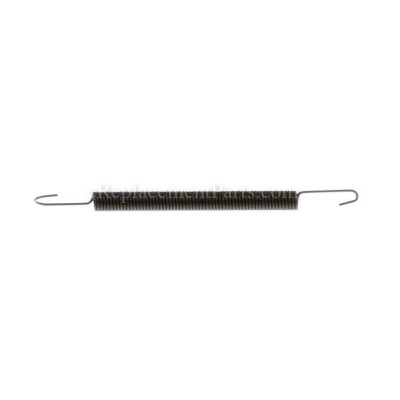


Idler Spring 532414557
OEM part for: Poulan, Husqvarna, Craftsman, Jonsered
Part Number: 532414557
$6.21
In Stock
Jump To:
Frequently Purchased Together ?


Compatibility
This Idler Spring will fit the following 342 machines. Confirm this part works with your model, and view the detailed model diagrams and repair help we have to offer.
Husqvarna
Craftsman
Poulan
Jonsered
Show More Compatible ModelsThis item works with the following types of products:
- Snowblower Parts
This part replaces obsolete part #: 414557, 5321810-44, 181044, 532181044
Questions & Answers ?
Our customer Service team is at the ready daily to answer your part and product questions.

Ask our Team
We have a dedicated staff with decades of collective experience in helping customers just like you purchase parts to repair their products.
Does this fit my product?Questions & Answers for Idler Spring
No questions have been asked yet
Customer Repair Instructions ?
All our customer repair instructions are solicited directly from other customers just like you who have purchased and replaced this exact part.
auger belt had cracks, and idler spring which provides return tension on idler pulley had corroded and broke
Robert - December 8, 2018
👍 3 of 3 people found this instruction helpful
Tool Type
Snowblower
Difficulty
Easy
Time
15-30 minutes
Tools Used
Wrench Set, Adjustable Wrench
separated engine/ snow thrower sections, replaced components, cleaned all corrosion, painted interior and re-assembled unit.
Did you find this story helpful?
Thanks for voting and helping fellow customers!
Snow blower wheels not engaging
Mark - March 15, 2018
👍 2 of 2 people found this instruction helpful
Tool Type
Snowblower
Difficulty
Easy
Time
Less than 15 minutes
Tools Used
Pliers, Socket set
Parts Used
Removed plastic shroud cover, exposed access to the top of the drive belts. idler spring had broke that puts tension on the drive belts. Removed broken spring and replaced it with new one . Replaced plastic shroud and it was good to go!
Did you find this story helpful?
Thanks for voting and helping fellow customers!
The Idler spring had broken
Paul - January 13, 2018
👍 3 of 5 people found this instruction helpful
Tool Type
Snowblower
Difficulty
Hard
Time
30-60 minutes
Tools Used
, My Hands
Parts Used
1. Only one end of the old spring was still connected to it's connection point. It took me a long time to discover where the other end the new spring needed to be attached.
2. After discovering the severed end of the old spring still attached to it's connection point I was able to make the repair.
3. Due to the extremely tight work area and the high levels of pressure needed to stretch the spring to it's connection point this part of the repair became very frustrating.
4. I finally discovered that by pushing the idler pulley arm further in (past the v-belt) I was able to attach the other end of the spring with minimal stretching of the spring.
Did you find this story helpful?
Thanks for voting and helping fellow customers!
Tighter spring was broke and the belts needed to be replaced
Kenneth - October 9, 2020
Tool Type
Snowblower
Difficulty
Medium
Time
30-60 minutes
Tools Used
Pliers, Wrench Set
Disconnected the snow blower from the engine and proceeded to replace the broken spring, and replaced the belts.
Did you find this story helpful?
Thanks for voting and helping fellow customers!
Idler spring breaks every time I use the machine
Robert - February 28, 2019
Tool Type
Snowblower
Difficulty
Easy
Time
Less than 15 minutes
Tools Used
Socket set
Parts Used
Removed the snow chute first. Then removed the cover from the gears. Then removed the broken spring and placed the new spring. Put all parts back on in reverse order.
Did you find this story helpful?
Thanks for voting and helping fellow customers!
No drive
William - February 27, 2019
Tool Type
Snowblower
Difficulty
Medium
Time
30-60 minutes
Tools Used
Screwdriver, Power Drill, Socket set, Wrench Set, Nutdriver, Ratchet
cut off the old belt it was stuck in the machine, followed a video from you tube which was close , but did not cover everything on my Machine, figured out the rest as I went along. There had been some differences in my Model but overall the video was helpful. I may have some other pully problems and nee to buy some more parts. but I did get the machine running, and e replacement parts had the parts I needed .
Did you find this story helpful?
Thanks for voting and helping fellow customers!
Idler pulley worn, idler spring broken, belts worn. Replaced all snowblower works fine now.
Bill - April 1, 2016
👍 2 of 4 people found this instruction helpful
Tool Type
Snowblower
Difficulty
Medium
Time
30-60 minutes
Tools Used
Screwdriver, Socket set
Remove the two bolts that hold the front and back sections together, one on either side of the machine. Remove broken parts, reinstall. It's helpful if you have a second set of hands to get the two parts back together and keep the new belts in place but it can be done by yourself.
Did you find this story helpful?
Thanks for voting and helping fellow customers!
Many problems: the drive and auger wouldn't engage, not scraping down to the driveway, two broken knobs, extremely worn skids, rusted chute at the bottom making it hard to rotate
Todd - November 12, 2017
👍 0 of 1 people found this instruction helpful
Tool Type
Snowblower
Difficulty
Medium
Time
1-2 hours
Tools Used
Screwdriver, Pliers, Socket set, Wrench Set
Parts Used
- Handle Knob - 532185577
- Bar, Scraper (measures 26-1/2 - 532404932
- Right Hand Skid Plate - 532436125
- Plate Skid - 532174762
- Spring, Brake - 532178828
- Knob, Handle, 3/8, Tri-point, - 532178899
- Traction Drive Spring - 532180926
- Spring, Auger Control - 532178669
- Impeller Belt - 532408010
- Rubber Wheel Plate - 532435789
- V-Belt, Traction - 532416954
- Idler Spring - 532414557
- Chute - 585056901
I replaced lots of parts using multiple tools. The only problems I had was due to rusted fasteners. I had a great experience with eReplacementParts my order arrived very fast including one part (the chute assembly) all pieces fit perfect. I did a major overhaul now the blower is running great.
Did you find this story helpful?
Thanks for voting and helping fellow customers!
OEM stands for Original Equipment Manufacturer and means the part you’re buying is sourced directly from the manufacturer who made your product. At eReplacementParts, we sell only genuine OEM parts, guaranteeing the part you’re purchasing is of better design and of higher quality than aftermarket parts.
Our product descriptions are a combination of data sourced directly from the manufacturers who made your product as well as content researched and curated by our content & customer service teams. This content is edited and reviewed internally before being made public to customers.
Our customer service team are at the ready daily to answer your part and product questions. We have a dedicated staff with decades of collective experience in helping customers just like you purchase parts to repair their products.
All our part reviews are solicited directly from other customers who have purchased this exact part. While we moderate these reviews for profanity, offensive language or personally identifiable information, these reviews are posted exactly as submitted and no alterations are made by our team.
All our customer repair instructions are solicited directly from other customers just like you who have purchased and replaced this exact part. While we moderate these reviews for profanity, offensive language or personally identifiable information, these reviews are posted exactly as submitted and no alterations are made by our team.
Based on data from past customer purchasing behaviors, these parts are most commonly purchased together along with the part you are viewing. These parts may be necessary or helpful to replace to complete your current repair.
All our installation videos are created and produced in collaboration with our in-house repair technician, Mark Sodja, who has helped millions of eReplacementParts customers over the last 13 years repair their products. Mark has years of experience in selling and repairing both commercial and residential products with a specialty in gas-powered equipment.
This data is collected from customers who submitted a repair instruction after replacing this exact part. Customers can rate how easy the repair was to complete and how long it took. We aggregate this data to provide a repair rating that allows customers to quickly determine the difficulty and time needed to perform their own repair.