eReplacementParts.com
877-346-4815
Bolens Parts
Repair Parts Home
  
Lawn Equipment Parts
  
Bolens Parts
  946-04670A Control Cable

Control Cable 946-04670A

OEM part for: Yard Machines, Bolens, MTD, Yard Man, Troy-Bilt, Husky

Part Number: 946-04670A


Install
Videos!
Control Cable - 946-04670A:Yard Machines 360 View
Control Cable - 946-04670A:Yard MachinesControl Cable - 946-04670A:Yard MachinesControl Cable - 946-04670A:Yard MachinesControl Cable - 946-04670A:Yard Machines 360 View
In Stock
Order within the next 1 hour and your part ships today!
Easy Less than 15 minutes (11 rated repairs)?
OEM: Original Equipment Manufacturer ?
Yard MachinesBolensMTDYard ManTroy-BiltHusky
Does this d-block d-md-none fit my product?

Product Description ?

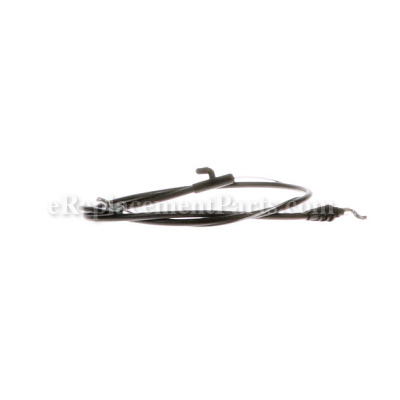
This replacement control cable is an authentic part designed for use on walk behind and push lawn mowers. This cable is connected to the control handle and it controls the blade. The blade will stop when the control handle is released on walk behind mowers. This cable consists of a rubberized metal cable with with z-shaped ends and it is sold individually.

Replacing the control cable is a simple task that doesn\'t require any tools.

• First you want to note where the old cable is attached
• Remove the cable end where it connects to the motor
• Secure the one end of the new cable in place
• Now you can run the new cable up to the control handle
• Disconnect the other end of the old cable
• Secure the z-shaped end of the new cable in place
• Adjust the tension as needed

  • Cable Length: 50-inch, Casing Length: 36-3/4inch
  • Classification: Part
  • Weight: 0.38 lbs.
  • Shipping: Ships Worldwide

Frequently Purchased Together ?

Compatibility

This part will fit the following 75 machines

Bolens

11A-A14A065 (2011) Push Lawn Mower View Diagrams & Manuals
11A-A14S265 (2011) Push Lawn Mower View Diagrams & Manuals

MTD

11A-B2M7004 (2011) Push Lawn Mower View Diagrams & Manuals
11A-B22Q704 (2011) Push Lawn Mower View Diagrams & Manuals
11A-A1JC027 (2011) 21" Push Mower View Diagrams & Manuals
12AKD3K9095 (2012) 21" Self-Propelled Lawn Mower View Diagrams & Manuals
11A-B26M004 (2012) Lawn Mower View Diagrams & Manuals
11A-B2J1704 (2012) 11A-B2J1704 2012 View Diagrams & Manuals
12AKD37K095 (2012) Lawn Mower View Diagrams & Manuals
11A-B22Q704 (2013) Lawn Mower View Diagrams & Manuals
11A-B22Q704 (2012) Lawn Mower View Diagrams & Manuals
12AVD32Q704 (2012) Lawn Mower View Diagrams & Manuals
12AVD32Q704 (2013) Lawn Mower View Diagrams & Manuals
12AVD32Q704 (2011) Lawn Mower View Diagrams & Manuals
11A-A18N255 Walk Behind Gas Lawn Mower View Diagrams & Manuals
11A-A14A065 (2011) Push Walk Behind Mower View Diagrams & Manuals
11A-A14S265 (2011) Push Walk Behind Mower View Diagrams & Manuals
11A-B29Q897 (2011) Lawn Mower View Diagrams & Manuals
11A-A09Q897 (2012) Lawn Mower View Diagrams & Manuals
11A-B29Q897 (2012) Lawn Mower View Diagrams & Manuals
11A-A09Q897 (2013) Lawn Mower View Diagrams & Manuals
11A-B29Q897 (2013) Lawn Mower View Diagrams & Manuals
12AVB29Q897 (2011) Lawn Mower View Diagrams & Manuals
12AVB29Q897 (2012) Lawn Mower View Diagrams & Manuals
12AVD39Q897 (2012) Lawn Mower View Diagrams & Manuals
12ALD33Q897 (2013) Lawn Mower View Diagrams & Manuals
12AVB29Q897 (2013) Lawn Mower View Diagrams & Manuals
12AVD39Q897 (2013) Lawn Mower View Diagrams & Manuals
11A-B24A059 (2011) Lawn Mower View Diagrams & Manuals
11A-B2M7059 (2011) Lawn Mower View Diagrams & Manuals
11A-B24A059 (2012) Lawn Mower View Diagrams & Manuals
11A-A18M055 (2011) Push Walk Behind Mower View Diagrams & Manuals
11A-A19Q701 (2011) Push Walk Behind Mower View Diagrams & Manuals
11A-B29Q701 (2011) Push Walk Behind Mower View Diagrams & Manuals
11A-B2M7001 (2011) Push Walk Behind Mower View Diagrams & Manuals
11A-A19Q701 (2012) Push Walk Behind Mower View Diagrams & Manuals
11A-B29Q701 (2012) Push Walk Behind Mower View Diagrams & Manuals
11A-A19Q701 (2013) Push Walk Behind Mower View Diagrams & Manuals
11A-B29Q701 (2013) Push Walk Behind Mower View Diagrams & Manuals
12AVD39Q701 (2011) Self Propelled Walk Behind Mower View Diagrams & Manuals
12AVD39Q701 (2012) Self Propelled Walk Behind Mower View Diagrams & Manuals

Yard Man

11A-A18M055 (2011) Push lawn Mower View Diagrams & Manuals
11A-B2M7001 (2011) Push lawn Mower View Diagrams & Manuals
11A-A19Q701 (2011) Push lawn Mower View Diagrams & Manuals
11A-B29Q701 (2011) Push lawn Mower View Diagrams & Manuals
12AVD39Q701 (2011) Self Propelled Lawn Mower View Diagrams & Manuals
11A-A19Q701 (2012) Lawn Mower View Diagrams & Manuals
11A-A19Q701 (2013) Lawn Mower View Diagrams & Manuals
11A-B29Q701 (2013) Lawn Mower View Diagrams & Manuals
11A-B29Q701 (2012) Lawn Mower View Diagrams & Manuals
12AVD39Q701 (2012) Lawn Mower View Diagrams & Manuals
12AVD39Q701 (2013) Self-Propelled Walk-Behind Mower View Diagrams & Manuals

Yard Machines

11A-A14E029 (2011) Push Lawn Mower View Diagrams & Manuals
11A-A14R229 (2011) Push Lawn Mower View Diagrams & Manuals
11A-B24A000 (2011) Push Lawn Mower View Diagrams & Manuals

Troy-Bilt

11A-B29Q711 (2010) Push Walk-Behind Mower View Diagrams & Manuals
11A-B29Q766 (2010) Push Walk-Behind Mower View Diagrams & Manuals
TB130 (11A-B29Q711) (2011) Push Walk-Behind Mower View Diagrams & Manuals
TB130 (11A-B29Q766) (2011) Push Walk-Behind Mower View Diagrams & Manuals
TB130 (11A-B29Q711) (2012) Push Walk-Behind Mower View Diagrams & Manuals
TB130 (11A-B29Q766) (2012) Push Walk-Behind Mower View Diagrams & Manuals
12AVA29Q711 (2010) Self-Propelled Walk-Behind Mower View Diagrams & Manuals
TB250 (12AVA29Q711) (2010) Self-Propelled Walk-Behind Mower View Diagrams & Manuals
12AVA29Q766 (2010) Self-Propelled Walk-Behind Mower View Diagrams & Manuals
TB250 (12AVA29Q766) (2010) Self-Propelled Walk-Behind Mower View Diagrams & Manuals
TB260 (12AVB29Q711) (2011) Self-Propelled Walk-Behind Mower View Diagrams & Manuals
TB260 (12AVB29Q766) (2011) Self-Propelled Walk-Behind Mower View Diagrams & Manuals
TB130 (11A-B29Q711)(2013) Lawn Mower View Diagrams & Manuals
TB130 (11A-B29Q766)(2013) Lawn Mower View Diagrams & Manuals
TB260 (12AVB29Q766)(2012) Lawn Mower View Diagrams & Manuals
TB260 (12AVB29Q766)(2013) Lawn Mower View Diagrams & Manuals
11A-B29Q711 (TB130)(2013) Push Walk-Behind Mower View Diagrams & Manuals
11A-B29Q766 (TB130)(2013) Push Walk-Behind Mower View Diagrams & Manuals
12AVB29Q766 (TB260)(2013) Self-Propelled Walk-Behind Mower View Diagrams & Manuals

Husky

11A-B29Q731 (2013) Lawn Mower View Diagrams & Manuals
Show More Compatible Models
Don't see yours? Try searching our site for :

This item works with the following types of products:

  • Lawn Mower Parts

This part replaces obsolete part #: 946-04670B (Honda Only), 946-04670B, 946-04670

Customer Part Reviews ?

4.8
Average Rating (out of 5):
5 Reviews
Click to filter by ratings:
5 stars
4
4 stars
1
3 stars
0
2 stars
0
1 stars
0
  • Highest Rating
  • Most Recent
< PREV
  • 1
NEXT >
  • Fast shipment and worked perfectly
    It was great that the websiste made it easy to find the part to keep my old mower working, and the part worked perfectly.
    Guest - August 18, 2021 Verified Purchase
    Simple fix
    The part was exactly as advertised and delivery was prompt. Installation was straightforward.
    Guest - April 25, 2021 Verified Purchase
    Easy Repair
    The part arrived ahead of schedule. Was easy to install. Saved me a trip to the mower service store!
    Guest - June 4, 2020 Verified Purchase
    Prompt shipping, easy repair... part fit as advertised
    Prompt shipping, easy repair... part fit as advertised
    Guest - June 14, 2019 Verified Purchase
    Easy repair
    The part was almost the same as the original. The only difference was the clip that attached the cable to the handle.
    Guest - May 4, 2019 Verified Purchase
    t
    t
    t - t days ago Verified Purchase
    eReplacementParts Team
    t

    Questions & Answers ?

    Our customer Service team is at the ready daily to answer your part and product questions.

    photo of team member
    Ask our Team

    We have a dedicated staff with decades of collective experience in helping customers just like you purchase parts to repair their products.

    Does this fit my product?

    Questions & Answers for Control Cable


    No questions have been asked yet

    Customer Repair Instructions ?

    All our customer repair instructions are solicited directly from other customers just like you who have purchased and replaced this exact part.

    Easy Less than 15 minutes (11 rated repairs)?

    The choke cable had rusted and broke

    Mike - September 8, 2016
    👍 4 of 4 people found this instruction helpful
    Tool Type

    Lawn Mower

    Difficulty

    Easy

    Time

    Less than 15 minutes

    Tools Used

    1. Had to take the Push handle off with a screwdriver
    2. Sliped the "L" shape ends into holes.
    3. Put the Push handle back on.
    4. Done and works perfect
    Did you find this story helpful?
    Thanks for voting and helping fellow customers!

    Engine brake control cable broke.

    Michael - August 8, 2016
    👍 2 of 2 people found this instruction helpful
    Tool Type

    Lawn Mower

    Difficulty

    Easy

    Time

    Less than 15 minutes

    Tools Used

    Pliers

    Disconnected the cable at the handle and at the carb, removed the old cable and installed the new cable. Back to mowing! Less than 5 minutes for total repair, but the small engine shop quoted me a price of about $50.
    Did you find this story helpful?
    Thanks for voting and helping fellow customers!

    The original engine stop cable had corroded and snapped.

    Michele - May 15, 2016
    👍 3 of 4 people found this instruction helpful
    Tool Type

    Lawn Mower

    Difficulty

    Easy

    Time

    Less than 15 minutes

    Tools Used

    Pliers, wire cutter

    Simply use a pair of pliers to twist the connecting ends of the old cable and remove them from the attachment point on the engine and from the mower handle. It may be easier to do after cutting the wire cable itself so you are only manipulating the ends and not a long piece of cable. Attach the new cable to the engine point first, then to the mower handle, then secure the plastic fitting that holds the cable along side the mower handle. Test function by grasping the engine stop handle and observing the attachment point on the engine. It should move all the way back towards the operator and enable the engine to start and run. Let go of the handle and observe that the attachment point on the engine should quickly return all the way forward, preventing the engine from running. You should NOT have to push the handle forward. The attachment point on the engine should have a spring connected to it that will quickly pull the point forward as soon as the operator releases the handle.
    Did you find this story helpful?
    Thanks for voting and helping fellow customers!

    Lawnmower control cable broken inside plastic sheath.

    Phil - June 3, 2019
    Tool Type

    Lawn Mower

    Difficulty

    Easy

    Time

    Less than 15 minutes

    Tools Used

    Pliers, No tools necessary but pushing the plastic clip into the met

    1. Removed old control cable. (Plastic retainer clip took some manipulation to pop out).
    2. Install new control cable making sure to insert plastic upper retaining post into mower handle.
    3. Took longer to remove packaging than to install the part. You can do this.
    Did you find this story helpful?
    Thanks for voting and helping fellow customers!

    Control cable broke

    Max - May 5, 2019
    Tool Type

    Lawn Mower

    Difficulty

    Easy

    Time

    Less than 15 minutes

    Tools Used

    , No tools required

    Remove control cable
    Replace control cable
    Did you find this story helpful?
    Thanks for voting and helping fellow customers!

    Starter rope broke, drive wheel bald, control cable stiff

    Richard - September 5, 2018
    Tool Type

    Lawn Mower

    Difficulty

    Easy

    Time

    15-30 minutes

    Tools Used

    Pliers, Wrench Set, Angle cutters

    Removed the recoil assembly and replaced. Same with the control cable and Drive wheels. All three where very simple. Only 3 nuts holding the recoil assembly down. Remove the nuts, pull the old assembly off and replace.
    Did you find this story helpful?
    Thanks for voting and helping fellow customers!

    Throttle Cable was broken.

    Jake - July 13, 2018
    Tool Type

    Lawn Mower

    Difficulty

    Easy

    Time

    15-30 minutes

    Tools Used

    Pliers, Hack Saw

    1. Removed old Throttle Cable. Had to cut existing connection at the engine throttle with a hack saw. This part was a little tedious.
    2. Installed New Cable. It wasn't an exact replica as I anticipated, but I was able to make it work with a pair of pliers.
    3. All in all....I was satisfied with the results.
    Did you find this story helpful?
    Thanks for voting and helping fellow customers!

    Control cable broke.

    michael - September 21, 2017
    Tool Type

    Lawn Mower

    Difficulty

    Easy

    Time

    Less than 15 minutes

    Tools Used

    Screwdriver, Pliers

    Removed the old cable and installed the new cable. Took maybe 5 minutes. Mower started on the 1st try.
    Did you find this story helpful?
    Thanks for voting and helping fellow customers!

    Cable crimped, blade control didn't work

    JAMES - August 31, 2017
    Tool Type

    Lawn Mower

    Difficulty

    Easy

    Time

    Less than 15 minutes

    Tools Used

    Pliers, Nutdriver

    Make a note of how the cable is attach at the engine
    Install the cable at the engine then install the new blade control in the handle and connect the cable to it
    Did you find this story helpful?
    Thanks for voting and helping fellow customers!

    Shut off cable broke

    Richard - August 19, 2017
    Tool Type

    Lawn Mower

    Difficulty

    Easy

    Time

    Less than 15 minutes

    Tools Used

    Pliers

    1.Removed old cable by squeezing rubber mount with pliers
    2. Placed bottom hook on brake lever
    3. Attach rubber mount in middle by squeezing with pliers
    4. Attach top hook into upper handle.
    Did you find this story helpful?
    Thanks for voting and helping fellow customers!

    OEM stands for Original Equipment Manufacturer and means the part you’re buying is sourced directly from the manufacturer who made your product. At eReplacementParts, we sell only genuine OEM parts, guaranteeing the part you’re purchasing is of better design and of higher quality than aftermarket parts.

    Our product descriptions are a combination of data sourced directly from the manufacturers who made your product as well as content researched and curated by our content & customer service teams. This content is edited and reviewed internally before being made public to customers.

    Our customer service team are at the ready daily to answer your part and product questions. We have a dedicated staff with decades of collective experience in helping customers just like you purchase parts to repair their products.

    All our part reviews are solicited directly from other customers who have purchased this exact part. While we moderate these reviews for profanity, offensive language or personally identifiable information, these reviews are posted exactly as submitted and no alterations are made by our team.

    All our customer repair instructions are solicited directly from other customers just like you who have purchased and replaced this exact part. While we moderate these reviews for profanity, offensive language or personally identifiable information, these reviews are posted exactly as submitted and no alterations are made by our team.

    Based on data from past customer purchasing behaviors, these parts are most commonly purchased together along with the part you are viewing. These parts may be necessary or helpful to replace to complete your current repair.

    All our installation videos are created and produced in collaboration with our in-house repair technician, Mark Sodja, who has helped millions of eReplacementParts customers over the last 13 years repair their products. Mark has years of experience in selling and repairing both commercial and residential products with a specialty in gas-powered equipment.

    This data is collected from customers who submitted a repair instruction after replacing this exact part. Customers can rate how easy the repair was to complete and how long it took. We aggregate this data to provide a repair rating that allows customers to quickly determine the difficulty and time needed to perform their own repair.

    eReplacementParts.com
    7174 South 400 West
    Suite 5
    Midvale, UT 84047
    visa mastercard discover american express PayPal