
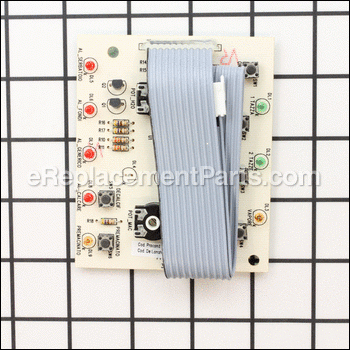
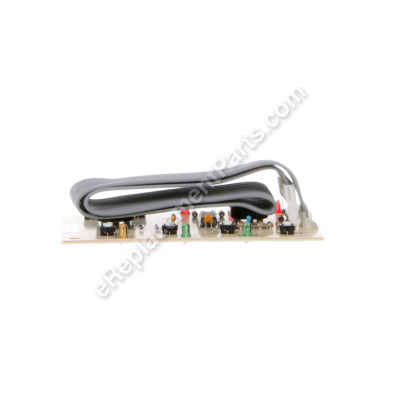

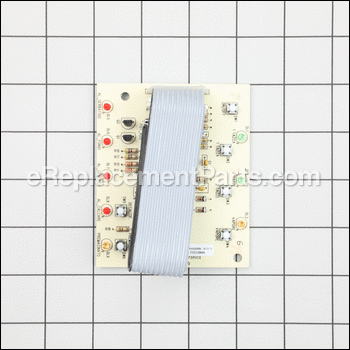
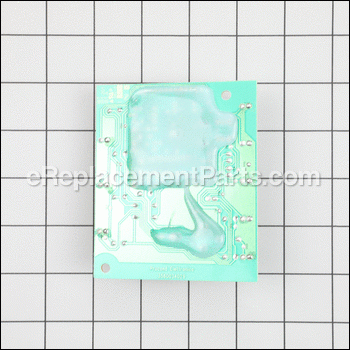

Dls-pcb Control(basic)(rohs) E AS00000621
OEM part for: DeLonghi
Part Number: AS00000621
$39.45
In Stock
Jump To:
Frequently Purchased Together ?
Compatibility
This part will fit the following 12 machines
DeLonghi
EAM3200 Magnifica View Diagrams & Manuals
EAM3300 Magnifica View Diagrams & Manuals
EAM4000.B Magnifica View Diagrams & Manuals
ESAM3300 Magnifica View Diagrams & Manuals
ESAM3300.S Magnifica View Diagrams & Manuals
ESAM2000 (132212063) Caffe Venezia Super Automatic View Diagrams & Manuals
EAM3200 (132212006) Magnifica Super Automatic Espresso/Coffee Machine View Diagrams & Manuals
EAM3300 (132213001) Magnifica Fully Automatic Expresso View Diagrams & Manuals
ESAM3300EXD Superautomatic Capachino System View Diagrams & Manuals
ESAM3300EXHD Super Automatic Capachino System View Diagrams & Manuals
EAM4000 (0132212014) Magnifica Expresso View Diagrams & Manuals
ESAM3300S Magnifica Automatic Espresso/Cappuccino View Diagrams & Manuals
Show More Compatible Models
This item works with the following types of products:
- Coffee Maker Parts
This part replaces obsolete part #: 5232110000, 5232102800
Customer Part Reviews ?
Average Rating (out of 5):
Click to filter by ratings:
5 stars
1
4 stars
0
3 stars
0
2 stars
0
1 stars
0
< PREV
- 1
Friendly and helpful staff, got the right part the first time, easy to install
Friendly and helpful staff, got the right part the first time, easy to install
Guest -
May 15, 2020
Verified Purchase
t
t
t -
t days ago
Verified Purchase
eReplacementParts Team
t
Questions & Answers ?
Our customer Service team is at the ready daily to answer your part and product questions.

Ask our Team
We have a dedicated staff with decades of collective experience in helping customers just like you purchase parts to repair their products.
Does this fit my product?Questions & Answers for Dls-pcb Control(basic)(rohs) E
No questions have been asked yet
Customer Repair Instructions ?
All our customer repair instructions are solicited directly from other customers just like you who have purchased and replaced this exact part.
The on off push button on the Delonghi Magnifica ESAM3300 stopped functioning
Todd - February 26, 2018
👍 4 of 4 people found this instruction helpful
Tool Type
Coffee Maker
Difficulty
Easy
Time
30-60 minutes
Tools Used
Screwdriver, A very small screwdriver to pry the board from it\\\'s clips.
Parts Used
1. Unplug & remove steam knob-pull straight off. remove water receptacle
2. Remove the 2 screws from the back of each side panel and slide them both off.
3. Remove the 2 screws holding the back and remove it.
4 Remove the 2 screw from the top and the 2 screws (there are 4 total) from each side of the face plate
5 Release the clip and carefully pull out the ribbon plug from it's receptacle in the Main control board.
6 Note the position of the 2 knobs and remove the face plate from the unit and the now loose top. you should be no more than 10-15 minutes into it.
7 Remove the single control board hold down screw and carefully push back the plastic clips one at a time and pry out the control board. This may take a while. A jewelers screwdriver might help. Do not break the plastic clips.
8 Install the new board being careful to align the 2 knob posts with their respective holes. Note the posts have a flat side. Make sure the buttons fit where they belong. Refasten the hold down screw.
9 Reattach the ribbon and plug it in. Test the buttons to make sure they fit in properly and they work. Be careful, don't touch the board contacts or electrocute yourself.
10 If it doesn't respond, unplug it and remove and refit again . It may take a couple of attempts.
11 Reassemble in reverse order.
Did you find this story helpful?
Thanks for voting and helping fellow customers!
Control board was broken and power wouldn’t turn on.
Gabriel - August 26, 2021
Tool Type
Coffee Maker
Difficulty
Easy
Time
Less than 15 minutes
Tools Used
Screwdriver
Parts Used
Followed the directions provided and it worked very well. The plastic tabs holding the control board were very tight but pried loose with a little care.
Did you find this story helpful?
Thanks for voting and helping fellow customers!
DeLonghi Espresso Machine had a bad control board-not responding correctly
Barbara - July 13, 2020
Tool Type
Coffee Maker
Difficulty
Easy
Time
Less than 15 minutes
Tools Used
Screwdriver
Parts Used
This was an easy fix. Removed the plugged in wire and control board and plugged in the new one. Only tricky part was lining up the control pots for coffee amount and bean amount behind the front panel.
Did you find this story helpful?
Thanks for voting and helping fellow customers!
Orignal control board acting up -- power on button would not work, nor would "make coffee" button.
Mark - March 1, 2020
Tool Type
Coffee Maker
Difficulty
Medium
Time
15-30 minutes
Tools Used
Screwdriver
Parts Used
Followed instructions from e-Replacement Parts.com web site. Instructions were generally easy to follow, had one or two hiccups, but I successfully installed new control board and new board works fine.
I appreciate having the instructions on the e-Replacement Parts.com web site. Those instructions for replacing the control board convinced me to purchase a replacement board from e-ReplacementParts.com
I appreciate having the instructions on the e-Replacement Parts.com web site. Those instructions for replacing the control board convinced me to purchase a replacement board from e-ReplacementParts.com
Did you find this story helpful?
Thanks for voting and helping fellow customers!
Constantly repeating warmup cycle
Gregg - December 21, 2018
Tool Type
Coffee Maker
Difficulty
Medium
Time
15-30 minutes
Tools Used
Screwdriver
Parts Used
1. Removed cover panels from sides, back and top of unit
2. Removed steam control knob
3. Removed front panel
4. Disconnected ribbon cable from power supply board at rear left of unit
5. Using a small bladed screwdriver, carefully pried the control board loose from 2 of 4 clips holding it in place on the front panel so it could be slipped free of the panel and removed.
6. Placed new board in panel
Connected ribbin cable from new board to power supply board.
7 reassembled coffee maker and brewed an espresso.
Did you find this story helpful?
Thanks for voting and helping fellow customers!
ON-OFF control stopped to work
Bernardo - February 17, 2018
Tool Type
Coffee Maker
Difficulty
Easy
Time
15-30 minutes
Tools Used
Screwdriver
Parts Used
Remove side and back covers
Remove front panel
Replace control board
Remove front panel
Replace control board
Did you find this story helpful?
Thanks for voting and helping fellow customers!
OEM stands for Original Equipment Manufacturer and means the part you’re buying is sourced directly from the manufacturer who made your product. At eReplacementParts, we sell only genuine OEM parts, guaranteeing the part you’re purchasing is of better design and of higher quality than aftermarket parts.
Our product descriptions are a combination of data sourced directly from the manufacturers who made your product as well as content researched and curated by our content & customer service teams. This content is edited and reviewed internally before being made public to customers.
Our customer service team are at the ready daily to answer your part and product questions. We have a dedicated staff with decades of collective experience in helping customers just like you purchase parts to repair their products.
All our part reviews are solicited directly from other customers who have purchased this exact part. While we moderate these reviews for profanity, offensive language or personally identifiable information, these reviews are posted exactly as submitted and no alterations are made by our team.
All our customer repair instructions are solicited directly from other customers just like you who have purchased and replaced this exact part. While we moderate these reviews for profanity, offensive language or personally identifiable information, these reviews are posted exactly as submitted and no alterations are made by our team.
Based on data from past customer purchasing behaviors, these parts are most commonly purchased together along with the part you are viewing. These parts may be necessary or helpful to replace to complete your current repair.
All our installation videos are created and produced in collaboration with our in-house repair technician, Mark Sodja, who has helped millions of eReplacementParts customers over the last 13 years repair their products. Mark has years of experience in selling and repairing both commercial and residential products with a specialty in gas-powered equipment.
This data is collected from customers who submitted a repair instruction after replacing this exact part. Customers can rate how easy the repair was to complete and how long it took. We aggregate this data to provide a repair rating that allows customers to quickly determine the difficulty and time needed to perform their own repair.