
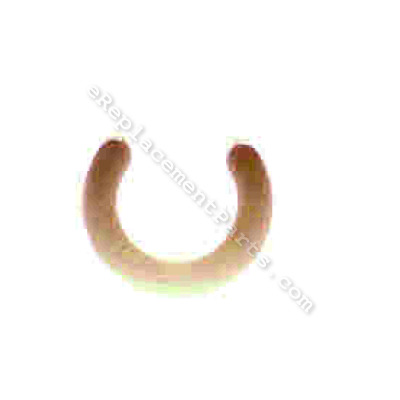


This authentic component is an OEM part which is designed for use with Troy-Bilt and Yard Man lawn mowers. It helps to provide spacing for the front bracket assembly. This is an identical replacement for a damaged or a faulty hardware that was installed on a new unit. This high-quality clip spacer is made of durable plastic and is sold individually. Make sure to check the diagrams of your model for the exact location and the correct installation of this component. Replacing it will not require any special tools, simply remove the old and secure the new.
Spacer:clip 731-05470
OEM part for: Troy-Bilt, Yard Man, MTD, Cub Cadet
Part Number: 731-05470
$4.99
In Stock
Jump To:
Frequently Purchased Together ?

Compatibility
This part will fit the following 54 machines
Troy-Bilt
12AG836E011 (2007) Lawn Mower View Diagrams & Manuals
12AG836E066 (2007) Lawn Mower View Diagrams & Manuals
12AI83K2266 (2008) Lawn Mower View Diagrams & Manuals
12AI865Q711 (2008) Lawn Mower View Diagrams & Manuals
12AG836E711 (2006) Lawn Mower View Diagrams & Manuals
12AI867Q011 (2008) Lawn Mower View Diagrams & Manuals
12AG836E766 (2006) Lawn Mower View Diagrams & Manuals
12AI869F011 (2009) Lawn Mower View Diagrams & Manuals
12AG836G211 (2007) Lawn Mower View Diagrams & Manuals
12AI869G211 (2009) Lawn Mower View Diagrams & Manuals
12AG836G266 (2007) Lawn Mower View Diagrams & Manuals
12AI86K1066 (2008) Lawn Mower View Diagrams & Manuals
12AI86K2266 (2008) Lawn Mower View Diagrams & Manuals
12AJ836E011 (2008) Lawn Mower View Diagrams & Manuals
12AI836M011 (2008) Lawn Mower View Diagrams & Manuals
12AJ836G211 (2008) Lawn Mower View Diagrams & Manuals
12AI836N211 (2008) Lawn Mower View Diagrams & Manuals
12AJ866E066 (2008) Lawn Mower View Diagrams & Manuals
12AI839F011 (2009) Lawn Mower View Diagrams & Manuals
12AJ866G266 (2008) Lawn Mower View Diagrams & Manuals
12AI839G211 (2009) Lawn Mower View Diagrams & Manuals
12AI83K1066 (2008) Lawn Mower View Diagrams & Manuals
12AV838Q766 (2006) Lawn Mower View Diagrams & Manuals
12AV834Q711 (2006) Lawn Mower View Diagrams & Manuals
12AV834Q766 (2006) Lawn Mower View Diagrams & Manuals
12AV835Q711 (2007) Lawn Mower View Diagrams & Manuals
12AV835Q766 (2007) Lawn Mower View Diagrams & Manuals
12AI832Q711 (2010) Self-Propelled Walk-Behind Mower View Diagrams & Manuals
12AI832Q766 (2010) Self-Propelled Walk-Behind Mower View Diagrams & Manuals
12AI869F011 (2010) Self-Propelled Walk-Behind Mower View Diagrams & Manuals
12AI869F066 (2010) Self-Propelled Walk-Behind Mower View Diagrams & Manuals
12AI869G211 (2010) Self-Propelled Walk-Behind Mower View Diagrams & Manuals
12A-1839F011 Walk-Behind Lawn Mower View Diagrams & Manuals
12AI83K1066 (2009) Lawn Mower View Diagrams & Manuals
12AI83K2266 (2009) Lawn Mower View Diagrams & Manuals
12AI86K1066 (2009) Lawn Mower View Diagrams & Manuals
12AI86K2266 (2009) Lawn Mower View Diagrams & Manuals
23A-1AXA711 (2015) Flex Unit View Diagrams & Manuals
23A-1AXA711 (2017) Flex Unit View Diagrams & Manuals
23A-1AXA766 (2018) Flex Unit View Diagrams & Manuals
12BV835Q711 (2007) Self-Propelled Walk-Behind Mower View Diagrams & Manuals
Yard Man
12BV829Q755 (2007) Lawn Mower View Diagrams & Manuals
12AV829C755 (2006) Lawn Mower View Diagrams & Manuals
MTD
12AJ836L597 (2008) Lawn Mower View Diagrams & Manuals
12AJ836L597 (2009) Lawn Mower View Diagrams & Manuals
12AI832Q724 (2008) Lawn Mower View Diagrams & Manuals
12AI832Q724 (2009) Lawn Mower View Diagrams & Manuals
12AV83MC790 (W-83MC)(2006) Lawn Mower View Diagrams & Manuals
12AV839R090 (12AV839R090 W839R)(2007) Lawn Mower View Diagrams & Manuals
12AV839S290 (2007) Lawn Mower View Diagrams & Manuals
12AV829C755 (2006) Self Propelled Walk Behind Mower View Diagrams & Manuals
12BV829Q755 (2007) Self Propelled Walk Behind Mower View Diagrams & Manuals
Cub Cadet
39A70117100 (2018) 58-Inch Snow Blade View Diagrams & Manuals
39B70047100 58-Inch Kit Snow Blade View Diagrams & Manuals
Show More Compatible Models
This item works with the following types of products:
- Lawn Mower Parts
Customer Part Reviews ?
Average Rating (out of 5):
Click to filter by ratings:
5 stars
4
4 stars
1
3 stars
0
2 stars
0
1 stars
0
< PREV
- 1
Exactly correct
Fast service correct part
Guest -
22 days ago
Verified Purchase
Right front wheel on Troybilt mower fell off.
The parts I received were great. They came package fine and quickly. I believe you definitely have a great parts listing,schematics and other peoples summary on how they went about fixing their stuff.
Guest -
July 29, 2022
Verified Purchase
Good fit
The part fit perfectly.
Guest -
July 26, 2022
Verified Purchase
easy and fast
Just what I wanted when I needed it.
Guest -
September 8, 2021
Verified Purchase
Fit perfectly
It fit right in place.
peter -
September 8, 2020
Verified Purchase
t
t
t -
t days ago
Verified Purchase
eReplacementParts Team
t
Questions & Answers ?
Our customer Service team is at the ready daily to answer your part and product questions.

Ask our Team
We have a dedicated staff with decades of collective experience in helping customers just like you purchase parts to repair their products.
Does this fit my product?Questions & Answers for Spacer:clip
No questions have been asked yet
Customer Repair Instructions ?
All our customer repair instructions are solicited directly from other customers just like you who have purchased and replaced this exact part.
The hex bearing was missing causing the right front wheel to fall out of place.
Byron - October 11, 2016
👍 8 of 8 people found this instruction helpful
Tool Type
Lawn Mower
Difficulty
Easy
Time
Less than 15 minutes
Tools Used
Parts Used
1. Removed the clip spacer.
2. Installed the hex bearing on the axel with the hex facing out.
3. Put the axel in place.
4. Slide the hex bearing so that it locks into the chassis.
5. Reinstall the clip spacer.
2. Installed the hex bearing on the axel with the hex facing out.
3. Put the axel in place.
4. Slide the hex bearing so that it locks into the chassis.
5. Reinstall the clip spacer.
Did you find this story helpful?
Thanks for voting and helping fellow customers!
Spring broke on original front bracket assembly
Michael - April 24, 2017
👍 2 of 2 people found this instruction helpful
Tool Type
Lawn Mower
Difficulty
Easy
Time
15-30 minutes
Tools Used
Screwdriver, Pliers, Socket set
Took old off...then after not being sure how other new went on...did an on-line search of my specific mower and that sort of repair.. once identified how to put back in place via on line web page...was simple and fast to repair
Did you find this story helpful?
Thanks for voting and helping fellow customers!
Front right axle retainer broke off
Steven - September 4, 2016
👍 2 of 2 people found this instruction helpful
Tool Type
Lawn Mower
Difficulty
Easy
Time
Less than 15 minutes
Tools Used
Put mower on its side, slipped in the hex axle nut onto shaft and pushed into the mower housing. Then snapped in the spacer retainer. Done
Did you find this story helpful?
Thanks for voting and helping fellow customers!
Lawn mower front wheel detached from housing
Fredrick - May 2, 2023
Tool Type
Lawn Mower
Difficulty
Easy
Time
Less than 15 minutes
Tools Used
, No tools needed
Flange bearing had broken and was missing
1. Removed the old clip spacer.
2. Snapped new flange bearing on "axel"
3. Rotated bearing until it could be pressed into mower deck.
4. Snapped new clip spacer in place to hold bearing
1. Removed the old clip spacer.
2. Snapped new flange bearing on "axel"
3. Rotated bearing until it could be pressed into mower deck.
4. Snapped new clip spacer in place to hold bearing
Did you find this story helpful?
Thanks for voting and helping fellow customers!
Front wheel Split bearing worn out replaced w new spacer.
William - July 17, 2019
Tool Type
Lawn Mower
Difficulty
Easy
Time
Less than 15 minutes
Tools Used
, NO TOOLS NEEDED, CLIPPED RIGHT IN.
Popped out old part instaled new ..TROT REAR POWERED MOWER SMARTLY ENGINEERED.
Did you find this story helpful?
Thanks for voting and helping fellow customers!
Split flange bearing was heavily grooved and fell out. Clip spacer was worn also
Robert - September 18, 2018
Tool Type
Lawn Mower
Difficulty
Easy
Time
Less than 15 minutes
Tools Used
Screwdriver, Pliers
1. Disconnected spark plug wire
2. Lifted and supported the front of the mower.
3. Removed old bearing and spacer from both sides.
4. Slipped bearings over the axle and slid them out to set in housing.
5. Installed clip spacers inside bearings.
6. Lowered mower back to the ground
7. Reconnected spark plug wire
2. Lifted and supported the front of the mower.
3. Removed old bearing and spacer from both sides.
4. Slipped bearings over the axle and slid them out to set in housing.
5. Installed clip spacers inside bearings.
6. Lowered mower back to the ground
7. Reconnected spark plug wire
Did you find this story helpful?
Thanks for voting and helping fellow customers!
The clip spacer and split hex flange bearing broke off during use and fell off
Warner - August 27, 2017
Tool Type
Lawn Mower
Difficulty
Easy
Time
Less than 15 minutes
Tools Used
, NONE
Simply slid the split hex flange bearing onto the axle first, then popped the clip spacer on. Perfect fit. Took about 30 seconds max.
Great products and service and quick delivery. Very impressed.
Great products and service and quick delivery. Very impressed.
Did you find this story helpful?
Thanks for voting and helping fellow customers!
Lawn mower wheels were falling off.
Arnold - May 15, 2017
Tool Type
Lawn Mower
Difficulty
Medium
Time
15-30 minutes
Tools Used
Screwdriver, Pliers
Removed the old parts and used the new ones on both sides.
Did you find this story helpful?
Thanks for voting and helping fellow customers!
OEM stands for Original Equipment Manufacturer and means the part you’re buying is sourced directly from the manufacturer who made your product. At eReplacementParts, we sell only genuine OEM parts, guaranteeing the part you’re purchasing is of better design and of higher quality than aftermarket parts.
Our product descriptions are a combination of data sourced directly from the manufacturers who made your product as well as content researched and curated by our content & customer service teams. This content is edited and reviewed internally before being made public to customers.
Our customer service team are at the ready daily to answer your part and product questions. We have a dedicated staff with decades of collective experience in helping customers just like you purchase parts to repair their products.
All our part reviews are solicited directly from other customers who have purchased this exact part. While we moderate these reviews for profanity, offensive language or personally identifiable information, these reviews are posted exactly as submitted and no alterations are made by our team.
All our customer repair instructions are solicited directly from other customers just like you who have purchased and replaced this exact part. While we moderate these reviews for profanity, offensive language or personally identifiable information, these reviews are posted exactly as submitted and no alterations are made by our team.
Based on data from past customer purchasing behaviors, these parts are most commonly purchased together along with the part you are viewing. These parts may be necessary or helpful to replace to complete your current repair.
All our installation videos are created and produced in collaboration with our in-house repair technician, Mark Sodja, who has helped millions of eReplacementParts customers over the last 13 years repair their products. Mark has years of experience in selling and repairing both commercial and residential products with a specialty in gas-powered equipment.
This data is collected from customers who submitted a repair instruction after replacing this exact part. Customers can rate how easy the repair was to complete and how long it took. We aggregate this data to provide a repair rating that allows customers to quickly determine the difficulty and time needed to perform their own repair.