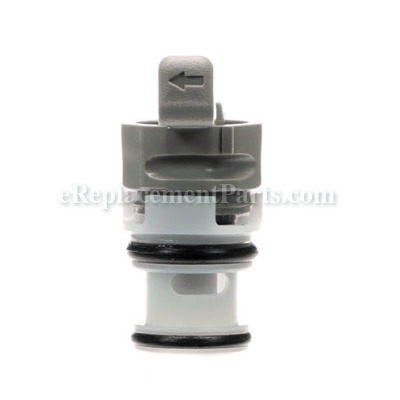


This is a Genuine OEM replacement part used on some Dewalt Nailers and Staplers. This item includes a new valve and o-rings. If your tool is leaking air or the trigger valve is stuck, replacing this part may resolve the issue.
Trigger Valve Assembly N566148
OEM part for: DeWALT
Part Number: N566148
$11.05
In Stock
Jump To:
Frequently Purchased Together ?


Compatibility
This part will fit the following 42 machines
DeWALT
D51275 Type 1 Finish Nailer View Diagrams & Manuals
D51256 Type 1 Finish Nailer Kit View Diagrams & Manuals
D51256 Type 2 Finish Nailer Kit View Diagrams & Manuals
D51238 Type 1 Brad Nailer Kit View Diagrams & Manuals
D51430 Type 1 Stapler View Diagrams & Manuals
D51431 Type 1 Stapler View Diagrams & Manuals
D51321 Type 1 Coil Roofing Nailer View Diagrams & Manuals
D51236 Type 1 Nailer View Diagrams & Manuals
D51238 Type 2 Nailer View Diagrams & Manuals
D51256 Type 3 Nailer View Diagrams & Manuals
D51275 Type 2 Nailer View Diagrams & Manuals
D51275 Type 3 Nailer View Diagrams & Manuals
D51420 Type 1 Stapler View Diagrams & Manuals
D51422 Type 1 Stapler View Diagrams & Manuals
D51430 Type 2 Stapler View Diagrams & Manuals
D51431 Type 2 Stapler View Diagrams & Manuals
D51825 3 1/2 Framing Nailer View Diagrams & Manuals
D51850 3 1/2 Framing Nailer View Diagrams & Manuals
D51276 15 Gauge Finish Nailer View Diagrams & Manuals
D51257 16 Gauge Finish Nailer View Diagrams & Manuals
D51855 Type 1 Coil Framing Nailer View Diagrams & Manuals
D51321 Type 2 Coil Roofing Nailer View Diagrams & Manuals
D51822 Type 4 Framing Nailer View Diagrams & Manuals
D51844 Type 4 Framing Nailer View Diagrams & Manuals
D51257K Type 1 16 GA Finish Nailer View Diagrams & Manuals
D51257K Type 2 16 GA Finish Nailer View Diagrams & Manuals
D51420K (Type 1) 18 Gauge 1" X 1/4" Narrow Crown Stapler View Diagrams & Manuals
D51422K (Type 1) 18 Gauge 1-1/2" x 1/4" Narrow Crown Stapler View Diagrams & Manuals
D51276K (Type 1) 15 Gauge 1" to 2-1/2" Finish Nailer View Diagrams & Manuals
D51236K (Type 1) 18 Ga 1 1/4" Brad Nailer View Diagrams & Manuals
D51238K (Type 1) 2" 18 Ga Brad Nailer View Diagrams & Manuals
D51238K (Type 2) Lawnedger Power Tool View Diagrams & Manuals
D51238K (Type 3) Lawnedger Power Tool View Diagrams & Manuals
D51276K (Type 2) 15 Gauge 1 Inch To 2-1/2 Inch Finish Nailer Power Tool View Diagrams & Manuals
D51822 (Type 5) Lawnedger Power Tool View Diagrams & Manuals
D51825 (Type 1) Lawnedger Power Tool View Diagrams & Manuals
D51844 (Type 5) Lawnedger Power Tool View Diagrams & Manuals
D51850 (Type 1) Lawnedger Power Tool View Diagrams & Manuals
D51422K (Type 2) Lawnedger Power Tool View Diagrams & Manuals
D51422K (Type 3) Lawnedger Power Tool View Diagrams & Manuals
D51430 (Type 3) Nailer Power Tool View Diagrams & Manuals
D51431 (Type 3) Nailer Power Tool View Diagrams & Manuals
Show More Compatible Models
This item works with the following types of products:
- Nailer Parts
- Stapler Parts
This part replaces obsolete part #: 647956-00, 641011-00, 395510-00
Customer Part Reviews ?
Average Rating (out of 5):
Click to filter by ratings:
5 stars
53
4 stars
4
3 stars
1
2 stars
1
1 stars
1
< PREV
- 1
- 2
- 3
PERFECT MATCHED PART
ONCE I RECEIVED THE CORRECT PART IT WAS A GOOD MATCH. STILL WAITING FOE SECOND PART I ORDERED.
Guest -
December 14, 2023
Verified Purchase
5 minute repair and now my nailer works like new
Exact part - fits perfectly and works correctly!
Guest -
October 2, 2023
Verified Purchase
DEWALT nail gun trigger replacement
I should have ordered this part from you a month ago when the nailer did not function. I received the part in short time and installed in less than 3 minutes ....thank you
Guest -
August 12, 2023
Verified Purchase
Easy
Fit as it should
Jim -
May 8, 2023
Verified Purchase
Worked as expected
Easy and fast repair
Guest -
April 8, 2023
Verified Purchase
Nailed it!
Had a double shot on my nail gun that blew out the O ring on the trigger valve. Replaced the trigger valve(easy changeout) on my Dewalt nailer and I'm back nailing it! Valve was in stock, shipping was on time.
Alejandro F -
September 29, 2022
Verified Purchase
Very simple fix
My nail gun was just letting out a puff of air around the trigger when pulled. Watched a video on how to change, took less than 5 minutes, super simple, and completely fixed problem
RICKY -
May 25, 2022
Verified Purchase
Works great
Easy assy
Guest -
March 1, 2022
Verified Purchase
Too easy to get two older nailers back in action! Thanks ereplacement parts !
From DeWalt nailers to neglected weed whackers, ereplacement parts is the easiest , fastest way to get what you need !
Guest -
February 26, 2022
Verified Purchase
Trigger valve
Correct part for my dewar nail gun. Good price and quick shipping. Will definitely use ereplacement parts again.
James -
February 3, 2022
Verified Purchase
t
t
t -
t days ago
Verified Purchase
eReplacementParts Team
t
Questions & Answers ?
Our customer Service team is at the ready daily to answer your part and product questions.

Ask our Team
We have a dedicated staff with decades of collective experience in helping customers just like you purchase parts to repair their products.
Does this fit my product?Questions & Answers for Trigger Valve Assembly
How do I tell what type of nail gun do I have, 1, 2, 3, or 4? I need a trigger assy but don't know which one to order. 5140095-73 or N566148
Dennis
for model number D51844
asked on 2023-01-09
Hello Dennis, Thank you for the question. The Type number will be located on a sticker with the model number on the Nailer. Thank you for your inquiry, good luck with this repair!
eReplacementParts Team January 09, 2023
What is difference in above models D51256 but type 1 type 2 type 3 I need a trigger valve assembly that fits 21/2 inch nails
Raymond
for model number D51256
asked on 2022-11-18
Hello Raymond, thank you for your question. With respect to the model and different Type numbers, the Trigger Valve is exactly the same for each of the types as part N566148. We hope this information will help you.
eReplacementParts Team November 18, 2022
Customer Repair Instructions ?
All our customer repair instructions are solicited directly from other customers just like you who have purchased and replaced this exact part.
The Nail gun failed to fire, tried all the recommendations online to determine reason, Trigger valve failure was the top rated reason.
Joseph - March 17, 2017
👍 43 of 46 people found this instruction helpful
Tool Type
Nailer
Difficulty
Easy
Time
Less than 15 minutes
Tools Used
, Nail to punch out the roll pins
Parts Used
1. Took out the hinge pin for the trigger, saved the rubber retainer washer that holds the pin.
2. Set the trigger and spring aside.
3. Use a straight punch OR take a nail the diameter of the two spring pins that hold the valve in place, grind the end of the nail flat. Gently tap the two pins out, NOTE they are different lengths.
4. Pull the trigger valve assembly out of the gun frame, Mine separated and required long nose pliers to pull the second half of the assembly out.
5. Inspect the empty hole for dirt and or debris, clean as needed.
6. Take the new valve assembly and use a light touch of Vaseline on the two rubber "O" rings just to help them insert in the frame. Caution do not block the air gaps in the valve system, just a light touch of lube to help assembly.
7. Orient the gray safety lever in the correct position and insert the valve assembly into the gun frame. align the two notches so the spring pins will slide in place.
8. Insert the spring pins Long and Short in the correct holes, tap them in until evenly seated. (same amount showing on both sides)
9. Place the trigger and spring back into position and push the hinge pin in making sure it engages the safety bar (this should not have moved but if it did make sure it is back where it belongs so the hinge pin keeps it in place).
10. Place the retaining rubber washer on the end of the hinge pin and you're back in business
Did you find this story helpful?
Thanks for voting and helping fellow customers!
Nailer was shooting air out of the trigger and not nailing.
steve - September 28, 2016
👍 8 of 8 people found this instruction helpful
Tool Type
Nailer
Difficulty
Easy
Time
Less than 15 minutes
Tools Used
, A nail and a hammer to pop the pins out. Easy
Parts Used
Took a small nail and a hammer to push out the 2 pins that hold the trigger assembly in place.
Pulled trigger out, slid the new trigger in and pushed the 2 pins back in and DONE. Works like new.
Pulled trigger out, slid the new trigger in and pushed the 2 pins back in and DONE. Works like new.
Did you find this story helpful?
Thanks for voting and helping fellow customers!
Misfire- hammer wouldn't retract
Nick - December 15, 2015
👍 5 of 5 people found this instruction helpful
Tool Type
Nailer
Difficulty
Easy
Time
Less than 15 minutes
Tools Used
Screwdriver, punch
Removed trigger, punched both pins out, removed old valve, installed new valve, installed pins
released latch,removed screw from contact tip,installed new contact tip
released latch,removed screw from contact tip,installed new contact tip
Did you find this story helpful?
Thanks for voting and helping fellow customers!
Nail gun quit firing. Large amount of air coming out of trigger valve
David - January 28, 2016
👍 4 of 4 people found this instruction helpful
Tool Type
Nailer
Difficulty
Easy
Time
15-30 minutes
Tools Used
Pliers, Nail and hammer to punch pins out
Parts Used
Removed trigger and pins holding in the trigger valve in the gun. Removed trigger valve and replaced with new one with a little lithium grease add to it. Put pins back in and then the trigger. Worked just fine after this repair.
Did you find this story helpful?
Thanks for voting and helping fellow customers!
Nail gun quit firing
jeff - June 20, 2016
👍 2 of 2 people found this instruction helpful
Tool Type
Nailer
Difficulty
Medium
Time
15-30 minutes
Tools Used
, Small hammer and small punch
Parts Used
Punched out the roll pins, removed and replaced trigger assembly. Lined up holes and replaced the roll pins.
Did you find this story helpful?
Thanks for voting and helping fellow customers!
Nailer was leaking air through the trigger mechanism when the trigger was pulled.
Thomas - October 25, 2017
👍 1 of 1 people found this instruction helpful
Tool Type
Nailer
Difficulty
Medium
Time
15-30 minutes
Tools Used
Parts Used
1. Removed the trigger by removing the rubber retainer from the pin and pulling the pin out.
2. Removed the trigger valve assembly by pushing out the two locking pins and pulling the valve out of the housing. I used an Allen wrench similar in size to the pins to drive the pins out of the housing.
3. Reversed the procedure to install the new trigger valve assembly.
Nailer was tested and works like a new one.
Did you find this story helpful?
Thanks for voting and helping fellow customers!
Air leak when the trigger was pulled
Tony - February 5, 2017
👍 2 of 3 people found this instruction helpful
Tool Type
Nailer
Difficulty
Easy
Time
Less than 15 minutes
Tools Used
Pliers, Punch to remove pins
Parts Used
1. Removed the trigger and damaged trigger valve assembly (watched online video).
2. Installed new trigger valve assembly.
3. Installed two pins to hold the trigger valve assembly in place.
4. Installed the trigger.
5. Connected air hose, tested it and my nailer is back in operation.
2. Installed new trigger valve assembly.
3. Installed two pins to hold the trigger valve assembly in place.
4. Installed the trigger.
5. Connected air hose, tested it and my nailer is back in operation.
Did you find this story helpful?
Thanks for voting and helping fellow customers!
Wont fire and air coming out of trigger area
jeremy - December 23, 2016
👍 3 of 5 people found this instruction helpful
Tool Type
Nailer
Difficulty
Easy
Time
15-30 minutes
Tools Used
, Punch, hammer and small screw driver
Parts Used
Remove one pin above trigger pull trigger out then punch out two roll pins holding trigger valve. Pull out valve and install new and reinstall everything
Did you find this story helpful?
Thanks for voting and helping fellow customers!
Air leaking from nose and from trigger valve
PAUL - April 20, 2016
👍 1 of 1 people found this instruction helpful
Tool Type
Nailer
Difficulty
Medium
Time
1-2 hours
Tools Used
Screwdriver, Pliers, ALLEN WRENCH SET
Take your time and follow the enclosed instructions.
Did you find this story helpful?
Thanks for voting and helping fellow customers!
My Dewalt coil roofing nailer, model D51321 was misfiring more often then the drive pin started not retracting.I considered buying a new one.
Ronnie - September 23, 2018
Tool Type
Nailer
Difficulty
Easy
Time
1-2 hours
Tools Used
, Allen wrench
I replaced the O-rings,as well as the trigger assembly.A straight forward procedure and with the parts from eReplacement parts,they fit without any problems.Parts matched perfectly with the old ones.
I will look to them again for quality replacement parts that fit,when I do the next repair.
I will look to them again for quality replacement parts that fit,when I do the next repair.
Did you find this story helpful?
Thanks for voting and helping fellow customers!
Load More Install Stories
OEM stands for Original Equipment Manufacturer and means the part you’re buying is sourced directly from the manufacturer who made your product. At eReplacementParts, we sell only genuine OEM parts, guaranteeing the part you’re purchasing is of better design and of higher quality than aftermarket parts.
Our product descriptions are a combination of data sourced directly from the manufacturers who made your product as well as content researched and curated by our content & customer service teams. This content is edited and reviewed internally before being made public to customers.
Our customer service team are at the ready daily to answer your part and product questions. We have a dedicated staff with decades of collective experience in helping customers just like you purchase parts to repair their products.
All our part reviews are solicited directly from other customers who have purchased this exact part. While we moderate these reviews for profanity, offensive language or personally identifiable information, these reviews are posted exactly as submitted and no alterations are made by our team.
All our customer repair instructions are solicited directly from other customers just like you who have purchased and replaced this exact part. While we moderate these reviews for profanity, offensive language or personally identifiable information, these reviews are posted exactly as submitted and no alterations are made by our team.
Based on data from past customer purchasing behaviors, these parts are most commonly purchased together along with the part you are viewing. These parts may be necessary or helpful to replace to complete your current repair.
All our installation videos are created and produced in collaboration with our in-house repair technician, Mark Sodja, who has helped millions of eReplacementParts customers over the last 13 years repair their products. Mark has years of experience in selling and repairing both commercial and residential products with a specialty in gas-powered equipment.
This data is collected from customers who submitted a repair instruction after replacing this exact part. Customers can rate how easy the repair was to complete and how long it took. We aggregate this data to provide a repair rating that allows customers to quickly determine the difficulty and time needed to perform their own repair.