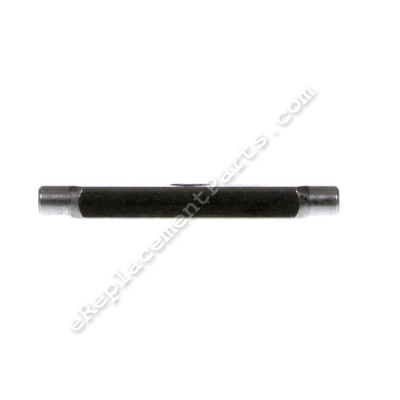


The block connects to the work plate with hex nuts. This is an authentic Ryobi part sourced directly from the manufacturer for use in table saws. Keep in mind this high-quality part is sold individually. It is made out of metal and will require replacing if it becomes broken. A screwdriver, a set of pliers, and a wrench set may be needed during the installation of this part.
Block 089037007033
OEM part for: Ryobi
Part Number: 089037007033
$4.99
In Stock
Jump To:
Frequently Purchased Together ?


Compatibility
This part will fit the following 9 machines
Ryobi
RTS10 10" Table Saw View Diagrams & Manuals
RTS21 10 in. Table Saw View Diagrams & Manuals
RTS21G RTS21G 10-In. Table Saw View Diagrams & Manuals
RTS08 Rts08 8-1/4 In. Table Saw 1-20-21 (Rev:03) View Diagrams & Manuals
RTS08T Rts08t 8-1/4 In. Table Saw 1-20-21 (Rev:03) View Diagrams & Manuals
RTS12 Rts12 10 In. Table Saw 2-24-21 (Rev:04) View Diagrams & Manuals
RTS12T Rts12t 10 In. Table Saw 2-24-21 (Rev:04) View Diagrams & Manuals
RTS23 Rts23 10 In. Table Saw 2-24-21 (Rev:04) View Diagrams & Manuals
RTS23T Rts23t 10 In. Table Saw 2-24-21 (Rev:04) View Diagrams & Manuals
Show More Compatible Models
This item works with the following types of products:
- Saw Parts
- Table Saw Parts
Customer Part Reviews ?
Average Rating (out of 5):
Click to filter by ratings:
5 stars
5
4 stars
0
3 stars
0
2 stars
0
1 stars
0
< PREV
- 1
Level Block for Table Saw
I received the wrong Level Pin but the correct Level Block. Been waiting the correct Pin to arrive. Tim argued with me that's only been 6-7 days. Basically be patient it's going to ship out 11days plus the 3-5 days delivery later.
Omar -
May 21, 2023
Verified Purchase
Too easy
Quick, consise, convenient.
David -
June 29, 2021
Verified Purchase
Perfect trouble shooting
the blade wouldn't rise or drop and I didn't know why. I selected the symptoms and ordered the parts. I highly recommend the clips along with the rest. I fixed it in two hours and now it works.
Guest -
July 14, 2020
Verified Purchase
Perfect match
Easy to install
Guest -
October 29, 2019
Verified Purchase
Just What I needed
Great company. They had the part I needed . . . offered a fair price . . . and got it to me within days. No drama. I'll definitely order from these guys again.
Guest -
June 10, 2019
Verified Purchase
t
t
t -
t days ago
Verified Purchase
eReplacementParts Team
t
Questions & Answers ?
Our customer Service team is at the ready daily to answer your part and product questions.

Ask our Team
We have a dedicated staff with decades of collective experience in helping customers just like you purchase parts to repair their products.
Does this fit my product?Questions & Answers for Block
No questions have been asked yet
Customer Repair Instructions ?
All our customer repair instructions are solicited directly from other customers just like you who have purchased and replaced this exact part.
Could not raise saw blade
Steven - June 3, 2016
👍 3 of 3 people found this instruction helpful
Tool Type
Table Saw
Difficulty
Medium
Time
15-30 minutes
Tools Used
Screwdriver, Pliers, Wrench Set, hooks and picks
Parts Used
We replaced the block with threaded hole that moves to raise/lower the saw blade. The old part had worn ends and would twist in its slots (also slightly worn) and lock up the screw that moves the blade. Getting the lock washer off and back on the end of the drive screw was tricky. We took the saw off its stand and turned it upside down to get access to the mechanism. We loosened the nuts on the drive screw holding it against the front plate. Lacking the right lock washer pliers, we used electronics hooks and picks to open the lock washer and used a screwdriver to lever it off the end of the drive screw. With the lock washer off, we could unscrew the drive screw from the block. We then angled the block so it just came out of the slots, with just a little help from a soft-tipped hammer.
Reversing the operations, we angled the replacement block into the slots and screwed the drive screw into the block and tightened the nuts holding the drive screw assembly against the front plate. We pulled the lock washer open and put a screwdriver blade in to hold it open (this lock washer has slots, not holes for the removal tool). Angling the washer partially on the end of the drive screw, we used a screwdriver to push the washer on and snap it into the retaining groove. We put some grease on the drive screw and the saw blade now raises and lowers, though we cannot lower it too much or the mechanism gets stuck, probably due to wear of the slots. But, the saw is usable again!
Reversing the operations, we angled the replacement block into the slots and screwed the drive screw into the block and tightened the nuts holding the drive screw assembly against the front plate. We pulled the lock washer open and put a screwdriver blade in to hold it open (this lock washer has slots, not holes for the removal tool). Angling the washer partially on the end of the drive screw, we used a screwdriver to push the washer on and snap it into the retaining groove. We put some grease on the drive screw and the saw blade now raises and lowers, though we cannot lower it too much or the mechanism gets stuck, probably due to wear of the slots. But, the saw is usable again!
Did you find this story helpful?
Thanks for voting and helping fellow customers!
Blade wouldn't raise or lower - elevation screw was stripped, the block nut was also stripped and damaged the screw.
Jan - April 5, 2018
👍 2 of 2 people found this instruction helpful
Tool Type
Table Saw
Difficulty
Medium
Time
1-2 hours
Tools Used
Screwdriver, Pliers, Adjustable Wrench, C-ring pliers
There are two jam nuts on the screw shaft that were seriously jammed! Tried all my wrenches, lock pliers, and wishful thinking to get them loose. Finally I got my oscillating saw with metal blade and cut the shaft in two places to remove the segment with the two jam nuts. Then put one nut in my metal vise and used an adjustable wrench on the other jam nut. That worked. But the nuts were cornered by all that work so I sent in a second order to get two nuts. There's a teeny c-ring on the end of the shaft and I used a cold chisel to break it off since I didn't have the c-ring pliers yet. All of this was the 1.5 hours of the work. Once I got the parts from eReplacementParts and the c-ring pliers took 30 minutes to fix everything. To be on the safe side I ordered a second set of screw shaft and block nut in case I need another fix.
The parts from eReplacementParts got here quickly (I used USPS), they were reasonably priced. And they worked. Thanks to them I didn't have to buy a new table saw.
The parts from eReplacementParts got here quickly (I used USPS), they were reasonably priced. And they worked. Thanks to them I didn't have to buy a new table saw.
Did you find this story helpful?
Thanks for voting and helping fellow customers!
Height adjustment rod stripped and cross bar
joseph - May 24, 2016
👍 2 of 2 people found this instruction helpful
Tool Type
Table Saw
Difficulty
Medium
Time
30-60 minutes
Tools Used
Screwdriver, Pliers, Wrench Set, sazall or hacksaw
Unplug saw turn saw upside down on suitable support ,remove blade, snap ring retainer at end of shaft and friction washer. Inside the housing back off the crank handle until shaft is out of the cross bar. If the shaft is stripped and will not come out of cross bar, hacksaw the shaft off near the handle. There is a double nut lock 14 mm inside of saw base housing . Also there is friction washer, remove crank handle, remove center trim cover. Replace shaft reverse process. When install double nut depth is set for the amount of drag on the housing. Align the cross bar when setting depth, to much clearance will allow the snap ring come off end of the shaft. Be sure to order enough parts to make the job complete. Nuts washers and clips. Joe M.
Did you find this story helpful?
Thanks for voting and helping fellow customers!
Depth adjustment pulley wouldn't turn
grady - November 10, 2017
👍 1 of 1 people found this instruction helpful
Tool Type
Table Saw
Difficulty
Medium
Time
15-30 minutes
Tools Used
Pliers, Wrench Set, hacksaw
The blade depth adjustment pulley had seized - the elevation shaft and the block had totally fused together. Ordered a new one of each.
The Repair: First, I took note of the stacking order of the nuts and washers on the shaft. I drew a diagram.
Once the new parts arrived, I took my hacksaw and cut old shaft to get it and the old block out of there… You might be tempted to pry out the old parts but better not to risk bending anything out of alignment in the assembly.
Removing the old washers and nuts from the old shaft is easy once it’s cut.
Starting with the pulley handle, thread that on and insert the shaft into the case. Then add back the nuts, washers and new block as they were before.
One important detail on this repair - the small retaining ring at the end of the shaft that holds it in place. This was a bit of a pain to remove and replace because I didn’t have the proper tool. Used needle-nose pliers.
Did you find this story helpful?
Thanks for voting and helping fellow customers!
Threaded block was bent on new table saw. Ryobi wanted me to return the whole unit but instead I just replaced the block.
Ronald - October 11, 2017
👍 1 of 1 people found this instruction helpful
Tool Type
Table Saw
Difficulty
Medium
Time
30-60 minutes
Tools Used
Pliers, Wrench Set, snap ring pliers
Parts Used
Removed snap ring from end of threaded rod. Loosened two nuts on threaded rod then removed threaded rod from hole in bracket. With the threaded rod now free I could slide the block out of the two slots. Installed new block, re-inserted threaded rod into hole and replaced snap ring. Then tightened the two nuts on the threaded rod to firmly hold it in place, it allowed for the threaded rod to be cranked. Applied grease to threaded rod.
Did you find this story helpful?
Thanks for voting and helping fellow customers!
Saw would not raise when height wheel turned
Ronald - November 22, 2021
Tool Type
Table Saw
Difficulty
Medium
Time
30-60 minutes
Tools Used
Wrench Set, small snap ring pliers
Removed old stripped block and elevating shaft. You will need a thin wrench to loosen the two nuts that hold the shaft in place. THE SHAFT IS LEFT HAND TRHEAD!! So to loosen you turn it clockwise. Also the snap ring on the end of the shaft is very small and would be easy to lose. Once the nuts are loose and the snap ring is remove it goes quite easy. Just install the new stuff in reverse order. If new shaft does no come with adjusting wheel -mine did- you will need to drive out the drive pin holding he wheel on and put it on the new shaft.
Did you find this story helpful?
Thanks for voting and helping fellow customers!
SAW BLADE ELEVATION ASS. WORE OUT
STEPHEN - October 4, 2021
Tool Type
Table Saw
Difficulty
Medium
Time
30-60 minutes
Tools Used
Pliers, Socket set, Wrench Set
REMOVED OLD
INSALLED NEW
INSALLED NEW
Did you find this story helpful?
Thanks for voting and helping fellow customers!
The blade height could not be adjusted. It was frozen.
Antonio - February 11, 2021
Tool Type
Table Saw
Difficulty
Easy
Time
15-30 minutes
Tools Used
Screwdriver, Pliers, Wrench Set
I removed the adjustment wheel (crank) and loosened the lock nuts on the old elevating shaft. Then I removed the lock rings at the end of the shaft and unscrewed it out of the stripped block. Once it was out, the new block and shaft went on in minutes. I put new lock rings on the shaft end just to be sure nothing came loose and reinstalled the adjustment wheel. Works great. One must remember to grease the shaft threads. I didn't. It's what caused the problem.
Did you find this story helpful?
Thanks for voting and helping fellow customers!
Saw assembly wouldn’t raise
Alan - December 10, 2020
Tool Type
Table Saw
Difficulty
Medium
Time
30-60 minutes
Tools Used
Wrench Set
Parts Used
Removed the retainer nuts from the blade height adjuster dial. Removed clip from adjuster bolt. Slipped bolt out and removed block. Started bolt in new block and reassembled
Did you find this story helpful?
Thanks for voting and helping fellow customers!
Stripped elevating shft and/or block
Jens - May 10, 2020
Tool Type
Table Saw
Difficulty
Easy
Time
30-60 minutes
Tools Used
Screwdriver, Wrench Set, Adjustable Wrench, Scrap wood approx. .5\\
Loosened elevating shaft lock nuts. Pried elevator block up with scrap wood and removed both. Reversed process to re-install.
Did you find this story helpful?
Thanks for voting and helping fellow customers!
Load More Install Stories
OEM stands for Original Equipment Manufacturer and means the part you’re buying is sourced directly from the manufacturer who made your product. At eReplacementParts, we sell only genuine OEM parts, guaranteeing the part you’re purchasing is of better design and of higher quality than aftermarket parts.
Our product descriptions are a combination of data sourced directly from the manufacturers who made your product as well as content researched and curated by our content & customer service teams. This content is edited and reviewed internally before being made public to customers.
Our customer service team are at the ready daily to answer your part and product questions. We have a dedicated staff with decades of collective experience in helping customers just like you purchase parts to repair their products.
All our part reviews are solicited directly from other customers who have purchased this exact part. While we moderate these reviews for profanity, offensive language or personally identifiable information, these reviews are posted exactly as submitted and no alterations are made by our team.
All our customer repair instructions are solicited directly from other customers just like you who have purchased and replaced this exact part. While we moderate these reviews for profanity, offensive language or personally identifiable information, these reviews are posted exactly as submitted and no alterations are made by our team.
Based on data from past customer purchasing behaviors, these parts are most commonly purchased together along with the part you are viewing. These parts may be necessary or helpful to replace to complete your current repair.
All our installation videos are created and produced in collaboration with our in-house repair technician, Mark Sodja, who has helped millions of eReplacementParts customers over the last 13 years repair their products. Mark has years of experience in selling and repairing both commercial and residential products with a specialty in gas-powered equipment.
This data is collected from customers who submitted a repair instruction after replacing this exact part. Customers can rate how easy the repair was to complete and how long it took. We aggregate this data to provide a repair rating that allows customers to quickly determine the difficulty and time needed to perform their own repair.