
This lock nut is a high quality hardware that is utilized on Ridgid and Ryobi table saws. It has multiple uses depending on the model of your unit, please make sure to check appropriate diagrams for correct location and use of this lock nut. Note that one durable hex lock nut is included per order.
Lock Nut 1/4 - 20 411072702
OEM part for: Ryobi, Ridgid
Part Number: 411072702
$4.99
In Stock
Jump To:
Frequently Purchased Together ?


Compatibility
This part will fit the following 28 machines
Ryobi
BTS10 10" Portable Table Saw View Diagrams & Manuals
BTS10S Table Saw View Diagrams & Manuals
BTS20 10" Portable Table Saw View Diagrams & Manuals
BTS20R 10" Table Saw View Diagrams & Manuals
BTS20R-1 10" Table Saw View Diagrams & Manuals
BTS21 10" Table Saw View Diagrams & Manuals
BTS12S 10" Table Saw View Diagrams & Manuals
RTS10 10" Table Saw View Diagrams & Manuals
BTS211 10" Table Saw View Diagrams & Manuals
RTS21 10 in. Table Saw View Diagrams & Manuals
RTS31 10 In. Table Saw View Diagrams & Manuals
RTS21G RTS21G 10-In. Table Saw View Diagrams & Manuals
RTS22 10-Inch Table Saw View Diagrams & Manuals
RTS22T 10-Inch Table Saw View Diagrams & Manuals
RTS10NS 10-Inch Table Saw View Diagrams & Manuals
RTS11 10-Inch Table Saw View Diagrams & Manuals
RTS08 Rts08 8-1/4 In. Table Saw 1-20-21 (Rev:03) View Diagrams & Manuals
RTS08T Rts08t 8-1/4 In. Table Saw 1-20-21 (Rev:03) View Diagrams & Manuals
RTS12 Rts12 10 In. Table Saw 2-24-21 (Rev:04) View Diagrams & Manuals
RTS12T Rts12t 10 In. Table Saw 2-24-21 (Rev:04) View Diagrams & Manuals
RTS23 Rts23 10 In. Table Saw 2-24-21 (Rev:04) View Diagrams & Manuals
RTS23T Rts23t 10 In. Table Saw 2-24-21 (Rev:04) View Diagrams & Manuals
Ridgid
R4516 Table Saw View Diagrams & Manuals
R4517 Table Saw 4-28-18 (Rev:02) View Diagrams & Manuals
R45171 Table Saw 7-26-18 (Rev:05) View Diagrams & Manuals
R45171NS Table Saw 5-4-18 (Rev:01) View Diagrams & Manuals
RTS10G 10 In. Tile Saw 3-8-17 (Rev:04) View Diagrams & Manuals
R45171T Table Saw View Diagrams & Manuals
Show More Compatible Models
This item works with the following types of products:
- Saw Parts
- Table Saw Parts
This part replaces obsolete part #: 089110102180 (1-28-20 (Rev:05))
Customer Part Reviews ?
Average Rating (out of 5):
Click to filter by ratings:
5 stars
1
4 stars
0
3 stars
0
2 stars
0
1 stars
0
< PREV
- 1
The parts were exactly as described, service was excellent.
The parts were individually packaged in clear plastic packaging with the description on the face. Great idea!
Michael -
September 23, 2020
Verified Purchase
t
t
t -
t days ago
Verified Purchase
eReplacementParts Team
t
Questions & Answers ?
Our customer Service team is at the ready daily to answer your part and product questions.

Ask our Team
We have a dedicated staff with decades of collective experience in helping customers just like you purchase parts to repair their products.
Does this fit my product?Questions & Answers for Lock Nut 1/4 - 20
No questions have been asked yet
Customer Repair Instructions ?
All our customer repair instructions are solicited directly from other customers just like you who have purchased and replaced this exact part.
Ryobi 10 in. Table Saw (BTS21) Rusted and Badly Abused
George - September 6, 2021
Tool Type
Table Saw
Difficulty
Medium
Time
More than 2 hours
Tools Used
Screwdriver, Pliers, Power Drill, Socket set, Adjustable Wrench, Taps, Hex Keys
Parts Used
- Cord Protector - 445338-00
- Deflector - 148520-00
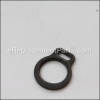
- Spring - 0101010907
- Lock Nut 1/4 - 20 - 411072702
- Washer M6.5 X 13 X 1.5t - 412012041
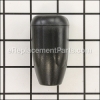
- Bevel Handle - 0131020212
- Blade Wrench - 089240020104
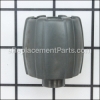
- Knob Ring - 0134010238
- Height/Bevel Adjusting Handwheel - 089240020110
- Outer Dust Cover - 0134010226
- Eccentric Screw - 089110110041
- Wrench A - 089240020103
1. Torn down to bear bones
2. Clean off years of rust by soaking in vinegar for 2 days
3. Remove busted bolts and re-tap hole 2 days (both SAE and Metric)
4. Begin re-assemble and lubricate moving parts 3 days
5. Test and align saw 1 day
Note: Only work on 1 to 3 hours per day
The saw was brought from a pawn shop
Was able to most parts from eReplacement but some parts or items are no longer
manufacture (had to make my own)
Did you find this story helpful?
Thanks for voting and helping fellow customers!
Broken blade raising assembly
Michael - February 11, 2016
👍 0 of 1 people found this instruction helpful
Tool Type
Table Saw
Difficulty
Medium
Time
15-30 minutes
Tools Used
Screwdriver, Wrench Set, center punch
Remove the old handle pin from the spindle with a center punch. Install the new handle with the center punch and pin. Then install the turning wheel onto the handle with the long screw and washer nut. Snap in the cover and you are done.
Did you find this story helpful?
Thanks for voting and helping fellow customers!
OEM stands for Original Equipment Manufacturer and means the part you’re buying is sourced directly from the manufacturer who made your product. At eReplacementParts, we sell only genuine OEM parts, guaranteeing the part you’re purchasing is of better design and of higher quality than aftermarket parts.
Our product descriptions are a combination of data sourced directly from the manufacturers who made your product as well as content researched and curated by our content & customer service teams. This content is edited and reviewed internally before being made public to customers.
Our customer service team are at the ready daily to answer your part and product questions. We have a dedicated staff with decades of collective experience in helping customers just like you purchase parts to repair their products.
All our part reviews are solicited directly from other customers who have purchased this exact part. While we moderate these reviews for profanity, offensive language or personally identifiable information, these reviews are posted exactly as submitted and no alterations are made by our team.
All our customer repair instructions are solicited directly from other customers just like you who have purchased and replaced this exact part. While we moderate these reviews for profanity, offensive language or personally identifiable information, these reviews are posted exactly as submitted and no alterations are made by our team.
Based on data from past customer purchasing behaviors, these parts are most commonly purchased together along with the part you are viewing. These parts may be necessary or helpful to replace to complete your current repair.
All our installation videos are created and produced in collaboration with our in-house repair technician, Mark Sodja, who has helped millions of eReplacementParts customers over the last 13 years repair their products. Mark has years of experience in selling and repairing both commercial and residential products with a specialty in gas-powered equipment.
This data is collected from customers who submitted a repair instruction after replacing this exact part. Customers can rate how easy the repair was to complete and how long it took. We aggregate this data to provide a repair rating that allows customers to quickly determine the difficulty and time needed to perform their own repair.