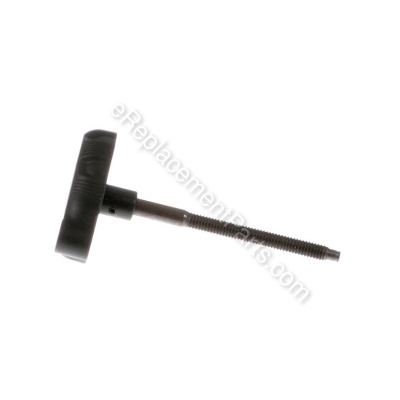
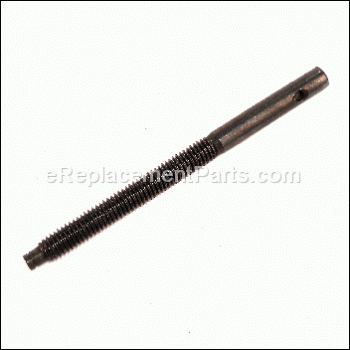


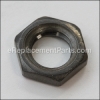
It is a genuine item that is supplied directly from the original equipment manufacturer for use with Ryobi table saws. This is an identical replacement for a missing or worn elevating shaft that was originally installed on a new unit, please make sure to refer to the appropriate diagrams of your unit for the correct location and application of this component. Keep in mind this high-quality item is made of durable metal and is sold individually.
Elevating Shaft (3/8-16 X 137 089037007042
OEM part for: Ryobi
Part Number: 089037007042
$4.99
In Stock
Jump To:
Frequently Purchased Together ?


Compatibility
This item works with the following types of products:
- Saw Parts
- Table Saw Parts
Customer Part Reviews ?
Average Rating (out of 5):
Click to filter by ratings:
5 stars
5
4 stars
0
3 stars
0
2 stars
0
1 stars
0
< PREV
- 1
Just a Advertised
I was super happy to receive this threaded shaft. I didn't realize it included the plastic handle and roll pin. Made assembly easier and faster.
Guest -
December 13, 2022
Verified Purchase
Easy fix.
Fast shipping. Exactly what I needed to fix my table saw
Guest -
May 12, 2020
Verified Purchase
Awesome customer service
What I appreciated most from my experience was the human side of business that lacks today. Great communication, understanding, and service
Guest -
April 2, 2020
Verified Purchase
great part, installed today
The part arrived earlier than expected. easy to install.
Guest -
October 22, 2019
Verified Purchase
Great part
Arrive in time for me
Guest -
July 8, 2019
Verified Purchase
t
t
t -
t days ago
Verified Purchase
eReplacementParts Team
t
Questions & Answers ?
Our customer Service team is at the ready daily to answer your part and product questions.

Ask our Team
We have a dedicated staff with decades of collective experience in helping customers just like you purchase parts to repair their products.
Does this fit my product?Questions & Answers for Elevating Shaft (3/8-16 X 137
Does this come with the knob connected to the shaft
Daniel
for model number Ryobi rts 10 s/n# xx130366072
asked on 2022-12-15
Hi Daniel,
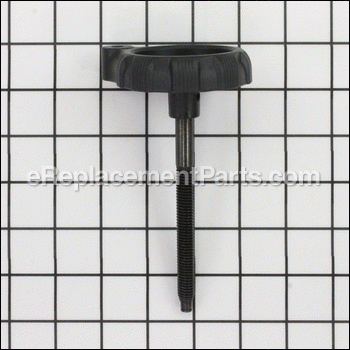
Thank you for your question. The knob or hand wheel is sold separately. The part number listed under your model number for the hand wheel is 089037007041. If you need help placing an order for it, customer service is open 7 days a week and anyone will be happy to assist you. Please feel free to give us a call. We look forward to hearing from you!
eReplacementParts Team December 15, 2022
Customer Repair Instructions ?
All our customer repair instructions are solicited directly from other customers just like you who have purchased and replaced this exact part.
Saw would not raise when height wheel turned
Ronald - November 22, 2021
👍 1 of 1 people found this instruction helpful
Tool Type
Table Saw
Difficulty
Medium
Time
30-60 minutes
Tools Used
Wrench Set, small snap ring pliers
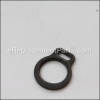
Removed old stripped block and elevating shaft. You will need a thin wrench to loosen the two nuts that hold the shaft in place. THE SHAFT IS LEFT HAND TRHEAD!! So to loosen you turn it clockwise. Also the snap ring on the end of the shaft is very small and would be easy to lose. Once the nuts are loose and the snap ring is remove it goes quite easy. Just install the new stuff in reverse order. If new shaft does no come with adjusting wheel -mine did- you will need to drive out the drive pin holding he wheel on and put it on the new shaft.
Did you find this story helpful?
Thanks for voting and helping fellow customers!
The Elevation Shaft (the bolt that raises and lowers the blade), and the Block (bolt assembly) that the elevation shaft is threaded into, and pulls and pushes on to raise and lower the blade both had
Dennis - September 25, 2018
Tool Type
Table Saw
Difficulty
Easy
Time
15-30 minutes
Tools Used
Wrench Set, Long nose pliers.
This particular repair procedure ends up being is self evident. Once you tip over your saw and put it on something that makes it easy to look at (I used saw horses), you will notice what's wrong right away. In this case, the blade not being able to be raised since the parts mentioned above were both damaged was the problem. A helpful note, which you will discover right away, is that the threads on these parts and items attached are reverse of standard- clockwise loosens and counter clockwise tightens.
A summary of what needs to be done would be:
* Tip over your saw, and notice the damaged Elevation Shaft and Block.
* Remove the Circlip on the end of the Elevation Shaft.
* Unthread the Elevation Shaft through the Block.
* Loosen the Jam Nut on the Elevation Shaft (nut closest to the circlip end the shaft).
* Unthread Elevation Shaft Retaining Nut (the nut closest to the handle that you crank to raise and lower your saw's blade) and Jam Nut together, keeping a space of a couple of threads apart so the two nuts don't keep jamming up on you when unthreading them together from the damaged Elevation Shaft.
* Remove the "direction plate" from your old Elevation Shaft crank handle, by using a flat head screw drive to work the retaining tabs free. Install your "direction plate" on your new Elevation Shaft crank handle. The tabs may be difficult to release. If they break, no worries- the direction plate fits super tight anyway, so there really is no need for the tabs (you'll see for yourself if a tab or two breaks when removing from the old shaft).
* Install in reverse order.
Hope this helps. Happy repairing.
Did you find this story helpful?
Thanks for voting and helping fellow customers!
OEM stands for Original Equipment Manufacturer and means the part you’re buying is sourced directly from the manufacturer who made your product. At eReplacementParts, we sell only genuine OEM parts, guaranteeing the part you’re purchasing is of better design and of higher quality than aftermarket parts.
Our product descriptions are a combination of data sourced directly from the manufacturers who made your product as well as content researched and curated by our content & customer service teams. This content is edited and reviewed internally before being made public to customers.
Our customer service team are at the ready daily to answer your part and product questions. We have a dedicated staff with decades of collective experience in helping customers just like you purchase parts to repair their products.
All our part reviews are solicited directly from other customers who have purchased this exact part. While we moderate these reviews for profanity, offensive language or personally identifiable information, these reviews are posted exactly as submitted and no alterations are made by our team.
All our customer repair instructions are solicited directly from other customers just like you who have purchased and replaced this exact part. While we moderate these reviews for profanity, offensive language or personally identifiable information, these reviews are posted exactly as submitted and no alterations are made by our team.
Based on data from past customer purchasing behaviors, these parts are most commonly purchased together along with the part you are viewing. These parts may be necessary or helpful to replace to complete your current repair.
All our installation videos are created and produced in collaboration with our in-house repair technician, Mark Sodja, who has helped millions of eReplacementParts customers over the last 13 years repair their products. Mark has years of experience in selling and repairing both commercial and residential products with a specialty in gas-powered equipment.
This data is collected from customers who submitted a repair instruction after replacing this exact part. Customers can rate how easy the repair was to complete and how long it took. We aggregate this data to provide a repair rating that allows customers to quickly determine the difficulty and time needed to perform their own repair.