

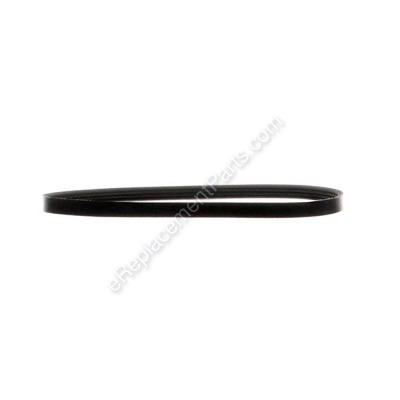


This belt is a genuine Troy-Bilt replacement part, it is not an aftermarket alternative. It is a high quality item designed for use with edgers. This is the main belt that drives the blade. Over time belts tend to wear out and stretch eventually requiring replacement. Please note, one rubber belt is included per order. To complete this repair you will need a set of wrenches. Always clean the pulleys before installing the new belt.
Belt 754-04149
OEM part for: Troy-Bilt, MTD
Part Number: 754-04149
$31.56
In Stock
Jump To:
Frequently Purchased Together ?

Compatibility
This part will fit the following 15 machines
Troy-Bilt
25A-515-966 (TBE515) (2007) Edger View Diagrams & Manuals
25B-515-966 (TBE515) (2008) Edger View Diagrams & Manuals
TBE515 (2009) Gas Edger View Diagrams & Manuals
TB515EC (25C-515-966)(2010) Edger View Diagrams & Manuals
25B-515-966 (TBE515)(2009) Edger View Diagrams & Manuals
TB516EC (25A-516-766)(2012) Edger View Diagrams & Manuals
TB516EC (25A-516-966) Edger View Diagrams & Manuals
TB516EC (25B-516-766)(2018) Edger View Diagrams & Manuals
TBE304 (25A-304-766) Edger View Diagrams & Manuals
25B-304-766 (TBE304) Edger View Diagrams & Manuals
25B-516-766 (TB516EC)(2018) Edger View Diagrams & Manuals
25C-515-966 (TB515EC)(2010) Edger View Diagrams & Manuals
MTD
25A-515-799 (316.772370)(2008) Edger View Diagrams & Manuals
25B-515-799 (316.77238)(2010) Edger View Diagrams & Manuals
25A-516-799 (316.773800)(2011) Edger View Diagrams & Manuals
Show More Compatible Models
This item works with the following types of products:
- Edger Parts
This part replaces obsolete part #: 753-05560
Customer Part Reviews ?
Average Rating (out of 5):
Click to filter by ratings:
5 stars
6
4 stars
0
3 stars
0
2 stars
0
1 stars
0
< PREV
- 1
The part was correct, installed and is working excellent as brand new.
The part was correct, installed and is working excellent as brand new.
Guest -
October 19, 2023
Verified Purchase
perfect fit.
tough part. looks like it'll last quite some time.
Guest -
July 5, 2023
Verified Purchase
Great part
My edger works better than when it was new
Guest -
September 3, 2021
Verified Purchase
It fit perfectly
Fit perfect arrived in time
Guest -
August 16, 2021
Verified Purchase
Easy to find
Order was easy, delivery was prompt. Part were correct and work great. Only downer was I discovered manufacturer did not originally assemble the product correctly causing the issue. Product work great now.
Guest -
June 23, 2020
Verified Purchase
worked as expected
A little more difficult to replace than expected, some disassembly but in all not hard to replace.
Guest -
June 13, 2019
Verified Purchase
t
t
t -
t days ago
Verified Purchase
eReplacementParts Team
t
Questions & Answers ?
Our customer Service team is at the ready daily to answer your part and product questions.

Ask our Team
We have a dedicated staff with decades of collective experience in helping customers just like you purchase parts to repair their products.
Does this fit my product?Questions & Answers for Belt
No questions have been asked yet
Customer Repair Instructions ?
All our customer repair instructions are solicited directly from other customers just like you who have purchased and replaced this exact part.
Belt and pulley melted due to being under powered during heavy use. Troy bilt TB516EC
Mark - November 10, 2016
👍 3 of 3 people found this instruction helpful
Tool Type
Edger
Difficulty
Easy
Time
15-30 minutes
Tools Used
Socket set, Wrench Set, Nutdriver, Torx and Allen Wrench
Parts Used
1. Remove Belt cover #45
2. Remove nut securing blade. #43
3. Remove blade. #42
4. Remove Blade Guard. #40
5. Remove driven assembly secured by three torx screws thru plastic housing. #26
Now with the belt pulley assembly has been separated from the unit remove the 6mm
bolt securing the pulley to the shaft. #32 This bolt will be difficult to turn as it is secured with Loctite.
6.Remove pulley from shaft.
Reverse procedure to reassemble don't forget the Blue Loctite on the pulley securing bolt and keeping in mind to fit the belt over the pulley and drive pulley on assembly first, and also The Idler pulley will need to be depressed while lining up the spindle plate to the spindle spacer.
Did you find this story helpful?
Thanks for voting and helping fellow customers!
Edger drive belt was worn after 10-12 years
Kenneth - June 25, 2023
Tool Type
Edger
Difficulty
Easy
Time
Less than 15 minutes
Tools Used
Socket set, Wrench Set, Torx screwdriver
Parts Used
1. Removed edger blade
2 removed blade collar
3 removed safety shield
4 replaced belt
5 reinstalled in reverse order
2 removed blade collar
3 removed safety shield
4 replaced belt
5 reinstalled in reverse order
Did you find this story helpful?
Thanks for voting and helping fellow customers!
belt and pulley burnt up
Boyd - August 22, 2020
Tool Type
Edger
Difficulty
Easy
Time
30-60 minutes
Tools Used
Screwdriver, Socket set
Parts Used
took apart and replaced
Did you find this story helpful?
Thanks for voting and helping fellow customers!
pulley melted
Mort - May 30, 2019
Tool Type
Edger
Difficulty
Easy
Time
15-30 minutes
Tools Used
Wrench Set, torx bit and driver
Parts Used
disassembled replaced pulley and belt, reassembled. Easy
Did you find this story helpful?
Thanks for voting and helping fellow customers!
The engine ran but the cutting blade did not.
Jose - October 13, 2016
Tool Type
Edger
Difficulty
Medium
Time
30-60 minutes
Tools Used
Screwdriver, Socket set, Wrench Set
Parts Used
1. Remove the cover plates to the belt and the pully.
2. Removed the bolt holding the pully.
3. Replaced worn pully and installed new pully.
4. Removed old belt and replace with new belt.
5. Replace all cover plates.
No special instructions needed work was straight forward and simple.
2. Removed the bolt holding the pully.
3. Replaced worn pully and installed new pully.
4. Removed old belt and replace with new belt.
5. Replace all cover plates.
No special instructions needed work was straight forward and simple.
Did you find this story helpful?
Thanks for voting and helping fellow customers!
Pulley and belt broke.
Pete - October 3, 2017
👍 0 of 1 people found this instruction helpful
Tool Type
Edger
Difficulty
Medium
Time
15-30 minutes
Tools Used
Power Drill, Socket set, Nutdriver
Parts Used
1. Remove screws for housing.
2. Take photos to know where they went.
3. Take photos before removing damaged parts.
4. Replace new parts place belt back from photos.
5. Remove all dirt and damaged parts.
6. Replace screws.
2. Take photos to know where they went.
3. Take photos before removing damaged parts.
4. Replace new parts place belt back from photos.
5. Remove all dirt and damaged parts.
6. Replace screws.
Did you find this story helpful?
Thanks for voting and helping fellow customers!
Plastic pulley melted belt
james - May 2, 2016
👍 0 of 1 people found this instruction helpful
Tool Type
Edger
Difficulty
Medium
Time
15-30 minutes
Tools Used
Adjustable Wrench, allen wrench
Parts Used
Removed belt cover , removed pulley and belt, cleaned out area and cover. Installed parts. Everything went fine and the parts were the correct pieces needed. Back to work I go...... and I must say I was worried about delivery time 5-7 days. The order was here in 2 days good job team e-replacement
Did you find this story helpful?
Thanks for voting and helping fellow customers!
OEM stands for Original Equipment Manufacturer and means the part you’re buying is sourced directly from the manufacturer who made your product. At eReplacementParts, we sell only genuine OEM parts, guaranteeing the part you’re purchasing is of better design and of higher quality than aftermarket parts.
Our product descriptions are a combination of data sourced directly from the manufacturers who made your product as well as content researched and curated by our content & customer service teams. This content is edited and reviewed internally before being made public to customers.
Our customer service team are at the ready daily to answer your part and product questions. We have a dedicated staff with decades of collective experience in helping customers just like you purchase parts to repair their products.
All our part reviews are solicited directly from other customers who have purchased this exact part. While we moderate these reviews for profanity, offensive language or personally identifiable information, these reviews are posted exactly as submitted and no alterations are made by our team.
All our customer repair instructions are solicited directly from other customers just like you who have purchased and replaced this exact part. While we moderate these reviews for profanity, offensive language or personally identifiable information, these reviews are posted exactly as submitted and no alterations are made by our team.
Based on data from past customer purchasing behaviors, these parts are most commonly purchased together along with the part you are viewing. These parts may be necessary or helpful to replace to complete your current repair.
All our installation videos are created and produced in collaboration with our in-house repair technician, Mark Sodja, who has helped millions of eReplacementParts customers over the last 13 years repair their products. Mark has years of experience in selling and repairing both commercial and residential products with a specialty in gas-powered equipment.
This data is collected from customers who submitted a repair instruction after replacing this exact part. Customers can rate how easy the repair was to complete and how long it took. We aggregate this data to provide a repair rating that allows customers to quickly determine the difficulty and time needed to perform their own repair.