eReplacementParts.com
877-346-4815
Makita Parts
Repair Parts Home  Power Tool Parts  Makita Parts  211031-6 Ball Bearing

Install
Videos!
Ball Bearing - 211031-6:Makita 360 View
Ball Bearing - 211031-6:MakitaBall Bearing - 211031-6:MakitaBall Bearing - 211031-6:MakitaBall Bearing - 211031-6:MakitaBall Bearing - 211031-6:MakitaBall Bearing - 211031-6:Makita 360 ViewBall Bearing - 211031-6:Makita

Ball Bearing 211031-6

Part Number: 211031-6
Makita
Availability: In Stock
Price: $14.54
Order within the next 13 hours
and your part ships today!

*This part replaces obsolete part #: 211033-2, 210029-0, 211032-4 and 11032-4B.

Product Information
Description:
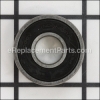
Included in Part Number 516306-1.
rnThis Ball Bearing is sealed on both sides. This genuine Makita replacement part is sold individually.

rnrn
  • Ball bearings minimize friction between rotating parts in your tool. The balls or rollers bear the load and spin, distributing the weight evenly, while the minimal contact area of the balls reduces friction. This reduces wear on the tool, allowing it to run smoothly.
    rn
  • Bearings experience constant wear when the tool is in operation from pressure, heat, vibration and friction. Because of this, many Bearings need periodic maintenance or replacement.
  • Frequently Purchased With
    Compatibility

    This part is compatible with the following machines:

    Makita
    Expand the 150+ compatible machines
    Products Compatibility

    This item works with the following types of products:

    • • Band Saw
    • • Blower
    • • Chain Saw
    • • Circular Saw
    • • Cordless Drill
    • • Demolition Hammer
    • • Drill
    • • Electric Drill
    • • Grinder
    • • Hammer Drill
    • • Impact Driver
    • • Impact Wrench
    • • Jig saw
    • • Miter Saw
    • • Nibbler
    • • Planer
    • • Polisher
    • • Reciprocating Saw
    • • Rotary Hammer
    • • Router
    • • Sander
    • • Saw
    • • Screwdriver
    • • Shear
    Expand List
    Repair Guides
    Watch the Repair Video for Ball Bearing
    Articles:
    Step-by-step instructions for removing and installing the armature bearing on your Makita grinder....
    April 16, 2018
    Step-by-step instructions for removing and installing the armature bearing on your Makita power scraper....
    July 02, 2018

    Questions & Answers for Ball Bearing


    No questions have been asked yet
    Repair Instructions: Submitted by Customers Like You
    Tool Type:
    Circular Saw
    Parts Used:
    Ball Bearing - 211031-6
    Shoe Base - 163378-3
    Repair Difficulty:
    Expert
    Time Spent Repairing:
    30-60 minutes
    Tools Used:
    Screwdriver, Pliers, Socket set, Wrench Set, Adjustable Wrench, Vise
    Either it was the wrong size or there were multiple bearings as this one was smaller than the one I could see so I left the old one in there.
    Replacing the shoe base wasn’t too difficult but the trick is to remove the licking arm the holds the adjusting nut in place. It is done easily with a Phillips screwdriver but it is not obvious that it needs to be removed first.
    Did you find this story helpful?
    Thanks for voting and helping fellow customers!
    Tool Type:
    Grinder
    Parts Used:
    Ball Bearing - 211031-6
    Carbon Brush Set - CB303
    Repair Difficulty:
    Medium
    Time Spent Repairing:
    15-30 minutes
    Tools Used:
    Screwdriver, small vise, spray cleaner and small piece of 600grit paper
    rear commutator bearing wore out and brushes wore unevenly loosing power
    1. Took apart black and decker 9 amp grinder.. took pics with phone for trigger button and hold down pin. Also taking notes of length screws and where.
    2. Gently separated handle (2 pieces). Took more pics. Analysed damage. Removed brushes by removing black flat caps, lifted torsional spring and lifter them out. Also spray cleaned the insides and all vents wiping everything clean from grit and whatever that black stuff is..
    3. Slid out motor, brake cleaned off dust and grim. 600 grit sand paper on brush area very lightly to clean. Removed old bearing with vise by gently twisting it off.
    4. Added the rubber ribbed boot then bearing on motor assembly.
    5. Slid motor assembly back in making sure bearing-boot assembly was completely inside its support.
    6. Raised each torsional spring sliding the brush in with wire facing the slotted end to float freely. Then let the spring down on top of the brush.. then the black plastic protective cap on the brush assembly.
    7. The trigger lever and locking button was tricky. The black push lock button goes in one of 2 ways. Most I would imagine would be similar such that placing it in the handle first, it should point strain up in alignment with trigger. The trigger fits in the one side with the black push button..which needs to be put in its place before securing it fully it on the motor assembly. Make sure the black plastic cap did not fall off in the process as it can (and dislodge preventing the 2 halves coming together tightly..do not force..it should slowly come together with gentle persuasion).
    8. Making sure no wires where hanging loose and in their proper places and clearance slots.. move trigger switch into position into the handle half you have with the trigger.. Holding switch in place, check trigger operation for the on off clicking, then the black lock button that holds the trigger on-in..
    9. Gently lower top half on..making sure the trigger pin pivot fits inside that half properly and with the switch still in its position. Also double checking no wires came loose and may be hanging outside the interior and may get caught up in the 2 halves coming together.
    10. Screw back together and check trigger operation again. Pat yourself on your back..
    11. Optional. Check grinder head pinion gear bearing.. Mine was good, I scrapped off the old grease and added high speed bearing gear grease to the pinion and crown gears in the head of the grinder..(4 screws from the top)..
    12. Testing. It will take a few minutes for the brushes to set properly imo. Also, until the bearing grease in the head moves a bit, there will be a lot of drag. It goes away after a few seconds or so. fresh everthing. Grinder worked like brand new! Thanks eReplacementparts.com!!
    Did you find this story helpful?
    Thanks for voting and helping fellow customers!
    Tool Type:
    Planer
    Parts Used:
    Ball Bearing - 211097-6
    Ball Bearing - 211031-6
    Insulation Washer - 681614-0
    Ball Bearing - 210025-8
    Power Cord (8-foot) - 664064-4
    Repair Difficulty:
    Easy
    Time Spent Repairing:
    1-2 hours
    Tools Used:
    Screwdriver, Socket set, Nutdriver, bearing puller
    bearings froze up
    removed old bearings
    installed new bearings
    installed new power cord
    installed new blades
    Did you find this story helpful?
    Thanks for voting and helping fellow customers!
    Tool Type:
    Sander
    Parts Used:
    Ball Bearing - 211031-6
    Edge Slider - 155873-7
    Pulley 10-22.1 (l) - 222121-0
    Fan 70 - 241833-6
    Repair Difficulty:
    Medium
    Time Spent Repairing:
    15-30 minutes
    Tools Used:
    Screwdriver, Pliers, Socket set
    the bearing locked up ,when removing the bearing broke the fan, had replace it
    REMOVED THE BEARING AND REPLACED, AND THE SLIDER IT WAS WORE
    Did you find this story helpful?
    Thanks for voting and helping fellow customers!
    Tool Type:
    Hammer Drill
    Parts Used:
    Ball Bearing - 211031-6
    Ball Bearing - 211201-7
    Ball Bearing - 210025-8
    Carbon Brush Set - CB407
    Repair Difficulty:
    Easy
    Time Spent Repairing:
    15-30 minutes
    Tools Used:
    Screwdriver, Pliers, Bearing puller, ball joint press, bench vise
    The carbon brushes and one of the bearing was spent (almost 15 years of use) and just decided to replace the other two
    Did you find this story helpful?
    Thanks for voting and helping fellow customers!
    1 of 2 people found this instruction helpful
    Tool Type:
    Polisher
    Parts Used:
    Ball Bearing - 211106-1
    Ball Bearing - 211031-6
    Carbon Brush Set - CB303
    Repair Difficulty:
    Easy
    Time Spent Repairing:
    30-60 minutes
    Tools Used:
    Screwdriver, Power Drill, Nutdriver
    Bearings worn on 2 polishers-Makita plus brushes worn.
    Remove both the head and open the handle, take brushes out then slide armature out and use a bearing puller to remove bearings and tap new ones on using a deep well socket the same size if the inner race of the bearing and a rubber mallet to drive on. Then put in new brushes and close the tool up..
    Did you find this story helpful?
    Thanks for voting and helping fellow customers!
    Reviews
    4.5
    Average Rating (out of 5):
    2 Reviews
    Click to filter by ratings:
    5 stars
    1
    4 stars
    1
    3 stars
    0
    2 stars
    0
    1 stars
    0
    • Highest Rating
    • Most Recent
    < PREV
    • 1
    NEXT >
  • Difficult repair
    Part worked fine once installed
    Guest - 4 days ago Verified Purchase
    OEM parts that showed up when predicted.
    The parts diagrahm makes it easy to order the correct parts. The parts came in the designated time.
    John - September 1, 2023 Verified Purchase
    Verified Purchase
    eReplacementParts Team
    • Highest Rating
    • Most Recent
    < PREV
    • 1
    NEXT >
    Product Information
    Repair Guides
    Watch the Repair Video for Ball Bearing
    Articles:
    Step-by-step instructions for removing and installing the armature bearing on your Makita grinder....
    April 16, 2018
    Step-by-step instructions for removing and installing the armature bearing on your Makita power scraper....
    July 02, 2018
    eReplacementParts.com
    7174 South 400 West
    Suite 5
    Midvale, UT 84047
    visa mastercard discover american express PayPal