eReplacementParts.com
877-346-4814
Briggs and Stratton Parts

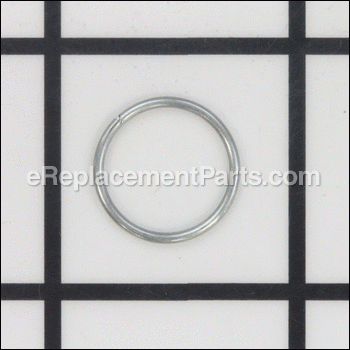
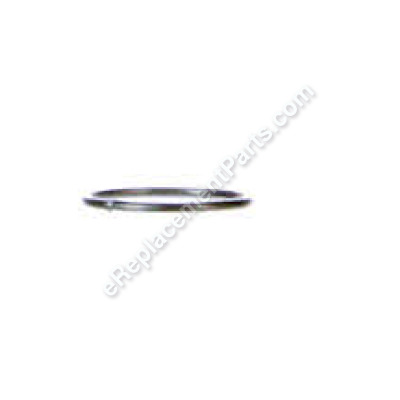
Spring-friction 691855

OEM part for: Briggs and Stratton, Toro, Lawn Boy, Vanguard - Briggs & Stratton

Part Number: 691855


Install
Videos!
Spring-friction - 691855:Briggs and Stratton 360 View
Spring-friction - 691855:Briggs and StrattonSpring-friction - 691855:Briggs and StrattonSpring-friction - 691855:Briggs and Stratton 360 View
In Stock
Order within the next 12 hours and your part ships today!
Medium 30-60 minutes (6 rated repairs)?
OEM: Original Equipment Manufacturer ?
Briggs and StrattonToroLawn BoyVanguard - Briggs & Stratton
Does this fit my product?

Product Description ?

  • Classification: Part
  • Weight: 0.01 lbs.
  • Shipping: Ships Worldwide

Compatibility

This Spring-friction will fit the following 20264 machines. Confirm this part works with your model, and view the detailed model diagrams and repair help we have to offer.

Briggs and Stratton

Toro

Lawn Boy

Vanguard - Briggs & Stratton

Show More Compatible Models
Don't see yours? Try searching our site for :

This item works with the following types of products:

  • Engine Parts
  • Generator Parts
  • Snowblower Parts
  • Lawn Mower Parts

This part replaces obsolete part #: 557057, 263073

Customer Part Reviews ?

5
Average Rating (out of 5):
2 Reviews
Click to filter by ratings:
5 stars
2
4 stars
0
3 stars
0
2 stars
0
1 stars
0
  • Highest Rating
  • Most Recent
< PREV
  • 1
NEXT >
  • Great parts
    Great exact part and shipped and delivered quickly
    Guest - July 12, 2023 Verified Purchase
    Correct part
    It’s a clip ring. What’s to say
    Guest - April 8, 2021 Verified Purchase

    Questions & Answers ?

    Our customer Service team is at the ready daily to answer your part and product questions.

    photo of team member
    Ask our Team

    We have a dedicated staff with decades of collective experience in helping customers just like you purchase parts to repair their products.

    Does this fit my product?

    Questions & Answers for Spring-friction


    No questions have been asked yet

    Customer Repair Instructions ?

    All our customer repair instructions are solicited directly from other customers just like you who have purchased and replaced this exact part.

    Medium 30-60 minutes (6 rated repairs)?

    Lawn mower rope broke and coil spring loop had become undone and twisted.

    Alfonso - April 27, 2018
    👍 1 of 1 people found this instruction helpful
    Tool Type

    Lawn Mower

    Difficulty

    Medium

    Time

    30-60 minutes

    Tools Used

    Screwdriver, Pliers, Nutdriver, two pair of needle nose pliers.

    Remove the engine shroud and then remove three bolts holding the gas down. Loosen another bolt left rear & down of the gas tank and you can tilt the gas tank back w/o removing it completely. Then remove another bolt holding the oil fill tube, pull up slightly and turn to the side so that it clears the engine cover. Remove 4 bolts holding the engine cover/pulley spring assembly and lift it up slowly(make sure you recall how it is mounted over some engine flanges). Remove a bolt holding down the Pawl friction plate over the pulley spring assembly and lift up on the assembly carefully as it contains the recoil starter spring. I then discovered that my new pulley spring assembly had the anchoring loop (the one that anchors on the center tab of the engine cover) looping to the right. My original spring looped to the left. I then had to use two needle nose pliers to carefully grab the spring loop and bend it around to the left making a new anchoring loop. This was very time consuming as you have to be careful of the spring not uncoiling. Once you done the new loop, bent the spring loop towards the center of the coiled spring so that it can catch on the center tab of the engine cover. Once you insert the pulley spring assembly, turn it counter clockwise until tight and then turn it back one turn to release some tension. You have to stick a small screwdriver in-between the pulley assembly and one of the slots in the engine cover to keep the spring from uncoiling. You them align the rope hole in the pulley with the rope hole in the engine cover and insert the new rope, grab it with needle nose and pull it, giving you some slack to tie the knot. You can now release the rope slowly (make sure you have the pull rope handle attached to the other end of rope) until the rope winds completely. You now attach cover back onto engine, making sure it fits correcting onto its location. You can now reattach all other parts in reverse of how you took them off. If you have a digital camera or phone, take pictures before or as you unassemble the engine, so you can remember what goes where.
    Did you find this story helpful?
    Thanks for voting and helping fellow customers!

    All rope starter parts were missing.

    Elston - March 5, 2024
    Pretty easy and straightforward to fix, especially if you took the old one apart. Mine had all the parts missing. I wish they were metal or tougher parts. They wear out break to easily in my opinion. The rewind spring was the hardest part to get right. There are good YouTube videos that show how though.
    You can do it! Lol
    Did you find this story helpful?
    Thanks for voting and helping fellow customers!

    bad friction wheel

    Myron - September 7, 2023
    Tool Type

    Snowblower

    Difficulty

    Medium

    Time

    1-2 hours

    Tools Used

    Pliers, Socket set, Wrench Set

    removed bad friction wheel replaced with new
    Did you find this story helpful?
    Thanks for voting and helping fellow customers!

    It appears that the two ratchet pawls had some wear on them. Trying to start the pressure washer would act as if the rope broke.

    stephen - April 11, 2021
    Tool Type

    Engine

    Difficulty

    Medium

    Time

    30-60 minutes

    Tools Used

    Screwdriver, Pliers, Socket set

    1. Removed all the extra sheetmetal from the top end of the engine. (2) Removed the rope and spring assy and examined the pawl and pawl plate.The rope was not broken so I placed the new pawls and the pawl plate and also the new "C" ring. (3) replaced the spring assembly and readjusted the rope and fired it up. Starts and runs like it used to. I have to say what made this job an easier job then I thought it would be, was reading a ton of the trouble reviews so that I already had some idea what to expect. This was the first time I did this kind of repair.
    Did you find this story helpful?
    Thanks for voting and helping fellow customers!

    Pawl friction plate and friction spring dislodged and and got crushed.

    David - June 17, 2017
    Tool Type

    Lawn Mower

    Difficulty

    Easy

    Time

    Less than 15 minutes

    Tools Used

    Screwdriver, Socket set, Vise Gripes

    1. Removed the starter housing.
    2. Removed the broken parts.
    3. Pulled the starter rope to its fullest extent locking it in place with vise gripes.
    4. Reinstalled the starter housing on the mower and released the vise grips to allow the rope to retract.
    5. One pull on the starter rope and it started on the first pull.
    Did you find this story helpful?
    Thanks for voting and helping fellow customers!

    The starter rope was not retracting

    Ashley - June 9, 2016
    Tool Type

    Lawn Mower

    Difficulty

    Medium

    Time

    15-30 minutes

    Tools Used

    Screwdriver, Pliers

    What I did was adjust the hook that attached to the little piece of metal in the blower housing. Then turned the recoil counter clockwise 6 times till you feel tension. Then bolt back on the housing.
    Did you find this story helpful?
    Thanks for voting and helping fellow customers!

    OEM stands for Original Equipment Manufacturer and means the part you’re buying is sourced directly from the manufacturer who made your product. At eReplacementParts, we sell only genuine OEM parts, guaranteeing the part you’re purchasing is of better design and of higher quality than aftermarket parts.

    Our product descriptions are a combination of data sourced directly from the manufacturers who made your product as well as content researched and curated by our content & customer service teams. This content is edited and reviewed internally before being made public to customers.

    Our customer service team are at the ready daily to answer your part and product questions. We have a dedicated staff with decades of collective experience in helping customers just like you purchase parts to repair their products.

    All our part reviews are solicited directly from other customers who have purchased this exact part. While we moderate these reviews for profanity, offensive language or personally identifiable information, these reviews are posted exactly as submitted and no alterations are made by our team.

    All our customer repair instructions are solicited directly from other customers just like you who have purchased and replaced this exact part. While we moderate these reviews for profanity, offensive language or personally identifiable information, these reviews are posted exactly as submitted and no alterations are made by our team.

    Based on data from past customer purchasing behaviors, these parts are most commonly purchased together along with the part you are viewing. These parts may be necessary or helpful to replace to complete your current repair.

    All our installation videos are created and produced in collaboration with our in-house repair technician, Mark Sodja, who has helped millions of eReplacementParts customers over the last 13 years repair their products. Mark has years of experience in selling and repairing both commercial and residential products with a specialty in gas-powered equipment.

    This data is collected from customers who submitted a repair instruction after replacing this exact part. Customers can rate how easy the repair was to complete and how long it took. We aggregate this data to provide a repair rating that allows customers to quickly determine the difficulty and time needed to perform their own repair.

    eReplacementParts.com
    7174 South 400 West
    Suite 5
    Midvale, UT 84047
    visa mastercard discover american express PayPal