
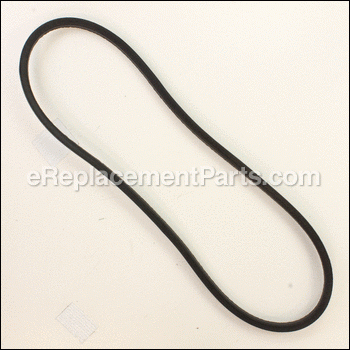


This is a Genuine Manufacturer Approved replacement Belt used on Murray Lawn Tractors. This part is made out of Rubber and it is Sold Individually. This is the the Smaller Belt that drives Blades on your unit.
Clean pulleys before installing the new belt to ensure top performance and longevity with your new belt. Inspect belt periodically and replace it when worn or stretched to maintain peak performance.
You would need a Wrench set and Pliers to replace this belt.
• For your safety make sure to disconnect the spark plug wire.
• Fist you would need to lower the mower deck to the lowest position
• Then move the blade engagement lever to the Off position.
• Roll the belt off the engine pulley from between the belt guide and pulley.
• Remove mower deck by removing the bow-tie pins securing the left and right lift arms
• Disconnect the blade engagement cable from the mower deck
• Remove the bolts from the mower deck belt pulley covers and pull the covers off.
• Loosen but don’t remove the nuts on the top of the idler pulleys.
• Install the new mower deck belt through the belt guides and around the pulleys.
• Tighten the nuts on the top of the idler pulleys.
• Re-Assemble the Deck
Belt-secondary 47.10 37X66MA
OEM part for: Murray
Part Number: 37X66MA
Jump To:
Product Description ?
- Classification: Part
- Weight: 0.34 lbs.
- Shipping: Ships Worldwide
Frequently Purchased Together ?


Compatibility
This Belt-secondary 47.10 will fit the following 249 machines. Confirm this part works with your model, and view the detailed model diagrams and repair help we have to offer.
Murray
Show More Compatible ModelsThis item works with the following types of products:
- Lawn Tractor Parts
This part replaces obsolete part #: 37X66, 037X66MA, 720404
Customer Part Reviews ?
- 1
Questions & Answers ?
Our customer Service team is at the ready daily to answer your part and product questions.

Ask our Team
We have a dedicated staff with decades of collective experience in helping customers just like you purchase parts to repair their products.
Does this fit my product?Questions & Answers for Belt-secondary 47.10
Customer Repair Instructions ?
All our customer repair instructions are solicited directly from other customers just like you who have purchased and replaced this exact part.
Secondary belt broke.
Tool Type
Lawn Tractor
Difficulty
Hard
Time
1-2 hours
Tools Used
Socket set, Wrench Set, Nutdriver
Parts Used
Next time.
Replace all belts since the main belt has to be removed anyway.
Old tractor, pulleys just worn out and belts needed replacing
Tool Type
Lawn Tractor
Difficulty
Medium
Time
30-60 minutes
Tools Used
Screwdriver, Pliers, Socket set, Wrench Set
One of the deck belts was cracked to the point of needing replacement and the drive belt idler pulley tension spring was broken.
Tool Type
Lawn Tractor
Difficulty
Medium
Time
1-2 hours
Tools Used
Socket set, Wrench Set
This is more or less how it went:
I removed the mower deck, marking the various arms and mounting pins so I knew where everything when. I dragged the deck away from the tractor, cleaned it thoroughly, primed the bad spots, and repainted the deck with matching paint. I masked all of the decals so they still looked sharp when I pulled off the tape.
I replaced the secondary drive belt and the primary belt. Once it was roughly in place, I fooled around with the spring until I found a place that would hold it under tension and seemed far enough to stretch it.
I hooked one end to the bracket and using a tool I made of a thick piece of wood and a piece of 550 cord, I stretched the spring until I could hook the other end. (Be careful not to aim the spring at your head in the event it comes loose.) I had no problem slipping the 550 cord from behind the spring.
I double checked the operation of the spring and pushed the deck back under the tractor and placed the drive belt around the drive pulley. As I had marked the deck supporting locations, I had no trouble putting it back on the tractor.
Once the deck was back under the tractor, I leveled it while it was parked on my driveway.
I think removing the deck was the simplest thing to do; I might have been able to do everything with the deck on the tractor (I don't know) but this way everything was free and clear and I could repaint the rusty spots.
Our belts were cracked and breaking
Tool Type
Lawn Tractor
Difficulty
Medium
Time
1-2 hours
Tools Used
Screwdriver, Socket set, Wrench Set
Take a picture of the belt routing and install the belts
Then install the primary belt above the chassis
Replace the deck
OEM stands for Original Equipment Manufacturer and means the part you’re buying is sourced directly from the manufacturer who made your product. At eReplacementParts, we sell only genuine OEM parts, guaranteeing the part you’re purchasing is of better design and of higher quality than aftermarket parts.
Our product descriptions are a combination of data sourced directly from the manufacturers who made your product as well as content researched and curated by our content & customer service teams. This content is edited and reviewed internally before being made public to customers.
Our customer service team are at the ready daily to answer your part and product questions. We have a dedicated staff with decades of collective experience in helping customers just like you purchase parts to repair their products.
All our part reviews are solicited directly from other customers who have purchased this exact part. While we moderate these reviews for profanity, offensive language or personally identifiable information, these reviews are posted exactly as submitted and no alterations are made by our team.
All our customer repair instructions are solicited directly from other customers just like you who have purchased and replaced this exact part. While we moderate these reviews for profanity, offensive language or personally identifiable information, these reviews are posted exactly as submitted and no alterations are made by our team.
Based on data from past customer purchasing behaviors, these parts are most commonly purchased together along with the part you are viewing. These parts may be necessary or helpful to replace to complete your current repair.
All our installation videos are created and produced in collaboration with our in-house repair technician, Mark Sodja, who has helped millions of eReplacementParts customers over the last 13 years repair their products. Mark has years of experience in selling and repairing both commercial and residential products with a specialty in gas-powered equipment.
This data is collected from customers who submitted a repair instruction after replacing this exact part. Customers can rate how easy the repair was to complete and how long it took. We aggregate this data to provide a repair rating that allows customers to quickly determine the difficulty and time needed to perform their own repair.