
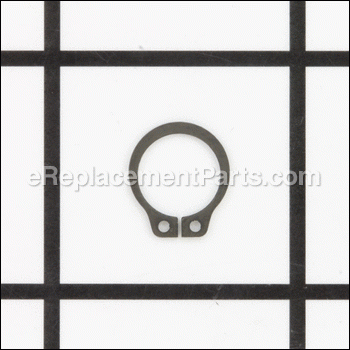
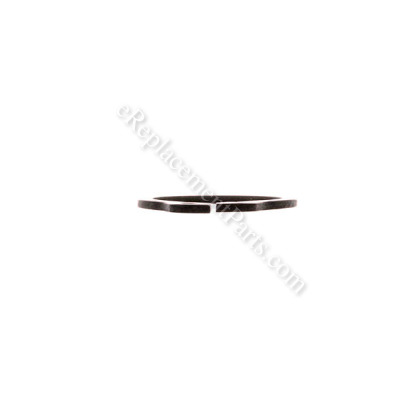


This is an authentic replacement part manufactured for use with Poulan chainsaws. The ring retainer is commonly used to secure the sprocket to the gear drive. This ring retainer is sold as an individual replacement part, please see model diagram for associative parts.
Ring-retainer 530042090
OEM part for: Poulan
Part Number: 530042090
$4.99
In Stock
Compatibility
This part will fit the following 9 machines
Poulan
ES300 Electric Chain Saw View Diagrams & Manuals
ES350 Electric Chain Saw View Diagrams & Manuals
ES350WT Electric Chain Saw View Diagrams & Manuals
400E Pro Electric Chainsaw View Diagrams & Manuals
400EX Pro Electric Chainsaw View Diagrams & Manuals
ES400 Electric Saw View Diagrams & Manuals
PP300E Electric Chainsaw View Diagrams & Manuals
PP 400 E Chainsaw Electric View Diagrams & Manuals
PP 400 EX Chainsaw Electric View Diagrams & Manuals
Show More Compatible Models
This item works with the following types of products:
- Chain Saw Parts
- Saw Parts
Questions & Answers ?
Our customer Service team is at the ready daily to answer your part and product questions.

Ask our Team
We have a dedicated staff with decades of collective experience in helping customers just like you purchase parts to repair their products.
Does this fit my product?Questions & Answers for Ring-retainer
No questions have been asked yet
Customer Repair Instructions ?
All our customer repair instructions are solicited directly from other customers just like you who have purchased and replaced this exact part.
Gear drive on this electric chainsaw is plastic. Easy to strip out if you work it hard. This is the second time I’ve had to fix it in 10 years. This Poulan saw is otherwise a good saw.
David - January 14, 2022
Tool Type
Chain Saw
Difficulty
Easy
Time
15-30 minutes
Tools Used
Socket set, Stardriver
Parts Used
1. Removed bar and chain
2. Removed chain sprocket by removing the ring retainer.
3. Removed all screws holding the casing together and pulled casing apart.
4. Pulled old gear drive out.
5. Slipped new gear drive in.
6. Reassemble casing
7. Installed new chain sprocket and retainer ring.
8. Reinstalled bar and chain.
2. Removed chain sprocket by removing the ring retainer.
3. Removed all screws holding the casing together and pulled casing apart.
4. Pulled old gear drive out.
5. Slipped new gear drive in.
6. Reassemble casing
7. Installed new chain sprocket and retainer ring.
8. Reinstalled bar and chain.
Did you find this story helpful?
Thanks for voting and helping fellow customers!
Poulan Electric model ES300 - Replaced Gear Drive and Sprocket
Charles - May 29, 2019
Tool Type
Chain Saw
Difficulty
Easy
Time
15-30 minutes
Tools Used
Screwdriver, Star Drive Hand Screwdriver
Remove chain and bar
Empty chain oil
Remove the Star Drive Screws
Push the handle slightly forward and pull it loose.
Remove Ring Retainer and Sprocket
Remove gear drive and washer
Replace gear drive and washer (make sure washer is on same side the old one came off.
Carefully put the case cover back on engaging the gear drive
Before screwing the screws, put the new sprocket washer and washer on, but before putting the new ring retainer on, check to see that the sprocket turns the shaft from the motor.
Affix the Ring Retainer (you can use a small screw driver and needle nose pliers for this)
Replace the handle
Replace the screws..
Replace the bar and chain ( I purchased a new 16", .050 gauge, 3/8" Pitch Bar and Chain from Home Depot. There are no Poulan Bar and Chain for this model.
Charlie R
Plug it in and tested. works like brand new
Did you find this story helpful?
Thanks for voting and helping fellow customers!
Sprocket worn out
robert - October 7, 2018
Tool Type
Chain Saw
Difficulty
Easy
Time
Less than 15 minutes
Tools Used
Screwdriver, Pliers, Socket set
Took off the cover, removed retainer ring, removed bad sprocket and installed new sprocket. Put the cover back on and was done.
Did you find this story helpful?
Thanks for voting and helping fellow customers!
Gear drive burned out due to overuse. Shaft melted where pressed into plastic gear disk.
Thomas - February 7, 2018
Tool Type
Chain Saw
Difficulty
Easy
Time
30-60 minutes
Tools Used
Screwdriver
Parts Used
Took it apart, found melted plastic around the shaft, ordered the part.
Most of the time was in cleaning the inside of the saw.
Most of the time was in cleaning the inside of the saw.
Did you find this story helpful?
Thanks for voting and helping fellow customers!
Worn sprocket gear
daryll - December 27, 2017
Tool Type
Chain Saw
Difficulty
Easy
Time
15-30 minutes
Tools Used
Screwdriver, Ring-retainer release tool
Removed chain and bar from chainsaw after loosening tension on chain and removing the chain and sprocket gear cover. Using a release tool I removed the old ring-retainer,sprocket gear and washer.put on new washer, sprocket gear and ring retainer. re-installed the bar , chain and cover. re-tighten the chain . Repair is completed !!
Did you find this story helpful?
Thanks for voting and helping fellow customers!
Broken gear drive.
Donald - June 20, 2016
Tool Type
Chain Saw
Difficulty
Medium
Time
30-60 minutes
Tools Used
Screwdriver, spring spreader
1. Remove chain cover and removed chain.
2. Removed Ring retainer and then the sprocket gear.
3. Removed all screws holding case together
4. Pried case apart
5. Removed old broken gear drive
6. Lubed new gear drive and dropped into place.
7. Replaced case
8. Put in all screws for case
9. Dropped sprocket onto shaft and installed the ring retainer. Used a ring retainer spreader tool.
10. Put the chain and chain cover back on.
Done.
Did you find this story helpful?
Thanks for voting and helping fellow customers!
OEM stands for Original Equipment Manufacturer and means the part you’re buying is sourced directly from the manufacturer who made your product. At eReplacementParts, we sell only genuine OEM parts, guaranteeing the part you’re purchasing is of better design and of higher quality than aftermarket parts.
Our product descriptions are a combination of data sourced directly from the manufacturers who made your product as well as content researched and curated by our content & customer service teams. This content is edited and reviewed internally before being made public to customers.
Our customer service team are at the ready daily to answer your part and product questions. We have a dedicated staff with decades of collective experience in helping customers just like you purchase parts to repair their products.
All our part reviews are solicited directly from other customers who have purchased this exact part. While we moderate these reviews for profanity, offensive language or personally identifiable information, these reviews are posted exactly as submitted and no alterations are made by our team.
All our customer repair instructions are solicited directly from other customers just like you who have purchased and replaced this exact part. While we moderate these reviews for profanity, offensive language or personally identifiable information, these reviews are posted exactly as submitted and no alterations are made by our team.
Based on data from past customer purchasing behaviors, these parts are most commonly purchased together along with the part you are viewing. These parts may be necessary or helpful to replace to complete your current repair.
All our installation videos are created and produced in collaboration with our in-house repair technician, Mark Sodja, who has helped millions of eReplacementParts customers over the last 13 years repair their products. Mark has years of experience in selling and repairing both commercial and residential products with a specialty in gas-powered equipment.
This data is collected from customers who submitted a repair instruction after replacing this exact part. Customers can rate how easy the repair was to complete and how long it took. We aggregate this data to provide a repair rating that allows customers to quickly determine the difficulty and time needed to perform their own repair.