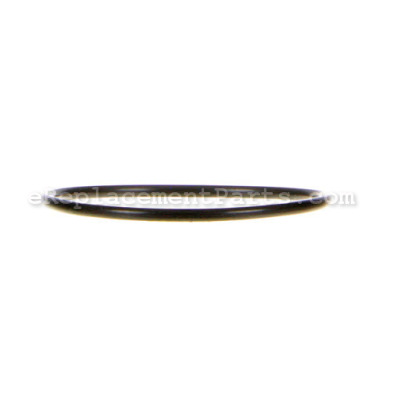
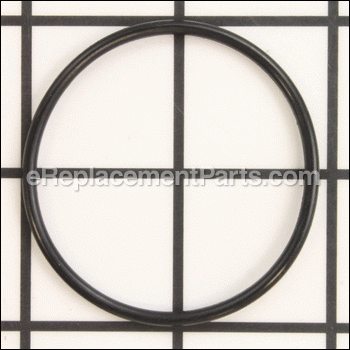
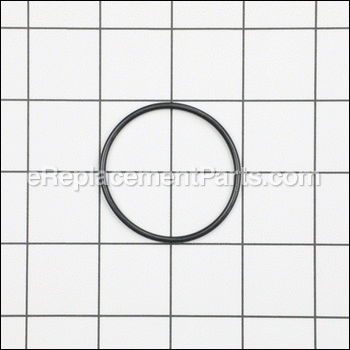


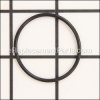
This replacement part is supplied directly from the original equipment manufacturer for use with Bostitch nailers and staplers. It is utilized to provide an air-tight seal for the cylinder sleeve, please refer to the appropriate diagrams of your model for the correct location and application of this hardware. Keep in mind this durable part is made of high-quality rubber and is sold individually.
O-ring,44.7mmx2.4mm 180459
OEM part for: Bostitch, DeWALT
Part Number: 180459
$3.99
In Stock
Jump To:
Frequently Purchased Together ?


Compatibility
This part will fit the following 21 machines
Bostitch
BT1855 Oil-Free Brad Nailer View Diagrams & Manuals
SX1838 Pneumatic Brad Nailer & Stapler View Diagrams & Manuals
SL1838BC (Type 0) Cap Stapler View Diagrams & Manuals
BT1855K (Type 0) 18 Gauge Brad Nailer View Diagrams & Manuals
SX1838K (Type 0) Oil-Free Stapler View Diagrams & Manuals
EHF1838K (Type 0) Flooring Stapler View Diagrams & Manuals
LHF2025K (Type 0) Flooring Stapler View Diagrams & Manuals
BTFP12233 (Type 1) Smart Point 18 GA Brad Nailer Kit View Diagrams & Manuals
EHF1838K (161200001 and higher) Stapler Power Tool View Diagrams & Manuals
LHF2025K (161200001 and higher) Stapler Power Tool View Diagrams & Manuals
SL1838BC (151230000 > higher) Cap Stapler Power Tool View Diagrams & Manuals
SL1838BC (161200001 > higher) Cap Stapler Power Tool View Diagrams & Manuals
BT1855K (10152000 and Higher) 18ga Brad Nailer - 2 Power Tool View Diagrams & Manuals
BT1855K (12340000 and Higher) 18ga Brad Nailer - 2 Power Tool View Diagrams & Manuals
BTFP12233 (15150000 and higher) 18ga Brad Nailer Kit 2-1 Power Tool View Diagrams & Manuals
BTFP12233 (20003001 AND HIGHER) 18ga Brad Nailer Kit 2-1 Power Tool View Diagrams & Manuals
DeWALT
DWLHF2025K (Type 0) 20ga Engr Floor Stap View Diagrams & Manuals
DWEHF1838K (Type 0) 18ga 7/32 Crwn Flr S View Diagrams & Manuals
DWFP12233 (Type 1) 18 Guage Brad Nailer View Diagrams & Manuals
DWFP1838 (Type 1) 18ga 1-1/2 Stapler View Diagrams & Manuals
DWFP12233 (20003001) 18 Ga Precision Point Finish Nailer Power Tool View Diagrams & Manuals
Show More Compatible Models
This item works with the following types of products:
- Nailer Parts
- Stapler Parts
Repair Videos ?
Watch the Repair Video for
O-ring,44.7mmx2.4mm

Customer Part Reviews ?
Average Rating (out of 5):
Click to filter by ratings:
5 stars
4
4 stars
0
3 stars
0
2 stars
0
1 stars
0
< PREV
- 1
Brad gun
Parts fit perfectly. Easy to install in minutes. Much cheaper than buying a new gun.
Donald -
June 15, 2023
Verified Purchase
Great part, love everything.
Arribed quickly and good condition. Thank you.
Bersain Alvarez -
March 27, 2023
Verified Purchase
Pneumatic nailer and stapler rebuild
Parts arrived in good shape and in a timely manner. I have used you folks several times before and you have never failed to deliver. Thanks.
Guest -
February 25, 2022
Verified Purchase
Worked as described
Other than 2 parts in my order are on back order, no fault of ereplacment, shipping was great.
Don -
September 28, 2021
Verified Purchase
t
t
t -
t days ago
Verified Purchase
eReplacementParts Team
t
Questions & Answers ?
Our customer Service team is at the ready daily to answer your part and product questions.

Ask our Team
We have a dedicated staff with decades of collective experience in helping customers just like you purchase parts to repair their products.
Does this fit my product?Questions & Answers for O-ring,44.7mmx2.4mm
No questions have been asked yet
Customer Repair Instructions ?
All our customer repair instructions are solicited directly from other customers just like you who have purchased and replaced this exact part.
Wouldn't eject nail
Michael - June 20, 2018
Tool Type
Nailer
Difficulty
Easy
Time
15-30 minutes
Tools Used
, Allen wrench
Removed the screws holding the top cap on
Replaced O-ring and piston ring and worked great!
Replaced O-ring and piston ring and worked great!
Did you find this story helpful?
Thanks for voting and helping fellow customers!
Driver wouldn't rebound/reset behind nail head. Thus, it wouldn't set/shoot
Colin - March 8, 2017
Tool Type
Nailer
Difficulty
Easy
Time
Less than 15 minutes
Tools Used
Pliers, Allen wrench
If you've already diagnosed the issue, mine being that the nail gun wouldn't fire a nail, then this repair is very simple. I have the Bostitch BT-1855 18 gauge nailer. First you will need to remove the cap and (4) Allen head screws at the rear of the gun (part #181917, or item 2 if you are looking at your factory schematic which is the exploded diagram. Once you have removed the cap be sure to set aside the frame cap gasket (item 3, part #175682). Concealed inside the cap are items 4-9 on your schematic. You should see a clear bumper, spring and O-rings. You shouldn't need to replace these. You will need to remove and replace items 10-16 on your schematic. They are as follows: 10-piston driver (#180451) 11-piston ring (#180457), 12-cylinder sleeve (#180458), 13-O-ring (#180459), 14-check seal (#180460), 15-bumper (#180461), 16-driver guide (#180462). I pulled everything out and lined it up just as it went into the nailer, so as not to forget the original placement and mechanics. Remove your replacement parts from their packaging. Assemble items 10-16 together, then place the completed assembly into the gun; rather than putting each individual item back in place. Reattach frame cap seal and frame cap. Test fire gun. All told it should take about 15-30 minutes to complete this repair. You should only need the appropriate size Allen wrench and maybe a small flat head screw driver for prying some of the O-rings out.
Did you find this story helpful?
Thanks for voting and helping fellow customers!
Valve piston dissentigtated from use
Douglas - January 26, 2017
Tool Type
Nailer
Difficulty
Easy
Time
15-30 minutes
Tools Used
Wrench Set
1. Took nailgun apart.
2. Replaced piston.
3. Reassembled.
2. Replaced piston.
3. Reassembled.
Did you find this story helpful?
Thanks for voting and helping fellow customers!
OEM stands for Original Equipment Manufacturer and means the part you’re buying is sourced directly from the manufacturer who made your product. At eReplacementParts, we sell only genuine OEM parts, guaranteeing the part you’re purchasing is of better design and of higher quality than aftermarket parts.
Our product descriptions are a combination of data sourced directly from the manufacturers who made your product as well as content researched and curated by our content & customer service teams. This content is edited and reviewed internally before being made public to customers.
Our customer service team are at the ready daily to answer your part and product questions. We have a dedicated staff with decades of collective experience in helping customers just like you purchase parts to repair their products.
All our part reviews are solicited directly from other customers who have purchased this exact part. While we moderate these reviews for profanity, offensive language or personally identifiable information, these reviews are posted exactly as submitted and no alterations are made by our team.
All our customer repair instructions are solicited directly from other customers just like you who have purchased and replaced this exact part. While we moderate these reviews for profanity, offensive language or personally identifiable information, these reviews are posted exactly as submitted and no alterations are made by our team.
Based on data from past customer purchasing behaviors, these parts are most commonly purchased together along with the part you are viewing. These parts may be necessary or helpful to replace to complete your current repair.
All our installation videos are created and produced in collaboration with our in-house repair technician, Mark Sodja, who has helped millions of eReplacementParts customers over the last 13 years repair their products. Mark has years of experience in selling and repairing both commercial and residential products with a specialty in gas-powered equipment.
This data is collected from customers who submitted a repair instruction after replacing this exact part. Customers can rate how easy the repair was to complete and how long it took. We aggregate this data to provide a repair rating that allows customers to quickly determine the difficulty and time needed to perform their own repair.