


This is a genuine OEM sourced replacement trimmer head designed for use with string trimmers. This 2-line trimmer head is designed to quickly and efficiently cut through grass. This assembly includes the bump head knob.
Head Asm Cnt 841-032392S
OEM part for: MTD, Troy-Bilt, Cub Cadet
Part Number: 841-032392S
$23.73
In Stock
Jump To:
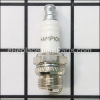
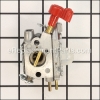
Frequently Purchased Together ?


Compatibility
This Head Asm Cnt will fit the following 40 machines. Confirm this part works with your model, and view the detailed model diagrams and repair help we have to offer.
Troy-Bilt
Cub Cadet
Show More Compatible ModelsThis item works with the following types of products:
- Trimmer Parts
This part replaces obsolete part #: 841-031656S ((Replaces 796-00072) (Includes 28)), 841-031656S, 796-00072, 996-00033, 796-00033
Customer Part Reviews ?
Average Rating (out of 5):
Click to filter by ratings:
5 stars
32
4 stars
5
3 stars
0
2 stars
0
1 stars
1
< PREV
- 1
- 2
- 3
Simple repair and replacement.
Very easy replacement. Just unscrew old bumper head and screw new one back on. Ready to go.
My old head was very tight and it did take some strength and effort to break it loose. Other than that, no real problems.
Terry -
September 20, 2023
Verified Purchase
very pleased with the part and time that i received it.
very good services.
Guest -
June 23, 2023
Verified Purchase
Easy relacement.
The new weed whacker head works well! The delivery was done quicker than I expected.
Thomas -
June 17, 2023
Verified Purchase
Direct replacement for TroyBilt trimmer
It comes pre strung and threads right on in the same place with the same thread as the factory. It doesn't get any easier!! Good price and fast shipping! You can't go wrong with this company and their products!
Guest -
November 3, 2022
Verified Purchase
New head for weed eater
Quick shipping, ready to use right out of the box
Guest -
August 14, 2022
Verified Purchase
Great Help on a Troy Trimmer
Troys are tricky, and Customer service helped me return a wrong part and get the correct one. Thank you
Guest -
May 17, 2022
Verified Purchase
New weed eater head, fast delivery - perfect part!
Quick transaction and delivery. Quality part, works perfectly. Came with directions.
Guest -
October 5, 2021
Verified Purchase
Thankful........
Just thankful to find Troybilt parts. Have had this weedeater long, long time n no problems. Eyelets wore out n fell out n no one carries Troybilt anymore. So, thank you n will use erplacements if ever needed.
Guest -
August 24, 2021
Verified Purchase
Great part
You Normally don’t get the part already loaded up with line excellent condition easy to replace I’ll buy my replacement parts from you the next time I need them thanks
Guest -
August 16, 2021
Verified Purchase
Easy repair
Weed eater is working perfectly with new part
Guest -
August 5, 2021
Verified Purchase
Questions & Answers ?
Our customer Service team is at the ready daily to answer your part and product questions.

Ask our Team
We have a dedicated staff with decades of collective experience in helping customers just like you purchase parts to repair their products.
Does this fit my product?Questions & Answers for Head Asm Cnt
Looking for the head replacement
Leo G
for model number TB2044XP troy bilt weed eater
asked on 2023-11-26
Hello Leo, Thank you for your inquiry. We confirm part# 841-032392S is the compatible trimmer head assembly for this model. We hope this helps.
eReplacementParts Team November 26, 2023
what difference of mtd-841-0323925 left cutting head assembly
louis
for model number tbp2044 xp
asked on 2023-05-06
Hello Louis, thank you for your question. They are the same part so there is no difference between the part you had clicked on and the one you had typed in. We have no reference to the model you providedtbp2044 xp. Good luck with this repair.
eReplacementParts Team May 06, 2023
Hi, My Bump Head came apart and I lost the spring in the Bump Head. Where can I get a spring?
Jim
for model number TROY-BILT TB304S
asked on 2022-05-15
Hello Jim, thank you for your question. The spring is not sold separately. The Heady is part 841-032392S. If you need help placing an order, customer service is open 7 days a week. Please feel free to give us a call. We look forward to hearing from you.
eReplacementParts Team May 15, 2022
Is this the head where you stick the string in through the hall end of the slot and load it by turning the knob?
John
for model number 841-032392s
asked on 2022-04-18
Hello John, thank you for writing. Yes, it is. If there is any old trimming line still in the spool, remove it before installing the new line. To remove the line, firmly press in the tabs on the cutting head and remove the spool cover. Then remove the old line and use a clean cloth to clean the inner reel. Then align the tabs on the spool cover with the holes on the outer spool and push the spool cover onto the outer spool. Then push the push the spool cover onto the outer spool until the tabs securely snap into the holes. Once you have completed this, cut 20 feet of new trimming line. Then turn the bump knob clockwise to align the arrows. Then insert the new trimming line into the entry eyelet and push the line through the cutting head until a few inches protrude from the exit eyelet. Pull the protruding line until approximately 10 feet of line extends from each side of the cutting head. Make sure the lengths on each side are equal. Turn the bump knob clockwise to wind the line until about 5 inches protrudes from each side of the cutting head. Make sure that you do not push down on the bump knob while winding the line. If you need help placing an order, customer service is open 7 days a week. Please feel free to give us a call. We look forward to hearing from you.
eReplacementParts Team April 18, 2022
New cutting head arrived today. How do I remove the entire old head? It won't break loose?
Bonnie
for model number TB6040XP
asked on 2022-04-02
Hello Bonnie, thank you for your question. We do have a video for a similar product that may be of some help for you. https://youtu.be/0ba6mF5Ut8c. If you need help placing an order, customer service is open 7 days a week. Please feel free to give us a call. We look forward to hearing from you.
eReplacementParts Team April 02, 2022
How do you know what trimming head you need. I see the left hand trimming head in the parts list. Is it the common trim head that comes on this weed eater when you buy it? Just wanting to make sure I order the right one. Thx
David
for model number TB2044xp
asked on 2022-03-01
Hello David, Thank you for contacting us. We have researched the model you have provided and have found the part you are looking for is Part Number:841-032392S and is a guaranteed fit for this model. If you need help placing an order, customer service is open 7 days a week. Please feel free to give us a call. We look forward to hearing from you!
eReplacementParts Team March 01, 2022
Customer Repair Instructions ?
All our customer repair instructions are solicited directly from other customers just like you who have purchased and replaced this exact part.
Eyelet missing from the original trimmer head would not keep the line extended out.
Gilbert - September 28, 2017
👍 11 of 12 people found this instruction helpful
Tool Type
Trimmer
Difficulty
Easy
Time
Less than 15 minutes
Tools Used
Screwdriver, Wrench Set
Parts Used
I replaced the original head with the updated OEM replacement head.
Did you find this story helpful?
Thanks for voting and helping fellow customers!
Needed to replace the cutting head assembly on the weedeater
Janice - June 24, 2016
👍 8 of 13 people found this instruction helpful
Tool Type
Trimmer
Difficulty
Medium
Time
15-30 minutes
Tools Used
Screwdriver
Parts Used
1. Remove cover of old weed eater assembly
2. Unscrew old assembly
3. Remove cover of new assembly
4. Screw new assembly in
5. Attach cover for new assembly
2. Unscrew old assembly
3. Remove cover of new assembly
4. Screw new assembly in
5. Attach cover for new assembly
Did you find this story helpful?
Thanks for voting and helping fellow customers!
Eyelets on line spool fell out during operation.
Ron - September 26, 2018
👍 2 of 2 people found this instruction helpful
Tool Type
Trimmer
Difficulty
Medium
Time
Less than 15 minutes
Tools Used
Adjustable Wrench
Parts Used
Unscrewed old unit and installed new spool.
Did you find this story helpful?
Thanks for voting and helping fellow customers!
Trimmer eyelet guides came apart
James - September 24, 2018
👍 1 of 1 people found this instruction helpful
Tool Type
Trimmer
Difficulty
Easy
Time
Less than 15 minutes
Tools Used
Screwdriver
Parts Used
Unscrewed the old trimmer head, screwed the new one on.
Did you find this story helpful?
Thanks for voting and helping fellow customers!
Worn out trimmer head
Steven - July 22, 2018
👍 1 of 1 people found this instruction helpful
Tool Type
Trimmer
Difficulty
Easy
Time
Less than 15 minutes
Tools Used
Screwdriver
Parts Used
Removed old head and replaced with new. Hardest part was figuring out the left hand threads. After that, piece of cake.
Did you find this story helpful?
Thanks for voting and helping fellow customers!
Trimmer head broke
Timothy - July 9, 2018
👍 1 of 1 people found this instruction helpful
Tool Type
Trimmer
Difficulty
Easy
Time
Less than 15 minutes
Tools Used
Screwdriver
Parts Used
Screwed off broke trimmer head and screwed on new head
Perfect part
Perfect price
Perfect part
Perfect price
Did you find this story helpful?
Thanks for voting and helping fellow customers!
Cutting head wore out.
William - October 10, 2018
Tool Type
Trimmer
Difficulty
Easy
Time
Less than 15 minutes
Tools Used
Parts Used
Take off by hand and replaced by hand. Screw off and screw on . That easy
Did you find this story helpful?
Thanks for voting and helping fellow customers!
Inner mechanism was reamed out on original trimmer
Craig - September 17, 2018
Tool Type
Trimmer
Difficulty
Medium
Time
30-60 minutes
Tools Used
Screwdriver, Vise to remove head
Parts Used
It was necessary to remove the trimmer head.
This took time since I did not have access to a very large pipe wrench.
It also had a reversed thread application. ... Instead of being "righty tighty, lefty lucy, it was the opposite.
Once I had the shaft secured in the vise and began untightening the trimmer head, it was very easy.
This took time since I did not have access to a very large pipe wrench.
It also had a reversed thread application. ... Instead of being "righty tighty, lefty lucy, it was the opposite.
Once I had the shaft secured in the vise and began untightening the trimmer head, it was very easy.
Did you find this story helpful?
Thanks for voting and helping fellow customers!
Bad head
Henry - July 5, 2018
Tool Type
Trimmer
Difficulty
Easy
Time
Less than 15 minutes
Tools Used
Screwdriver
Parts Used
Remove and replace was easy, work great, thanks
Did you find this story helpful?
Thanks for voting and helping fellow customers!
Trimmer pull starter rope broke
Scott - June 28, 2018
Tool Type
Trimmer
Difficulty
Easy
Time
15-30 minutes
Tools Used
Screwdriver
Took off old pull rope assembly and put the new one on.
Did you find this story helpful?
Thanks for voting and helping fellow customers!
Load More Install Stories
OEM stands for Original Equipment Manufacturer and means the part you’re buying is sourced directly from the manufacturer who made your product. At eReplacementParts, we sell only genuine OEM parts, guaranteeing the part you’re purchasing is of better design and of higher quality than aftermarket parts.
Our product descriptions are a combination of data sourced directly from the manufacturers who made your product as well as content researched and curated by our content & customer service teams. This content is edited and reviewed internally before being made public to customers.
Our customer service team are at the ready daily to answer your part and product questions. We have a dedicated staff with decades of collective experience in helping customers just like you purchase parts to repair their products.
All our part reviews are solicited directly from other customers who have purchased this exact part. While we moderate these reviews for profanity, offensive language or personally identifiable information, these reviews are posted exactly as submitted and no alterations are made by our team.
All our customer repair instructions are solicited directly from other customers just like you who have purchased and replaced this exact part. While we moderate these reviews for profanity, offensive language or personally identifiable information, these reviews are posted exactly as submitted and no alterations are made by our team.
Based on data from past customer purchasing behaviors, these parts are most commonly purchased together along with the part you are viewing. These parts may be necessary or helpful to replace to complete your current repair.
All our installation videos are created and produced in collaboration with our in-house repair technician, Mark Sodja, who has helped millions of eReplacementParts customers over the last 13 years repair their products. Mark has years of experience in selling and repairing both commercial and residential products with a specialty in gas-powered equipment.
This data is collected from customers who submitted a repair instruction after replacing this exact part. Customers can rate how easy the repair was to complete and how long it took. We aggregate this data to provide a repair rating that allows customers to quickly determine the difficulty and time needed to perform their own repair.