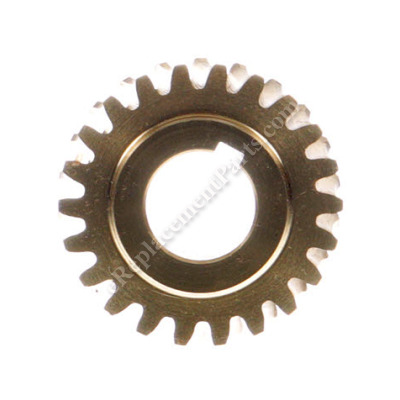


This is an authentic OEM sourced part which is specially designed for use with Craftsman snowblowers. It is an identical replacement for a missing or faulty worm gear that helps to drive the auger shaft and has a key slot in the arbor to fit onto the output shaft using a woodruff key which is sold separately. Keep in mind this high-quality component is made of durable metal and is sold individually. Please make sure to check the appropriate diagrams of your model for the correct location and application of this part.
Gear,worm 51405MA
OEM part for: Murray
Part Number: 51405MA
$85.92
In Stock
Jump To:
Frequently Purchased Together ?


Compatibility
This Gear,worm will fit the following 231 machines. Confirm this part works with your model, and view the detailed model diagrams and repair help we have to offer.
Murray
Show More Compatible ModelsThis item works with the following types of products:
- Snowblower Parts
This part replaces obsolete part #: 51405, 724379
Customer Part Reviews ?
Average Rating (out of 5):
Click to filter by ratings:
5 stars
1
4 stars
0
3 stars
0
2 stars
0
1 stars
0
< PREV
- 1
Great Part and easy repair.
The part arrived earlier than expected, worked properly and was half the cost of the same part from others. Great job guys.
Matt -
January 15, 2020
Verified Purchase
Questions & Answers ?
Our customer Service team is at the ready daily to answer your part and product questions.

Ask our Team
We have a dedicated staff with decades of collective experience in helping customers just like you purchase parts to repair their products.
Does this fit my product?Questions & Answers for Gear,worm
No questions have been asked yet
Customer Repair Instructions ?
All our customer repair instructions are solicited directly from other customers just like you who have purchased and replaced this exact part.
Worn gear
Ronald - February 13, 2022
Tool Type
Snowblower
Difficulty
Easy
Time
1-2 hours
Tools Used
Power Drill, Socket set, Wrench Set
Parts Used
Removed gear box,replaced worm gear and reinstalled
Did you find this story helpful?
Thanks for voting and helping fellow customers!
My snow blower "ate" a frzen newspaper that was under the snow and bent the Auger drive shaft and Impeller shaft
CHAD - February 17, 2020
Tool Type
Snowblower
Difficulty
Medium
Time
1-2 hours
Tools Used
Pliers, Socket set
I had to separate the Auger unit from the engine/drive unit. Then I had to disassemble the auger drive shaft and gear box. I reassembled everything with the parts provided from Ereplacementparts.com and it works like new!. Saved me $600 and from having to buy a new snow blower.
Did you find this story helpful?
Thanks for voting and helping fellow customers!
WORN OUT WORM GEAR
kevin - February 21, 2019
Tool Type
Snowblower
Difficulty
Medium
Time
30-60 minutes
Tools Used
Socket set, FILE
Parts Used
REMOVED BELT COVER ,TWO SCREWS, THEN DISCONNECTED CHUTE CONTROL ,THAT WAS JUST A SPRING CLIP,THEN THE 6 BOLTS TO THE FRONT HALF ,separated the two halfs,then loosen the 2 sets bolts at the pulley,then I removed the 6 bolts [3 on each side]for the auger support bearings,gave it a couple hits and separated the auger drive from the housing,then I removed the impellor from the drive shaft,2 shear pins,then removed the 6 bolts for the gear drive ,drove the old gear off, replaced with new gear, cleaned the old grease ,inspected the shaft and filed off any burrs and reassembled,
Did you find this story helpful?
Thanks for voting and helping fellow customers!
The teeth broke off the front auger
donald - December 20, 2018
Tool Type
Snowblower
Difficulty
Medium
Time
1-2 hours
Tools Used
Socket set, Adjustable Wrench, Hammer
Removed belt cover and belt and separated snowblower removed belt pulley and removed bolts holding auger assembly and tapped the auger drive shaft out of rear bearing removed front augers and separated front gear assembly and removed shafts and tapped gear off the the auger shaft and installed new gear and cleaned housing and reassembled and installed new grease and reinstalled augers and impeller and reinstalled back into blower housing and reinstalled belt pulley and reconnected blower assembly to engine assembly and reinstalled belt and shield and rechecked everything and ran blower.
Did you find this story helpful?
Thanks for voting and helping fellow customers!
Snowblower feed auger, worm gear stripped - ate heavy rug under snow!!!!
Marlyn - May 9, 2018
Tool Type
Snowblower
Difficulty
Medium
Time
30-60 minutes
Tools Used
Screwdriver, Socket set, Wrench Set
1. Removed removed spare breaker bolt box from top of blower
2. Remove auger side guides from frame of throat
3. Loosen pulley back of fed assembly - split fed assembly from body of blower
4. Using pulley puller, removed pulley from shaft (drives gear box)
5. Pull auger assembly from throat housing
6. Slide augers off each side of assembly (remove breaker bolts)
7. Separate gear box housing halves - remove brass shavings with grease & all
8. Slide replacement worm gear into position
9. Put new grease into each gear box half, place gasket & tighten halves together
10. Reverse procedure to reassemble
Did you find this story helpful?
Thanks for voting and helping fellow customers!
Auger didn't turn
phillip - May 25, 2018
👍 0 of 1 people found this instruction helpful
Tool Type
Snowblower
Difficulty
Medium
Time
30-60 minutes
Tools Used
Socket set, Wrench Set, Adjustable Wrench
Parts Used
1. Opened bottom of blower
2. Loosen screws holding auger pulley
3. Removed 3 bolts on each side of auger holding bearings
4. Pulled auger and shaft out front of machine.
5. Opened worm gear case on auger after removing both augers
6. Removed shaft and old worm gear
7. Replaced worm gear and shaft then greased with 00 grease.
8. Make sure bushings flat side align then put back together worm gear casing
9. Removed large grease nut on side of worm gear housing and filled rest of housing with gear.
10. Removed front housing auger and put auger bearings back attached to sides. then put on auger pulley.
11. Put complete assembly back on mower and placed belt on pulley.
12. Had wife run snowblower so I could see auger move like it was suppose to.
Did you find this story helpful?
Thanks for voting and helping fellow customers!
OEM stands for Original Equipment Manufacturer and means the part you’re buying is sourced directly from the manufacturer who made your product. At eReplacementParts, we sell only genuine OEM parts, guaranteeing the part you’re purchasing is of better design and of higher quality than aftermarket parts.
Our product descriptions are a combination of data sourced directly from the manufacturers who made your product as well as content researched and curated by our content & customer service teams. This content is edited and reviewed internally before being made public to customers.
Our customer service team are at the ready daily to answer your part and product questions. We have a dedicated staff with decades of collective experience in helping customers just like you purchase parts to repair their products.
All our part reviews are solicited directly from other customers who have purchased this exact part. While we moderate these reviews for profanity, offensive language or personally identifiable information, these reviews are posted exactly as submitted and no alterations are made by our team.
All our customer repair instructions are solicited directly from other customers just like you who have purchased and replaced this exact part. While we moderate these reviews for profanity, offensive language or personally identifiable information, these reviews are posted exactly as submitted and no alterations are made by our team.
Based on data from past customer purchasing behaviors, these parts are most commonly purchased together along with the part you are viewing. These parts may be necessary or helpful to replace to complete your current repair.
All our installation videos are created and produced in collaboration with our in-house repair technician, Mark Sodja, who has helped millions of eReplacementParts customers over the last 13 years repair their products. Mark has years of experience in selling and repairing both commercial and residential products with a specialty in gas-powered equipment.
This data is collected from customers who submitted a repair instruction after replacing this exact part. Customers can rate how easy the repair was to complete and how long it took. We aggregate this data to provide a repair rating that allows customers to quickly determine the difficulty and time needed to perform their own repair.