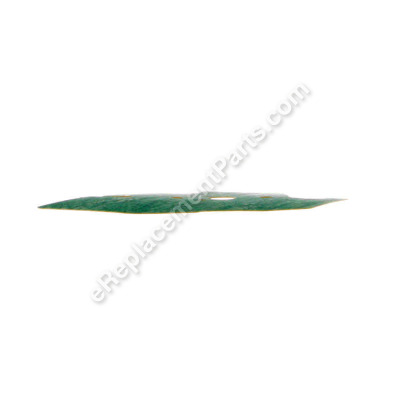
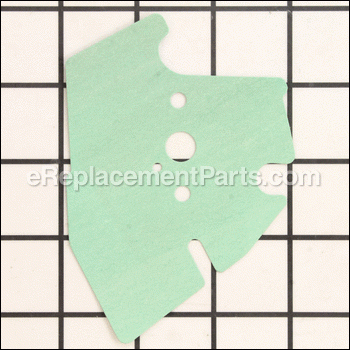


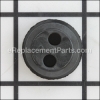
This authentic manufacturer-supplied gasket is specially designed for Honda engines commonly installed on a variety of lawn and garden equipment. It is a special hardware that helps to provide a tight seal between connected components of a carburetor. This is an identical replacement for a missing or a damaged gasket that was installed on a new unit. One durable composite material part is included. Refer to the appropriate diagrams for your model to ensure the proper replacement procedure. A screwdriver will be needed to perform this repair.
Gasket- Carburetor 16221-Z0H-010
OEM part for: Honda
Part Number: 16221-Z0H-010
$4.99
In Stock
Jump To:
Frequently Purchased Together ?


Compatibility
This part will fit the following 31 machines
Honda
GX25 (Type SA2)(VIN# GCAAM-1000001-1199999) Small Engine View Diagrams & Manuals
GX25 (Type SA2/A)(VIN# GCAAM-1200001-9999999) Small Engine View Diagrams & Manuals
GX25 (Type SAT)(VIN# GCAAM-1000001-1199999) Small Engine View Diagrams & Manuals
GX25 (Type SAT/A)(VIN# GCAAM-1200001-9999999) Small Engine View Diagrams & Manuals
GX25 (Type TA)(VIN# GCAAM-1000001-1199999) Small Engine View Diagrams & Manuals
GX25 (Type TA/A)(VIN# GCAAM-1200001-9999999) Small Engine View Diagrams & Manuals
GX25 (Type TA2)(VIN# GCAAM-1000001-1199999) Small Engine View Diagrams & Manuals
GX25 (Type TA2/A)(VIN# GCAAM-1200001-9999999) Small Engine View Diagrams & Manuals
GX25N (Type S3)(VIN# GCADK-1000001-9999999) Small Engine View Diagrams & Manuals
GX25N (Type SGT3)(VIN# GCADK-1000001-9999999) Small Engine View Diagrams & Manuals
GX25N (Type ST3)(VIN# GCADK-1000001-9999999) Small Engine View Diagrams & Manuals
GX25N (Type T3)(VIN# GCADK-1000001-9999999) Small Engine View Diagrams & Manuals
GX25N (Type TZ3)(VIN# GCAVK-1000001-9999999) Small Engine View Diagrams & Manuals
GX25N (Type TZR3)(VIN# GCAVK-1000001-9999999) Small Engine View Diagrams & Manuals
GX25NT (Type S3)(VIN# GCART-1000001) Small Engine View Diagrams & Manuals
GX25NT (Type SATM)(VIN# GCART-1000001) Small Engine View Diagrams & Manuals
GX25NT (Type SGT3)(VIN# GCART-1000001) Small Engine View Diagrams & Manuals
GX25NT (Type SGT9)(VIN# GCART-1000001) Small Engine View Diagrams & Manuals
GX25NT (Type SMTD)(VIN# GCART-1000001) Small Engine View Diagrams & Manuals
GX25NT (Type ST3)(VIN# GCART-1000001) Small Engine View Diagrams & Manuals
GX25NT (Type T3)(VIN# GCART-1000001) Small Engine View Diagrams & Manuals
FG110 (Type A)(VIN# FAAA-1000001 to FAAA-1199999) Rototiller View Diagrams & Manuals
FG110 (Type AT)(VIN# FAAA-1000001 to FAAA-1199999) Rototiller View Diagrams & Manuals
FG110K1 (Type AT)(VIN# FAAA-1200001) Rototiller View Diagrams & Manuals
HHT25S (Type LTA)(VIN# HAFA-1000001 to HAFA-9999999) Trimmer/Brush Cutter View Diagrams & Manuals
HHT25S (Type LTA/A)(VIN# HAFA-1000001 to HAFA-9999999) Trimmer/Brush Cutter View Diagrams & Manuals
HHT25S (Type LTAT)(VIN# HAFA-1000001) Trimmer/Brush Cutter View Diagrams & Manuals
GX25NT (Type HAT)(VIN# GCART-1000001-9999999) Engine View Diagrams & Manuals
GX25NT (Type S2)(VIN# GCART-1000001-9999999) Engine View Diagrams & Manuals
UMC425A (Type LAAT)(VIN# GCALT-1000001-9999999) Trimmer / Brushcutter View Diagrams & Manuals
UMC435A (Type LAAT)(VIN# GCAMT-1000001-9999999) Trimmer / Brushcutter View Diagrams & Manuals
Show More Compatible Models
This item works with the following types of products:
- Engine Parts
- Trimmer Parts
This part replaces obsolete part #: 16221-Z0H-000, 16221-Z0H-000 (Serial# (1000001-9999999))
Customer Part Reviews ?
Average Rating (out of 5):
Click to filter by ratings:
5 stars
3
4 stars
0
3 stars
0
2 stars
0
1 stars
0
< PREV
- 1
Carb gasket
It was an actual Honda part and worked as it should.
Guest -
September 21, 2021
Verified Purchase
Best site for replacement parts!
OEM, fast shipping, correct part, easy website to navigate and find the correct part fast. Excellent experience .
Guest -
April 4, 2021
Verified Purchase
Exact fit, arrived on time, worked as expected.
The part was an exact fit. Order arrived on time as expected. Happy with purchase.
Guest -
October 16, 2019
Verified Purchase
t
t
t -
t days ago
Verified Purchase
eReplacementParts Team
t
Questions & Answers ?
Our customer Service team is at the ready daily to answer your part and product questions.

Ask our Team
We have a dedicated staff with decades of collective experience in helping customers just like you purchase parts to repair their products.
Does this fit my product?Questions & Answers for Gasket- Carburetor
No questions have been asked yet
Customer Repair Instructions ?
All our customer repair instructions are solicited directly from other customers just like you who have purchased and replaced this exact part.
Carburetor clogged from ethanol gas in my Honda string trimmer
William - August 12, 2017
👍 1 of 1 people found this instruction helpful
Tool Type
Engine
Difficulty
Medium
Time
15-30 minutes
Tools Used
Socket set, Wrench Set
It was a snap. Took off engine shroud.
Unbolted carb. Two bolts.
Disconnected throttle linkage.
Gave it a good cleaning
Reassembled in reverse order with a new gasket.
All parts fit perfectly and it started right up.
Note-Now I use only ethanol free gas in my gas powered lawn equipment. I have had problems with ethanol gas even using Stabil.
Did you find this story helpful?
Thanks for voting and helping fellow customers!
Wouldn't start
Jeffrey - August 30, 2022
Tool Type
Engine
Difficulty
Medium
Time
30-60 minutes
Tools Used
Screwdriver, Pliers, Socket set, Wrench Set
Replaced carburetor
Did you find this story helpful?
Thanks for voting and helping fellow customers!
needed carb
Darwin - June 7, 2021
Tool Type
Engine
Difficulty
Easy
Time
Less than 15 minutes
Tools Used
Screwdriver, Wrench Set
installed in place of old one
Did you find this story helpful?
Thanks for voting and helping fellow customers!
Honda FG110 tiller very hard to start and once started would stall out when throttle applied.
Art - June 6, 2021
Tool Type
Engine
Difficulty
Easy
Time
15-30 minutes
Tools Used
Screwdriver, Socket set
1. Replaced the carburetor…quick and easy
2. Replaced the fuel filter. Snagged the fuel line out of the tank with a clothes hanger. Be sure not to pull too hard so you don’t disconnect the fuel line inside the fuel tank
3. Replaced the air filter after installing new carburetor..
4. Replaced spark plug. Had to remove one screw holding the plastic cover onto the the engine to get to the plug. Removed plug and installed new one.
After the repairs the tiller was as good as new.
Did you find this story helpful?
Thanks for voting and helping fellow customers!
Honda string trimmer would start, run and die.
Paul - October 29, 2020
Tool Type
Engine
Difficulty
Easy
Time
15-30 minutes
Tools Used
Screwdriver, Pliers, Wrench Set, Nutdriver
1, Removed air cleaner and cover
2. Removed two nuts holding carb in place
3. Disconnected throttle cable and fuel lines
4. Removed old carb and gasket
5. Installed new carb and gasket.
6. Reconnected throttle cable and fuel lines
7. Replaced two nuts to hold carb in place.
8. Replaced air cleaner and cover
9. Drained old fuel and added new ethanol-free fuel
10. Started and runs like new.
Did you find this story helpful?
Thanks for voting and helping fellow customers!
The engine would not run well and would die out.
Doug - June 3, 2020
Tool Type
Engine
Difficulty
Easy
Time
15-30 minutes
Tools Used
Screwdriver, Pliers, Socket set
1. Removed air filter and cover.
2. Removed the old carburetor and gasket from the engine. Held on with 2 nuts.
3. Removed fuel lines and saved for re-installation.
4.Removed throttle cable.
5. Installed new gasket and new carburetor.
6. Installed the nuts back on to the bolts that go through the carburetor. Be careful to slide bolts completely through the carburetor. You may need pliers to pull it back through to its full extension.
6. Reinstalled the throttle cable.
7. Placed filter and cover back on.
8. Re-installed the fuel lines from the tank to the carburetor.
9. Primed the engine and then choked and restarted.
10. It ran perfectly and started first time every time for the rest of the day.
INstalled
Did you find this story helpful?
Thanks for voting and helping fellow customers!
Tiller Carb had cracked primer pump carb also needing replaced do to old gas, filter dry rot
Robert - May 18, 2018
Tool Type
Engine
Difficulty
Easy
Time
15-30 minutes
Tools Used
Screwdriver, Pliers, Socket set, Wrench Set
Removed air filter housing with screwdriver
Removed 2 fuel lines from carb with pliers being careful not to crack line
Removed 2 nuts holding carb with wrench or socket wrench
Removed gasket and clean service.
Replace in reverse being careful not to over tighten nuts to carb.
Removed 2 fuel lines from carb with pliers being careful not to crack line
Removed 2 nuts holding carb with wrench or socket wrench
Removed gasket and clean service.
Replace in reverse being careful not to over tighten nuts to carb.
Did you find this story helpful?
Thanks for voting and helping fellow customers!
OEM stands for Original Equipment Manufacturer and means the part you’re buying is sourced directly from the manufacturer who made your product. At eReplacementParts, we sell only genuine OEM parts, guaranteeing the part you’re purchasing is of better design and of higher quality than aftermarket parts.
Our product descriptions are a combination of data sourced directly from the manufacturers who made your product as well as content researched and curated by our content & customer service teams. This content is edited and reviewed internally before being made public to customers.
Our customer service team are at the ready daily to answer your part and product questions. We have a dedicated staff with decades of collective experience in helping customers just like you purchase parts to repair their products.
All our part reviews are solicited directly from other customers who have purchased this exact part. While we moderate these reviews for profanity, offensive language or personally identifiable information, these reviews are posted exactly as submitted and no alterations are made by our team.
All our customer repair instructions are solicited directly from other customers just like you who have purchased and replaced this exact part. While we moderate these reviews for profanity, offensive language or personally identifiable information, these reviews are posted exactly as submitted and no alterations are made by our team.
Based on data from past customer purchasing behaviors, these parts are most commonly purchased together along with the part you are viewing. These parts may be necessary or helpful to replace to complete your current repair.
All our installation videos are created and produced in collaboration with our in-house repair technician, Mark Sodja, who has helped millions of eReplacementParts customers over the last 13 years repair their products. Mark has years of experience in selling and repairing both commercial and residential products with a specialty in gas-powered equipment.
This data is collected from customers who submitted a repair instruction after replacing this exact part. Customers can rate how easy the repair was to complete and how long it took. We aggregate this data to provide a repair rating that allows customers to quickly determine the difficulty and time needed to perform their own repair.