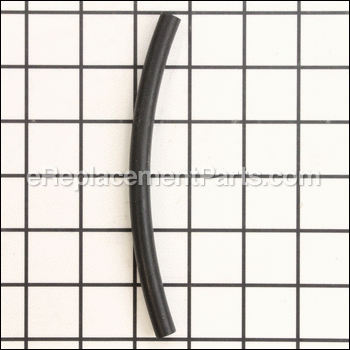
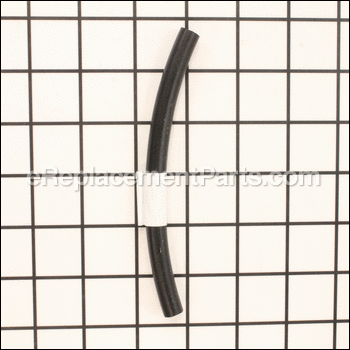
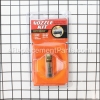
This is a genuine OEM replacement part designed for use with Pro Temp, Heat Stream and Master kerosene forced air heaters. The line is utilized to deliver the fuel from the tank into the carburetor. When you press the primer bulb, it will purge all the air out of the carburetor and fill its chambers with fuel. The excess fuel is then forced back into the tank through the return line. Unfortunately, over time lines will become brittle and may begin to crack eventually requiring a replacement. Keep in mind this high-quality part is made of durable rubber and is sold individually.
Fuel Line 70-036-1010
OEM part for: Pro Temp, Heat Stream, Heat Hog, Master
Part Number: 70-036-1010
Jump To:
Frequently Purchased Together ?
Compatibility
This part will fit the following 8 machines
Pro Temp
Heat Stream
Heat Hog
Master
This item works with the following types of products:
- Heater Parts
This part replaces obsolete part #: 70-036-0200, 70-036-0100
Customer Part Reviews ?
- 1
Questions & Answers ?
Our customer Service team is at the ready daily to answer your part and product questions.

Ask our Team
We have a dedicated staff with decades of collective experience in helping customers just like you purchase parts to repair their products.
Does this fit my product?Questions & Answers for Fuel Line
Customer Repair Instructions ?
All our customer repair instructions are solicited directly from other customers just like you who have purchased and replaced this exact part.
Air line was cracked so the heater would not light.
Tool Type
Heater
Difficulty
Easy
Time
30-60 minutes
Tools Used
Screwdriver, Pliers, Nutdriver, None
2. Pulled the cover off the air pump at the back of the motor and installed the new filters.
3. Pulled the motor assembly up and back to replace the air hose. Does not need to be moved far but gives you access to route the new air line. Disconnected the air line and installed the new one.
4 removed the fuel line and filter. Installed new filter and fuel line.
5 Put back together and turned it on. It lit right up and ran fine. Also adjusted the pressure on the air pump at that time. My heater is nice there is a gage right on the air pump and pressure can be adjusted with the unit assembled.
Done and ready to have heat in the shop when it gets cold, which in central PA in December will be very soon.
Rubber lines were cracked
Tool Type
Heater
Difficulty
Easy
Time
Less than 15 minutes
Tools Used
Screwdriver, Pliers
Parts Used
2. Remove the screws for the controls cover and put it to one side. Switch wiring is long enough. This gives access to air hose.
3. Pinch and slide air and fuel line hose clips off the hose joints. Use a screwdriver to help prise the hose off each connection stub. Remove hoses, threading them through the holes in the lower cylindrical cover, noting the routing.
4. Reverse disassembly procedure to fit the new hoses and reattach the covers
Not running properly, low pressure, cracked air line and deteriorated fuel line
Tool Type
Heater
Difficulty
Medium
Time
1-2 hours
Tools Used
Screwdriver, Pliers
fuel and air lines both cracked leaking fuel and sucking air
Tool Type
Heater
Difficulty
Easy
Time
15-30 minutes
Tools Used
Screwdriver, Pliers, Socket set, Nutdriver
Parts Used
the heater sat unused for several years both the air and fuel lines were split.I was amazed to be able to find these parts. Thank you.
Tool Type
Heater
Difficulty
Easy
Time
15-30 minutes
Tools Used
Pliers
Parts Used
Then installed the new ones
OEM stands for Original Equipment Manufacturer and means the part you’re buying is sourced directly from the manufacturer who made your product. At eReplacementParts, we sell only genuine OEM parts, guaranteeing the part you’re purchasing is of better design and of higher quality than aftermarket parts.
Our product descriptions are a combination of data sourced directly from the manufacturers who made your product as well as content researched and curated by our content & customer service teams. This content is edited and reviewed internally before being made public to customers.
Our customer service team are at the ready daily to answer your part and product questions. We have a dedicated staff with decades of collective experience in helping customers just like you purchase parts to repair their products.
All our part reviews are solicited directly from other customers who have purchased this exact part. While we moderate these reviews for profanity, offensive language or personally identifiable information, these reviews are posted exactly as submitted and no alterations are made by our team.
All our customer repair instructions are solicited directly from other customers just like you who have purchased and replaced this exact part. While we moderate these reviews for profanity, offensive language or personally identifiable information, these reviews are posted exactly as submitted and no alterations are made by our team.
Based on data from past customer purchasing behaviors, these parts are most commonly purchased together along with the part you are viewing. These parts may be necessary or helpful to replace to complete your current repair.
All our installation videos are created and produced in collaboration with our in-house repair technician, Mark Sodja, who has helped millions of eReplacementParts customers over the last 13 years repair their products. Mark has years of experience in selling and repairing both commercial and residential products with a specialty in gas-powered equipment.
This data is collected from customers who submitted a repair instruction after replacing this exact part. Customers can rate how easy the repair was to complete and how long it took. We aggregate this data to provide a repair rating that allows customers to quickly determine the difficulty and time needed to perform their own repair.

