
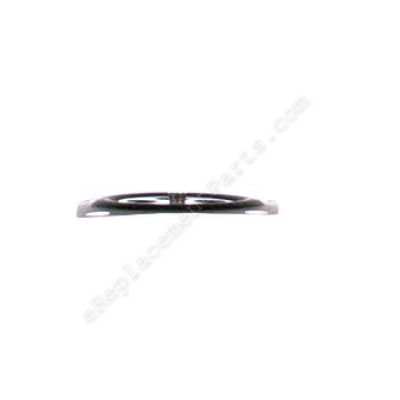


The metering diaphragm fits between the metering diaphragm gasket and the air purge body assembly. This part is available individually and is made of a thin material that can break easily. It is a genuine item that is supplied by the original equipment manufacturer for use with trimmers, edgers, blowers, and chainsaws made by Echo and Shindaiwa. A screwdriver may be needed when replacing the diaphragm.
Diaphragm-metering 12314103930
OEM part for: Echo, Shindaiwa, Little Wonder
Part Number: 12314103930
$12.70
In Stock
Jump To:
Frequently Purchased Together ?


Compatibility
This Diaphragm-metering will fit the following 163 machines. Confirm this part works with your model, and view the detailed model diagrams and repair help we have to offer.
Shindaiwa
Echo
Little Wonder
Show More Compatible ModelsThis item works with the following types of products:
- Hedge Trimmer Parts
- Trimmer Parts
- Edger Parts
- Pruner Parts
- Blower Parts
- Chain Saw Parts
- Saw Parts
- Grass Trimmer Parts
- Multi-Tool Parts
This part replaces obsolete part #: 22100-81260
Repair Videos ?
Articles:
|
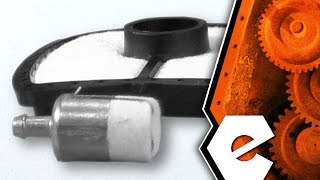
Filthy Filters? This article will show you how to install a filter kit on an Echo SRM-225 trimmer....
May 27, 2015
|

Customer Part Reviews ?
Questions & Answers ?
Our customer Service team is at the ready daily to answer your part and product questions.

Ask our Team
We have a dedicated staff with decades of collective experience in helping customers just like you purchase parts to repair their products.
Does this fit my product?Questions & Answers for Diaphragm-metering
No questions have been asked yet
Customer Repair Instructions ?
All our customer repair instructions are solicited directly from other customers just like you who have purchased and replaced this exact part.
Unit would start cold but would not run after it warmed up
Ronald - November 14, 2015
👍 3 of 3 people found this instruction helpful
Tool Type
Blower
Difficulty
Easy
Time
15-30 minutes
Tools Used
Screwdriver
Easily disassembled the carb. Only a screwdriver is needed. Replaced the two rubber parts diaphragm parts. The blower, which I was about to throw away, now runs like new!
Did you find this story helpful?
Thanks for voting and helping fellow customers!
Hard starting - would run very briefly and stop.
Randall - July 1, 2017
👍 1 of 1 people found this instruction helpful
Tool Type
Chain Saw
Difficulty
Medium
Time
1-2 hours
Tools Used
Screwdriver, Pliers, Socket set, Wrench Set, Nutdriver, compressed air, carburetor cleaning solvent
1: Remove air filter
2: Remove recoil starter assembly.
3: Loosen carburetor nuts
4: Disconnect throttle and choke linkage from carburetor
5: Unplug kill switch wiring
6: Remove carburetor from engine
7: Disassemble carburetor - note the location of low and high speed needles and tension springs
8: Pry out strainer from carburetor body
9: Soak metallic carburetor parts in carburetor cleaner.
10: Carefully scrape old gasket material from carburetor body, diaphragm and pump covers
11: Blow out all passages thoroughly and blow dry all parts.
12: Inspect tank and fuel line - clean
13: Reassemble carburetor with new strainer, pump and diaphragm
14: Install carburetor and reassemble saw in reverse order from disassembly.
Blade tensioner and adjuster were replaced at this time as well - had nothing to do with the starting problem.
Did you find this story helpful?
Thanks for voting and helping fellow customers!
OEM stands for Original Equipment Manufacturer and means the part you’re buying is sourced directly from the manufacturer who made your product. At eReplacementParts, we sell only genuine OEM parts, guaranteeing the part you’re purchasing is of better design and of higher quality than aftermarket parts.
Our product descriptions are a combination of data sourced directly from the manufacturers who made your product as well as content researched and curated by our content & customer service teams. This content is edited and reviewed internally before being made public to customers.
Our customer service team are at the ready daily to answer your part and product questions. We have a dedicated staff with decades of collective experience in helping customers just like you purchase parts to repair their products.
All our part reviews are solicited directly from other customers who have purchased this exact part. While we moderate these reviews for profanity, offensive language or personally identifiable information, these reviews are posted exactly as submitted and no alterations are made by our team.
All our customer repair instructions are solicited directly from other customers just like you who have purchased and replaced this exact part. While we moderate these reviews for profanity, offensive language or personally identifiable information, these reviews are posted exactly as submitted and no alterations are made by our team.
Based on data from past customer purchasing behaviors, these parts are most commonly purchased together along with the part you are viewing. These parts may be necessary or helpful to replace to complete your current repair.
All our installation videos are created and produced in collaboration with our in-house repair technician, Mark Sodja, who has helped millions of eReplacementParts customers over the last 13 years repair their products. Mark has years of experience in selling and repairing both commercial and residential products with a specialty in gas-powered equipment.
This data is collected from customers who submitted a repair instruction after replacing this exact part. Customers can rate how easy the repair was to complete and how long it took. We aggregate this data to provide a repair rating that allows customers to quickly determine the difficulty and time needed to perform their own repair.