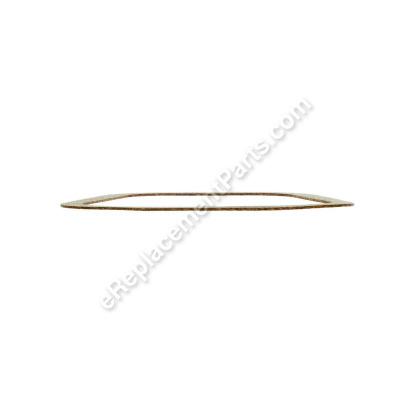
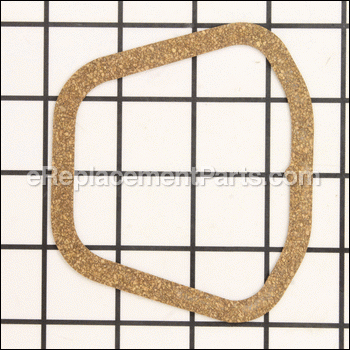
This is an authentic manufacturer-sourced replacement part which is specially designed for use with Honda engines commonly installed on lawn and garden equipment. The purpose of this special gasket is to provide an air-tight seal for the cylinder cover, over time gaskets tend to deteriorate and crack eventually requiring a replacement to maintain a proper seal. It is a high-quality component which is made of durable composite material and is sold individually.
Cylinder Head Cover Gasket 12391-ZE1-000
OEM part for: Honda
Part Number: 12391-ZE1-000
Jump To:
Frequently Purchased Together ?
Compatibility
This Cylinder Head Cover Gasket will fit the following 3895 machines. Confirm this part works with your model, and view the detailed model diagrams and repair help we have to offer.
This item works with the following types of products:
- Engine Parts
Customer Part Reviews ?
- 1
Questions & Answers ?
Our customer Service team is at the ready daily to answer your part and product questions.

Ask our Team
We have a dedicated staff with decades of collective experience in helping customers just like you purchase parts to repair their products.
Does this fit my product?Questions & Answers for Cylinder Head Cover Gasket
Customer Repair Instructions ?
All our customer repair instructions are solicited directly from other customers just like you who have purchased and replaced this exact part.
Just replaceing with new.
Tool Type
Engine
Difficulty
Easy
Time
Less than 15 minutes
Tools Used
Socket set
Compression relief wasn’t working.
Tool Type
Engine
Difficulty
Medium
Time
1-2 hours
Tools Used
Screwdriver, Socket set, Wrench Set
2. Removed six bolts to remove side cover to access camshafts.
3. Discovered plastic pieces and wire insulation jamming up the compression relief mechanism on the camshaft. Plastic pieces and wire insulation came from the low oil pressure switch, somehow the wire to the pressure switch got got on the crankshaft tearing the insulation off and breaking the plastic molding around the fitting that passes through the block.
4. Had to order low oil pressure switch.
5. Removed the two screws holding the switch and the 10mm nut on the outside of the block, where the fitting passes through the block.
6. Reinstalled the pressure switch.
7. Cleaned out the debris in the compression relief mechanism and insured it was working freely.
8. Removed the valve cover and pulled out the pushrods to help reinstall the camshaft.
9. Lined up the timing marks on the camshaft and the crankshaft and slide the camshaft into position.
10. Cleaned off the old case gasket, installed the new one, and reinstalled the case cover. Tightened the six bolts.
11. Removed the four 10mm bolts on the valve cover and removed it.
12. Loosened the nuts on the rocker arms and reinstalled the pushrods.
13. With the piston at top dead center, adjusted the gap on the intake valve to .006 and then adjusted the exhaust valve gap to .008.
14. Cleaned off the old valve cover gasket and using the new gasket, reinstalled the valve cover, tightening the four 10mm bolts.
15. Removed the spark plug, checked the gap on the new plug and reinstalled the plug.
16. Removed the 10mm bolt on bottom of carburetor bowel
17. Cleaned out the carburetor bowel, installed new baskets on the bowel and the 10mm bolt and put the carburetor bowel back on.
18. Removed the wing nuts holding on the air cleaner cover and the air filter.
19. Removed the three 10mm bolts holding on the plastic hosing over the carburetor.
20. Removed the two Phillips screws holding on the metal cover to the top of the gas shutoff.
21. Removed the cover, spring washer and the shutoff lever, to access the shutoff valve rubber gasket.
22. Installed new shutoff rubber gasket.
23. Reinstalled the shutoff lever spring washer, cover and two Phillips screws.
24. Verified the shutoff valve was working and no gas was leaking out of the bottom of the
carburetor bowel.
25. Replaced the plastic housing cover and reinstalled the three 10mm bolts.
26. Installed the air filter and cover, held in place with two wing nuts.
27. Filled the crankcase with 0.625 quart of 30w oil.
28. Checked for oil leaks.
29. With the gas and choke in the on position, pulled the rope starter and started the engine.
30. Much easier pulling the starter rope, with the compression relief valve working. Motor didn’t kick back and rip the stater rope handle out of my hand.
31. With the engine running, shut off the gas valve and let the engine run out of gas to verify gas shutoff valve was working correctly.
32. Reinstalled the engine on the pressure washer.
33. Connected the water hose to pressure washer and started the engine.
34. Pressure washed the motor in my truck.
35. Pressure washer worked great and the motor didn’t rip the starter handle out of my hand when starting.
36. Successful repair!
Damaged sparkplug threads on Honda GX200
Tool Type
Engine
Difficulty
Easy
Time
1-2 hours
Tools Used
Screwdriver, Socket set, Nutdriver
2. Removed flywheel shroud and rotated engine to TDC prior to combustion
3. Removed carburetor assembly
4. Removed exhaust assembly
5. Removed cylinder head
6. Transferred exhaust bolts studs to new head
7. Transferred valves and stem seal (intake) to new head (7ft-lbs on valve pivot bolts, .006
intake/.008 exhaust at TDC)
8. Reinstall head (17ft-lbs on head bolts) Tighten in cross pattern - pass1: finder tight,
pass2: half torque, pass3: Full torque
9. Reinstall other components in reverse order
Showed how to disassemble and reassemble engine for a class.
Tool Type
Engine
Difficulty
Medium
Time
1-2 hours
Tools Used
Socket set, Wrench Set
OEM stands for Original Equipment Manufacturer and means the part you’re buying is sourced directly from the manufacturer who made your product. At eReplacementParts, we sell only genuine OEM parts, guaranteeing the part you’re purchasing is of better design and of higher quality than aftermarket parts.
Our product descriptions are a combination of data sourced directly from the manufacturers who made your product as well as content researched and curated by our content & customer service teams. This content is edited and reviewed internally before being made public to customers.
Our customer service team are at the ready daily to answer your part and product questions. We have a dedicated staff with decades of collective experience in helping customers just like you purchase parts to repair their products.
All our part reviews are solicited directly from other customers who have purchased this exact part. While we moderate these reviews for profanity, offensive language or personally identifiable information, these reviews are posted exactly as submitted and no alterations are made by our team.
All our customer repair instructions are solicited directly from other customers just like you who have purchased and replaced this exact part. While we moderate these reviews for profanity, offensive language or personally identifiable information, these reviews are posted exactly as submitted and no alterations are made by our team.
Based on data from past customer purchasing behaviors, these parts are most commonly purchased together along with the part you are viewing. These parts may be necessary or helpful to replace to complete your current repair.
All our installation videos are created and produced in collaboration with our in-house repair technician, Mark Sodja, who has helped millions of eReplacementParts customers over the last 13 years repair their products. Mark has years of experience in selling and repairing both commercial and residential products with a specialty in gas-powered equipment.
This data is collected from customers who submitted a repair instruction after replacing this exact part. Customers can rate how easy the repair was to complete and how long it took. We aggregate this data to provide a repair rating that allows customers to quickly determine the difficulty and time needed to perform their own repair.


