eReplacementParts.com
877-346-4814
DeWALT Parts
Repair Parts Home
  
Power Tool Parts
  
DeWALT Parts
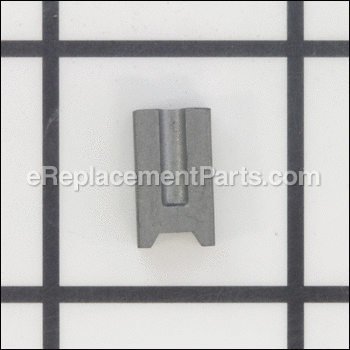
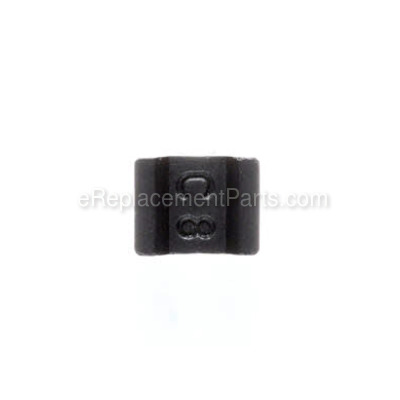
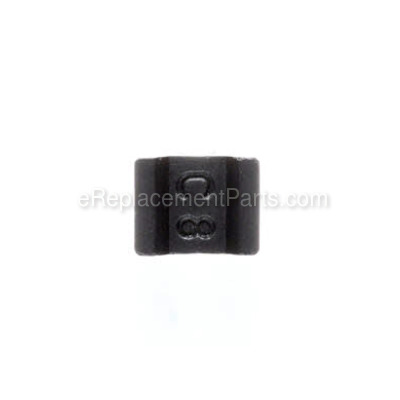
  176846-04 Carbon Brush

Carbon Brush 176846-04

OEM part for: DeWALT

Part Number: 176846-04


Install
Videos!
Carbon Brush - 176846-04:DeWALT 360 View
Carbon Brush - 176846-04:DeWALTCarbon Brush - 176846-04:DeWALTCarbon Brush - 176846-04:DeWALT 360 View
Usually ships in 7 - 12 business days
Leaves our warehouse within
7 - 12 business days

Minimum Quantity of 2 Required

Easy 15-30 minutes (11 rated repairs)?
OEM: Original Equipment Manufacturer ?
Black and Decker DeWALT Porter Cable

Product Description ?

This carbon brush is an authentic DeWalt replacement part.
It is sold individually, 2 are needed to make a set
• Worn brushes are frequently the cause of a poorly running motor.
• Replacing brushes can fix an intermittently operating motor.
• New brushes can restore a motor’s electric braking.

Carbon motor brushes are one of the most commonly replaced power tool parts.
The reason is that carbon brushes are wear items, meaning that through friction and use they will gradually wear away and eventually will need replacing.
Worn brushes are a common causes of intermittent motor function, reduced electric braking and reduced motor power.
A worn-out brush will often be worn down near to the wire lead and can be cracked, pitted, or burned.
When replacing carbon brushes, also check your armature for burns, cracks, or other damage which are indications of a larger motor problem needing attention.

  • Classification: Part
  • Weight: 0.01 lbs.
  • Also Known As: Motor Brush
  • Shipping: Ships Worldwide

Compatibility

This is the official OEM part for the following brands:

  • Black and Decker
  • DeWALT
  • Porter Cable

This item works with the following types of products:

  • Drill
  • Electric Drill
  • Hammer Drill
  • Screwdriver
  • Shear

This part replaces obsolete part #: 176846-03, 176846-02

Repair Videos ?

Watch the Repair Video for Carbon Brush
Articles:
Step-by-step instructions for removing and installing the motor brushes on your DeWALT shear. ...
April 02, 2018

Customer Part Reviews ?

5
Average Rating (out of 5):
5 Reviews
Click to filter by ratings:
5 stars
5
4 stars
0
3 stars
0
2 stars
0
1 stars
0
  • Highest Rating
  • Most Recent
< PREV
  • 1
NEXT >
  • Exact part
    great price great service
    mark - June 17, 2021 Verified Purchase
    the Carbon Brush was great. & worked great
    The only issue I have is the plastic parts. which I know you have no choice about. All ls good, Thanks a lot.
    Victoria - May 11, 2021 Verified Purchase
    worked ok
    back in business
    Guest - March 17, 2020 Verified Purchase
    Needed parts shipped promptly
    Nee brushes for electric drill shilled promptly and drill now runs as designed. Very happy.
    Guest - November 22, 2019 Verified Purchase
    Brushes
    It's what I ordered and fit good.
    Guest - November 6, 2019 Verified Purchase

    Questions & Answers ?

    Our customer Service team is at the ready daily to answer your part and product questions.

    photo of team member
    Ask our Team

    We have a dedicated staff with decades of collective experience in helping customers just like you purchase parts to repair their products.

    Does this fit my product?

    Questions & Answers for Carbon Brush


    No questions have been asked yet

    Customer Repair Instructions ?

    All our customer repair instructions are solicited directly from other customers just like you who have purchased and replaced this exact part.

    Easy 15-30 minutes (11 rated repairs)?

    1/2 drill, I thought I burned up smoke was coming out and burned smell

    joe - November 24, 2021
    Tool Type

    Electric Drill

    Difficulty

    Medium

    Time

    15-30 minutes

    Tools Used

    Screwdriver

    Replaced brushes. There are two per drill ,spring loaded retainers make it easy to open them,slide in New brushes release and reassemble
    Did you find this story helpful?
    Thanks for voting and helping fellow customers!

    electric brushes need replaced.

    mike - March 22, 2020
    Tool Type

    Electric Drill

    Difficulty

    Easy

    Time

    Less than 15 minutes

    Tools Used

    Screwdriver

    Replaced the brushes.
    Did you find this story helpful?
    Thanks for voting and helping fellow customers!

    Old and worn out

    Robert - March 13, 2019
    Tool Type

    Circular Saw

    Difficulty

    Easy

    Time

    15-30 minutes

    Tools Used

    Screwdriver

    On the saws just removed the blades and clipped the springs in place. Replacing the brushes only took removing the caps.
    Did you find this story helpful?
    Thanks for voting and helping fellow customers!

    Not enough power

    Elizabeth - December 1, 2018
    Tool Type

    Screwdriver

    Difficulty

    Easy

    Time

    Less than 15 minutes

    Tools Used

    Screwdriver

    Remove the head off the drill take brushes out and put new ones in put head back on and wahlah perfect
    Did you find this story helpful?
    Thanks for voting and helping fellow customers!

    Commutator bar damaged on armature

    Ted - May 11, 2017
    Tool Type

    Electric Drill

    Difficulty

    Medium

    Time

    30-60 minutes

    Tools Used

    Screwdriver, Bearing puller

    Remove screws from handle and separate halves to access trigger mechanism and brush holders. Remove brushes.
    Remove case screws and separate case at motor and gearbox joint. Be mindful of shims on ends of gear shafts. They need to stay in place.
    The armature will now slide out of the case with a little effort. Rear bearing has a rubber coating that will cause some drag for the first half inch or so.
    The old bearings can be removed from the armature and installed on the new part with the proper puller however if your drill is heavily used or you do not have a puller it may be best to install new bearings with the new armature. The nose end bearing may be stuck in the plate that serves as the rear of the gearcase. It is just a snug fit and should come out with a few light taps.
    Reassemble in reverse order and enjoy.
    Did you find this story helpful?
    Thanks for voting and helping fellow customers!

    Armature noisy and excessive sparking

    George - August 29, 2016
    Tool Type

    Electric Drill

    Difficulty

    Medium

    Time

    15-30 minutes

    Tools Used

    Screwdriver, Pliers

    Dismantled the handle and rthe ear case of the drill to access the motor/armature. Used a screwdriver and pliers to pull back the brush contact springs and remove the brushes. Cleaned commutator surfaces. Replaced brushes and reattached rear case and handle. Done.
    Did you find this story helpful?
    Thanks for voting and helping fellow customers!

    Motor was skipping

    Philip - June 30, 2016
    Tool Type

    Electric Drill

    Difficulty

    Easy

    Time

    Less than 15 minutes

    Tools Used

    Screwdriver

    1. Removed back of handle.
    2. Pried up retaining springs for brushes.
    3. Removed old brushes and allowed retaining springs to return to holding position.
    4. Replaced back of handle
    Did you find this story helpful?
    Thanks for voting and helping fellow customers!

    Brush holder was burned and broken

    Paul - July 19, 2016
    Tool Type

    Screwdriver

    Difficulty

    Medium

    Time

    15-30 minutes

    Tools Used

    Screwdriver, Star tip

    1. Removed back handle cover.
    2. Unscrewed brush holder.
    3. Pulled the holder out with wires attached.
    4. Installed new brushes into new holders.
    5. Swapped wires over to new holder.
    6. Installed new holder into drill while lifting the brush.
    7. Repeat for the other side holder.
    8. Reinstall back handle cover.
    Did you find this story helpful?
    Thanks for voting and helping fellow customers!

    Brushes worn, brush holders melted

    Pedro - June 3, 2016
    Tool Type

    Screwdriver

    Difficulty

    Easy

    Time

    15-30 minutes

    Tools Used

    Screwdriver

    Remove the screws from the back handle cover, and remove the cover. Remove the terminals from the brush holder. Remove the screw holding the brush holder, remove the brush holder, the worn brush will come out. Screw in the new brush holder. Then lift the brush spring from inside of the brush holder and place the new brush in the holder and place the spring behind it. Connect the terminal to the brush holder. Repeat for the other side. Replace the back handle cover. And you're done.
    Did you find this story helpful?
    Thanks for voting and helping fellow customers!

    Right brush holder at some time had gotten hot and melted causing brush to cant which caused excessive arcing and intermittent starts.

    Tim - May 19, 2016
    Tool Type

    Electric Drill

    Difficulty

    Easy

    Time

    Less than 15 minutes

    Tools Used

    Screwdriver

    Removed back of pistol grip after taking out 4 Phillips screws. Removed 1 screw retaining brush holder and removed it and brush. Installed new one in reverse order paying attention to wire connections. Installed back of pistol grip and after a short period of run time the brushes seated properly and all problems solved
    Did you find this story helpful?
    Thanks for voting and helping fellow customers!

    OEM stands for Original Equipment Manufacturer and means the part you’re buying is sourced directly from the manufacturer who made your product. At eReplacementParts, we sell only genuine OEM parts, guaranteeing the part you’re purchasing is of better design and of higher quality than aftermarket parts.

    Learn More

    Our product descriptions are a combination of data sourced directly from the manufacturers who made your product as well as content researched and curated by our content & customer service teams. This content is edited and reviewed internally before being made public to customers.

    Our customer service team are at the ready daily to answer your part and product questions. We have a dedicated staff with decades of collective experience in helping customers just like you purchase parts to repair their products.

    All our part reviews are solicited directly from other customers who have purchased this exact part. While we moderate these reviews for profanity, offensive language or personally identifiable information, these reviews are posted exactly as submitted and no alterations are made by our team.

    All our customer repair instructions are solicited directly from other customers just like you who have purchased and replaced this exact part. While we moderate these reviews for profanity, offensive language or personally identifiable information, these reviews are posted exactly as submitted and no alterations are made by our team.

    Based on data from past customer purchasing behaviors, these parts are most commonly purchased together along with the part you are viewing. These parts may be necessary or helpful to replace to complete your current repair.

    All our installation videos are created and produced in collaboration with our in-house repair technician, Mark Sodja, who has helped millions of eReplacementParts customers over the last 13 years repair their products. Mark has years of experience in selling and repairing both commercial and residential products with a specialty in gas-powered equipment.

    This data is collected from customers who submitted a repair instruction after replacing this exact part. Customers can rate how easy the repair was to complete and how long it took. We aggregate this data to provide a repair rating that allows customers to quickly determine the difficulty and time needed to perform their own repair.

    eReplacementParts.com
    7174 South 400 West
    Suite 5
    Midvale, UT 84047
    visa mastercard discover american express PayPal
    Recent searches:
    Suggested searches:
    Models:
    Manufacturers:
    Need help finding your model number?