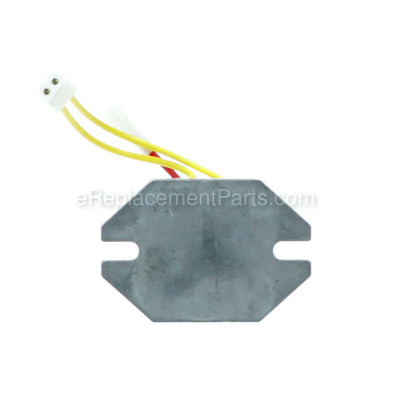
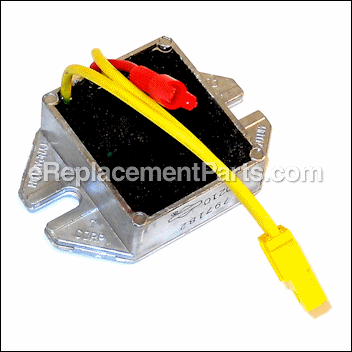


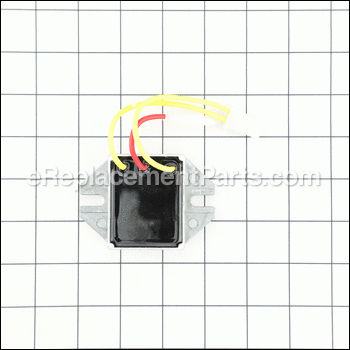

This is a geniune OEM part. The Briggs & Stratton, 10-16 amp voltage regulator is composed of metal, wiring and plastic parts. The regulator is compatible with many lawn and garden machines. This part is connected to the engine's terminals, and has been designed to manage the voltage in the device's electrical system. A screwdriver and a socket set are needed in making the removal and repair. It is recommended to refer to the manual and diagrams for repair instructions. This item is sold individually.
Regulator 845907
OEM part for: Briggs and Stratton, Toro, Vanguard - Briggs & Stratton
Part Number: 845907
$66.97
In Stock
Jump To:
Frequently Purchased Together ?

Compatibility
This part will fit the following 18269 machines
Briggs and Stratton
8799-1 Portable Generator View Diagrams & Manuals
311707 (0132-E1) Engine View Diagrams & Manuals
445777-0231-E1 Engine View Diagrams & Manuals
422447-4059-01 Engine View Diagrams & Manuals
20B437-0111-E1 Engine View Diagrams & Manuals
20B437-0112-E1 Engine View Diagrams & Manuals
20F437-0113-E1 Engine View Diagrams & Manuals
20F437-0114-E1 Engine View Diagrams & Manuals
20H137-0119-B1 Engine View Diagrams & Manuals
20H137-0119-E9 Engine View Diagrams & Manuals
20H137-0124-B1 Engine View Diagrams & Manuals
20H137-0124-E9 Engine View Diagrams & Manuals
20H137-0125-B1 Engine View Diagrams & Manuals
20H137-0129-B1 Engine View Diagrams & Manuals
20H137-0131-B1 Engine View Diagrams & Manuals
20H137-0136-B1 Engine View Diagrams & Manuals
20H137-0138-H1 Engine View Diagrams & Manuals
20H232-0122-B1 Engine View Diagrams & Manuals
20H232-0124-B1 Engine View Diagrams & Manuals
20H232-0126-B1 Engine View Diagrams & Manuals
20H232-0128-B1 Engine View Diagrams & Manuals
20H232-0134-B1 Engine View Diagrams & Manuals
20H232-0135-B1 Engine View Diagrams & Manuals
20H237-0113-B1 Engine View Diagrams & Manuals
20H237-0113-E9 Engine View Diagrams & Manuals
20H237-0115-B1 Engine View Diagrams & Manuals
20H237-0123-B1 Engine View Diagrams & Manuals
20H237-0125-B1 Engine View Diagrams & Manuals
20H237-0127-B1 Engine View Diagrams & Manuals
20H237-0127-H7 Engine View Diagrams & Manuals
20H237-0131-B1 Engine View Diagrams & Manuals
20H237-0132-B1 Engine View Diagrams & Manuals
20H237-0133-B1 Engine View Diagrams & Manuals
20L237-0110-G1 Engine View Diagrams & Manuals
20M307-0144-H1 Engine View Diagrams & Manuals
20M337-0134-H1 Engine View Diagrams & Manuals
20P237-0115-E1 Engine View Diagrams & Manuals
20P237-0126-E1 Engine View Diagrams & Manuals
20P437-0110-E1 Engine View Diagrams & Manuals
20S132-0111-F1 Engine View Diagrams & Manuals
20S157-0110-F1 Engine View Diagrams & Manuals
20S202-0127-F1 Engine View Diagrams & Manuals
20S207-0120-F1 Engine View Diagrams & Manuals
20S212-0112-F1 Engine View Diagrams & Manuals
20S212-0117-G1 Engine View Diagrams & Manuals
20S212-0118-F1 Engine View Diagrams & Manuals
20S212-1151-F1 Engine View Diagrams & Manuals
20S212-1194-G1 Engine View Diagrams & Manuals
20S212-1309-F1 Engine View Diagrams & Manuals
20S217-0113-F1 Engine View Diagrams & Manuals
20S232-0035-F1 Engine View Diagrams & Manuals
20S232-0036-F1 Engine View Diagrams & Manuals
20S232-0037-F1 Engine View Diagrams & Manuals
20S232-0038-F1 Engine View Diagrams & Manuals
20S232-0063-F1 Engine View Diagrams & Manuals
20S232-0108-F1 Engine View Diagrams & Manuals
20S232-1124-F1 Engine View Diagrams & Manuals
20S232-1127-F1 Engine View Diagrams & Manuals
20S232-1246-F1 Engine View Diagrams & Manuals
20S237-0041-F1 Engine View Diagrams & Manuals
20S237-0042-F1 Engine View Diagrams & Manuals
20S237-0109-F1 Engine View Diagrams & Manuals
20S237-0123-F1 Engine View Diagrams & Manuals
20S237-1116-F1 Engine View Diagrams & Manuals
20S237-1216-F1 Engine View Diagrams & Manuals
20S237-1322-F1 Engine View Diagrams & Manuals
20S237-1533-F1 Engine View Diagrams & Manuals
20S252-0049-F1 Engine View Diagrams & Manuals
20S252-0121-F1 Engine View Diagrams & Manuals
20S252-0122-F1 Engine View Diagrams & Manuals
20S257-0050-F1 Engine View Diagrams & Manuals
20S257-0124-F1 Engine View Diagrams & Manuals
20S257-1197-F1 Engine View Diagrams & Manuals
21A977-0115-E1 Engine View Diagrams & Manuals
21A977-0165-E1 Engine View Diagrams & Manuals
21A977-0165-E9 Engine View Diagrams & Manuals
21A977-0189-E1 Engine View Diagrams & Manuals
21A977-0197-E1 Engine View Diagrams & Manuals
21B417-1117-E1 Engine View Diagrams & Manuals
21B902-0015-E1 Engine View Diagrams & Manuals
21B902-0015-G1 Engine View Diagrams & Manuals
21B902-0022-B1 Engine View Diagrams & Manuals
21B902-0022-E1 Engine View Diagrams & Manuals
21B902-0022-E9 Engine View Diagrams & Manuals
21B906-0020-B1 Engine View Diagrams & Manuals
21B906-0020-B9 Engine View Diagrams & Manuals
21B906-0020-E1 Engine View Diagrams & Manuals
21B906-0020-E9 Engine View Diagrams & Manuals
21B906-0121-E1 Engine View Diagrams & Manuals
21B906-0192-B1 Engine View Diagrams & Manuals
21B906-0192-E1 Engine View Diagrams & Manuals
21B907-0026-E1 Engine View Diagrams & Manuals
21B907-0026-G1 Engine View Diagrams & Manuals
21B907-0028-B1 Engine View Diagrams & Manuals
21B907-0028-B9 Engine View Diagrams & Manuals
21B907-0028-E1 Engine View Diagrams & Manuals
21B907-0028-E9 Engine View Diagrams & Manuals
21B907-0029-B1 Engine View Diagrams & Manuals
21B907-0029-E1 Engine View Diagrams & Manuals
21B907-0029-G1 Engine View Diagrams & Manuals
21B907-0131-E1 Engine View Diagrams & Manuals
21B907-0132-E1 Engine View Diagrams & Manuals
21B907-0137-B1 Engine View Diagrams & Manuals
21B907-0137-E1 Engine View Diagrams & Manuals
21B907-0139-B1 Engine View Diagrams & Manuals
21B907-0139-E1 Engine View Diagrams & Manuals
21B907-0140-B1 Engine View Diagrams & Manuals
21B907-0140-E1 Engine View Diagrams & Manuals
21B907-0153-G1 Engine View Diagrams & Manuals
21B907-0154-B1 Engine View Diagrams & Manuals
21B907-0159-B1 Engine View Diagrams & Manuals
21B907-0164-B1 Engine View Diagrams & Manuals
21B907-0203-G1 Engine View Diagrams & Manuals
21B972-0016-E1 Engine View Diagrams & Manuals
21B972-0016-G1 Engine View Diagrams & Manuals
21B972-0116-E1 Engine View Diagrams & Manuals
21B972-0117-B1 Engine View Diagrams & Manuals
21B972-0117-E1 Engine View Diagrams & Manuals
21B972-0142-B1 Engine View Diagrams & Manuals
21B972-0142-E1 Engine View Diagrams & Manuals
21B976-0114-E1 Engine View Diagrams & Manuals
21B976-0194-B1 Engine View Diagrams & Manuals
21B976-0194-E1 Engine View Diagrams & Manuals
21B976-0202-G1 Engine View Diagrams & Manuals
21B976-4194-B1 Engine View Diagrams & Manuals
21B977-0036-B1 Engine View Diagrams & Manuals
21B977-0036-E1 Engine View Diagrams & Manuals
21B977-0036-G1 Engine View Diagrams & Manuals
21B977-0038-B1 Engine View Diagrams & Manuals
21B977-0038-E1 Engine View Diagrams & Manuals
21B977-0038-E9 Engine View Diagrams & Manuals
21B977-0110-B1 Engine View Diagrams & Manuals
21B977-0110-E1 Engine View Diagrams & Manuals
21B977-0119-E1 Engine View Diagrams & Manuals
21B977-0120-B1 Engine View Diagrams & Manuals
21B977-0120-E1 Engine View Diagrams & Manuals
21B977-0123-E1 Engine View Diagrams & Manuals
21B977-0124-E1 Engine View Diagrams & Manuals
21B977-0126-B1 Engine View Diagrams & Manuals
21B977-0126-E1 Engine View Diagrams & Manuals
21B977-0127-B1 Engine View Diagrams & Manuals
21B977-0127-E1 Engine View Diagrams & Manuals
21B977-0129-B1 Engine View Diagrams & Manuals
21B977-0129-E1 Engine View Diagrams & Manuals
21B977-0130-E1 Engine View Diagrams & Manuals
21B977-0136-B1 Engine View Diagrams & Manuals
21B977-0136-E1 Engine View Diagrams & Manuals
21B977-0138-E1 Engine View Diagrams & Manuals
21B977-0141-B1 Engine View Diagrams & Manuals
21B977-0141-E1 Engine View Diagrams & Manuals
21B977-0146-B1 Engine View Diagrams & Manuals
21B977-0147-B1 Engine View Diagrams & Manuals
21B977-0149-B1 Engine View Diagrams & Manuals
21B977-0152-B1 Engine View Diagrams & Manuals
21B977-0152-B9 Engine View Diagrams & Manuals
21B977-0155-B1 Engine View Diagrams & Manuals
21B977-0156-B1 Engine View Diagrams & Manuals
21B977-0157-B1 Engine View Diagrams & Manuals
21B977-0160-B1 Engine View Diagrams & Manuals
21B977-0161-B1 Engine View Diagrams & Manuals
21B977-0162-B1 Engine View Diagrams & Manuals
21B977-0163-B1 Engine View Diagrams & Manuals
21B977-0163-E1 Engine View Diagrams & Manuals
21B977-0167-B1 Engine View Diagrams & Manuals
21B977-0168-B1 Engine View Diagrams & Manuals
21B977-0183-B1 Engine View Diagrams & Manuals
21B977-0183-E1 Engine View Diagrams & Manuals
21B977-0190-E1 Engine View Diagrams & Manuals
21B977-0193-B1 Engine View Diagrams & Manuals
21B977-0195-B1 Engine View Diagrams & Manuals
21B977-0195-E1 Engine View Diagrams & Manuals
21B977-0197-B1 Engine View Diagrams & Manuals
21B977-0198-B1 Engine View Diagrams & Manuals
21B977-0198-E1 Engine View Diagrams & Manuals
21B977-0205-B1 Engine View Diagrams & Manuals
21B977-0206-G1 Engine View Diagrams & Manuals
21B977-0209-G1 Engine View Diagrams & Manuals
21B977-0210-B1 Engine View Diagrams & Manuals
21B977-0213-B1 Engine View Diagrams & Manuals
21B977-0215-B1 Engine View Diagrams & Manuals
21B977-0216-H1 Engine View Diagrams & Manuals
21B977-0773-B1 Engine View Diagrams & Manuals
21B977-0843-B1 Engine View Diagrams & Manuals
21B977-4155-B1 Engine View Diagrams & Manuals
21B977-4156-B1 Engine View Diagrams & Manuals
21B977-4195-B1 Engine View Diagrams & Manuals
21B977-4198-B1 Engine View Diagrams & Manuals
21M307-0131-F1 Engine View Diagrams & Manuals
21M307-0133-H1 Engine View Diagrams & Manuals
21M317-0115-E1 Engine View Diagrams & Manuals
21M317-0115-H1 Engine View Diagrams & Manuals
21M317-0125-E1 Engine View Diagrams & Manuals
21M337-0123-H1 Engine View Diagrams & Manuals
21M417-0171-E1 Engine View Diagrams & Manuals
21P237-0119-E1 Engine View Diagrams & Manuals
21S132-0034-F1 Engine View Diagrams & Manuals
21S132-0035-F1 Engine View Diagrams & Manuals
21S132-0036-F1 Engine View Diagrams & Manuals
21S132-0063-F1 Engine View Diagrams & Manuals
21S137-0033-F1 Engine View Diagrams & Manuals
21S137-0041-F1 Engine View Diagrams & Manuals
21S157-0050-F1 Engine View Diagrams & Manuals
21S237-0003-F1 Engine View Diagrams & Manuals
21S237-0043-F1 Engine View Diagrams & Manuals
21S237-0110-F1 Engine View Diagrams & Manuals
21T207-0120-F1 Engine View Diagrams & Manuals
21T217-1116-F1 Engine View Diagrams & Manuals
21T237-1541-F1 Engine View Diagrams & Manuals
25T232-0007-F1 Engine View Diagrams & Manuals
25T232-0009-G1 Engine View Diagrams & Manuals
25T232-0013-G1 Engine View Diagrams & Manuals
25T232-0018-F1 Engine View Diagrams & Manuals
25T232-0019-H7 Engine View Diagrams & Manuals
25T232-0021-H1 Engine View Diagrams & Manuals
25T232-0037-F1 Engine View Diagrams & Manuals
25T232-0112-H1 Engine View Diagrams & Manuals
25T232-0115-H1 Engine View Diagrams & Manuals
25T232-0115-H7 Engine View Diagrams & Manuals
25T232-0116-H1 Engine View Diagrams & Manuals
25T232-0116-H7 Engine View Diagrams & Manuals
25T232-0118-F1 Engine View Diagrams & Manuals
25T232-0119-H1 Engine View Diagrams & Manuals
25T232-0120-H1 Engine View Diagrams & Manuals
25T232-0122-H1 Engine View Diagrams & Manuals
25T232-0122-H7 Engine View Diagrams & Manuals
25T232-0123-F1 Engine View Diagrams & Manuals
25T232-0124-H1 Engine View Diagrams & Manuals
25T232-0124-H7 Engine View Diagrams & Manuals
25T232-0125-H1 Engine View Diagrams & Manuals
25T232-0126-H1 Engine View Diagrams & Manuals
25T232-0127-H1 Engine View Diagrams & Manuals
25T232-0131-H1 Engine View Diagrams & Manuals
25T232-0135-F1 Engine View Diagrams & Manuals
25T232-0138-H1 Engine View Diagrams & Manuals
25T232-0146-H7 Engine View Diagrams & Manuals
25T232-0150-H7 Engine View Diagrams & Manuals
25T232-0158-F1 Engine View Diagrams & Manuals
25T232-0160-G1 Engine View Diagrams & Manuals
25T232-0162-H7 Engine View Diagrams & Manuals
25T232-0170-B1 Engine View Diagrams & Manuals
25T232-0172-B1 Engine View Diagrams & Manuals
25T235-0017-B1 Engine View Diagrams & Manuals
25T235-0110-G1 Engine View Diagrams & Manuals
25T235-0111-G1 Engine View Diagrams & Manuals
25T235-0111-G2 Engine View Diagrams & Manuals
25T235-0114-B1 Engine View Diagrams & Manuals
25T235-0132-B1 Engine View Diagrams & Manuals
25T235-0132-H7 Engine View Diagrams & Manuals
25T235-0134-H1 Engine View Diagrams & Manuals
25T235-0134-H7 Engine View Diagrams & Manuals
25T235-0147-H7 Engine View Diagrams & Manuals
25T235-0152-H1 Engine View Diagrams & Manuals
25T235-0167-H7 Engine View Diagrams & Manuals
25T235-0169-B1 Engine View Diagrams & Manuals
25T235-0171-B1 Engine View Diagrams & Manuals
25T237-0001-H1 Engine View Diagrams & Manuals
25T237-0002-H1 Engine View Diagrams & Manuals
25T237-0004-H7 Engine View Diagrams & Manuals
25T237-0005-B1 Engine View Diagrams & Manuals
25T237-0006-H7 Engine View Diagrams & Manuals
25T237-0010-F1 Engine View Diagrams & Manuals
25T237-0011-F1 Engine View Diagrams & Manuals
25T237-0012-G1 Engine View Diagrams & Manuals
25T237-0014-H7 Engine View Diagrams & Manuals
25T237-0020-H1 Engine View Diagrams & Manuals
25T237-0022-F1 Engine View Diagrams & Manuals
25T237-0023-H7 Engine View Diagrams & Manuals
25T237-0113-H1 Engine View Diagrams & Manuals
25T237-0121-H1 Engine View Diagrams & Manuals
25T237-0137-B1 Engine View Diagrams & Manuals
25T237-0139-G1 Engine View Diagrams & Manuals
25T237-0142-H1 Engine View Diagrams & Manuals
25T237-0143-H1 Engine View Diagrams & Manuals
25T237-0145-H1 Engine View Diagrams & Manuals
25T237-0148-H1 Engine View Diagrams & Manuals
25T237-0149-F1 Engine View Diagrams & Manuals
25T237-0151-H7 Engine View Diagrams & Manuals
25T237-0153-H1 Engine View Diagrams & Manuals
25T237-0155-H1 Engine View Diagrams & Manuals
25T237-0156-H1 Engine View Diagrams & Manuals
25T237-0161-H1 Engine View Diagrams & Manuals
25T237-0165-B1 Engine View Diagrams & Manuals
25T237-0166-H1 Engine View Diagrams & Manuals
28AH77-0112-E1 Engine View Diagrams & Manuals
28B707-1125-E1 Engine View Diagrams & Manuals
28BH77-0115-E1 Engine View Diagrams & Manuals
28M706-1031-E1 Engine View Diagrams & Manuals
28M707-0026-01 Engine View Diagrams & Manuals
28M707-0029-01 Engine View Diagrams & Manuals
28M707-0036-01 Engine View Diagrams & Manuals
28M707-0101-01 Engine View Diagrams & Manuals
28M707-0102-01 Engine View Diagrams & Manuals
28M707-0112-01 Engine View Diagrams & Manuals
28M707-0113-01 Engine View Diagrams & Manuals
28M707-0114-01 Engine View Diagrams & Manuals
28M707-0115-01 Engine View Diagrams & Manuals
28M707-0118-01 Engine View Diagrams & Manuals
28M707-0122-01 Engine View Diagrams & Manuals
28M707-0123-01 Engine View Diagrams & Manuals
28M707-0124-01 Engine View Diagrams & Manuals
28M707-0125-01 Engine View Diagrams & Manuals
28M707-0126-01 Engine View Diagrams & Manuals
28M707-0127-01 Engine View Diagrams & Manuals
28M707-0128-01 Engine View Diagrams & Manuals
28M707-0129-01 Engine View Diagrams & Manuals
28M707-0130-01 Engine View Diagrams & Manuals
28M707-0132-01 Engine View Diagrams & Manuals
28M707-0133-01 Engine View Diagrams & Manuals
28M707-0136-01 Engine View Diagrams & Manuals
28M707-0137-01 Engine View Diagrams & Manuals
28M707-0138-01 Engine View Diagrams & Manuals
28M707-0140-01 Engine View Diagrams & Manuals
28M707-0142-01 Engine View Diagrams & Manuals
28M707-0143-01 Engine View Diagrams & Manuals
28M707-0146-01 Engine View Diagrams & Manuals
28M707-0147-01 Engine View Diagrams & Manuals
28M707-0148-01 Engine View Diagrams & Manuals
28M707-0178-01 Engine View Diagrams & Manuals
28M707-0179-01 Engine View Diagrams & Manuals
28M707-0180-01 Engine View Diagrams & Manuals
28M707-0526-A1 Engine View Diagrams & Manuals
28M707-0529-A1 Engine View Diagrams & Manuals
28M707-0604-A1 Engine View Diagrams & Manuals
28M707-0615-A1 Engine View Diagrams & Manuals
28M707-0622-A1 Engine View Diagrams & Manuals
28M707-0633-A1 Engine View Diagrams & Manuals
28M707-0647-A1 Engine View Diagrams & Manuals
28M707-0648-A1 Engine View Diagrams & Manuals
28M707-0660-A1 Engine View Diagrams & Manuals
28M707-1026-E1 Engine View Diagrams & Manuals
28M707-1029-E1 Engine View Diagrams & Manuals
28M707-1036-E1 Engine View Diagrams & Manuals
28M707-1039-E1 Engine View Diagrams & Manuals
28M707-1040-E1 Engine View Diagrams & Manuals
28M707-1102-E1 Engine View Diagrams & Manuals
28M707-1113-E1 Engine View Diagrams & Manuals
28M707-1120-E1 Engine View Diagrams & Manuals
28M707-1121-E1 Engine View Diagrams & Manuals
28M707-1122-E1 Engine View Diagrams & Manuals
28M707-1123-E1 Engine View Diagrams & Manuals
28M707-1124-E1 Engine View Diagrams & Manuals
28M707-1125-E1 Engine View Diagrams & Manuals
28M707-1127-E1 Engine View Diagrams & Manuals
28M707-1128-E1 Engine View Diagrams & Manuals
28M707-1129-E1 Engine View Diagrams & Manuals
28M707-1130-E1 Engine View Diagrams & Manuals
28M707-1132-E1 Engine View Diagrams & Manuals
28M707-1133-E1 Engine View Diagrams & Manuals
28M707-1135-E1 Engine View Diagrams & Manuals
28M707-1136-E1 Engine View Diagrams & Manuals
28M707-1137-E1 Engine View Diagrams & Manuals
28M707-1138-E1 Engine View Diagrams & Manuals
28M707-1141-E1 Engine View Diagrams & Manuals
28M707-1143-E1 Engine View Diagrams & Manuals
28M707-1147-E1 Engine View Diagrams & Manuals
28M707-1148-E1 Engine View Diagrams & Manuals
28M707-1149-E1 Engine View Diagrams & Manuals
28M707-1150-E1 Engine View Diagrams & Manuals
28M707-1151-E1 Engine View Diagrams & Manuals
28M707-1152-E1 Engine View Diagrams & Manuals
28M707-1160-E1 Engine View Diagrams & Manuals
28M707-1161-E1 Engine View Diagrams & Manuals
28M707-1162-E1 Engine View Diagrams & Manuals
28M707-1162-E2 Engine View Diagrams & Manuals
28M707-1166-E1 Engine View Diagrams & Manuals
28M707-1167-E1 Engine View Diagrams & Manuals
28M707-1178-E1 Engine View Diagrams & Manuals
28M707-1179-E1 Engine View Diagrams & Manuals
28M707-1180-E1 Engine View Diagrams & Manuals
28M707-1182-E1 Engine View Diagrams & Manuals
28M707-1183-E1 Engine View Diagrams & Manuals
28M707-1184-E1 Engine View Diagrams & Manuals
28M707-1185-E1 Engine View Diagrams & Manuals
28M707-1186-E1 Engine View Diagrams & Manuals
28M707-1187-E1 Engine View Diagrams & Manuals
28M707-1189-E1 Engine View Diagrams & Manuals
28M707-1190-E1 Engine View Diagrams & Manuals
28M707-1192-E1 Engine View Diagrams & Manuals
28M707-1193-E1 Engine View Diagrams & Manuals
28M707-1194-E1 Engine View Diagrams & Manuals
28Q777-0026-01 Engine View Diagrams & Manuals
28Q777-0026-02 Engine View Diagrams & Manuals
28Q777-0026-03 Engine View Diagrams & Manuals
28Q777-0101-01 Engine View Diagrams & Manuals
28Q777-0102-01 Engine View Diagrams & Manuals
28Q777-0112-01 Engine View Diagrams & Manuals
28Q777-0116-01 Engine View Diagrams & Manuals
28Q777-0117-01 Engine View Diagrams & Manuals
28Q777-0128-01 Engine View Diagrams & Manuals
28Q777-0129-01 Engine View Diagrams & Manuals
28Q777-0136-01 Engine View Diagrams & Manuals
28Q777-0139-01 Engine View Diagrams & Manuals
28Q777-0140-01 Engine View Diagrams & Manuals
28Q777-0144-01 Engine View Diagrams & Manuals
28Q777-0148-01 Engine View Diagrams & Manuals
28Q777-0149-01 Engine View Diagrams & Manuals
28Q777-0150-01 Engine View Diagrams & Manuals
28Q777-0151-01 Engine View Diagrams & Manuals
28Q777-0155-01 Engine View Diagrams & Manuals
28Q777-0155-02 Engine View Diagrams & Manuals
28Q777-0156-01 Engine View Diagrams & Manuals
28Q777-0164-01 Engine View Diagrams & Manuals
28Q777-0165-01 Engine View Diagrams & Manuals
28Q777-0166-01 Engine View Diagrams & Manuals
28Q777-0167-01 Engine View Diagrams & Manuals
28Q777-0168-01 Engine View Diagrams & Manuals
28Q777-0526-E1 Engine View Diagrams & Manuals
28Q777-0526-E2 Engine View Diagrams & Manuals
28Q777-0536-A1 Engine View Diagrams & Manuals
28Q777-0536-E1 Engine View Diagrams & Manuals
28Q777-0601-E1 Engine View Diagrams & Manuals
28Q777-0602-E1 Engine View Diagrams & Manuals
28Q777-0612-A1 Engine View Diagrams & Manuals
28Q777-0613-A1 Engine View Diagrams & Manuals
28Q777-0616-E1 Engine View Diagrams & Manuals
28Q777-0623-A1 Engine View Diagrams & Manuals
28Q777-0624-01 Engine View Diagrams & Manuals
28Q777-0624-A1 Engine View Diagrams & Manuals
28Q777-0627-A1 Engine View Diagrams & Manuals
28Q777-0627-A2 Engine View Diagrams & Manuals
28Q777-0630-A1 Engine View Diagrams & Manuals
28Q777-0631-E1 Engine View Diagrams & Manuals
28Q777-0636-E1 Engine View Diagrams & Manuals
28Q777-0639-E1 Engine View Diagrams & Manuals
28Q777-0641-A1 Engine View Diagrams & Manuals
28Q777-0641-E1 Engine View Diagrams & Manuals
28Q777-0642-A1 Engine View Diagrams & Manuals
28Q777-0645-E1 Engine View Diagrams & Manuals
28Q777-0646-A1 Engine View Diagrams & Manuals
28Q777-0646-E1 Engine View Diagrams & Manuals
28Q777-0647-A1 Engine View Diagrams & Manuals
28Q777-0647-E1 Engine View Diagrams & Manuals
28Q777-0650-A1 Engine View Diagrams & Manuals
28Q777-0655-A1 Engine View Diagrams & Manuals
28Q777-0655-A2 Engine View Diagrams & Manuals
28Q777-0656-A1 Engine View Diagrams & Manuals
28Q777-0662-E1 Engine View Diagrams & Manuals
28Q777-0664-A1 Engine View Diagrams & Manuals
28Q777-0667-A1 Engine View Diagrams & Manuals
28Q777-0668-E1 Engine View Diagrams & Manuals
28Q777-0670-A1 Engine View Diagrams & Manuals
28Q777-0670-E1 Engine View Diagrams & Manuals
28Q777-0671-A1 Engine View Diagrams & Manuals
28Q777-0672-E1 Engine View Diagrams & Manuals
28Q777-0673-E1 Engine View Diagrams & Manuals
28Q777-0674-E1 Engine View Diagrams & Manuals
28Q777-0675-A1 Engine View Diagrams & Manuals
28Q777-0675-E1 Engine View Diagrams & Manuals
28Q777-0676-A1 Engine View Diagrams & Manuals
28Q777-0677-E1 Engine View Diagrams & Manuals
28Q777-0678-E1 Engine View Diagrams & Manuals
28Q777-0679-E1 Engine View Diagrams & Manuals
28Q777-0681-01 Engine View Diagrams & Manuals
28Q777-0687-E1 Engine View Diagrams & Manuals
28Q777-0687-E3 Engine View Diagrams & Manuals
28Q777-0688-E1 Engine View Diagrams & Manuals
28Q777-0690-E1 Engine View Diagrams & Manuals
28Q777-0691-E1 Engine View Diagrams & Manuals
28Q777-0692-E1 Engine View Diagrams & Manuals
28Q777-0693-E1 Engine View Diagrams & Manuals
28Q777-0694-E1 Engine View Diagrams & Manuals
31A607-3026-G5 Engine View Diagrams & Manuals
31A607-3472-G5 Engine View Diagrams & Manuals
31A607-3496-G1 Engine View Diagrams & Manuals
31A607-3496-G5 Engine View Diagrams & Manuals
31A607-4116-B1 Engine View Diagrams & Manuals
31A607-4118-B1 Engine View Diagrams & Manuals
31A607-4139-B1 Engine View Diagrams & Manuals
31A677-0036-E1 Engine View Diagrams & Manuals
31A677-0036-G1 Engine View Diagrams & Manuals
31A677-0119-B1 Engine View Diagrams & Manuals
31A677-0119-E1 Engine View Diagrams & Manuals
31A677-0128-B1 Engine View Diagrams & Manuals
31A677-0136-B1 Engine View Diagrams & Manuals
31A677-0143-B1 Engine View Diagrams & Manuals
31A677-0146-B1 Engine View Diagrams & Manuals
31A677-0150-B1 Engine View Diagrams & Manuals
31A677-0163-B1 Engine View Diagrams & Manuals
31A607-0026-G1 Engine View Diagrams & Manuals
31A607-0111-B1 Engine View Diagrams & Manuals
31A607-0111-E1 Engine View Diagrams & Manuals
31A607-0113-B1 Engine View Diagrams & Manuals
31A607-0113-E1 Engine View Diagrams & Manuals
31A607-0114-B1 Engine View Diagrams & Manuals
31A607-0114-E1 Engine View Diagrams & Manuals
31A607-0115-B1 Engine View Diagrams & Manuals
31A607-0115-E1 Engine View Diagrams & Manuals
31A607-0116-B1 Engine View Diagrams & Manuals
31A607-0116-E1 Engine View Diagrams & Manuals
31A607-0117-B1 Engine View Diagrams & Manuals
31A607-0117-E1 Engine View Diagrams & Manuals
31A607-0118-B1 Engine View Diagrams & Manuals
31A607-0118-E1 Engine View Diagrams & Manuals
31A607-0120-B1 Engine View Diagrams & Manuals
31A607-0123-B1 Engine View Diagrams & Manuals
31A607-0123-E1 Engine View Diagrams & Manuals
31A607-0124-B1 Engine View Diagrams & Manuals
31A607-0125-B1 Engine View Diagrams & Manuals
31A607-0126-B1 Engine View Diagrams & Manuals
31A607-0127-B1 Engine View Diagrams & Manuals
31A607-0130-B1 Engine View Diagrams & Manuals
31A607-0132-B1 Engine View Diagrams & Manuals
31A607-0137-B1 Engine View Diagrams & Manuals
31A607-0138-B1 Engine View Diagrams & Manuals
31A607-0139-B1 Engine View Diagrams & Manuals
31A607-0140-B1 Engine View Diagrams & Manuals
31A607-0141-B1 Engine View Diagrams & Manuals
31A607-0142-G1 Engine View Diagrams & Manuals
31A607-0144-B1 Engine View Diagrams & Manuals
31A607-0145-B1 Engine View Diagrams & Manuals
31A607-0149-B1 Engine View Diagrams & Manuals
31A607-0151-B1 Engine View Diagrams & Manuals
31A607-0152-B1 Engine View Diagrams & Manuals
31A607-0154-B1 Engine View Diagrams & Manuals
31A607-0155-B1 Engine View Diagrams & Manuals
31A607-0156-B1 Engine View Diagrams & Manuals
31A607-0157-B1 Engine View Diagrams & Manuals
31A607-0158-B1 Engine View Diagrams & Manuals
31A607-0160-B1 Engine View Diagrams & Manuals
31A607-0161-B1 Engine View Diagrams & Manuals
31A607-0162-B1 Engine View Diagrams & Manuals
31A607-0164-B1 Engine View Diagrams & Manuals
31A607-0458-B1 Engine View Diagrams & Manuals
31A607-0458-E1 Engine View Diagrams & Manuals
31A607-0470-B1 Engine View Diagrams & Manuals
31A607-0508-B1 Engine View Diagrams & Manuals
31A607-0740-B1 Engine View Diagrams & Manuals
31A607-0741-B1 Engine View Diagrams & Manuals
31A607-0741-B2 Engine View Diagrams & Manuals
31A607-0741-B3 Engine View Diagrams & Manuals
31A607-0741-E1 Engine View Diagrams & Manuals
31A607-0741-G1 Engine View Diagrams & Manuals
31A607-0741-G2 Engine View Diagrams & Manuals
31A607-0756-B1 Engine View Diagrams & Manuals
31A607-0786-B1 Engine View Diagrams & Manuals
31A607-0787-B1 Engine View Diagrams & Manuals
31A607-0827-B1 Engine View Diagrams & Manuals
31A607-0950-G5 Engine View Diagrams & Manuals
31A607-0968-B1 Engine View Diagrams & Manuals
31A607-1190-B1 Engine View Diagrams & Manuals
31A607-1392-B1 Engine View Diagrams & Manuals
31A607-1432-B1 Engine View Diagrams & Manuals
31A607-1472-B1 Engine View Diagrams & Manuals
31A607-2149-B1 Engine View Diagrams & Manuals
31A607-2151-B1 Engine View Diagrams & Manuals
31A607-2392-B1 Engine View Diagrams & Manuals
31A607-2432-B1 Engine View Diagrams & Manuals
31A607-2470-B1 Engine View Diagrams & Manuals
31A707-0116-B1 Engine View Diagrams & Manuals
31A707-0116-E1 Engine View Diagrams & Manuals
31A707-0117-B1 Engine View Diagrams & Manuals
31A707-0121-B1 Engine View Diagrams & Manuals
31A707-0335-B1 Engine View Diagrams & Manuals
31A707-0335-E1 Engine View Diagrams & Manuals
31A707-0335-E2 Engine View Diagrams & Manuals
31A707-0504-B1 Engine View Diagrams & Manuals
31A707-0504-E1 Engine View Diagrams & Manuals
31A707-0525-B1 Engine View Diagrams & Manuals
31A707-0525-B2 Engine View Diagrams & Manuals
31A707-0525-E1 Engine View Diagrams & Manuals
31A707-0525-G1 Engine View Diagrams & Manuals
31A707-0696-B1 Engine View Diagrams & Manuals
31A707-0787-B1 Engine View Diagrams & Manuals
31A707-0796-B1 Engine View Diagrams & Manuals
31A707-0874-G1 Engine View Diagrams & Manuals
31A707-0874-G5 Engine View Diagrams & Manuals
31A707-1375-B1 Engine View Diagrams & Manuals
31A707-1454-B1 Engine View Diagrams & Manuals
31A707-2121-B1 Engine View Diagrams & Manuals
31A707-2454-B1 Engine View Diagrams & Manuals
31A777-0112-B1 Engine View Diagrams & Manuals
31A777-0112-E1 Engine View Diagrams & Manuals
31A777-0115-B1 Engine View Diagrams & Manuals
31A777-0118-B1 Engine View Diagrams & Manuals
31A777-0120-B1 Engine View Diagrams & Manuals
31C707-0005-G1 Engine View Diagrams & Manuals
31C707-0026-G1 Engine View Diagrams & Manuals
31C707-0101-B1 Engine View Diagrams & Manuals
31C707-0110-B1 Engine View Diagrams & Manuals
31C707-0154-B1 Engine View Diagrams & Manuals
31C707-0154-E1 Engine View Diagrams & Manuals
31C707-0160-B1 Engine View Diagrams & Manuals
31C707-0175-E1 Engine View Diagrams & Manuals
31C707-0230-B1 Engine View Diagrams & Manuals
31C707-0230-B2 Engine View Diagrams & Manuals
31C707-0230-E1 Engine View Diagrams & Manuals
31C707-0230-E2 Engine View Diagrams & Manuals
31C707-0240-B1 Engine View Diagrams & Manuals
31C707-0240-E1 Engine View Diagrams & Manuals
31C707-0240-E2 Engine View Diagrams & Manuals
31C707-0431-B1 Engine View Diagrams & Manuals
31C707-0431-E1 Engine View Diagrams & Manuals
31C707-0506-B2 Engine View Diagrams & Manuals
31C707-0571-B1 Engine View Diagrams & Manuals
31C707-0603-B1 Engine View Diagrams & Manuals
31C707-0603-B2 Engine View Diagrams & Manuals
31C707-0603-E1 Engine View Diagrams & Manuals
31C707-0603-E2 Engine View Diagrams & Manuals
31C707-0603-G1 Engine View Diagrams & Manuals
31C707-0603-G2 Engine View Diagrams & Manuals
31C707-0817-B1 Engine View Diagrams & Manuals
31C707-0826-B1 Engine View Diagrams & Manuals
31C707-0897-B1 Engine View Diagrams & Manuals
31C707-1329-B1 Engine View Diagrams & Manuals
31C707-1346-B1 Engine View Diagrams & Manuals
31C707-1346-B2 Engine View Diagrams & Manuals
31C707-1346-G2 Engine View Diagrams & Manuals
31C707-1429-B1 Engine View Diagrams & Manuals
31C707-1431-B1 Engine View Diagrams & Manuals
31C707-2429-B1 Engine View Diagrams & Manuals
31C707-2506-B2 Engine View Diagrams & Manuals
31C707-2826-B1 Engine View Diagrams & Manuals
31C707-3005-G5 Engine View Diagrams & Manuals
31C707-3026-G5 Engine View Diagrams & Manuals
31C707-3346-G1 Engine View Diagrams & Manuals
31C707-3346-G2 Engine View Diagrams & Manuals
31C707-3346-G5 Engine View Diagrams & Manuals
31C707-3346-G6 Engine View Diagrams & Manuals
31C707-3487-G1 Engine View Diagrams & Manuals
31C707-3487-G5 Engine View Diagrams & Manuals
31C707-4346-G1 Engine View Diagrams & Manuals
31C707-4346-G5 Engine View Diagrams & Manuals
31C777-0153-B1 Engine View Diagrams & Manuals
31C777-0155-B1 Engine View Diagrams & Manuals
31C777-0155-E1 Engine View Diagrams & Manuals
31C777-0156-B1 Engine View Diagrams & Manuals
31C777-0159-B1 Engine View Diagrams & Manuals
31C777-0173-E1 Engine View Diagrams & Manuals
31C777-0226-E1 Engine View Diagrams & Manuals
31E607-0116-B1 Engine View Diagrams & Manuals
31E607-0124-B1 Engine View Diagrams & Manuals
31E607-0124-E1 Engine View Diagrams & Manuals
31E607-0140-B1 Engine View Diagrams & Manuals
31E607-0141-B1 Engine View Diagrams & Manuals
31E607-2116-B1 Engine View Diagrams & Manuals
31E607-4140-B1 Engine View Diagrams & Manuals
31E677-0110-B1 Engine View Diagrams & Manuals
31E677-0110-E1 Engine View Diagrams & Manuals
31E677-0111-B1 Engine View Diagrams & Manuals
31E677-0111-E1 Engine View Diagrams & Manuals
31E677-0112-B1 Engine View Diagrams & Manuals
31E677-0112-E1 Engine View Diagrams & Manuals
31E677-0114-B1 Engine View Diagrams & Manuals
31E677-0117-B1 Engine View Diagrams & Manuals
31E677-0118-B1 Engine View Diagrams & Manuals
31E677-0120-B1 Engine View Diagrams & Manuals
31E677-0120-E1 Engine View Diagrams & Manuals
31E677-0123-B1 Engine View Diagrams & Manuals
31E677-0125-B1 Engine View Diagrams & Manuals
31E677-0133-B1 Engine View Diagrams & Manuals
31E677-0133-E1 Engine View Diagrams & Manuals
31E677-0134-B1 Engine View Diagrams & Manuals
31E677-0134-E1 Engine View Diagrams & Manuals
31E677-0143-B1 Engine View Diagrams & Manuals
31E677-0144-B1 Engine View Diagrams & Manuals
31E677-0145-B1 Engine View Diagrams & Manuals
31E677-0147-B1 Engine View Diagrams & Manuals
31E677-0148-B1 Engine View Diagrams & Manuals
31E677-0718-B1 Engine View Diagrams & Manuals
31E677-0746-B1 Engine View Diagrams & Manuals
31E677-0746-E1 Engine View Diagrams & Manuals
31E677-0772-B1 Engine View Diagrams & Manuals
31E677-0812-B1 Engine View Diagrams & Manuals
31E677-0812-E1 Engine View Diagrams & Manuals
31E677-1438-B1 Engine View Diagrams & Manuals
31E677-2117-B1 Engine View Diagrams & Manuals
31E677-2438-B1 Engine View Diagrams & Manuals
31E677-2772-B1 Engine View Diagrams & Manuals
31E677-4143-B1 Engine View Diagrams & Manuals
31E777-1628-G5 Engine View Diagrams & Manuals
31E777-2439-B1 Engine View Diagrams & Manuals
31E777-3136-G1 Engine View Diagrams & Manuals
31E777-3136-G5 Engine View Diagrams & Manuals
31E777-4500-G5 Engine View Diagrams & Manuals
31E707-0111-E1 Engine View Diagrams & Manuals
31E707-0129-B1 Engine View Diagrams & Manuals
31E707-0129-E1 Engine View Diagrams & Manuals
31E777-0114-E1 Engine View Diagrams & Manuals
31E777-0115-B1 Engine View Diagrams & Manuals
31E777-0115-E1 Engine View Diagrams & Manuals
31E777-0115-G1 Engine View Diagrams & Manuals
31E777-0117-B1 Engine View Diagrams & Manuals
31E777-0118-B1 Engine View Diagrams & Manuals
31E777-0120-B1 Engine View Diagrams & Manuals
31E777-0126-E1 Engine View Diagrams & Manuals
31E777-0130-B1 Engine View Diagrams & Manuals
31E777-0130-E1 Engine View Diagrams & Manuals
31E777-0131-B1 Engine View Diagrams & Manuals
31E777-0132-B1 Engine View Diagrams & Manuals
31E777-0134-B1 Engine View Diagrams & Manuals
31E777-0136-B1 Engine View Diagrams & Manuals
31E777-0136-G1 Engine View Diagrams & Manuals
31E777-0137-B1 Engine View Diagrams & Manuals
31E777-0137-G1 Engine View Diagrams & Manuals
31E777-0140-B1 Engine View Diagrams & Manuals
31E777-0141-B1 Engine View Diagrams & Manuals
31E777-0142-B1 Engine View Diagrams & Manuals
31E777-0143-G5 Engine View Diagrams & Manuals
31E777-0144-B1 Engine View Diagrams & Manuals
31E777-0378-E1 Engine View Diagrams & Manuals
31E777-0443-E1 Engine View Diagrams & Manuals
31E777-0719-B1 Engine View Diagrams & Manuals
31E777-0813-B1 Engine View Diagrams & Manuals
31E777-0813-E1 Engine View Diagrams & Manuals
31E777-1439-B1 Engine View Diagrams & Manuals
31E777-1500-G1 Engine View Diagrams & Manuals
31E777-1500-G5 Engine View Diagrams & Manuals
31E777-1501-B1 Engine View Diagrams & Manuals
31F777-0111-E1 Engine View Diagrams & Manuals
31F777-0124-E1 Engine View Diagrams & Manuals
31F777-0125-E1 Engine View Diagrams & Manuals
31F777-0126-E1 Engine View Diagrams & Manuals
31F777-0161-E1 Engine View Diagrams & Manuals
31F777-0162-E1 Engine View Diagrams & Manuals
31G707-0026-B1 Engine View Diagrams & Manuals
31G707-0026-E1 Engine View Diagrams & Manuals
31G707-0026-G1 Engine View Diagrams & Manuals
31G707-0140-B1 Engine View Diagrams & Manuals
31G707-0175-B1 Engine View Diagrams & Manuals
31G707-3026-G5 Engine View Diagrams & Manuals
31G777-0036-B1 Engine View Diagrams & Manuals
31G777-0036-E1 Engine View Diagrams & Manuals
31G777-0036-G1 Engine View Diagrams & Manuals
31G777-0112-B1 Engine View Diagrams & Manuals
31G777-0112-E1 Engine View Diagrams & Manuals
31G777-0113-E1 Engine View Diagrams & Manuals
31G777-0114-E1 Engine View Diagrams & Manuals
31G777-0115-E1 Engine View Diagrams & Manuals
31G777-0116-E1 Engine View Diagrams & Manuals
31G777-0119-E1 Engine View Diagrams & Manuals
31G777-0120-B1 Engine View Diagrams & Manuals
31G777-0120-E1 Engine View Diagrams & Manuals
31G777-0121-B1 Engine View Diagrams & Manuals
31G777-0121-E1 Engine View Diagrams & Manuals
31G777-0123-E1 Engine View Diagrams & Manuals
31G777-0125-B1 Engine View Diagrams & Manuals
31G777-0125-E1 Engine View Diagrams & Manuals
31G777-0126-B1 Engine View Diagrams & Manuals
31G777-0126-E1 Engine View Diagrams & Manuals
31G777-0127-B1 Engine View Diagrams & Manuals
31G777-0127-E1 Engine View Diagrams & Manuals
31G777-0128-B1 Engine View Diagrams & Manuals
31G777-0128-E1 Engine View Diagrams & Manuals
31G777-0130-B1 Engine View Diagrams & Manuals
31G777-0130-E1 Engine View Diagrams & Manuals
31G777-0131-B1 Engine View Diagrams & Manuals
31G777-0131-E1 Engine View Diagrams & Manuals
31G777-0132-B1 Engine View Diagrams & Manuals
31G777-0132-E1 Engine View Diagrams & Manuals
31G777-0133-B1 Engine View Diagrams & Manuals
31G777-0133-E1 Engine View Diagrams & Manuals
31G777-0134-B1 Engine View Diagrams & Manuals
31G777-0135-B1 Engine View Diagrams & Manuals
31G777-0136-B1 Engine View Diagrams & Manuals
31G777-0138-B1 Engine View Diagrams & Manuals
31G777-0139-B1 Engine View Diagrams & Manuals
31G777-0142-B1 Engine View Diagrams & Manuals
31G777-0143-B1 Engine View Diagrams & Manuals
31G777-0144-B1 Engine View Diagrams & Manuals
31G777-0146-B1 Engine View Diagrams & Manuals
31G777-0147-B1 Engine View Diagrams & Manuals
31G777-0148-B1 Engine View Diagrams & Manuals
31G777-0149-B1 Engine View Diagrams & Manuals
31G777-0150-B1 Engine View Diagrams & Manuals
31G777-0151-E1 Engine View Diagrams & Manuals
31G777-0153-B1 Engine View Diagrams & Manuals
31G777-0154-B1 Engine View Diagrams & Manuals
31G777-0155-B1 Engine View Diagrams & Manuals
31G777-0156-G1 Engine View Diagrams & Manuals
31G777-0156-G5 Engine View Diagrams & Manuals
31G777-0157-B1 Engine View Diagrams & Manuals
31G777-0158-B1 Engine View Diagrams & Manuals
31G777-0159-B1 Engine View Diagrams & Manuals
31G777-0160-G5 Engine View Diagrams & Manuals
31G777-0161-B1 Engine View Diagrams & Manuals
31G777-0162-B1 Engine View Diagrams & Manuals
31G777-0165-E1 Engine View Diagrams & Manuals
31G777-0166-E1 Engine View Diagrams & Manuals
31G777-0167-B1 Engine View Diagrams & Manuals
31G777-0167-E1 Engine View Diagrams & Manuals
31G777-0168-B1 Engine View Diagrams & Manuals
31G777-0169-B1 Engine View Diagrams & Manuals
31G777-0171-G5 Engine View Diagrams & Manuals
31G777-0172-E1 Engine View Diagrams & Manuals
31G777-0174-G5 Engine View Diagrams & Manuals
31G777-0181-E1 Engine View Diagrams & Manuals
31G777-0191-E1 Engine View Diagrams & Manuals
31G777-0192-E1 Engine View Diagrams & Manuals
31G777-0193-E1 Engine View Diagrams & Manuals
31G777-0194-B1 Engine View Diagrams & Manuals
31G777-0196-E1 Engine View Diagrams & Manuals
31G777-0199-E1 Engine View Diagrams & Manuals
31G777-0200-B1 Engine View Diagrams & Manuals
31G777-0200-E1 Engine View Diagrams & Manuals
31G777-0201-B1 Engine View Diagrams & Manuals
31G777-0201-E1 Engine View Diagrams & Manuals
31G777-0203-B1 Engine View Diagrams & Manuals
31G777-0204-B1 Engine View Diagrams & Manuals
31G777-0235-G1 Engine View Diagrams & Manuals
31G777-0235-G5 Engine View Diagrams & Manuals
31G777-0235-G6 Engine View Diagrams & Manuals
31G777-0238-B1 Engine View Diagrams & Manuals
31G777-0238-B2 Engine View Diagrams & Manuals
31G777-0238-B5 Engine View Diagrams & Manuals
31G777-0238-B6 Engine View Diagrams & Manuals
31G777-0253-E1 Engine View Diagrams & Manuals
31G777-0258-E1 Engine View Diagrams & Manuals
31G777-0263-E1 Engine View Diagrams & Manuals
31G777-0290-E1 Engine View Diagrams & Manuals
31G777-0290-E2 Engine View Diagrams & Manuals
31G777-0292-B1 Engine View Diagrams & Manuals
31G777-0292-E1 Engine View Diagrams & Manuals
31G777-0293-B1 Engine View Diagrams & Manuals
31G777-0293-E1 Engine View Diagrams & Manuals
31G777-0294-B1 Engine View Diagrams & Manuals
31G777-0294-E1 Engine View Diagrams & Manuals
31G777-0297-B1 Engine View Diagrams & Manuals
31G777-0297-E1 Engine View Diagrams & Manuals
31G777-0297-G1 Engine View Diagrams & Manuals
31G777-0299-B1 Engine View Diagrams & Manuals
31G777-0299-E1 Engine View Diagrams & Manuals
31G777-0300-B1 Engine View Diagrams & Manuals
31G777-0302-B1 Engine View Diagrams & Manuals
31G777-0303-G1 Engine View Diagrams & Manuals
31G777-0304-G1 Engine View Diagrams & Manuals
31G777-0305-B1 Engine View Diagrams & Manuals
31G777-0305-B2 Engine View Diagrams & Manuals
31G777-0424-B1 Engine View Diagrams & Manuals
31G777-0559-B1 Engine View Diagrams & Manuals
31G777-0720-B1 Engine View Diagrams & Manuals
31G777-0806-B1 Engine View Diagrams & Manuals
31G777-0806-E1 Engine View Diagrams & Manuals
31G777-0814-B1 Engine View Diagrams & Manuals
31G777-0814-E1 Engine View Diagrams & Manuals
31G777-1191-B1 Engine View Diagrams & Manuals
31G777-1413-B1 Engine View Diagrams & Manuals
31G777-1440-B1 Engine View Diagrams & Manuals
31G777-1583-B1 Engine View Diagrams & Manuals
31G777-1597-G5 Engine View Diagrams & Manuals
31G777-2143-B1 Engine View Diagrams & Manuals
31G777-2144-B1 Engine View Diagrams & Manuals
31G777-2146-B1 Engine View Diagrams & Manuals
31G777-2424-B1 Engine View Diagrams & Manuals
31G777-2440-B1 Engine View Diagrams & Manuals
31G777-3036-G5 Engine View Diagrams & Manuals
31G777-3304-G1 Engine View Diagrams & Manuals
31G777-3304-G5 Engine View Diagrams & Manuals
31G777-4127-B1 Engine View Diagrams & Manuals
31G777-4130-B1 Engine View Diagrams & Manuals
31G777-4133-B1 Engine View Diagrams & Manuals
31G777-4302-B1 Engine View Diagrams & Manuals
31H777-0110-E1 Engine View Diagrams & Manuals
31H777-0113-E1 Engine View Diagrams & Manuals
31H777-0115-E1 Engine View Diagrams & Manuals
31H777-0117-E1 Engine View Diagrams & Manuals
31H777-0118-E1 Engine View Diagrams & Manuals
31H777-0120-E1 Engine View Diagrams & Manuals
31H777-0122-B1 Engine View Diagrams & Manuals
31H777-0168-E1 Engine View Diagrams & Manuals
31K777-0190-E1 Engine View Diagrams & Manuals
31M777-0111-E1 Engine View Diagrams & Manuals
31M777-0167-E1 Engine View Diagrams & Manuals
31L777-0110-B1 Engine View Diagrams & Manuals
31L777-0110-E1 Engine View Diagrams & Manuals
31L777-0111-G1 Engine View Diagrams & Manuals
31L777-0111-G5 Engine View Diagrams & Manuals
31L777-0122-B1 Engine View Diagrams & Manuals
31L777-0122-E1 Engine View Diagrams & Manuals
31L777-0123-E1 Engine View Diagrams & Manuals
31L777-0124-E1 Engine View Diagrams & Manuals
31L777-0125-B1 Engine View Diagrams & Manuals
31L777-0126-B1 Engine View Diagrams & Manuals
31L777-0126-G1 Engine View Diagrams & Manuals
31L777-0127-B1 Engine View Diagrams & Manuals
31L777-0128-G1 Engine View Diagrams & Manuals
31L777-0128-G5 Engine View Diagrams & Manuals
31L777-0136-G1 Engine View Diagrams & Manuals
31L777-0138-E1 Engine View Diagrams & Manuals
31L777-0140-B1 Engine View Diagrams & Manuals
31L777-0141-B1 Engine View Diagrams & Manuals
31L777-0157-E1 Engine View Diagrams & Manuals
31L777-0168-E1 Engine View Diagrams & Manuals
31L777-0169-E1 Engine View Diagrams & Manuals
31L777-0170-B1 Engine View Diagrams & Manuals
31L777-0170-E1 Engine View Diagrams & Manuals
31L777-0171-B1 Engine View Diagrams & Manuals
31L777-0171-E1 Engine View Diagrams & Manuals
31L777-0173-G5 Engine View Diagrams & Manuals
31L777-0174-G5 Engine View Diagrams & Manuals
31L777-0192-E1 Engine View Diagrams & Manuals
31L777-3136-G5 Engine View Diagrams & Manuals
31N707-0026-E1 Engine View Diagrams & Manuals
31N707-0026-G1 Engine View Diagrams & Manuals
31N707-0101-B1 Engine View Diagrams & Manuals
31N707-0130-B1 Engine View Diagrams & Manuals
31N707-0132-B1 Engine View Diagrams & Manuals
31N707-0233-E1 Engine View Diagrams & Manuals
31N707-0301-B1 Engine View Diagrams & Manuals
31N707-0301-B2 Engine View Diagrams & Manuals
31N707-0301-B3 Engine View Diagrams & Manuals
31N707-0301-E1 Engine View Diagrams & Manuals
31N707-0301-E2 Engine View Diagrams & Manuals
31N707-0301-G1 Engine View Diagrams & Manuals
31N707-0302-G1 Engine View Diagrams & Manuals
31N707-0429-B1 Engine View Diagrams & Manuals
31N707-0430-B1 Engine View Diagrams & Manuals
31N707-0430-E1 Engine View Diagrams & Manuals
31N707-0539-B1 Engine View Diagrams & Manuals
31N707-0840-B1 Engine View Diagrams & Manuals
31N707-0872-G1 Engine View Diagrams & Manuals
31N707-0872-G5 Engine View Diagrams & Manuals
31N707-1374-B1 Engine View Diagrams & Manuals
31N707-1374-G1 Engine View Diagrams & Manuals
31N707-1437-B1 Engine View Diagrams & Manuals
31N707-1441-B1 Engine View Diagrams & Manuals
31N707-2132-B1 Engine View Diagrams & Manuals
31N707-2437-B1 Engine View Diagrams & Manuals
31N707-2441-B1 Engine View Diagrams & Manuals
31N707-2539-B1 Engine View Diagrams & Manuals
31N707-3026-G5 Engine View Diagrams & Manuals
31N707-3374-G1 Engine View Diagrams & Manuals
31N707-3374-G5 Engine View Diagrams & Manuals
31N707-4374-G1 Engine View Diagrams & Manuals
31N777-0131-B1 Engine View Diagrams & Manuals
31P707-0123-B1 Engine View Diagrams & Manuals
31P707-0123-E1 Engine View Diagrams & Manuals
31P707-0123-E2 Engine View Diagrams & Manuals
31P707-0124-B1 Engine View Diagrams & Manuals
31P707-0124-E1 Engine View Diagrams & Manuals
31P707-0124-E2 Engine View Diagrams & Manuals
31P707-0126-B1 Engine View Diagrams & Manuals
31P707-0126-B2 Engine View Diagrams & Manuals
31P707-0130-B1 Engine View Diagrams & Manuals
31P707-0131-G1 Engine View Diagrams & Manuals
31P707-0132-B1 Engine View Diagrams & Manuals
31P707-0136-B1 Engine View Diagrams & Manuals
31P707-0140-B1 Engine View Diagrams & Manuals
31P707-0140-B2 Engine View Diagrams & Manuals
31P707-0149-B1 Engine View Diagrams & Manuals
31P707-0149-B2 Engine View Diagrams & Manuals
31P707-0241-B1 Engine View Diagrams & Manuals
31P707-0241-B2 Engine View Diagrams & Manuals
31P707-0241-B5 Engine View Diagrams & Manuals
31P707-0241-B6 Engine View Diagrams & Manuals
31P707-0242-B1 Engine View Diagrams & Manuals
31P707-0242-B2 Engine View Diagrams & Manuals
31P707-0244-B1 Engine View Diagrams & Manuals
31P707-0244-B2 Engine View Diagrams & Manuals
31P707-0372-B1 Engine View Diagrams & Manuals
31P707-0372-B2 Engine View Diagrams & Manuals
31P707-0832-B1 Engine View Diagrams & Manuals
31P777-0110-B1 Engine View Diagrams & Manuals
31P777-0115-E1 Engine View Diagrams & Manuals
31P777-0116-B1 Engine View Diagrams & Manuals
31P777-0116-E1 Engine View Diagrams & Manuals
31P777-0117-E1 Engine View Diagrams & Manuals
31P777-0117-E2 Engine View Diagrams & Manuals
31P777-0120-B1 Engine View Diagrams & Manuals
31P777-0120-E1 Engine View Diagrams & Manuals
31P777-0121-B1 Engine View Diagrams & Manuals
31P777-0122-B1 Engine View Diagrams & Manuals
31P777-0125-B1 Engine View Diagrams & Manuals
31P777-0125-E1 Engine View Diagrams & Manuals
31P777-0133-B1 Engine View Diagrams & Manuals
31P777-0133-E1 Engine View Diagrams & Manuals
31P777-0134-B1 Engine View Diagrams & Manuals
31P777-0135-G1 Engine View Diagrams & Manuals
31P777-0137-B1 Engine View Diagrams & Manuals
31P777-0141-G1 Engine View Diagrams & Manuals
31P777-0142-B1 Engine View Diagrams & Manuals
31P777-0143-B1 Engine View Diagrams & Manuals
31P777-0146-G1 Engine View Diagrams & Manuals
31P777-0146-G2 Engine View Diagrams & Manuals
31P777-0147-B1 Engine View Diagrams & Manuals
31P777-0148-B1 Engine View Diagrams & Manuals
31P777-0150-B1 Engine View Diagrams & Manuals
31P777-0153-B1 Engine View Diagrams & Manuals
31P777-0155-B1 Engine View Diagrams & Manuals
31P777-0156-G1 Engine View Diagrams & Manuals
31P777-0156-G5 Engine View Diagrams & Manuals
31P777-0202-G1 Engine View Diagrams & Manuals
31P777-0203-B1 Engine View Diagrams & Manuals
31P777-0237-G1 Engine View Diagrams & Manuals
31P777-0237-G5 Engine View Diagrams & Manuals
31P777-0237-G6 Engine View Diagrams & Manuals
31P777-0238-G5 Engine View Diagrams & Manuals
31P777-0293-E1 Engine View Diagrams & Manuals
31P777-0293-E2 Engine View Diagrams & Manuals
31P777-0296-B1 Engine View Diagrams & Manuals
31P777-0296-E1 Engine View Diagrams & Manuals
31P777-0299-B1 Engine View Diagrams & Manuals
31P777-0299-E1 Engine View Diagrams & Manuals
31P777-0337-E1 Engine View Diagrams & Manuals
31P777-0348-B1 Engine View Diagrams & Manuals
31P777-0348-E1 Engine View Diagrams & Manuals
31P777-0349-B1 Engine View Diagrams & Manuals
31P777-0349-E1 Engine View Diagrams & Manuals
31P777-0366-B1 Engine View Diagrams & Manuals
31P777-0366-E1 Engine View Diagrams & Manuals
31P777-0367-B1 Engine View Diagrams & Manuals
31P777-0367-E1 Engine View Diagrams & Manuals
31P777-0367-E2 Engine View Diagrams & Manuals
31P777-0371-B1 Engine View Diagrams & Manuals
31P777-0371-E1 Engine View Diagrams & Manuals
31P777-0378-B1 Engine View Diagrams & Manuals
31P777-0378-E1 Engine View Diagrams & Manuals
31P777-0492-B1 Engine View Diagrams & Manuals
31P777-0492-E1 Engine View Diagrams & Manuals
31P777-0565-B1 Engine View Diagrams & Manuals
31P777-0581-B1 Engine View Diagrams & Manuals
31P777-0581-E1 Engine View Diagrams & Manuals
31P777-0602-B1 Engine View Diagrams & Manuals
31P777-0602-B2 Engine View Diagrams & Manuals
31P777-0602-E1 Engine View Diagrams & Manuals
31P777-0602-E2 Engine View Diagrams & Manuals
31P777-0602-G2 Engine View Diagrams & Manuals
31P777-0770-B1 Engine View Diagrams & Manuals
31P777-0899-B1 Engine View Diagrams & Manuals
31P777-0899-E1 Engine View Diagrams & Manuals
31P777-1076-B1 Engine View Diagrams & Manuals
31P777-1462-B1 Engine View Diagrams & Manuals
31P777-2143-B1 Engine View Diagrams & Manuals
31P777-2147-B1 Engine View Diagrams & Manuals
31P777-2148-B1 Engine View Diagrams & Manuals
31P777-2770-B1 Engine View Diagrams & Manuals
31P777-3202-G5 Engine View Diagrams & Manuals
31P777-3462-G5 Engine View Diagrams & Manuals
31P777-3602-G6 Engine View Diagrams & Manuals
31Q777-0036-B1 Engine View Diagrams & Manuals
31Q777-0036-E1 Engine View Diagrams & Manuals
31Q777-0036-G1 Engine View Diagrams & Manuals
31Q777-0110-E1 Engine View Diagrams & Manuals
31Q777-0111-B1 Engine View Diagrams & Manuals
31Q777-0112-B1 Engine View Diagrams & Manuals
31Q777-0112-E1 Engine View Diagrams & Manuals
31Q777-0113-B1 Engine View Diagrams & Manuals
31Q777-0113-G1 Engine View Diagrams & Manuals
31Q777-0115-B1 Engine View Diagrams & Manuals
31Q777-0115-G1 Engine View Diagrams & Manuals
31Q777-0116-B1 Engine View Diagrams & Manuals
31Q777-0117-B1 Engine View Diagrams & Manuals
31Q777-0118-G1 Engine View Diagrams & Manuals
31Q777-0119-G1 Engine View Diagrams & Manuals
31Q777-0120-B1 Engine View Diagrams & Manuals
31Q777-0121-G1 Engine View Diagrams & Manuals
31Q777-0122-G1 Engine View Diagrams & Manuals
31Q777-0136-G1 Engine View Diagrams & Manuals
31Q777-0137-G5 Engine View Diagrams & Manuals
31Q777-0215-B1 Engine View Diagrams & Manuals
31Q777-0215-E1 Engine View Diagrams & Manuals
31Q777-0298-E1 Engine View Diagrams & Manuals
31Q777-0305-E1 Engine View Diagrams & Manuals
31Q777-0466-B1 Engine View Diagrams & Manuals
31Q777-0466-E1 Engine View Diagrams & Manuals
31Q777-0592-B1 Engine View Diagrams & Manuals
31Q777-0806-B1 Engine View Diagrams & Manuals
31Q777-2121-B1 Engine View Diagrams & Manuals
31Q777-3136-G5 Engine View Diagrams & Manuals
33M677-0110-G5 Engine View Diagrams & Manuals
33M677-0117-G1 Engine View Diagrams & Manuals
33M677-0121-B1 Engine View Diagrams & Manuals
33M677-0122-B1 Engine View Diagrams & Manuals
33M677-0123-G1 Engine View Diagrams & Manuals
33M677-0124-B1 Engine View Diagrams & Manuals
33M677-0149-B1 Engine View Diagrams & Manuals
33M677-0151-B1 Engine View Diagrams & Manuals
33M677-1398-B1 Engine View Diagrams & Manuals
33M677-1494-B1 Engine View Diagrams & Manuals
33M677-1594-G5 Engine View Diagrams & Manuals
33M677-2124-G5 Engine View Diagrams & Manuals
33M677-2494-G5 Engine View Diagrams & Manuals
33M777-0036-G1 Engine View Diagrams & Manuals
33M777-0111-B1 Engine View Diagrams & Manuals
33M777-0111-E1 Engine View Diagrams & Manuals
33M777-0112-B1 Engine View Diagrams & Manuals
33M777-0114-B1 Engine View Diagrams & Manuals
33M777-0116-G1 Engine View Diagrams & Manuals
33M777-0117-B1 Engine View Diagrams & Manuals
33M777-0118-G1 Engine View Diagrams & Manuals
33M777-0119-B1 Engine View Diagrams & Manuals
33M777-0120-B1 Engine View Diagrams & Manuals
33M777-0121-B1 Engine View Diagrams & Manuals
33M777-0123-B1 Engine View Diagrams & Manuals
33M777-0124-B1 Engine View Diagrams & Manuals
33M777-0125-B1 Engine View Diagrams & Manuals
33M777-0126-G5 Engine View Diagrams & Manuals
33M777-1400-B1 Engine View Diagrams & Manuals
33M777-1495-B1 Engine View Diagrams & Manuals
33M777-1506-B1 Engine View Diagrams & Manuals
33M777-1583-B1 Engine View Diagrams & Manuals
33M777-2116-G5 Engine View Diagrams & Manuals
33M777-2117-G1 Engine View Diagrams & Manuals
33M777-2117-G5 Engine View Diagrams & Manuals
33M777-2401-G5 Engine View Diagrams & Manuals
33M777-2495-G5 Engine View Diagrams & Manuals
33M777-3036-G5 Engine View Diagrams & Manuals
33M777-4583-G5 Engine View Diagrams & Manuals
33M977-0001-G1 Engine View Diagrams & Manuals
33M977-0002-G5 Engine View Diagrams & Manuals
33M977-0003-G5 Engine View Diagrams & Manuals
33M977-0004-G5 Engine View Diagrams & Manuals
33M977-0005-G5 Engine View Diagrams & Manuals
33M977-0006-G1 Engine View Diagrams & Manuals
33M977-0007-G1 Engine View Diagrams & Manuals
33M977-0008-G1 Engine View Diagrams & Manuals
33M977-0009-G1 Engine View Diagrams & Manuals
281H07-0111-E1 Engine View Diagrams & Manuals
281H07-0112-E1 Engine View Diagrams & Manuals
281H07-0113-E1 Engine View Diagrams & Manuals
281H07-0372-E1 Engine View Diagrams & Manuals
281H07-0384-B1 Engine View Diagrams & Manuals
281H07-0384-E1 Engine View Diagrams & Manuals
284H77-0121-E1 Engine View Diagrams & Manuals
285H07-0028-E1 Engine View Diagrams & Manuals
285H77-0116-E1 Engine View Diagrams & Manuals
285H77-0178-E1 Engine View Diagrams & Manuals
286H77-0122-B1 Engine View Diagrams & Manuals
286H77-0122-E1 Engine View Diagrams & Manuals
202312-0100-B1 Engine View Diagrams & Manuals
202312-0100-E9 Engine View Diagrams & Manuals
202312-0112-B1 Engine View Diagrams & Manuals
202312-0112-E9 Engine View Diagrams & Manuals
202312-0145-B1 Engine View Diagrams & Manuals
202312-0145-E9 Engine View Diagrams & Manuals
202312-0147-B1 Engine View Diagrams & Manuals
202312-0147-E9 Engine View Diagrams & Manuals
202312-0155-B1 Engine View Diagrams & Manuals
202312-0155-E9 Engine View Diagrams & Manuals
202312-0159-B1 Engine View Diagrams & Manuals
202312-0159-B9 Engine View Diagrams & Manuals
202312-0179-B1 Engine View Diagrams & Manuals
202312-0179-E9 Engine View Diagrams & Manuals
202312-0196-B1 Engine View Diagrams & Manuals
202312-0196-E9 Engine View Diagrams & Manuals
202312-0199-B1 Engine View Diagrams & Manuals
202312-0199-E9 Engine View Diagrams & Manuals
202312-0205-B1 Engine View Diagrams & Manuals
202312-0205-E9 Engine View Diagrams & Manuals
202312-0218-B1 Engine View Diagrams & Manuals
202312-0218-B9 Engine View Diagrams & Manuals
202312-0434-B1 Engine View Diagrams & Manuals
202312-0434-B9 Engine View Diagrams & Manuals
202312-1157-B1 Engine View Diagrams & Manuals
202312-1157-E9 Engine View Diagrams & Manuals
202317-0204-B1 Engine View Diagrams & Manuals
202317-0204-E9 Engine View Diagrams & Manuals
202332-0035-B1 Engine View Diagrams & Manuals
202332-0035-E9 Engine View Diagrams & Manuals
202332-0036-B1 Engine View Diagrams & Manuals
202332-0036-E9 Engine View Diagrams & Manuals
202332-0063-B1 Engine View Diagrams & Manuals
202332-0063-E9 Engine View Diagrams & Manuals
202332-0116-B1 Engine View Diagrams & Manuals
202332-0116-E9 Engine View Diagrams & Manuals
202332-0123-B1 Engine View Diagrams & Manuals
202332-0123-E9 Engine View Diagrams & Manuals
202332-0136-B1 Engine View Diagrams & Manuals
202332-0136-E9 Engine View Diagrams & Manuals
202332-0148-B1 Engine View Diagrams & Manuals
202332-0148-E9 Engine View Diagrams & Manuals
202332-0150-H1 Engine View Diagrams & Manuals
202332-0156-B1 Engine View Diagrams & Manuals
202332-0156-E9 Engine View Diagrams & Manuals
202332-0160-B1 Engine View Diagrams & Manuals
202332-0160-B9 Engine View Diagrams & Manuals
202332-0163-B1 Engine View Diagrams & Manuals
202332-0163-B9 Engine View Diagrams & Manuals
202332-0170-B1 Engine View Diagrams & Manuals
202332-0177-B1 Engine View Diagrams & Manuals
202332-0177-E9 Engine View Diagrams & Manuals
202332-0182-B1 Engine View Diagrams & Manuals
202332-0182-E9 Engine View Diagrams & Manuals
202332-0185-B1 Engine View Diagrams & Manuals
202332-0185-E9 Engine View Diagrams & Manuals
202332-0194-B1 Engine View Diagrams & Manuals
202332-0194-E9 Engine View Diagrams & Manuals
202332-0200-B1 Engine View Diagrams & Manuals
202332-0200-B9 Engine View Diagrams & Manuals
202332-0207-B1 Engine View Diagrams & Manuals
202332-0207-E9 Engine View Diagrams & Manuals
202332-0210-B1 Engine View Diagrams & Manuals
202332-0210-E9 Engine View Diagrams & Manuals
202332-0213-B1 Engine View Diagrams & Manuals
202332-0213-B9 Engine View Diagrams & Manuals
202332-0213-H1 Engine View Diagrams & Manuals
202332-0214-B1 Engine View Diagrams & Manuals
202332-0214-B9 Engine View Diagrams & Manuals
202332-0214-H1 Engine View Diagrams & Manuals
202332-0215-B1 Engine View Diagrams & Manuals
202332-0215-B9 Engine View Diagrams & Manuals
202332-0215-H1 Engine View Diagrams & Manuals
202332-0221-H1 Engine View Diagrams & Manuals
202332-0223-B1 Engine View Diagrams & Manuals
202332-0224-B1 Engine View Diagrams & Manuals
202332-0224-H1 Engine View Diagrams & Manuals
202332-0226-H1 Engine View Diagrams & Manuals
202332-0227-H1 Engine View Diagrams & Manuals
202332-0535-B1 Engine View Diagrams & Manuals
202332-0535-E9 Engine View Diagrams & Manuals
202332-0536-B1 Engine View Diagrams & Manuals
202332-0536-E9 Engine View Diagrams & Manuals
202332-0563-B1 Engine View Diagrams & Manuals
202332-0563-E9 Engine View Diagrams & Manuals
202332-1035-B1 Engine View Diagrams & Manuals
202332-1035-E9 Engine View Diagrams & Manuals
202332-1036-B1 Engine View Diagrams & Manuals
202332-1036-E9 Engine View Diagrams & Manuals
202332-1105-B1 Engine View Diagrams & Manuals
202332-1105-E9 Engine View Diagrams & Manuals
202332-1119-B1 Engine View Diagrams & Manuals
202332-1119-E9 Engine View Diagrams & Manuals
202332-1122-B1 Engine View Diagrams & Manuals
202332-1122-E9 Engine View Diagrams & Manuals
202332-1122-H1 Engine View Diagrams & Manuals
202332-1123-B1 Engine View Diagrams & Manuals
202332-1123-E9 Engine View Diagrams & Manuals
202332-1124-B1 Engine View Diagrams & Manuals
202332-1124-E9 Engine View Diagrams & Manuals
202332-1136-B1 Engine View Diagrams & Manuals
202332-1136-E9 Engine View Diagrams & Manuals
202332-1136-H1 Engine View Diagrams & Manuals
202332-1149-B1 Engine View Diagrams & Manuals
202332-1149-B9 Engine View Diagrams & Manuals
202332-1149-E9 Engine View Diagrams & Manuals
202332-1150-B1 Engine View Diagrams & Manuals
202332-1150-B9 Engine View Diagrams & Manuals
202332-1150-E9 Engine View Diagrams & Manuals
202332-1151-B1 Engine View Diagrams & Manuals
202332-1151-B9 Engine View Diagrams & Manuals
202332-1151-E9 Engine View Diagrams & Manuals
202332-1152-B1 Engine View Diagrams & Manuals
202332-1152-B9 Engine View Diagrams & Manuals
202332-1152-E9 Engine View Diagrams & Manuals
202332-1171-B1 Engine View Diagrams & Manuals
202332-1171-B9 Engine View Diagrams & Manuals
202332-1171-E9 Engine View Diagrams & Manuals
202336-1135-B1 Engine View Diagrams & Manuals
202336-1135-E9 Engine View Diagrams & Manuals
202337-0033-B1 Engine View Diagrams & Manuals
202337-0033-E9 Engine View Diagrams & Manuals
202337-0041-B1 Engine View Diagrams & Manuals
202337-0041-E9 Engine View Diagrams & Manuals
202337-0111-B1 Engine View Diagrams & Manuals
202337-0111-E9 Engine View Diagrams & Manuals
202337-0113-H1 Engine View Diagrams & Manuals
202337-0117-B1 Engine View Diagrams & Manuals
202337-0127-B1 Engine View Diagrams & Manuals
202337-0127-E9 Engine View Diagrams & Manuals
202337-0139-B1 Engine View Diagrams & Manuals
202337-0139-E9 Engine View Diagrams & Manuals
202337-0149-B1 Engine View Diagrams & Manuals
202337-0149-H1 Engine View Diagrams & Manuals
202337-0176-B1 Engine View Diagrams & Manuals
202337-0180-B1 Engine View Diagrams & Manuals
202337-0180-E1 Engine View Diagrams & Manuals
202337-0181-B1 Engine View Diagrams & Manuals
202337-0181-E9 Engine View Diagrams & Manuals
202337-0183-B1 Engine View Diagrams & Manuals
202337-0183-E9 Engine View Diagrams & Manuals
202337-0195-B1 Engine View Diagrams & Manuals
202337-0195-E9 Engine View Diagrams & Manuals
202337-0197-B1 Engine View Diagrams & Manuals
202337-0197-E9 Engine View Diagrams & Manuals
202337-0203-B1 Engine View Diagrams & Manuals
202337-0203-E9 Engine View Diagrams & Manuals
202337-0211-B1 Engine View Diagrams & Manuals
202337-0211-E9 Engine View Diagrams & Manuals
202337-1041-B1 Engine View Diagrams & Manuals
202337-1041-E9 Engine View Diagrams & Manuals
202337-1111-B1 Engine View Diagrams & Manuals
202337-1111-B9 Engine View Diagrams & Manuals
202337-1111-E9 Engine View Diagrams & Manuals
202337-1125-B1 Engine View Diagrams & Manuals
202337-1125-E9 Engine View Diagrams & Manuals
202337-1154-B1 Engine View Diagrams & Manuals
202337-1154-B9 Engine View Diagrams & Manuals
202337-1154-H1 Engine View Diagrams & Manuals
202337-1161-B1 Engine View Diagrams & Manuals
202337-1161-B9 Engine View Diagrams & Manuals
202352-0049-B1 Engine View Diagrams & Manuals
202352-0049-E9 Engine View Diagrams & Manuals
202352-0206-B1 Engine View Diagrams & Manuals
202352-0208-B1 Engine View Diagrams & Manuals
202352-0208-E9 Engine View Diagrams & Manuals
202352-0212-B1 Engine View Diagrams & Manuals
202352-0212-E9 Engine View Diagrams & Manuals
202352-0216-B1 Engine View Diagrams & Manuals
202352-0216-B9 Engine View Diagrams & Manuals
202352-0216-H1 Engine View Diagrams & Manuals
202352-0549-B1 Engine View Diagrams & Manuals
202352-0549-E9 Engine View Diagrams & Manuals
202352-1049-B1 Engine View Diagrams & Manuals
202352-1049-E9 Engine View Diagrams & Manuals
202352-1128-B1 Engine View Diagrams & Manuals
202352-1128-B9 Engine View Diagrams & Manuals
202352-1128-E9 Engine View Diagrams & Manuals
202357-0193-B1 Engine View Diagrams & Manuals
202357-0193-E9 Engine View Diagrams & Manuals
202357-0209-B1 Engine View Diagrams & Manuals
202357-0209-E9 Engine View Diagrams & Manuals
202412-0100-E1 Engine View Diagrams & Manuals
202412-0100-E9 Engine View Diagrams & Manuals
202412-0112-E1 Engine View Diagrams & Manuals
202412-0112-E9 Engine View Diagrams & Manuals
202412-0134-E1 Engine View Diagrams & Manuals
202412-0142-E1 Engine View Diagrams & Manuals
202412-0145-E1 Engine View Diagrams & Manuals
202412-0145-E9 Engine View Diagrams & Manuals
202412-0147-E1 Engine View Diagrams & Manuals
202412-0147-E9 Engine View Diagrams & Manuals
202412-0155-E1 Engine View Diagrams & Manuals
202412-0155-E9 Engine View Diagrams & Manuals
202412-0157-E1 Engine View Diagrams & Manuals
202412-0157-E9 Engine View Diagrams & Manuals
202412-0158-E1 Engine View Diagrams & Manuals
202412-0159-B9 Engine View Diagrams & Manuals
202412-0166-E1 Engine View Diagrams & Manuals
202412-0167-E1 Engine View Diagrams & Manuals
202412-0167-E9 Engine View Diagrams & Manuals
202412-0168-E1 Engine View Diagrams & Manuals
202412-0175-E1 Engine View Diagrams & Manuals
202412-0178-E9 Engine View Diagrams & Manuals
202412-0179-E9 Engine View Diagrams & Manuals
202412-0199-E9 Engine View Diagrams & Manuals
202412-0205-E9 Engine View Diagrams & Manuals
202412-0434-B1 Engine View Diagrams & Manuals
202412-0434-E1 Engine View Diagrams & Manuals
202412-0434-E9 Engine View Diagrams & Manuals
202417-0204-E9 Engine View Diagrams & Manuals
202432-0035-E1 Engine View Diagrams & Manuals
202432-0035-E9 Engine View Diagrams & Manuals
202432-0036-E1 Engine View Diagrams & Manuals
202432-0036-E2 Engine View Diagrams & Manuals
202432-0036-E9 Engine View Diagrams & Manuals
202432-0063-E1 Engine View Diagrams & Manuals
202432-0063-E9 Engine View Diagrams & Manuals
202432-0105-E1 Engine View Diagrams & Manuals
202432-0105-E9 Engine View Diagrams & Manuals
202432-0114-E1 Engine View Diagrams & Manuals
202432-0116-E1 Engine View Diagrams & Manuals
202432-0116-E9 Engine View Diagrams & Manuals
202432-0118-E1 Engine View Diagrams & Manuals
202432-0119-E1 Engine View Diagrams & Manuals
202432-0119-E9 Engine View Diagrams & Manuals
202432-0121-E1 Engine View Diagrams & Manuals
202432-0122-E1 Engine View Diagrams & Manuals
202432-0122-E9 Engine View Diagrams & Manuals
202432-0123-E1 Engine View Diagrams & Manuals
202432-0123-E9 Engine View Diagrams & Manuals
202432-0124-E1 Engine View Diagrams & Manuals
202432-0124-E9 Engine View Diagrams & Manuals
202432-0132-E1 Engine View Diagrams & Manuals
202432-0136-E1 Engine View Diagrams & Manuals
202432-0136-E9 Engine View Diagrams & Manuals
202432-0148-E1 Engine View Diagrams & Manuals
202432-0148-E9 Engine View Diagrams & Manuals
202432-0149-B1 Engine View Diagrams & Manuals
202432-0149-B9 Engine View Diagrams & Manuals
202432-0149-E1 Engine View Diagrams & Manuals
202432-0149-E9 Engine View Diagrams & Manuals
202432-0150-B1 Engine View Diagrams & Manuals
202432-0150-B9 Engine View Diagrams & Manuals
202432-0150-E1 Engine View Diagrams & Manuals
202432-0150-E9 Engine View Diagrams & Manuals
202432-0151-B1 Engine View Diagrams & Manuals
202432-0151-B9 Engine View Diagrams & Manuals
202432-0151-E1 Engine View Diagrams & Manuals
202432-0151-E9 Engine View Diagrams & Manuals
202432-0152-B1 Engine View Diagrams & Manuals
202432-0152-B9 Engine View Diagrams & Manuals
202432-0152-E1 Engine View Diagrams & Manuals
202432-0152-E9 Engine View Diagrams & Manuals
202432-0156-E1 Engine View Diagrams & Manuals
202432-0156-E9 Engine View Diagrams & Manuals
202432-0160-B1 Engine View Diagrams & Manuals
202432-0160-B9 Engine View Diagrams & Manuals
202432-0163-B9 Engine View Diagrams & Manuals
202432-0171-B1 Engine View Diagrams & Manuals
202432-0171-B9 Engine View Diagrams & Manuals
202432-0171-E1 Engine View Diagrams & Manuals
202432-0171-E9 Engine View Diagrams & Manuals
202432-0177-E9 Engine View Diagrams & Manuals
202432-0182-E9 Engine View Diagrams & Manuals
202432-0185-E9 Engine View Diagrams & Manuals
202432-0194-E9 Engine View Diagrams & Manuals
202432-0200-B9 Engine View Diagrams & Manuals
202432-0207-E9 Engine View Diagrams & Manuals
202432-0210-E9 Engine View Diagrams & Manuals
202436-0135-E1 Engine View Diagrams & Manuals
202436-0135-E9 Engine View Diagrams & Manuals
202437-0033-E1 Engine View Diagrams & Manuals
202437-0033-E9 Engine View Diagrams & Manuals
202437-0041-E1 Engine View Diagrams & Manuals
202437-0041-E9 Engine View Diagrams & Manuals
202437-0111-B1 Engine View Diagrams & Manuals
202437-0111-B9 Engine View Diagrams & Manuals
202437-0111-E1 Engine View Diagrams & Manuals
202437-0111-E9 Engine View Diagrams & Manuals
202437-0125-E1 Engine View Diagrams & Manuals
202437-0125-E9 Engine View Diagrams & Manuals
202437-0127-E1 Engine View Diagrams & Manuals
202437-0127-E9 Engine View Diagrams & Manuals
202437-0133-E1 Engine View Diagrams & Manuals
202437-0139-E1 Engine View Diagrams & Manuals
202437-0139-E9 Engine View Diagrams & Manuals
202437-0140-E1 Engine View Diagrams & Manuals
202437-0154-B1 Engine View Diagrams & Manuals
202437-0154-B9 Engine View Diagrams & Manuals
202437-0161-B1 Engine View Diagrams & Manuals
202437-0161-B9 Engine View Diagrams & Manuals
202437-0180-E1 Engine View Diagrams & Manuals
202437-0181-E9 Engine View Diagrams & Manuals
202437-0183-E9 Engine View Diagrams & Manuals
202437-0197-E9 Engine View Diagrams & Manuals
202437-0203-E9 Engine View Diagrams & Manuals
202437-0211-E9 Engine View Diagrams & Manuals
202452-0049-E1 Engine View Diagrams & Manuals
202452-0049-E2 Engine View Diagrams & Manuals
202452-0049-E3 Engine View Diagrams & Manuals
202452-0049-E9 Engine View Diagrams & Manuals
202452-0128-B1 Engine View Diagrams & Manuals
202452-0128-B9 Engine View Diagrams & Manuals
202452-0128-E1 Engine View Diagrams & Manuals
202452-0128-E9 Engine View Diagrams & Manuals
202452-0212-E9 Engine View Diagrams & Manuals
202457-0193-E1 Engine View Diagrams & Manuals
202457-0193-E9 Engine View Diagrams & Manuals
202457-0209-E9 Engine View Diagrams & Manuals
203432-0035-E1 Engine View Diagrams & Manuals
203432-0035-E9 Engine View Diagrams & Manuals
203432-0036-E1 Engine View Diagrams & Manuals
203432-0036-E2 Engine View Diagrams & Manuals
203432-0036-E9 Engine View Diagrams & Manuals
203432-0100-E1 Engine View Diagrams & Manuals
203432-0100-E9 Engine View Diagrams & Manuals
203432-0111-E1 Engine View Diagrams & Manuals
203432-0111-E9 Engine View Diagrams & Manuals
203432-0114-E1 Engine View Diagrams & Manuals
203432-0116-E1 Engine View Diagrams & Manuals
203432-0116-E9 Engine View Diagrams & Manuals
203432-0117-E1 Engine View Diagrams & Manuals
203432-0118-E1 Engine View Diagrams & Manuals
203432-0120-E1 Engine View Diagrams & Manuals
203432-0120-E9 Engine View Diagrams & Manuals
203432-0121-E1 Engine View Diagrams & Manuals
203432-0121-E9 Engine View Diagrams & Manuals
203432-0129-E1 Engine View Diagrams & Manuals
203432-0129-E9 Engine View Diagrams & Manuals
203432-0130-B1 Engine View Diagrams & Manuals
203432-0130-B9 Engine View Diagrams & Manuals
203432-0130-E1 Engine View Diagrams & Manuals
203432-0130-E9 Engine View Diagrams & Manuals
203432-0131-B1 Engine View Diagrams & Manuals
203432-0131-B9 Engine View Diagrams & Manuals
203432-0131-E1 Engine View Diagrams & Manuals
203432-0131-E9 Engine View Diagrams & Manuals
203432-0132-B1 Engine View Diagrams & Manuals
203432-0132-B9 Engine View Diagrams & Manuals
203432-0132-E1 Engine View Diagrams & Manuals
203432-0132-E9 Engine View Diagrams & Manuals
203432-0134-E1 Engine View Diagrams & Manuals
203432-0134-E9 Engine View Diagrams & Manuals
203437-0041-E1 Engine View Diagrams & Manuals
203437-0041-E9 Engine View Diagrams & Manuals
203437-0110-E1 Engine View Diagrams & Manuals
203437-0110-E9 Engine View Diagrams & Manuals
203437-0127-E1 Engine View Diagrams & Manuals
203437-0128-E1 Engine View Diagrams & Manuals
203437-0128-E9 Engine View Diagrams & Manuals
203452-0049-E1 Engine View Diagrams & Manuals
203452-0049-E2 Engine View Diagrams & Manuals
203452-0049-E9 Engine View Diagrams & Manuals
203452-0133-B1 Engine View Diagrams & Manuals
203452-0133-B9 Engine View Diagrams & Manuals
203452-0133-E1 Engine View Diagrams & Manuals
203452-0133-E9 Engine View Diagrams & Manuals
203455-0119-E1 Engine View Diagrams & Manuals
204437-0110-E1 Engine View Diagrams & Manuals
205312-0100-B1 Engine View Diagrams & Manuals
205312-0100-E9 Engine View Diagrams & Manuals
205312-0113-B1 Engine View Diagrams & Manuals
205312-0113-E9 Engine View Diagrams & Manuals
205312-0121-B1 Engine View Diagrams & Manuals
205312-0121-E9 Engine View Diagrams & Manuals
205312-0129-B1 Engine View Diagrams & Manuals
205312-0129-E9 Engine View Diagrams & Manuals
205312-0133-B1 Engine View Diagrams & Manuals
205312-0133-E9 Engine View Diagrams & Manuals
205312-0140-B1 Engine View Diagrams & Manuals
205312-0140-E1 Engine View Diagrams & Manuals
205312-0151-B1 Engine View Diagrams & Manuals
205312-0161-B1 Engine View Diagrams & Manuals
205312-0161-E9 Engine View Diagrams & Manuals
205312-0178-B1 Engine View Diagrams & Manuals
205312-0178-E2 Engine View Diagrams & Manuals
205312-0194-B1 Engine View Diagrams & Manuals
205312-0194-E1 Engine View Diagrams & Manuals
205312-0202-B1 Engine View Diagrams & Manuals
205312-0202-E9 Engine View Diagrams & Manuals
205312-0203-B1 Engine View Diagrams & Manuals
205312-0203-E9 Engine View Diagrams & Manuals
205312-0205-B1 Engine View Diagrams & Manuals
205312-0205-E1 Engine View Diagrams & Manuals
205312-0208-B1 Engine View Diagrams & Manuals
205312-0208-E9 Engine View Diagrams & Manuals
205312-0209-B1 Engine View Diagrams & Manuals
205312-0209-E9 Engine View Diagrams & Manuals
205312-0214-B1 Engine View Diagrams & Manuals
205312-0214-E1 Engine View Diagrams & Manuals
205312-0215-B1 Engine View Diagrams & Manuals
205312-0215-E9 Engine View Diagrams & Manuals
205312-0219-B1 Engine View Diagrams & Manuals
205312-0219-B9 Engine View Diagrams & Manuals
205312-0219-H1 Engine View Diagrams & Manuals
205312-0230-B1 Engine View Diagrams & Manuals
205312-0230-B9 Engine View Diagrams & Manuals
205312-0236-B1 Engine View Diagrams & Manuals
205312-0236-E9 Engine View Diagrams & Manuals
205312-0299-B1 Engine View Diagrams & Manuals
205312-0299-E9 Engine View Diagrams & Manuals
205312-0301-B1 Engine View Diagrams & Manuals
205312-0301-B9 Engine View Diagrams & Manuals
205312-0301-E9 Engine View Diagrams & Manuals
205312-0309-B1 Engine View Diagrams & Manuals
205312-0309-E9 Engine View Diagrams & Manuals
205312-1191-B1 Engine View Diagrams & Manuals
205312-1191-E9 Engine View Diagrams & Manuals
205317-0210-B1 Engine View Diagrams & Manuals
205317-0210-E9 Engine View Diagrams & Manuals
205332-0036-B1 Engine View Diagrams & Manuals
205332-0036-E9 Engine View Diagrams & Manuals
205332-0115-B1 Engine View Diagrams & Manuals
205332-0115-E9 Engine View Diagrams & Manuals
205332-0118-B1 Engine View Diagrams & Manuals
205332-0119-B1 Engine View Diagrams & Manuals
205332-0119-B9 Engine View Diagrams & Manuals
205332-0119-H1 Engine View Diagrams & Manuals
205332-0123-B1 Engine View Diagrams & Manuals
205332-0123-B9 Engine View Diagrams & Manuals
205332-0123-H1 Engine View Diagrams & Manuals
205332-0124-B1 Engine View Diagrams & Manuals
205332-0126-B1 Engine View Diagrams & Manuals
205332-0128-B1 Engine View Diagrams & Manuals
205332-0130-B1 Engine View Diagrams & Manuals
205332-0130-H1 Engine View Diagrams & Manuals
205332-0136-B1 Engine View Diagrams & Manuals
205332-0136-E9 Engine View Diagrams & Manuals
205332-0141-B1 Engine View Diagrams & Manuals
205332-0141-E9 Engine View Diagrams & Manuals
205332-0145-B1 Engine View Diagrams & Manuals
205332-0145-E9 Engine View Diagrams & Manuals
205332-0164-B1 Engine View Diagrams & Manuals
205332-0164-E1 Engine View Diagrams & Manuals
205332-0165-B1 Engine View Diagrams & Manuals
205332-0165-E9 Engine View Diagrams & Manuals
205332-0166-B1 Engine View Diagrams & Manuals
205332-0166-E9 Engine View Diagrams & Manuals
205332-0168-B1 Engine View Diagrams & Manuals
205332-0168-E9 Engine View Diagrams & Manuals
205332-0173-B1 Engine View Diagrams & Manuals
205332-0173-B9 Engine View Diagrams & Manuals
205332-0173-H1 Engine View Diagrams & Manuals
205332-0175-H1 Engine View Diagrams & Manuals
205332-0196-B1 Engine View Diagrams & Manuals
205332-0196-E9 Engine View Diagrams & Manuals
205332-0213-B1 Engine View Diagrams & Manuals
205332-0213-E9 Engine View Diagrams & Manuals
205332-0229-B1 Engine View Diagrams & Manuals
205332-0229-B9 Engine View Diagrams & Manuals
205332-0229-H1 Engine View Diagrams & Manuals
205332-0241-B1 Engine View Diagrams & Manuals
205332-0245-B1 Engine View Diagrams & Manuals
205332-0246-B1 Engine View Diagrams & Manuals
205332-0279-B1 Engine View Diagrams & Manuals
205332-0279-E9 Engine View Diagrams & Manuals
205332-0280-B1 Engine View Diagrams & Manuals
205332-0280-E9 Engine View Diagrams & Manuals
205332-0282-B1 Engine View Diagrams & Manuals
205332-0304-B1 Engine View Diagrams & Manuals
205332-0304-E9 Engine View Diagrams & Manuals
205332-0305-B1 Engine View Diagrams & Manuals
205332-0305-E9 Engine View Diagrams & Manuals
205332-0306-B1 Engine View Diagrams & Manuals
205332-0306-E9 Engine View Diagrams & Manuals
205332-0307-B1 Engine View Diagrams & Manuals
205332-0307-E9 Engine View Diagrams & Manuals
205332-0313-B1 Engine View Diagrams & Manuals
205332-0313-B9 Engine View Diagrams & Manuals
205332-0313-H1 Engine View Diagrams & Manuals
205332-0314-B1 Engine View Diagrams & Manuals
205332-0314-B9 Engine View Diagrams & Manuals
205332-0314-H1 Engine View Diagrams & Manuals
205332-0535-B1 Engine View Diagrams & Manuals
205332-0535-E9 Engine View Diagrams & Manuals
205332-0536-B1 Engine View Diagrams & Manuals
205332-0536-E9 Engine View Diagrams & Manuals
205332-0537-B1 Engine View Diagrams & Manuals
205332-0537-E9 Engine View Diagrams & Manuals
205332-0538-B1 Engine View Diagrams & Manuals
205332-0538-E9 Engine View Diagrams & Manuals
205332-0563-B1 Engine View Diagrams & Manuals
205332-0563-E9 Engine View Diagrams & Manuals
205332-1035-B1 Engine View Diagrams & Manuals
205332-1035-E9 Engine View Diagrams & Manuals
205332-1036-B1 Engine View Diagrams & Manuals
205332-1036-B9 Engine View Diagrams & Manuals
205332-1036-E9 Engine View Diagrams & Manuals
205332-1105-B1 Engine View Diagrams & Manuals
205332-1105-E9 Engine View Diagrams & Manuals
205332-1163-B1 Engine View Diagrams & Manuals
205332-1163-E9 Engine View Diagrams & Manuals
205332-1163-H1 Engine View Diagrams & Manuals
205332-1164-B1 Engine View Diagrams & Manuals
205332-1164-E9 Engine View Diagrams & Manuals
205332-1164-H1 Engine View Diagrams & Manuals
205332-1165-B1 Engine View Diagrams & Manuals
205332-1165-E9 Engine View Diagrams & Manuals
205332-1166-B1 Engine View Diagrams & Manuals
205332-1166-E9 Engine View Diagrams & Manuals
205332-1171-B1 Engine View Diagrams & Manuals
205332-1171-E9 Engine View Diagrams & Manuals
205332-1183-B1 Engine View Diagrams & Manuals
205332-1183-E9 Engine View Diagrams & Manuals
205332-1183-H1 Engine View Diagrams & Manuals
205332-1196-B1 Engine View Diagrams & Manuals
205332-1196-B9 Engine View Diagrams & Manuals
205332-1196-E9 Engine View Diagrams & Manuals
205332-1197-B1 Engine View Diagrams & Manuals
205332-1197-B9 Engine View Diagrams & Manuals
205332-1197-E9 Engine View Diagrams & Manuals
205332-1199-B1 Engine View Diagrams & Manuals
205332-1199-E9 Engine View Diagrams & Manuals
205332-1200-B1 Engine View Diagrams & Manuals
205332-1200-B9 Engine View Diagrams & Manuals
205332-1200-E9 Engine View Diagrams & Manuals
205332-1201-B1 Engine View Diagrams & Manuals
205332-1201-B9 Engine View Diagrams & Manuals
205332-1201-E9 Engine View Diagrams & Manuals
205332-1207-B1 Engine View Diagrams & Manuals
205332-1207-E9 Engine View Diagrams & Manuals
205332-1207-H1 Engine View Diagrams & Manuals
205332-1211-B1 Engine View Diagrams & Manuals
205332-1211-B9 Engine View Diagrams & Manuals
205332-1232-B1 Engine View Diagrams & Manuals
205332-1232-B9 Engine View Diagrams & Manuals
205337-0041-B1 Engine View Diagrams & Manuals
205337-0041-E9 Engine View Diagrams & Manuals
205337-0116-B1 Engine View Diagrams & Manuals
205337-0120-B1 Engine View Diagrams & Manuals
205337-0120-B9 Engine View Diagrams & Manuals
205337-0120-H1 Engine View Diagrams & Manuals
205337-0134-B1 Engine View Diagrams & Manuals
205337-0134-H1 Engine View Diagrams & Manuals
205337-0150-B1 Engine View Diagrams & Manuals
205337-0150-E9 Engine View Diagrams & Manuals
205337-0169-B1 Engine View Diagrams & Manuals
205337-0169-E9 Engine View Diagrams & Manuals
205337-0172-B1 Engine View Diagrams & Manuals
205337-0204-B1 Engine View Diagrams & Manuals
205337-0204-E9 Engine View Diagrams & Manuals
205337-0216-B1 Engine View Diagrams & Manuals
205337-0216-E9 Engine View Diagrams & Manuals
205337-0218-B1 Engine View Diagrams & Manuals
205337-0218-E9 Engine View Diagrams & Manuals
205337-0242-B1 Engine View Diagrams & Manuals
205337-0302-B1 Engine View Diagrams & Manuals
205337-0302-E9 Engine View Diagrams & Manuals
205337-0303-B1 Engine View Diagrams & Manuals
205337-0303-E9 Engine View Diagrams & Manuals
205337-0312-B1 Engine View Diagrams & Manuals
205337-0312-E9 Engine View Diagrams & Manuals
205337-0317-B1 Engine View Diagrams & Manuals
205337-0317-H1 Engine View Diagrams & Manuals
205337-0319-B1 Engine View Diagrams & Manuals
205337-0322-B1 Engine View Diagrams & Manuals
205337-0533-B1 Engine View Diagrams & Manuals
205337-0533-E9 Engine View Diagrams & Manuals
205337-0541-B1 Engine View Diagrams & Manuals
205337-0541-E9 Engine View Diagrams & Manuals
205337-0542-B1 Engine View Diagrams & Manuals
205337-0542-E9 Engine View Diagrams & Manuals
205337-1041-B1 Engine View Diagrams & Manuals
205337-1041-E9 Engine View Diagrams & Manuals
205337-1172-B1 Engine View Diagrams & Manuals
205337-1172-E9 Engine View Diagrams & Manuals
205337-1174-B1 Engine View Diagrams & Manuals
205337-1174-B9 Engine View Diagrams & Manuals
205337-1174-H1 Engine View Diagrams & Manuals
205337-1185-B1 Engine View Diagrams & Manuals
205337-1185-E9 Engine View Diagrams & Manuals
205337-1185-H1 Engine View Diagrams & Manuals
205337-1198-B1 Engine View Diagrams & Manuals
205337-1198-B9 Engine View Diagrams & Manuals
205337-1198-E9 Engine View Diagrams & Manuals
205337-1313-B1 Engine View Diagrams & Manuals
205352-0049-B1 Engine View Diagrams & Manuals
205352-0049-E9 Engine View Diagrams & Manuals
205352-0122-B1 Engine View Diagrams & Manuals
205352-0122-B9 Engine View Diagrams & Manuals
205352-0122-H1 Engine View Diagrams & Manuals
205352-0195-B1 Engine View Diagrams & Manuals
205352-0195-B9 Engine View Diagrams & Manuals
205352-0195-H1 Engine View Diagrams & Manuals
205352-0281-B1 Engine View Diagrams & Manuals
205352-0281-E9 Engine View Diagrams & Manuals
205352-0310-B1 Engine View Diagrams & Manuals
205352-0310-E9 Engine View Diagrams & Manuals
205352-0315-B1 Engine View Diagrams & Manuals
205352-0315-H1 Engine View Diagrams & Manuals
205352-0549-B1 Engine View Diagrams & Manuals
205352-0549-E9 Engine View Diagrams & Manuals
205352-1049-B1 Engine View Diagrams & Manuals
205352-1049-E9 Engine View Diagrams & Manuals
205352-1195-B1 Engine View Diagrams & Manuals
205352-1195-E9 Engine View Diagrams & Manuals
205352-1549-B1 Engine View Diagrams & Manuals
205352-1549-E9 Engine View Diagrams & Manuals
205355-0212-B1 Engine View Diagrams & Manuals
205355-0212-E9 Engine View Diagrams & Manuals
205357-0197-B1 Engine View Diagrams & Manuals
205357-0311-B1 Engine View Diagrams & Manuals
205357-0311-E9 Engine View Diagrams & Manuals
205357-0550-B1 Engine View Diagrams & Manuals
205357-0550-E9 Engine View Diagrams & Manuals
205357-1050-B1 Engine View Diagrams & Manuals
205357-1050-E9 Engine View Diagrams & Manuals
205412-0100-E1 Engine View Diagrams & Manuals
205412-0100-E9 Engine View Diagrams & Manuals
205412-0113-E1 Engine View Diagrams & Manuals
205412-0113-E9 Engine View Diagrams & Manuals
205412-0116-E1 Engine View Diagrams & Manuals
205412-0120-E1 Engine View Diagrams & Manuals
205412-0121-E1 Engine View Diagrams & Manuals
205412-0121-E9 Engine View Diagrams & Manuals
205412-0125-E1 Engine View Diagrams & Manuals
205412-0126-E1 Engine View Diagrams & Manuals
205412-0128-E1 Engine View Diagrams & Manuals
205412-0129-E1 Engine View Diagrams & Manuals
205412-0129-E9 Engine View Diagrams & Manuals
205412-0130-E1 Engine View Diagrams & Manuals
205412-0133-E1 Engine View Diagrams & Manuals
205412-0133-E9 Engine View Diagrams & Manuals
205412-0134-E1 Engine View Diagrams & Manuals
205412-0140-E1 Engine View Diagrams & Manuals
205412-0153-E1 Engine View Diagrams & Manuals
205412-0154-E1 Engine View Diagrams & Manuals
205412-0161-E1 Engine View Diagrams & Manuals
205412-0161-E9 Engine View Diagrams & Manuals
205412-0167-E1 Engine View Diagrams & Manuals
205412-0173-E1 Engine View Diagrams & Manuals
205412-0175-E1 Engine View Diagrams & Manuals
205412-0177-E1 Engine View Diagrams & Manuals
205412-0177-E2 Engine View Diagrams & Manuals
205412-0178-E1 Engine View Diagrams & Manuals
205412-0178-E2 Engine View Diagrams & Manuals
205412-0179-E1 Engine View Diagrams & Manuals
205412-0184-E1 Engine View Diagrams & Manuals
205412-0187-E1 Engine View Diagrams & Manuals
205412-0188-E1 Engine View Diagrams & Manuals
205412-0190-E1 Engine View Diagrams & Manuals
205412-0191-E1 Engine View Diagrams & Manuals
205412-0191-E9 Engine View Diagrams & Manuals
205412-0194-E1 Engine View Diagrams & Manuals
205412-0202-E1 Engine View Diagrams & Manuals
205412-0202-E9 Engine View Diagrams & Manuals
205412-0203-E1 Engine View Diagrams & Manuals
205412-0203-E9 Engine View Diagrams & Manuals
205412-0205-E1 Engine View Diagrams & Manuals
205412-0208-E1 Engine View Diagrams & Manuals
205412-0208-E9 Engine View Diagrams & Manuals
205412-0209-E1 Engine View Diagrams & Manuals
205412-0209-E9 Engine View Diagrams & Manuals
205412-0214-E1 Engine View Diagrams & Manuals
205412-0215-E9 Engine View Diagrams & Manuals
205412-0217-E1 Engine View Diagrams & Manuals
205412-0228-E1 Engine View Diagrams & Manuals
205412-0230-B1 Engine View Diagrams & Manuals
205412-0230-B9 Engine View Diagrams & Manuals
205412-0236-E9 Engine View Diagrams & Manuals
205412-0278-E1 Engine View Diagrams & Manuals
205412-0299-E1 Engine View Diagrams & Manuals
205412-0299-E9 Engine View Diagrams & Manuals
205412-0301-B1 Engine View Diagrams & Manuals
205412-0301-B9 Engine View Diagrams & Manuals
205412-0301-E9 Engine View Diagrams & Manuals
205412-0309-E9 Engine View Diagrams & Manuals
205417-0123-E1 Engine View Diagrams & Manuals
205417-0148-E1 Engine View Diagrams & Manuals
205417-0210-E1 Engine View Diagrams & Manuals
205417-0210-E9 Engine View Diagrams & Manuals
205432-0035-E1 Engine View Diagrams & Manuals
205432-0035-E9 Engine View Diagrams & Manuals
205432-0036-B1 Engine View Diagrams & Manuals
205432-0036-B9 Engine View Diagrams & Manuals
205432-0036-E1 Engine View Diagrams & Manuals
205432-0036-E2 Engine View Diagrams & Manuals
205432-0036-E9 Engine View Diagrams & Manuals
205432-0038-E1 Engine View Diagrams & Manuals
205432-0038-E9 Engine View Diagrams & Manuals
205432-0105-E1 Engine View Diagrams & Manuals
205432-0105-E9 Engine View Diagrams & Manuals
205432-0114-E1 Engine View Diagrams & Manuals
205432-0114-E2 Engine View Diagrams & Manuals
205432-0115-E1 Engine View Diagrams & Manuals
205432-0115-E9 Engine View Diagrams & Manuals
205432-0132-E1 Engine View Diagrams & Manuals
205432-0136-E1 Engine View Diagrams & Manuals
205432-0136-E9 Engine View Diagrams & Manuals
205432-0141-E1 Engine View Diagrams & Manuals
205432-0141-E9 Engine View Diagrams & Manuals
205432-0145-E1 Engine View Diagrams & Manuals
205432-0145-E9 Engine View Diagrams & Manuals
205432-0159-E1 Engine View Diagrams & Manuals
205432-0163-E1 Engine View Diagrams & Manuals
205432-0163-E9 Engine View Diagrams & Manuals
205432-0164-E1 Engine View Diagrams & Manuals
205432-0164-E9 Engine View Diagrams & Manuals
205432-0165-E1 Engine View Diagrams & Manuals
205432-0165-E9 Engine View Diagrams & Manuals
205432-0166-E1 Engine View Diagrams & Manuals
205432-0166-E9 Engine View Diagrams & Manuals
205432-0168-E1 Engine View Diagrams & Manuals
205432-0168-E9 Engine View Diagrams & Manuals
205432-0171-E1 Engine View Diagrams & Manuals
205432-0171-E9 Engine View Diagrams & Manuals
205432-0183-E1 Engine View Diagrams & Manuals
205432-0183-E9 Engine View Diagrams & Manuals
205432-0196-B1 Engine View Diagrams & Manuals
205432-0196-B9 Engine View Diagrams & Manuals
205432-0196-E1 Engine View Diagrams & Manuals
205432-0196-E9 Engine View Diagrams & Manuals
205432-0197-B1 Engine View Diagrams & Manuals
205432-0197-B9 Engine View Diagrams & Manuals
205432-0197-E1 Engine View Diagrams & Manuals
205432-0197-E9 Engine View Diagrams & Manuals
205432-0199-E1 Engine View Diagrams & Manuals
205432-0199-E9 Engine View Diagrams & Manuals
205432-0200-B1 Engine View Diagrams & Manuals
205432-0200-B9 Engine View Diagrams & Manuals
205432-0200-E1 Engine View Diagrams & Manuals
205432-0200-E9 Engine View Diagrams & Manuals
205432-0201-B1 Engine View Diagrams & Manuals
205432-0201-B9 Engine View Diagrams & Manuals
205432-0201-E1 Engine View Diagrams & Manuals
205432-0201-E9 Engine View Diagrams & Manuals
205432-0207-E1 Engine View Diagrams & Manuals
205432-0207-E9 Engine View Diagrams & Manuals
205432-0211-B1 Engine View Diagrams & Manuals
205432-0211-B9 Engine View Diagrams & Manuals
205432-0213-E9 Engine View Diagrams & Manuals
205432-0227-E1 Engine View Diagrams & Manuals
205432-0232-B1 Engine View Diagrams & Manuals
205432-0232-B9 Engine View Diagrams & Manuals
205432-0279-E1 Engine View Diagrams & Manuals
205432-0279-E9 Engine View Diagrams & Manuals
205432-0280-E9 Engine View Diagrams & Manuals
205432-0304-E9 Engine View Diagrams & Manuals
205432-0305-E9 Engine View Diagrams & Manuals
205432-0306-E9 Engine View Diagrams & Manuals
205432-0307-E9 Engine View Diagrams & Manuals
205432-0535-E9 Engine View Diagrams & Manuals
205432-0536-E9 Engine View Diagrams & Manuals
205432-0537-E9 Engine View Diagrams & Manuals
205432-0538-E9 Engine View Diagrams & Manuals
205432-0563-E9 Engine View Diagrams & Manuals
205437-0041-E1 Engine View Diagrams & Manuals
205437-0041-E9 Engine View Diagrams & Manuals
205437-0118-E1 Engine View Diagrams & Manuals
205437-0150-E1 Engine View Diagrams & Manuals
205437-0150-E9 Engine View Diagrams & Manuals
205437-0169-E1 Engine View Diagrams & Manuals
205437-0169-E9 Engine View Diagrams & Manuals
205437-0172-E1 Engine View Diagrams & Manuals
205437-0172-E9 Engine View Diagrams & Manuals
205437-0174-B1 Engine View Diagrams & Manuals
205437-0174-B9 Engine View Diagrams & Manuals
205437-0174-E1 Engine View Diagrams & Manuals
205437-0180-E1 Engine View Diagrams & Manuals
205437-0185-E1 Engine View Diagrams & Manuals
205437-0185-E9 Engine View Diagrams & Manuals
205437-0186-E1 Engine View Diagrams & Manuals
205437-0186-E9 Engine View Diagrams & Manuals
205437-0198-B1 Engine View Diagrams & Manuals
205437-0198-B9 Engine View Diagrams & Manuals
205437-0198-E1 Engine View Diagrams & Manuals
205437-0198-E9 Engine View Diagrams & Manuals
205437-0204-E1 Engine View Diagrams & Manuals
205437-0204-E9 Engine View Diagrams & Manuals
205437-0216-E9 Engine View Diagrams & Manuals
205437-0229-E1 Engine View Diagrams & Manuals
205437-0229-E9 Engine View Diagrams & Manuals
205437-0303-E9 Engine View Diagrams & Manuals
205437-0312-E9 Engine View Diagrams & Manuals
205437-0313-B1 Engine View Diagrams & Manuals
205437-0533-E9 Engine View Diagrams & Manuals
205437-0541-E9 Engine View Diagrams & Manuals
205437-0542-E9 Engine View Diagrams & Manuals
205452-0049-E1 Engine View Diagrams & Manuals
205452-0049-E9 Engine View Diagrams & Manuals
205452-0195-E1 Engine View Diagrams & Manuals
205452-0195-E9 Engine View Diagrams & Manuals
205452-0281-E9 Engine View Diagrams & Manuals
205452-0310-E9 Engine View Diagrams & Manuals
205452-0549-E9 Engine View Diagrams & Manuals
205455-0212-E1 Engine View Diagrams & Manuals
205455-0212-E9 Engine View Diagrams & Manuals
205457-0050-E1 Engine View Diagrams & Manuals
205457-0050-E9 Engine View Diagrams & Manuals
205457-0112-E1 Engine View Diagrams & Manuals
205457-0311-E9 Engine View Diagrams & Manuals
205457-0550-E9 Engine View Diagrams & Manuals
206437-0041-E1 Engine View Diagrams & Manuals
206437-0041-E2 Engine View Diagrams & Manuals
206437-0041-E9 Engine View Diagrams & Manuals
206437-0112-E1 Engine View Diagrams & Manuals
206437-0119-E1 Engine View Diagrams & Manuals
206437-0122-B1 Engine View Diagrams & Manuals
206437-0122-B9 Engine View Diagrams & Manuals
206437-0122-E1 Engine View Diagrams & Manuals
206437-0122-E9 Engine View Diagrams & Manuals
206457-0117-E1 Engine View Diagrams & Manuals
206457-0118-E1 Engine View Diagrams & Manuals
206457-0118-E9 Engine View Diagrams & Manuals
207437-0117-E1 Engine View Diagrams & Manuals
207437-0123-E1 Engine View Diagrams & Manuals
207437-0124-E1 Engine View Diagrams & Manuals
207437-0124-E9 Engine View Diagrams & Manuals
207437-0125-E1 Engine View Diagrams & Manuals
207437-0127-E1 Engine View Diagrams & Manuals
210317-0132-B1 Engine View Diagrams & Manuals
210317-0132-E9 Engine View Diagrams & Manuals
210317-0142-B1 Engine View Diagrams & Manuals
210317-0142-E1 Engine View Diagrams & Manuals
210317-0152-B1 Engine View Diagrams & Manuals
210317-0152-E9 Engine View Diagrams & Manuals
210317-0193-B1 Engine View Diagrams & Manuals
210317-0193-E9 Engine View Diagrams & Manuals
210317-1142-B1 Engine View Diagrams & Manuals
210317-1142-E1 Engine View Diagrams & Manuals
210417-0132-E1 Engine View Diagrams & Manuals
210417-0132-E2 Engine View Diagrams & Manuals
210417-0132-E9 Engine View Diagrams & Manuals
210417-0142-E1 Engine View Diagrams & Manuals
210417-0152-E1 Engine View Diagrams & Manuals
210417-0152-E9 Engine View Diagrams & Manuals
210417-0193-E9 Engine View Diagrams & Manuals
212312-0100-B1 Engine View Diagrams & Manuals
212312-0100-E9 Engine View Diagrams & Manuals
212312-0113-B1 Engine View Diagrams & Manuals
212312-0113-E9 Engine View Diagrams & Manuals
212312-0117-B1 Engine View Diagrams & Manuals
212312-0117-E9 Engine View Diagrams & Manuals
212312-0120-B1 Engine View Diagrams & Manuals
212312-0120-B9 Engine View Diagrams & Manuals
212312-0123-B1 Engine View Diagrams & Manuals
212312-0123-E1 Engine View Diagrams & Manuals
212312-0125-B1 Engine View Diagrams & Manuals
212312-0132-B1 Engine View Diagrams & Manuals
212312-0132-E9 Engine View Diagrams & Manuals
212312-0138-B1 Engine View Diagrams & Manuals
212312-0138-E9 Engine View Diagrams & Manuals
212312-0570-B1 Engine View Diagrams & Manuals
212312-0570-E1 Engine View Diagrams & Manuals
212312-1126-B1 Engine View Diagrams & Manuals
212312-1126-E1 Engine View Diagrams & Manuals
212315-0115-B1 Engine View Diagrams & Manuals
212315-0115-E1 Engine View Diagrams & Manuals
212315-0124-B1 Engine View Diagrams & Manuals
212315-0124-E1 Engine View Diagrams & Manuals
212315-0130-B1 Engine View Diagrams & Manuals
212315-0130-E1 Engine View Diagrams & Manuals
212315-1127-B1 Engine View Diagrams & Manuals
212317-0118-B1 Engine View Diagrams & Manuals
212317-0118-E9 Engine View Diagrams & Manuals
212317-0119-B1 Engine View Diagrams & Manuals
212317-0119-B9 Engine View Diagrams & Manuals
212317-0121-B1 Engine View Diagrams & Manuals
212317-0121-E9 Engine View Diagrams & Manuals
212317-0129-B1 Engine View Diagrams & Manuals
212317-0131-B1 Engine View Diagrams & Manuals
212317-0131-E9 Engine View Diagrams & Manuals
212317-1129-E1 Engine View Diagrams & Manuals
212332-0128-B1 Engine View Diagrams & Manuals
212332-0128-E9 Engine View Diagrams & Manuals
212332-0135-B1 Engine View Diagrams & Manuals
212332-0135-E9 Engine View Diagrams & Manuals
212332-0136-B1 Engine View Diagrams & Manuals
212332-0136-E9 Engine View Diagrams & Manuals
212332-0139-B1 Engine View Diagrams & Manuals
212332-0139-E9 Engine View Diagrams & Manuals
212332-0140-B1 Engine View Diagrams & Manuals
212332-0140-E9 Engine View Diagrams & Manuals
212332-0142-B1 Engine View Diagrams & Manuals
212332-0142-B9 Engine View Diagrams & Manuals
212332-0536-B1 Engine View Diagrams & Manuals
212332-0536-E9 Engine View Diagrams & Manuals
212332-0546-B1 Engine View Diagrams & Manuals
212332-1036-B1 Engine View Diagrams & Manuals
212332-1036-E9 Engine View Diagrams & Manuals
212332-1122-B1 Engine View Diagrams & Manuals
212332-1122-B9 Engine View Diagrams & Manuals
212335-0143-B1 Engine View Diagrams & Manuals
212337-0041-B1 Engine View Diagrams & Manuals
212337-0041-E9 Engine View Diagrams & Manuals
212337-0112-B1 Engine View Diagrams & Manuals
212337-0112-E9 Engine View Diagrams & Manuals
212337-0116-B1 Engine View Diagrams & Manuals
212337-0116-E9 Engine View Diagrams & Manuals
212337-0541-B1 Engine View Diagrams & Manuals
212337-0541-E9 Engine View Diagrams & Manuals
212337-0543-B1 Engine View Diagrams & Manuals
212337-1041-B1 Engine View Diagrams & Manuals
212337-1041-E9 Engine View Diagrams & Manuals
212417-0118-E1 Engine View Diagrams & Manuals
212417-0118-E9 Engine View Diagrams & Manuals
212417-0119-B1 Engine View Diagrams & Manuals
212417-0119-B9 Engine View Diagrams & Manuals
212417-0121-E1 Engine View Diagrams & Manuals
212417-0121-E9 Engine View Diagrams & Manuals
212417-0129-E1 Engine View Diagrams & Manuals
212417-0131-E9 Engine View Diagrams & Manuals
212437-0041-E1 Engine View Diagrams & Manuals
212437-0041-E9 Engine View Diagrams & Manuals
212437-0112-E1 Engine View Diagrams & Manuals
212437-0112-E9 Engine View Diagrams & Manuals
212437-0116-E1 Engine View Diagrams & Manuals
212437-0116-E9 Engine View Diagrams & Manuals
212437-0541-E9 Engine View Diagrams & Manuals
216317-0112-B1 Engine View Diagrams & Manuals
216317-0112-E9 Engine View Diagrams & Manuals
216317-0116-B1 Engine View Diagrams & Manuals
216337-0541-B1 Engine View Diagrams & Manuals
216977-0116-E1 Engine View Diagrams & Manuals
217317-0119-B1 Engine View Diagrams & Manuals
217337-0043-B1 Engine View Diagrams & Manuals
217337-0114-B1 Engine View Diagrams & Manuals
217337-0114-H1 Engine View Diagrams & Manuals
217902-0015-E1 Engine View Diagrams & Manuals
217902-0015-G1 Engine View Diagrams & Manuals
217902-0016-E1 Engine View Diagrams & Manuals
217902-0016-G1 Engine View Diagrams & Manuals
217902-0020-B1 Engine View Diagrams & Manuals
217902-0020-B9 Engine View Diagrams & Manuals
217902-0020-E1 Engine View Diagrams & Manuals
217902-0020-E9 Engine View Diagrams & Manuals
217902-0117-B1 Engine View Diagrams & Manuals
217902-0117-E1 Engine View Diagrams & Manuals
217902-0119-B1 Engine View Diagrams & Manuals
217902-0119-E1 Engine View Diagrams & Manuals
217902-0124-B1 Engine View Diagrams & Manuals
217902-0124-E1 Engine View Diagrams & Manuals
217902-0124-E9 Engine View Diagrams & Manuals
217902-0127-B1 Engine View Diagrams & Manuals
217902-0127-E1 Engine View Diagrams & Manuals
217902-0127-E9 Engine View Diagrams & Manuals
217902-0130-B1 Engine View Diagrams & Manuals
217902-0134-B1 Engine View Diagrams & Manuals
217902-0134-E1 Engine View Diagrams & Manuals
217902-0134-E9 Engine View Diagrams & Manuals
217902-0148-B1 Engine View Diagrams & Manuals
217902-0155-B1 Engine View Diagrams & Manuals
217902-3015-G5 Engine View Diagrams & Manuals
217902-3148-B1 Engine View Diagrams & Manuals
217902-4020-F1 Engine View Diagrams & Manuals
217907-0019-B1 Engine View Diagrams & Manuals
217907-0019-E1 Engine View Diagrams & Manuals
217907-0019-E9 Engine View Diagrams & Manuals
217907-0019-G1 Engine View Diagrams & Manuals
217907-0025-E1 Engine View Diagrams & Manuals
217907-0025-G1 Engine View Diagrams & Manuals
217907-0028-B1 Engine View Diagrams & Manuals
217907-0028-E1 Engine View Diagrams & Manuals
217907-0028-E9 Engine View Diagrams & Manuals
217907-0116-B1 Engine View Diagrams & Manuals
217907-0116-E1 Engine View Diagrams & Manuals
217907-0121-B1 Engine View Diagrams & Manuals
217907-0123-E1 Engine View Diagrams & Manuals
217907-0125-B1 Engine View Diagrams & Manuals
217907-0125-E1 Engine View Diagrams & Manuals
217907-0125-E9 Engine View Diagrams & Manuals
217907-0128-B1 Engine View Diagrams & Manuals
217907-0128-E1 Engine View Diagrams & Manuals
217907-0128-E9 Engine View Diagrams & Manuals
217907-0133-B1 Engine View Diagrams & Manuals
217907-0133-E1 Engine View Diagrams & Manuals
217907-0135-B1 Engine View Diagrams & Manuals
217907-0135-E1 Engine View Diagrams & Manuals
217907-0135-E9 Engine View Diagrams & Manuals
217907-0140-B1 Engine View Diagrams & Manuals
217907-0140-E1 Engine View Diagrams & Manuals
217907-0141-B1 Engine View Diagrams & Manuals
217907-0141-E1 Engine View Diagrams & Manuals
217907-0142-G1 Engine View Diagrams & Manuals
217907-0143-B1 Engine View Diagrams & Manuals
217907-0149-B1 Engine View Diagrams & Manuals
217907-0154-B1 Engine View Diagrams & Manuals
217907-3019-G5 Engine View Diagrams & Manuals
217907-3025-G5 Engine View Diagrams & Manuals
217907-4028-F1 Engine View Diagrams & Manuals
217907-4135-F1 Engine View Diagrams & Manuals
217907-4149-B1 Engine View Diagrams & Manuals
217972-0145-G1 Engine View Diagrams & Manuals
217972-0153-B1 Engine View Diagrams & Manuals
217972-0158-F1 Engine View Diagrams & Manuals
217972-1153-H1 Engine View Diagrams & Manuals
217976-0152-B1 Engine View Diagrams & Manuals
217977-0110-H1 Engine View Diagrams & Manuals
217977-0111-B1 Engine View Diagrams & Manuals
217977-0112-E1 Engine View Diagrams & Manuals
217977-0118-E1 Engine View Diagrams & Manuals
217977-0122-B1 Engine View Diagrams & Manuals
217977-0122-E1 Engine View Diagrams & Manuals
217977-0129-G1 Engine View Diagrams & Manuals
217977-0129-G5 Engine View Diagrams & Manuals
217977-0157-G5 Engine View Diagrams & Manuals
219802-0117-B1 Engine View Diagrams & Manuals
219802-0117-E1 Engine View Diagrams & Manuals
219802-0117-E9 Engine View Diagrams & Manuals
219802-0118-B1 Engine View Diagrams & Manuals
219802-0118-E1 Engine View Diagrams & Manuals
219802-0118-E9 Engine View Diagrams & Manuals
219802-0132-B1 Engine View Diagrams & Manuals
219802-0132-E1 Engine View Diagrams & Manuals
219802-0132-E9 Engine View Diagrams & Manuals
219802-0133-B1 Engine View Diagrams & Manuals
219802-0144-B1 Engine View Diagrams & Manuals
219802-0164-B1 Engine View Diagrams & Manuals
219802-0169-B1 Engine View Diagrams & Manuals
219802-0287-F1 Engine View Diagrams & Manuals
219802-0597-B1 Engine View Diagrams & Manuals
219802-0597-E1 Engine View Diagrams & Manuals
219802-2115-B1 Engine View Diagrams & Manuals
219802-4118-B1 Engine View Diagrams & Manuals
219802-4118-F1 Engine View Diagrams & Manuals
219802-4132-H1 Engine View Diagrams & Manuals
219806-0165-B1 Engine View Diagrams & Manuals
219807-0026-G1 Engine View Diagrams & Manuals
219807-0101-B1 Engine View Diagrams & Manuals
219807-0110-B1 Engine View Diagrams & Manuals
219807-0113-E1 Engine View Diagrams & Manuals
219807-0114-B1 Engine View Diagrams & Manuals
219807-0114-E1 Engine View Diagrams & Manuals
219807-0121-E1 Engine View Diagrams & Manuals
219807-0121-E9 Engine View Diagrams & Manuals
219807-0122-B1 Engine View Diagrams & Manuals
219807-0122-E1 Engine View Diagrams & Manuals
219807-0122-E9 Engine View Diagrams & Manuals
219807-0123-E1 Engine View Diagrams & Manuals
219807-0124-B1 Engine View Diagrams & Manuals
219807-0124-E1 Engine View Diagrams & Manuals
219807-0124-E9 Engine View Diagrams & Manuals
219807-0125-B1 Engine View Diagrams & Manuals
219807-0136-E1 Engine View Diagrams & Manuals
219807-0137-B1 Engine View Diagrams & Manuals
219807-0137-E1 Engine View Diagrams & Manuals
219807-0137-E9 Engine View Diagrams & Manuals
219807-0138-B1 Engine View Diagrams & Manuals
219807-0138-E1 Engine View Diagrams & Manuals
219807-0139-B1 Engine View Diagrams & Manuals
219807-0139-E1 Engine View Diagrams & Manuals
219807-0141-B1 Engine View Diagrams & Manuals
219807-0142-B1 Engine View Diagrams & Manuals
219807-0142-E1 Engine View Diagrams & Manuals
219807-0143-B1 Engine View Diagrams & Manuals
219807-0143-E1 Engine View Diagrams & Manuals
219807-0146-B1 Engine View Diagrams & Manuals
219807-0146-B2 Engine View Diagrams & Manuals
219807-0146-E1 Engine View Diagrams & Manuals
219807-0146-E2 Engine View Diagrams & Manuals
219807-0147-B1 Engine View Diagrams & Manuals
219807-0147-E1 Engine View Diagrams & Manuals
219807-0148-B1 Engine View Diagrams & Manuals
219807-0150-B1 Engine View Diagrams & Manuals
219807-0151-B1 Engine View Diagrams & Manuals
219807-0152-B1 Engine View Diagrams & Manuals
219807-0153-B1 Engine View Diagrams & Manuals
219807-0154-B1 Engine View Diagrams & Manuals
219807-0155-B1 Engine View Diagrams & Manuals
219807-0158-B1 Engine View Diagrams & Manuals
219807-0160-B1 Engine View Diagrams & Manuals
219807-0161-B1 Engine View Diagrams & Manuals
219807-0163-B1 Engine View Diagrams & Manuals
219807-0166-B1 Engine View Diagrams & Manuals
219807-0168-B1 Engine View Diagrams & Manuals
219807-0170-B1 Engine View Diagrams & Manuals
219807-0171-B1 Engine View Diagrams & Manuals
219807-0172-B1 Engine View Diagrams & Manuals
219807-0173-H1 Engine View Diagrams & Manuals
219807-0174-B1 Engine View Diagrams & Manuals
219807-0175-F1 Engine View Diagrams & Manuals
219807-0176-H1 Engine View Diagrams & Manuals
219807-0177-G5 Engine View Diagrams & Manuals
219807-0311-B1 Engine View Diagrams & Manuals
219807-0311-E1 Engine View Diagrams & Manuals
219807-0322-B1 Engine View Diagrams & Manuals
219807-0322-E1 Engine View Diagrams & Manuals
219807-0336-B1 Engine View Diagrams & Manuals
219807-0336-E1 Engine View Diagrams & Manuals
219807-0371-B1 Engine View Diagrams & Manuals
219807-0371-E1 Engine View Diagrams & Manuals
219807-0388-B1 Engine View Diagrams & Manuals
219807-0388-E1 Engine View Diagrams & Manuals
219807-0389-B1 Engine View Diagrams & Manuals
219807-0389-E1 Engine View Diagrams & Manuals
219807-0421-B1 Engine View Diagrams & Manuals
219807-0648-B1 Engine View Diagrams & Manuals
219807-0664-B1 Engine View Diagrams & Manuals
219807-0733-B1 Engine View Diagrams & Manuals
219807-0939-B1 Engine View Diagrams & Manuals
219807-1168-B1 Engine View Diagrams & Manuals
219807-1177-B1 Engine View Diagrams & Manuals
219807-1210-B1 Engine View Diagrams & Manuals
219807-1376-B1 Engine View Diagrams & Manuals
219807-1402-B1 Engine View Diagrams & Manuals
219807-1515-B1 Engine View Diagrams & Manuals
219807-1515-G5 Engine View Diagrams & Manuals
219807-1539-G1 Engine View Diagrams & Manuals
219807-1539-G5 Engine View Diagrams & Manuals
219807-1549-G1 Engine View Diagrams & Manuals
219807-1549-G5 Engine View Diagrams & Manuals
219807-1581-G5 Engine View Diagrams & Manuals
219807-2118-B1 Engine View Diagrams & Manuals
219807-2189-B1 Engine View Diagrams & Manuals
219807-2190-B1 Engine View Diagrams & Manuals
219807-2301-B1 Engine View Diagrams & Manuals
219807-2380-B1 Engine View Diagrams & Manuals
219807-2381-B1 Engine View Diagrams & Manuals
219807-2695-B1 Engine View Diagrams & Manuals
219807-2695-G1 Engine View Diagrams & Manuals
219807-2712-B1 Engine View Diagrams & Manuals
219807-3026-G5 Engine View Diagrams & Manuals
219807-3118-B1 Engine View Diagrams & Manuals
219807-3138-B1 Engine View Diagrams & Manuals
219807-3148-B1 Engine View Diagrams & Manuals
219807-3151-B1 Engine View Diagrams & Manuals
219807-3152-B1 Engine View Diagrams & Manuals
219807-3154-B1 Engine View Diagrams & Manuals
219807-3190-B1 Engine View Diagrams & Manuals
219807-3210-B1 Engine View Diagrams & Manuals
219807-3376-B1 Engine View Diagrams & Manuals
219807-3389-G1 Engine View Diagrams & Manuals
219807-3389-G5 Engine View Diagrams & Manuals
219807-3402-B1 Engine View Diagrams & Manuals
219807-3695-G1 Engine View Diagrams & Manuals
219807-3695-G5 Engine View Diagrams & Manuals
219807-3712-G1 Engine View Diagrams & Manuals
219807-3712-G5 Engine View Diagrams & Manuals
219807-3733-B1 Engine View Diagrams & Manuals
219807-4028-F1 Engine View Diagrams & Manuals
219807-4029-F1 Engine View Diagrams & Manuals
219807-4124-B1 Engine View Diagrams & Manuals
219807-4124-F1 Engine View Diagrams & Manuals
219807-4161-H1 Engine View Diagrams & Manuals
219807-4389-G1 Engine View Diagrams & Manuals
219872-0134-B1 Engine View Diagrams & Manuals
219872-0134-B9 Engine View Diagrams & Manuals
219872-0134-E1 Engine View Diagrams & Manuals
219872-0134-E9 Engine View Diagrams & Manuals
219902-0127-B1 Engine View Diagrams & Manuals
219902-0128-B1 Engine View Diagrams & Manuals
219902-0134-B1 Engine View Diagrams & Manuals
219902-0135-B1 Engine View Diagrams & Manuals
219902-0135-G1 Engine View Diagrams & Manuals
219902-0175-B1 Engine View Diagrams & Manuals
219902-3015-G5 Engine View Diagrams & Manuals
219906-0124-B1 Engine View Diagrams & Manuals
219906-0124-E1 Engine View Diagrams & Manuals
219907-0105-E1 Engine View Diagrams & Manuals
219907-0110-E1 Engine View Diagrams & Manuals
219907-0111-E1 Engine View Diagrams & Manuals
219907-0112-E1 Engine View Diagrams & Manuals
219907-0114-E1 Engine View Diagrams & Manuals
219907-0114-E9 Engine View Diagrams & Manuals
219907-0118-E1 Engine View Diagrams & Manuals
219907-0119-E1 Engine View Diagrams & Manuals
219907-0120-E1 Engine View Diagrams & Manuals
219907-0123-B1 Engine View Diagrams & Manuals
219907-0123-E1 Engine View Diagrams & Manuals
219907-0125-B1 Engine View Diagrams & Manuals
219907-0126-B1 Engine View Diagrams & Manuals
219907-0131-B1 Engine View Diagrams & Manuals
219907-0131-E1 Engine View Diagrams & Manuals
219907-0131-G1 Engine View Diagrams & Manuals
219907-0136-B1 Engine View Diagrams & Manuals
219907-0170-B1 Engine View Diagrams & Manuals
219907-0170-E1 Engine View Diagrams & Manuals
219907-0171-E1 Engine View Diagrams & Manuals
219907-0172-B1 Engine View Diagrams & Manuals
219907-0172-E1 Engine View Diagrams & Manuals
219907-0181-B1 Engine View Diagrams & Manuals
219972-0141-B1 Engine View Diagrams & Manuals
219972-0143-B1 Engine View Diagrams & Manuals
219977-0129-B1 Engine View Diagrams & Manuals
219977-0130-B1 Engine View Diagrams & Manuals
219977-0139-B1 Engine View Diagrams & Manuals
219977-0140-B1 Engine View Diagrams & Manuals
219977-0142-G1 Engine View Diagrams & Manuals
219977-0144-B1 Engine View Diagrams & Manuals
219907-3026-G5 Engine View Diagrams & Manuals
219977-0174-B1 Engine View Diagrams & Manuals
219977-0176-B1 Engine View Diagrams & Manuals
219972-0145-B1 Engine View Diagrams & Manuals
219972-0145-H1 Engine View Diagrams & Manuals
219972-0147-B1 Engine View Diagrams & Manuals
219972-0151-F1 Engine View Diagrams & Manuals
219907-3029-G5 Engine View Diagrams & Manuals
219972-0153-G5 Engine View Diagrams & Manuals
219972-0158-F1 Engine View Diagrams & Manuals
219977-0146-G1 Engine View Diagrams & Manuals
219977-0146-G5 Engine View Diagrams & Manuals
219977-0148-B1 Engine View Diagrams & Manuals
219977-0150-G5 Engine View Diagrams & Manuals
219977-0152-H1 Engine View Diagrams & Manuals
219977-0154-G5 Engine View Diagrams & Manuals
219977-0155-G5 Engine View Diagrams & Manuals
219977-0156-F1 Engine View Diagrams & Manuals
219977-0157-H1 Engine View Diagrams & Manuals
219977-0177-B1 Engine View Diagrams & Manuals
219977-0178-B1 Engine View Diagrams & Manuals
219977-0179-B1 Engine View Diagrams & Manuals
219977-3130-G1 Engine View Diagrams & Manuals
220416-0158-99 Engine View Diagrams & Manuals
220431-0142-99 Engine View Diagrams & Manuals
220431-0143-99 Engine View Diagrams & Manuals
220431-0156-99 Engine View Diagrams & Manuals
220432-0111-99 Engine View Diagrams & Manuals
220432-0112-99 Engine View Diagrams & Manuals
220432-0113-99 Engine View Diagrams & Manuals
220432-0131-99 Engine View Diagrams & Manuals
220432-0133-99 Engine View Diagrams & Manuals
220432-0134-99 Engine View Diagrams & Manuals
220432-0135-99 Engine View Diagrams & Manuals
220432-0136-99 Engine View Diagrams & Manuals
220432-0137-99 Engine View Diagrams & Manuals
220432-0138-99 Engine View Diagrams & Manuals
220432-0139-99 Engine View Diagrams & Manuals
220432-0145-99 Engine View Diagrams & Manuals
220432-0146-99 Engine View Diagrams & Manuals
220432-0147-99 Engine View Diagrams & Manuals
220432-0149-99 Engine View Diagrams & Manuals
220432-0151-99 Engine View Diagrams & Manuals
220432-0152-99 Engine View Diagrams & Manuals
220432-0153-99 Engine View Diagrams & Manuals
220432-0154-99 Engine View Diagrams & Manuals
220432-0155-99 Engine View Diagrams & Manuals
220432-0157-99 Engine View Diagrams & Manuals
220432-2035-99 Engine View Diagrams & Manuals
220432-2037-99 Engine View Diagrams & Manuals
220432-2070-99 Engine View Diagrams & Manuals
220435-0130-99 Engine View Diagrams & Manuals
220435-0132-99 Engine View Diagrams & Manuals
220435-0134-99 Engine View Diagrams & Manuals
220435-0140-99 Engine View Diagrams & Manuals
220437-0120-99 Engine View Diagrams & Manuals
220437-0144-99 Engine View Diagrams & Manuals
220437-0148-99 Engine View Diagrams & Manuals
220437-0150-99 Engine View Diagrams & Manuals
220437-2073-99 Engine View Diagrams & Manuals
220702-0111-99 Engine View Diagrams & Manuals
220702-0138-99 Engine View Diagrams & Manuals
220702-0143-99 Engine View Diagrams & Manuals
220702-0516-01 Engine View Diagrams & Manuals
220702-0611-01 Engine View Diagrams & Manuals
220705-0163-99 Engine View Diagrams & Manuals
220705-0646-01 Engine View Diagrams & Manuals
220706-0146-99 Engine View Diagrams & Manuals
220707-0118-99 Engine View Diagrams & Manuals
220707-0119-99 Engine View Diagrams & Manuals
220707-0130-99 Engine View Diagrams & Manuals
220707-0131-99 Engine View Diagrams & Manuals
220707-0132-99 Engine View Diagrams & Manuals
220707-0133-99 Engine View Diagrams & Manuals
220707-0134-99 Engine View Diagrams & Manuals
220707-0135-99 Engine View Diagrams & Manuals
220707-0136-99 Engine View Diagrams & Manuals
220707-0137-99 Engine View Diagrams & Manuals
220707-0139-99 Engine View Diagrams & Manuals
220707-0140-99 Engine View Diagrams & Manuals
220707-0141-99 Engine View Diagrams & Manuals
220707-0142-99 Engine View Diagrams & Manuals
220707-0144-99 Engine View Diagrams & Manuals
220707-0145-99 Engine View Diagrams & Manuals
220707-0147-99 Engine View Diagrams & Manuals
220707-0148-99 Engine View Diagrams & Manuals
220707-0149-99 Engine View Diagrams & Manuals
220707-0150-99 Engine View Diagrams & Manuals
220707-0151-99 Engine View Diagrams & Manuals
220707-0161-99 Engine View Diagrams & Manuals
220707-0164-99 Engine View Diagrams & Manuals
220707-0618-01 Engine View Diagrams & Manuals
220707-0619-01 Engine View Diagrams & Manuals
220707-0630-01 Engine View Diagrams & Manuals
220707-0632-01 Engine View Diagrams & Manuals
220707-0631-01 Engine View Diagrams & Manuals
220707-0633-01 Engine View Diagrams & Manuals
220707-0635-01 Engine View Diagrams & Manuals
220707-0634-01 Engine View Diagrams & Manuals
220707-0634-02 Engine View Diagrams & Manuals
220707-0637-01 Engine View Diagrams & Manuals
220707-0636-01 Engine View Diagrams & Manuals
220707-0640-01 Engine View Diagrams & Manuals
220707-0638-01 Engine View Diagrams & Manuals
220707-0639-01 Engine View Diagrams & Manuals
220707-0641-01 Engine View Diagrams & Manuals
220707-0642-01 Engine View Diagrams & Manuals
220707-0644-01 Engine View Diagrams & Manuals
220707-0643-01 Engine View Diagrams & Manuals
220707-0645-01 Engine View Diagrams & Manuals
220707-0647-01 Engine View Diagrams & Manuals
220707-0648-01 Engine View Diagrams & Manuals
220707-0649-01 Engine View Diagrams & Manuals
220707-0650-01 Engine View Diagrams & Manuals
220707-0651-01 Engine View Diagrams & Manuals
220707-0652-01 Engine View Diagrams & Manuals
220707-0654-01 Engine View Diagrams & Manuals
220707-0653-01 Engine View Diagrams & Manuals
220707-0665-99 Engine View Diagrams & Manuals
220707-0655-01 Engine View Diagrams & Manuals
220707-0656-01 Engine View Diagrams & Manuals
220707-0657-01 Engine View Diagrams & Manuals
220707-0668-01 Engine View Diagrams & Manuals
220707-0669-01 Engine View Diagrams & Manuals
220707-0670-01 Engine View Diagrams & Manuals
221431-0140-01 Engine View Diagrams & Manuals
221431-0142-01 Engine View Diagrams & Manuals
221431-0146-01 Engine View Diagrams & Manuals
221431-0156-01 Engine View Diagrams & Manuals
221431-0176-01 Engine View Diagrams & Manuals
221431-0179-01 Engine View Diagrams & Manuals
221431-0183-01 Engine View Diagrams & Manuals
221431-0189-01 Engine View Diagrams & Manuals
221431-0319-01 Engine View Diagrams & Manuals
221431-0336-01 Engine View Diagrams & Manuals
221431-0339-01 Engine View Diagrams & Manuals
221432-0111-01 Engine View Diagrams & Manuals
221432-0112-01 Engine View Diagrams & Manuals
221432-0113-01 Engine View Diagrams & Manuals
221432-0131-01 Engine View Diagrams & Manuals
221432-0131-02 Engine View Diagrams & Manuals
221432-0131-03 Engine View Diagrams & Manuals
221432-0133-01 Engine View Diagrams & Manuals
221432-0134-01 Engine View Diagrams & Manuals
221432-0135-01 Engine View Diagrams & Manuals
221432-0135-02 Engine View Diagrams & Manuals
221432-0138-01 Engine View Diagrams & Manuals
221432-0138-02 Engine View Diagrams & Manuals
221432-0139-01 Engine View Diagrams & Manuals
221432-0141-01 Engine View Diagrams & Manuals
221432-0143-99 Engine View Diagrams & Manuals
221432-0145-01 Engine View Diagrams & Manuals
221432-0145-02 Engine View Diagrams & Manuals
221432-0145-03 Engine View Diagrams & Manuals
221432-0145-04 Engine View Diagrams & Manuals
221432-0145-05 Engine View Diagrams & Manuals
221432-0147-01 Engine View Diagrams & Manuals
221432-0148-01 Engine View Diagrams & Manuals
221432-0148-02 Engine View Diagrams & Manuals
221432-0148-03 Engine View Diagrams & Manuals
221432-0152-01 Engine View Diagrams & Manuals
221432-0152-02 Engine View Diagrams & Manuals
221432-0154-01 Engine View Diagrams & Manuals
221432-0155-01 Engine View Diagrams & Manuals
221432-0155-02 Engine View Diagrams & Manuals
221432-0191-01 Engine View Diagrams & Manuals
221432-0194-01 Engine View Diagrams & Manuals
221432-0196-01 Engine View Diagrams & Manuals
221432-0198-99 Engine View Diagrams & Manuals
221432-0200-01 Engine View Diagrams & Manuals
221432-0203-01 Engine View Diagrams & Manuals
221432-0204-01 Engine View Diagrams & Manuals
221432-0205-01 Engine View Diagrams & Manuals
221432-0206-99 Engine View Diagrams & Manuals
221432-0207-01 Engine View Diagrams & Manuals
221432-0208-01 Engine View Diagrams & Manuals
221432-0208-02 Engine View Diagrams & Manuals
221432-0211-01 Engine View Diagrams & Manuals
221432-0213-01 Engine View Diagrams & Manuals
221432-0300-01 Engine View Diagrams & Manuals
221432-0301-99 Engine View Diagrams & Manuals
221432-0302-99 Engine View Diagrams & Manuals
221432-0304-99 Engine View Diagrams & Manuals
221432-0310-01 Engine View Diagrams & Manuals
221432-0312-01 Engine View Diagrams & Manuals
221432-0314-01 Engine View Diagrams & Manuals
221432-0315-01 Engine View Diagrams & Manuals
221432-0317-01 Engine View Diagrams & Manuals
221432-0318-01 Engine View Diagrams & Manuals
221432-0321-01 Engine View Diagrams & Manuals
221432-0322-01 Engine View Diagrams & Manuals
221432-0322-02 Engine View Diagrams & Manuals
221432-0326-01 Engine View Diagrams & Manuals
221432-0327-01 Engine View Diagrams & Manuals
221432-0329-01 Engine View Diagrams & Manuals
221432-0330-01 Engine View Diagrams & Manuals
221432-0333-01 Engine View Diagrams & Manuals
221432-0334-01 Engine View Diagrams & Manuals
221432-0335-01 Engine View Diagrams & Manuals
221432-0337-99 Engine View Diagrams & Manuals
221432-0342-01 Engine View Diagrams & Manuals
221432-0343-01 Engine View Diagrams & Manuals
221432-0345-01 Engine View Diagrams & Manuals
221432-0346-01 Engine View Diagrams & Manuals
221432-0349-99 Engine View Diagrams & Manuals
221432-0350-01 Engine View Diagrams & Manuals
221432-0351-01 Engine View Diagrams & Manuals
221432-0352-01 Engine View Diagrams & Manuals
221432-0353-01 Engine View Diagrams & Manuals
221432-1345-01 Engine View Diagrams & Manuals
221432-1345-02 Engine View Diagrams & Manuals
221432-1353-01 Engine View Diagrams & Manuals
221432-2035-01 Engine View Diagrams & Manuals
221432-2035-02 Engine View Diagrams & Manuals
221432-2037-01 Engine View Diagrams & Manuals
221432-2037-02 Engine View Diagrams & Manuals
221432-2037-03 Engine View Diagrams & Manuals
221432-2070-01 Engine View Diagrams & Manuals
221432-2070-02 Engine View Diagrams & Manuals
221432-2070-03 Engine View Diagrams & Manuals
221432-2070-04 Engine View Diagrams & Manuals
221432-2135-01 Engine View Diagrams & Manuals
221432-2135-02 Engine View Diagrams & Manuals
221432-2136-01 Engine View Diagrams & Manuals
221432-2136-02 Engine View Diagrams & Manuals
221432-2137-01 Engine View Diagrams & Manuals
221432-2137-03 Engine View Diagrams & Manuals
221432-2138-99 Engine View Diagrams & Manuals
221432-2170-01 Engine View Diagrams & Manuals
221432-2170-02 Engine View Diagrams & Manuals
221432-2170-04 Engine View Diagrams & Manuals
221432-2171-01 Engine View Diagrams & Manuals
221432-2174-01 Engine View Diagrams & Manuals
221432-4006-01 Engine View Diagrams & Manuals
221432-4035-01 Engine View Diagrams & Manuals
221432-4035-02 Engine View Diagrams & Manuals
221432-4035-03 Engine View Diagrams & Manuals
221432-4035-04 Engine View Diagrams & Manuals
221432-4035-05 Engine View Diagrams & Manuals
221432-4037-01 Engine View Diagrams & Manuals
221432-4037-02 Engine View Diagrams & Manuals
221432-4037-03 Engine View Diagrams & Manuals
221432-4037-04 Engine View Diagrams & Manuals
221432-4037-05 Engine View Diagrams & Manuals
221432-4070-01 Engine View Diagrams & Manuals
221432-4070-02 Engine View Diagrams & Manuals
221432-4070-03 Engine View Diagrams & Manuals
221432-4070-04 Engine View Diagrams & Manuals
221432-4070-05 Engine View Diagrams & Manuals
221432-4090-01 Engine View Diagrams & Manuals
221432-5006-01 Engine View Diagrams & Manuals
221432-5035-01 Engine View Diagrams & Manuals
221432-5035-04 Engine View Diagrams & Manuals
221432-5037-01 Engine View Diagrams & Manuals
221432-5037-05 Engine View Diagrams & Manuals
221432-5037-06 Engine View Diagrams & Manuals
221432-5070-01 Engine View Diagrams & Manuals
221433-0332-01 Engine View Diagrams & Manuals
221433-0332-02 Engine View Diagrams & Manuals
221435-0144-01 Engine View Diagrams & Manuals
221435-0153-01 Engine View Diagrams & Manuals
221435-0172-01 Engine View Diagrams & Manuals
221435-0192-01 Engine View Diagrams & Manuals
221435-0197-01 Engine View Diagrams & Manuals
221435-0323-01 Engine View Diagrams & Manuals
221435-0325-01 Engine View Diagrams & Manuals
221435-4001-01 Engine View Diagrams & Manuals
221435-4001-02 Engine View Diagrams & Manuals
221435-4001-03 Engine View Diagrams & Manuals
221435-4001-04 Engine View Diagrams & Manuals
221435-5001-02 Engine View Diagrams & Manuals
221436-0201-01 Engine View Diagrams & Manuals
221437-0120-01 Engine View Diagrams & Manuals
221437-0130-01 Engine View Diagrams & Manuals
221437-0132-01 Engine View Diagrams & Manuals
221437-0136-01 Engine View Diagrams & Manuals
221437-0149-01 Engine View Diagrams & Manuals
221437-0151-01 Engine View Diagrams & Manuals
221437-0157-01 Engine View Diagrams & Manuals
221437-0158-01 Engine View Diagrams & Manuals
221437-0160-01 Engine View Diagrams & Manuals
221437-0161-01 Engine View Diagrams & Manuals
221437-0166-01 Engine View Diagrams & Manuals
221437-0166-02 Engine View Diagrams & Manuals
221437-0168-01 Engine View Diagrams & Manuals
221437-0169-01 Engine View Diagrams & Manuals
221437-0178-01 Engine View Diagrams & Manuals
221437-0180-01 Engine View Diagrams & Manuals
221437-0180-02 Engine View Diagrams & Manuals
221437-0181-01 Engine View Diagrams & Manuals
221437-0182-01 Engine View Diagrams & Manuals
221437-0184-01 Engine View Diagrams & Manuals
221437-0186-01 Engine View Diagrams & Manuals
221437-0187-01 Engine View Diagrams & Manuals
221437-0187-02 Engine View Diagrams & Manuals
221437-0190-01 Engine View Diagrams & Manuals
221437-0193-01 Engine View Diagrams & Manuals
221437-0195-01 Engine View Diagrams & Manuals
221437-0199-01 Engine View Diagrams & Manuals
221437-0202-01 Engine View Diagrams & Manuals
221437-0203-99 Engine View Diagrams & Manuals
221437-0209-01 Engine View Diagrams & Manuals
221437-0210-01 Engine View Diagrams & Manuals
221437-0212-99 Engine View Diagrams & Manuals
221437-0304-01 Engine View Diagrams & Manuals
221437-0311-01 Engine View Diagrams & Manuals
221437-0313-01 Engine View Diagrams & Manuals
221437-0316-01 Engine View Diagrams & Manuals
221437-0320-01 Engine View Diagrams & Manuals
221437-0324-01 Engine View Diagrams & Manuals
221437-0328-01 Engine View Diagrams & Manuals
221437-0331-01 Engine View Diagrams & Manuals
221437-0338-01 Engine View Diagrams & Manuals
221437-0340-01 Engine View Diagrams & Manuals
221437-0341-01 Engine View Diagrams & Manuals
221437-0344-01 Engine View Diagrams & Manuals
221437-0347-01 Engine View Diagrams & Manuals
221437-0348-01 Engine View Diagrams & Manuals
221437-2045-01 Engine View Diagrams & Manuals
221437-2045-02 Engine View Diagrams & Manuals
221437-2073-01 Engine View Diagrams & Manuals
221437-2073-02 Engine View Diagrams & Manuals
221437-2073-03 Engine View Diagrams & Manuals
221437-2145-01 Engine View Diagrams & Manuals
221437-2145-02 Engine View Diagrams & Manuals
221437-2146-01 Engine View Diagrams & Manuals
221437-2146-02 Engine View Diagrams & Manuals
221437-2173-01 Engine View Diagrams & Manuals
221437-4003-01 Engine View Diagrams & Manuals
221437-4005-01 Engine View Diagrams & Manuals
221437-4007-01 Engine View Diagrams & Manuals
221437-4045-01 Engine View Diagrams & Manuals
221437-5005-01 Engine View Diagrams & Manuals
221437-5045-01 Engine View Diagrams & Manuals
221452-0116-01 Engine View Diagrams & Manuals
221452-0137-01 Engine View Diagrams & Manuals
221452-0150-01 Engine View Diagrams & Manuals
221452-0163-01 Engine View Diagrams & Manuals
221452-0163-02 Engine View Diagrams & Manuals
221452-0163-03 Engine View Diagrams & Manuals
221452-0303-01 Engine View Diagrams & Manuals
221452-2049-01 Engine View Diagrams & Manuals
221452-2049-02 Engine View Diagrams & Manuals
221452-2049-03 Engine View Diagrams & Manuals
221452-2049-04 Engine View Diagrams & Manuals
221452-2049-05 Engine View Diagrams & Manuals
221452-2049-06 Engine View Diagrams & Manuals
221452-2049-07 Engine View Diagrams & Manuals
221452-2049-08 Engine View Diagrams & Manuals
221452-2148-01 Engine View Diagrams & Manuals
221452-2149-01 Engine View Diagrams & Manuals
221452-2149-03 Engine View Diagrams & Manuals
221452-4049-01 Engine View Diagrams & Manuals
221452-4049-02 Engine View Diagrams & Manuals
221452-4049-03 Engine View Diagrams & Manuals
221452-4049-04 Engine View Diagrams & Manuals
221452-5049-01 Engine View Diagrams & Manuals
221452-5049-03 Engine View Diagrams & Manuals
221457-0121-01 Engine View Diagrams & Manuals
221457-0305-99 Engine View Diagrams & Manuals
221457-2050-01 Engine View Diagrams & Manuals
221457-2050-02 Engine View Diagrams & Manuals
221457-2050-03 Engine View Diagrams & Manuals
221457-2050-04 Engine View Diagrams & Manuals
221457-2050-05 Engine View Diagrams & Manuals
221457-2050-06 Engine View Diagrams & Manuals
221457-2050-07 Engine View Diagrams & Manuals
221457-2050-08 Engine View Diagrams & Manuals
221457-2150-01 Engine View Diagrams & Manuals
221457-2150-02 Engine View Diagrams & Manuals
221457-4038-01 Engine View Diagrams & Manuals
221457-4050-01 Engine View Diagrams & Manuals
221457-4050-02 Engine View Diagrams & Manuals
221457-5038-01 Engine View Diagrams & Manuals
221457-5038-02 Engine View Diagrams & Manuals
226432-0006-01 Engine View Diagrams & Manuals
226432-0006-02 Engine View Diagrams & Manuals
226432-0035-01 Engine View Diagrams & Manuals
226432-0036-01 Engine View Diagrams & Manuals
226432-0037-01 Engine View Diagrams & Manuals
226432-0047-01 Engine View Diagrams & Manuals
226432-0047-02 Engine View Diagrams & Manuals
226432-0050-99 Engine View Diagrams & Manuals
226432-0057-99 Engine View Diagrams & Manuals
226432-0070-99 Engine View Diagrams & Manuals
226432-0101-01 Engine View Diagrams & Manuals
226432-0110-99 Engine View Diagrams & Manuals
226432-0111-01 Engine View Diagrams & Manuals
226432-0112-99 Engine View Diagrams & Manuals
226432-0114-01 Engine View Diagrams & Manuals
226432-0115-01 Engine View Diagrams & Manuals
226432-0116-01 Engine View Diagrams & Manuals
226432-0145-01 Engine View Diagrams & Manuals
226432-0147-99 Engine View Diagrams & Manuals
226432-1006-E1 Engine View Diagrams & Manuals
226432-1006-E2 Engine View Diagrams & Manuals
226432-1035-E1 Engine View Diagrams & Manuals
226432-1101-E1 Engine View Diagrams & Manuals
226432-1114-E1 Engine View Diagrams & Manuals
226437-0005-01 Engine View Diagrams & Manuals
226437-0045-01 Engine View Diagrams & Manuals
226437-0046-99 Engine View Diagrams & Manuals
226437-1005-E1 Engine View Diagrams & Manuals
226452-0044-99 Engine View Diagrams & Manuals
226452-0049-01 Engine View Diagrams & Manuals
226452-0049-02 Engine View Diagrams & Manuals
226452-0049-03 Engine View Diagrams & Manuals
226452-0103-01 Engine View Diagrams & Manuals
226452-1049-E1 Engine View Diagrams & Manuals
226457-0048-99 Engine View Diagrams & Manuals
226457-0060-01 Engine View Diagrams & Manuals
235432-0035-01 Engine View Diagrams & Manuals
235432-0037-01 Engine View Diagrams & Manuals
235432-0042-01 Engine View Diagrams & Manuals
235432-0047-01 Engine View Diagrams & Manuals
235432-0058-01 Engine View Diagrams & Manuals
235432-0070-01 Engine View Diagrams & Manuals
235432-0071-01 Engine View Diagrams & Manuals
235432-0083-01 Engine View Diagrams & Manuals
235432-0090-01 Engine View Diagrams & Manuals
235432-0120-01 Engine View Diagrams & Manuals
235432-0122-01 Engine View Diagrams & Manuals
235432-0235-A1 Engine View Diagrams & Manuals
235432-0235-B2 Engine View Diagrams & Manuals
235432-0235-E1 Engine View Diagrams & Manuals
235432-0235-E2 Engine View Diagrams & Manuals
235432-0235-E9 Engine View Diagrams & Manuals
235432-0247-E1 Engine View Diagrams & Manuals
235432-0290-B1 Engine View Diagrams & Manuals
235432-0290-E1 Engine View Diagrams & Manuals
235432-0290-E2 Engine View Diagrams & Manuals
235432-0290-E9 Engine View Diagrams & Manuals
235432-0520-B1 Engine View Diagrams & Manuals
235432-0520-E1 Engine View Diagrams & Manuals
235432-0520-E9 Engine View Diagrams & Manuals
235432-0540-B1 Engine View Diagrams & Manuals
235432-0540-E1 Engine View Diagrams & Manuals
235432-0540-E9 Engine View Diagrams & Manuals
235432-0561-B1 Engine View Diagrams & Manuals
235432-0561-E1 Engine View Diagrams & Manuals
235432-0561-E9 Engine View Diagrams & Manuals
235432-0595-B1 Engine View Diagrams & Manuals
235432-0595-E1 Engine View Diagrams & Manuals
235432-0596-B1 Engine View Diagrams & Manuals
235432-0596-E1 Engine View Diagrams & Manuals
235436-0122-01 Engine View Diagrams & Manuals
235437-0043-01 Engine View Diagrams & Manuals
235437-0074-01 Engine View Diagrams & Manuals
235437-0076-01 Engine View Diagrams & Manuals
235437-0080-01 Engine View Diagrams & Manuals
235437-0084-01 Engine View Diagrams & Manuals
235437-0276-E1 Engine View Diagrams & Manuals
235437-0276-E9 Engine View Diagrams & Manuals
235437-0280-B1 Engine View Diagrams & Manuals
235437-0280-E1 Engine View Diagrams & Manuals
235437-0280-E9 Engine View Diagrams & Manuals
235437-0284-B1 Engine View Diagrams & Manuals
235437-0284-E1 Engine View Diagrams & Manuals
235437-0284-E2 Engine View Diagrams & Manuals
235437-0284-E9 Engine View Diagrams & Manuals
235437-0522-B1 Engine View Diagrams & Manuals
235437-0522-E1 Engine View Diagrams & Manuals
235437-0522-E9 Engine View Diagrams & Manuals
243431-0010-99 Engine View Diagrams & Manuals
243431-0020-99 Engine View Diagrams & Manuals
243431-0021-99 Engine View Diagrams & Manuals
243431-0022-99 Engine View Diagrams & Manuals
243431-0023-99 Engine View Diagrams & Manuals
243431-0024-99 Engine View Diagrams & Manuals
243431-0112-99 Engine View Diagrams & Manuals
243431-0116-99 Engine View Diagrams & Manuals
243431-0118-99 Engine View Diagrams & Manuals
243431-0120-99 Engine View Diagrams & Manuals
243431-0121-99 Engine View Diagrams & Manuals
243431-0122-99 Engine View Diagrams & Manuals
243431-0123-99 Engine View Diagrams & Manuals
243431-0124-99 Engine View Diagrams & Manuals
243431-0125-99 Engine View Diagrams & Manuals
243431-0129-99 Engine View Diagrams & Manuals
243431-0130-99 Engine View Diagrams & Manuals
243431-0131-99 Engine View Diagrams & Manuals
243431-0132-99 Engine View Diagrams & Manuals
243431-0133-99 Engine View Diagrams & Manuals
243431-0135-99 Engine View Diagrams & Manuals
243431-0137-99 Engine View Diagrams & Manuals
243431-0139-99 Engine View Diagrams & Manuals
243431-0140-99 Engine View Diagrams & Manuals
243431-0143-99 Engine View Diagrams & Manuals
243431-0146-99 Engine View Diagrams & Manuals
243431-0147-99 Engine View Diagrams & Manuals
243431-0148-99 Engine View Diagrams & Manuals
243431-0149-99 Engine View Diagrams & Manuals
243431-0150-99 Engine View Diagrams & Manuals
243431-0152-99 Engine View Diagrams & Manuals
243431-0154-99 Engine View Diagrams & Manuals
243431-0156-99 Engine View Diagrams & Manuals
243431-0157-99 Engine View Diagrams & Manuals
243431-0159-99 Engine View Diagrams & Manuals
243431-0160-99 Engine View Diagrams & Manuals
243431-0161-99 Engine View Diagrams & Manuals
243431-0162-99 Engine View Diagrams & Manuals
243431-0163-99 Engine View Diagrams & Manuals
243431-0164-99 Engine View Diagrams & Manuals
243431-0165-99 Engine View Diagrams & Manuals
243431-0166-99 Engine View Diagrams & Manuals
243431-0167-99 Engine View Diagrams & Manuals
243431-0168-99 Engine View Diagrams & Manuals
243431-0169-99 Engine View Diagrams & Manuals
243431-0170-99 Engine View Diagrams & Manuals
243431-0171-99 Engine View Diagrams & Manuals
243431-0172-99 Engine View Diagrams & Manuals
243431-0173-99 Engine View Diagrams & Manuals
243431-0174-99 Engine View Diagrams & Manuals
243431-0175-99 Engine View Diagrams & Manuals
243431-0176-99 Engine View Diagrams & Manuals
243431-0177-99 Engine View Diagrams & Manuals
243431-0178-99 Engine View Diagrams & Manuals
243431-0179-99 Engine View Diagrams & Manuals
243431-0181-99 Engine View Diagrams & Manuals
243431-0183-99 Engine View Diagrams & Manuals
243431-0184-99 Engine View Diagrams & Manuals
243431-0185-99 Engine View Diagrams & Manuals
243431-0186-99 Engine View Diagrams & Manuals
243431-0187-99 Engine View Diagrams & Manuals
243431-0189-99 Engine View Diagrams & Manuals
243431-0190-99 Engine View Diagrams & Manuals
243431-0191-99 Engine View Diagrams & Manuals
243431-0192-99 Engine View Diagrams & Manuals
243431-0193-99 Engine View Diagrams & Manuals
243431-0194-99 Engine View Diagrams & Manuals
243431-0195-99 Engine View Diagrams & Manuals
243431-0196-99 Engine View Diagrams & Manuals
243431-0197-99 Engine View Diagrams & Manuals
243431-0198-99 Engine View Diagrams & Manuals
243431-0199-99 Engine View Diagrams & Manuals
243431-0200-99 Engine View Diagrams & Manuals
243431-0510-99 Engine View Diagrams & Manuals
243431-0520-99 Engine View Diagrams & Manuals
243431-0522-99 Engine View Diagrams & Manuals
243431-0523-99 Engine View Diagrams & Manuals
243431-0524-99 Engine View Diagrams & Manuals
243431-0525-99 Engine View Diagrams & Manuals
243431-0527-99 Engine View Diagrams & Manuals
243431-0528-99 Engine View Diagrams & Manuals
243431-0529-99 Engine View Diagrams & Manuals
243431-0530-99 Engine View Diagrams & Manuals
243431-0531-99 Engine View Diagrams & Manuals
243431-0560-99 Engine View Diagrams & Manuals
243431-0561-99 Engine View Diagrams & Manuals
243431-0610-99 Engine View Diagrams & Manuals
243431-0612-99 Engine View Diagrams & Manuals
243431-0614-99 Engine View Diagrams & Manuals
243431-0615-99 Engine View Diagrams & Manuals
243431-0616-99 Engine View Diagrams & Manuals
243431-0618-99 Engine View Diagrams & Manuals
243431-0619-99 Engine View Diagrams & Manuals
243431-0620-99 Engine View Diagrams & Manuals
243431-0621-99 Engine View Diagrams & Manuals
243431-0622-99 Engine View Diagrams & Manuals
243431-0625-99 Engine View Diagrams & Manuals
243431-0626-99 Engine View Diagrams & Manuals
243431-0627-99 Engine View Diagrams & Manuals
243431-0628-99 Engine View Diagrams & Manuals
243431-0629-99 Engine View Diagrams & Manuals
243431-0630-99 Engine View Diagrams & Manuals
243431-0631-99 Engine View Diagrams & Manuals
243431-0632-99 Engine View Diagrams & Manuals
243431-0635-99 Engine View Diagrams & Manuals
243431-0636-99 Engine View Diagrams & Manuals
243431-0637-99 Engine View Diagrams & Manuals
243431-0639-99 Engine View Diagrams & Manuals
243431-0640-99 Engine View Diagrams & Manuals
243431-0641-99 Engine View Diagrams & Manuals
243431-0642-99 Engine View Diagrams & Manuals
243431-0644-99 Engine View Diagrams & Manuals
243431-0645-99 Engine View Diagrams & Manuals
243431-0647-99 Engine View Diagrams & Manuals
243431-0648-99 Engine View Diagrams & Manuals
243431-0649-99 Engine View Diagrams & Manuals
243431-0651-99 Engine View Diagrams & Manuals
243431-0652-99 Engine View Diagrams & Manuals
243431-0653-99 Engine View Diagrams & Manuals
243431-0654-99 Engine View Diagrams & Manuals
243431-0655-99 Engine View Diagrams & Manuals
243431-0656-99 Engine View Diagrams & Manuals
243431-0657-99 Engine View Diagrams & Manuals
243431-0658-99 Engine View Diagrams & Manuals
243431-0659-99 Engine View Diagrams & Manuals
243431-0660-99 Engine View Diagrams & Manuals
243431-0661-99 Engine View Diagrams & Manuals
243431-0662-99 Engine View Diagrams & Manuals
243431-0664-99 Engine View Diagrams & Manuals
243431-0665-99 Engine View Diagrams & Manuals
243431-0666-99 Engine View Diagrams & Manuals
243431-0667-99 Engine View Diagrams & Manuals
243431-0669-99 Engine View Diagrams & Manuals
243431-0670-99 Engine View Diagrams & Manuals
243431-0671-99 Engine View Diagrams & Manuals
243431-0673-99 Engine View Diagrams & Manuals
243431-0674-99 Engine View Diagrams & Manuals
243431-0675-99 Engine View Diagrams & Manuals
243431-0676-99 Engine View Diagrams & Manuals
243431-0677-99 Engine View Diagrams & Manuals
243431-0678-99 Engine View Diagrams & Manuals
243431-0679-99 Engine View Diagrams & Manuals
243431-0680-99 Engine View Diagrams & Manuals
243431-0682-99 Engine View Diagrams & Manuals
243431-0683-99 Engine View Diagrams & Manuals
243431-0684-99 Engine View Diagrams & Manuals
243431-0685-99 Engine View Diagrams & Manuals
243431-0686-99 Engine View Diagrams & Manuals
243431-0687-99 Engine View Diagrams & Manuals
243431-0688-99 Engine View Diagrams & Manuals
243431-0689-99 Engine View Diagrams & Manuals
243431-0690-99 Engine View Diagrams & Manuals
243431-0692-99 Engine View Diagrams & Manuals
243431-0693-99 Engine View Diagrams & Manuals
243431-0695-99 Engine View Diagrams & Manuals
243431-0696-99 Engine View Diagrams & Manuals
243431-0697-99 Engine View Diagrams & Manuals
243431-0699-99 Engine View Diagrams & Manuals
243431-0700-99 Engine View Diagrams & Manuals
243431-0702-99 Engine View Diagrams & Manuals
243431-0703-99 Engine View Diagrams & Manuals
243431-0704-99 Engine View Diagrams & Manuals
243431-0705-99 Engine View Diagrams & Manuals
243431-0706-99 Engine View Diagrams & Manuals
243431-0707-99 Engine View Diagrams & Manuals
243431-0708-99 Engine View Diagrams & Manuals
243431-0709-99 Engine View Diagrams & Manuals
243431-0710-99 Engine View Diagrams & Manuals
243431-0712-99 Engine View Diagrams & Manuals
243431-0713-99 Engine View Diagrams & Manuals
243431-0715-99 Engine View Diagrams & Manuals
243431-0716-99 Engine View Diagrams & Manuals
243431-0717-99 Engine View Diagrams & Manuals
243431-0718-99 Engine View Diagrams & Manuals
243431-0720-99 Engine View Diagrams & Manuals
243431-0721-99 Engine View Diagrams & Manuals
243431-0722-99 Engine View Diagrams & Manuals
243431-0724-99 Engine View Diagrams & Manuals
243431-0725-99 Engine View Diagrams & Manuals
243431-0726-99 Engine View Diagrams & Manuals
243431-0727-99 Engine View Diagrams & Manuals
243431-0728-99 Engine View Diagrams & Manuals
243431-0729-99 Engine View Diagrams & Manuals
243431-0731-99 Engine View Diagrams & Manuals
243431-0732-99 Engine View Diagrams & Manuals
243431-0733-99 Engine View Diagrams & Manuals
243431-0734-99 Engine View Diagrams & Manuals
243431-0735-99 Engine View Diagrams & Manuals
243431-0737-99 Engine View Diagrams & Manuals
243431-0738-99 Engine View Diagrams & Manuals
243431-0739-99 Engine View Diagrams & Manuals
243431-0740-99 Engine View Diagrams & Manuals
243431-0743-99 Engine View Diagrams & Manuals
243431-0746-99 Engine View Diagrams & Manuals
243431-0748-99 Engine View Diagrams & Manuals
243431-0750-99 Engine View Diagrams & Manuals
243431-0754-99 Engine View Diagrams & Manuals
243431-0755-99 Engine View Diagrams & Manuals
243431-0757-99 Engine View Diagrams & Manuals
243431-0758-99 Engine View Diagrams & Manuals
243431-0759-99 Engine View Diagrams & Manuals
243431-0760-99 Engine View Diagrams & Manuals
243431-0761-99 Engine View Diagrams & Manuals
243431-0763-99 Engine View Diagrams & Manuals
243431-0764-99 Engine View Diagrams & Manuals
243431-0765-99 Engine View Diagrams & Manuals
243431-0766-99 Engine View Diagrams & Manuals
243431-0768-99 Engine View Diagrams & Manuals
243431-0769-99 Engine View Diagrams & Manuals
243431-0770-99 Engine View Diagrams & Manuals
243431-0771-99 Engine View Diagrams & Manuals
243431-0772-99 Engine View Diagrams & Manuals
243431-0773-99 Engine View Diagrams & Manuals
243431-0774-99 Engine View Diagrams & Manuals
243431-0775-99 Engine View Diagrams & Manuals
243431-0776-99 Engine View Diagrams & Manuals
243431-0777-99 Engine View Diagrams & Manuals
243431-0778-99 Engine View Diagrams & Manuals
243431-0779-99 Engine View Diagrams & Manuals
243431-0781-99 Engine View Diagrams & Manuals
243431-0782-99 Engine View Diagrams & Manuals
243431-0783-99 Engine View Diagrams & Manuals
243431-0784-99 Engine View Diagrams & Manuals
243431-0785-99 Engine View Diagrams & Manuals
243431-0791-99 Engine View Diagrams & Manuals
243431-0792-99 Engine View Diagrams & Manuals
243431-0793-99 Engine View Diagrams & Manuals
243431-0794-99 Engine View Diagrams & Manuals
243431-0795-99 Engine View Diagrams & Manuals
243431-0796-99 Engine View Diagrams & Manuals
243431-0797-99 Engine View Diagrams & Manuals
243431-0798-99 Engine View Diagrams & Manuals
243431-0799-99 Engine View Diagrams & Manuals
243431-0800-99 Engine View Diagrams & Manuals
243431-0801-99 Engine View Diagrams & Manuals
243431-1111-01 Engine View Diagrams & Manuals
243431-1117-99 Engine View Diagrams & Manuals
243431-1130-01 Engine View Diagrams & Manuals
243431-1130-02 Engine View Diagrams & Manuals
243431-1130-03 Engine View Diagrams & Manuals
243431-1130-04 Engine View Diagrams & Manuals
243431-1130-98 Engine View Diagrams & Manuals
243431-1130-99 Engine View Diagrams & Manuals
243431-1131-99 Engine View Diagrams & Manuals
243431-1132-01 Engine View Diagrams & Manuals
243431-1133-01 Engine View Diagrams & Manuals
243431-1133-02 Engine View Diagrams & Manuals
243431-1133-03 Engine View Diagrams & Manuals
243431-1133-04 Engine View Diagrams & Manuals
243431-1133-05 Engine View Diagrams & Manuals
243431-1134-01 Engine View Diagrams & Manuals
243431-1135-01 Engine View Diagrams & Manuals
243431-1135-02 Engine View Diagrams & Manuals
243431-1135-03 Engine View Diagrams & Manuals
243431-1135-04 Engine View Diagrams & Manuals
243431-1135-05 Engine View Diagrams & Manuals
243431-1135-06 Engine View Diagrams & Manuals
243431-1137-01 Engine View Diagrams & Manuals
243431-1137-02 Engine View Diagrams & Manuals
243431-1138-01 Engine View Diagrams & Manuals
243431-1138-02 Engine View Diagrams & Manuals
243431-1139-99 Engine View Diagrams & Manuals
243431-1140-01 Engine View Diagrams & Manuals
243431-1142-01 Engine View Diagrams & Manuals
243431-1143-01 Engine View Diagrams & Manuals
243431-1144-01 Engine View Diagrams & Manuals
243431-1145-99 Engine View Diagrams & Manuals
243431-1147-99 Engine View Diagrams & Manuals
243431-1148-99 Engine View Diagrams & Manuals
243431-1149-01 Engine View Diagrams & Manuals
243431-1150-01 Engine View Diagrams & Manuals
243431-1152-01 Engine View Diagrams & Manuals
243431-1152-02 Engine View Diagrams & Manuals
243431-1152-03 Engine View Diagrams & Manuals
243431-1153-99 Engine View Diagrams & Manuals
243431-1156-99 Engine View Diagrams & Manuals
243431-1157-01 Engine View Diagrams & Manuals
243431-1158-01 Engine View Diagrams & Manuals
243431-1161-01 Engine View Diagrams & Manuals
243431-1162-99 Engine View Diagrams & Manuals
243431-1163-99 Engine View Diagrams & Manuals
243431-1166-01 Engine View Diagrams & Manuals
243431-1167-99 Engine View Diagrams & Manuals
243431-1168-01 Engine View Diagrams & Manuals
243431-1169-01 Engine View Diagrams & Manuals
243431-1170-01 Engine View Diagrams & Manuals
243431-1172-01 Engine View Diagrams & Manuals
243431-1172-02 Engine View Diagrams & Manuals
243431-1173-99 Engine View Diagrams & Manuals
243431-1174-01 Engine View Diagrams & Manuals
243431-1174-02 Engine View Diagrams & Manuals
243431-2520-01 Engine View Diagrams & Manuals
243431-2520-02 Engine View Diagrams & Manuals
243431-2520-03 Engine View Diagrams & Manuals
243431-2520-04 Engine View Diagrams & Manuals
243431-2520-05 Engine View Diagrams & Manuals
243431-2520-06 Engine View Diagrams & Manuals
243431-2520-07 Engine View Diagrams & Manuals
243431-2520-08 Engine View Diagrams & Manuals
243431-2522-01 Engine View Diagrams & Manuals
243431-2522-02 Engine View Diagrams & Manuals
243431-2522-03 Engine View Diagrams & Manuals
243431-2524-01 Engine View Diagrams & Manuals
243431-2524-02 Engine View Diagrams & Manuals
243431-2524-03 Engine View Diagrams & Manuals
243431-2524-04 Engine View Diagrams & Manuals
243431-2524-05 Engine View Diagrams & Manuals
243431-2528-99 Engine View Diagrams & Manuals
243431-2529-99 Engine View Diagrams & Manuals
243431-2531-01 Engine View Diagrams & Manuals
243431-2541-99 Engine View Diagrams & Manuals
243431-2550-99 Engine View Diagrams & Manuals
243431-2580-01 Engine View Diagrams & Manuals
243431-2581-01 Engine View Diagrams & Manuals
243432-0561-99 Engine View Diagrams & Manuals
243432-0624-99 Engine View Diagrams & Manuals
243432-0733-99 Engine View Diagrams & Manuals
243432-0734-99 Engine View Diagrams & Manuals
243432-0735-99 Engine View Diagrams & Manuals
243432-0736-99 Engine View Diagrams & Manuals
243432-0737-99 Engine View Diagrams & Manuals
243432-0738-99 Engine View Diagrams & Manuals
243432-0739-99 Engine View Diagrams & Manuals
243432-0744-99 Engine View Diagrams & Manuals
243432-0749-99 Engine View Diagrams & Manuals
243432-0754-99 Engine View Diagrams & Manuals
243432-0757-99 Engine View Diagrams & Manuals
243432-0761-99 Engine View Diagrams & Manuals
243432-0762-99 Engine View Diagrams & Manuals
243432-0768-99 Engine View Diagrams & Manuals
243432-0770-99 Engine View Diagrams & Manuals
243432-0780-99 Engine View Diagrams & Manuals
243432-0786-99 Engine View Diagrams & Manuals
243432-0794-99 Engine View Diagrams & Manuals
243432-0797-99 Engine View Diagrams & Manuals
243432-0801-99 Engine View Diagrams & Manuals
243432-1131-01 Engine View Diagrams & Manuals
243432-1136-01 Engine View Diagrams & Manuals
243432-1141-01 Engine View Diagrams & Manuals
243432-1145-01 Engine View Diagrams & Manuals
243432-1146-01 Engine View Diagrams & Manuals
243432-1151-01 Engine View Diagrams & Manuals
243432-1154-01 Engine View Diagrams & Manuals
243432-1159-01 Engine View Diagrams & Manuals
243432-1160-01 Engine View Diagrams & Manuals
243432-1164-01 Engine View Diagrams & Manuals
243432-2561-01 Engine View Diagrams & Manuals
243432-2561-02 Engine View Diagrams & Manuals
243434-0137-99 Engine View Diagrams & Manuals
243434-0194-99 Engine View Diagrams & Manuals
243434-0527-99 Engine View Diagrams & Manuals
243434-0670-99 Engine View Diagrams & Manuals
243434-0676-99 Engine View Diagrams & Manuals
243434-0716-99 Engine View Diagrams & Manuals
243436-1139-01 Engine View Diagrams & Manuals
243436-1156-01 Engine View Diagrams & Manuals
243436-1162-01 Engine View Diagrams & Manuals
243436-1163-01 Engine View Diagrams & Manuals
243436-1173-01 Engine View Diagrams & Manuals
243437-0775-99 Engine View Diagrams & Manuals
243437-0776-99 Engine View Diagrams & Manuals
243437-0778-99 Engine View Diagrams & Manuals
243437-0782-99 Engine View Diagrams & Manuals
243437-0792-99 Engine View Diagrams & Manuals
243437-1147-01 Engine View Diagrams & Manuals
243437-1148-01 Engine View Diagrams & Manuals
243437-1153-01 Engine View Diagrams & Manuals
243437-1155-01 Engine View Diagrams & Manuals
243437-1167-01 Engine View Diagrams & Manuals
243437-2528-01 Engine View Diagrams & Manuals
243437-2528-02 Engine View Diagrams & Manuals
243437-2529-01 Engine View Diagrams & Manuals
243437-2529-02 Engine View Diagrams & Manuals
243437-2530-01 Engine View Diagrams & Manuals
243437-2530-02 Engine View Diagrams & Manuals
243437-2530-03 Engine View Diagrams & Manuals
243451-1116-01 Engine View Diagrams & Manuals
243451-1116-02 Engine View Diagrams & Manuals
243451-2540-01 Engine View Diagrams & Manuals
243451-2540-02 Engine View Diagrams & Manuals
243452-2541-01 Engine View Diagrams & Manuals
243452-2541-02 Engine View Diagrams & Manuals
243452-2541-03 Engine View Diagrams & Manuals
243452-2541-04 Engine View Diagrams & Manuals
243457-2550-01 Engine View Diagrams & Manuals
243457-2550-02 Engine View Diagrams & Manuals
243457-2550-03 Engine View Diagrams & Manuals
243457-2550-04 Engine View Diagrams & Manuals
243457-2550-05 Engine View Diagrams & Manuals
243457-2550-06 Engine View Diagrams & Manuals
243457-2550-07 Engine View Diagrams & Manuals
243457-2550-08 Engine View Diagrams & Manuals
245430-0299-B1 Engine View Diagrams & Manuals
245430-0299-E1 Engine View Diagrams & Manuals
245432-0035-01 Engine View Diagrams & Manuals
245432-0042-01 Engine View Diagrams & Manuals
245432-0047-01 Engine View Diagrams & Manuals
245432-0047-02 Engine View Diagrams & Manuals
245432-0058-01 Engine View Diagrams & Manuals
245432-0070-01 Engine View Diagrams & Manuals
245432-0071-01 Engine View Diagrams & Manuals
245432-0083-01 Engine View Diagrams & Manuals
245432-0090-01 Engine View Diagrams & Manuals
245432-0121-01 Engine View Diagrams & Manuals
245432-0235-A1 Engine View Diagrams & Manuals
245432-0235-E1 Engine View Diagrams & Manuals
245432-0235-E2 Engine View Diagrams & Manuals
245432-0235-E3 Engine View Diagrams & Manuals
245432-0235-E9 Engine View Diagrams & Manuals
245432-0242-E1 Engine View Diagrams & Manuals
245432-0247-A1 Engine View Diagrams & Manuals
245432-0247-E1 Engine View Diagrams & Manuals
245432-0247-E2 Engine View Diagrams & Manuals
245432-0247-E9 Engine View Diagrams & Manuals
245432-0261-E1 Engine View Diagrams & Manuals
245432-0270-A1 Engine View Diagrams & Manuals
245432-0270-E1 Engine View Diagrams & Manuals
245432-0270-E9 Engine View Diagrams & Manuals
245432-0274-E1 Engine View Diagrams & Manuals
245432-0274-E9 Engine View Diagrams & Manuals
245432-0290-E1 Engine View Diagrams & Manuals
245432-0290-E2 Engine View Diagrams & Manuals
245432-0290-E9 Engine View Diagrams & Manuals
245432-0519-E1 Engine View Diagrams & Manuals
245432-0519-E2 Engine View Diagrams & Manuals
245432-0521-E1 Engine View Diagrams & Manuals
245432-0521-E9 Engine View Diagrams & Manuals
245432-0527-E1 Engine View Diagrams & Manuals
245432-0527-E9 Engine View Diagrams & Manuals
245432-0529-E1 Engine View Diagrams & Manuals
245432-0538-E1 Engine View Diagrams & Manuals
245432-0544-E1 Engine View Diagrams & Manuals
245432-0545-E1 Engine View Diagrams & Manuals
245432-0546-E1 Engine View Diagrams & Manuals
245432-0546-E9 Engine View Diagrams & Manuals
245432-0548-01 Engine View Diagrams & Manuals
245432-0549-E1 Engine View Diagrams & Manuals
245432-0553-E1 Engine View Diagrams & Manuals
245432-0557-E1 Engine View Diagrams & Manuals
245432-0562-E1 Engine View Diagrams & Manuals
245432-0565-E1 Engine View Diagrams & Manuals
245432-0565-E9 Engine View Diagrams & Manuals
245432-0566-E1 Engine View Diagrams & Manuals
245432-0566-E9 Engine View Diagrams & Manuals
245432-0567-E1 Engine View Diagrams & Manuals
245432-0567-E9 Engine View Diagrams & Manuals
245432-0577-E1 Engine View Diagrams & Manuals
245432-0577-E9 Engine View Diagrams & Manuals
245432-0579-E1 Engine View Diagrams & Manuals
245432-0579-E9 Engine View Diagrams & Manuals
245435-0303-E9 Engine View Diagrams & Manuals
245435-0561-E1 Engine View Diagrams & Manuals
245436-0133-E9 Engine View Diagrams & Manuals
245436-0541-E1 Engine View Diagrams & Manuals
245436-0564-E1 Engine View Diagrams & Manuals
245436-0564-E9 Engine View Diagrams & Manuals
245436-0576-E1 Engine View Diagrams & Manuals
245436-0576-E9 Engine View Diagrams & Manuals
245437-0074-01 Engine View Diagrams & Manuals
245437-0076-01 Engine View Diagrams & Manuals
245437-0080-01 Engine View Diagrams & Manuals
245437-0084-01 Engine View Diagrams & Manuals
245437-0128-01 Engine View Diagrams & Manuals
245437-0271-E1 Engine View Diagrams & Manuals
245437-0271-E9 Engine View Diagrams & Manuals
245437-0276-E1 Engine View Diagrams & Manuals
245437-0280-E1 Engine View Diagrams & Manuals
245437-0280-E2 Engine View Diagrams & Manuals
245437-0280-E9 Engine View Diagrams & Manuals
245437-0284-A1 Engine View Diagrams & Manuals
245437-0284-E1 Engine View Diagrams & Manuals
245437-0284-E2 Engine View Diagrams & Manuals
245437-0284-E9 Engine View Diagrams & Manuals
245437-0523-E1 Engine View Diagrams & Manuals
245437-0523-E2 Engine View Diagrams & Manuals
245437-0528-E1 Engine View Diagrams & Manuals
245437-0528-E9 Engine View Diagrams & Manuals
245437-0532-E1 Engine View Diagrams & Manuals
245437-0539-E1 Engine View Diagrams & Manuals
245437-0550-E1 Engine View Diagrams & Manuals
245437-0555-E1 Engine View Diagrams & Manuals
245437-0556-E1 Engine View Diagrams & Manuals
245437-0559-E1 Engine View Diagrams & Manuals
245437-0563-E1 Engine View Diagrams & Manuals
245437-0580-E1 Engine View Diagrams & Manuals
245437-0580-E9 Engine View Diagrams & Manuals
245437-0581-E9 Engine View Diagrams & Manuals
247432-0113-B1 Engine View Diagrams & Manuals
247432-0113-E1 Engine View Diagrams & Manuals
247432-0113-E9 Engine View Diagrams & Manuals
247437-0111-B1 Engine View Diagrams & Manuals
247437-0111-E1 Engine View Diagrams & Manuals
247437-0112-E1 Engine View Diagrams & Manuals
247437-0112-E9 Engine View Diagrams & Manuals
250417-1167-E1 Engine View Diagrams & Manuals
251411-0147-99 Engine View Diagrams & Manuals
251411-0148-99 Engine View Diagrams & Manuals
251411-0157-99 Engine View Diagrams & Manuals
251411-0175-99 Engine View Diagrams & Manuals
251411-0217-99 Engine View Diagrams & Manuals
251411-0223-99 Engine View Diagrams & Manuals
251412-0015-99 Engine View Diagrams & Manuals
251412-0070-99 Engine View Diagrams & Manuals
251412-0071-99 Engine View Diagrams & Manuals
251412-0111-99 Engine View Diagrams & Manuals
251412-0136-99 Engine View Diagrams & Manuals
251412-0154-99 Engine View Diagrams & Manuals
251412-0158-99 Engine View Diagrams & Manuals
251412-0160-99 Engine View Diagrams & Manuals
251412-0162-99 Engine View Diagrams & Manuals
251412-0164-99 Engine View Diagrams & Manuals
251412-0165-99 Engine View Diagrams & Manuals
251412-0167-99 Engine View Diagrams & Manuals
251412-0168-99 Engine View Diagrams & Manuals
251412-0169-99 Engine View Diagrams & Manuals
251412-0170-99 Engine View Diagrams & Manuals
251412-0171-99 Engine View Diagrams & Manuals
251412-0178-99 Engine View Diagrams & Manuals
251412-0179-99 Engine View Diagrams & Manuals
251412-0180-99 Engine View Diagrams & Manuals
251412-0181-99 Engine View Diagrams & Manuals
251412-0187-99 Engine View Diagrams & Manuals
251412-0191-99 Engine View Diagrams & Manuals
251412-0193-99 Engine View Diagrams & Manuals
251412-0194-99 Engine View Diagrams & Manuals
251412-0195-99 Engine View Diagrams & Manuals
251412-0197-99 Engine View Diagrams & Manuals
251412-0199-99 Engine View Diagrams & Manuals
251412-0204-99 Engine View Diagrams & Manuals
251412-0205-99 Engine View Diagrams & Manuals
251412-0208-99 Engine View Diagrams & Manuals
251412-0212-99 Engine View Diagrams & Manuals
251412-0214-99 Engine View Diagrams & Manuals
251412-0218-99 Engine View Diagrams & Manuals
251412-0220-99 Engine View Diagrams & Manuals
251412-0226-99 Engine View Diagrams & Manuals
251415-0152-99 Engine View Diagrams & Manuals
251415-0161-99 Engine View Diagrams & Manuals
251415-0163-99 Engine View Diagrams & Manuals
251415-0196-99 Engine View Diagrams & Manuals
251415-0198-99 Engine View Diagrams & Manuals
251415-0207-99 Engine View Diagrams & Manuals
251415-0211-99 Engine View Diagrams & Manuals
251415-0215-99 Engine View Diagrams & Manuals
251415-0219-99 Engine View Diagrams & Manuals
251415-0225-99 Engine View Diagrams & Manuals
251416-0149-99 Engine View Diagrams & Manuals
251416-0192-99 Engine View Diagrams & Manuals
251417-0025-99 Engine View Diagrams & Manuals
251417-0026-99 Engine View Diagrams & Manuals
251417-0072-99 Engine View Diagrams & Manuals
251417-0118-99 Engine View Diagrams & Manuals
251417-0119-99 Engine View Diagrams & Manuals
251417-0130-99 Engine View Diagrams & Manuals
251417-0131-99 Engine View Diagrams & Manuals
251417-0132-99 Engine View Diagrams & Manuals
251417-0133-99 Engine View Diagrams & Manuals
251417-0134-99 Engine View Diagrams & Manuals
251417-0135-99 Engine View Diagrams & Manuals
251417-0136-99 Engine View Diagrams & Manuals
251417-0137-99 Engine View Diagrams & Manuals
251417-0138-99 Engine View Diagrams & Manuals
251417-0139-99 Engine View Diagrams & Manuals
251417-0140-99 Engine View Diagrams & Manuals
251417-0141-99 Engine View Diagrams & Manuals
251417-0142-99 Engine View Diagrams & Manuals
251417-0143-99 Engine View Diagrams & Manuals
251417-0144-99 Engine View Diagrams & Manuals
251417-0145-99 Engine View Diagrams & Manuals
251417-0146-99 Engine View Diagrams & Manuals
251417-0150-99 Engine View Diagrams & Manuals
251417-0151-99 Engine View Diagrams & Manuals
251417-0153-99 Engine View Diagrams & Manuals
251417-0155-99 Engine View Diagrams & Manuals
251417-0156-99 Engine View Diagrams & Manuals
251417-0159-99 Engine View Diagrams & Manuals
251417-0166-99 Engine View Diagrams & Manuals
251417-0172-99 Engine View Diagrams & Manuals
251417-0173-99 Engine View Diagrams & Manuals
251417-0174-99 Engine View Diagrams & Manuals
251417-0176-99 Engine View Diagrams & Manuals
251417-0177-99 Engine View Diagrams & Manuals
251417-0182-99 Engine View Diagrams & Manuals
251417-0183-99 Engine View Diagrams & Manuals
251417-0184-99 Engine View Diagrams & Manuals
251417-0185-99 Engine View Diagrams & Manuals
251417-0186-99 Engine View Diagrams & Manuals
251417-0188-99 Engine View Diagrams & Manuals
251417-0189-99 Engine View Diagrams & Manuals
251417-0190-99 Engine View Diagrams & Manuals
251417-0200-99 Engine View Diagrams & Manuals
251417-0201-99 Engine View Diagrams & Manuals
251417-0202-99 Engine View Diagrams & Manuals
251417-0203-99 Engine View Diagrams & Manuals
251417-0206-99 Engine View Diagrams & Manuals
251417-0209-99 Engine View Diagrams & Manuals
251417-0210-99 Engine View Diagrams & Manuals
251417-0213-99 Engine View Diagrams & Manuals
251417-0216-99 Engine View Diagrams & Manuals
251417-0224-99 Engine View Diagrams & Manuals
251702-0016-99 Engine View Diagrams & Manuals
251702-0111-99 Engine View Diagrams & Manuals
251702-0159-99 Engine View Diagrams & Manuals
251702-0163-99 Engine View Diagrams & Manuals
251702-0164-99 Engine View Diagrams & Manuals
251702-0165-99 Engine View Diagrams & Manuals
251702-0167-99 Engine View Diagrams & Manuals
251702-0170-99 Engine View Diagrams & Manuals
251702-0174-99 Engine View Diagrams & Manuals
251702-0176-99 Engine View Diagrams & Manuals
251702-0180-99 Engine View Diagrams & Manuals
251702-0182-99 Engine View Diagrams & Manuals
251702-0183-99 Engine View Diagrams & Manuals
251702-0185-99 Engine View Diagrams & Manuals
251702-0191-99 Engine View Diagrams & Manuals
251702-0193-99 Engine View Diagrams & Manuals
251702-0194-99 Engine View Diagrams & Manuals
251702-0195-99 Engine View Diagrams & Manuals
251702-0197-99 Engine View Diagrams & Manuals
251702-0199-99 Engine View Diagrams & Manuals
251705-0192-99 Engine View Diagrams & Manuals
251707-0025-99 Engine View Diagrams & Manuals
251707-0026-99 Engine View Diagrams & Manuals
251707-0118-99 Engine View Diagrams & Manuals
251707-0130-99 Engine View Diagrams & Manuals
251707-0131-99 Engine View Diagrams & Manuals
251707-0132-99 Engine View Diagrams & Manuals
251707-0133-99 Engine View Diagrams & Manuals
251707-0134-99 Engine View Diagrams & Manuals
251707-0135-99 Engine View Diagrams & Manuals
251707-0136-99 Engine View Diagrams & Manuals
251707-0137-99 Engine View Diagrams & Manuals
251707-0138-99 Engine View Diagrams & Manuals
251707-0139-99 Engine View Diagrams & Manuals
251707-0140-99 Engine View Diagrams & Manuals
251707-0141-99 Engine View Diagrams & Manuals
251707-0142-99 Engine View Diagrams & Manuals
251707-0143-99 Engine View Diagrams & Manuals
251707-0144-99 Engine View Diagrams & Manuals
251707-0145-99 Engine View Diagrams & Manuals
251707-0146-99 Engine View Diagrams & Manuals
251707-0147-99 Engine View Diagrams & Manuals
251707-0148-99 Engine View Diagrams & Manuals
251707-0149-99 Engine View Diagrams & Manuals
251707-0150-99 Engine View Diagrams & Manuals
251707-0151-99 Engine View Diagrams & Manuals
251707-0152-99 Engine View Diagrams & Manuals
251707-0153-99 Engine View Diagrams & Manuals
251707-0154-99 Engine View Diagrams & Manuals
251707-0155-99 Engine View Diagrams & Manuals
251707-0156-99 Engine View Diagrams & Manuals
251707-0157-99 Engine View Diagrams & Manuals
251707-0158-99 Engine View Diagrams & Manuals
251707-0160-99 Engine View Diagrams & Manuals
251707-0161-99 Engine View Diagrams & Manuals
251707-0162-99 Engine View Diagrams & Manuals
251707-0166-99 Engine View Diagrams & Manuals
251707-0168-99 Engine View Diagrams & Manuals
251707-0169-99 Engine View Diagrams & Manuals
251707-0171-99 Engine View Diagrams & Manuals
251707-0172-99 Engine View Diagrams & Manuals
251707-0173-99 Engine View Diagrams & Manuals
251707-0175-99 Engine View Diagrams & Manuals
251707-0177-99 Engine View Diagrams & Manuals
251707-0178-99 Engine View Diagrams & Manuals
251707-0179-99 Engine View Diagrams & Manuals
251707-0181-99 Engine View Diagrams & Manuals
251707-0184-99 Engine View Diagrams & Manuals
251707-0186-99 Engine View Diagrams & Manuals
251707-0187-99 Engine View Diagrams & Manuals
251707-0188-99 Engine View Diagrams & Manuals
251707-0189-99 Engine View Diagrams & Manuals
251707-0190-99 Engine View Diagrams & Manuals
251707-0196-99 Engine View Diagrams & Manuals
251707-0198-99 Engine View Diagrams & Manuals
252411-0162-99 Engine View Diagrams & Manuals
252411-0168-99 Engine View Diagrams & Manuals
252411-0219-99 Engine View Diagrams & Manuals
252411-0672-01 Engine View Diagrams & Manuals
252411-0752-01 Engine View Diagrams & Manuals
252412-0015-99 Engine View Diagrams & Manuals
252412-0016-99 Engine View Diagrams & Manuals
252412-0070-99 Engine View Diagrams & Manuals
252412-0071-99 Engine View Diagrams & Manuals
252412-0110-99 Engine View Diagrams & Manuals
252412-0111-99 Engine View Diagrams & Manuals
252412-0112-99 Engine View Diagrams & Manuals
252412-0134-99 Engine View Diagrams & Manuals
252412-0136-99 Engine View Diagrams & Manuals
252412-0139-99 Engine View Diagrams & Manuals
252412-0142-99 Engine View Diagrams & Manuals
252412-0147-99 Engine View Diagrams & Manuals
252412-0148-99 Engine View Diagrams & Manuals
252412-0151-99 Engine View Diagrams & Manuals
252412-0154-99 Engine View Diagrams & Manuals
252412-0158-99 Engine View Diagrams & Manuals
252412-0159-99 Engine View Diagrams & Manuals
252412-0160-99 Engine View Diagrams & Manuals
252412-0163-99 Engine View Diagrams & Manuals
252412-0164-99 Engine View Diagrams & Manuals
252412-0165-99 Engine View Diagrams & Manuals
252412-0166-99 Engine View Diagrams & Manuals
252412-0167-99 Engine View Diagrams & Manuals
252412-0172-99 Engine View Diagrams & Manuals
252412-0173-99 Engine View Diagrams & Manuals
252412-0174-99 Engine View Diagrams & Manuals
252412-0176-99 Engine View Diagrams & Manuals
252412-0178-99 Engine View Diagrams & Manuals
252412-0179-99 Engine View Diagrams & Manuals
252412-0184-99 Engine View Diagrams & Manuals
252412-0187-99 Engine View Diagrams & Manuals
252412-0191-99 Engine View Diagrams & Manuals
252412-0192-99 Engine View Diagrams & Manuals
252412-0194-99 Engine View Diagrams & Manuals
252412-0196-99 Engine View Diagrams & Manuals
252412-0200-99 Engine View Diagrams & Manuals
252412-0202-99 Engine View Diagrams & Manuals
252412-0203-99 Engine View Diagrams & Manuals
252412-0207-99 Engine View Diagrams & Manuals
252412-0209-99 Engine View Diagrams & Manuals
252412-0210-99 Engine View Diagrams & Manuals
252412-0212-99 Engine View Diagrams & Manuals
252412-0213-99 Engine View Diagrams & Manuals
252412-0216-99 Engine View Diagrams & Manuals
252412-0221-99 Engine View Diagrams & Manuals
252412-0223-99 Engine View Diagrams & Manuals
252412-0224-99 Engine View Diagrams & Manuals
252412-0225-99 Engine View Diagrams & Manuals
252412-0226-99 Engine View Diagrams & Manuals
252412-0228-99 Engine View Diagrams & Manuals
252412-0229-99 Engine View Diagrams & Manuals
252412-0230-99 Engine View Diagrams & Manuals
252412-0235-99 Engine View Diagrams & Manuals
252412-0238-99 Engine View Diagrams & Manuals
252412-0239-99 Engine View Diagrams & Manuals
252412-0240-99 Engine View Diagrams & Manuals
252412-0241-99 Engine View Diagrams & Manuals
252412-0243-99 Engine View Diagrams & Manuals
252412-0247-99 Engine View Diagrams & Manuals
252412-0249-99 Engine View Diagrams & Manuals
252412-0250-99 Engine View Diagrams & Manuals
252412-0252-99 Engine View Diagrams & Manuals
252412-0254-99 Engine View Diagrams & Manuals
252412-0255-99 Engine View Diagrams & Manuals
252412-0258-99 Engine View Diagrams & Manuals
252412-0260-99 Engine View Diagrams & Manuals
252412-0262-99 Engine View Diagrams & Manuals
252412-0263-99 Engine View Diagrams & Manuals
252412-0266-99 Engine View Diagrams & Manuals
252412-0268-99 Engine View Diagrams & Manuals
252412-0273-99 Engine View Diagrams & Manuals
252412-0275-99 Engine View Diagrams & Manuals
252412-0515-01 Engine View Diagrams & Manuals
252412-0515-02 Engine View Diagrams & Manuals
252412-0515-03 Engine View Diagrams & Manuals
252412-0515-04 Engine View Diagrams & Manuals
252412-0516-01 Engine View Diagrams & Manuals
252412-0517-99 Engine View Diagrams & Manuals
252412-0570-01 Engine View Diagrams & Manuals
252412-0570-02 Engine View Diagrams & Manuals
252412-0570-03 Engine View Diagrams & Manuals
252412-0571-01 Engine View Diagrams & Manuals
252412-0571-02 Engine View Diagrams & Manuals
252412-0571-03 Engine View Diagrams & Manuals
252412-0601-01 Engine View Diagrams & Manuals
252412-0606-01 Engine View Diagrams & Manuals
252412-0611-01 Engine View Diagrams & Manuals
252412-0612-01 Engine View Diagrams & Manuals
252412-0613-01 Engine View Diagrams & Manuals
252412-0633-01 Engine View Diagrams & Manuals
252412-0634-01 Engine View Diagrams & Manuals
252412-0634-02 Engine View Diagrams & Manuals
252412-0636-01 Engine View Diagrams & Manuals
252412-0637-01 Engine View Diagrams & Manuals
252412-0642-01 Engine View Diagrams & Manuals
252412-0646-01 Engine View Diagrams & Manuals
252412-0647-01 Engine View Diagrams & Manuals
252412-0648-01 Engine View Diagrams & Manuals
252412-0649-01 Engine View Diagrams & Manuals
252412-0649-02 Engine View Diagrams & Manuals
252412-0649-03 Engine View Diagrams & Manuals
252412-0652-01 Engine View Diagrams & Manuals
252412-0653-01 Engine View Diagrams & Manuals
252412-0653-02 Engine View Diagrams & Manuals
252412-0656-01 Engine View Diagrams & Manuals
252412-0657-01 Engine View Diagrams & Manuals
252412-0657-02 Engine View Diagrams & Manuals
252412-0660-01 Engine View Diagrams & Manuals
252412-0661-01 Engine View Diagrams & Manuals
252412-0662-01 Engine View Diagrams & Manuals
252412-0666-01 Engine View Diagrams & Manuals
252412-0667-01 Engine View Diagrams & Manuals
252412-0671-01 Engine View Diagrams & Manuals
252412-0674-01 Engine View Diagrams & Manuals
252412-0676-99 Engine View Diagrams & Manuals
252412-0678-01 Engine View Diagrams & Manuals
252412-0683-01 Engine View Diagrams & Manuals
252412-0685-01 Engine View Diagrams & Manuals
252412-0686-01 Engine View Diagrams & Manuals
252412-0689-01 Engine View Diagrams & Manuals
252412-0690-01 Engine View Diagrams & Manuals
252412-0692-01 Engine View Diagrams & Manuals
252412-0696-01 Engine View Diagrams & Manuals
252412-0698-01 Engine View Diagrams & Manuals
252412-0700-01 Engine View Diagrams & Manuals
252412-0701-01 Engine View Diagrams & Manuals
252412-0702-01 Engine View Diagrams & Manuals
252412-0703-99 Engine View Diagrams & Manuals
252412-0704-01 Engine View Diagrams & Manuals
252412-0706-01 Engine View Diagrams & Manuals
252412-0707-01 Engine View Diagrams & Manuals
252412-0707-03 Engine View Diagrams & Manuals
252412-0707-04 Engine View Diagrams & Manuals
252412-0709-01 Engine View Diagrams & Manuals
252412-0710-01 Engine View Diagrams & Manuals
252412-0712-01 Engine View Diagrams & Manuals
252412-0714-01 Engine View Diagrams & Manuals
252412-0717-01 Engine View Diagrams & Manuals
252412-0720-01 Engine View Diagrams & Manuals
252412-0722-01 Engine View Diagrams & Manuals
252412-0723-01 Engine View Diagrams & Manuals
252412-0724-01 Engine View Diagrams & Manuals
252412-0726-99 Engine View Diagrams & Manuals
252412-0727-99 Engine View Diagrams & Manuals
252412-0728-99 Engine View Diagrams & Manuals
252412-0730-99 Engine View Diagrams & Manuals
252412-0733-01 Engine View Diagrams & Manuals
252412-0741-01 Engine View Diagrams & Manuals
252412-0743-01 Engine View Diagrams & Manuals
252412-0745-99 Engine View Diagrams & Manuals
252412-0746-01 Engine View Diagrams & Manuals
252412-0747-01 Engine View Diagrams & Manuals
252412-0748-01 Engine View Diagrams & Manuals
252412-0758-01 Engine View Diagrams & Manuals
252412-0763-01 Engine View Diagrams & Manuals
252412-0764-01 Engine View Diagrams & Manuals
252412-0768-01 Engine View Diagrams & Manuals
252412-5071-01 Engine View Diagrams & Manuals
252412-5130-01 Engine View Diagrams & Manuals
252412-5131-01 Engine View Diagrams & Manuals
252412-5131-02 Engine View Diagrams & Manuals
252412-5132-99 Engine View Diagrams & Manuals
252412-5133-01 Engine View Diagrams & Manuals
252412-5135-01 Engine View Diagrams & Manuals
252412-5136-01 Engine View Diagrams & Manuals
252412-5137-01 Engine View Diagrams & Manuals
252412-5137-02 Engine View Diagrams & Manuals
252412-5139-01 Engine View Diagrams & Manuals
252412-5139-02 Engine View Diagrams & Manuals
252412-5140-01 Engine View Diagrams & Manuals
252412-5143-01 Engine View Diagrams & Manuals
252412-5146-99 Engine View Diagrams & Manuals
252412-5147-01 Engine View Diagrams & Manuals
252412-5149-01 Engine View Diagrams & Manuals
252412-5152-01 Engine View Diagrams & Manuals
252412-5501-01 Engine View Diagrams & Manuals
252412-5501-02 Engine View Diagrams & Manuals
252412-5502-99 Engine View Diagrams & Manuals
252412-5504-99 Engine View Diagrams & Manuals
252412-5506-01 Engine View Diagrams & Manuals
252412-5508-01 Engine View Diagrams & Manuals
252412-5508-02 Engine View Diagrams & Manuals
252412-5509-01 Engine View Diagrams & Manuals
252412-5510-01 Engine View Diagrams & Manuals
252412-5515-01 Engine View Diagrams & Manuals
252412-5570-01 Engine View Diagrams & Manuals
252412-5570-02 Engine View Diagrams & Manuals
252412-5570-03 Engine View Diagrams & Manuals
252412-5571-01 Engine View Diagrams & Manuals
252413-0201-99 Engine View Diagrams & Manuals
252413-0223-99 Engine View Diagrams & Manuals
252413-0691-01 Engine View Diagrams & Manuals
252413-0715-01 Engine View Diagrams & Manuals
252413-0727-01 Engine View Diagrams & Manuals
252415-0138-99 Engine View Diagrams & Manuals
252415-0146-99 Engine View Diagrams & Manuals
252415-0155-99 Engine View Diagrams & Manuals
252415-0175-99 Engine View Diagrams & Manuals
252415-0183-99 Engine View Diagrams & Manuals
252415-0188-99 Engine View Diagrams & Manuals
252415-0189-99 Engine View Diagrams & Manuals
252415-0197-99 Engine View Diagrams & Manuals
252415-0206-99 Engine View Diagrams & Manuals
252415-0248-99 Engine View Diagrams & Manuals
252415-0264-99 Engine View Diagrams & Manuals
252415-0654-01 Engine View Diagrams & Manuals
252415-0659-01 Engine View Diagrams & Manuals
252415-0659-02 Engine View Diagrams & Manuals
252415-0665-01 Engine View Diagrams & Manuals
252415-0679-01 Engine View Diagrams & Manuals
252415-0711-01 Engine View Diagrams & Manuals
252415-0721-01 Engine View Diagrams & Manuals
252415-0742-01 Engine View Diagrams & Manuals
252415-5134-01 Engine View Diagrams & Manuals
252415-5150-01 Engine View Diagrams & Manuals
252416-0141-99 Engine View Diagrams & Manuals
252416-0185-99 Engine View Diagrams & Manuals
252416-0190-99 Engine View Diagrams & Manuals
252416-0234-99 Engine View Diagrams & Manuals
252416-0631-01 Engine View Diagrams & Manuals
252416-0632-01 Engine View Diagrams & Manuals
252416-0670-01 Engine View Diagrams & Manuals
252416-0670-02 Engine View Diagrams & Manuals
252416-0677-01 Engine View Diagrams & Manuals
252416-0693-01 Engine View Diagrams & Manuals
252416-0705-01 Engine View Diagrams & Manuals
252416-0718-99 Engine View Diagrams & Manuals
252416-0719-01 Engine View Diagrams & Manuals
252416-0728-01 Engine View Diagrams & Manuals
252416-0730-99 Engine View Diagrams & Manuals
252416-0734-01 Engine View Diagrams & Manuals
252416-0735-01 Engine View Diagrams & Manuals
252416-0737-01 Engine View Diagrams & Manuals
252416-0739-01 Engine View Diagrams & Manuals
252416-0740-01 Engine View Diagrams & Manuals
252416-0745-01 Engine View Diagrams & Manuals
252416-0749-01 Engine View Diagrams & Manuals
252416-0755-01 Engine View Diagrams & Manuals
252416-0756-01 Engine View Diagrams & Manuals
252416-0757-01 Engine View Diagrams & Manuals
252416-0757-02 Engine View Diagrams & Manuals
252416-5507-01 Engine View Diagrams & Manuals
252417-0025-99 Engine View Diagrams & Manuals
252417-0026-99 Engine View Diagrams & Manuals
252417-0027-99 Engine View Diagrams & Manuals
252417-0050-99 Engine View Diagrams & Manuals
252417-0072-99 Engine View Diagrams & Manuals
252417-0118-99 Engine View Diagrams & Manuals
252417-0119-99 Engine View Diagrams & Manuals
252417-0120-99 Engine View Diagrams & Manuals
252417-0128-99 Engine View Diagrams & Manuals
252417-0129-99 Engine View Diagrams & Manuals
252417-0130-99 Engine View Diagrams & Manuals
252417-0131-99 Engine View Diagrams & Manuals
252417-0132-99 Engine View Diagrams & Manuals
252417-0133-99 Engine View Diagrams & Manuals
252417-0137-99 Engine View Diagrams & Manuals
252417-0140-99 Engine View Diagrams & Manuals
252417-0143-99 Engine View Diagrams & Manuals
252417-0144-99 Engine View Diagrams & Manuals
252417-0149-99 Engine View Diagrams & Manuals
252417-0150-99 Engine View Diagrams & Manuals
252417-0152-99 Engine View Diagrams & Manuals
252417-0153-99 Engine View Diagrams & Manuals
252417-0157-99 Engine View Diagrams & Manuals
252417-0161-99 Engine View Diagrams & Manuals
252417-0169-99 Engine View Diagrams & Manuals
252417-0171-99 Engine View Diagrams & Manuals
252417-0177-99 Engine View Diagrams & Manuals
252417-0180-99 Engine View Diagrams & Manuals
252417-0181-99 Engine View Diagrams & Manuals
252417-0182-99 Engine View Diagrams & Manuals
252417-0186-99 Engine View Diagrams & Manuals
252417-0189-99 Engine View Diagrams & Manuals
252417-0193-99 Engine View Diagrams & Manuals
252417-0195-99 Engine View Diagrams & Manuals
252417-0198-99 Engine View Diagrams & Manuals
252417-0199-99 Engine View Diagrams & Manuals
252417-0204-99 Engine View Diagrams & Manuals
252417-0205-99 Engine View Diagrams & Manuals
252417-0208-99 Engine View Diagrams & Manuals
252417-0211-99 Engine View Diagrams & Manuals
252417-0214-99 Engine View Diagrams & Manuals
252417-0215-99 Engine View Diagrams & Manuals
252417-0217-99 Engine View Diagrams & Manuals
252417-0218-99 Engine View Diagrams & Manuals
252417-0220-99 Engine View Diagrams & Manuals
252417-0222-99 Engine View Diagrams & Manuals
252417-0227-99 Engine View Diagrams & Manuals
252417-0231-99 Engine View Diagrams & Manuals
252417-0232-99 Engine View Diagrams & Manuals
252417-0233-99 Engine View Diagrams & Manuals
252417-0236-99 Engine View Diagrams & Manuals
252417-0237-99 Engine View Diagrams & Manuals
252417-0242-99 Engine View Diagrams & Manuals
252417-0244-99 Engine View Diagrams & Manuals
252417-0245-99 Engine View Diagrams & Manuals
252417-0246-99 Engine View Diagrams & Manuals
252417-0251-99 Engine View Diagrams & Manuals
252417-0253-99 Engine View Diagrams & Manuals
252417-0256-99 Engine View Diagrams & Manuals
252417-0257-99 Engine View Diagrams & Manuals
252417-0259-99 Engine View Diagrams & Manuals
252417-0261-99 Engine View Diagrams & Manuals
252417-0265-99 Engine View Diagrams & Manuals
252417-0267-99 Engine View Diagrams & Manuals
252417-0269-99 Engine View Diagrams & Manuals
252417-0270-99 Engine View Diagrams & Manuals
252417-0271-99 Engine View Diagrams & Manuals
252417-0272-99 Engine View Diagrams & Manuals
252417-0274-99 Engine View Diagrams & Manuals
252417-0525-01 Engine View Diagrams & Manuals
252417-0526-01 Engine View Diagrams & Manuals
252417-0526-02 Engine View Diagrams & Manuals
252417-0527-01 Engine View Diagrams & Manuals
252417-0550-01 Engine View Diagrams & Manuals
252417-0550-02 Engine View Diagrams & Manuals
252417-0572-01 Engine View Diagrams & Manuals
252417-0572-02 Engine View Diagrams & Manuals
252417-0572-03 Engine View Diagrams & Manuals
252417-0604-01 Engine View Diagrams & Manuals
252417-0607-01 Engine View Diagrams & Manuals
252417-0618-01 Engine View Diagrams & Manuals
252417-0619-01 Engine View Diagrams & Manuals
252417-0620-01 Engine View Diagrams & Manuals
252417-0630-01 Engine View Diagrams & Manuals
252417-0635-01 Engine View Diagrams & Manuals
252417-0635-02 Engine View Diagrams & Manuals
252417-0638-01 Engine View Diagrams & Manuals
252417-0639-01 Engine View Diagrams & Manuals
252417-0640-01 Engine View Diagrams & Manuals
252417-0641-01 Engine View Diagrams & Manuals
252417-0643-01 Engine View Diagrams & Manuals
252417-0644-01 Engine View Diagrams & Manuals
252417-0645-01 Engine View Diagrams & Manuals
252417-0649-99 Engine View Diagrams & Manuals
252417-0650-01 Engine View Diagrams & Manuals
252417-0651-01 Engine View Diagrams & Manuals
252417-0655-01 Engine View Diagrams & Manuals
252417-0658-01 Engine View Diagrams & Manuals
252417-0663-01 Engine View Diagrams & Manuals
252417-0664-01 Engine View Diagrams & Manuals
252417-0668-01 Engine View Diagrams & Manuals
252417-0668-02 Engine View Diagrams & Manuals
252417-0668-03 Engine View Diagrams & Manuals
252417-0668-04 Engine View Diagrams & Manuals
252417-0669-01 Engine View Diagrams & Manuals
252417-0673-01 Engine View Diagrams & Manuals
252417-0675-01 Engine View Diagrams & Manuals
252417-0676-01 Engine View Diagrams & Manuals
252417-0680-01 Engine View Diagrams & Manuals
252417-0681-99 Engine View Diagrams & Manuals
252417-0682-01 Engine View Diagrams & Manuals
252417-0684-01 Engine View Diagrams & Manuals
252417-0687-01 Engine View Diagrams & Manuals
252417-0688-01 Engine View Diagrams & Manuals
252417-0694-01 Engine View Diagrams & Manuals
252417-0695-01 Engine View Diagrams & Manuals
252417-0697-01 Engine View Diagrams & Manuals
252417-0699-01 Engine View Diagrams & Manuals
252417-0703-01 Engine View Diagrams & Manuals
252417-0708-01 Engine View Diagrams & Manuals
252417-0713-01 Engine View Diagrams & Manuals
252417-0713-03 Engine View Diagrams & Manuals
252417-0713-04 Engine View Diagrams & Manuals
252417-0716-01 Engine View Diagrams & Manuals
252417-0725-01 Engine View Diagrams & Manuals
252417-0727-01 Engine View Diagrams & Manuals
252417-0731-99 Engine View Diagrams & Manuals
252417-0732-01 Engine View Diagrams & Manuals
252417-0736-01 Engine View Diagrams & Manuals
252417-0738-01 Engine View Diagrams & Manuals
252417-0739-99 Engine View Diagrams & Manuals
252417-0744-01 Engine View Diagrams & Manuals
252417-0750-01 Engine View Diagrams & Manuals
252417-0751-01 Engine View Diagrams & Manuals
252417-0753-01 Engine View Diagrams & Manuals
252417-0754-01 Engine View Diagrams & Manuals
252417-0755-01 Engine View Diagrams & Manuals
252417-0759-99 Engine View Diagrams & Manuals
252417-0760-99 Engine View Diagrams & Manuals
252417-0761-01 Engine View Diagrams & Manuals
252417-0762-01 Engine View Diagrams & Manuals
252417-0765-01 Engine View Diagrams & Manuals
252417-0767-01 Engine View Diagrams & Manuals
252417-5132-01 Engine View Diagrams & Manuals
252417-5138-01 Engine View Diagrams & Manuals
252417-5141-99 Engine View Diagrams & Manuals
252417-5142-01 Engine View Diagrams & Manuals
252417-5144-01 Engine View Diagrams & Manuals
252417-5145-01 Engine View Diagrams & Manuals
252417-5148-01 Engine View Diagrams & Manuals
252417-5151-99 Engine View Diagrams & Manuals
252417-5153-01 Engine View Diagrams & Manuals
252417-5154-99 Engine View Diagrams & Manuals
252417-5502-01 Engine View Diagrams & Manuals
252417-5503-01 Engine View Diagrams & Manuals
252417-5505-01 Engine View Diagrams & Manuals
252417-5526-01 Engine View Diagrams & Manuals
252417-5526-02 Engine View Diagrams & Manuals
252417-5545-01 Engine View Diagrams & Manuals
252417-5545-03 Engine View Diagrams & Manuals
252417-5573-01 Engine View Diagrams & Manuals
252417-5575-01 Engine View Diagrams & Manuals
252702-0015-99 Engine View Diagrams & Manuals
252702-0016-99 Engine View Diagrams & Manuals
252702-0111-99 Engine View Diagrams & Manuals
252702-0112-99 Engine View Diagrams & Manuals
252702-0142-99 Engine View Diagrams & Manuals
252702-0144-99 Engine View Diagrams & Manuals
252702-0148-99 Engine View Diagrams & Manuals
252702-0149-99 Engine View Diagrams & Manuals
252702-0152-99 Engine View Diagrams & Manuals
252702-0155-99 Engine View Diagrams & Manuals
252702-0156-99 Engine View Diagrams & Manuals
252702-0160-99 Engine View Diagrams & Manuals
252702-0165-99 Engine View Diagrams & Manuals
252702-0176-99 Engine View Diagrams & Manuals
252702-0182-99 Engine View Diagrams & Manuals
252702-0184-99 Engine View Diagrams & Manuals
252702-0187-99 Engine View Diagrams & Manuals
252702-0190-99 Engine View Diagrams & Manuals
252702-0191-99 Engine View Diagrams & Manuals
252702-0194-99 Engine View Diagrams & Manuals
252702-0198-99 Engine View Diagrams & Manuals
252702-0203-99 Engine View Diagrams & Manuals
252702-0211-99 Engine View Diagrams & Manuals
252702-0214-99 Engine View Diagrams & Manuals
252702-0217-99 Engine View Diagrams & Manuals
252702-0218-99 Engine View Diagrams & Manuals
252702-0226-99 Engine View Diagrams & Manuals
252702-0227-99 Engine View Diagrams & Manuals
252702-0244-99 Engine View Diagrams & Manuals
252702-0246-99 Engine View Diagrams & Manuals
252702-0515-01 Engine View Diagrams & Manuals
252702-0516-01 Engine View Diagrams & Manuals
252702-0560-01 Engine View Diagrams & Manuals
252702-0611-01 Engine View Diagrams & Manuals
252702-0618-01 Engine View Diagrams & Manuals
252702-0619-99 Engine View Diagrams & Manuals
252702-0635-01 Engine View Diagrams & Manuals
252702-0639-01 Engine View Diagrams & Manuals
252702-0649-01 Engine View Diagrams & Manuals
252702-0659-01 Engine View Diagrams & Manuals
252702-0663-01 Engine View Diagrams & Manuals
252702-0664-01 Engine View Diagrams & Manuals
252702-0666-01 Engine View Diagrams & Manuals
252702-0689-01 Engine View Diagrams & Manuals
252702-0713-01 Engine View Diagrams & Manuals
252707-0025-99 Engine View Diagrams & Manuals
252707-0026-99 Engine View Diagrams & Manuals
252707-0027-99 Engine View Diagrams & Manuals
252707-0028-99 Engine View Diagrams & Manuals
252707-0118-99 Engine View Diagrams & Manuals
252707-0119-99 Engine View Diagrams & Manuals
252707-0130-99 Engine View Diagrams & Manuals
252707-0131-99 Engine View Diagrams & Manuals
252707-0132-99 Engine View Diagrams & Manuals
252707-0133-99 Engine View Diagrams & Manuals
252707-0134-99 Engine View Diagrams & Manuals
252707-0135-99 Engine View Diagrams & Manuals
252707-0136-99 Engine View Diagrams & Manuals
252707-0137-99 Engine View Diagrams & Manuals
252707-0138-99 Engine View Diagrams & Manuals
252707-0139-99 Engine View Diagrams & Manuals
252707-0140-99 Engine View Diagrams & Manuals
252707-0141-99 Engine View Diagrams & Manuals
252707-0143-99 Engine View Diagrams & Manuals
252707-0145-99 Engine View Diagrams & Manuals
252707-0146-99 Engine View Diagrams & Manuals
252707-0147-99 Engine View Diagrams & Manuals
252707-0150-99 Engine View Diagrams & Manuals
252707-0151-99 Engine View Diagrams & Manuals
252707-0154-99 Engine View Diagrams & Manuals
252707-0157-99 Engine View Diagrams & Manuals
252707-0158-99 Engine View Diagrams & Manuals
252707-0159-99 Engine View Diagrams & Manuals
252707-0161-99 Engine View Diagrams & Manuals
252707-0162-99 Engine View Diagrams & Manuals
252707-0163-99 Engine View Diagrams & Manuals
252707-0164-99 Engine View Diagrams & Manuals
252707-0166-99 Engine View Diagrams & Manuals
252707-0167-99 Engine View Diagrams & Manuals
252707-0168-99 Engine View Diagrams & Manuals
252707-0169-99 Engine View Diagrams & Manuals
252707-0170-99 Engine View Diagrams & Manuals
252707-0171-99 Engine View Diagrams & Manuals
252707-0172-99 Engine View Diagrams & Manuals
252707-0173-99 Engine View Diagrams & Manuals
252707-0174-99 Engine View Diagrams & Manuals
252707-0175-99 Engine View Diagrams & Manuals
252707-0177-99 Engine View Diagrams & Manuals
252707-0178-99 Engine View Diagrams & Manuals
252707-0179-99 Engine View Diagrams & Manuals
252707-0180-99 Engine View Diagrams & Manuals
252707-0181-99 Engine View Diagrams & Manuals
252707-0182-99 Engine View Diagrams & Manuals
252707-0183-99 Engine View Diagrams & Manuals
252707-0185-99 Engine View Diagrams & Manuals
252707-0186-99 Engine View Diagrams & Manuals
252707-0188-99 Engine View Diagrams & Manuals
252707-0189-99 Engine View Diagrams & Manuals
252707-0192-99 Engine View Diagrams & Manuals
252707-0193-99 Engine View Diagrams & Manuals
252707-0195-99 Engine View Diagrams & Manuals
252707-0196-99 Engine View Diagrams & Manuals
252707-0197-99 Engine View Diagrams & Manuals
252707-0199-99 Engine View Diagrams & Manuals
252707-0200-99 Engine View Diagrams & Manuals
252707-0201-99 Engine View Diagrams & Manuals
252707-0202-99 Engine View Diagrams & Manuals
252707-0204-99 Engine View Diagrams & Manuals
252707-0205-99 Engine View Diagrams & Manuals
252707-0206-99 Engine View Diagrams & Manuals
252707-0207-99 Engine View Diagrams & Manuals
252707-0208-99 Engine View Diagrams & Manuals
252707-0209-99 Engine View Diagrams & Manuals
252707-0210-99 Engine View Diagrams & Manuals
252707-0212-99 Engine View Diagrams & Manuals
252707-0213-99 Engine View Diagrams & Manuals
252707-0215-99 Engine View Diagrams & Manuals
252707-0216-99 Engine View Diagrams & Manuals
252707-0219-99 Engine View Diagrams & Manuals
252707-0220-99 Engine View Diagrams & Manuals
252707-0221-99 Engine View Diagrams & Manuals
252707-0222-99 Engine View Diagrams & Manuals
252707-0223-99 Engine View Diagrams & Manuals
252707-0224-99 Engine View Diagrams & Manuals
252707-0225-99 Engine View Diagrams & Manuals
252707-0228-99 Engine View Diagrams & Manuals
252707-0229-99 Engine View Diagrams & Manuals
252707-0230-99 Engine View Diagrams & Manuals
252707-0231-99 Engine View Diagrams & Manuals
252707-0232-99 Engine View Diagrams & Manuals
252707-0233-99 Engine View Diagrams & Manuals
252707-0234-99 Engine View Diagrams & Manuals
252707-0235-99 Engine View Diagrams & Manuals
252707-0236-99 Engine View Diagrams & Manuals
252707-0237-99 Engine View Diagrams & Manuals
252707-0238-99 Engine View Diagrams & Manuals
252707-0239-99 Engine View Diagrams & Manuals
252707-0240-99 Engine View Diagrams & Manuals
252707-0241-99 Engine View Diagrams & Manuals
252707-0242-99 Engine View Diagrams & Manuals
252707-0243-99 Engine View Diagrams & Manuals
252707-0245-99 Engine View Diagrams & Manuals
252707-0247-99 Engine View Diagrams & Manuals
252707-0525-01 Engine View Diagrams & Manuals
252707-0526-01 Engine View Diagrams & Manuals
252707-0527-01 Engine View Diagrams & Manuals
252707-0528-01 Engine View Diagrams & Manuals
252707-0537-01 Engine View Diagrams & Manuals
252707-0615-99 Engine View Diagrams & Manuals
252707-0616-01 Engine View Diagrams & Manuals
252707-0617-01 Engine View Diagrams & Manuals
252707-0618-01 Engine View Diagrams & Manuals
252707-0619-01 Engine View Diagrams & Manuals
252707-0620-01 Engine View Diagrams & Manuals
252707-0621-01 Engine View Diagrams & Manuals
252707-0621-02 Engine View Diagrams & Manuals
252707-0621-03 Engine View Diagrams & Manuals
252707-0621-04 Engine View Diagrams & Manuals
252707-0621-05 Engine View Diagrams & Manuals
252707-0622-01 Engine View Diagrams & Manuals
252707-0622-02 Engine View Diagrams & Manuals
252707-0623-99 Engine View Diagrams & Manuals
252707-0624-01 Engine View Diagrams & Manuals
252707-0625-01 Engine View Diagrams & Manuals
252707-0630-01 Engine View Diagrams & Manuals
252707-0631-01 Engine View Diagrams & Manuals
252707-0632-01 Engine View Diagrams & Manuals
252707-0632-02 Engine View Diagrams & Manuals
252707-0633-01 Engine View Diagrams & Manuals
252707-0634-01 Engine View Diagrams & Manuals
252707-0636-01 Engine View Diagrams & Manuals
252707-0637-01 Engine View Diagrams & Manuals
252707-0638-01 Engine View Diagrams & Manuals
252707-0640-01 Engine View Diagrams & Manuals
252707-0641-01 Engine View Diagrams & Manuals
252707-0642-01 Engine View Diagrams & Manuals
252707-0643-01 Engine View Diagrams & Manuals
252707-0644-01 Engine View Diagrams & Manuals
252707-0644-02 Engine View Diagrams & Manuals
252707-0645-01 Engine View Diagrams & Manuals
252707-0646-01 Engine View Diagrams & Manuals
252707-0647-01 Engine View Diagrams & Manuals
252707-0648-01 Engine View Diagrams & Manuals
252707-0650-01 Engine View Diagrams & Manuals
252707-0651-01 Engine View Diagrams & Manuals
252707-0652-01 Engine View Diagrams & Manuals
252707-0653-01 Engine View Diagrams & Manuals
252707-0654-01 Engine View Diagrams & Manuals
252707-0655-01 Engine View Diagrams & Manuals
252707-0655-02 Engine View Diagrams & Manuals
252707-0656-01 Engine View Diagrams & Manuals
252707-0657-01 Engine View Diagrams & Manuals
252707-0657-02 Engine View Diagrams & Manuals
252707-0658-01 Engine View Diagrams & Manuals
252707-0660-01 Engine View Diagrams & Manuals
252707-0661-01 Engine View Diagrams & Manuals
252707-0662-01 Engine View Diagrams & Manuals
252707-0665-01 Engine View Diagrams & Manuals
252707-0667-01 Engine View Diagrams & Manuals
252707-0668-01 Engine View Diagrams & Manuals
252707-0669-01 Engine View Diagrams & Manuals
252707-0669-02 Engine View Diagrams & Manuals
252707-0670-01 Engine View Diagrams & Manuals
252707-0671-01 Engine View Diagrams & Manuals
252707-0672-01 Engine View Diagrams & Manuals
252707-0673-01 Engine View Diagrams & Manuals
252707-0674-01 Engine View Diagrams & Manuals
252707-0675-01 Engine View Diagrams & Manuals
252707-0675-02 Engine View Diagrams & Manuals
252707-0676-01 Engine View Diagrams & Manuals
252707-0676-02 Engine View Diagrams & Manuals
252707-0677-01 Engine View Diagrams & Manuals
252707-0677-02 Engine View Diagrams & Manuals
252707-0678-01 Engine View Diagrams & Manuals
252707-0679-01 Engine View Diagrams & Manuals
252707-0680-01 Engine View Diagrams & Manuals
252707-0681-01 Engine View Diagrams & Manuals
252707-0682-01 Engine View Diagrams & Manuals
252707-0682-02 Engine View Diagrams & Manuals
252707-0683-01 Engine View Diagrams & Manuals
252707-0684-01 Engine View Diagrams & Manuals
252707-0685-01 Engine View Diagrams & Manuals
252707-0686-01 Engine View Diagrams & Manuals
252707-0687-01 Engine View Diagrams & Manuals
252707-0687-02 Engine View Diagrams & Manuals
252707-0688-01 Engine View Diagrams & Manuals
252707-0690-01 Engine View Diagrams & Manuals
252707-0691-01 Engine View Diagrams & Manuals
252707-0692-01 Engine View Diagrams & Manuals
252707-0693-01 Engine View Diagrams & Manuals
252707-0695-01 Engine View Diagrams & Manuals
252707-0696-99 Engine View Diagrams & Manuals
252707-0697-01 Engine View Diagrams & Manuals
252707-0698-01 Engine View Diagrams & Manuals
252707-0699-01 Engine View Diagrams & Manuals
252707-0700-01 Engine View Diagrams & Manuals
252707-0701-01 Engine View Diagrams & Manuals
252707-0702-01 Engine View Diagrams & Manuals
252707-0703-01 Engine View Diagrams & Manuals
252707-0704-01 Engine View Diagrams & Manuals
252707-0705-01 Engine View Diagrams & Manuals
252707-0706-01 Engine View Diagrams & Manuals
252707-0707-01 Engine View Diagrams & Manuals
252707-0708-01 Engine View Diagrams & Manuals
252707-0709-01 Engine View Diagrams & Manuals
252707-0710-01 Engine View Diagrams & Manuals
252707-0711-01 Engine View Diagrams & Manuals
252707-0712-01 Engine View Diagrams & Manuals
252707-0713-99 Engine View Diagrams & Manuals
252707-0714-01 Engine View Diagrams & Manuals
252707-0715-01 Engine View Diagrams & Manuals
252707-0716-99 Engine View Diagrams & Manuals
252707-0717-01 Engine View Diagrams & Manuals
252707-0718-01 Engine View Diagrams & Manuals
252707-0719-01 Engine View Diagrams & Manuals
252707-4001-99 Engine View Diagrams & Manuals
252707-4002-99 Engine View Diagrams & Manuals
252707-4003-99 Engine View Diagrams & Manuals
253412-0111-99 Engine View Diagrams & Manuals
253417-0027-99 Engine View Diagrams & Manuals
253417-0117-99 Engine View Diagrams & Manuals
253417-0118-99 Engine View Diagrams & Manuals
253417-0130-99 Engine View Diagrams & Manuals
253417-0131-99 Engine View Diagrams & Manuals
253417-0132-99 Engine View Diagrams & Manuals
253417-0133-99 Engine View Diagrams & Manuals
253417-0527-99 Engine View Diagrams & Manuals
253417-0618-99 Engine View Diagrams & Manuals
253417-0630-99 Engine View Diagrams & Manuals
253417-0631-99 Engine View Diagrams & Manuals
253417-0632-99 Engine View Diagrams & Manuals
253417-0633-99 Engine View Diagrams & Manuals
253417-0634-99 Engine View Diagrams & Manuals
253417-0635-99 Engine View Diagrams & Manuals
253417-0636-99 Engine View Diagrams & Manuals
253417-0637-99 Engine View Diagrams & Manuals
253417-0638-99 Engine View Diagrams & Manuals
253417-0639-99 Engine View Diagrams & Manuals
253417-0640-99 Engine View Diagrams & Manuals
253417-1027-01 Engine View Diagrams & Manuals
253417-1031-01 Engine View Diagrams & Manuals
253417-1117-01 Engine View Diagrams & Manuals
253417-1118-01 Engine View Diagrams & Manuals
253417-1130-01 Engine View Diagrams & Manuals
253417-1131-01 Engine View Diagrams & Manuals
253417-1132-01 Engine View Diagrams & Manuals
253417-1133-01 Engine View Diagrams & Manuals
253417-1135-01 Engine View Diagrams & Manuals
253702-0015-01 Engine View Diagrams & Manuals
253702-0015-02 Engine View Diagrams & Manuals
253702-0016-01 Engine View Diagrams & Manuals
253702-0016-02 Engine View Diagrams & Manuals
253702-0020-01 Engine View Diagrams & Manuals
253702-0111-01 Engine View Diagrams & Manuals
253702-0133-01 Engine View Diagrams & Manuals
253702-0134-01 Engine View Diagrams & Manuals
253702-0135-01 Engine View Diagrams & Manuals
253702-0138-01 Engine View Diagrams & Manuals
253702-0138-02 Engine View Diagrams & Manuals
253702-0140-01 Engine View Diagrams & Manuals
253702-0146-01 Engine View Diagrams & Manuals
253702-0148-01 Engine View Diagrams & Manuals
253702-0148-02 Engine View Diagrams & Manuals
253702-0156-01 Engine View Diagrams & Manuals
253702-0159-99 Engine View Diagrams & Manuals
253702-0161-01 Engine View Diagrams & Manuals
253702-0162-01 Engine View Diagrams & Manuals
253702-0165-01 Engine View Diagrams & Manuals
253702-0174-01 Engine View Diagrams & Manuals
253702-0175-01 Engine View Diagrams & Manuals
253702-0182-01 Engine View Diagrams & Manuals
253702-0190-01 Engine View Diagrams & Manuals
253702-0192-01 Engine View Diagrams & Manuals
253702-0198-99 Engine View Diagrams & Manuals
253702-0205-01 Engine View Diagrams & Manuals
253702-0210-01 Engine View Diagrams & Manuals
253702-0214-01 Engine View Diagrams & Manuals
253702-0231-01 Engine View Diagrams & Manuals
253702-0315-01 Engine View Diagrams & Manuals
253702-0315-02 Engine View Diagrams & Manuals
253702-0316-01 Engine View Diagrams & Manuals
253702-0316-02 Engine View Diagrams & Manuals
253702-0405-99 Engine View Diagrams & Manuals
253702-0414-01 Engine View Diagrams & Manuals
253702-0420-01 Engine View Diagrams & Manuals
253702-0423-01 Engine View Diagrams & Manuals
253702-4004-99 Engine View Diagrams & Manuals
253703-0031-01 Engine View Diagrams & Manuals
253703-0032-01 Engine View Diagrams & Manuals
253706-0151-01 Engine View Diagrams & Manuals
253706-0152-01 Engine View Diagrams & Manuals
253706-0180-01 Engine View Diagrams & Manuals
253706-0223-01 Engine View Diagrams & Manuals
253707-0025-01 Engine View Diagrams & Manuals
253707-0026-01 Engine View Diagrams & Manuals
253707-0026-02 Engine View Diagrams & Manuals
253707-0027-01 Engine View Diagrams & Manuals
253707-0028-01 Engine View Diagrams & Manuals
253707-0028-02 Engine View Diagrams & Manuals
253707-0030-01 Engine View Diagrams & Manuals
253707-0030-02 Engine View Diagrams & Manuals
253707-0118-01 Engine View Diagrams & Manuals
253707-0121-01 Engine View Diagrams & Manuals
253707-0122-01 Engine View Diagrams & Manuals
253707-0130-01 Engine View Diagrams & Manuals
253707-0131-01 Engine View Diagrams & Manuals
253707-0132-01 Engine View Diagrams & Manuals
253707-0136-01 Engine View Diagrams & Manuals
253707-0137-01 Engine View Diagrams & Manuals
253707-0137-02 Engine View Diagrams & Manuals
253707-0139-01 Engine View Diagrams & Manuals
253707-0141-01 Engine View Diagrams & Manuals
253707-0141-02 Engine View Diagrams & Manuals
253707-0142-01 Engine View Diagrams & Manuals
253707-0143-01 Engine View Diagrams & Manuals
253707-0143-02 Engine View Diagrams & Manuals
253707-0144-01 Engine View Diagrams & Manuals
253707-0144-02 Engine View Diagrams & Manuals
253707-0145-01 Engine View Diagrams & Manuals
253707-0147-01 Engine View Diagrams & Manuals
253707-0149-01 Engine View Diagrams & Manuals
253707-0149-02 Engine View Diagrams & Manuals
253707-0150-01 Engine View Diagrams & Manuals
253707-0150-02 Engine View Diagrams & Manuals
253707-0153-01 Engine View Diagrams & Manuals
253707-0153-02 Engine View Diagrams & Manuals
253707-0154-01 Engine View Diagrams & Manuals
253707-0154-02 Engine View Diagrams & Manuals
253707-0155-01 Engine View Diagrams & Manuals
253707-0155-02 Engine View Diagrams & Manuals
253707-0157-01 Engine View Diagrams & Manuals
253707-0158-01 Engine View Diagrams & Manuals
253707-0158-02 Engine View Diagrams & Manuals
253707-0158-03 Engine View Diagrams & Manuals
253707-0159-01 Engine View Diagrams & Manuals
253707-0159-02 Engine View Diagrams & Manuals
253707-0160-01 Engine View Diagrams & Manuals
253707-0160-02 Engine View Diagrams & Manuals
253707-0163-01 Engine View Diagrams & Manuals
253707-0163-02 Engine View Diagrams & Manuals
253707-0164-01 Engine View Diagrams & Manuals
253707-0166-01 Engine View Diagrams & Manuals
253707-0167-01 Engine View Diagrams & Manuals
253707-0168-01 Engine View Diagrams & Manuals
253707-0169-01 Engine View Diagrams & Manuals
253707-0170-01 Engine View Diagrams & Manuals
253707-0170-02 Engine View Diagrams & Manuals
253707-0171-01 Engine View Diagrams & Manuals
253707-0173-01 Engine View Diagrams & Manuals
253707-0173-02 Engine View Diagrams & Manuals
253707-0176-01 Engine View Diagrams & Manuals
253707-0177-01 Engine View Diagrams & Manuals
253707-0178-01 Engine View Diagrams & Manuals
253707-0179-01 Engine View Diagrams & Manuals
253707-0181-01 Engine View Diagrams & Manuals
253707-0183-01 Engine View Diagrams & Manuals
253707-0183-02 Engine View Diagrams & Manuals
253707-0184-01 Engine View Diagrams & Manuals
253707-0185-01 Engine View Diagrams & Manuals
253707-0186-01 Engine View Diagrams & Manuals
253707-0187-01 Engine View Diagrams & Manuals
253707-0188-01 Engine View Diagrams & Manuals
253707-0189-01 Engine View Diagrams & Manuals
253707-0191-01 Engine View Diagrams & Manuals
253707-0193-01 Engine View Diagrams & Manuals
253707-0194-01 Engine View Diagrams & Manuals
253707-0195-01 Engine View Diagrams & Manuals
253707-0196-01 Engine View Diagrams & Manuals
253707-0197-01 Engine View Diagrams & Manuals
253707-0198-01 Engine View Diagrams & Manuals
253707-0199-01 Engine View Diagrams & Manuals
253707-0200-01 Engine View Diagrams & Manuals
253707-0201-01 Engine View Diagrams & Manuals
253707-0202-01 Engine View Diagrams & Manuals
253707-0204-01 Engine View Diagrams & Manuals
253707-0206-01 Engine View Diagrams & Manuals
253707-0206-02 Engine View Diagrams & Manuals
253707-0208-01 Engine View Diagrams & Manuals
253707-0209-01 Engine View Diagrams & Manuals
253707-0211-01 Engine View Diagrams & Manuals
253707-0212-01 Engine View Diagrams & Manuals
253707-0213-01 Engine View Diagrams & Manuals
253707-0215-01 Engine View Diagrams & Manuals
253707-0216-01 Engine View Diagrams & Manuals
253707-0217-01 Engine View Diagrams & Manuals
253707-0218-01 Engine View Diagrams & Manuals
253707-0219-01 Engine View Diagrams & Manuals
253707-0220-01 Engine View Diagrams & Manuals
253707-0221-01 Engine View Diagrams & Manuals
253707-0222-01 Engine View Diagrams & Manuals
253707-0224-01 Engine View Diagrams & Manuals
253707-0225-01 Engine View Diagrams & Manuals
253707-0226-99 Engine View Diagrams & Manuals
253707-0227-99 Engine View Diagrams & Manuals
253707-0228-99 Engine View Diagrams & Manuals
253707-0229-01 Engine View Diagrams & Manuals
253707-0231-99 Engine View Diagrams & Manuals
253707-0246-01 Engine View Diagrams & Manuals
253707-0247-01 Engine View Diagrams & Manuals
253707-0248-01 Engine View Diagrams & Manuals
253707-0249-01 Engine View Diagrams & Manuals
253707-0250-01 Engine View Diagrams & Manuals
253707-0251-01 Engine View Diagrams & Manuals
253707-0252-99 Engine View Diagrams & Manuals
253707-0253-01 Engine View Diagrams & Manuals
253707-0254-01 Engine View Diagrams & Manuals
253707-0270-99 Engine View Diagrams & Manuals
253707-0318-01 Engine View Diagrams & Manuals
253707-0325-01 Engine View Diagrams & Manuals
253707-0326-01 Engine View Diagrams & Manuals
253707-0327-01 Engine View Diagrams & Manuals
253707-0328-01 Engine View Diagrams & Manuals
253707-0328-02 Engine View Diagrams & Manuals
253707-0400-01 Engine View Diagrams & Manuals
253707-0406-01 Engine View Diagrams & Manuals
253707-0407-01 Engine View Diagrams & Manuals
253707-0408-01 Engine View Diagrams & Manuals
253707-0409-01 Engine View Diagrams & Manuals
253707-0410-01 Engine View Diagrams & Manuals
253707-0410-02 Engine View Diagrams & Manuals
253707-0411-01 Engine View Diagrams & Manuals
253707-0412-01 Engine View Diagrams & Manuals
253707-0413-01 Engine View Diagrams & Manuals
253707-0415-01 Engine View Diagrams & Manuals
253707-0416-01 Engine View Diagrams & Manuals
253707-0417-01 Engine View Diagrams & Manuals
253707-0418-01 Engine View Diagrams & Manuals
253707-0419-01 Engine View Diagrams & Manuals
253707-0421-01 Engine View Diagrams & Manuals
253707-0422-01 Engine View Diagrams & Manuals
253707-0424-01 Engine View Diagrams & Manuals
253707-0425-01 Engine View Diagrams & Manuals
253707-0426-01 Engine View Diagrams & Manuals
253707-0427-01 Engine View Diagrams & Manuals
253707-0428-01 Engine View Diagrams & Manuals
253707-0429-01 Engine View Diagrams & Manuals
253707-0430-01 Engine View Diagrams & Manuals
253707-0431-01 Engine View Diagrams & Manuals
253707-0432-01 Engine View Diagrams & Manuals
253707-0433-01 Engine View Diagrams & Manuals
253707-4001-99 Engine View Diagrams & Manuals
253707-4002-99 Engine View Diagrams & Manuals
253707-4003-99 Engine View Diagrams & Manuals
253707-4005-01 Engine View Diagrams & Manuals
253707-4006-99 Engine View Diagrams & Manuals
254412-0544-01 Engine View Diagrams & Manuals
254412-0549-01 Engine View Diagrams & Manuals
254412-0556-99 Engine View Diagrams & Manuals
254412-0563-01 Engine View Diagrams & Manuals
254412-0576-01 Engine View Diagrams & Manuals
254412-0576-02 Engine View Diagrams & Manuals
254412-0576-03 Engine View Diagrams & Manuals
254412-0578-01 Engine View Diagrams & Manuals
254412-1549-99 Engine View Diagrams & Manuals
254412-1563-99 Engine View Diagrams & Manuals
254412-1576-99 Engine View Diagrams & Manuals
254412-1578-01 Engine View Diagrams & Manuals
254415-0550-01 Engine View Diagrams & Manuals
254415-1550-99 Engine View Diagrams & Manuals
254416-0577-01 Engine View Diagrams & Manuals
254417-0545-01 Engine View Diagrams & Manuals
254417-0545-02 Engine View Diagrams & Manuals
254417-0557-99 Engine View Diagrams & Manuals
254421-0132-01 Engine View Diagrams & Manuals
254421-0136-01 Engine View Diagrams & Manuals
254422-0015-01 Engine View Diagrams & Manuals
254422-0015-02 Engine View Diagrams & Manuals
254422-0015-03 Engine View Diagrams & Manuals
254422-0015-04 Engine View Diagrams & Manuals
254422-0070-01 Engine View Diagrams & Manuals
254422-0070-02 Engine View Diagrams & Manuals
254422-0111-01 Engine View Diagrams & Manuals
254422-0120-01 Engine View Diagrams & Manuals
254422-0122-01 Engine View Diagrams & Manuals
254422-0123-99 Engine View Diagrams & Manuals
254422-0126-99 Engine View Diagrams & Manuals
254422-0128-01 Engine View Diagrams & Manuals
254422-0133-01 Engine View Diagrams & Manuals
254422-0133-02 Engine View Diagrams & Manuals
254422-0135-01 Engine View Diagrams & Manuals
254422-0137-01 Engine View Diagrams & Manuals
254422-0138-01 Engine View Diagrams & Manuals
254422-0215-01 Engine View Diagrams & Manuals
254422-0215-02 Engine View Diagrams & Manuals
254422-0215-03 Engine View Diagrams & Manuals
254422-0216-01 Engine View Diagrams & Manuals
254422-0216-02 Engine View Diagrams & Manuals
254422-0269-01 Engine View Diagrams & Manuals
254422-0270-01 Engine View Diagrams & Manuals
254422-0270-02 Engine View Diagrams & Manuals
254422-0270-03 Engine View Diagrams & Manuals
254422-0300-01 Engine View Diagrams & Manuals
254422-0310-01 Engine View Diagrams & Manuals
254422-0312-01 Engine View Diagrams & Manuals
254422-0313-01 Engine View Diagrams & Manuals
254422-0313-02 Engine View Diagrams & Manuals
254422-0313-03 Engine View Diagrams & Manuals
254422-0315-01 Engine View Diagrams & Manuals
254422-0318-01 Engine View Diagrams & Manuals
254422-0319-01 Engine View Diagrams & Manuals
254422-0320-01 Engine View Diagrams & Manuals
254422-0325-01 Engine View Diagrams & Manuals
254422-0328-01 Engine View Diagrams & Manuals
254422-0331-01 Engine View Diagrams & Manuals
254422-0331-02 Engine View Diagrams & Manuals
254422-0331-03 Engine View Diagrams & Manuals
254422-0331-04 Engine View Diagrams & Manuals
254422-0332-01 Engine View Diagrams & Manuals
254422-0333-01 Engine View Diagrams & Manuals
254422-0335-01 Engine View Diagrams & Manuals
254422-0340-01 Engine View Diagrams & Manuals
254422-0340-02 Engine View Diagrams & Manuals
254422-0341-01 Engine View Diagrams & Manuals
254422-0342-99 Engine View Diagrams & Manuals
254422-0343-99 Engine View Diagrams & Manuals
254422-0344-01 Engine View Diagrams & Manuals
254422-0345-01 Engine View Diagrams & Manuals
254422-0345-02 Engine View Diagrams & Manuals
254422-0346-01 Engine View Diagrams & Manuals
254422-0349-01 Engine View Diagrams & Manuals
254422-0352-01 Engine View Diagrams & Manuals
254422-0355-01 Engine View Diagrams & Manuals
254422-0358-01 Engine View Diagrams & Manuals
254422-0360-01 Engine View Diagrams & Manuals
254422-0361-01 Engine View Diagrams & Manuals
254422-0364-99 Engine View Diagrams & Manuals
254422-0365-99 Engine View Diagrams & Manuals
254422-0368-01 Engine View Diagrams & Manuals
254422-0370-01 Engine View Diagrams & Manuals
254422-0501-01 Engine View Diagrams & Manuals
254422-0505-01 Engine View Diagrams & Manuals
254422-0506-99 Engine View Diagrams & Manuals
254422-0508-01 Engine View Diagrams & Manuals
254422-0508-02 Engine View Diagrams & Manuals
254422-0512-01 Engine View Diagrams & Manuals
254422-0514-99 Engine View Diagrams & Manuals
254422-0517-01 Engine View Diagrams & Manuals
254422-0521-01 Engine View Diagrams & Manuals
254422-0523-01 Engine View Diagrams & Manuals
254422-0526-01 Engine View Diagrams & Manuals
254422-0527-01 Engine View Diagrams & Manuals
254422-0528-01 Engine View Diagrams & Manuals
254422-0528-02 Engine View Diagrams & Manuals
254422-0530-99 Engine View Diagrams & Manuals
254422-0532-01 Engine View Diagrams & Manuals
254422-0535-01 Engine View Diagrams & Manuals
254422-0536-01 Engine View Diagrams & Manuals
254422-0536-02 Engine View Diagrams & Manuals
254422-0537-01 Engine View Diagrams & Manuals
254422-0537-02 Engine View Diagrams & Manuals
254422-0538-01 Engine View Diagrams & Manuals
254422-0539-01 Engine View Diagrams & Manuals
254422-0540-01 Engine View Diagrams & Manuals
254422-0541-01 Engine View Diagrams & Manuals
254422-0555-01 Engine View Diagrams & Manuals
254422-0558-01 Engine View Diagrams & Manuals
254422-0562-01 Engine View Diagrams & Manuals
254422-0564-99 Engine View Diagrams & Manuals
254422-0565-99 Engine View Diagrams & Manuals
254422-0567-01 Engine View Diagrams & Manuals
254422-0568-01 Engine View Diagrams & Manuals
254422-0572-01 Engine View Diagrams & Manuals
254422-0573-99 Engine View Diagrams & Manuals
254422-0574-99 Engine View Diagrams & Manuals
254422-1508-01 Engine View Diagrams & Manuals
254422-1508-02 Engine View Diagrams & Manuals
254422-1512-01 Engine View Diagrams & Manuals
254422-1526-01 Engine View Diagrams & Manuals
254422-1558-99 Engine View Diagrams & Manuals
254422-1572-01 Engine View Diagrams & Manuals
254422-1573-99 Engine View Diagrams & Manuals
254422-4002-99 Engine View Diagrams & Manuals
254422-4003-01 Engine View Diagrams & Manuals
254422-4004-01 Engine View Diagrams & Manuals
254422-4004-02 Engine View Diagrams & Manuals
254422-4004-03 Engine View Diagrams & Manuals
254422-4004-04 Engine View Diagrams & Manuals
254422-4005-01 Engine View Diagrams & Manuals
254422-4014-01 Engine View Diagrams & Manuals
254422-4014-02 Engine View Diagrams & Manuals
254422-4014-03 Engine View Diagrams & Manuals
254422-4014-04 Engine View Diagrams & Manuals
254422-4014-05 Engine View Diagrams & Manuals
254422-4014-06 Engine View Diagrams & Manuals
254422-4014-07 Engine View Diagrams & Manuals
254422-4014-08 Engine View Diagrams & Manuals
254422-4014-10 Engine View Diagrams & Manuals
254422-4015-01 Engine View Diagrams & Manuals
254422-4015-02 Engine View Diagrams & Manuals
254422-4015-03 Engine View Diagrams & Manuals
254422-4015-04 Engine View Diagrams & Manuals
254422-4022-01 Engine View Diagrams & Manuals
254422-4023-01 Engine View Diagrams & Manuals
254422-4026-01 Engine View Diagrams & Manuals
254422-4026-02 Engine View Diagrams & Manuals
254422-4026-03 Engine View Diagrams & Manuals
254422-4029-01 Engine View Diagrams & Manuals
254422-4030-01 Engine View Diagrams & Manuals
254422-4030-02 Engine View Diagrams & Manuals
254422-4031-99 Engine View Diagrams & Manuals
254422-4044-01 Engine View Diagrams & Manuals
254422-4045-01 Engine View Diagrams & Manuals
254422-4045-02 Engine View Diagrams & Manuals
254422-4055-99 Engine View Diagrams & Manuals
254422-4070-01 Engine View Diagrams & Manuals
254422-4070-02 Engine View Diagrams & Manuals
254422-4070-04 Engine View Diagrams & Manuals
254422-4070-05 Engine View Diagrams & Manuals
254422-4070-06 Engine View Diagrams & Manuals
254422-4070-07 Engine View Diagrams & Manuals
254422-4070-08 Engine View Diagrams & Manuals
254422-4070-09 Engine View Diagrams & Manuals
254422-4070-10 Engine View Diagrams & Manuals
254422-4071-01 Engine View Diagrams & Manuals
254422-4072-99 Engine View Diagrams & Manuals
254422-4090-01 Engine View Diagrams & Manuals
254422-5004-01 Engine View Diagrams & Manuals
254422-5004-02 Engine View Diagrams & Manuals
254422-5014-01 Engine View Diagrams & Manuals
254422-5014-05 Engine View Diagrams & Manuals
254422-5014-08 Engine View Diagrams & Manuals
254422-5015-01 Engine View Diagrams & Manuals
254422-5015-02 Engine View Diagrams & Manuals
254422-5026-02 Engine View Diagrams & Manuals
254422-5044-99 Engine View Diagrams & Manuals
254422-5045-02 Engine View Diagrams & Manuals
254422-5070-01 Engine View Diagrams & Manuals
254422-5070-02 Engine View Diagrams & Manuals
254425-0329-01 Engine View Diagrams & Manuals
254425-0511-01 Engine View Diagrams & Manuals
254426-0316-01 Engine View Diagrams & Manuals
254426-0531-01 Engine View Diagrams & Manuals
254426-0543-01 Engine View Diagrams & Manuals
254426-0547-01 Engine View Diagrams & Manuals
254427-0025-01 Engine View Diagrams & Manuals
254427-0026-01 Engine View Diagrams & Manuals
254427-0027-01 Engine View Diagrams & Manuals
254427-0027-02 Engine View Diagrams & Manuals
254427-0028-01 Engine View Diagrams & Manuals
254427-0050-99 Engine View Diagrams & Manuals
254427-0121-01 Engine View Diagrams & Manuals
254427-0123-01 Engine View Diagrams & Manuals
254427-0124-01 Engine View Diagrams & Manuals
254427-0125-01 Engine View Diagrams & Manuals
254427-0127-01 Engine View Diagrams & Manuals
254427-0129-01 Engine View Diagrams & Manuals
254427-0130-01 Engine View Diagrams & Manuals
254427-0131-01 Engine View Diagrams & Manuals
254427-0134-01 Engine View Diagrams & Manuals
254427-0225-01 Engine View Diagrams & Manuals
254427-0226-01 Engine View Diagrams & Manuals
254427-0227-01 Engine View Diagrams & Manuals
254427-0227-02 Engine View Diagrams & Manuals
254427-0228-01 Engine View Diagrams & Manuals
254427-0229-01 Engine View Diagrams & Manuals
254427-0250-01 Engine View Diagrams & Manuals
254427-0308-99 Engine View Diagrams & Manuals
254427-0311-99 Engine View Diagrams & Manuals
254427-0314-01 Engine View Diagrams & Manuals
254427-0317-01 Engine View Diagrams & Manuals
254427-0321-01 Engine View Diagrams & Manuals
254427-0322-01 Engine View Diagrams & Manuals
254427-0323-01 Engine View Diagrams & Manuals
254427-0324-01 Engine View Diagrams & Manuals
254427-0326-99 Engine View Diagrams & Manuals
254427-0327-01 Engine View Diagrams & Manuals
254427-0330-01 Engine View Diagrams & Manuals
254427-0334-01 Engine View Diagrams & Manuals
254427-0336-01 Engine View Diagrams & Manuals
254427-0337-01 Engine View Diagrams & Manuals
254427-0338-01 Engine View Diagrams & Manuals
254427-0339-01 Engine View Diagrams & Manuals
254427-0347-01 Engine View Diagrams & Manuals
254427-0347-02 Engine View Diagrams & Manuals
254427-0348-01 Engine View Diagrams & Manuals
254427-0350-01 Engine View Diagrams & Manuals
254427-0351-01 Engine View Diagrams & Manuals
254427-0353-01 Engine View Diagrams & Manuals
254427-0354-01 Engine View Diagrams & Manuals
254427-0356-01 Engine View Diagrams & Manuals
254427-0357-01 Engine View Diagrams & Manuals
254427-0359-01 Engine View Diagrams & Manuals
254427-0362-01 Engine View Diagrams & Manuals
254427-0363-01 Engine View Diagrams & Manuals
254427-0365-01 Engine View Diagrams & Manuals
254427-0369-01 Engine View Diagrams & Manuals
254427-0507-01 Engine View Diagrams & Manuals
254427-0509-99 Engine View Diagrams & Manuals
254427-0510-01 Engine View Diagrams & Manuals
254427-0513-99 Engine View Diagrams & Manuals
254427-0516-01 Engine View Diagrams & Manuals
254427-0518-99 Engine View Diagrams & Manuals
254427-0519-01 Engine View Diagrams & Manuals
254427-0520-01 Engine View Diagrams & Manuals
254427-0522-01 Engine View Diagrams & Manuals
254427-0524-01 Engine View Diagrams & Manuals
254427-0525-01 Engine View Diagrams & Manuals
254427-0529-01 Engine View Diagrams & Manuals
254427-0534-01 Engine View Diagrams & Manuals
254427-0542-01 Engine View Diagrams & Manuals
254427-0546-01 Engine View Diagrams & Manuals
254427-0546-02 Engine View Diagrams & Manuals
254427-0548-01 Engine View Diagrams & Manuals
254427-0551-01 Engine View Diagrams & Manuals
254427-0552-01 Engine View Diagrams & Manuals
254427-0553-01 Engine View Diagrams & Manuals
254427-0554-01 Engine View Diagrams & Manuals
254427-0559-01 Engine View Diagrams & Manuals
254427-0560-01 Engine View Diagrams & Manuals
254427-0560-02 Engine View Diagrams & Manuals
254427-0561-99 Engine View Diagrams & Manuals
254427-0566-01 Engine View Diagrams & Manuals
254427-0569-01 Engine View Diagrams & Manuals
254427-0570-01 Engine View Diagrams & Manuals
254427-0571-01 Engine View Diagrams & Manuals
254427-0575-01 Engine View Diagrams & Manuals
254427-1559-01 Engine View Diagrams & Manuals
254427-1560-02 Engine View Diagrams & Manuals
254427-1571-01 Engine View Diagrams & Manuals
254427-1575-99 Engine View Diagrams & Manuals
254427-4006-01 Engine View Diagrams & Manuals
254427-4006-02 Engine View Diagrams & Manuals
254427-4007-01 Engine View Diagrams & Manuals
254427-4010-01 Engine View Diagrams & Manuals
254427-4010-02 Engine View Diagrams & Manuals
254427-4010-03 Engine View Diagrams & Manuals
254427-4012-01 Engine View Diagrams & Manuals
254427-4012-02 Engine View Diagrams & Manuals
254427-4012-03 Engine View Diagrams & Manuals
254427-4013-01 Engine View Diagrams & Manuals
254427-4013-02 Engine View Diagrams & Manuals
254427-4013-03 Engine View Diagrams & Manuals
254427-4016-01 Engine View Diagrams & Manuals
254427-4017-01 Engine View Diagrams & Manuals
254427-4017-02 Engine View Diagrams & Manuals
254427-4018-01 Engine View Diagrams & Manuals
254427-4019-01 Engine View Diagrams & Manuals
254427-4019-02 Engine View Diagrams & Manuals
254427-4024-01 Engine View Diagrams & Manuals
254427-4025-01 Engine View Diagrams & Manuals
254427-4027-01 Engine View Diagrams & Manuals
254427-4027-02 Engine View Diagrams & Manuals
254427-4027-03 Engine View Diagrams & Manuals
254427-4028-01 Engine View Diagrams & Manuals
254427-4028-02 Engine View Diagrams & Manuals
254427-4028-03 Engine View Diagrams & Manuals
254427-4032-01 Engine View Diagrams & Manuals
254427-4033-01 Engine View Diagrams & Manuals
254427-4033-02 Engine View Diagrams & Manuals
254427-4034-01 Engine View Diagrams & Manuals
254427-4034-02 Engine View Diagrams & Manuals
254427-4035-01 Engine View Diagrams & Manuals
254427-4036-01 Engine View Diagrams & Manuals
254427-4047-01 Engine View Diagrams & Manuals
254427-4050-01 Engine View Diagrams & Manuals
254427-5006-01 Engine View Diagrams & Manuals
254427-5007-01 Engine View Diagrams & Manuals
254427-5012-01 Engine View Diagrams & Manuals
254427-5013-99 Engine View Diagrams & Manuals
254427-5017-01 Engine View Diagrams & Manuals
254427-5019-01 Engine View Diagrams & Manuals
254427-5024-99 Engine View Diagrams & Manuals
254427-5025-01 Engine View Diagrams & Manuals
254427-5027-01 Engine View Diagrams & Manuals
254427-5027-03 Engine View Diagrams & Manuals
254427-5028-01 Engine View Diagrams & Manuals
254427-5034-99 Engine View Diagrams & Manuals
254427-5035-01 Engine View Diagrams & Manuals
254427-5036-01 Engine View Diagrams & Manuals
254427-5047-01 Engine View Diagrams & Manuals
254427-5075-01 Engine View Diagrams & Manuals
256412-0111-01 Engine View Diagrams & Manuals
256412-0132-01 Engine View Diagrams & Manuals
256412-0153-01 Engine View Diagrams & Manuals
256412-0653-A1 Engine View Diagrams & Manuals
256412-0660-A1 Engine View Diagrams & Manuals
256412-1132-E1 Engine View Diagrams & Manuals
256412-1153-E1 Engine View Diagrams & Manuals
256412-1178-E1 Engine View Diagrams & Manuals
256412-1178-E2 Engine View Diagrams & Manuals
256417-0113-01 Engine View Diagrams & Manuals
256417-0133-01 Engine View Diagrams & Manuals
256417-0134-01 Engine View Diagrams & Manuals
256417-0134-02 Engine View Diagrams & Manuals
256417-0634-A2 Engine View Diagrams & Manuals
256417-1133-E1 Engine View Diagrams & Manuals
256417-1134-E1 Engine View Diagrams & Manuals
256417-1134-E2 Engine View Diagrams & Manuals
256422-0004-01 Engine View Diagrams & Manuals
256422-0004-03 Engine View Diagrams & Manuals
256422-0015-01 Engine View Diagrams & Manuals
256422-0015-02 Engine View Diagrams & Manuals
256422-0015-03 Engine View Diagrams & Manuals
256422-0015-04 Engine View Diagrams & Manuals
256422-0026-02 Engine View Diagrams & Manuals
256422-0070-01 Engine View Diagrams & Manuals
256422-0070-02 Engine View Diagrams & Manuals
256422-0070-04 Engine View Diagrams & Manuals
256422-0101-01 Engine View Diagrams & Manuals
256422-0116-01 Engine View Diagrams & Manuals
256422-0120-01 Engine View Diagrams & Manuals
256422-0124-01 Engine View Diagrams & Manuals
256422-0128-01 Engine View Diagrams & Manuals
256422-0129-01 Engine View Diagrams & Manuals
256422-0130-99 Engine View Diagrams & Manuals
256422-0135-01 Engine View Diagrams & Manuals
256422-0136-01 Engine View Diagrams & Manuals
256422-0137-01 Engine View Diagrams & Manuals
256422-0143-01 Engine View Diagrams & Manuals
256422-0173-01 Engine View Diagrams & Manuals
256422-0515-A1 Engine View Diagrams & Manuals
256422-0570-A1 Engine View Diagrams & Manuals
256422-0570-A2 Engine View Diagrams & Manuals
256422-0601-A1 Engine View Diagrams & Manuals
256422-0635-A1 Engine View Diagrams & Manuals
256422-0661-A1 Engine View Diagrams & Manuals
256422-0695-A1 Engine View Diagrams & Manuals
256422-0696-A1 Engine View Diagrams & Manuals
256422-1004-E1 Engine View Diagrams & Manuals
256422-1015-E1 Engine View Diagrams & Manuals
256422-1015-E2 Engine View Diagrams & Manuals
256422-1015-E4 Engine View Diagrams & Manuals
256422-1070-E1 Engine View Diagrams & Manuals
256422-1070-E2 Engine View Diagrams & Manuals
256422-1101-E1 Engine View Diagrams & Manuals
256422-1105-E1 Engine View Diagrams & Manuals
256422-1135-E1 Engine View Diagrams & Manuals
256422-1136-E1 Engine View Diagrams & Manuals
256422-1137-E1 Engine View Diagrams & Manuals
256422-1138-E1 Engine View Diagrams & Manuals
256422-1143-E1 Engine View Diagrams & Manuals
256422-1154-E1 Engine View Diagrams & Manuals
256422-1161-E1 Engine View Diagrams & Manuals
256422-1161-E2 Engine View Diagrams & Manuals
256422-1174-E1 Engine View Diagrams & Manuals
256422-1176-E1 Engine View Diagrams & Manuals
256422-1195-E1 Engine View Diagrams & Manuals
256422-1196-E1 Engine View Diagrams & Manuals
256422-1203-E1 Engine View Diagrams & Manuals
256422-1205-E1 Engine View Diagrams & Manuals
256422-1210-E1 Engine View Diagrams & Manuals
256426-0121-01 Engine View Diagrams & Manuals
256426-0130-01 Engine View Diagrams & Manuals
256426-1121-E1 Engine View Diagrams & Manuals
256426-1130-E1 Engine View Diagrams & Manuals
256427-0006-01 Engine View Diagrams & Manuals
256427-0006-02 Engine View Diagrams & Manuals
256427-0006-03 Engine View Diagrams & Manuals
256427-0007-01 Engine View Diagrams & Manuals
256427-0008-01 Engine View Diagrams & Manuals
256427-0012-01 Engine View Diagrams & Manuals
256427-0020-01 Engine View Diagrams & Manuals
256427-0025-01 Engine View Diagrams & Manuals
256427-0027-01 Engine View Diagrams & Manuals
256427-0028-01 Engine View Diagrams & Manuals
256427-0028-03 Engine View Diagrams & Manuals
256427-0115-01 Engine View Diagrams & Manuals
256427-0139-01 Engine View Diagrams & Manuals
256427-0140-01 Engine View Diagrams & Manuals
256427-0156-01 Engine View Diagrams & Manuals
256427-0174-01 Engine View Diagrams & Manuals
256427-0506-A2 Engine View Diagrams & Manuals
256427-0512-A1 Engine View Diagrams & Manuals
256427-0525-A1 Engine View Diagrams & Manuals
256427-0527-A1 Engine View Diagrams & Manuals
256427-0528-A1 Engine View Diagrams & Manuals
256427-1006-E2 Engine View Diagrams & Manuals
256427-1006-E3 Engine View Diagrams & Manuals
256427-1007-E1 Engine View Diagrams & Manuals
256427-1008-E1 Engine View Diagrams & Manuals
256427-1012-E1 Engine View Diagrams & Manuals
256427-1020-E1 Engine View Diagrams & Manuals
256427-1025-E1 Engine View Diagrams & Manuals
256427-1027-E1 Engine View Diagrams & Manuals
256427-1028-E1 Engine View Diagrams & Manuals
256427-1029-E1 Engine View Diagrams & Manuals
256427-1072-E1 Engine View Diagrams & Manuals
256427-1139-E1 Engine View Diagrams & Manuals
256427-1140-E1 Engine View Diagrams & Manuals
256427-1156-E1 Engine View Diagrams & Manuals
256427-1162-E1 Engine View Diagrams & Manuals
256427-1175-E1 Engine View Diagrams & Manuals
256427-1177-E1 Engine View Diagrams & Manuals
256427-1198-E1 Engine View Diagrams & Manuals
256427-1200-E1 Engine View Diagrams & Manuals
256427-1201-E1 Engine View Diagrams & Manuals
256427-1204-E1 Engine View Diagrams & Manuals
256427-1206-E1 Engine View Diagrams & Manuals
256427-1211-E1 Engine View Diagrams & Manuals
256452-0049-E2 Engine View Diagrams & Manuals
256452-1049-E1 Engine View Diagrams & Manuals
256452-1049-E2 Engine View Diagrams & Manuals
256452-1202-E1 Engine View Diagrams & Manuals
256457-1050-E1 Engine View Diagrams & Manuals
257702-0103-01 Engine View Diagrams & Manuals
257702-0104-01 Engine View Diagrams & Manuals
257702-0130-01 Engine View Diagrams & Manuals
257702-4001-01 Engine View Diagrams & Manuals
257702-4005-99 Engine View Diagrams & Manuals
257705-0134-01 Engine View Diagrams & Manuals
257707-0101-01 Engine View Diagrams & Manuals
257707-0102-01 Engine View Diagrams & Manuals
257707-0116-01 Engine View Diagrams & Manuals
257707-0117-01 Engine View Diagrams & Manuals
257707-0118-01 Engine View Diagrams & Manuals
257707-0118-02 Engine View Diagrams & Manuals
257707-0119-01 Engine View Diagrams & Manuals
257707-0120-01 Engine View Diagrams & Manuals
257707-0121-99 Engine View Diagrams & Manuals
257707-0122-01 Engine View Diagrams & Manuals
257707-0123-01 Engine View Diagrams & Manuals
257707-0124-01 Engine View Diagrams & Manuals
257707-0125-01 Engine View Diagrams & Manuals
257707-0126-01 Engine View Diagrams & Manuals
257707-0127-01 Engine View Diagrams & Manuals
257707-0128-01 Engine View Diagrams & Manuals
257707-0129-01 Engine View Diagrams & Manuals
257707-0130-99 Engine View Diagrams & Manuals
257707-0131-01 Engine View Diagrams & Manuals
257707-0132-99 Engine View Diagrams & Manuals
257707-0133-01 Engine View Diagrams & Manuals
257707-0135-01 Engine View Diagrams & Manuals
257707-0136-01 Engine View Diagrams & Manuals
257707-0137-01 Engine View Diagrams & Manuals
257707-0138-01 Engine View Diagrams & Manuals
257707-0143-01 Engine View Diagrams & Manuals
257707-0146-99 Engine View Diagrams & Manuals
257707-0147-01 Engine View Diagrams & Manuals
257707-0148-01 Engine View Diagrams & Manuals
257707-0149-01 Engine View Diagrams & Manuals
257707-0150-01 Engine View Diagrams & Manuals
257707-4005-01 Engine View Diagrams & Manuals
257707-4007-99 Engine View Diagrams & Manuals
257707-4008-01 Engine View Diagrams & Manuals
257707-4009-01 Engine View Diagrams & Manuals
257707-4029-99 Engine View Diagrams & Manuals
260772-0020-01 Series Engine View Diagrams & Manuals
260772-0022-99 Series Engine View Diagrams & Manuals
260772-0023-99 Series Engine View Diagrams & Manuals
260772-0110-01 Series Engine View Diagrams & Manuals
260772-0118-01 Series Engine View Diagrams & Manuals
260772-0120-01 Series Engine View Diagrams & Manuals
260772-0122-99 Series Engine View Diagrams & Manuals
260772-0125-01 Series Engine View Diagrams & Manuals
260777-0010-01 Series Engine View Diagrams & Manuals
260777-0011-99 Series Engine View Diagrams & Manuals
260777-0014-99 Series Engine View Diagrams & Manuals
260777-0026-01 Series Engine View Diagrams & Manuals
260777-0027-99 Series Engine View Diagrams & Manuals
260777-0029-99 Engine View Diagrams & Manuals
260777-0047-01 Engine View Diagrams & Manuals
260777-0111-01 Engine View Diagrams & Manuals
260777-0112-01 Engine View Diagrams & Manuals
260777-0116-01 Engine View Diagrams & Manuals
260777-0117-01 Engine View Diagrams & Manuals
260777-0117-02 Engine View Diagrams & Manuals
260777-0119-01 Engine View Diagrams & Manuals
260777-0123-01 Engine View Diagrams & Manuals
261772-0020-01 Engine View Diagrams & Manuals
261772-0021-01 Engine View Diagrams & Manuals
261772-0022-01 Engine View Diagrams & Manuals
261772-0022-02 Engine View Diagrams & Manuals
261772-0023-01 Engine View Diagrams & Manuals
261772-0023-02 Engine View Diagrams & Manuals
261772-0110-01 Engine View Diagrams & Manuals
261772-0116-99 Engine View Diagrams & Manuals
261772-0118-01 Engine View Diagrams & Manuals
261772-0120-01 Engine View Diagrams & Manuals
261772-0122-01 Engine View Diagrams & Manuals
261772-0128-01 Engine View Diagrams & Manuals
261772-0131-01 Engine View Diagrams & Manuals
261772-0132-01 Engine View Diagrams & Manuals
261772-0147-99 Engine View Diagrams & Manuals
261772-0148-01 Engine View Diagrams & Manuals
261772-0149-01 Engine View Diagrams & Manuals
261772-0151-01 Engine View Diagrams & Manuals
261772-0152-99 Engine View Diagrams & Manuals
261776-0012-01 Engine View Diagrams & Manuals
261776-0012-02 Engine View Diagrams & Manuals
261776-0015-01 Engine View Diagrams & Manuals
261776-0015-02 Engine View Diagrams & Manuals
261776-0033-01 Engine View Diagrams & Manuals
261776-0133-01 Engine View Diagrams & Manuals
261776-0162-99 Engine View Diagrams & Manuals
261777-0010-01 Engine View Diagrams & Manuals
261777-0010-02 Engine View Diagrams & Manuals
261777-0011-01 Engine View Diagrams & Manuals
261777-0011-02 Engine View Diagrams & Manuals
261777-0013-01 Engine View Diagrams & Manuals
261777-0013-02 Engine View Diagrams & Manuals
261777-0014-01 Engine View Diagrams & Manuals
261777-0014-02 Engine View Diagrams & Manuals
261777-0016-01 Engine View Diagrams & Manuals
261777-0026-01 Engine View Diagrams & Manuals
261777-0026-02 Engine View Diagrams & Manuals
261777-0026-03 Engine View Diagrams & Manuals
261777-0026-04 Engine View Diagrams & Manuals
261777-0026-05 Engine View Diagrams & Manuals
261777-0029-01 Engine View Diagrams & Manuals
261777-0029-02 Engine View Diagrams & Manuals
261777-0036-01 Engine View Diagrams & Manuals
261777-0111-01 Engine View Diagrams & Manuals
261777-0112-01 Engine View Diagrams & Manuals
261777-0117-99 Engine View Diagrams & Manuals
261777-0119-01 Engine View Diagrams & Manuals
261777-0121-01 Engine View Diagrams & Manuals
261777-0123-01 Engine View Diagrams & Manuals
261777-0124-01 Engine View Diagrams & Manuals
261777-0125-01 Engine View Diagrams & Manuals
261777-0126-01 Engine View Diagrams & Manuals
261777-0126-02 Engine View Diagrams & Manuals
261777-0127-01 Engine View Diagrams & Manuals
261777-0129-01 Engine View Diagrams & Manuals
261777-0130-01 Engine View Diagrams & Manuals
261777-0134-01 Engine View Diagrams & Manuals
261777-0135-01 Engine View Diagrams & Manuals
261777-0136-01 Engine View Diagrams & Manuals
261777-0137-01 Engine View Diagrams & Manuals
261777-0138-01 Engine View Diagrams & Manuals
261777-0140-99 Engine View Diagrams & Manuals
261777-0141-01 Engine View Diagrams & Manuals
261777-0142-01 Engine View Diagrams & Manuals
261777-0143-01 Engine View Diagrams & Manuals
261777-0144-01 Engine View Diagrams & Manuals
261777-0145-01 Engine View Diagrams & Manuals
261777-0146-99 Engine View Diagrams & Manuals
261777-0150-01 Engine View Diagrams & Manuals
261777-0153-01 Engine View Diagrams & Manuals
261777-0154-99 Engine View Diagrams & Manuals
261777-0155-01 Engine View Diagrams & Manuals
261777-0156-01 Engine View Diagrams & Manuals
261777-0157-01 Engine View Diagrams & Manuals
261777-0158-01 Engine View Diagrams & Manuals
261777-0159-01 Engine View Diagrams & Manuals
261777-0160-99 Engine View Diagrams & Manuals
261777-0163-01 Engine View Diagrams & Manuals
261777-0163-02 Engine View Diagrams & Manuals
261777-0164-01 Engine View Diagrams & Manuals
261777-0165-01 Engine View Diagrams & Manuals
280702-0111-01 Engine View Diagrams & Manuals
280707-0118-01 Engine View Diagrams & Manuals
280707-0119-01 Engine View Diagrams & Manuals
280707-0125-01 Engine View Diagrams & Manuals
280707-0126-01 Engine View Diagrams & Manuals
280707-0127-01 Engine View Diagrams & Manuals
280707-0128-01 Engine View Diagrams & Manuals
280707-0129-01 Engine View Diagrams & Manuals
280707-0130-01 Engine View Diagrams & Manuals
280707-0132-01 Engine View Diagrams & Manuals
280707-0133-01 Engine View Diagrams & Manuals
280707-0134-01 Engine View Diagrams & Manuals
280707-0135-01 Engine View Diagrams & Manuals
280707-0136-01 Engine View Diagrams & Manuals
280707-0137-01 Engine View Diagrams & Manuals
280707-0410-01 Engine View Diagrams & Manuals
280707-0411-01 Engine View Diagrams & Manuals
280707-0411-02 Engine View Diagrams & Manuals
280707-0411-03 Engine View Diagrams & Manuals
280707-0412-99 Engine View Diagrams & Manuals
280707-0414-01 Engine View Diagrams & Manuals
281702-0015-01 Engine View Diagrams & Manuals
281702-0016-01 Engine View Diagrams & Manuals
281702-0016-02 Engine View Diagrams & Manuals
281702-0020-01 Engine View Diagrams & Manuals
281702-0111-01 Engine View Diagrams & Manuals
281702-0129-01 Engine View Diagrams & Manuals
281702-0136-01 Engine View Diagrams & Manuals
281702-0139-01 Engine View Diagrams & Manuals
281702-0141-01 Engine View Diagrams & Manuals
281702-0141-02 Engine View Diagrams & Manuals
281702-0146-01 Engine View Diagrams & Manuals
281702-0152-01 Engine View Diagrams & Manuals
281702-0154-01 Engine View Diagrams & Manuals
281702-0159-01 Engine View Diagrams & Manuals
281702-0164-01 Engine View Diagrams & Manuals
281702-0167-01 Engine View Diagrams & Manuals
281702-0172-01 Engine View Diagrams & Manuals
281702-0178-99 Engine View Diagrams & Manuals
281702-0183-01 Engine View Diagrams & Manuals
281702-0220-99 Engine View Diagrams & Manuals
281702-0221-99 Engine View Diagrams & Manuals
281702-0224-99 Engine View Diagrams & Manuals
281702-0231-01 Engine View Diagrams & Manuals
281702-0235-01 Engine View Diagrams & Manuals
281702-0419-01 Engine View Diagrams & Manuals
281702-4015-01 Engine View Diagrams & Manuals
281702-4015-02 Engine View Diagrams & Manuals
281702-4016-01 Engine View Diagrams & Manuals
281702-4020-01 Engine View Diagrams & Manuals
281706-0180-01 Engine View Diagrams & Manuals
281706-0186-01 Engine View Diagrams & Manuals
281706-0193-01 Engine View Diagrams & Manuals
281706-0203-01 Engine View Diagrams & Manuals
281707-0002-99 Engine View Diagrams & Manuals
281707-0025-01 Engine View Diagrams & Manuals
281707-0026-01 Engine View Diagrams & Manuals
281707-0028-01 Engine View Diagrams & Manuals
281707-0028-02 Engine View Diagrams & Manuals
281707-0029-01 Engine View Diagrams & Manuals
281707-0029-02 Engine View Diagrams & Manuals
281707-0029-03 Engine View Diagrams & Manuals
281707-0030-01 Engine View Diagrams & Manuals
281707-0112-01 Engine View Diagrams & Manuals
281707-0118-01 Engine View Diagrams & Manuals
281707-0119-01 Engine View Diagrams & Manuals
281707-0125-01 Engine View Diagrams & Manuals
281707-0126-01 Engine View Diagrams & Manuals
281707-0127-01 Engine View Diagrams & Manuals
281707-0127-02 Engine View Diagrams & Manuals
281707-0128-01 Engine View Diagrams & Manuals
281707-0130-01 Engine View Diagrams & Manuals
281707-0131-01 Engine View Diagrams & Manuals
281707-0132-01 Engine View Diagrams & Manuals
281707-0133-01 Engine View Diagrams & Manuals
281707-0134-01 Engine View Diagrams & Manuals
281707-0135-01 Engine View Diagrams & Manuals
281707-0137-01 Engine View Diagrams & Manuals
281707-0138-01 Engine View Diagrams & Manuals
281707-0138-02 Engine View Diagrams & Manuals
281707-0140-01 Engine View Diagrams & Manuals
281707-0142-01 Engine View Diagrams & Manuals
281707-0143-01 Engine View Diagrams & Manuals
281707-0143-02 Engine View Diagrams & Manuals
281707-0144-01 Engine View Diagrams & Manuals
281707-0145-99 Engine View Diagrams & Manuals
281707-0147-01 Engine View Diagrams & Manuals
281707-0148-01 Engine View Diagrams & Manuals
281707-0149-01 Engine View Diagrams & Manuals
281707-0150-01 Engine View Diagrams & Manuals
281707-0151-01 Engine View Diagrams & Manuals
281707-0153-01 Engine View Diagrams & Manuals
281707-0155-01 Engine View Diagrams & Manuals
281707-0155-02 Engine View Diagrams & Manuals
281707-0156-01 Engine View Diagrams & Manuals
281707-0157-01 Engine View Diagrams & Manuals
281707-0158-01 Engine View Diagrams & Manuals
281707-0160-01 Engine View Diagrams & Manuals
281707-0161-01 Engine View Diagrams & Manuals
281707-0162-01 Engine View Diagrams & Manuals
281707-0163-01 Engine View Diagrams & Manuals
281707-0163-02 Engine View Diagrams & Manuals
281707-0165-01 Engine View Diagrams & Manuals
281707-0166-01 Engine View Diagrams & Manuals
281707-0168-01 Engine View Diagrams & Manuals
281707-0168-02 Engine View Diagrams & Manuals
281707-0169-01 Engine View Diagrams & Manuals
281707-0170-01 Engine View Diagrams & Manuals
281707-0171-01 Engine View Diagrams & Manuals
281707-0173-01 Engine View Diagrams & Manuals
281707-0174-01 Engine View Diagrams & Manuals
281707-0175-01 Engine View Diagrams & Manuals
281707-0176-01 Engine View Diagrams & Manuals
281707-0177-01 Engine View Diagrams & Manuals
281707-0179-01 Engine View Diagrams & Manuals
281707-0181-01 Engine View Diagrams & Manuals
281707-0182-01 Engine View Diagrams & Manuals
281707-0184-01 Engine View Diagrams & Manuals
281707-0185-01 Engine View Diagrams & Manuals
281707-0187-01 Engine View Diagrams & Manuals
281707-0188-01 Engine View Diagrams & Manuals
281707-0189-01 Engine View Diagrams & Manuals
281707-0190-01 Engine View Diagrams & Manuals
281707-0191-01 Engine View Diagrams & Manuals
281707-0192-01 Engine View Diagrams & Manuals
281707-0194-01 Engine View Diagrams & Manuals
281707-0195-01 Engine View Diagrams & Manuals
281707-0196-01 Engine View Diagrams & Manuals
281707-0197-01 Engine View Diagrams & Manuals
281707-0198-01 Engine View Diagrams & Manuals
281707-0199-01 Engine View Diagrams & Manuals
281707-0200-01 Engine View Diagrams & Manuals
281707-0200-02 Engine View Diagrams & Manuals
281707-0201-01 Engine View Diagrams & Manuals
281707-0202-01 Engine View Diagrams & Manuals
281707-0204-01 Engine View Diagrams & Manuals
281707-0205-01 Engine View Diagrams & Manuals
281707-0205-02 Engine View Diagrams & Manuals
281707-0206-01 Engine View Diagrams & Manuals
281707-0207-01 Engine View Diagrams & Manuals
281707-0208-01 Engine View Diagrams & Manuals
281707-0209-01 Engine View Diagrams & Manuals
281707-0210-01 Engine View Diagrams & Manuals
281707-0211-01 Engine View Diagrams & Manuals
281707-0212-01 Engine View Diagrams & Manuals
281707-0213-01 Engine View Diagrams & Manuals
281707-0214-01 Engine View Diagrams & Manuals
281707-0215-01 Engine View Diagrams & Manuals
281707-0216-01 Engine View Diagrams & Manuals
281707-0217-01 Engine View Diagrams & Manuals
281707-0217-02 Engine View Diagrams & Manuals
281707-0218-99 Engine View Diagrams & Manuals
281707-0219-01 Engine View Diagrams & Manuals
281707-0222-01 Engine View Diagrams & Manuals
281707-0223-01 Engine View Diagrams & Manuals
281707-0225-01 Engine View Diagrams & Manuals
281707-0226-01 Engine View Diagrams & Manuals
281707-0227-99 Engine View Diagrams & Manuals
281707-0228-01 Engine View Diagrams & Manuals
281707-0229-01 Engine View Diagrams & Manuals
281707-0230-99 Engine View Diagrams & Manuals
281707-0232-01 Engine View Diagrams & Manuals
281707-0233-01 Engine View Diagrams & Manuals
281707-0234-99 Engine View Diagrams & Manuals
281707-0401-01 Engine View Diagrams & Manuals
281707-0410-01 Engine View Diagrams & Manuals
281707-0411-01 Engine View Diagrams & Manuals
281707-0412-01 Engine View Diagrams & Manuals
281707-0413-01 Engine View Diagrams & Manuals
281707-0414-01 Engine View Diagrams & Manuals
281707-0414-02 Engine View Diagrams & Manuals
281707-0414-03 Engine View Diagrams & Manuals
281707-0415-01 Engine View Diagrams & Manuals
281707-0416-01 Engine View Diagrams & Manuals
281707-0417-01 Engine View Diagrams & Manuals
281707-0418-01 Engine View Diagrams & Manuals
281707-0420-01 Engine View Diagrams & Manuals
281707-0421-01 Engine View Diagrams & Manuals
281707-0422-01 Engine View Diagrams & Manuals
281707-0422-02 Engine View Diagrams & Manuals
281707-0423-01 Engine View Diagrams & Manuals
281707-0424-01 Engine View Diagrams & Manuals
281707-0425-01 Engine View Diagrams & Manuals
281707-0426-99 Engine View Diagrams & Manuals
281707-0427-01 Engine View Diagrams & Manuals
281707-0428-01 Engine View Diagrams & Manuals
281707-0429-01 Engine View Diagrams & Manuals
281707-0430-01 Engine View Diagrams & Manuals
281707-0431-01 Engine View Diagrams & Manuals
281707-0432-01 Engine View Diagrams & Manuals
281707-0433-99 Engine View Diagrams & Manuals
281707-0434-01 Engine View Diagrams & Manuals
281707-0435-01 Engine View Diagrams & Manuals
281707-0436-99 Engine View Diagrams & Manuals
281707-0437-01 Engine View Diagrams & Manuals
281707-4001-01 Engine View Diagrams & Manuals
281707-4002-99 Engine View Diagrams & Manuals
281707-4003-01 Engine View Diagrams & Manuals
281707-4003-02 Engine View Diagrams & Manuals
281707-4004-01 Engine View Diagrams & Manuals
281707-4029-01 Engine View Diagrams & Manuals
281707-4029-02 Engine View Diagrams & Manuals
281707-4030-01 Engine View Diagrams & Manuals
281707-7001-99 Engine View Diagrams & Manuals
283702-0102-01 Engine View Diagrams & Manuals
283702-0515-A1 Engine View Diagrams & Manuals
283702-1015-E1 Engine View Diagrams & Manuals
283702-1041-E1 Engine View Diagrams & Manuals
283702-1107-E1 Engine View Diagrams & Manuals
283702-4015-01 Engine View Diagrams & Manuals
283702-4015-02 Engine View Diagrams & Manuals
283702-4016-01 Engine View Diagrams & Manuals
283702-4516-E1 Engine View Diagrams & Manuals
283707-0101-01 Engine View Diagrams & Manuals
283707-0109-01 Engine View Diagrams & Manuals
283707-0110-01 Engine View Diagrams & Manuals
283707-0111-01 Engine View Diagrams & Manuals
283707-0115-01 Engine View Diagrams & Manuals
283707-0116-01 Engine View Diagrams & Manuals
283707-0117-01 Engine View Diagrams & Manuals
283707-0118-01 Engine View Diagrams & Manuals
283707-0118-02 Engine View Diagrams & Manuals
283707-0119-01 Engine View Diagrams & Manuals
283707-0120-01 Engine View Diagrams & Manuals
283707-0123-01 Engine View Diagrams & Manuals
283707-0124-01 Engine View Diagrams & Manuals
283707-0125-01 Engine View Diagrams & Manuals
283707-0126-01 Engine View Diagrams & Manuals
283707-0127-01 Engine View Diagrams & Manuals
283707-0128-01 Engine View Diagrams & Manuals
283707-0129-01 Engine View Diagrams & Manuals
283707-0129-02 Engine View Diagrams & Manuals
283707-0131-01 Engine View Diagrams & Manuals
283707-0134-01 Engine View Diagrams & Manuals
283707-0136-01 Engine View Diagrams & Manuals
283707-0137-01 Engine View Diagrams & Manuals
283707-0138-01 Engine View Diagrams & Manuals
283707-0139-01 Engine View Diagrams & Manuals
283707-0140-01 Engine View Diagrams & Manuals
283707-0147-01 Engine View Diagrams & Manuals
283707-0148-01 Engine View Diagrams & Manuals
283707-0149-01 Engine View Diagrams & Manuals
283707-0152-01 Engine View Diagrams & Manuals
283707-0153-01 Engine View Diagrams & Manuals
283707-0156-01 Engine View Diagrams & Manuals
283707-0157-01 Engine View Diagrams & Manuals
283707-0157-02 Engine View Diagrams & Manuals
283707-0159-01 Engine View Diagrams & Manuals
283707-0160-01 Engine View Diagrams & Manuals
283707-0161-01 Engine View Diagrams & Manuals
283707-0162-01 Engine View Diagrams & Manuals
283707-0165-01 Engine View Diagrams & Manuals
283707-0166-01 Engine View Diagrams & Manuals
283707-0167-01 Engine View Diagrams & Manuals
283707-0217-02 Engine View Diagrams & Manuals
283707-0517-A1 Engine View Diagrams & Manuals
283707-0604-A1 Engine View Diagrams & Manuals
283707-0634-A1 Engine View Diagrams & Manuals
283707-0639-A1 Engine View Diagrams & Manuals
283707-0667-A1 Engine View Diagrams & Manuals
283707-1068-E1 Engine View Diagrams & Manuals
283707-1101-E1 Engine View Diagrams & Manuals
283707-1136-E1 Engine View Diagrams & Manuals
283707-1137-E1 Engine View Diagrams & Manuals
283707-1139-E1 Engine View Diagrams & Manuals
283707-1156-E1 Engine View Diagrams & Manuals
283707-1162-E1 Engine View Diagrams & Manuals
283707-1166-E1 Engine View Diagrams & Manuals
283707-1167-E1 Engine View Diagrams & Manuals
283707-1217-E1 Engine View Diagrams & Manuals
283707-4003-01 Engine View Diagrams & Manuals
283707-4029-01 Engine View Diagrams & Manuals
283707-4030-01 Engine View Diagrams & Manuals
283707-4030-02 Engine View Diagrams & Manuals
286702-0131-01 Engine View Diagrams & Manuals
286702-0139-01 Engine View Diagrams & Manuals
286702-0418-01 Engine View Diagrams & Manuals
286702-0622-A1 Engine View Diagrams & Manuals
286702-1015-E1 Engine View Diagrams & Manuals
286702-1016-E1 Engine View Diagrams & Manuals
286702-1107-E1 Engine View Diagrams & Manuals
286702-1122-E1 Engine View Diagrams & Manuals
286702-1139-E1 Engine View Diagrams & Manuals
286702-1193-E1 Engine View Diagrams & Manuals
286702-4015-01 Engine View Diagrams & Manuals
286702-4016-01 Engine View Diagrams & Manuals
286702-4515-A1 Engine View Diagrams & Manuals
286702-4515-E1 Engine View Diagrams & Manuals
286702-4515-E2 Engine View Diagrams & Manuals
286702-4516-A1 Engine View Diagrams & Manuals
286702-4516-E1 Engine View Diagrams & Manuals
286707-0102-01 Engine View Diagrams & Manuals
286707-0103-01 Engine View Diagrams & Manuals
286707-0111-01 Engine View Diagrams & Manuals
286707-0111-02 Engine View Diagrams & Manuals
286707-0112-01 Engine View Diagrams & Manuals
286707-0113-01 Engine View Diagrams & Manuals
286707-0114-01 Engine View Diagrams & Manuals
286707-0115-01 Engine View Diagrams & Manuals
286707-0116-01 Engine View Diagrams & Manuals
286707-0117-01 Engine View Diagrams & Manuals
286707-0118-01 Engine View Diagrams & Manuals
286707-0119-01 Engine View Diagrams & Manuals
286707-0120-01 Engine View Diagrams & Manuals
286707-0121-01 Engine View Diagrams & Manuals
286707-0122-01 Engine View Diagrams & Manuals
286707-0123-01 Engine View Diagrams & Manuals
286707-0124-01 Engine View Diagrams & Manuals
286707-0125-01 Engine View Diagrams & Manuals
286707-0126-01 Engine View Diagrams & Manuals
286707-0127-01 Engine View Diagrams & Manuals
286707-0128-01 Engine View Diagrams & Manuals
286707-0129-01 Engine View Diagrams & Manuals
286707-0130-01 Engine View Diagrams & Manuals
286707-0132-01 Engine View Diagrams & Manuals
286707-0134-01 Engine View Diagrams & Manuals
286707-0136-01 Engine View Diagrams & Manuals
286707-0137-01 Engine View Diagrams & Manuals
286707-0138-01 Engine View Diagrams & Manuals
286707-0138-02 Engine View Diagrams & Manuals
286707-0140-01 Engine View Diagrams & Manuals
286707-0140-02 Engine View Diagrams & Manuals
286707-0141-01 Engine View Diagrams & Manuals
286707-0142-01 Engine View Diagrams & Manuals
286707-0143-01 Engine View Diagrams & Manuals
286707-0144-01 Engine View Diagrams & Manuals
286707-0145-01 Engine View Diagrams & Manuals
286707-0145-02 Engine View Diagrams & Manuals
286707-0146-01 Engine View Diagrams & Manuals
286707-0147-01 Engine View Diagrams & Manuals
286707-0148-01 Engine View Diagrams & Manuals
286707-0149-01 Engine View Diagrams & Manuals
286707-0149-02 Engine View Diagrams & Manuals
286707-0150-01 Engine View Diagrams & Manuals
286707-0151-01 Engine View Diagrams & Manuals
286707-0152-01 Engine View Diagrams & Manuals
286707-0153-01 Engine View Diagrams & Manuals
286707-0155-01 Engine View Diagrams & Manuals
286707-0156-01 Engine View Diagrams & Manuals
286707-0157-01 Engine View Diagrams & Manuals
286707-0158-01 Engine View Diagrams & Manuals
286707-0158-02 Engine View Diagrams & Manuals
286707-0159-01 Engine View Diagrams & Manuals
286707-0160-01 Engine View Diagrams & Manuals
286707-0161-01 Engine View Diagrams & Manuals
286707-0162-01 Engine View Diagrams & Manuals
286707-0163-01 Engine View Diagrams & Manuals
286707-0164-01 Engine View Diagrams & Manuals
286707-0166-01 Engine View Diagrams & Manuals
286707-0167-01 Engine View Diagrams & Manuals
286707-0167-03 Engine View Diagrams & Manuals
286707-0167-04 Engine View Diagrams & Manuals
286707-0169-01 Engine View Diagrams & Manuals
286707-0170-01 Engine View Diagrams & Manuals
286707-0171-01 Engine View Diagrams & Manuals
286707-0172-01 Engine View Diagrams & Manuals
286707-0173-01 Engine View Diagrams & Manuals
286707-0174-01 Engine View Diagrams & Manuals
286707-0175-01 Engine View Diagrams & Manuals
286707-0176-01 Engine View Diagrams & Manuals
286707-0177-01 Engine View Diagrams & Manuals
286707-0179-01 Engine View Diagrams & Manuals
286707-0182-01 Engine View Diagrams & Manuals
286707-0183-01 Engine View Diagrams & Manuals
286707-0184-01 Engine View Diagrams & Manuals
286707-0185-01 Engine View Diagrams & Manuals
286707-0186-01 Engine View Diagrams & Manuals
286707-0187-01 Engine View Diagrams & Manuals
286707-0190-01 Engine View Diagrams & Manuals
286707-0401-01 Engine View Diagrams & Manuals
286707-0403-01 Engine View Diagrams & Manuals
286707-0411-01 Engine View Diagrams & Manuals
286707-0412-01 Engine View Diagrams & Manuals
286707-0413-01 Engine View Diagrams & Manuals
286707-0414-01 Engine View Diagrams & Manuals
286707-0416-01 Engine View Diagrams & Manuals
286707-0417-01 Engine View Diagrams & Manuals
286707-0419-01 Engine View Diagrams & Manuals
286707-0420-01 Engine View Diagrams & Manuals
286707-0422-01 Engine View Diagrams & Manuals
286707-0423-01 Engine View Diagrams & Manuals
286707-0424-01 Engine View Diagrams & Manuals
286707-0425-01 Engine View Diagrams & Manuals
286707-0437-01 Engine View Diagrams & Manuals
286707-0438-01 Engine View Diagrams & Manuals
286707-0439-01 Engine View Diagrams & Manuals
286707-0441-01 Engine View Diagrams & Manuals
286707-0442-01 Engine View Diagrams & Manuals
286707-0443-01 Engine View Diagrams & Manuals
286707-0450-01 Engine View Diagrams & Manuals
286707-0452-01 Engine View Diagrams & Manuals
286707-0453-01 Engine View Diagrams & Manuals
286707-0454-01 Engine View Diagrams & Manuals
286707-0455-01 Engine View Diagrams & Manuals
286707-0604-A1 Engine View Diagrams & Manuals
286707-0634-A1 Engine View Diagrams & Manuals
286707-1021-E1 Engine View Diagrams & Manuals
286707-1025-E1 Engine View Diagrams & Manuals
286707-1026-E1 Engine View Diagrams & Manuals
286707-1028-E1 Engine View Diagrams & Manuals
286707-1028-E2 Engine View Diagrams & Manuals
286707-1029-E1 Engine View Diagrams & Manuals
286707-1029-E2 Engine View Diagrams & Manuals
286707-1102-E1 Engine View Diagrams & Manuals
286707-1103-E1 Engine View Diagrams & Manuals
286707-1137-E1 Engine View Diagrams & Manuals
286707-1141-E1 Engine View Diagrams & Manuals
286707-1142-E1 Engine View Diagrams & Manuals
286707-1143-E1 Engine View Diagrams & Manuals
286707-1143-E2 Engine View Diagrams & Manuals
286707-1152-E1 Engine View Diagrams & Manuals
286707-1160-E1 Engine View Diagrams & Manuals
286707-1162-E1 Engine View Diagrams & Manuals
286707-1163-E1 Engine View Diagrams & Manuals
286707-1172-E1 Engine View Diagrams & Manuals
286707-1182-E1 Engine View Diagrams & Manuals
286707-1183-E1 Engine View Diagrams & Manuals
286707-1184-E1 Engine View Diagrams & Manuals
286707-1185-E1 Engine View Diagrams & Manuals
286707-1186-E1 Engine View Diagrams & Manuals
286707-1187-E1 Engine View Diagrams & Manuals
286707-1188-E1 Engine View Diagrams & Manuals
286707-1190-E1 Engine View Diagrams & Manuals
286707-1194-E1 Engine View Diagrams & Manuals
286707-1196-E1 Engine View Diagrams & Manuals
286707-1197-E1 Engine View Diagrams & Manuals
286707-1198-E1 Engine View Diagrams & Manuals
286707-1199-E1 Engine View Diagrams & Manuals
286707-1200-E1 Engine View Diagrams & Manuals
286707-1202-E1 Engine View Diagrams & Manuals
286707-1205-E1 Engine View Diagrams & Manuals
286707-1206-E1 Engine View Diagrams & Manuals
286707-1424-E1 Engine View Diagrams & Manuals
286707-1425-E1 Engine View Diagrams & Manuals
286707-4020-01 Engine View Diagrams & Manuals
286707-4021-01 Engine View Diagrams & Manuals
286707-4025-01 Engine View Diagrams & Manuals
286707-4026-01 Engine View Diagrams & Manuals
286707-4027-01 Engine View Diagrams & Manuals
286707-4028-01 Engine View Diagrams & Manuals
286707-4028-02 Engine View Diagrams & Manuals
286707-4029-01 Engine View Diagrams & Manuals
286707-4029-02 Engine View Diagrams & Manuals
286707-4029-03 Engine View Diagrams & Manuals
286707-4030-01 Engine View Diagrams & Manuals
286707-4031-01 Engine View Diagrams & Manuals
286707-4520-A1 Engine View Diagrams & Manuals
286707-4520-E1 Engine View Diagrams & Manuals
286707-4521-E1 Engine View Diagrams & Manuals
286707-4525-A1 Engine View Diagrams & Manuals
286707-4525-E1 Engine View Diagrams & Manuals
286707-4526-A1 Engine View Diagrams & Manuals
286707-4526-E1 Engine View Diagrams & Manuals
286707-4527-A1 Engine View Diagrams & Manuals
286707-4528-A1 Engine View Diagrams & Manuals
286707-4528-E1 Engine View Diagrams & Manuals
286707-4528-E2 Engine View Diagrams & Manuals
286707-4529-A1 Engine View Diagrams & Manuals
286707-4529-A2 Engine View Diagrams & Manuals
286707-4529-E1 Engine View Diagrams & Manuals
286707-4529-E2 Engine View Diagrams & Manuals
289702-1107-E1 Engine View Diagrams & Manuals
289702-1151-E1 Engine View Diagrams & Manuals
289707-0101-01 Engine View Diagrams & Manuals
289707-0102-01 Engine View Diagrams & Manuals
289707-0103-01 Engine View Diagrams & Manuals
289707-0113-01 Engine View Diagrams & Manuals
289707-0114-01 Engine View Diagrams & Manuals
289707-0114-02 Engine View Diagrams & Manuals
289707-0115-01 Engine View Diagrams & Manuals
289707-0116-01 Engine View Diagrams & Manuals
289707-0117-01 Engine View Diagrams & Manuals
289707-0120-01 Engine View Diagrams & Manuals
289707-0121-01 Engine View Diagrams & Manuals
289707-0130-01 Engine View Diagrams & Manuals
289707-0150-01 Engine View Diagrams & Manuals
289707-0154-01 Engine View Diagrams & Manuals
289707-0168-01 Engine View Diagrams & Manuals
289707-0169-01 Engine View Diagrams & Manuals
289707-0170-01 Engine View Diagrams & Manuals
289707-0171-01 Engine View Diagrams & Manuals
289707-0179-01 Engine View Diagrams & Manuals
289707-0186-01 Engine View Diagrams & Manuals
289707-0604-A1 Engine View Diagrams & Manuals
289707-0615-A1 Engine View Diagrams & Manuals
289707-0654-A1 Engine View Diagrams & Manuals
289707-0686-A1 Engine View Diagrams & Manuals
289707-0689-A1 Engine View Diagrams & Manuals
289707-1101-E1 Engine View Diagrams & Manuals
289707-1102-E1 Engine View Diagrams & Manuals
289707-1110-E1 Engine View Diagrams & Manuals
289707-1119-E1 Engine View Diagrams & Manuals
289707-1120-E1 Engine View Diagrams & Manuals
289707-1121-E1 Engine View Diagrams & Manuals
289707-1150-E1 Engine View Diagrams & Manuals
289707-1154-E1 Engine View Diagrams & Manuals
289707-1155-E1 Engine View Diagrams & Manuals
289707-1171-E1 Engine View Diagrams & Manuals
289707-1179-E1 Engine View Diagrams & Manuals
289707-1179-E2 Engine View Diagrams & Manuals
289707-1179-E3 Engine View Diagrams & Manuals
289707-1186-E1 Engine View Diagrams & Manuals
289707-1199-E1 Engine View Diagrams & Manuals
289707-1200-E1 Engine View Diagrams & Manuals
289707-1201-E1 Engine View Diagrams & Manuals
289707-1202-E1 Engine View Diagrams & Manuals
289707-1204-E1 Engine View Diagrams & Manuals
290442-0023-01 Engine View Diagrams & Manuals
290442-0023-02 Engine View Diagrams & Manuals
290442-0031-01 Engine View Diagrams & Manuals
290442-0031-02 Engine View Diagrams & Manuals
290442-0031-99 Engine View Diagrams & Manuals
290442-0034-01 Engine View Diagrams & Manuals
290442-0034-99 Engine View Diagrams & Manuals
290442-0040-01 Engine View Diagrams & Manuals
290442-0040-02 Engine View Diagrams & Manuals
290442-0043-01 Engine View Diagrams & Manuals
290442-0043-02 Engine View Diagrams & Manuals
290442-0044-01 Engine View Diagrams & Manuals
290442-0047-01 Engine View Diagrams & Manuals
290442-0047-02 Engine View Diagrams & Manuals
290442-0053-01 Engine View Diagrams & Manuals
290442-0053-02 Engine View Diagrams & Manuals
290442-0057-01 Engine View Diagrams & Manuals
290442-0057-02 Engine View Diagrams & Manuals
290442-0059-01 Engine View Diagrams & Manuals
290442-0060-01 Engine View Diagrams & Manuals
290442-0061-01 Engine View Diagrams & Manuals
290442-0061-03 Engine View Diagrams & Manuals
290442-0062-01 Engine View Diagrams & Manuals
290442-0062-02 Engine View Diagrams & Manuals
290442-0063-99 Engine View Diagrams & Manuals
290442-0070-01 Engine View Diagrams & Manuals
290442-0070-02 Engine View Diagrams & Manuals
290442-0084-99 Engine View Diagrams & Manuals
290442-0085-99 Engine View Diagrams & Manuals
290442-0102-01 Engine View Diagrams & Manuals
290442-0122-01 Engine View Diagrams & Manuals
290442-0123-01 Engine View Diagrams & Manuals
290442-0307-01 Engine View Diagrams & Manuals
290442-0311-99 Engine View Diagrams & Manuals
290442-0318-01 Engine View Diagrams & Manuals
290442-0320-01 Engine View Diagrams & Manuals
290442-0320-03 Engine View Diagrams & Manuals
290442-0329-99 Engine View Diagrams & Manuals
290442-0330-99 Engine View Diagrams & Manuals
290442-0340-01 Engine View Diagrams & Manuals
290442-0340-02 Engine View Diagrams & Manuals
290442-0343-99 Engine View Diagrams & Manuals
290442-0344-99 Engine View Diagrams & Manuals
290442-0347-01 Engine View Diagrams & Manuals
290442-0347-02 Engine View Diagrams & Manuals
290442-0347-03 Engine View Diagrams & Manuals
290442-0347-05 Engine View Diagrams & Manuals
290442-0350-01 Engine View Diagrams & Manuals
290442-0353-01 Engine View Diagrams & Manuals
290442-0357-01 Engine View Diagrams & Manuals
290442-0357-02 Engine View Diagrams & Manuals
290442-0359-01 Engine View Diagrams & Manuals
290442-0360-01 Engine View Diagrams & Manuals
290442-0360-03 Engine View Diagrams & Manuals
290442-0361-01 Engine View Diagrams & Manuals
290442-0361-03 Engine View Diagrams & Manuals
290442-0362-99 Engine View Diagrams & Manuals
290442-0363-01 Engine View Diagrams & Manuals
290442-0366-01 Engine View Diagrams & Manuals
290442-0370-01 Engine View Diagrams & Manuals
290442-0370-02 Engine View Diagrams & Manuals
290442-0371-99 Engine View Diagrams & Manuals
290442-0372-01 Engine View Diagrams & Manuals
290442-0384-99 Engine View Diagrams & Manuals
290442-0385-01 Engine View Diagrams & Manuals
290442-0390-01 Engine View Diagrams & Manuals
290442-0390-02 Engine View Diagrams & Manuals
290442-0391-01 Engine View Diagrams & Manuals
290442-0395-99 Engine View Diagrams & Manuals
290442-0398-01 Engine View Diagrams & Manuals
290442-0398-02 Engine View Diagrams & Manuals
290442-0402-01 Engine View Diagrams & Manuals
290442-0405-99 Engine View Diagrams & Manuals
290442-0408-01 Engine View Diagrams & Manuals
290442-0409-01 Engine View Diagrams & Manuals
290442-0412-01 Engine View Diagrams & Manuals
290442-0415-01 Engine View Diagrams & Manuals
290442-0416-01 Engine View Diagrams & Manuals
290442-0416-02 Engine View Diagrams & Manuals
290442-0422-01 Engine View Diagrams & Manuals
290442-0426-01 Engine View Diagrams & Manuals
290442-0427-01 Engine View Diagrams & Manuals
290442-0433-01 Engine View Diagrams & Manuals
290442-0436-01 Engine View Diagrams & Manuals
290442-0438-99 Engine View Diagrams & Manuals
290442-0443-01 Engine View Diagrams & Manuals
290442-0445-01 Engine View Diagrams & Manuals
290442-0446-01 Engine View Diagrams & Manuals
290442-0447-01 Engine View Diagrams & Manuals
290442-0447-02 Engine View Diagrams & Manuals
290442-0448-01 Engine View Diagrams & Manuals
290442-0449-99 Engine View Diagrams & Manuals
290442-0454-01 Engine View Diagrams & Manuals
290442-0457-01 Engine View Diagrams & Manuals
290442-0458-01 Engine View Diagrams & Manuals
290442-0459-01 Engine View Diagrams & Manuals
290442-0461-99 Engine View Diagrams & Manuals
290442-0500-01 Engine View Diagrams & Manuals
290442-0501-01 Engine View Diagrams & Manuals
290442-0503-01 Engine View Diagrams & Manuals
290442-0505-01 Engine View Diagrams & Manuals
290442-0506-99 Engine View Diagrams & Manuals
290442-1066-A1 Engine View Diagrams & Manuals
290442-1072-A1 Engine View Diagrams & Manuals
290442-1133-A1 Engine View Diagrams & Manuals
290442-1134-99 Engine View Diagrams & Manuals
290442-1135-99 Engine View Diagrams & Manuals
290442-1136-A1 Engine View Diagrams & Manuals
290442-1146-A1 Engine View Diagrams & Manuals
290442-1147-A1 Engine View Diagrams & Manuals
290442-1148-A1 Engine View Diagrams & Manuals
290442-1157-A1 Engine View Diagrams & Manuals
290442-1158-A1 Engine View Diagrams & Manuals
290442-1159-A1 Engine View Diagrams & Manuals
290442-1161-99 Engine View Diagrams & Manuals
290442-1191-A1 Engine View Diagrams & Manuals
290442-1205-A1 Engine View Diagrams & Manuals
290442-1206-A1 Engine View Diagrams & Manuals
290446-0124-01 Engine View Diagrams & Manuals
290446-0407-01 Engine View Diagrams & Manuals
290446-0410-01 Engine View Diagrams & Manuals
290446-0414-01 Engine View Diagrams & Manuals
290446-0421-01 Engine View Diagrams & Manuals
290446-0429-01 Engine View Diagrams & Manuals
290446-0430-01 Engine View Diagrams & Manuals
290446-0432-99 Engine View Diagrams & Manuals
290446-0434-01 Engine View Diagrams & Manuals
290446-0435-01 Engine View Diagrams & Manuals
290446-0451-01 Engine View Diagrams & Manuals
290446-1114-A1 Engine View Diagrams & Manuals
290446-1163-A1 Engine View Diagrams & Manuals
290447-0021-99 Engine View Diagrams & Manuals
290447-0022-01 Engine View Diagrams & Manuals
290447-0024-99 Engine View Diagrams & Manuals
290447-0026-01 Engine View Diagrams & Manuals
290447-0026-02 Engine View Diagrams & Manuals
290447-0026-03 Engine View Diagrams & Manuals
290447-0027-01 Engine View Diagrams & Manuals
290447-0028-99 Engine View Diagrams & Manuals
290447-0029-99 Engine View Diagrams & Manuals
290447-0030-99 Engine View Diagrams & Manuals
290447-0032-01 Engine View Diagrams & Manuals
290447-0032-02 Engine View Diagrams & Manuals
290447-0032-99 Engine View Diagrams & Manuals
290447-0033-01 Engine View Diagrams & Manuals
290447-0035-01 Engine View Diagrams & Manuals
290447-0035-99 Engine View Diagrams & Manuals
290447-0041-01 Engine View Diagrams & Manuals
290447-0041-02 Engine View Diagrams & Manuals
290447-0042-01 Engine View Diagrams & Manuals
290447-0042-02 Engine View Diagrams & Manuals
290447-0046-01 Engine View Diagrams & Manuals
290447-0046-02 Engine View Diagrams & Manuals
290447-0048-01 Engine View Diagrams & Manuals
290447-0048-02 Engine View Diagrams & Manuals
290447-0049-01 Engine View Diagrams & Manuals
290447-0049-02 Engine View Diagrams & Manuals
290447-0051-01 Engine View Diagrams & Manuals
290447-0051-02 Engine View Diagrams & Manuals
290447-0052-01 Engine View Diagrams & Manuals
290447-0052-02 Engine View Diagrams & Manuals
290447-0054-01 Engine View Diagrams & Manuals
290447-0056-01 Engine View Diagrams & Manuals
290447-0056-02 Engine View Diagrams & Manuals
290447-0058-01 Engine View Diagrams & Manuals
290447-0058-02 Engine View Diagrams & Manuals
290447-0064-99 Engine View Diagrams & Manuals
290447-0073-99 Engine View Diagrams & Manuals
290447-0074-99 Engine View Diagrams & Manuals
290447-0075-99 Engine View Diagrams & Manuals
290447-0076-01 Engine View Diagrams & Manuals
290447-0078-99 Engine View Diagrams & Manuals
290447-0082-99 Engine View Diagrams & Manuals
290447-0100-01 Engine View Diagrams & Manuals
290447-0120-01 Engine View Diagrams & Manuals
290447-0121-01 Engine View Diagrams & Manuals
290447-0125-01 Engine View Diagrams & Manuals
290447-0314-99 Engine View Diagrams & Manuals
290447-0316-99 Engine View Diagrams & Manuals
290447-0326-01 Engine View Diagrams & Manuals
290447-0327-99 Engine View Diagrams & Manuals
290447-0328-99 Engine View Diagrams & Manuals
290447-0341-99 Engine View Diagrams & Manuals
290447-0342-01 Engine View Diagrams & Manuals
290447-0346-01 Engine View Diagrams & Manuals
290447-0346-02 Engine View Diagrams & Manuals
290447-0348-01 Engine View Diagrams & Manuals
290447-0348-02 Engine View Diagrams & Manuals
290447-0348-03 Engine View Diagrams & Manuals
290447-0349-99 Engine View Diagrams & Manuals
290447-0351-01 Engine View Diagrams & Manuals
290447-0352-01 Engine View Diagrams & Manuals
290447-0354-01 Engine View Diagrams & Manuals
290447-0355-01 Engine View Diagrams & Manuals
290447-0356-01 Engine View Diagrams & Manuals
290447-0357-99 Engine View Diagrams & Manuals
290447-0358-01 Engine View Diagrams & Manuals
290447-0364-01 Engine View Diagrams & Manuals
290447-0364-03 Engine View Diagrams & Manuals
290447-0373-01 Engine View Diagrams & Manuals
290447-0374-01 Engine View Diagrams & Manuals
290447-0375-01 Engine View Diagrams & Manuals
290447-0376-01 Engine View Diagrams & Manuals
290447-0377-01 Engine View Diagrams & Manuals
290447-0378-01 Engine View Diagrams & Manuals
290447-0382-01 Engine View Diagrams & Manuals
290447-0392-99 Engine View Diagrams & Manuals
290447-0394-01 Engine View Diagrams & Manuals
290447-0406-01 Engine View Diagrams & Manuals
290447-0411-01 Engine View Diagrams & Manuals
290447-0413-01 Engine View Diagrams & Manuals
290447-0417-01 Engine View Diagrams & Manuals
290447-0418-01 Engine View Diagrams & Manuals
290447-0419-01 Engine View Diagrams & Manuals
290447-0420-01 Engine View Diagrams & Manuals
290447-0423-01 Engine View Diagrams & Manuals
290447-0425-01 Engine View Diagrams & Manuals
290447-0428-01 Engine View Diagrams & Manuals
290447-0431-01 Engine View Diagrams & Manuals
290447-0437-01 Engine View Diagrams & Manuals
290447-0439-01 Engine View Diagrams & Manuals
290447-0440-99 Engine View Diagrams & Manuals
290447-0441-01 Engine View Diagrams & Manuals
290447-0442-01 Engine View Diagrams & Manuals
290447-0444-01 Engine View Diagrams & Manuals
290447-0450-01 Engine View Diagrams & Manuals
290447-0452-01 Engine View Diagrams & Manuals
290447-0453-01 Engine View Diagrams & Manuals
290447-0460-01 Engine View Diagrams & Manuals
290447-0502-01 Engine View Diagrams & Manuals
290447-0504-01 Engine View Diagrams & Manuals
290447-1073-A1 Engine View Diagrams & Manuals
290447-1074-A1 Engine View Diagrams & Manuals
290447-1075-A1 Engine View Diagrams & Manuals
290447-1076-A1 Engine View Diagrams & Manuals
290447-1077-A1 Engine View Diagrams & Manuals
290447-1094-A1 Engine View Diagrams & Manuals
290447-1106-A1 Engine View Diagrams & Manuals
290447-1137-A1 Engine View Diagrams & Manuals
290447-1147-99 Engine View Diagrams & Manuals
290447-1149-A1 Engine View Diagrams & Manuals
290447-1152-A1 Engine View Diagrams & Manuals
290447-1153-A1 Engine View Diagrams & Manuals
290447-1154-A1 Engine View Diagrams & Manuals
290447-1160-A1 Engine View Diagrams & Manuals
290772-0020-99 Engine View Diagrams & Manuals
290772-0102-01 Engine View Diagrams & Manuals
290772-0402-01 Engine View Diagrams & Manuals
290777-0015-99 Engine View Diagrams & Manuals
290777-0016-99 Engine View Diagrams & Manuals
290777-0031-99 Engine View Diagrams & Manuals
290777-0033-99 Engine View Diagrams & Manuals
290777-0100-01 Engine View Diagrams & Manuals
290777-0106-01 Engine View Diagrams & Manuals
290777-0107-01 Engine View Diagrams & Manuals
290777-0108-01 Engine View Diagrams & Manuals
290777-0333-01 Engine View Diagrams & Manuals
290777-0333-02 Engine View Diagrams & Manuals
290777-0410-01 Engine View Diagrams & Manuals
294440-0414-01 Engine View Diagrams & Manuals
294440-0478-01 Engine View Diagrams & Manuals
294440-1114-A1 Engine View Diagrams & Manuals
294440-1178-A1 Engine View Diagrams & Manuals
294442-0102-01 Engine View Diagrams & Manuals
294442-0315-01 Engine View Diagrams & Manuals
294442-0318-01 Engine View Diagrams & Manuals
294442-0347-01 Engine View Diagrams & Manuals
294442-0357-01 Engine View Diagrams & Manuals
294442-0359-01 Engine View Diagrams & Manuals
294442-0360-01 Engine View Diagrams & Manuals
294442-0361-01 Engine View Diagrams & Manuals
294442-0363-01 Engine View Diagrams & Manuals
294442-0365-01 Engine View Diagrams & Manuals
294442-0365-02 Engine View Diagrams & Manuals
294442-0370-01 Engine View Diagrams & Manuals
294442-0370-02 Engine View Diagrams & Manuals
294442-0423-01 Engine View Diagrams & Manuals
294442-0427-01 Engine View Diagrams & Manuals
294442-0457-01 Engine View Diagrams & Manuals
294442-0460-01 Engine View Diagrams & Manuals
294442-0461-01 Engine View Diagrams & Manuals
294442-0479-01 Engine View Diagrams & Manuals
294442-0480-01 Engine View Diagrams & Manuals
294442-0481-01 Engine View Diagrams & Manuals
294442-0481-E1 Engine View Diagrams & Manuals
294442-1015-A1 Engine View Diagrams & Manuals
294442-1018-E1 Engine View Diagrams & Manuals
294442-1018-E2 Engine View Diagrams & Manuals
294442-1020-E1 Engine View Diagrams & Manuals
294442-1020-E9 Engine View Diagrams & Manuals
294442-1047-A1 Engine View Diagrams & Manuals
294442-1049-A1 Engine View Diagrams & Manuals
294442-1049-E1 Engine View Diagrams & Manuals
294442-1059-A1 Engine View Diagrams & Manuals
294442-1060-A1 Engine View Diagrams & Manuals
294442-1061-A1 Engine View Diagrams & Manuals
294442-1063-A1 Engine View Diagrams & Manuals
294442-1065-A1 Engine View Diagrams & Manuals
294442-1065-A2 Engine View Diagrams & Manuals
294442-1070-A1 Engine View Diagrams & Manuals
294442-1070-A2 Engine View Diagrams & Manuals
294442-1085-A1 Engine View Diagrams & Manuals
294442-1085-E1 Engine View Diagrams & Manuals
294442-1102-E1 Engine View Diagrams & Manuals
294442-1111-A1 Engine View Diagrams & Manuals
294442-1115-A1 Engine View Diagrams & Manuals
294442-1119-A1 Engine View Diagrams & Manuals
294442-1123-E1 Engine View Diagrams & Manuals
294442-1124-A1 Engine View Diagrams & Manuals
294442-1126-A1 Engine View Diagrams & Manuals
294442-1127-A1 Engine View Diagrams & Manuals
294442-1133-A1 Engine View Diagrams & Manuals
294442-1135-E1 Engine View Diagrams & Manuals
294442-1136-A1 Engine View Diagrams & Manuals
294442-1143-A1 Engine View Diagrams & Manuals
294442-1157-A1 Engine View Diagrams & Manuals
294442-1158-A1 Engine View Diagrams & Manuals
294442-1161-E1 Engine View Diagrams & Manuals
294442-1169-E1 Engine View Diagrams & Manuals
294442-1171-E1 Engine View Diagrams & Manuals
294442-1171-E9 Engine View Diagrams & Manuals
294442-1172-E1 Engine View Diagrams & Manuals
294442-1179-E1 Engine View Diagrams & Manuals
294442-1179-E9 Engine View Diagrams & Manuals
294442-1181-A1 Engine View Diagrams & Manuals
294442-1181-E1 Engine View Diagrams & Manuals
294442-1185-A1 Engine View Diagrams & Manuals
294442-1190-A1 Engine View Diagrams & Manuals
294442-1191-A1 Engine View Diagrams & Manuals
294442-1194-A1 Engine View Diagrams & Manuals
294442-1194-A2 Engine View Diagrams & Manuals
294442-1195-E1 Engine View Diagrams & Manuals
294442-1195-E9 Engine View Diagrams & Manuals
294442-1199-A1 Engine View Diagrams & Manuals
294442-1199-E1 Engine View Diagrams & Manuals
294442-1207-A1 Engine View Diagrams & Manuals
294442-1212-A1 Engine View Diagrams & Manuals
294442-1217-E1 Engine View Diagrams & Manuals
294442-1249-E1 Engine View Diagrams & Manuals
294442-1249-E9 Engine View Diagrams & Manuals
294442-1250-E1 Engine View Diagrams & Manuals
294442-1254-E1 Engine View Diagrams & Manuals
294442-1272-E1 Engine View Diagrams & Manuals
294442-1274-E1 Engine View Diagrams & Manuals
294446-0428-01 Engine View Diagrams & Manuals
294446-0449-01 Engine View Diagrams & Manuals
294446-0462-01 Engine View Diagrams & Manuals
294446-1113-A1 Engine View Diagrams & Manuals
294446-1128-A1 Engine View Diagrams & Manuals
294446-1141-E1 Engine View Diagrams & Manuals
294446-1146-E1 Engine View Diagrams & Manuals
294446-1149-A1 Engine View Diagrams & Manuals
294446-1162-A1 Engine View Diagrams & Manuals
294446-1176-E1 Engine View Diagrams & Manuals
294446-1189-E1 Engine View Diagrams & Manuals
294446-1192-A1 Engine View Diagrams & Manuals
294446-1193-A1 Engine View Diagrams & Manuals
294446-1202-E1 Engine View Diagrams & Manuals
294446-1211-E1 Engine View Diagrams & Manuals
294446-1231-E1 Engine View Diagrams & Manuals
294446-1231-E9 Engine View Diagrams & Manuals
294446-1245-E1 Engine View Diagrams & Manuals
294446-1246-E1 Engine View Diagrams & Manuals
294446-1263-E1 Engine View Diagrams & Manuals
294447-0030-01 Engine View Diagrams & Manuals
294447-0030-02 Engine View Diagrams & Manuals
294447-0040-01 Engine View Diagrams & Manuals
294447-0100-01 Engine View Diagrams & Manuals
294447-0107-01 Engine View Diagrams & Manuals
294447-0108-01 Engine View Diagrams & Manuals
294447-0109-01 Engine View Diagrams & Manuals
294447-0111-01 Engine View Diagrams & Manuals
294447-0313-01 Engine View Diagrams & Manuals
294447-0314-01 Engine View Diagrams & Manuals
294447-0319-01 Engine View Diagrams & Manuals
294447-0325-01 Engine View Diagrams & Manuals
294447-0326-01 Engine View Diagrams & Manuals
294447-0327-01 Engine View Diagrams & Manuals
294447-0340-01 Engine View Diagrams & Manuals
294447-0342-01 Engine View Diagrams & Manuals
294447-0346-02 Engine View Diagrams & Manuals
294447-0348-01 Engine View Diagrams & Manuals
294447-0348-02 Engine View Diagrams & Manuals
294447-0354-01 Engine View Diagrams & Manuals
294447-0364-01 Engine View Diagrams & Manuals
294447-0364-02 Engine View Diagrams & Manuals
294447-0374-01 Engine View Diagrams & Manuals
294447-0375-01 Engine View Diagrams & Manuals
294447-0375-02 Engine View Diagrams & Manuals
294447-0376-01 Engine View Diagrams & Manuals
294447-0377-01 Engine View Diagrams & Manuals
294447-0378-01 Engine View Diagrams & Manuals
294447-0401-01 Engine View Diagrams & Manuals
294447-0410-01 Engine View Diagrams & Manuals
294447-0412-01 Engine View Diagrams & Manuals
294447-0413-01 Engine View Diagrams & Manuals
294447-0417-01 Engine View Diagrams & Manuals
294447-0418-01 Engine View Diagrams & Manuals
294447-0422-01 Engine View Diagrams & Manuals
294447-0430-01 Engine View Diagrams & Manuals
294447-0432-01 Engine View Diagrams & Manuals
294447-0437-01 Engine View Diagrams & Manuals
294447-0445-01 Engine View Diagrams & Manuals
294447-0445-02 Engine View Diagrams & Manuals
294447-0447-01 Engine View Diagrams & Manuals
294447-0448-01 Engine View Diagrams & Manuals
294447-1013-A1 Engine View Diagrams & Manuals
294447-1014-A1 Engine View Diagrams & Manuals
294447-1019-E1 Engine View Diagrams & Manuals
294447-1025-A1 Engine View Diagrams & Manuals
294447-1025-E1 Engine View Diagrams & Manuals
294447-1026-A1 Engine View Diagrams & Manuals
294447-1026-E1 Engine View Diagrams & Manuals
294447-1027-A1 Engine View Diagrams & Manuals
294447-1028-A2 Engine View Diagrams & Manuals
294447-1029-A1 Engine View Diagrams & Manuals
294447-1042-A1 Engine View Diagrams & Manuals
294447-1042-E1 Engine View Diagrams & Manuals
294447-1046-A2 Engine View Diagrams & Manuals
294447-1046-E2 Engine View Diagrams & Manuals
294447-1048-A1 Engine View Diagrams & Manuals
294447-1048-A2 Engine View Diagrams & Manuals
294447-1054-A1 Engine View Diagrams & Manuals
294447-1056-A1 Engine View Diagrams & Manuals
294447-1056-E1 Engine View Diagrams & Manuals
294447-1058-A1 Engine View Diagrams & Manuals
294447-1058-A2 Engine View Diagrams & Manuals
294447-1058-E2 Engine View Diagrams & Manuals
294447-1064-A1 Engine View Diagrams & Manuals
294447-1064-E1 Engine View Diagrams & Manuals
294447-1064-E2 Engine View Diagrams & Manuals
294447-1074-E1 Engine View Diagrams & Manuals
294447-1075-A2 Engine View Diagrams & Manuals
294447-1075-E2 Engine View Diagrams & Manuals
294447-1076-A1 Engine View Diagrams & Manuals
294447-1077-E1 Engine View Diagrams & Manuals
294447-1078-A1 Engine View Diagrams & Manuals
294447-1100-E1 Engine View Diagrams & Manuals
294447-1110-A1 Engine View Diagrams & Manuals
294447-1110-E1 Engine View Diagrams & Manuals
294447-1116-A1 Engine View Diagrams & Manuals
294447-1117-A1 Engine View Diagrams & Manuals
294447-1118-A1 Engine View Diagrams & Manuals
294447-1122-E1 Engine View Diagrams & Manuals
294447-1122-E9 Engine View Diagrams & Manuals
294447-1129-A1 Engine View Diagrams & Manuals
294447-1130-A1 Engine View Diagrams & Manuals
294447-1131-A1 Engine View Diagrams & Manuals
294447-1132-A1 Engine View Diagrams & Manuals
294447-1134-E1 Engine View Diagrams & Manuals
294447-1137-A1 Engine View Diagrams & Manuals
294447-1138-E1 Engine View Diagrams & Manuals
294447-1142-A1 Engine View Diagrams & Manuals
294447-1145-A2 Engine View Diagrams & Manuals
294447-1147-A1 Engine View Diagrams & Manuals
294447-1148-E1 Engine View Diagrams & Manuals
294447-1150-A1 Engine View Diagrams & Manuals
294447-1151-A1 Engine View Diagrams & Manuals
294447-1163-A1 Engine View Diagrams & Manuals
294447-1165-E1 Engine View Diagrams & Manuals
294447-1165-E9 Engine View Diagrams & Manuals
294447-1167-A1 Engine View Diagrams & Manuals
294447-1170-A1 Engine View Diagrams & Manuals
294447-1173-A1 Engine View Diagrams & Manuals
294447-1175-E1 Engine View Diagrams & Manuals
294447-1182-A1 Engine View Diagrams & Manuals
294447-1183-A1 Engine View Diagrams & Manuals
294447-1183-E1 Engine View Diagrams & Manuals
294447-1187-E1 Engine View Diagrams & Manuals
294447-1196-E1 Engine View Diagrams & Manuals
294447-1197-E1 Engine View Diagrams & Manuals
294447-1200-E1 Engine View Diagrams & Manuals
294447-1201-A1 Engine View Diagrams & Manuals
294447-1203-E1 Engine View Diagrams & Manuals
294447-1204-E1 Engine View Diagrams & Manuals
294447-1205-E1 Engine View Diagrams & Manuals
294447-1209-A1 Engine View Diagrams & Manuals
294447-1210-A1 Engine View Diagrams & Manuals
294447-1213-E1 Engine View Diagrams & Manuals
294447-1218-E1 Engine View Diagrams & Manuals
294447-1219-E1 Engine View Diagrams & Manuals
294447-1220-E1 Engine View Diagrams & Manuals
294447-1222-E1 Engine View Diagrams & Manuals
294447-1222-E9 Engine View Diagrams & Manuals
294447-1223-E1 Engine View Diagrams & Manuals
294447-1224-A1 Engine View Diagrams & Manuals
294447-1224-E1 Engine View Diagrams & Manuals
294447-1230-A1 Engine View Diagrams & Manuals
294447-1235-A1 Engine View Diagrams & Manuals
294447-1235-E1 Engine View Diagrams & Manuals
294447-1236-A1 Engine View Diagrams & Manuals
294447-1237-E1 Engine View Diagrams & Manuals
294447-1238-A1 Engine View Diagrams & Manuals
294447-1238-E1 Engine View Diagrams & Manuals
294447-1238-E9 Engine View Diagrams & Manuals
294447-1241-E1 Engine View Diagrams & Manuals
294447-1243-E1 Engine View Diagrams & Manuals
294447-1244-E1 Engine View Diagrams & Manuals
294447-1247-E1 Engine View Diagrams & Manuals
294447-1252-01 Engine View Diagrams & Manuals
294447-1253-E1 Engine View Diagrams & Manuals
294447-1255-E1 Engine View Diagrams & Manuals
294447-1256-E1 Engine View Diagrams & Manuals
294447-1257-E1 Engine View Diagrams & Manuals
294447-1258-E1 Engine View Diagrams & Manuals
294447-1259-E1 Engine View Diagrams & Manuals
294447-1267-E1 Engine View Diagrams & Manuals
294447-1268-E1 Engine View Diagrams & Manuals
294447-1269-E1 Engine View Diagrams & Manuals
294447-1271-E1 Engine View Diagrams & Manuals
294447-1277-E1 Engine View Diagrams & Manuals
294447-1278-E1 Engine View Diagrams & Manuals
294447-1281-E1 Engine View Diagrams & Manuals
294447-1281-E9 Engine View Diagrams & Manuals
294447-1282-E1 Engine View Diagrams & Manuals
294772-0102-01 Engine View Diagrams & Manuals
294772-0320-01 Engine View Diagrams & Manuals
294772-0320-02 Engine View Diagrams & Manuals
294772-0334-02 Engine View Diagrams & Manuals
294772-1034-A2 Engine View Diagrams & Manuals
294772-1102-A1 Engine View Diagrams & Manuals
294772-1102-E1 Engine View Diagrams & Manuals
294772-1138-A1 Engine View Diagrams & Manuals
294772-1138-E1 Engine View Diagrams & Manuals
294772-1140-E1 Engine View Diagrams & Manuals
294772-1147-E1 Engine View Diagrams & Manuals
294772-1150-E1 Engine View Diagrams & Manuals
294775-1143-E1 Engine View Diagrams & Manuals
294776-0432-01 Engine View Diagrams & Manuals
294776-1132-A1 Engine View Diagrams & Manuals
294776-1132-E1 Engine View Diagrams & Manuals
294777-0015-01 Engine View Diagrams & Manuals
294777-0015-02 Engine View Diagrams & Manuals
294777-0016-01 Engine View Diagrams & Manuals
294777-0016-02 Engine View Diagrams & Manuals
294777-0017-01 Engine View Diagrams & Manuals
294777-0033-01 Engine View Diagrams & Manuals
294777-0033-02 Engine View Diagrams & Manuals
294777-0035-01 Engine View Diagrams & Manuals
294777-0035-02 Engine View Diagrams & Manuals
294777-0108-01 Engine View Diagrams & Manuals
294777-0109-01 Engine View Diagrams & Manuals
294777-0111-01 Engine View Diagrams & Manuals
294777-0112-01 Engine View Diagrams & Manuals
294777-0113-01 Engine View Diagrams & Manuals
294777-0114-01 Engine View Diagrams & Manuals
294777-0114-02 Engine View Diagrams & Manuals
294777-0116-01 Engine View Diagrams & Manuals
294777-0117-01 Engine View Diagrams & Manuals
294777-0118-01 Engine View Diagrams & Manuals
294777-0119-01 Engine View Diagrams & Manuals
294777-0316-01 Engine View Diagrams & Manuals
294777-0316-02 Engine View Diagrams & Manuals
294777-0330-01 Engine View Diagrams & Manuals
294777-0330-02 Engine View Diagrams & Manuals
294777-0331-01 Engine View Diagrams & Manuals
294777-0331-02 Engine View Diagrams & Manuals
294777-0332-01 Engine View Diagrams & Manuals
294777-0333-01 Engine View Diagrams & Manuals
294777-0333-02 Engine View Diagrams & Manuals
294777-0333-04 Engine View Diagrams & Manuals
294777-0335-01 Engine View Diagrams & Manuals
294777-0335-02 Engine View Diagrams & Manuals
294777-0400-01 Engine View Diagrams & Manuals
294777-0410-01 Engine View Diagrams & Manuals
294777-0411-01 Engine View Diagrams & Manuals
294777-0412-01 Engine View Diagrams & Manuals
294777-0414-01 Engine View Diagrams & Manuals
294777-0415-01 Engine View Diagrams & Manuals
294777-0416-01 Engine View Diagrams & Manuals
294777-0417-01 Engine View Diagrams & Manuals
294777-0417-02 Engine View Diagrams & Manuals
294777-0418-01 Engine View Diagrams & Manuals
294777-0419-01 Engine View Diagrams & Manuals
294777-0420-01 Engine View Diagrams & Manuals
294777-0429-01 Engine View Diagrams & Manuals
294777-0430-01 Engine View Diagrams & Manuals
294777-0431-01 Engine View Diagrams & Manuals
294777-0433-01 Engine View Diagrams & Manuals
294777-0435-01 Engine View Diagrams & Manuals
294777-1035-A1 Engine View Diagrams & Manuals
294777-1035-A2 Engine View Diagrams & Manuals
294777-1035-E1 Engine View Diagrams & Manuals
294777-1035-E2 Engine View Diagrams & Manuals
294777-1100-A1 Engine View Diagrams & Manuals
294777-1100-E1 Engine View Diagrams & Manuals
294777-1110-A1 Engine View Diagrams & Manuals
294777-1110-E1 Engine View Diagrams & Manuals
294777-1117-A2 Engine View Diagrams & Manuals
294777-1118-A1 Engine View Diagrams & Manuals
294777-1119-A1 Engine View Diagrams & Manuals
294777-1120-A1 Engine View Diagrams & Manuals
294777-1120-E1 Engine View Diagrams & Manuals
294777-1121-A1 Engine View Diagrams & Manuals
294777-1121-E1 Engine View Diagrams & Manuals
294777-1122-E1 Engine View Diagrams & Manuals
294777-1124-E1 Engine View Diagrams & Manuals
294777-1125-E1 Engine View Diagrams & Manuals
294777-1130-A1 Engine View Diagrams & Manuals
294777-1130-E1 Engine View Diagrams & Manuals
294777-1131-A1 Engine View Diagrams & Manuals
294777-1131-E1 Engine View Diagrams & Manuals
294777-1133-A1 Engine View Diagrams & Manuals
294777-1133-E1 Engine View Diagrams & Manuals
294777-1139-E1 Engine View Diagrams & Manuals
294777-1142-E1 Engine View Diagrams & Manuals
294777-1145-E1 Engine View Diagrams & Manuals
294777-1146-E1 Engine View Diagrams & Manuals
295342-0112-B1 Engine View Diagrams & Manuals
295342-0113-H1 Engine View Diagrams & Manuals
295342-0180-H1 Engine View Diagrams & Manuals
295342-0185-H1 Engine View Diagrams & Manuals
295342-0187-F1 Engine View Diagrams & Manuals
295342-0188-B1 Engine View Diagrams & Manuals
295346-0001-G1 Engine View Diagrams & Manuals
295346-0119-B1 Engine View Diagrams & Manuals
295346-0150-H1 Engine View Diagrams & Manuals
295347-0003-F1 Engine View Diagrams & Manuals
295347-0004-G1 Engine View Diagrams & Manuals
295347-0110-H1 Engine View Diagrams & Manuals
295347-0111-F1 Engine View Diagrams & Manuals
295347-0120-G1 Engine View Diagrams & Manuals
295347-0121-G1 Engine View Diagrams & Manuals
295347-0135-B1 Engine View Diagrams & Manuals
295347-0144-B1 Engine View Diagrams & Manuals
295347-0179-F1 Engine View Diagrams & Manuals
295347-0182-F1 Engine View Diagrams & Manuals
295347-0186-H1 Engine View Diagrams & Manuals
295347-0189-B1 Engine View Diagrams & Manuals
295347-0190-B1 Engine View Diagrams & Manuals
295347-0191-G1 Engine View Diagrams & Manuals
295347-0191-H1 Engine View Diagrams & Manuals
295347-0198-F1 Engine View Diagrams & Manuals
295347-1174-G1 Engine View Diagrams & Manuals
295447-0132-E1 Engine View Diagrams & Manuals
295447-0135-E1 Engine View Diagrams & Manuals
295447-0138-E1 Engine View Diagrams & Manuals
295447-0138-E9 Engine View Diagrams & Manuals
295447-0144-B1 Engine View Diagrams & Manuals
295447-0144-G1 Engine View Diagrams & Manuals
295447-0157-B1 Engine View Diagrams & Manuals
295447-0159-G1 Engine View Diagrams & Manuals
295447-0159-G2 Engine View Diagrams & Manuals
295447-0171-G1 Engine View Diagrams & Manuals
295447-0174-G1 Engine View Diagrams & Manuals
297440-0008-G1 Engine View Diagrams & Manuals
297440-0153-G1 Engine View Diagrams & Manuals
297440-0153-G2 Engine View Diagrams & Manuals
297447-0159-G1 Engine View Diagrams & Manuals
297447-0159-G2 Engine View Diagrams & Manuals
295440-0153-G1 Engine View Diagrams & Manuals
295440-0153-G2 Engine View Diagrams & Manuals
295442-0112-E1 Engine View Diagrams & Manuals
295442-0113-E1 Engine View Diagrams & Manuals
295442-0113-E9 Engine View Diagrams & Manuals
295442-0130-01 Engine View Diagrams & Manuals
295442-0134-E1 Engine View Diagrams & Manuals
295442-0134-E9 Engine View Diagrams & Manuals
295442-0136-E1 Engine View Diagrams & Manuals
295442-0140-E1 Engine View Diagrams & Manuals
295442-0162-E9 Engine View Diagrams & Manuals
295446-0119-E1 Engine View Diagrams & Manuals
295446-0139-E1 Engine View Diagrams & Manuals
295446-0139-E9 Engine View Diagrams & Manuals
295447-0110-E1 Engine View Diagrams & Manuals
295447-0110-E9 Engine View Diagrams & Manuals
295447-0111-E1 Engine View Diagrams & Manuals
295447-0116-E1 Engine View Diagrams & Manuals
295447-0116-E9 Engine View Diagrams & Manuals
295447-0117-E1 Engine View Diagrams & Manuals
295447-0118-E1 Engine View Diagrams & Manuals
295447-0123-E1 Engine View Diagrams & Manuals
295447-0126-E1 Engine View Diagrams & Manuals
295447-0126-E2 Engine View Diagrams & Manuals
295447-0128-E1 Engine View Diagrams & Manuals
295447-0128-E9 Engine View Diagrams & Manuals
295772-0112-E1 Engine View Diagrams & Manuals
295772-0112-G1 Engine View Diagrams & Manuals
295772-0114-B1 Engine View Diagrams & Manuals
295772-0114-E1 Engine View Diagrams & Manuals
295772-0114-G1 Engine View Diagrams & Manuals
295777-0100-E1 Engine View Diagrams & Manuals
295777-0100-G1 Engine View Diagrams & Manuals
295777-0113-E1 Engine View Diagrams & Manuals
295777-0113-G1 Engine View Diagrams & Manuals
303437-0100-01 Engine View Diagrams & Manuals
303437-0101-01 Engine View Diagrams & Manuals
303440-1320-E1 Engine View Diagrams & Manuals
303440-1326-E1 Engine View Diagrams & Manuals
303440-1381-E1 Engine View Diagrams & Manuals
303440-1409-E1 Engine View Diagrams & Manuals
303440-1409-E2 Engine View Diagrams & Manuals
303440-1410-E1 Engine View Diagrams & Manuals
303440-1410-E2 Engine View Diagrams & Manuals
303442-0023-01 Engine View Diagrams & Manuals
303442-0023-02 Engine View Diagrams & Manuals
303442-0031-01 Engine View Diagrams & Manuals
303442-0031-02 Engine View Diagrams & Manuals
303442-0034-01 Engine View Diagrams & Manuals
303442-0036-01 Engine View Diagrams & Manuals
303442-0036-02 Engine View Diagrams & Manuals
303442-0040-01 Engine View Diagrams & Manuals
303442-0040-02 Engine View Diagrams & Manuals
303442-0043-01 Engine View Diagrams & Manuals
303442-0043-02 Engine View Diagrams & Manuals
303442-0044-01 Engine View Diagrams & Manuals
303442-0047-01 Engine View Diagrams & Manuals
303442-0047-02 Engine View Diagrams & Manuals
303442-0053-01 Engine View Diagrams & Manuals
303442-0053-02 Engine View Diagrams & Manuals
303442-0057-01 Engine View Diagrams & Manuals
303442-0057-02 Engine View Diagrams & Manuals
303442-0060-01 Engine View Diagrams & Manuals
303442-0060-02 Engine View Diagrams & Manuals
303442-0070-01 Engine View Diagrams & Manuals
303442-0084-01 Engine View Diagrams & Manuals
303442-0085-01 Engine View Diagrams & Manuals
303442-0102-01 Engine View Diagrams & Manuals
303442-0123-01 Engine View Diagrams & Manuals
303442-0123-02 Engine View Diagrams & Manuals
303442-0126-01 Engine View Diagrams & Manuals
303442-0128-01 Engine View Diagrams & Manuals
303442-0129-01 Engine View Diagrams & Manuals
303442-0136-01 Engine View Diagrams & Manuals
303442-0138-01 Engine View Diagrams & Manuals
303442-0140-01 Engine View Diagrams & Manuals
303442-0142-01 Engine View Diagrams & Manuals
303442-0309-01 Engine View Diagrams & Manuals
303442-0312-01 Engine View Diagrams & Manuals
303442-0313-01 Engine View Diagrams & Manuals
303442-0314-01 Engine View Diagrams & Manuals
303442-0317-01 Engine View Diagrams & Manuals
303442-0319-01 Engine View Diagrams & Manuals
303442-0319-03 Engine View Diagrams & Manuals
303442-0321-01 Engine View Diagrams & Manuals
303442-0339-01 Engine View Diagrams & Manuals
303442-0340-01 Engine View Diagrams & Manuals
303442-0340-02 Engine View Diagrams & Manuals
303442-0343-01 Engine View Diagrams & Manuals
303442-0344-01 Engine View Diagrams & Manuals
303442-0347-01 Engine View Diagrams & Manuals
303442-0347-02 Engine View Diagrams & Manuals
303442-0350-01 Engine View Diagrams & Manuals
303442-0353-01 Engine View Diagrams & Manuals
303442-0357-01 Engine View Diagrams & Manuals
303442-0360-01 Engine View Diagrams & Manuals
303442-0360-03 Engine View Diagrams & Manuals
303442-0362-01 Engine View Diagrams & Manuals
303442-0365-01 Engine View Diagrams & Manuals
303442-0365-02 Engine View Diagrams & Manuals
303442-0365-05 Engine View Diagrams & Manuals
303442-0366-01 Engine View Diagrams & Manuals
303442-0370-01 Engine View Diagrams & Manuals
303442-0372-01 Engine View Diagrams & Manuals
303442-0385-01 Engine View Diagrams & Manuals
303442-0391-01 Engine View Diagrams & Manuals
303442-0397-01 Engine View Diagrams & Manuals
303442-0399-01 Engine View Diagrams & Manuals
303442-0399-02 Engine View Diagrams & Manuals
303442-0403-01 Engine View Diagrams & Manuals
303442-0413-01 Engine View Diagrams & Manuals
303442-0416-01 Engine View Diagrams & Manuals
303442-0419-01 Engine View Diagrams & Manuals
303442-0419-02 Engine View Diagrams & Manuals
303442-0423-01 Engine View Diagrams & Manuals
303442-0424-01 Engine View Diagrams & Manuals
303442-0425-01 Engine View Diagrams & Manuals
303442-0426-01 Engine View Diagrams & Manuals
303442-0427-01 Engine View Diagrams & Manuals
303442-0428-01 Engine View Diagrams & Manuals
303442-0435-02 Engine View Diagrams & Manuals
303442-0438-01 Engine View Diagrams & Manuals
303442-0448-01 Engine View Diagrams & Manuals
303442-0458-01 Engine View Diagrams & Manuals
303442-0464-01 Engine View Diagrams & Manuals
303442-0475-01 Engine View Diagrams & Manuals
303442-0476-01 Engine View Diagrams & Manuals
303442-0488-01 Engine View Diagrams & Manuals
303442-0496-01 Engine View Diagrams & Manuals
303442-0502-01 Engine View Diagrams & Manuals
303442-0505-01 Engine View Diagrams & Manuals
303442-0518-01 Engine View Diagrams & Manuals
303442-1009-A2 Engine View Diagrams & Manuals
303442-1012-A1 Engine View Diagrams & Manuals
303442-1013-A1 Engine View Diagrams & Manuals
303442-1014-A1 Engine View Diagrams & Manuals
303442-1017-A1 Engine View Diagrams & Manuals
303442-1019-E3 Engine View Diagrams & Manuals
303442-1021-A1 Engine View Diagrams & Manuals
303442-1027-A1 Engine View Diagrams & Manuals
303442-1027-E1 Engine View Diagrams & Manuals
303442-1027-E2 Engine View Diagrams & Manuals
303442-1027-E9 Engine View Diagrams & Manuals
303442-1028-A1 Engine View Diagrams & Manuals
303442-1028-E1 Engine View Diagrams & Manuals
303442-1030-A1 Engine View Diagrams & Manuals
303442-1030-E1 Engine View Diagrams & Manuals
303442-1031-A1 Engine View Diagrams & Manuals
303442-1033-E1 Engine View Diagrams & Manuals
303442-1033-E9 Engine View Diagrams & Manuals
303442-1034-E1 Engine View Diagrams & Manuals
303442-1034-E9 Engine View Diagrams & Manuals
303442-1040-E1 Engine View Diagrams & Manuals
303442-1043-A1 Engine View Diagrams & Manuals
303442-1044-A1 Engine View Diagrams & Manuals
303442-1047-A1 Engine View Diagrams & Manuals
303442-1047-A2 Engine View Diagrams & Manuals
303442-1053-A1 Engine View Diagrams & Manuals
303442-1059-A1 Engine View Diagrams & Manuals
303442-1059-E1 Engine View Diagrams & Manuals
303442-1060-A3 Engine View Diagrams & Manuals
303442-1060-A4 Engine View Diagrams & Manuals
303442-1060-E3 Engine View Diagrams & Manuals
303442-1062-A1 Engine View Diagrams & Manuals
303442-1066-A1 Engine View Diagrams & Manuals
303442-1069-E1 Engine View Diagrams & Manuals
303442-1070-A1 Engine View Diagrams & Manuals
303442-1072-A1 Engine View Diagrams & Manuals
303442-1087-A1 Engine View Diagrams & Manuals
303442-1095-A1 Engine View Diagrams & Manuals
303442-1095-E1 Engine View Diagrams & Manuals
303442-1095-E9 Engine View Diagrams & Manuals
303442-1102-E1 Engine View Diagrams & Manuals
303442-1107-A1 Engine View Diagrams & Manuals
303442-1113-A1 Engine View Diagrams & Manuals
303442-1114-A1 Engine View Diagrams & Manuals
303442-1116-E1 Engine View Diagrams & Manuals
303442-1116-E2 Engine View Diagrams & Manuals
303442-1116-E9 Engine View Diagrams & Manuals
303442-1118-A1 Engine View Diagrams & Manuals
303442-1119-A1 Engine View Diagrams & Manuals
303442-1124-A1 Engine View Diagrams & Manuals
303442-1127-A1 Engine View Diagrams & Manuals
303442-1129-A1 Engine View Diagrams & Manuals
303442-1130-E1 Engine View Diagrams & Manuals
303442-1130-E9 Engine View Diagrams & Manuals
303442-1131-A1 Engine View Diagrams & Manuals
303442-1133-A1 Engine View Diagrams & Manuals
303442-1134-A1 Engine View Diagrams & Manuals
303442-1134-E1 Engine View Diagrams & Manuals
303442-1138-E1 Engine View Diagrams & Manuals
303442-1148-E1 Engine View Diagrams & Manuals
303442-1158-A1 Engine View Diagrams & Manuals
303442-1159-A1 Engine View Diagrams & Manuals
303442-1164-A1 Engine View Diagrams & Manuals
303442-1250-A1 Engine View Diagrams & Manuals
303442-1250-E1 Engine View Diagrams & Manuals
303442-1251-E1 Engine View Diagrams & Manuals
303442-1275-E1 Engine View Diagrams & Manuals
303442-1275-E9 Engine View Diagrams & Manuals
303442-1277-E1 Engine View Diagrams & Manuals
303442-1277-E9 Engine View Diagrams & Manuals
303442-1299-E1 Engine View Diagrams & Manuals
303442-1299-E2 Engine View Diagrams & Manuals
303442-1303-E1 Engine View Diagrams & Manuals
303442-1327-E1 Engine View Diagrams & Manuals
303442-1327-E9 Engine View Diagrams & Manuals
303442-1338-E1 Engine View Diagrams & Manuals
303442-1338-E9 Engine View Diagrams & Manuals
303442-1343-E1 Engine View Diagrams & Manuals
303442-1343-E9 Engine View Diagrams & Manuals
303442-1403-E1 Engine View Diagrams & Manuals
303442-1420-E1 Engine View Diagrams & Manuals
303442-1422-E1 Engine View Diagrams & Manuals
303442-1429-E1 Engine View Diagrams & Manuals
303442-1429-E9 Engine View Diagrams & Manuals
303442-1439-E1 Engine View Diagrams & Manuals
303442-1439-E9 Engine View Diagrams & Manuals
303442-1450-E1 Engine View Diagrams & Manuals
303442-1450-E9 Engine View Diagrams & Manuals
303445-0037-01 Engine View Diagrams & Manuals
303445-0037-02 Engine View Diagrams & Manuals
303445-0439-01 Engine View Diagrams & Manuals
303445-1149-E1 Engine View Diagrams & Manuals
303445-1217-A1 Engine View Diagrams & Manuals
303445-1345-E1 Engine View Diagrams & Manuals
303446-0491-01 Engine View Diagrams & Manuals
303446-1191-A1 Engine View Diagrams & Manuals
303446-1232-E1 Engine View Diagrams & Manuals
303446-1242-A1 Engine View Diagrams & Manuals
303446-1293-E1 Engine View Diagrams & Manuals
303446-1346-E1 Engine View Diagrams & Manuals
303446-1380-E1 Engine View Diagrams & Manuals
303446-1412-E1 Engine View Diagrams & Manuals
303446-1413-E1 Engine View Diagrams & Manuals
303446-1421-E1 Engine View Diagrams & Manuals
303446-1425-E1 Engine View Diagrams & Manuals
303446-1432-E1 Engine View Diagrams & Manuals
303446-1434-E1 Engine View Diagrams & Manuals
303446-1434-E9 Engine View Diagrams & Manuals
303446-1449-E1 Engine View Diagrams & Manuals
303447-0021-01 Engine View Diagrams & Manuals
303447-0021-02 Engine View Diagrams & Manuals
303447-0022-01 Engine View Diagrams & Manuals
303447-0022-02 Engine View Diagrams & Manuals
303447-0024-01 Engine View Diagrams & Manuals
303447-0024-02 Engine View Diagrams & Manuals
303447-0026-01 Engine View Diagrams & Manuals
303447-0026-02 Engine View Diagrams & Manuals
303447-0026-03 Engine View Diagrams & Manuals
303447-0026-04 Engine View Diagrams & Manuals
303447-0027-01 Engine View Diagrams & Manuals
303447-0027-02 Engine View Diagrams & Manuals
303447-0028-01 Engine View Diagrams & Manuals
303447-0028-02 Engine View Diagrams & Manuals
303447-0029-01 Engine View Diagrams & Manuals
303447-0029-02 Engine View Diagrams & Manuals
303447-0030-01 Engine View Diagrams & Manuals
303447-0030-02 Engine View Diagrams & Manuals
303447-0032-01 Engine View Diagrams & Manuals
303447-0032-02 Engine View Diagrams & Manuals
303447-0033-01 Engine View Diagrams & Manuals
303447-0035-01 Engine View Diagrams & Manuals
303447-0041-01 Engine View Diagrams & Manuals
303447-0042-01 Engine View Diagrams & Manuals
303447-0042-02 Engine View Diagrams & Manuals
303447-0045-01 Engine View Diagrams & Manuals
303447-0046-01 Engine View Diagrams & Manuals
303447-0046-02 Engine View Diagrams & Manuals
303447-0048-01 Engine View Diagrams & Manuals
303447-0048-02 Engine View Diagrams & Manuals
303447-0049-01 Engine View Diagrams & Manuals
303447-0049-02 Engine View Diagrams & Manuals
303447-0051-01 Engine View Diagrams & Manuals
303447-0051-02 Engine View Diagrams & Manuals
303447-0052-01 Engine View Diagrams & Manuals
303447-0052-02 Engine View Diagrams & Manuals
303447-0054-01 Engine View Diagrams & Manuals
303447-0055-01 Engine View Diagrams & Manuals
303447-0056-01 Engine View Diagrams & Manuals
303447-0056-02 Engine View Diagrams & Manuals
303447-0058-01 Engine View Diagrams & Manuals
303447-0058-02 Engine View Diagrams & Manuals
303447-0061-01 Engine View Diagrams & Manuals
303447-0064-01 Engine View Diagrams & Manuals
303447-0064-02 Engine View Diagrams & Manuals
303447-0064-03 Engine View Diagrams & Manuals
303447-0074-01 Engine View Diagrams & Manuals
303447-0075-01 Engine View Diagrams & Manuals
303447-0076-01 Engine View Diagrams & Manuals
303447-0077-01 Engine View Diagrams & Manuals
303447-0078-01 Engine View Diagrams & Manuals
303447-0079-01 Engine View Diagrams & Manuals
303447-0092-01 Engine View Diagrams & Manuals
303447-0093-01 Engine View Diagrams & Manuals
303447-0093-02 Engine View Diagrams & Manuals
303447-0100-01 Engine View Diagrams & Manuals
303447-0103-01 Engine View Diagrams & Manuals
303447-0104-01 Engine View Diagrams & Manuals
303447-0120-01 Engine View Diagrams & Manuals
303447-0121-01 Engine View Diagrams & Manuals
303447-0122-01 Engine View Diagrams & Manuals
303447-0125-01 Engine View Diagrams & Manuals
303447-0130-01 Engine View Diagrams & Manuals
303447-0131-01 Engine View Diagrams & Manuals
303447-0132-01 Engine View Diagrams & Manuals
303447-0133-01 Engine View Diagrams & Manuals
303447-0134-01 Engine View Diagrams & Manuals
303447-0137-01 Engine View Diagrams & Manuals
303447-0139-01 Engine View Diagrams & Manuals
303447-0141-01 Engine View Diagrams & Manuals
303447-0143-01 Engine View Diagrams & Manuals
303447-0144-01 Engine View Diagrams & Manuals
303447-0145-01 Engine View Diagrams & Manuals
303447-0308-01 Engine View Diagrams & Manuals
303447-0310-01 Engine View Diagrams & Manuals
303447-0315-01 Engine View Diagrams & Manuals
303447-0316-01 Engine View Diagrams & Manuals
303447-0325-01 Engine View Diagrams & Manuals
303447-0326-01 Engine View Diagrams & Manuals
303447-0327-01 Engine View Diagrams & Manuals
303447-0327-02 Engine View Diagrams & Manuals
303447-0329-01 Engine View Diagrams & Manuals
303447-0342-01 Engine View Diagrams & Manuals
303447-0345-01 Engine View Diagrams & Manuals
303447-0345-02 Engine View Diagrams & Manuals
303447-0346-01 Engine View Diagrams & Manuals
303447-0346-02 Engine View Diagrams & Manuals
303447-0348-01 Engine View Diagrams & Manuals
303447-0348-02 Engine View Diagrams & Manuals
303447-0351-01 Engine View Diagrams & Manuals
303447-0352-01 Engine View Diagrams & Manuals
303447-0354-01 Engine View Diagrams & Manuals
303447-0355-01 Engine View Diagrams & Manuals
303447-0355-02 Engine View Diagrams & Manuals
303447-0356-01 Engine View Diagrams & Manuals
303447-0358-01 Engine View Diagrams & Manuals
303447-0358-02 Engine View Diagrams & Manuals
303447-0364-01 Engine View Diagrams & Manuals
303447-0364-02 Engine View Diagrams & Manuals
303447-0364-03 Engine View Diagrams & Manuals
303447-0364-04 Engine View Diagrams & Manuals
303447-0364-05 Engine View Diagrams & Manuals
303447-0369-01 Engine View Diagrams & Manuals
303447-0373-01 Engine View Diagrams & Manuals
303447-0373-02 Engine View Diagrams & Manuals
303447-0374-01 Engine View Diagrams & Manuals
303447-0375-01 Engine View Diagrams & Manuals
303447-0375-02 Engine View Diagrams & Manuals
303447-0376-01 Engine View Diagrams & Manuals
303447-0376-02 Engine View Diagrams & Manuals
303447-0377-01 Engine View Diagrams & Manuals
303447-0378-01 Engine View Diagrams & Manuals
303447-0379-01 Engine View Diagrams & Manuals
303447-0382-01 Engine View Diagrams & Manuals
303447-0386-01 Engine View Diagrams & Manuals
303447-0392-01 Engine View Diagrams & Manuals
303447-0393-01 Engine View Diagrams & Manuals
303447-0393-02 Engine View Diagrams & Manuals
303447-0394-01 Engine View Diagrams & Manuals
303447-0396-01 Engine View Diagrams & Manuals
303447-0396-02 Engine View Diagrams & Manuals
303447-0400-01 Engine View Diagrams & Manuals
303447-0401-01 Engine View Diagrams & Manuals
303447-0404-01 Engine View Diagrams & Manuals
303447-0405-01 Engine View Diagrams & Manuals
303447-0410-01 Engine View Diagrams & Manuals
303447-0411-01 Engine View Diagrams & Manuals
303447-0412-01 Engine View Diagrams & Manuals
303447-0414-01 Engine View Diagrams & Manuals
303447-0415-01 Engine View Diagrams & Manuals
303447-0417-01 Engine View Diagrams & Manuals
303447-0418-01 Engine View Diagrams & Manuals
303447-0420-01 Engine View Diagrams & Manuals
303447-0420-02 Engine View Diagrams & Manuals
303447-0422-01 Engine View Diagrams & Manuals
303447-0429-01 Engine View Diagrams & Manuals
303447-0430-01 Engine View Diagrams & Manuals
303447-0431-01 Engine View Diagrams & Manuals
303447-0432-01 Engine View Diagrams & Manuals
303447-0433-01 Engine View Diagrams & Manuals
303447-0434-01 Engine View Diagrams & Manuals
303447-0437-01 Engine View Diagrams & Manuals
303447-0440-01 Engine View Diagrams & Manuals
303447-0442-01 Engine View Diagrams & Manuals
303447-0443-01 Engine View Diagrams & Manuals
303447-0446-01 Engine View Diagrams & Manuals
303447-0447-01 Engine View Diagrams & Manuals
303447-0447-02 Engine View Diagrams & Manuals
303447-0449-01 Engine View Diagrams & Manuals
303447-0449-02 Engine View Diagrams & Manuals
303447-0450-01 Engine View Diagrams & Manuals
303447-0451-01 Engine View Diagrams & Manuals
303447-0452-01 Engine View Diagrams & Manuals
303447-0453-01 Engine View Diagrams & Manuals
303447-0453-02 Engine View Diagrams & Manuals
303447-0454-01 Engine View Diagrams & Manuals
303447-0455-01 Engine View Diagrams & Manuals
303447-0456-01 Engine View Diagrams & Manuals
303447-0462-01 Engine View Diagrams & Manuals
303447-0463-01 Engine View Diagrams & Manuals
303447-0466-01 Engine View Diagrams & Manuals
303447-0468-01 Engine View Diagrams & Manuals
303447-0470-01 Engine View Diagrams & Manuals
303447-0472-01 Engine View Diagrams & Manuals
303447-0474-01 Engine View Diagrams & Manuals
303447-0477-01 Engine View Diagrams & Manuals
303447-0478-01 Engine View Diagrams & Manuals
303447-0479-01 Engine View Diagrams & Manuals
303447-0480-01 Engine View Diagrams & Manuals
303447-0481-01 Engine View Diagrams & Manuals
303447-0482-01 Engine View Diagrams & Manuals
303447-0483-01 Engine View Diagrams & Manuals
303447-0485-01 Engine View Diagrams & Manuals
303447-0486-01 Engine View Diagrams & Manuals
303447-0489-01 Engine View Diagrams & Manuals
303447-0490-01 Engine View Diagrams & Manuals
303447-0492-01 Engine View Diagrams & Manuals
303447-0493-01 Engine View Diagrams & Manuals
303447-0494-01 Engine View Diagrams & Manuals
303447-0495-01 Engine View Diagrams & Manuals
303447-0497-01 Engine View Diagrams & Manuals
303447-0498-01 Engine View Diagrams & Manuals
303447-0501-01 Engine View Diagrams & Manuals
303447-0504-01 Engine View Diagrams & Manuals
303447-0506-01 Engine View Diagrams & Manuals
303447-0510-01 Engine View Diagrams & Manuals
303447-1008-A1 Engine View Diagrams & Manuals
303447-1010-A1 Engine View Diagrams & Manuals
303447-1015-A1 Engine View Diagrams & Manuals
303447-1016-A1 Engine View Diagrams & Manuals
303447-1018-A1 Engine View Diagrams & Manuals
303447-1018-A2 Engine View Diagrams & Manuals
303447-1018-E1 Engine View Diagrams & Manuals
303447-1018-E2 Engine View Diagrams & Manuals
303447-1023-A1 Engine View Diagrams & Manuals
303447-1023-E1 Engine View Diagrams & Manuals
303447-1025-A1 Engine View Diagrams & Manuals
303447-1026-E1 Engine View Diagrams & Manuals
303447-1029-E1 Engine View Diagrams & Manuals
303447-1035-A1 Engine View Diagrams & Manuals
303447-1036-A1 Engine View Diagrams & Manuals
303447-1036-E1 Engine View Diagrams & Manuals
303447-1042-A1 Engine View Diagrams & Manuals
303447-1042-A2 Engine View Diagrams & Manuals
303447-1042-E1 Engine View Diagrams & Manuals
303447-1042-E2 Engine View Diagrams & Manuals
303447-1046-A2 Engine View Diagrams & Manuals
303447-1046-E1 Engine View Diagrams & Manuals
303447-1046-E2 Engine View Diagrams & Manuals
303447-1048-E1 Engine View Diagrams & Manuals
303447-1048-E2 Engine View Diagrams & Manuals
303447-1049-E1 Engine View Diagrams & Manuals
303447-1049-E9 Engine View Diagrams & Manuals
303447-1051-A1 Engine View Diagrams & Manuals
303447-1052-E1 Engine View Diagrams & Manuals
303447-1054-A1 Engine View Diagrams & Manuals
303447-1055-A1 Engine View Diagrams & Manuals
303447-1055-A2 Engine View Diagrams & Manuals
303447-1056-A1 Engine View Diagrams & Manuals
303447-1058-A1 Engine View Diagrams & Manuals
303447-1064-A1 Engine View Diagrams & Manuals
303447-1064-A2 Engine View Diagrams & Manuals
303447-1064-E1 Engine View Diagrams & Manuals
303447-1064-E2 Engine View Diagrams & Manuals
303447-1068-A1 Engine View Diagrams & Manuals
303707-0100-01 Engine View Diagrams & Manuals
303707-0101-01 Engine View Diagrams & Manuals
303772-0020-01 Engine View Diagrams & Manuals
303772-0020-02 Engine View Diagrams & Manuals
303772-0021-01 Engine View Diagrams & Manuals
303772-0021-02 Engine View Diagrams & Manuals
303772-0102-01 Engine View Diagrams & Manuals
303772-0104-01 Engine View Diagrams & Manuals
303772-0132-01 Engine View Diagrams & Manuals
303772-0141-01 Engine View Diagrams & Manuals
303772-0320-01 Engine View Diagrams & Manuals
303772-0321-01 Engine View Diagrams & Manuals
303772-0321-02 Engine View Diagrams & Manuals
303772-0345-01 Engine View Diagrams & Manuals
303772-0345-02 Engine View Diagrams & Manuals
303772-0355-02 Engine View Diagrams & Manuals
303772-0415-01 Engine View Diagrams & Manuals
303772-0423-01 Engine View Diagrams & Manuals
303772-0437-01 Engine View Diagrams & Manuals
303772-1020-A1 Engine View Diagrams & Manuals
303772-1020-E1 Engine View Diagrams & Manuals
303772-1045-A1 Engine View Diagrams & Manuals
303772-1045-A2 Engine View Diagrams & Manuals
303772-1045-E2 Engine View Diagrams & Manuals
303772-1055-A2 Engine View Diagrams & Manuals
303772-1055-A3 Engine View Diagrams & Manuals
303772-1055-E2 Engine View Diagrams & Manuals
303772-1102-E1 Engine View Diagrams & Manuals
303772-1123-A1 Engine View Diagrams & Manuals
303772-1137-A1 Engine View Diagrams & Manuals
303772-1193-E1 Engine View Diagrams & Manuals
303772-1206-E1 Engine View Diagrams & Manuals
303775-0119-01 Engine View Diagrams & Manuals
303775-0120-01 Engine View Diagrams & Manuals
303776-0346-02 Engine View Diagrams & Manuals
303776-0422-01 Engine View Diagrams & Manuals
303776-0430-01 Engine View Diagrams & Manuals
303776-1046-A2 Engine View Diagrams & Manuals
303776-1046-E2 Engine View Diagrams & Manuals
303776-1122-A1 Engine View Diagrams & Manuals
303776-1127-A1 Engine View Diagrams & Manuals
303776-1130-A1 Engine View Diagrams & Manuals
303776-1130-E1 Engine View Diagrams & Manuals
303776-1152-A1 Engine View Diagrams & Manuals
303776-1156-E1 Engine View Diagrams & Manuals
303776-1188-A1 Engine View Diagrams & Manuals
303776-1188-E1 Engine View Diagrams & Manuals
303777-0007-01 Engine View Diagrams & Manuals
303777-0015-01 Engine View Diagrams & Manuals
303777-0015-02 Engine View Diagrams & Manuals
303777-0015-03 Engine View Diagrams & Manuals
303777-0015-04 Engine View Diagrams & Manuals
303777-0016-01 Engine View Diagrams & Manuals
303777-0016-02 Engine View Diagrams & Manuals
303777-0017-01 Engine View Diagrams & Manuals
303777-0017-02 Engine View Diagrams & Manuals
303777-0017-03 Engine View Diagrams & Manuals
303777-0017-04 Engine View Diagrams & Manuals
303777-0032-01 Engine View Diagrams & Manuals
303777-0032-02 Engine View Diagrams & Manuals
303777-0032-03 Engine View Diagrams & Manuals
303777-0032-05 Engine View Diagrams & Manuals
303777-0033-01 Engine View Diagrams & Manuals
303777-0033-02 Engine View Diagrams & Manuals
303777-0100-01 Engine View Diagrams & Manuals
303777-0103-01 Engine View Diagrams & Manuals
303777-0105-01 Engine View Diagrams & Manuals
303777-0121-01 Engine View Diagrams & Manuals
303777-0122-01 Engine View Diagrams & Manuals
303777-0124-01 Engine View Diagrams & Manuals
303777-0126-01 Engine View Diagrams & Manuals
303777-0127-01 Engine View Diagrams & Manuals
303777-0128-01 Engine View Diagrams & Manuals
303777-0129-01 Engine View Diagrams & Manuals
303777-0130-01 Engine View Diagrams & Manuals
303777-0131-01 Engine View Diagrams & Manuals
303777-0133-01 Engine View Diagrams & Manuals
303777-0134-01 Engine View Diagrams & Manuals
303777-0135-01 Engine View Diagrams & Manuals
303777-0137-01 Engine View Diagrams & Manuals
303777-0138-01 Engine View Diagrams & Manuals
303777-0139-01 Engine View Diagrams & Manuals
303777-0140-01 Engine View Diagrams & Manuals
303777-0142-01 Engine View Diagrams & Manuals
303777-0316-01 Engine View Diagrams & Manuals
303777-0330-01 Engine View Diagrams & Manuals
303777-0330-02 Engine View Diagrams & Manuals
303777-0331-01 Engine View Diagrams & Manuals
303777-0331-02 Engine View Diagrams & Manuals
303777-0332-01 Engine View Diagrams & Manuals
303777-0332-02 Engine View Diagrams & Manuals
303777-0332-03 Engine View Diagrams & Manuals
303777-0332-04 Engine View Diagrams & Manuals
303777-0332-07 Engine View Diagrams & Manuals
303777-0333-01 Engine View Diagrams & Manuals
303777-0333-02 Engine View Diagrams & Manuals
303777-0333-03 Engine View Diagrams & Manuals
303777-0344-01 Engine View Diagrams & Manuals
303777-0344-02 Engine View Diagrams & Manuals
303777-0400-01 Engine View Diagrams & Manuals
303777-0410-01 Engine View Diagrams & Manuals
303777-0411-01 Engine View Diagrams & Manuals
303777-0412-01 Engine View Diagrams & Manuals
303777-0413-01 Engine View Diagrams & Manuals
303777-0414-01 Engine View Diagrams & Manuals
303777-0416-01 Engine View Diagrams & Manuals
303777-0416-02 Engine View Diagrams & Manuals
303777-0417-01 Engine View Diagrams & Manuals
303777-0418-01 Engine View Diagrams & Manuals
303777-0419-01 Engine View Diagrams & Manuals
303777-0420-01 Engine View Diagrams & Manuals
303777-0421-01 Engine View Diagrams & Manuals
303777-0424-01 Engine View Diagrams & Manuals
303777-0425-01 Engine View Diagrams & Manuals
303777-0426-01 Engine View Diagrams & Manuals
303777-0428-01 Engine View Diagrams & Manuals
303777-0429-01 Engine View Diagrams & Manuals
303777-0431-01 Engine View Diagrams & Manuals
303777-0432-01 Engine View Diagrams & Manuals
303777-0434-01 Engine View Diagrams & Manuals
303777-0435-01 Engine View Diagrams & Manuals
303777-0435-02 Engine View Diagrams & Manuals
303777-0436-01 Engine View Diagrams & Manuals
303777-0438-01 Engine View Diagrams & Manuals
303777-0439-01 Engine View Diagrams & Manuals
303777-0440-01 Engine View Diagrams & Manuals
303777-1032-A1 Engine View Diagrams & Manuals
303777-1032-E1 Engine View Diagrams & Manuals
303777-1033-A3 Engine View Diagrams & Manuals
303777-1033-E1 Engine View Diagrams & Manuals
303777-1033-E3 Engine View Diagrams & Manuals
303777-1035-E2 Engine View Diagrams & Manuals
303777-1044-A2 Engine View Diagrams & Manuals
303777-1044-E2 Engine View Diagrams & Manuals
303777-1044-E3 Engine View Diagrams & Manuals
303777-1100-E1 Engine View Diagrams & Manuals
303777-1111-A1 Engine View Diagrams & Manuals
303777-1111-E1 Engine View Diagrams & Manuals
303777-1112-A1 Engine View Diagrams & Manuals
303777-1113-A1 Engine View Diagrams & Manuals
303777-1114-E1 Engine View Diagrams & Manuals
303777-1116-E2 Engine View Diagrams & Manuals
303777-1117-A1 Engine View Diagrams & Manuals
303777-1118-A1 Engine View Diagrams & Manuals
303777-1119-A1 Engine View Diagrams & Manuals
303777-1120-A1 Engine View Diagrams & Manuals
303777-1120-E1 Engine View Diagrams & Manuals
303777-1121-A1 Engine View Diagrams & Manuals
303777-1121-A2 Engine View Diagrams & Manuals
303777-1124-A1 Engine View Diagrams & Manuals
303777-1125-A1 Engine View Diagrams & Manuals
303777-1126-A1 Engine View Diagrams & Manuals
303777-1128-E1 Engine View Diagrams & Manuals
303777-1129-A1 Engine View Diagrams & Manuals
303777-1131-A1 Engine View Diagrams & Manuals
303777-1132-A1 Engine View Diagrams & Manuals
303777-1134-E1 Engine View Diagrams & Manuals
303777-1135-A1 Engine View Diagrams & Manuals
303777-1135-A2 Engine View Diagrams & Manuals
303777-1136-A1 Engine View Diagrams & Manuals
303777-1138-E1 Engine View Diagrams & Manuals
303777-1139-A1 Engine View Diagrams & Manuals
303777-1139-E1 Engine View Diagrams & Manuals
303777-1140-A1 Engine View Diagrams & Manuals
303777-1140-E1 Engine View Diagrams & Manuals
303777-1142-E1 Engine View Diagrams & Manuals
303777-1144-A1 Engine View Diagrams & Manuals
303777-1145-E1 Engine View Diagrams & Manuals
303777-1147-A1 Engine View Diagrams & Manuals
303777-1147-E1 Engine View Diagrams & Manuals
303777-1148-E1 Engine View Diagrams & Manuals
303777-1149-E1 Engine View Diagrams & Manuals
303777-1150-E1 Engine View Diagrams & Manuals
303777-1151-A1 Engine View Diagrams & Manuals
303777-1151-E1 Engine View Diagrams & Manuals
303777-1153-A1 Engine View Diagrams & Manuals
303777-1153-E1 Engine View Diagrams & Manuals
303777-1161-E1 Engine View Diagrams & Manuals
303777-1162-E1 Engine View Diagrams & Manuals
303777-1163-E1 Engine View Diagrams & Manuals
303777-1164-E1 Engine View Diagrams & Manuals
303777-1165-E1 Engine View Diagrams & Manuals
303777-1166-E1 Engine View Diagrams & Manuals
303777-1167-E1 Engine View Diagrams & Manuals
303777-1168-E1 Engine View Diagrams & Manuals
303777-1169-E1 Engine View Diagrams & Manuals
303777-1170-E1 Engine View Diagrams & Manuals
303777-1171-E1 Engine View Diagrams & Manuals
303777-1172-E1 Engine View Diagrams & Manuals
303777-1173-E1 Engine View Diagrams & Manuals
303777-1174-E1 Engine View Diagrams & Manuals
303777-1175-E1 Engine View Diagrams & Manuals
303777-1189-E1 Engine View Diagrams & Manuals
303777-1191-E1 Engine View Diagrams & Manuals
303777-1192-E1 Engine View Diagrams & Manuals
303777-1194-E1 Engine View Diagrams & Manuals
303777-1195-E1 Engine View Diagrams & Manuals
303777-1196-E1 Engine View Diagrams & Manuals
303777-1199-E1 Engine View Diagrams & Manuals
303777-1202-E1 Engine View Diagrams & Manuals
304447-0300-E1 Engine View Diagrams & Manuals
304447-0322-E1 Engine View Diagrams & Manuals
304447-0323-E1 Engine View Diagrams & Manuals
304447-0416-E1 Engine View Diagrams & Manuals
305440-0218-E1 Engine View Diagrams & Manuals
305440-0218-G1 Engine View Diagrams & Manuals
305440-0252-G1 Engine View Diagrams & Manuals
305440-0252-G2 Engine View Diagrams & Manuals
305440-0328-G1 Engine View Diagrams & Manuals
305440-1409-E1 Engine View Diagrams & Manuals
305440-1409-G1 Engine View Diagrams & Manuals
305440-1410-E2 Engine View Diagrams & Manuals
305440-1410-G2 Engine View Diagrams & Manuals
305440-2218-G1 Engine View Diagrams & Manuals
305440-3052-G1 Engine View Diagrams & Manuals
305442-0027-B1 Engine View Diagrams & Manuals
305442-0027-E1 Engine View Diagrams & Manuals
305442-0027-E9 Engine View Diagrams & Manuals
305442-0112-B1 Engine View Diagrams & Manuals
305442-0112-E1 Engine View Diagrams & Manuals
305442-0112-G1 Engine View Diagrams & Manuals
305442-0113-B1 Engine View Diagrams & Manuals
305442-0113-E1 Engine View Diagrams & Manuals
305442-0113-E9 Engine View Diagrams & Manuals
305442-0113-H1 Engine View Diagrams & Manuals
305442-0114-B1 Engine View Diagrams & Manuals
305442-0114-E1 Engine View Diagrams & Manuals
305442-0114-E9 Engine View Diagrams & Manuals
305442-0114-H1 Engine View Diagrams & Manuals
305442-0120-B1 Engine View Diagrams & Manuals
305442-0120-E1 Engine View Diagrams & Manuals
305442-0120-E9 Engine View Diagrams & Manuals
305442-0121-B1 Engine View Diagrams & Manuals
305442-0121-E1 Engine View Diagrams & Manuals
305442-0121-E9 Engine View Diagrams & Manuals
305442-0123-B1 Engine View Diagrams & Manuals
305442-0123-E1 Engine View Diagrams & Manuals
305442-0123-E9 Engine View Diagrams & Manuals
305442-0127-B1 Engine View Diagrams & Manuals
305442-0127-E1 Engine View Diagrams & Manuals
305442-0127-E9 Engine View Diagrams & Manuals
305442-0156-B1 Engine View Diagrams & Manuals
305442-0156-E1 Engine View Diagrams & Manuals
305442-0156-E9 Engine View Diagrams & Manuals
305442-0183-B1 Engine View Diagrams & Manuals
305442-0183-E1 Engine View Diagrams & Manuals
305442-0183-E9 Engine View Diagrams & Manuals
305442-0187-E1 Engine View Diagrams & Manuals
305442-0187-G1 Engine View Diagrams & Manuals
305442-0197-B1 Engine View Diagrams & Manuals
305442-0197-E1 Engine View Diagrams & Manuals
305442-0197-E9 Engine View Diagrams & Manuals
305442-0207-B1 Engine View Diagrams & Manuals
305442-0207-E9 Engine View Diagrams & Manuals
305442-0220-B1 Engine View Diagrams & Manuals
305442-0220-E9 Engine View Diagrams & Manuals
305442-0234-B1 Engine View Diagrams & Manuals
305442-0234-H1 Engine View Diagrams & Manuals
305442-0235-B1 Engine View Diagrams & Manuals
305442-0235-H1 Engine View Diagrams & Manuals
305442-0266-B1 Engine View Diagrams & Manuals
305442-0266-H1 Engine View Diagrams & Manuals
305442-0267-B1 Engine View Diagrams & Manuals
305442-0267-H1 Engine View Diagrams & Manuals
305442-0274-F1 Engine View Diagrams & Manuals
305442-0277-F1 Engine View Diagrams & Manuals
305442-0278-F1 Engine View Diagrams & Manuals
305442-0299-F1 Engine View Diagrams & Manuals
305442-0300-F1 Engine View Diagrams & Manuals
305442-0307-F1 Engine View Diagrams & Manuals
305442-0315-F1 Engine View Diagrams & Manuals
305442-0318-F1 Engine View Diagrams & Manuals
305442-0327-H1 Engine View Diagrams & Manuals
305442-0527-F1 Engine View Diagrams & Manuals
305442-1127-F8 Engine View Diagrams & Manuals
305442-1187-G1 Engine View Diagrams & Manuals
305442-1266-F8 Engine View Diagrams & Manuals
305445-0222-B1 Engine View Diagrams & Manuals
305445-0222-E1 Engine View Diagrams & Manuals
305445-0222-G1 Engine View Diagrams & Manuals
305445-0255-G1 Engine View Diagrams & Manuals
305446-0169-B1 Engine View Diagrams & Manuals
305446-0169-E1 Engine View Diagrams & Manuals
305446-0169-G1 Engine View Diagrams & Manuals
305446-0170-E1 Engine View Diagrams & Manuals
305446-0170-G1 Engine View Diagrams & Manuals
305446-0194-B1 Engine View Diagrams & Manuals
305446-0194-E1 Engine View Diagrams & Manuals
305446-0194-E9 Engine View Diagrams & Manuals
305446-0195-E1 Engine View Diagrams & Manuals
305446-0195-G1 Engine View Diagrams & Manuals
305446-0196-B1 Engine View Diagrams & Manuals
305446-0196-E1 Engine View Diagrams & Manuals
305446-0196-G1 Engine View Diagrams & Manuals
305446-0204-B1 Engine View Diagrams & Manuals
305446-0204-E1 Engine View Diagrams & Manuals
305446-0204-G1 Engine View Diagrams & Manuals
305446-0325-F1 Engine View Diagrams & Manuals
305447-0001-F1 Engine View Diagrams & Manuals
305447-0002-H1 Engine View Diagrams & Manuals
305447-0003-G1 Engine View Diagrams & Manuals
305447-0005-E1 Engine View Diagrams & Manuals
305447-0005-G1 Engine View Diagrams & Manuals
305447-0006-H7 Engine View Diagrams & Manuals
305447-0007-G1 Engine View Diagrams & Manuals
305447-0023-B1 Engine View Diagrams & Manuals
305447-0023-E1 Engine View Diagrams & Manuals
305447-0023-E9 Engine View Diagrams & Manuals
305447-0068-B1 Engine View Diagrams & Manuals
305447-0068-B2 Engine View Diagrams & Manuals
305447-0068-E1 Engine View Diagrams & Manuals
305447-0068-E2 Engine View Diagrams & Manuals
305447-0068-E9 Engine View Diagrams & Manuals
305447-0068-H1 Engine View Diagrams & Manuals
305447-0068-H7 Engine View Diagrams & Manuals
305447-0069-E9 Engine View Diagrams & Manuals
305447-0075-E1 Engine View Diagrams & Manuals
305447-0075-E2 Engine View Diagrams & Manuals
305447-0075-G1 Engine View Diagrams & Manuals
305447-0075-G2 Engine View Diagrams & Manuals
305447-0077-E1 Engine View Diagrams & Manuals
305447-0077-G1 Engine View Diagrams & Manuals
305447-0078-E1 Engine View Diagrams & Manuals
305447-0078-G1 Engine View Diagrams & Manuals
305447-0079-E1 Engine View Diagrams & Manuals
305447-0079-G1 Engine View Diagrams & Manuals
305447-0087-G1 Engine View Diagrams & Manuals
305447-0100-G1 Engine View Diagrams & Manuals
305447-0110-E1 Engine View Diagrams & Manuals
305447-0110-E2 Engine View Diagrams & Manuals
305447-0115-B1 Engine View Diagrams & Manuals
305447-0115-E1 Engine View Diagrams & Manuals
305447-0115-E9 Engine View Diagrams & Manuals
305447-0115-H1 Engine View Diagrams & Manuals
305447-0116-B1 Engine View Diagrams & Manuals
305447-0116-E1 Engine View Diagrams & Manuals
305447-0116-E2 Engine View Diagrams & Manuals
305447-0116-G1 Engine View Diagrams & Manuals
305447-0124-B1 Engine View Diagrams & Manuals
305447-0124-E1 Engine View Diagrams & Manuals
305447-0124-E9 Engine View Diagrams & Manuals
305447-0126-B1 Engine View Diagrams & Manuals
305447-0126-E1 Engine View Diagrams & Manuals
305447-0126-E9 Engine View Diagrams & Manuals
305447-0126-H1 Engine View Diagrams & Manuals
305447-0130-E1 Engine View Diagrams & Manuals
305447-0130-G1 Engine View Diagrams & Manuals
305447-0132-E1 Engine View Diagrams & Manuals
305447-0132-G1 Engine View Diagrams & Manuals
305447-0133-E1 Engine View Diagrams & Manuals
305447-0133-G1 Engine View Diagrams & Manuals
305447-0133-G2 Engine View Diagrams & Manuals
305447-0138-E1 Engine View Diagrams & Manuals
305447-0138-G1 Engine View Diagrams & Manuals
305447-0143-B1 Engine View Diagrams & Manuals
305447-0143-E1 Engine View Diagrams & Manuals
305447-0143-E9 Engine View Diagrams & Manuals
305447-0144-E1 Engine View Diagrams & Manuals
305447-0144-G1 Engine View Diagrams & Manuals
305447-0145-E1 Engine View Diagrams & Manuals
305447-0145-G1 Engine View Diagrams & Manuals
305447-0146-B1 Engine View Diagrams & Manuals
305447-0146-E1 Engine View Diagrams & Manuals
305447-0146-G1 Engine View Diagrams & Manuals
305447-0150-B1 Engine View Diagrams & Manuals
305447-0150-E1 Engine View Diagrams & Manuals
305447-0150-G1 Engine View Diagrams & Manuals
305447-0151-B1 Engine View Diagrams & Manuals
305447-0151-E1 Engine View Diagrams & Manuals
305447-0151-G1 Engine View Diagrams & Manuals
305447-0152-B1 Engine View Diagrams & Manuals
305447-0152-E1 Engine View Diagrams & Manuals
305447-0152-G1 Engine View Diagrams & Manuals
305447-0153-B1 Engine View Diagrams & Manuals
305447-0153-E1 Engine View Diagrams & Manuals
305447-0153-G1 Engine View Diagrams & Manuals
305447-0154-B1 Engine View Diagrams & Manuals
305447-0154-E1 Engine View Diagrams & Manuals
305447-0154-G1 Engine View Diagrams & Manuals
305447-0157-E1 Engine View Diagrams & Manuals
305447-0157-G1 Engine View Diagrams & Manuals
305447-0158-E1 Engine View Diagrams & Manuals
305447-0158-E9 Engine View Diagrams & Manuals
305447-0165-B1 Engine View Diagrams & Manuals
305447-0165-E1 Engine View Diagrams & Manuals
305447-0165-G1 Engine View Diagrams & Manuals
305447-0168-E1 Engine View Diagrams & Manuals
305447-0168-G1 Engine View Diagrams & Manuals
305447-0171-E1 Engine View Diagrams & Manuals
305447-0172-B1 Engine View Diagrams & Manuals
305447-0172-E1 Engine View Diagrams & Manuals
305447-0172-E9 Engine View Diagrams & Manuals
305447-0172-H1 Engine View Diagrams & Manuals
305447-0173-B1 Engine View Diagrams & Manuals
305447-0173-E1 Engine View Diagrams & Manuals
305447-0173-G1 Engine View Diagrams & Manuals
305447-0174-E1 Engine View Diagrams & Manuals
305447-0174-E9 Engine View Diagrams & Manuals
305447-0175-B1 Engine View Diagrams & Manuals
305447-0175-E1 Engine View Diagrams & Manuals
305447-0175-G1 Engine View Diagrams & Manuals
305447-0178-E1 Engine View Diagrams & Manuals
305447-0178-G1 Engine View Diagrams & Manuals
305447-0178-G2 Engine View Diagrams & Manuals
305447-0189-B1 Engine View Diagrams & Manuals
305447-0189-E1 Engine View Diagrams & Manuals
305447-0189-G1 Engine View Diagrams & Manuals
305447-0190-B1 Engine View Diagrams & Manuals
305447-0190-E1 Engine View Diagrams & Manuals
305447-0190-E9 Engine View Diagrams & Manuals
305447-0190-H1 Engine View Diagrams & Manuals
305447-0191-B1 Engine View Diagrams & Manuals
305447-0191-E1 Engine View Diagrams & Manuals
305447-0191-G1 Engine View Diagrams & Manuals
305447-0192-E1 Engine View Diagrams & Manuals
305447-0192-G1 Engine View Diagrams & Manuals
305447-0193-B1 Engine View Diagrams & Manuals
305447-0193-E1 Engine View Diagrams & Manuals
305447-0193-G1 Engine View Diagrams & Manuals
305447-0203-E1 Engine View Diagrams & Manuals
305447-0203-G1 Engine View Diagrams & Manuals
305447-0203-G2 Engine View Diagrams & Manuals
305447-0206-G1 Engine View Diagrams & Manuals
305447-0208-B1 Engine View Diagrams & Manuals
305447-0208-G1 Engine View Diagrams & Manuals
305447-0208-H7 Engine View Diagrams & Manuals
305447-0209-E1 Engine View Diagrams & Manuals
305447-0209-G1 Engine View Diagrams & Manuals
305447-0213-E1 Engine View Diagrams & Manuals
305447-0213-E9 Engine View Diagrams & Manuals
305447-0216-B1 Engine View Diagrams & Manuals
305447-0216-E9 Engine View Diagrams & Manuals
305447-0217-E1 Engine View Diagrams & Manuals
305447-0217-G1 Engine View Diagrams & Manuals
305447-0221-E1 Engine View Diagrams & Manuals
305447-0221-G1 Engine View Diagrams & Manuals
305447-0223-E1 Engine View Diagrams & Manuals
305447-0226-G1 Engine View Diagrams & Manuals
305447-0228-B1 Engine View Diagrams & Manuals
305447-0228-E9 Engine View Diagrams & Manuals
305447-0230-G1 Engine View Diagrams & Manuals
305447-0231-G1 Engine View Diagrams & Manuals
305447-0233-B1 Engine View Diagrams & Manuals
305447-0233-H1 Engine View Diagrams & Manuals
305447-0236-E1 Engine View Diagrams & Manuals
305447-0242-G1 Engine View Diagrams & Manuals
305447-0246-G1 Engine View Diagrams & Manuals
305447-0248-G1 Engine View Diagrams & Manuals
305447-0248-H7 Engine View Diagrams & Manuals
305447-0254-B1 Engine View Diagrams & Manuals
305447-0254-H1 Engine View Diagrams & Manuals
305447-0257-B1 Engine View Diagrams & Manuals
305447-0261-G1 Engine View Diagrams & Manuals
305447-0263-G1 Engine View Diagrams & Manuals
305447-0264-G1 Engine View Diagrams & Manuals
305447-0264-G2 Engine View Diagrams & Manuals
305447-0265-G1 Engine View Diagrams & Manuals
305447-0265-G2 Engine View Diagrams & Manuals
305447-0268-G1 Engine View Diagrams & Manuals
305447-0269-G1 Engine View Diagrams & Manuals
305447-0270-B1 Engine View Diagrams & Manuals
305447-0270-G1 Engine View Diagrams & Manuals
305447-0270-H7 Engine View Diagrams & Manuals
305447-0272-F1 Engine View Diagrams & Manuals
305447-0276-F1 Engine View Diagrams & Manuals
305447-0281-B1 Engine View Diagrams & Manuals
305447-0283-F1 Engine View Diagrams & Manuals
305447-0284-G1 Engine View Diagrams & Manuals
305447-0285-G1 Engine View Diagrams & Manuals
305447-0285-G2 Engine View Diagrams & Manuals
305447-0287-G1 Engine View Diagrams & Manuals
305447-0288-F1 Engine View Diagrams & Manuals
305447-0290-F1 Engine View Diagrams & Manuals
305447-0291-G1 Engine View Diagrams & Manuals
305447-0292-G1 Engine View Diagrams & Manuals
305447-0293-G1 Engine View Diagrams & Manuals
305447-0293-G2 Engine View Diagrams & Manuals
305447-0294-F1 Engine View Diagrams & Manuals
305447-0301-G1 Engine View Diagrams & Manuals
305447-0305-G1 Engine View Diagrams & Manuals
305447-0308-F1 Engine View Diagrams & Manuals
305447-0310-B1 Engine View Diagrams & Manuals
305447-0311-F1 Engine View Diagrams & Manuals
305447-0317-F1 Engine View Diagrams & Manuals
305447-0320-G1 Engine View Diagrams & Manuals
305447-0320-G2 Engine View Diagrams & Manuals
305447-0321-G1 Engine View Diagrams & Manuals
305447-0322-G1 Engine View Diagrams & Manuals
305447-0323-B1 Engine View Diagrams & Manuals
305447-0523-F1 Engine View Diagrams & Manuals
305447-0568-F1 Engine View Diagrams & Manuals
305447-1124-F8 Engine View Diagrams & Manuals
305447-1144-G1 Engine View Diagrams & Manuals
305447-1216-F8 Engine View Diagrams & Manuals
305447-1217-G1 Engine View Diagrams & Manuals
305447-1226-G1 Engine View Diagrams & Manuals
305447-1261-G1 Engine View Diagrams & Manuals
305447-1263-G1 Engine View Diagrams & Manuals
305447-1268-G1 Engine View Diagrams & Manuals
305447-1269-G1 Engine View Diagrams & Manuals
305447-2133-G1 Engine View Diagrams & Manuals
305447-2206-G1 Engine View Diagrams & Manuals
305447-2209-G1 Engine View Diagrams & Manuals
305447-3075-G1 Engine View Diagrams & Manuals
305447-3077-G1 Engine View Diagrams & Manuals
305447-3078-G1 Engine View Diagrams & Manuals
305447-3079-G1 Engine View Diagrams & Manuals
305447-3087-G1 Engine View Diagrams & Manuals
30544A-0111-E1 Engine View Diagrams & Manuals
30544A-0111-E2 Engine View Diagrams & Manuals
305772-0020-E1 Engine View Diagrams & Manuals
305772-0020-G1 Engine View Diagrams & Manuals
305772-0125-E1 Engine View Diagrams & Manuals
305772-0125-G1 Engine View Diagrams & Manuals
305772-0131-E1 Engine View Diagrams & Manuals
305772-0131-G1 Engine View Diagrams & Manuals
305772-0142-B1 Engine View Diagrams & Manuals
305772-0142-G1 Engine View Diagrams & Manuals
305772-3020-G1 Engine View Diagrams & Manuals
305775-0128-E1 Engine View Diagrams & Manuals
305775-0128-G1 Engine View Diagrams & Manuals
305776-0110-E1 Engine View Diagrams & Manuals
305776-0110-G1 Engine View Diagrams & Manuals
305776-0134-G1 Engine View Diagrams & Manuals
305776-0136-G1 Engine View Diagrams & Manuals
305776-1136-G1 Engine View Diagrams & Manuals
305777-0032-E1 Engine View Diagrams & Manuals
305777-0032-G1 Engine View Diagrams & Manuals
305777-0100-E1 Engine View Diagrams & Manuals
305777-0100-G1 Engine View Diagrams & Manuals
305777-0111-B1 Engine View Diagrams & Manuals
305777-0111-E1 Engine View Diagrams & Manuals
305777-0111-G1 Engine View Diagrams & Manuals
305777-0112-B1 Engine View Diagrams & Manuals
305777-0112-E1 Engine View Diagrams & Manuals
305777-0112-G1 Engine View Diagrams & Manuals
305777-0113-B1 Engine View Diagrams & Manuals
305777-0113-E1 Engine View Diagrams & Manuals
305777-0113-G1 Engine View Diagrams & Manuals
305777-0115-E1 Engine View Diagrams & Manuals
305777-0115-G1 Engine View Diagrams & Manuals
305777-0116-E1 Engine View Diagrams & Manuals
305777-0116-G1 Engine View Diagrams & Manuals
305777-0117-E1 Engine View Diagrams & Manuals
305777-0117-G1 Engine View Diagrams & Manuals
305777-0118-B1 Engine View Diagrams & Manuals
305777-0118-E1 Engine View Diagrams & Manuals
305777-0118-G1 Engine View Diagrams & Manuals
305777-0120-E1 Engine View Diagrams & Manuals
305777-0120-G1 Engine View Diagrams & Manuals
305777-0121-E1 Engine View Diagrams & Manuals
305777-0121-G1 Engine View Diagrams & Manuals
305777-0122-E1 Engine View Diagrams & Manuals
305777-0122-G1 Engine View Diagrams & Manuals
305777-0123-B1 Engine View Diagrams & Manuals
305777-0123-E1 Engine View Diagrams & Manuals
305777-0123-G1 Engine View Diagrams & Manuals
305777-0126-E1 Engine View Diagrams & Manuals
305777-0126-G1 Engine View Diagrams & Manuals
305777-0129-E1 Engine View Diagrams & Manuals
305777-0129-G1 Engine View Diagrams & Manuals
305777-0130-E1 Engine View Diagrams & Manuals
305777-0130-G1 Engine View Diagrams & Manuals
305777-0132-B1 Engine View Diagrams & Manuals
305777-0132-G1 Engine View Diagrams & Manuals
305777-0133-G1 Engine View Diagrams & Manuals
305777-0135-G1 Engine View Diagrams & Manuals
305777-0137-G1 Engine View Diagrams & Manuals
305777-0138-B1 Engine View Diagrams & Manuals
305777-0138-G1 Engine View Diagrams & Manuals
305777-0139-B1 Engine View Diagrams & Manuals
305777-0139-G1 Engine View Diagrams & Manuals
305777-0140-G1 Engine View Diagrams & Manuals
305777-0149-G1 Engine View Diagrams & Manuals
305777-1133-G1 Engine View Diagrams & Manuals
305777-1140-G1 Engine View Diagrams & Manuals
305777-3032-G1 Engine View Diagrams & Manuals
310707-0101-E1 Engine View Diagrams & Manuals
310707-0113-E1 Engine View Diagrams & Manuals
310707-0114-E1 Engine View Diagrams & Manuals
310707-0130-E1 Engine View Diagrams & Manuals
310707-0130-E3 Engine View Diagrams & Manuals
310707-0132-E1 Engine View Diagrams & Manuals
310707-0135-E1 Engine View Diagrams & Manuals
310707-0136-E1 Engine View Diagrams & Manuals
310707-0137-E1 Engine View Diagrams & Manuals
310707-0139-E1 Engine View Diagrams & Manuals
310707-0203-E1 Engine View Diagrams & Manuals
310777-0102-E1 Engine View Diagrams & Manuals
310777-0112-E1 Engine View Diagrams & Manuals
310777-0131-E1 Engine View Diagrams & Manuals
310777-0131-E3 Engine View Diagrams & Manuals
310777-0142-E1 Engine View Diagrams & Manuals
312707-0136-E1 Engine View Diagrams & Manuals
312777-0101-E1 Engine View Diagrams & Manuals
312777-0127-E1 Engine View Diagrams & Manuals
312777-0128-E1 Engine View Diagrams & Manuals
312777-0129-E1 Engine View Diagrams & Manuals
312777-0130-E1 Engine View Diagrams & Manuals
312777-0131-E1 Engine View Diagrams & Manuals
312777-0132-E1 Engine View Diagrams & Manuals
312777-0134-E1 Engine View Diagrams & Manuals
312777-0150-E1 Engine View Diagrams & Manuals
312777-0151-E1 Engine View Diagrams & Manuals
309447-0110-E1 Engine View Diagrams & Manuals
311707-0026-E1 Engine View Diagrams & Manuals
311707-0028-E1 Engine View Diagrams & Manuals
311707-0114-E1 Engine View Diagrams & Manuals
311707-0116-99 Engine View Diagrams & Manuals
311707-0117-99 Engine View Diagrams & Manuals
311707-0121-E1 Engine View Diagrams & Manuals
311707-0125-E1 Engine View Diagrams & Manuals
311707-0132-E1 Engine View Diagrams & Manuals
311707-0132-E3 Engine View Diagrams & Manuals
311707-0138-E1 Engine View Diagrams & Manuals
311707-0138-E2 Engine View Diagrams & Manuals
311707-0145-E1 Engine View Diagrams & Manuals
311707-0146-E1 Engine View Diagrams & Manuals
311707-0160-99 Engine View Diagrams & Manuals
311707-0162-99 Engine View Diagrams & Manuals
311707-0164-99 Engine View Diagrams & Manuals
311777-0005-E1 Engine View Diagrams & Manuals
311777-0036-E1 Engine View Diagrams & Manuals
311777-0038-E1 Engine View Diagrams & Manuals
311777-0070-E1 Engine View Diagrams & Manuals
311777-0101-E1 Engine View Diagrams & Manuals
311777-0105-E1 Engine View Diagrams & Manuals
311777-0115-E1 Engine View Diagrams & Manuals
311777-0116-E1 Engine View Diagrams & Manuals
311777-0117-E1 Engine View Diagrams & Manuals
311777-0120-E1 Engine View Diagrams & Manuals
311777-0131-E1 Engine View Diagrams & Manuals
311777-0133-E1 Engine View Diagrams & Manuals
311777-0134-E1 Engine View Diagrams & Manuals
311777-0134-E3 Engine View Diagrams & Manuals
311777-0137-E1 Engine View Diagrams & Manuals
311777-0139-E1 Engine View Diagrams & Manuals
311777-0140-E1 Engine View Diagrams & Manuals
311777-0141-E1 Engine View Diagrams & Manuals
311777-0142-E1 Engine View Diagrams & Manuals
311777-0143-E1 Engine View Diagrams & Manuals
311777-0143-E2 Engine View Diagrams & Manuals
311777-0144-E1 Engine View Diagrams & Manuals
311777-0144-E3 Engine View Diagrams & Manuals
311777-0148-E1 Engine View Diagrams & Manuals
311777-0151-E1 Engine View Diagrams & Manuals
311777-0152-E1 Engine View Diagrams & Manuals
311777-0152-E2 Engine View Diagrams & Manuals
311777-0153-E1 Engine View Diagrams & Manuals
311777-0154-E1 Engine View Diagrams & Manuals
311777-0156-E1 Engine View Diagrams & Manuals
311777-0157-E1 Engine View Diagrams & Manuals
311777-0159-E1 Engine View Diagrams & Manuals
311777-0160-E1 Engine View Diagrams & Manuals
311777-0162-E1 Engine View Diagrams & Manuals
311777-0164-E1 Engine View Diagrams & Manuals
311777-0165-E1 Engine View Diagrams & Manuals
311777-0166-E1 Engine View Diagrams & Manuals
311777-0167-E1 Engine View Diagrams & Manuals
311777-0209-E1 Engine View Diagrams & Manuals
326431-0020-99 Engine View Diagrams & Manuals
326431-0021-99 Engine View Diagrams & Manuals
326431-0022-99 Engine View Diagrams & Manuals
326431-0050-99 Engine View Diagrams & Manuals
326431-0112-99 Engine View Diagrams & Manuals
326431-0113-99 Engine View Diagrams & Manuals
326431-0114-99 Engine View Diagrams & Manuals
326431-0115-99 Engine View Diagrams & Manuals
326431-0116-99 Engine View Diagrams & Manuals
326431-0119-99 Engine View Diagrams & Manuals
326431-0120-99 Engine View Diagrams & Manuals
326431-0121-99 Engine View Diagrams & Manuals
326431-0123-99 Engine View Diagrams & Manuals
326431-0124-99 Engine View Diagrams & Manuals
326431-0126-99 Engine View Diagrams & Manuals
326431-0127-99 Engine View Diagrams & Manuals
326431-0128-99 Engine View Diagrams & Manuals
326431-0129-99 Engine View Diagrams & Manuals
326431-0130-99 Engine View Diagrams & Manuals
326431-0131-99 Engine View Diagrams & Manuals
326431-0133-99 Engine View Diagrams & Manuals
326431-0134-99 Engine View Diagrams & Manuals
326431-0135-99 Engine View Diagrams & Manuals
326431-0136-99 Engine View Diagrams & Manuals
326431-0137-99 Engine View Diagrams & Manuals
326431-0138-99 Engine View Diagrams & Manuals
326431-0139-99 Engine View Diagrams & Manuals
326431-0140-99 Engine View Diagrams & Manuals
326431-0141-99 Engine View Diagrams & Manuals
326431-0143-99 Engine View Diagrams & Manuals
326431-0144-99 Engine View Diagrams & Manuals
326431-0145-99 Engine View Diagrams & Manuals
326431-0147-99 Engine View Diagrams & Manuals
326431-0148-99 Engine View Diagrams & Manuals
326431-0149-99 Engine View Diagrams & Manuals
326431-0150-99 Engine View Diagrams & Manuals
326431-0151-99 Engine View Diagrams & Manuals
326431-0152-99 Engine View Diagrams & Manuals
326431-0153-99 Engine View Diagrams & Manuals
326431-0155-99 Engine View Diagrams & Manuals
326431-0156-99 Engine View Diagrams & Manuals
326431-0157-99 Engine View Diagrams & Manuals
326431-0158-99 Engine View Diagrams & Manuals
326431-0159-99 Engine View Diagrams & Manuals
326431-0160-99 Engine View Diagrams & Manuals
326431-0162-99 Engine View Diagrams & Manuals
326431-0163-99 Engine View Diagrams & Manuals
326431-0164-99 Engine View Diagrams & Manuals
326431-0165-99 Engine View Diagrams & Manuals
326431-0166-99 Engine View Diagrams & Manuals
326431-0167-99 Engine View Diagrams & Manuals
326431-0168-99 Engine View Diagrams & Manuals
326431-0169-99 Engine View Diagrams & Manuals
326431-0170-99 Engine View Diagrams & Manuals
326431-0171-99 Engine View Diagrams & Manuals
326431-0172-99 Engine View Diagrams & Manuals
326431-0173-99 Engine View Diagrams & Manuals
326431-0174-99 Engine View Diagrams & Manuals
326431-0175-99 Engine View Diagrams & Manuals
326431-0176-99 Engine View Diagrams & Manuals
326431-0178-99 Engine View Diagrams & Manuals
326431-0180-99 Engine View Diagrams & Manuals
326431-0181-99 Engine View Diagrams & Manuals
326431-0182-99 Engine View Diagrams & Manuals
326431-0183-99 Engine View Diagrams & Manuals
326431-0184-99 Engine View Diagrams & Manuals
326431-0185-99 Engine View Diagrams & Manuals
326431-0186-99 Engine View Diagrams & Manuals
326431-0187-99 Engine View Diagrams & Manuals
326431-0188-99 Engine View Diagrams & Manuals
326431-0189-99 Engine View Diagrams & Manuals
326431-0190-99 Engine View Diagrams & Manuals
326431-0191-99 Engine View Diagrams & Manuals
326431-0192-99 Engine View Diagrams & Manuals
326431-0193-99 Engine View Diagrams & Manuals
326431-0195-99 Engine View Diagrams & Manuals
326431-0196-99 Engine View Diagrams & Manuals
326431-0197-99 Engine View Diagrams & Manuals
326431-0198-99 Engine View Diagrams & Manuals
326431-0200-99 Engine View Diagrams & Manuals
326431-0201-99 Engine View Diagrams & Manuals
326431-0203-99 Engine View Diagrams & Manuals
326431-0204-99 Engine View Diagrams & Manuals
326431-0205-99 Engine View Diagrams & Manuals
326431-0206-99 Engine View Diagrams & Manuals
326431-0208-99 Engine View Diagrams & Manuals
326431-0209-99 Engine View Diagrams & Manuals
326431-0210-99 Engine View Diagrams & Manuals
326431-0211-99 Engine View Diagrams & Manuals
326431-0212-99 Engine View Diagrams & Manuals
326431-0213-99 Engine View Diagrams & Manuals
326431-0215-99 Engine View Diagrams & Manuals
326431-0216-99 Engine View Diagrams & Manuals
326431-0217-99 Engine View Diagrams & Manuals
326431-0218-99 Engine View Diagrams & Manuals
326431-0219-99 Engine View Diagrams & Manuals
326431-0220-99 Engine View Diagrams & Manuals
326431-0221-99 Engine View Diagrams & Manuals
326431-0222-99 Engine View Diagrams & Manuals
326431-0223-99 Engine View Diagrams & Manuals
326431-0224-99 Engine View Diagrams & Manuals
326431-0226-99 Engine View Diagrams & Manuals
326431-0227-99 Engine View Diagrams & Manuals
326431-0228-99 Engine View Diagrams & Manuals
326431-0229-99 Engine View Diagrams & Manuals
326431-0230-99 Engine View Diagrams & Manuals
326431-0231-99 Engine View Diagrams & Manuals
326431-0232-99 Engine View Diagrams & Manuals
326431-0233-99 Engine View Diagrams & Manuals
326431-0234-99 Engine View Diagrams & Manuals
326431-0235-99 Engine View Diagrams & Manuals
326431-0236-99 Engine View Diagrams & Manuals
326431-0237-99 Engine View Diagrams & Manuals
326431-0238-99 Engine View Diagrams & Manuals
326431-0240-99 Engine View Diagrams & Manuals
326431-0241-99 Engine View Diagrams & Manuals
326431-0242-99 Engine View Diagrams & Manuals
326431-0243-99 Engine View Diagrams & Manuals
326431-0244-99 Engine View Diagrams & Manuals
326431-0245-99 Engine View Diagrams & Manuals
326431-0246-99 Engine View Diagrams & Manuals
326431-0247-99 Engine View Diagrams & Manuals
326431-0248-99 Engine View Diagrams & Manuals
326431-0249-99 Engine View Diagrams & Manuals
326431-0250-99 Engine View Diagrams & Manuals
326431-0251-99 Engine View Diagrams & Manuals
326431-0252-99 Engine View Diagrams & Manuals
326431-0253-99 Engine View Diagrams & Manuals
326431-0254-99 Engine View Diagrams & Manuals
326431-0255-99 Engine View Diagrams & Manuals
326431-0256-99 Engine View Diagrams & Manuals
326431-0257-99 Engine View Diagrams & Manuals
326431-0258-99 Engine View Diagrams & Manuals
326431-0259-99 Engine View Diagrams & Manuals
326431-0260-99 Engine View Diagrams & Manuals
326431-0261-99 Engine View Diagrams & Manuals
326431-0262-99 Engine View Diagrams & Manuals
326431-0264-99 Engine View Diagrams & Manuals
326431-0265-99 Engine View Diagrams & Manuals
326431-0266-99 Engine View Diagrams & Manuals
326431-0269-99 Engine View Diagrams & Manuals
326431-0271-99 Engine View Diagrams & Manuals
326431-0272-99 Engine View Diagrams & Manuals
326431-0273-99 Engine View Diagrams & Manuals
326431-0274-99 Engine View Diagrams & Manuals
326431-0275-99 Engine View Diagrams & Manuals
326431-0276-99 Engine View Diagrams & Manuals
326431-0277-99 Engine View Diagrams & Manuals
326431-0278-99 Engine View Diagrams & Manuals
326431-0279-99 Engine View Diagrams & Manuals
326431-0281-99 Engine View Diagrams & Manuals
326431-0282-99 Engine View Diagrams & Manuals
326431-0283-99 Engine View Diagrams & Manuals
326431-0284-99 Engine View Diagrams & Manuals
326431-0285-99 Engine View Diagrams & Manuals
326431-0286-99 Engine View Diagrams & Manuals
326431-0287-99 Engine View Diagrams & Manuals
326431-0288-99 Engine View Diagrams & Manuals
326431-0289-99 Engine View Diagrams & Manuals
326431-0290-99 Engine View Diagrams & Manuals
326431-0291-99 Engine View Diagrams & Manuals
326431-0292-99 Engine View Diagrams & Manuals
326431-0293-99 Engine View Diagrams & Manuals
326431-0295-99 Engine View Diagrams & Manuals
326431-0297-99 Engine View Diagrams & Manuals
326431-0298-99 Engine View Diagrams & Manuals
326431-0300-99 Engine View Diagrams & Manuals
326431-0302-99 Engine View Diagrams & Manuals
326431-0303-99 Engine View Diagrams & Manuals
326431-0304-99 Engine View Diagrams & Manuals
326431-0305-99 Engine View Diagrams & Manuals
326431-0306-99 Engine View Diagrams & Manuals
326431-0307-99 Engine View Diagrams & Manuals
326431-0308-99 Engine View Diagrams & Manuals
326431-0309-99 Engine View Diagrams & Manuals
326431-0310-99 Engine View Diagrams & Manuals
326431-0311-99 Engine View Diagrams & Manuals
326431-0312-99 Engine View Diagrams & Manuals
326431-0314-99 Engine View Diagrams & Manuals
326431-0315-99 Engine View Diagrams & Manuals
326431-0316-99 Engine View Diagrams & Manuals
326431-0317-99 Engine View Diagrams & Manuals
326431-0318-99 Engine View Diagrams & Manuals
326431-0319-99 Engine View Diagrams & Manuals
326431-0320-99 Engine View Diagrams & Manuals
326431-0321-99 Engine View Diagrams & Manuals
326431-0322-99 Engine View Diagrams & Manuals
326431-0323-99 Engine View Diagrams & Manuals
326431-0324-99 Engine View Diagrams & Manuals
326431-0325-99 Engine View Diagrams & Manuals
326431-0326-99 Engine View Diagrams & Manuals
326431-0327-99 Engine View Diagrams & Manuals
326431-0328-99 Engine View Diagrams & Manuals
326431-0329-99 Engine View Diagrams & Manuals
326431-0330-99 Engine View Diagrams & Manuals
326431-0331-99 Engine View Diagrams & Manuals
326431-0332-99 Engine View Diagrams & Manuals
326431-0333-99 Engine View Diagrams & Manuals
326431-0334-99 Engine View Diagrams & Manuals
326431-0335-99 Engine View Diagrams & Manuals
326431-0336-99 Engine View Diagrams & Manuals
326431-0337-99 Engine View Diagrams & Manuals
326431-0338-99 Engine View Diagrams & Manuals
326431-0340-99 Engine View Diagrams & Manuals
326431-0341-99 Engine View Diagrams & Manuals
326431-0342-99 Engine View Diagrams & Manuals
326431-0343-99 Engine View Diagrams & Manuals
326431-0344-99 Engine View Diagrams & Manuals
326431-0345-99 Engine View Diagrams & Manuals
326431-0346-99 Engine View Diagrams & Manuals
326431-0347-99 Engine View Diagrams & Manuals
326431-0348-99 Engine View Diagrams & Manuals
326431-0349-99 Engine View Diagrams & Manuals
326431-0350-99 Engine View Diagrams & Manuals
326431-0351-99 Engine View Diagrams & Manuals
326431-0352-99 Engine View Diagrams & Manuals
326431-0353-99 Engine View Diagrams & Manuals
326431-0354-99 Engine View Diagrams & Manuals
326431-0355-99 Engine View Diagrams & Manuals
326431-0356-99 Engine View Diagrams & Manuals
326431-0357-99 Engine View Diagrams & Manuals
326431-0358-99 Engine View Diagrams & Manuals
326431-0359-99 Engine View Diagrams & Manuals
326431-0360-99 Engine View Diagrams & Manuals
326431-0361-99 Engine View Diagrams & Manuals
326431-0362-99 Engine View Diagrams & Manuals
326431-0363-99 Engine View Diagrams & Manuals
326431-0364-99 Engine View Diagrams & Manuals
326431-0365-99 Engine View Diagrams & Manuals
326431-0366-99 Engine View Diagrams & Manuals
326431-0367-99 Engine View Diagrams & Manuals
326431-0368-99 Engine View Diagrams & Manuals
326431-0369-99 Engine View Diagrams & Manuals
326431-0370-99 Engine View Diagrams & Manuals
326431-0371-99 Engine View Diagrams & Manuals
326431-0372-99 Engine View Diagrams & Manuals
326431-0373-99 Engine View Diagrams & Manuals
326431-0375-99 Engine View Diagrams & Manuals
326431-0376-99 Engine View Diagrams & Manuals
326431-0377-99 Engine View Diagrams & Manuals
326431-0378-99 Engine View Diagrams & Manuals
326431-0379-99 Engine View Diagrams & Manuals
326431-0381-99 Engine View Diagrams & Manuals
326431-0382-99 Engine View Diagrams & Manuals
326431-0383-99 Engine View Diagrams & Manuals
326431-0384-99 Engine View Diagrams & Manuals
326431-0385-99 Engine View Diagrams & Manuals
326431-0387-99 Engine View Diagrams & Manuals
326431-0388-99 Engine View Diagrams & Manuals
326431-0389-99 Engine View Diagrams & Manuals
326431-0391-99 Engine View Diagrams & Manuals
326431-0392-99 Engine View Diagrams & Manuals
326431-0394-99 Engine View Diagrams & Manuals
326431-0396-99 Engine View Diagrams & Manuals
326431-0399-99 Engine View Diagrams & Manuals
326431-0611-01 Engine View Diagrams & Manuals
326431-0620-01 Engine View Diagrams & Manuals
326431-0632-01 Series Engine View Diagrams & Manuals
326431-0632-02 Series Engine View Diagrams & Manuals
326431-0632-03 Series Engine View Diagrams & Manuals
326431-0632-04 Series Engine View Diagrams & Manuals
326431-0633-01 Series Engine View Diagrams & Manuals
326431-0637-01 Series Engine View Diagrams & Manuals
326431-0637-02 Engine View Diagrams & Manuals
326431-0637-03 Engine View Diagrams & Manuals
326431-0637-04 Engine View Diagrams & Manuals
326431-0637-05 Engine View Diagrams & Manuals
326431-0637-06 Engine View Diagrams & Manuals
326431-0640-01 Engine View Diagrams & Manuals
326431-0641-01 Engine View Diagrams & Manuals
326431-0642-01 Engine View Diagrams & Manuals
326431-0644-01 Engine View Diagrams & Manuals
326431-0645-01 Engine View Diagrams & Manuals
326431-0647-01 Engine View Diagrams & Manuals
326431-0647-02 Engine View Diagrams & Manuals
326431-0648-01 Engine View Diagrams & Manuals
326431-0650-01 Engine View Diagrams & Manuals
326431-0651-01 Engine View Diagrams & Manuals
326431-0651-02 Engine View Diagrams & Manuals
326431-0651-03 Engine View Diagrams & Manuals
326431-0651-04 Engine View Diagrams & Manuals
326431-0651-05 Engine View Diagrams & Manuals
326431-0651-06 Engine View Diagrams & Manuals
326431-0651-07 Engine View Diagrams & Manuals
326431-0651-08 Engine View Diagrams & Manuals
326431-0651-09 Engine View Diagrams & Manuals
326431-0652-01 Engine View Diagrams & Manuals
326431-0655-01 Engine View Diagrams & Manuals
326431-0656-01 Engine View Diagrams & Manuals
326431-0656-02 Engine View Diagrams & Manuals
326431-0656-03 Engine View Diagrams & Manuals
326431-0657-01 Engine View Diagrams & Manuals
326431-0659-01 Engine View Diagrams & Manuals
326431-0662-01 Engine View Diagrams & Manuals
326431-0664-01 Engine View Diagrams & Manuals
326431-0674-01 Engine View Diagrams & Manuals
326431-0674-02 Engine View Diagrams & Manuals
326431-0677-01 Engine View Diagrams & Manuals
326431-0683-01 Engine View Diagrams & Manuals
326431-0689-01 Engine View Diagrams & Manuals
326431-0690-01 Engine View Diagrams & Manuals
326431-0690-02 Engine View Diagrams & Manuals
326431-0694-01 Engine View Diagrams & Manuals
326431-0695-01 Engine View Diagrams & Manuals
326431-0696-01 Engine View Diagrams & Manuals
326431-0700-01 Engine View Diagrams & Manuals
326431-0706-01 Engine View Diagrams & Manuals
326431-0709-01 Engine View Diagrams & Manuals
326431-0709-02 Engine View Diagrams & Manuals
326431-0709-03 Engine View Diagrams & Manuals
326431-0709-04 Engine View Diagrams & Manuals
326431-0709-05 Engine View Diagrams & Manuals
326431-0717-01 Engine View Diagrams & Manuals
326431-0717-02 Engine View Diagrams & Manuals
326431-0717-03 Engine View Diagrams & Manuals
326431-0717-04 Engine View Diagrams & Manuals
326431-0717-05 Engine View Diagrams & Manuals
326431-0717-06 Engine View Diagrams & Manuals
326431-0717-07 Engine View Diagrams & Manuals
326431-0717-09 Engine View Diagrams & Manuals
326431-0722-01 Engine View Diagrams & Manuals
326431-0727-01 Engine View Diagrams & Manuals
326431-0734-01 Engine View Diagrams & Manuals
326431-0739-01 Engine View Diagrams & Manuals
326431-0743-01 Engine View Diagrams & Manuals
326431-0747-01 Engine View Diagrams & Manuals
326431-0755-99 Engine View Diagrams & Manuals
326431-0756-01 Engine View Diagrams & Manuals
326431-0757-01 Engine View Diagrams & Manuals
326431-0757-02 Engine View Diagrams & Manuals
326431-0762-01 Engine View Diagrams & Manuals
326431-0763-01 Engine View Diagrams & Manuals
326431-0766-99 Engine View Diagrams & Manuals
326431-0775-01 Engine View Diagrams & Manuals
326431-0778-01 Engine View Diagrams & Manuals
326431-0790-01 Engine View Diagrams & Manuals
326431-0790-02 Engine View Diagrams & Manuals
326431-0791-01 Engine View Diagrams & Manuals
326431-0792-01 Engine View Diagrams & Manuals
326431-0793-01 Engine View Diagrams & Manuals
326431-0793-02 Engine View Diagrams & Manuals
326431-0794-01 Engine View Diagrams & Manuals
326431-0799-01 Engine View Diagrams & Manuals
326431-0801-01 Engine View Diagrams & Manuals
326431-0802-01 Engine View Diagrams & Manuals
326431-0803-01 Engine View Diagrams & Manuals
326431-0803-02 Engine View Diagrams & Manuals
326431-0804-01 Engine View Diagrams & Manuals
326431-1160-99 Engine View Diagrams & Manuals
326431-2520-01 Engine View Diagrams & Manuals
326431-2520-02 Engine View Diagrams & Manuals
326431-2520-03 Engine View Diagrams & Manuals
326431-2520-04 Engine View Diagrams & Manuals
326431-2520-05 Engine View Diagrams & Manuals
326431-2520-06 Engine View Diagrams & Manuals
326431-2521-01 Engine View Diagrams & Manuals
326431-2521-02 Engine View Diagrams & Manuals
326431-2521-03 Engine View Diagrams & Manuals
326431-2521-04 Engine View Diagrams & Manuals
326431-2521-05 Engine View Diagrams & Manuals
326431-2521-06 Engine View Diagrams & Manuals
326431-2521-07 Engine View Diagrams & Manuals
326431-2521-08 Engine View Diagrams & Manuals
326431-2521-09 Engine View Diagrams & Manuals
326431-2522-01 Engine View Diagrams & Manuals
326431-2522-02 Engine View Diagrams & Manuals
326431-2522-03 Engine View Diagrams & Manuals
326431-2530-01 Engine View Diagrams & Manuals
326431-2550-01 Engine View Diagrams & Manuals
326431-2550-02 Engine View Diagrams & Manuals
326431-2550-03 Engine View Diagrams & Manuals
326431-2580-01 Engine View Diagrams & Manuals
326431-2580-02 Engine View Diagrams & Manuals
326431-2581-01 Engine View Diagrams & Manuals
326431-2582-01 Engine View Diagrams & Manuals
326431-2583-01 Engine View Diagrams & Manuals
326432-0060-99 Engine View Diagrams & Manuals
326432-0061-99 Engine View Diagrams & Manuals
326432-0062-99 Engine View Diagrams & Manuals
326432-0635-01 Engine View Diagrams & Manuals
326432-0635-02 Engine View Diagrams & Manuals
326432-0646-01 Engine View Diagrams & Manuals
326432-0646-02 Engine View Diagrams & Manuals
326432-0670-01 Engine View Diagrams & Manuals
326432-0681-01 Engine View Diagrams & Manuals
326432-0686-01 Engine View Diagrams & Manuals
326432-0691-01 Engine View Diagrams & Manuals
326432-0710-01 Engine View Diagrams & Manuals
326432-0713-01 Engine View Diagrams & Manuals
326432-0723-01 Engine View Diagrams & Manuals
326432-0728-01 Engine View Diagrams & Manuals
326432-0730-01 Engine View Diagrams & Manuals
326432-0735-01 Engine View Diagrams & Manuals
326432-0737-01 Engine View Diagrams & Manuals
326432-0744-01 Engine View Diagrams & Manuals
326432-0745-01 Engine View Diagrams & Manuals
326432-0750-01 Engine View Diagrams & Manuals
326432-0755-01 Engine View Diagrams & Manuals
326432-0759-01 Engine View Diagrams & Manuals
326432-0780-01 Engine View Diagrams & Manuals
326432-0785-01 Engine View Diagrams & Manuals
326432-0786-01 Engine View Diagrams & Manuals
326432-2560-01 Engine View Diagrams & Manuals
326432-2561-01 Engine View Diagrams & Manuals
326432-2561-02 Engine View Diagrams & Manuals
326432-2561-03 Engine View Diagrams & Manuals
326432-2562-01 Engine View Diagrams & Manuals
326432-2562-02 Engine View Diagrams & Manuals
326432-2562-03 Engine View Diagrams & Manuals
326432-2562-04 Engine View Diagrams & Manuals
326434-0023-99 Engine View Diagrams & Manuals
326435-0296-99 Engine View Diagrams & Manuals
326435-0374-99 Engine View Diagrams & Manuals
326435-0684-01 Engine View Diagrams & Manuals
326435-0705-01 Engine View Diagrams & Manuals
326435-0708-01 Engine View Diagrams & Manuals
326435-0724-01 Engine View Diagrams & Manuals
326435-0733-01 Engine View Diagrams & Manuals
326435-2596-01 Engine View Diagrams & Manuals
326436-0080-99 Engine View Diagrams & Manuals
326436-0386-99 Engine View Diagrams & Manuals
326436-0387-99 Engine View Diagrams & Manuals
326436-0393-99 Engine View Diagrams & Manuals
326436-0395-99 Engine View Diagrams & Manuals
326436-0396-99 Engine View Diagrams & Manuals
326436-0397-99 Engine View Diagrams & Manuals
326436-0631-01 Engine View Diagrams & Manuals
326436-0639-01 Engine View Diagrams & Manuals
326436-0726-01 Engine View Diagrams & Manuals
326436-0767-99 Engine View Diagrams & Manuals
326437-0027-99 Engine View Diagrams & Manuals
326437-0028-99 Engine View Diagrams & Manuals
326437-0063-99 Engine View Diagrams & Manuals
326437-0630-01 Engine View Diagrams & Manuals
326437-0630-02 Engine View Diagrams & Manuals
326437-0634-01 Engine View Diagrams & Manuals
326437-0634-02 Engine View Diagrams & Manuals
326437-0636-01 Engine View Diagrams & Manuals
326437-0638-01 Engine View Diagrams & Manuals
326437-0640-01 Engine View Diagrams & Manuals
326437-0643-01 Engine View Diagrams & Manuals
326437-0649-01 Engine View Diagrams & Manuals
326437-0653-01 Engine View Diagrams & Manuals
326437-0654-01 Engine View Diagrams & Manuals
326437-0658-01 Engine View Diagrams & Manuals
326437-0660-01 Engine View Diagrams & Manuals
326437-0661-01 Engine View Diagrams & Manuals
326437-0663-01 Engine View Diagrams & Manuals
326437-0665-01 Engine View Diagrams & Manuals
326437-0665-02 Engine View Diagrams & Manuals
326437-0666-01 Engine View Diagrams & Manuals
326437-0667-01 Engine View Diagrams & Manuals
326437-0667-02 Engine View Diagrams & Manuals
326437-0668-01 Engine View Diagrams & Manuals
326437-0668-02 Engine View Diagrams & Manuals
326437-0669-01 Engine View Diagrams & Manuals
326437-0671-01 Engine View Diagrams & Manuals
326437-0671-02 Engine View Diagrams & Manuals
326437-0671-03 Engine View Diagrams & Manuals
326437-0671-04 Engine View Diagrams & Manuals
326437-0672-01 Engine View Diagrams & Manuals
326437-0673-01 Engine View Diagrams & Manuals
326437-0675-01 Engine View Diagrams & Manuals
326437-0676-01 Engine View Diagrams & Manuals
326437-0678-01 Engine View Diagrams & Manuals
326437-0679-01 Engine View Diagrams & Manuals
326437-0680-01 Engine View Diagrams & Manuals
326437-0682-01 Engine View Diagrams & Manuals
326437-0682-02 Engine View Diagrams & Manuals
326437-0682-03 Engine View Diagrams & Manuals
326437-0685-01 Engine View Diagrams & Manuals
326437-0687-01 Engine View Diagrams & Manuals
326437-0688-01 Engine View Diagrams & Manuals
326437-0688-02 Engine View Diagrams & Manuals
326437-0692-01 Engine View Diagrams & Manuals
326437-0693-01 Engine View Diagrams & Manuals
326437-0697-01 Engine View Diagrams & Manuals
326437-0698-01 Engine View Diagrams & Manuals
326437-0699-01 Engine View Diagrams & Manuals
326437-0701-01 Engine View Diagrams & Manuals
326437-0702-01 Engine View Diagrams & Manuals
326437-0703-01 Engine View Diagrams & Manuals
326437-0704-01 Engine View Diagrams & Manuals
326437-0707-01 Engine View Diagrams & Manuals
326437-0711-01 Engine View Diagrams & Manuals
326437-0712-01 Engine View Diagrams & Manuals
326437-0714-01 Engine View Diagrams & Manuals
326437-0715-01 Engine View Diagrams & Manuals
326437-0716-01 Engine View Diagrams & Manuals
326437-0718-01 Engine View Diagrams & Manuals
326437-0718-02 Engine View Diagrams & Manuals
326437-0718-03 Engine View Diagrams & Manuals
326437-0719-01 Engine View Diagrams & Manuals
326437-0720-01 Engine View Diagrams & Manuals
326437-0720-02 Engine View Diagrams & Manuals
326437-0721-01 Engine View Diagrams & Manuals
326437-0725-01 Engine View Diagrams & Manuals
326437-0729-01 Engine View Diagrams & Manuals
326437-0731-01 Engine View Diagrams & Manuals
326437-0732-01 Engine View Diagrams & Manuals
326437-0736-01 Engine View Diagrams & Manuals
326437-0738-01 Engine View Diagrams & Manuals
326437-0740-01 Engine View Diagrams & Manuals
326437-0741-01 Engine View Diagrams & Manuals
326437-0742-01 Engine View Diagrams & Manuals
326437-0746-01 Engine View Diagrams & Manuals
326437-0748-01 Engine View Diagrams & Manuals
326437-0749-01 Engine View Diagrams & Manuals
326437-0749-02 Engine View Diagrams & Manuals
326437-0751-01 Engine View Diagrams & Manuals
326437-0752-01 Engine View Diagrams & Manuals
326437-0753-01 Engine View Diagrams & Manuals
326437-0754-01 Engine View Diagrams & Manuals
326437-0758-01 Engine View Diagrams & Manuals
326437-0758-02 Engine View Diagrams & Manuals
326437-0760-01 Engine View Diagrams & Manuals
326437-0761-01 Engine View Diagrams & Manuals
326437-0764-01 Engine View Diagrams & Manuals
326437-0765-01 Engine View Diagrams & Manuals
326437-0770-01 Engine View Diagrams & Manuals
326437-0771-01 Engine View Diagrams & Manuals
326437-0771-02 Engine View Diagrams & Manuals
326437-0771-03 Engine View Diagrams & Manuals
326437-0772-01 Engine View Diagrams & Manuals
326437-0774-01 Engine View Diagrams & Manuals
326437-0776-01 Engine View Diagrams & Manuals
326437-0779-01 Engine View Diagrams & Manuals
326437-0781-01 Engine View Diagrams & Manuals
326437-0782-01 Engine View Diagrams & Manuals
326437-0782-02 Engine View Diagrams & Manuals
326437-0783-01 Engine View Diagrams & Manuals
326437-0784-01 Engine View Diagrams & Manuals
326437-0787-01 Engine View Diagrams & Manuals
326437-0788-01 Engine View Diagrams & Manuals
326437-0789-01 Engine View Diagrams & Manuals
326437-0797-01 Engine View Diagrams & Manuals
326437-0797-02 Engine View Diagrams & Manuals
326437-2526-01 Engine View Diagrams & Manuals
326437-2527-01 Engine View Diagrams & Manuals
326437-2527-02 Engine View Diagrams & Manuals
326437-2527-03 Engine View Diagrams & Manuals
326437-2528-01 Engine View Diagrams & Manuals
326437-2528-02 Engine View Diagrams & Manuals
326437-2528-03 Engine View Diagrams & Manuals
326437-2528-04 Engine View Diagrams & Manuals
326437-2529-01 Engine View Diagrams & Manuals
326437-2529-02 Engine View Diagrams & Manuals
326437-2563-01 Engine View Diagrams & Manuals
326437-2563-02 Engine View Diagrams & Manuals
326437-2563-03 Engine View Diagrams & Manuals
326437-2563-04 Engine View Diagrams & Manuals
331807-0026-G1 Engine View Diagrams & Manuals
331807-0116-B1 Engine View Diagrams & Manuals
331807-3026-G5 Engine View Diagrams & Manuals
331877-0036-E1 Engine View Diagrams & Manuals
331877-0036-G1 Engine View Diagrams & Manuals
331877-0110-G5 Engine View Diagrams & Manuals
331877-0113-B1 Engine View Diagrams & Manuals
331877-0113-B2 Engine View Diagrams & Manuals
331877-0114-G1 Engine View Diagrams & Manuals
331877-0114-G2 Engine View Diagrams & Manuals
331877-0115-B1 Engine View Diagrams & Manuals
331877-0117-G1 Engine View Diagrams & Manuals
331877-0118-G1 Engine View Diagrams & Manuals
331877-0119-B1 Engine View Diagrams & Manuals
331877-0120-B1 Engine View Diagrams & Manuals
331877-0141-G1 Engine View Diagrams & Manuals
331877-0141-G2 Engine View Diagrams & Manuals
331877-0142-B1 Engine View Diagrams & Manuals
331877-0142-B2 Engine View Diagrams & Manuals
331877-0143-G1 Engine View Diagrams & Manuals
331877-0143-G2 Engine View Diagrams & Manuals
331877-0144-B1 Engine View Diagrams & Manuals
331877-0145-B1 Engine View Diagrams & Manuals
331877-0146-B1 Engine View Diagrams & Manuals
331877-0146-B2 Engine View Diagrams & Manuals
331877-0147-B1 Engine View Diagrams & Manuals
331877-0148-B1 Engine View Diagrams & Manuals
331877-0149-G5 Engine View Diagrams & Manuals
331877-0151-G5 Engine View Diagrams & Manuals
331877-0238-G1 Engine View Diagrams & Manuals
331877-0238-G5 Engine View Diagrams & Manuals
331877-0238-G6 Engine View Diagrams & Manuals
331877-0240-B1 Engine View Diagrams & Manuals
331877-0240-B2 Engine View Diagrams & Manuals
331877-0240-B5 Engine View Diagrams & Manuals
331877-0240-B6 Engine View Diagrams & Manuals
331877-0241-B1 Engine View Diagrams & Manuals
331877-0241-B2 Engine View Diagrams & Manuals
331877-0242-G5 Engine View Diagrams & Manuals
331877-0505-B1 Engine View Diagrams & Manuals
331877-0730-B1 Engine View Diagrams & Manuals
331877-0794-B1 Engine View Diagrams & Manuals
331877-0805-B1 Engine View Diagrams & Manuals
331877-0805-E1 Engine View Diagrams & Manuals
331877-0845-G1 Engine View Diagrams & Manuals
331877-0845-G5 Engine View Diagrams & Manuals
331877-0869-G1 Engine View Diagrams & Manuals
331877-0869-G5 Engine View Diagrams & Manuals
331877-0979-B1 Engine View Diagrams & Manuals
331877-1234-B1 Engine View Diagrams & Manuals
331877-1371-B1 Engine View Diagrams & Manuals
331877-1449-G1 Engine View Diagrams & Manuals
331877-1497-B1 Engine View Diagrams & Manuals
331877-1577-G5 Engine View Diagrams & Manuals
331877-2118-G1 Engine View Diagrams & Manuals
331877-2118-G5 Engine View Diagrams & Manuals
331877-2147-G1 Engine View Diagrams & Manuals
331877-2147-G5 Engine View Diagrams & Manuals
331877-2371-G1 Engine View Diagrams & Manuals
331877-2371-G5 Engine View Diagrams & Manuals
331877-2449-G1 Engine View Diagrams & Manuals
331877-2449-G5 Engine View Diagrams & Manuals
331877-2794-G1 Engine View Diagrams & Manuals
331877-2794-G5 Engine View Diagrams & Manuals
331877-3036-G5 Engine View Diagrams & Manuals
331877-4449-G5 Engine View Diagrams & Manuals
350442-0001-01 Engine View Diagrams & Manuals
350442-0002-01 Engine View Diagrams & Manuals
350442-0003-01 Engine View Diagrams & Manuals
350442-0004-01 Engine View Diagrams & Manuals
350442-0040-01 Engine View Diagrams & Manuals
350442-0040-02 Engine View Diagrams & Manuals
350442-0043-01 Engine View Diagrams & Manuals
350442-0043-02 Engine View Diagrams & Manuals
350442-0070-01 Engine View Diagrams & Manuals
350442-0102-01 Engine View Diagrams & Manuals
350442-0113-01 Engine View Diagrams & Manuals
350442-0120-01 Engine View Diagrams & Manuals
350442-0130-01 Engine View Diagrams & Manuals
350442-0131-01 Engine View Diagrams & Manuals
350442-0132-01 Engine View Diagrams & Manuals
350442-0137-01 Engine View Diagrams & Manuals
350442-0143-01 Engine View Diagrams & Manuals
350442-1001-A1 Engine View Diagrams & Manuals
350442-1001-E1 Engine View Diagrams & Manuals
350442-1003-A1 Engine View Diagrams & Manuals
350442-1004-A1 Engine View Diagrams & Manuals
350442-1040-E1 Engine View Diagrams & Manuals
350442-1043-A2 Engine View Diagrams & Manuals
350442-1065-A1 Engine View Diagrams & Manuals
350442-1065-E1 Engine View Diagrams & Manuals
350442-1065-E9 Engine View Diagrams & Manuals
350442-1067-E1 Engine View Diagrams & Manuals
350442-1070-A1 Engine View Diagrams & Manuals
350442-1102-E1 Engine View Diagrams & Manuals
350442-1107-A1 Engine View Diagrams & Manuals
350442-1113-A1 Engine View Diagrams & Manuals
350442-1122-A1 Engine View Diagrams & Manuals
350442-1131-E1 Engine View Diagrams & Manuals
350442-1132-A1 Engine View Diagrams & Manuals
350442-1137-E1 Engine View Diagrams & Manuals
350442-1143-A1 Engine View Diagrams & Manuals
350442-1156-E1 Engine View Diagrams & Manuals
350442-1159-A1 Engine View Diagrams & Manuals
350442-1172-A1 Engine View Diagrams & Manuals
350442-1186-E1 Engine View Diagrams & Manuals
350442-1186-E9 Engine View Diagrams & Manuals
350442-1194-E1 Engine View Diagrams & Manuals
350442-1249-E1 Engine View Diagrams & Manuals
350442-1252-E1 Engine View Diagrams & Manuals
350442-1256-E1 Engine View Diagrams & Manuals
350442-1263-E1 Engine View Diagrams & Manuals
350442-1263-E9 Engine View Diagrams & Manuals
350442-1313-E1 Engine View Diagrams & Manuals
350442-1313-E9 Engine View Diagrams & Manuals
350442-1365-E1 Engine View Diagrams & Manuals
350442-1365-E9 Engine View Diagrams & Manuals
350445-0138-01 Engine View Diagrams & Manuals
350445-0162-01 Engine View Diagrams & Manuals
350445-1138-A1 Engine View Diagrams & Manuals
350445-1162-E1 Engine View Diagrams & Manuals
350445-1162-E2 Engine View Diagrams & Manuals
350445-1245-E1 Engine View Diagrams & Manuals
350445-1398-E1 Engine View Diagrams & Manuals
350445-1401-E1 Engine View Diagrams & Manuals
350445-1401-E2 Engine View Diagrams & Manuals
350446-0152-01 Engine View Diagrams & Manuals
350446-1152-A1 Engine View Diagrams & Manuals
350447-0005-01 Engine View Diagrams & Manuals
350447-0006-01 Engine View Diagrams & Manuals
350447-0007-01 Engine View Diagrams & Manuals
350447-0008-01 Engine View Diagrams & Manuals
350447-0010-02 Engine View Diagrams & Manuals
350447-0012-01 Engine View Diagrams & Manuals
350447-0026-01 Engine View Diagrams & Manuals
350447-0027-01 Engine View Diagrams & Manuals
350447-0042-01 Engine View Diagrams & Manuals
350447-0046-01 Engine View Diagrams & Manuals
350447-0046-02 Engine View Diagrams & Manuals
350447-0047-01 Engine View Diagrams & Manuals
350447-0048-01 Engine View Diagrams & Manuals
350447-0048-02 Engine View Diagrams & Manuals
350447-0052-01 Engine View Diagrams & Manuals
350447-0055-01 Engine View Diagrams & Manuals
350447-0056-01 Engine View Diagrams & Manuals
350447-0058-01 Engine View Diagrams & Manuals
350447-0064-01 Engine View Diagrams & Manuals
350447-0064-02 Engine View Diagrams & Manuals
350447-0064-03 Engine View Diagrams & Manuals
350447-0064-04 Engine View Diagrams & Manuals
350447-0068-01 Engine View Diagrams & Manuals
350447-0068-02 Engine View Diagrams & Manuals
350447-0075-01 Engine View Diagrams & Manuals
350447-0076-01 Engine View Diagrams & Manuals
350447-0077-01 Engine View Diagrams & Manuals
350447-0078-01 Engine View Diagrams & Manuals
350447-0079-01 Engine View Diagrams & Manuals
350447-0080-01 Engine View Diagrams & Manuals
350447-0081-01 Engine View Diagrams & Manuals
350447-0082-01 Engine View Diagrams & Manuals
350447-0083-01 Engine View Diagrams & Manuals
350447-0084-01 Engine View Diagrams & Manuals
350447-0086-01 Engine View Diagrams & Manuals
350447-0100-01 Engine View Diagrams & Manuals
350447-0109-01 Engine View Diagrams & Manuals
350447-0110-01 Engine View Diagrams & Manuals
350447-0112-01 Engine View Diagrams & Manuals
350447-0114-01 Engine View Diagrams & Manuals
350447-0115-01 Engine View Diagrams & Manuals
350447-0117-01 Engine View Diagrams & Manuals
350447-0118-01 Engine View Diagrams & Manuals
350447-0119-01 Engine View Diagrams & Manuals
350447-0123-01 Engine View Diagrams & Manuals
350447-0123-02 Engine View Diagrams & Manuals
350447-0124-01 Engine View Diagrams & Manuals
350447-0125-01 Engine View Diagrams & Manuals
350447-0126-01 Engine View Diagrams & Manuals
350447-0127-01 Engine View Diagrams & Manuals
350447-0128-01 Engine View Diagrams & Manuals
350447-0129-01 Engine View Diagrams & Manuals
350447-0129-02 Engine View Diagrams & Manuals
350447-0133-01 Engine View Diagrams & Manuals
350447-0134-01 Engine View Diagrams & Manuals
350447-0136-01 Engine View Diagrams & Manuals
350447-0139-01 Engine View Diagrams & Manuals
350447-0144-01 Engine View Diagrams & Manuals
350447-0145-01 Engine View Diagrams & Manuals
350447-0146-01 Engine View Diagrams & Manuals
350447-0147-01 Engine View Diagrams & Manuals
350447-0148-01 Engine View Diagrams & Manuals
350447-0150-01 Engine View Diagrams & Manuals
350447-0151-01 Engine View Diagrams & Manuals
350447-0153-01 Engine View Diagrams & Manuals
350447-0154-01 Engine View Diagrams & Manuals
350447-0155-01 Engine View Diagrams & Manuals
350447-0157-01 Engine View Diagrams & Manuals
350447-0158-01 Engine View Diagrams & Manuals
350447-0160-01 Engine View Diagrams & Manuals
350447-0163-01 Engine View Diagrams & Manuals
350447-0164-01 Engine View Diagrams & Manuals
350447-0166-01 Engine View Diagrams & Manuals
350447-0167-01 Engine View Diagrams & Manuals
350447-0169-01 Engine View Diagrams & Manuals
350447-1005-E1 Engine View Diagrams & Manuals
350447-1006-A1 Engine View Diagrams & Manuals
350447-1010-A2 Engine View Diagrams & Manuals
350447-1010-E2 Engine View Diagrams & Manuals
350447-1011-A1 Engine View Diagrams & Manuals
350447-1013-E1 Engine View Diagrams & Manuals
350447-1014-E1 Engine View Diagrams & Manuals
350447-1026-A1 Engine View Diagrams & Manuals
350447-1026-E1 Engine View Diagrams & Manuals
350447-1027-A1 Engine View Diagrams & Manuals
350447-1042-A1 Engine View Diagrams & Manuals
350447-1042-E1 Engine View Diagrams & Manuals
350447-1046-A1 Engine View Diagrams & Manuals
350447-1046-E1 Engine View Diagrams & Manuals
350447-1046-E2 Engine View Diagrams & Manuals
350447-1047-E1 Engine View Diagrams & Manuals
350447-1048-A1 Engine View Diagrams & Manuals
350447-1048-A2 Engine View Diagrams & Manuals
350447-1052-A1 Engine View Diagrams & Manuals
350447-1058-A1 Engine View Diagrams & Manuals
350447-1064-A1 Engine View Diagrams & Manuals
350447-1064-E1 Engine View Diagrams & Manuals
350447-1064-E2 Engine View Diagrams & Manuals
350447-1066-A1 Engine View Diagrams & Manuals
350447-1066-A2 Engine View Diagrams & Manuals
350447-1066-E1 Engine View Diagrams & Manuals
350447-1066-E2 Engine View Diagrams & Manuals
350447-1066-E9 Engine View Diagrams & Manuals
350447-1075-A1 Engine View Diagrams & Manuals
350447-1075-E1 Engine View Diagrams & Manuals
350447-1076-A1 Engine View Diagrams & Manuals
350447-1076-E1 Engine View Diagrams & Manuals
350447-1077-A1 Engine View Diagrams & Manuals
350447-1077-A2 Engine View Diagrams & Manuals
350447-1077-E1 Engine View Diagrams & Manuals
350447-1078-A1 Engine View Diagrams & Manuals
350447-1078-E1 Engine View Diagrams & Manuals
350447-1079-A1 Engine View Diagrams & Manuals
350447-1079-E1 Engine View Diagrams & Manuals
350447-1080-A1 Engine View Diagrams & Manuals
350447-1080-E1 Engine View Diagrams & Manuals
350447-1081-E1 Engine View Diagrams & Manuals
350447-1082-A1 Engine View Diagrams & Manuals
350447-1083-A1 Engine View Diagrams & Manuals
350447-1084-A1 Engine View Diagrams & Manuals
350447-1084-E1 Engine View Diagrams & Manuals
350447-1085-E1 Engine View Diagrams & Manuals
350447-1085-E9 Engine View Diagrams & Manuals
350447-1086-E1 Engine View Diagrams & Manuals
350447-1087-E1 Engine View Diagrams & Manuals
350447-1096-A1 Engine View Diagrams & Manuals
350447-1096-E1 Engine View Diagrams & Manuals
350447-1096-E2 Engine View Diagrams & Manuals
350447-1096-E9 Engine View Diagrams & Manuals
350447-1100-E1 Engine View Diagrams & Manuals
350447-1105-E1 Engine View Diagrams & Manuals
350447-1109-E1 Engine View Diagrams & Manuals
350447-1110-E1 Engine View Diagrams & Manuals
350447-1111-E1 Engine View Diagrams & Manuals
350447-1113-E1 Engine View Diagrams & Manuals
350447-1115-A1 Engine View Diagrams & Manuals
350447-1116-E1 Engine View Diagrams & Manuals
350447-1116-E2 Engine View Diagrams & Manuals
350447-1118-A1 Engine View Diagrams & Manuals
350447-1118-E1 Engine View Diagrams & Manuals
350447-1119-A1 Engine View Diagrams & Manuals
350447-1120-E1 Engine View Diagrams & Manuals
350447-1123-A1 Engine View Diagrams & Manuals
350447-1125-E1 Engine View Diagrams & Manuals
350447-1125-E9 Engine View Diagrams & Manuals
350447-1126-A1 Engine View Diagrams & Manuals
350447-1127-A1 Engine View Diagrams & Manuals
350447-1128-E1 Engine View Diagrams & Manuals
350447-1129-E2 Engine View Diagrams & Manuals
350447-1133-E2 Engine View Diagrams & Manuals
350447-1134-A1 Engine View Diagrams & Manuals
350447-1136-A1 Engine View Diagrams & Manuals
350447-1139-A1 Engine View Diagrams & Manuals
350447-1139-E1 Engine View Diagrams & Manuals
350447-1144-A1 Engine View Diagrams & Manuals
350447-1145-E1 Engine View Diagrams & Manuals
350447-1146-A1 Engine View Diagrams & Manuals
350447-1147-A1 Engine View Diagrams & Manuals
350447-1148-A1 Engine View Diagrams & Manuals
350447-1150-E1 Engine View Diagrams & Manuals
350447-1151-A1 Engine View Diagrams & Manuals
350447-1153-A1 Engine View Diagrams & Manuals
350447-1154-A1 Engine View Diagrams & Manuals
350447-1155-A1 Engine View Diagrams & Manuals
350447-1157-E1 Engine View Diagrams & Manuals
350447-1158-E1 Engine View Diagrams & Manuals
350447-1160-A1 Engine View Diagrams & Manuals
350447-1160-E1 Engine View Diagrams & Manuals
350447-1163-A1 Engine View Diagrams & Manuals
350447-1164-A1 Engine View Diagrams & Manuals
350447-1166-A1 Engine View Diagrams & Manuals
350447-1167-A1 Engine View Diagrams & Manuals
350447-1169-A1 Engine View Diagrams & Manuals
350447-1170-A1 Engine View Diagrams & Manuals
350447-1171-A1 Engine View Diagrams & Manuals
350447-1171-E1 Engine View Diagrams & Manuals
350447-1173-A1 Engine View Diagrams & Manuals
350447-1174-E1 Engine View Diagrams & Manuals
350447-1175-A1 Engine View Diagrams & Manuals
350447-1176-A1 Engine View Diagrams & Manuals
350447-1183-A2 Engine View Diagrams & Manuals
350447-1183-E2 Engine View Diagrams & Manuals
350447-1184-A1 Engine View Diagrams & Manuals
350447-1185-E1 Engine View Diagrams & Manuals
350447-1185-E9 Engine View Diagrams & Manuals
350447-1188-A1 Engine View Diagrams & Manuals
350447-1189-A1 Engine View Diagrams & Manuals
350447-1190-E1 Engine View Diagrams & Manuals
350447-1191-A1 Engine View Diagrams & Manuals
350447-1191-E1 Engine View Diagrams & Manuals
350447-1195-A1 Engine View Diagrams & Manuals
350447-1195-E1 Engine View Diagrams & Manuals
350447-1196-A1 Engine View Diagrams & Manuals
350447-1197-E1 Engine View Diagrams & Manuals
350447-1198-A1 Engine View Diagrams & Manuals
350447-1198-E1 Engine View Diagrams & Manuals
350447-1199-E1 Engine View Diagrams & Manuals
350447-1200-A1 Engine View Diagrams & Manuals
350447-1201-E1 Engine View Diagrams & Manuals
350447-1203-A1 Engine View Diagrams & Manuals
350447-1204-A1 Engine View Diagrams & Manuals
350447-1206-E1 Engine View Diagrams & Manuals
350447-1208-E1 Engine View Diagrams & Manuals
350447-1209-A1 Engine View Diagrams & Manuals
350447-1213-A1 Engine View Diagrams & Manuals
350447-1214-E1 Engine View Diagrams & Manuals
350447-1217-E1 Engine View Diagrams & Manuals
350447-1218-A1 Engine View Diagrams & Manuals
350447-1218-E1 Engine View Diagrams & Manuals
350447-1220-E1 Engine View Diagrams & Manuals
350447-1221-A1 Engine View Diagrams & Manuals
350447-1221-E1 Engine View Diagrams & Manuals
350447-1222-A1 Engine View Diagrams & Manuals
350447-1222-E1 Engine View Diagrams & Manuals
350447-1224-A1 Engine View Diagrams & Manuals
350447-1225-A1 Engine View Diagrams & Manuals
350447-1225-E1 Engine View Diagrams & Manuals
350447-1227-A1 Engine View Diagrams & Manuals
350447-1228-E1 Engine View Diagrams & Manuals
350447-1230-A1 Engine View Diagrams & Manuals
350447-1230-E1 Engine View Diagrams & Manuals
350447-1232-A1 Engine View Diagrams & Manuals
350447-1232-E1 Engine View Diagrams & Manuals
350447-1233-A1 Engine View Diagrams & Manuals
350447-1233-E1 Engine View Diagrams & Manuals
350447-1234-E1 Engine View Diagrams & Manuals
350447-1235-E1 Engine View Diagrams & Manuals
350447-1237-E1 Engine View Diagrams & Manuals
350447-1240-E1 Engine View Diagrams & Manuals
350447-1242-E1 Engine View Diagrams & Manuals
350447-1243-E1 Engine View Diagrams & Manuals
350447-1244-E1 Engine View Diagrams & Manuals
350447-1246-E1 Engine View Diagrams & Manuals
350447-1247-E1 Engine View Diagrams & Manuals
350447-1248-E1 Engine View Diagrams & Manuals
350447-1250-E1 Engine View Diagrams & Manuals
350447-1250-E2 Engine View Diagrams & Manuals
350447-1250-E9 Engine View Diagrams & Manuals
350447-1251-E1 Engine View Diagrams & Manuals
350447-1253-E1 Engine View Diagrams & Manuals
350447-1254-E1 Engine View Diagrams & Manuals
350447-1255-E1 Engine View Diagrams & Manuals
350447-1257-E1 Engine View Diagrams & Manuals
350447-1259-E1 Engine View Diagrams & Manuals
350447-1261-E1 Engine View Diagrams & Manuals
350447-1266-E1 Engine View Diagrams & Manuals
350447-1266-E9 Engine View Diagrams & Manuals
350447-1268-E1 Engine View Diagrams & Manuals
350447-1268-E9 Engine View Diagrams & Manuals
350447-1269-E1 Engine View Diagrams & Manuals
350447-1269-E9 Engine View Diagrams & Manuals
350447-1273-E1 Engine View Diagrams & Manuals
350447-1274-E1 Engine View Diagrams & Manuals
350447-1275-E1 Engine View Diagrams & Manuals
350447-1277-E1 Engine View Diagrams & Manuals
350447-1278-E1 Engine View Diagrams & Manuals
350447-1279-E1 Engine View Diagrams & Manuals
350447-1280-E1 Engine View Diagrams & Manuals
350447-1281-E1 Engine View Diagrams & Manuals
350447-1283-E1 Engine View Diagrams & Manuals
350447-1284-E1 Engine View Diagrams & Manuals
350447-1287-E1 Engine View Diagrams & Manuals
350447-1289-E1 Engine View Diagrams & Manuals
350447-1289-E9 Engine View Diagrams & Manuals
350447-1290-E1 Engine View Diagrams & Manuals
350447-1294-E1 Engine View Diagrams & Manuals
350447-1304-E1 Engine View Diagrams & Manuals
350447-1306-E1 Engine View Diagrams & Manuals
40F777-0100-B1 Engine View Diagrams & Manuals
40F777-0111-E1 Engine View Diagrams & Manuals
40F777-0112-E1 Engine View Diagrams & Manuals
40F777-0113-B1 Engine View Diagrams & Manuals
40G777-0187-B1 Engine View Diagrams & Manuals
40G777-0188-G1 Engine View Diagrams & Manuals
40G777-0188-G5 Engine View Diagrams & Manuals
40G777-0383-E1 Engine View Diagrams & Manuals
40G777-0400-B1 Engine View Diagrams & Manuals
40G777-0400-E1 Engine View Diagrams & Manuals
40G777-0400-G1 Engine View Diagrams & Manuals
40G777-0862-B1 Engine View Diagrams & Manuals
40G777-1222-B1 Engine View Diagrams & Manuals
40G777-1222-G1 Engine View Diagrams & Manuals
40G777-1534-B1 Engine View Diagrams & Manuals
40G777-5188-G5 Engine View Diagrams & Manuals
40G777-5222-B1 Engine View Diagrams & Manuals
40G777-0002-G5 Engine View Diagrams & Manuals
40G777-0100-E1 Engine View Diagrams & Manuals
40G777-0101-B1 Engine View Diagrams & Manuals
40G777-0110-E1 Engine View Diagrams & Manuals
40G777-0111-B1 Engine View Diagrams & Manuals
40G777-0111-E1 Engine View Diagrams & Manuals
40G777-0112-B1 Engine View Diagrams & Manuals
40G777-0112-E1 Engine View Diagrams & Manuals
40G777-0114-B1 Engine View Diagrams & Manuals
40G777-0114-E1 Engine View Diagrams & Manuals
40G777-0115-B1 Engine View Diagrams & Manuals
40G777-0115-E1 Engine View Diagrams & Manuals
40G777-0116-B1 Engine View Diagrams & Manuals
40G777-0116-E1 Engine View Diagrams & Manuals
40G777-0117-G1 Engine View Diagrams & Manuals
40G777-0118-G1 Engine View Diagrams & Manuals
40G777-0122-G1 Engine View Diagrams & Manuals
40G777-0123-G1 Engine View Diagrams & Manuals
40G777-0124-G1 Engine View Diagrams & Manuals
40G777-0127-G1 Engine View Diagrams & Manuals
40G777-0129-B1 Engine View Diagrams & Manuals
40G777-0130-G5 Engine View Diagrams & Manuals
40G777-0131-G5 Engine View Diagrams & Manuals
40G777-0132-B1 Engine View Diagrams & Manuals
40G777-0133-G5 Engine View Diagrams & Manuals
40G777-0181-E1 Engine View Diagrams & Manuals
40G777-0183-B1 Engine View Diagrams & Manuals
40G777-0183-E1 Engine View Diagrams & Manuals
40G777-0184-B1 Engine View Diagrams & Manuals
40G777-0184-E1 Engine View Diagrams & Manuals
40G777-0185-G1 Engine View Diagrams & Manuals
40H777-0025-G5 Engine View Diagrams & Manuals
40H777-0026-E1 Engine View Diagrams & Manuals
40H777-0027-B1 Engine View Diagrams & Manuals
40H777-0027-E1 Engine View Diagrams & Manuals
40H777-0100-B1 Engine View Diagrams & Manuals
40H777-0101-B1 Engine View Diagrams & Manuals
40H777-0112-E1 Engine View Diagrams & Manuals
40H777-0114-B1 Engine View Diagrams & Manuals
40H777-0114-E1 Engine View Diagrams & Manuals
40H777-0115-B1 Engine View Diagrams & Manuals
40H777-0115-E1 Engine View Diagrams & Manuals
40H777-0116-B1 Engine View Diagrams & Manuals
40H777-0116-E1 Engine View Diagrams & Manuals
40H777-0117-G1 Engine View Diagrams & Manuals
40H777-0119-G1 Engine View Diagrams & Manuals
40H777-0120-G1 Engine View Diagrams & Manuals
40H777-0121-B1 Engine View Diagrams & Manuals
40H777-0122-G1 Engine View Diagrams & Manuals
40H777-0123-B1 Engine View Diagrams & Manuals
40H777-0124-G1 Engine View Diagrams & Manuals
40H777-0125-G1 Engine View Diagrams & Manuals
40H777-0126-G1 Engine View Diagrams & Manuals
40H777-0128-G1 Engine View Diagrams & Manuals
40H777-0129-B1 Engine View Diagrams & Manuals
40H777-0131-B1 Engine View Diagrams & Manuals
40H777-0134-B1 Engine View Diagrams & Manuals
40H777-0135-G1 Engine View Diagrams & Manuals
40H777-0136-B1 Engine View Diagrams & Manuals
40H777-0137-B1 Engine View Diagrams & Manuals
40H777-0138-G1 Engine View Diagrams & Manuals
40H777-0138-G5 Engine View Diagrams & Manuals
40H777-0139-B1 Engine View Diagrams & Manuals
40H777-0140-G1 Engine View Diagrams & Manuals
40H777-0140-G5 Engine View Diagrams & Manuals
40H777-0141-B1 Engine View Diagrams & Manuals
40H777-0142-G1 Engine View Diagrams & Manuals
40H777-0142-G5 Engine View Diagrams & Manuals
40H777-0143-B1 Engine View Diagrams & Manuals
40H777-0143-G5 Engine View Diagrams & Manuals
40H777-0144-G1 Engine View Diagrams & Manuals
40H777-0144-G5 Engine View Diagrams & Manuals
40H777-0146-G5 Engine View Diagrams & Manuals
40H777-0147-B1 Engine View Diagrams & Manuals
40H777-0148-G5 Engine View Diagrams & Manuals
40H777-0149-G5 Engine View Diagrams & Manuals
40H777-0150-G5 Engine View Diagrams & Manuals
40H777-0151-G5 Engine View Diagrams & Manuals
40H777-0152-B1 Engine View Diagrams & Manuals
40H777-0152-B2 Engine View Diagrams & Manuals
40H777-0153-G5 Engine View Diagrams & Manuals
40H777-0154-B1 Engine View Diagrams & Manuals
40H777-0155-G1 Engine View Diagrams & Manuals
40H777-0155-G2 Engine View Diagrams & Manuals
40H777-0156-B1 Engine View Diagrams & Manuals
40H777-0156-B2 Engine View Diagrams & Manuals
40H777-0160-G1 Engine View Diagrams & Manuals
40H777-0160-G2 Engine View Diagrams & Manuals
40H777-0162-B1 Engine View Diagrams & Manuals
40H777-0162-B2 Engine View Diagrams & Manuals
40H777-0164-B1 Engine View Diagrams & Manuals
40H777-0168-E1 Engine View Diagrams & Manuals
40H777-0171-E1 Engine View Diagrams & Manuals
40H777-0172-G1 Engine View Diagrams & Manuals
40H777-0173-B1 Engine View Diagrams & Manuals
40H777-0175-B1 Engine View Diagrams & Manuals
40H777-0176-B1 Engine View Diagrams & Manuals
40H777-0177-G5 Engine View Diagrams & Manuals
40H777-0178-G5 Engine View Diagrams & Manuals
40H777-0179-G5 Engine View Diagrams & Manuals
40H777-0181-G5 Engine View Diagrams & Manuals
40H777-0182-G5 Engine View Diagrams & Manuals
40H777-0182-G6 Engine View Diagrams & Manuals
40H777-0241-B1 Engine View Diagrams & Manuals
40H777-0241-E1 Engine View Diagrams & Manuals
40H777-0241-E2 Engine View Diagrams & Manuals
40H777-0242-B1 Engine View Diagrams & Manuals
40H777-0242-E1 Engine View Diagrams & Manuals
40H777-0242-E2 Engine View Diagrams & Manuals
40H777-0248-E1 Engine View Diagrams & Manuals
40H777-0274-G1 Engine View Diagrams & Manuals
40H777-0274-G5 Engine View Diagrams & Manuals
40H777-0274-G6 Engine View Diagrams & Manuals
40H777-0285-B1 Engine View Diagrams & Manuals
40H777-0285-B2 Engine View Diagrams & Manuals
40H777-0285-B5 Engine View Diagrams & Manuals
40H777-0285-B6 Engine View Diagrams & Manuals
40H777-0286-B1 Engine View Diagrams & Manuals
40H777-0287-G5 Engine View Diagrams & Manuals
40H777-0363-B1 Engine View Diagrams & Manuals
40H777-0363-E1 Engine View Diagrams & Manuals
40H777-0364-B1 Engine View Diagrams & Manuals
40H777-0364-E1 Engine View Diagrams & Manuals
40H777-0789-B1 Engine View Diagrams & Manuals
40H777-0822-B1 Engine View Diagrams & Manuals
40H777-0823-B1 Engine View Diagrams & Manuals
40H777-0871-B1 Engine View Diagrams & Manuals
40H777-1223-B1 Engine View Diagrams & Manuals
40H777-1223-G1 Engine View Diagrams & Manuals
40H777-1421-B1 Engine View Diagrams & Manuals
40H777-1421-G1 Engine View Diagrams & Manuals
40H777-1456-B1 Engine View Diagrams & Manuals
40H777-1458-B1 Engine View Diagrams & Manuals
40H777-1575-G5 Engine View Diagrams & Manuals
40H777-1633-G5 Engine View Diagrams & Manuals
40H777-2135-G5 Engine View Diagrams & Manuals
40H777-2136-G1 Engine View Diagrams & Manuals
40H777-2136-G5 Engine View Diagrams & Manuals
40H777-2421-G1 Engine View Diagrams & Manuals
40H777-2421-G5 Engine View Diagrams & Manuals
40H777-4143-G5 Engine View Diagrams & Manuals
40H777-4144-G5 Engine View Diagrams & Manuals
40H777-4421-G1 Engine View Diagrams & Manuals
40H777-4421-G5 Engine View Diagrams & Manuals
40H777-5129-B1 Engine View Diagrams & Manuals
40H777-5135-G5 Engine View Diagrams & Manuals
40H777-5136-B1 Engine View Diagrams & Manuals
40H777-5136-G5 Engine View Diagrams & Manuals
40H777-5137-B1 Engine View Diagrams & Manuals
40H777-5138-G5 Engine View Diagrams & Manuals
40H777-5139-B1 Engine View Diagrams & Manuals
40H777-5141-B1 Engine View Diagrams & Manuals
40H777-5142-G5 Engine View Diagrams & Manuals
40H777-5143-B1 Engine View Diagrams & Manuals
40H777-5144-G5 Engine View Diagrams & Manuals
40H777-5173-B1 Engine View Diagrams & Manuals
40H777-5175-B1 Engine View Diagrams & Manuals
42A707-1107-01 Engine View Diagrams & Manuals
42A707-1237-01 Engine View Diagrams & Manuals
42A707-1238-01 Engine View Diagrams & Manuals
42A707-1238-02 Engine View Diagrams & Manuals
42A707-1251-01 Engine View Diagrams & Manuals
42A707-1252-01 Engine View Diagrams & Manuals
42A707-1269-01 Engine View Diagrams & Manuals
42A707-1273-01 Engine View Diagrams & Manuals
42A707-1293-99 Engine View Diagrams & Manuals
42A707-1299-01 Engine View Diagrams & Manuals
42A707-1300-01 Engine View Diagrams & Manuals
42A707-1550-01 Engine View Diagrams & Manuals
42A707-1600-01 Engine View Diagrams & Manuals
42A707-1623-99 Engine View Diagrams & Manuals
42A707-1624-01 Engine View Diagrams & Manuals
42A707-1625-01 Engine View Diagrams & Manuals
42A707-1631-99 Engine View Diagrams & Manuals
42A707-1652-01 Engine View Diagrams & Manuals
42A707-1653-01 Engine View Diagrams & Manuals
42A707-1655-01 Engine View Diagrams & Manuals
42A707-1707-E1 Engine View Diagrams & Manuals
42A707-1838-A1 Engine View Diagrams & Manuals
42A707-2107-E1 Engine View Diagrams & Manuals
42A707-2238-E1 Engine View Diagrams & Manuals
42A707-2238-E2 Engine View Diagrams & Manuals
42A707-2240-99 Engine View Diagrams & Manuals
42A707-2299-E1 Engine View Diagrams & Manuals
42A707-2300-E1 Engine View Diagrams & Manuals
42A707-2550-E1 Engine View Diagrams & Manuals
42A707-2600-E1 Engine View Diagrams & Manuals
42A707-2625-E1 Engine View Diagrams & Manuals
42A707-2652-E1 Engine View Diagrams & Manuals
42A707-2653-E1 Engine View Diagrams & Manuals
42A707-2655-E1 Engine View Diagrams & Manuals
42A777-1127-01 Engine View Diagrams & Manuals
42A777-1201-01 Engine View Diagrams & Manuals
42A777-1236-01 Engine View Diagrams & Manuals
42A777-1270-01 Engine View Diagrams & Manuals
42A777-1271-01 Engine View Diagrams & Manuals
42A777-1272-01 Engine View Diagrams & Manuals
42A777-1285-01 Engine View Diagrams & Manuals
42A777-1286-01 Engine View Diagrams & Manuals
42A777-1295-01 Engine View Diagrams & Manuals
42A777-1298-01 Engine View Diagrams & Manuals
42A777-1727-E1 Engine View Diagrams & Manuals
42A777-1886-A1 Engine View Diagrams & Manuals
42A777-2127-E1 Engine View Diagrams & Manuals
42A777-2201-E1 Engine View Diagrams & Manuals
42A777-2236-E1 Engine View Diagrams & Manuals
42A777-2239-E1 Engine View Diagrams & Manuals
42A777-2271-E1 Engine View Diagrams & Manuals
42A777-2295-E1 Engine View Diagrams & Manuals
42A777-2295-E3 Engine View Diagrams & Manuals
42A777-2296-E1 Engine View Diagrams & Manuals
44H777-0113-E1 Engine View Diagrams & Manuals
44H777-0114-E1 Engine View Diagrams & Manuals
44H777-0116-E1 Engine View Diagrams & Manuals
44H777-0117-E1 Engine View Diagrams & Manuals
44H777-0118-B1 Engine View Diagrams & Manuals
44H777-0121-E1 Engine View Diagrams & Manuals
44H777-0122-E1 Engine View Diagrams & Manuals
44L777-5160-B2 Engine View Diagrams & Manuals
44L777-5160-B3 Engine View Diagrams & Manuals
44L777-5279-G5 Engine View Diagrams & Manuals
44L777-5282-B1 Engine View Diagrams & Manuals
44L777-5282-B5 Engine View Diagrams & Manuals
44L977-0001-G5 Engine View Diagrams & Manuals
44K777-0025-G1 Engine View Diagrams & Manuals
44K777-0026-E1 Engine View Diagrams & Manuals
44K777-0026-G1 Engine View Diagrams & Manuals
44K777-0027-E1 Engine View Diagrams & Manuals
44K777-0027-G1 Engine View Diagrams & Manuals
44K777-0100-B1 Engine View Diagrams & Manuals
44K777-0112-B1 Engine View Diagrams & Manuals
44K777-0112-E1 Engine View Diagrams & Manuals
44K777-0113-B1 Engine View Diagrams & Manuals
44K777-0113-E1 Engine View Diagrams & Manuals
44K777-0115-B1 Engine View Diagrams & Manuals
44K777-0115-E1 Engine View Diagrams & Manuals
44K777-0115-G1 Engine View Diagrams & Manuals
44K777-0116-B1 Engine View Diagrams & Manuals
44K777-0116-E1 Engine View Diagrams & Manuals
44K777-0116-G1 Engine View Diagrams & Manuals
44K777-0117-B1 Engine View Diagrams & Manuals
44K777-0117-E1 Engine View Diagrams & Manuals
44K777-0117-G1 Engine View Diagrams & Manuals
44K777-0119-B1 Engine View Diagrams & Manuals
44K777-0119-E1 Engine View Diagrams & Manuals
44K777-0119-G1 Engine View Diagrams & Manuals
44K777-0120-B1 Engine View Diagrams & Manuals
44K777-0120-E1 Engine View Diagrams & Manuals
44K777-0120-G1 Engine View Diagrams & Manuals
44K777-0121-B1 Engine View Diagrams & Manuals
44K777-0121-E1 Engine View Diagrams & Manuals
44K777-0123-B1 Engine View Diagrams & Manuals
44K777-0123-E1 Engine View Diagrams & Manuals
44K777-0124-B1 Engine View Diagrams & Manuals
44K777-0124-E1 Engine View Diagrams & Manuals
44K777-0125-G1 Engine View Diagrams & Manuals
44L777-0025-G1 Engine View Diagrams & Manuals
44L777-0026-G1 Engine View Diagrams & Manuals
44L777-0027-G1 Engine View Diagrams & Manuals
44L777-0035-G1 Engine View Diagrams & Manuals
44L777-0036-G1 Engine View Diagrams & Manuals
44L777-0037-G1 Engine View Diagrams & Manuals
44L777-0100-B1 Engine View Diagrams & Manuals
44L777-0110-G5 Engine View Diagrams & Manuals
44L777-0111-E1 Engine View Diagrams & Manuals
44L777-0112-E1 Engine View Diagrams & Manuals
44L777-0115-B1 Engine View Diagrams & Manuals
44L777-0116-G1 Engine View Diagrams & Manuals
44L777-0117-G1 Engine View Diagrams & Manuals
44L777-0118-B1 Engine View Diagrams & Manuals
44L777-0119-B1 Engine View Diagrams & Manuals
44L777-0121-B1 Engine View Diagrams & Manuals
44L777-0121-B2 Engine View Diagrams & Manuals
44L777-0123-G1 Engine View Diagrams & Manuals
44L777-0125-B1 Engine View Diagrams & Manuals
44L777-0125-E1 Engine View Diagrams & Manuals
44L777-0125-G1 Engine View Diagrams & Manuals
44L777-0128-B1 Engine View Diagrams & Manuals
44L777-0130-G1 Engine View Diagrams & Manuals
44L777-0131-B1 Engine View Diagrams & Manuals
44L777-0132-B1 Engine View Diagrams & Manuals
44L777-0133-B1 Engine View Diagrams & Manuals
44L777-0133-B2 Engine View Diagrams & Manuals
44L777-0134-G5 Engine View Diagrams & Manuals
44L777-0134-G6 Engine View Diagrams & Manuals
44L777-0135-G1 Engine View Diagrams & Manuals
44L777-0136-G1 Engine View Diagrams & Manuals
44L777-0137-G1 Engine View Diagrams & Manuals
44L777-0138-G1 Engine View Diagrams & Manuals
44L777-0138-G2 Engine View Diagrams & Manuals
44L777-0139-B1 Engine View Diagrams & Manuals
44L777-0140-G5 Engine View Diagrams & Manuals
44L777-0144-G1 Engine View Diagrams & Manuals
44L777-0145-G1 Engine View Diagrams & Manuals
44L777-0145-G5 Engine View Diagrams & Manuals
44L777-0160-B1 Engine View Diagrams & Manuals
44L777-0160-B2 Engine View Diagrams & Manuals
44L777-0160-B3 Engine View Diagrams & Manuals
44L777-0162-G1 Engine View Diagrams & Manuals
44L777-0279-G1 Engine View Diagrams & Manuals
44L777-0279-G5 Engine View Diagrams & Manuals
44L777-0279-G6 Engine View Diagrams & Manuals
44L777-0282-B1 Engine View Diagrams & Manuals
44L777-0282-B2 Engine View Diagrams & Manuals
44L777-0282-B5 Engine View Diagrams & Manuals
44L777-0593-B1 Engine View Diagrams & Manuals
44L777-0593-E1 Engine View Diagrams & Manuals
44L777-0719-B1 Engine View Diagrams & Manuals
44L777-0723-B1 Engine View Diagrams & Manuals
44L777-0757-B1 Engine View Diagrams & Manuals
44L777-0763-B1 Engine View Diagrams & Manuals
44L777-0769-B1 Engine View Diagrams & Manuals
44L777-1038-B1 Engine View Diagrams & Manuals
44L777-1224-B1 Engine View Diagrams & Manuals
44L777-1224-G1 Engine View Diagrams & Manuals
44L777-2119-G5 Engine View Diagrams & Manuals
44L777-2139-G5 Engine View Diagrams & Manuals
44L777-3136-G5 Engine View Diagrams & Manuals
44L777-3137-G5 Engine View Diagrams & Manuals
44L777-5110-G5 Engine View Diagrams & Manuals
44L777-5119-B1 Engine View Diagrams & Manuals
44L777-5119-G5 Engine View Diagrams & Manuals
44L777-5132-B1 Engine View Diagrams & Manuals
44L777-5137-G5 Engine View Diagrams & Manuals
44L777-5139-B1 Engine View Diagrams & Manuals
44L777-5139-G5 Engine View Diagrams & Manuals
44M777-0100-B1 Engine View Diagrams & Manuals
44M777-0110-B1 Engine View Diagrams & Manuals
44M777-0110-E1 Engine View Diagrams & Manuals
44M777-0110-G1 Engine View Diagrams & Manuals
44M777-0111-G5 Engine View Diagrams & Manuals
44M777-0113-B1 Engine View Diagrams & Manuals
44M777-0113-E1 Engine View Diagrams & Manuals
44M777-0113-G1 Engine View Diagrams & Manuals
44M777-0115-B1 Engine View Diagrams & Manuals
44M777-0115-E1 Engine View Diagrams & Manuals
44M777-0118-B1 Engine View Diagrams & Manuals
44M777-0118-E1 Engine View Diagrams & Manuals
44M777-0119-B1 Engine View Diagrams & Manuals
44M777-0119-E1 Engine View Diagrams & Manuals
44M777-0119-G1 Engine View Diagrams & Manuals
44M777-0121-B1 Engine View Diagrams & Manuals
44M777-0121-E1 Engine View Diagrams & Manuals
44M777-0121-G1 Engine View Diagrams & Manuals
44M777-0122-B1 Engine View Diagrams & Manuals
44M777-0122-B2 Engine View Diagrams & Manuals
44M777-0123-G1 Engine View Diagrams & Manuals
44M777-0123-G2 Engine View Diagrams & Manuals
44M777-0124-B1 Engine View Diagrams & Manuals
44M777-0125-B1 Engine View Diagrams & Manuals
44M777-0126-B1 Engine View Diagrams & Manuals
44M777-0127-G1 Engine View Diagrams & Manuals
44M777-0128-B1 Engine View Diagrams & Manuals
44M777-0130-G1 Engine View Diagrams & Manuals
44M777-0133-G1 Engine View Diagrams & Manuals
44M777-0135-G1 Engine View Diagrams & Manuals
44M777-0136-G1 Engine View Diagrams & Manuals
44M777-0139-B1 Engine View Diagrams & Manuals
44M777-0140-B1 Engine View Diagrams & Manuals
44M777-0143-B1 Engine View Diagrams & Manuals
44M777-0144-G1 Engine View Diagrams & Manuals
44M777-0145-B1 Engine View Diagrams & Manuals
44M777-0146-B1 Engine View Diagrams & Manuals
44M777-0147-G1 Engine View Diagrams & Manuals
44M777-0147-G2 Engine View Diagrams & Manuals
44M777-0148-B1 Engine View Diagrams & Manuals
44M777-0148-B2 Engine View Diagrams & Manuals
44M777-0149-G1 Engine View Diagrams & Manuals
44M777-0154-B1 Engine View Diagrams & Manuals
44M777-0155-G1 Engine View Diagrams & Manuals
44M777-0158-G1 Engine View Diagrams & Manuals
44M777-0159-G1 Engine View Diagrams & Manuals
44M777-0159-G2 Engine View Diagrams & Manuals
44M777-0160-G1 Engine View Diagrams & Manuals
44M777-0161-G1 Engine View Diagrams & Manuals
44M777-0163-B1 Engine View Diagrams & Manuals
44M777-0163-B2 Engine View Diagrams & Manuals
44M777-0164-B1 Engine View Diagrams & Manuals
44M777-0165-B1 Engine View Diagrams & Manuals
44M777-0166-B1 Engine View Diagrams & Manuals
44M777-0168-B1 Engine View Diagrams & Manuals
44M777-0169-B1 Engine View Diagrams & Manuals
44M777-0171-G1 Engine View Diagrams & Manuals
44M777-0171-G5 Engine View Diagrams & Manuals
44M777-0172-B1 Engine View Diagrams & Manuals
44M777-0172-G5 Engine View Diagrams & Manuals
44M777-0173-B1 Engine View Diagrams & Manuals
44M777-0174-G5 Engine View Diagrams & Manuals
44M777-0175-G5 Engine View Diagrams & Manuals
44M777-0175-G6 Engine View Diagrams & Manuals
44M777-0176-G1 Engine View Diagrams & Manuals
44M777-0278-G1 Engine View Diagrams & Manuals
44M777-0278-G5 Engine View Diagrams & Manuals
44M777-0278-G6 Engine View Diagrams & Manuals
44M777-0286-B1 Engine View Diagrams & Manuals
44M777-0286-B2 Engine View Diagrams & Manuals
44M777-0286-B5 Engine View Diagrams & Manuals
44M777-0286-B6 Engine View Diagrams & Manuals
44M777-0287-B1 Engine View Diagrams & Manuals
44M777-0287-B2 Engine View Diagrams & Manuals
44M777-0288-G5 Engine View Diagrams & Manuals
44M777-0288-G6 Engine View Diagrams & Manuals
44M777-0289-B1 Engine View Diagrams & Manuals
44M777-0289-B2 Engine View Diagrams & Manuals
44M777-0720-B1 Engine View Diagrams & Manuals
44M777-0729-B1 Engine View Diagrams & Manuals
44M777-0764-B1 Engine View Diagrams & Manuals
44M777-0764-G1 Engine View Diagrams & Manuals
44M777-0790-B1 Engine View Diagrams & Manuals
44M777-0790-G1 Engine View Diagrams & Manuals
44M777-0816-B1 Engine View Diagrams & Manuals
44M777-0818-B1 Engine View Diagrams & Manuals
44M777-0819-B1 Engine View Diagrams & Manuals
44M777-1091-B1 Engine View Diagrams & Manuals
44M777-1193-B1 Engine View Diagrams & Manuals
44M777-1193-G1 Engine View Diagrams & Manuals
44M777-1387-B1 Engine View Diagrams & Manuals
44M777-1387-G1 Engine View Diagrams & Manuals
44M777-1634-G5 Engine View Diagrams & Manuals
44M777-2144-G1 Engine View Diagrams & Manuals
44M777-2144-G5 Engine View Diagrams & Manuals
44M777-2146-G1 Engine View Diagrams & Manuals
44M777-2146-G5 Engine View Diagrams & Manuals
44M777-2147-G5 Engine View Diagrams & Manuals
44M777-2161-G5 Engine View Diagrams & Manuals
44M777-2165-G1 Engine View Diagrams & Manuals
44M777-2165-G5 Engine View Diagrams & Manuals
44M777-2166-G5 Engine View Diagrams & Manuals
44M777-2169-G1 Engine View Diagrams & Manuals
44M777-2169-G5 Engine View Diagrams & Manuals
44M777-4171-G5 Engine View Diagrams & Manuals
44M777-4172-G5 Engine View Diagrams & Manuals
44M777-5144-G5 Engine View Diagrams & Manuals
44M777-5147-G5 Engine View Diagrams & Manuals
44M777-5161-G5 Engine View Diagrams & Manuals
44M777-5164-B1 Engine View Diagrams & Manuals
44M777-5165-B1 Engine View Diagrams & Manuals
44M777-5165-G5 Engine View Diagrams & Manuals
44M777-5166-B1 Engine View Diagrams & Manuals
44M777-5166-G5 Engine View Diagrams & Manuals
44M777-5168-B1 Engine View Diagrams & Manuals
44M777-5169-B1 Engine View Diagrams & Manuals
44M777-5169-G5 Engine View Diagrams & Manuals
44M777-5171-G5 Engine View Diagrams & Manuals
44M777-5172-B1 Engine View Diagrams & Manuals
44M777-5172-G5 Engine View Diagrams & Manuals
44M977-0001-G5 Engine View Diagrams & Manuals
44M977-0110-G5 Engine View Diagrams & Manuals
44M977-0938-G5 Engine View Diagrams & Manuals
44N777-0114-B1 Engine View Diagrams & Manuals
44N777-0121-E1 Engine View Diagrams & Manuals
44N777-0122-E1 Engine View Diagrams & Manuals
44N777-0124-E1 Engine View Diagrams & Manuals
44P777-0003-G5 Engine View Diagrams & Manuals
44P777-0016-E1 Engine View Diagrams & Manuals
44P777-0016-G1 Engine View Diagrams & Manuals
44P777-0025-E1 Engine View Diagrams & Manuals
44P777-0025-G1 Engine View Diagrams & Manuals
44P777-0026-B1 Engine View Diagrams & Manuals
44P777-0026-E1 Engine View Diagrams & Manuals
44P777-0026-G1 Engine View Diagrams & Manuals
44P777-0027-B1 Engine View Diagrams & Manuals
44P777-0027-E1 Engine View Diagrams & Manuals
44P777-0027-G1 Engine View Diagrams & Manuals
44P777-0100-B1 Engine View Diagrams & Manuals
44P777-0110-E1 Engine View Diagrams & Manuals
44P777-0110-G1 Engine View Diagrams & Manuals
44P777-0111-B1 Engine View Diagrams & Manuals
44P777-0111-E1 Engine View Diagrams & Manuals
44P777-0112-B1 Engine View Diagrams & Manuals
44P777-0112-E1 Engine View Diagrams & Manuals
44P777-0113-B1 Engine View Diagrams & Manuals
44P777-0113-E1 Engine View Diagrams & Manuals
44P777-0113-G1 Engine View Diagrams & Manuals
44P777-0115-B1 Engine View Diagrams & Manuals
44P777-0115-E1 Engine View Diagrams & Manuals
44P777-0116-B1 Engine View Diagrams & Manuals
44P777-0116-E1 Engine View Diagrams & Manuals
44P777-0116-G1 Engine View Diagrams & Manuals
44P777-0117-B1 Engine View Diagrams & Manuals
44P777-0117-E1 Engine View Diagrams & Manuals
44P777-0119-B1 Engine View Diagrams & Manuals
44P777-0119-E1 Engine View Diagrams & Manuals
44P777-0120-B1 Engine View Diagrams & Manuals
44P777-0120-E1 Engine View Diagrams & Manuals
44P777-0120-G1 Engine View Diagrams & Manuals
44P777-0121-B1 Engine View Diagrams & Manuals
44P777-0121-E1 Engine View Diagrams & Manuals
44P777-0122-B1 Engine View Diagrams & Manuals
44P777-0122-B2 Engine View Diagrams & Manuals
44P777-0123-G1 Engine View Diagrams & Manuals
44P777-0123-G2 Engine View Diagrams & Manuals
44P777-0124-G1 Engine View Diagrams & Manuals
44P777-0126-B1 Engine View Diagrams & Manuals
44P777-0127-B1 Engine View Diagrams & Manuals
44P777-0128-B1 Engine View Diagrams & Manuals
44P777-0128-G1 Engine View Diagrams & Manuals
44P777-0129-B1 Engine View Diagrams & Manuals
44P777-0130-B1 Engine View Diagrams & Manuals
44P777-0132-G1 Engine View Diagrams & Manuals
44P777-0133-G1 Engine View Diagrams & Manuals
44P777-0134-G1 Engine View Diagrams & Manuals
44P777-0135-G1 Engine View Diagrams & Manuals
44P777-0136-G1 Engine View Diagrams & Manuals
44P777-0137-G1 Engine View Diagrams & Manuals
44P777-0138-G1 Engine View Diagrams & Manuals
44P777-0139-G1 Engine View Diagrams & Manuals
44P777-0141-B1 Engine View Diagrams & Manuals
44P777-0142-B1 Engine View Diagrams & Manuals
44P777-0143-B1 Engine View Diagrams & Manuals
44P777-0146-B1 Engine View Diagrams & Manuals
44P777-0149-G1 Engine View Diagrams & Manuals
44P777-0149-G2 Engine View Diagrams & Manuals
44P777-0150-B1 Engine View Diagrams & Manuals
44P777-0150-B2 Engine View Diagrams & Manuals
44P777-0151-G1 Engine View Diagrams & Manuals
44P777-0152-G1 Engine View Diagrams & Manuals
44P777-0153-G1 Engine View Diagrams & Manuals
44P777-0155-G1 Engine View Diagrams & Manuals
44P777-0156-G1 Engine View Diagrams & Manuals
44P777-0157-G1 Engine View Diagrams & Manuals
44P777-0158-G1 Engine View Diagrams & Manuals
44P777-0158-G2 Engine View Diagrams & Manuals
44P777-0159-G1 Engine View Diagrams & Manuals
44P777-0160-G1 Engine View Diagrams & Manuals
44P777-0162-G1 Engine View Diagrams & Manuals
44P777-0163-G1 Engine View Diagrams & Manuals
44P777-0164-B1 Engine View Diagrams & Manuals
44P777-0164-B2 Engine View Diagrams & Manuals
44P777-0166-G1 Engine View Diagrams & Manuals
44P777-0167-B1 Engine View Diagrams & Manuals
44P777-0168-G1 Engine View Diagrams & Manuals
44P777-0169-G1 Engine View Diagrams & Manuals
44P777-0170-G1 Engine View Diagrams & Manuals
44P777-0171-B1 Engine View Diagrams & Manuals
44P777-0172-G1 Engine View Diagrams & Manuals
44P777-0173-G1 Engine View Diagrams & Manuals
44P777-0174-G1 Engine View Diagrams & Manuals
44P777-0174-G5 Engine View Diagrams & Manuals
44P777-0176-G5 Engine View Diagrams & Manuals
44P777-0177-B1 Engine View Diagrams & Manuals
44P777-0178-G5 Engine View Diagrams & Manuals
44P777-0180-G5 Engine View Diagrams & Manuals
44P777-0181-G5 Engine View Diagrams & Manuals
44P777-0182-G5 Engine View Diagrams & Manuals
44P777-0183-G5 Engine View Diagrams & Manuals
44P777-0184-G5 Engine View Diagrams & Manuals
44P777-0185-G5 Engine View Diagrams & Manuals
44P777-0186-G5 Engine View Diagrams & Manuals
44P777-0277-G1 Engine View Diagrams & Manuals
44P777-0277-G5 Engine View Diagrams & Manuals
44P777-0277-G6 Engine View Diagrams & Manuals
44P777-0278-G1 Engine View Diagrams & Manuals
44P777-0278-G5 Engine View Diagrams & Manuals
44P777-0287-B1 Engine View Diagrams & Manuals
44P777-0287-B2 Engine View Diagrams & Manuals
44P777-0287-B5 Engine View Diagrams & Manuals
44P777-0287-B6 Engine View Diagrams & Manuals
44P777-0288-B1 Engine View Diagrams & Manuals
44P777-0288-B2 Engine View Diagrams & Manuals
44P777-0289-G5 Engine View Diagrams & Manuals
44P777-0289-G6 Engine View Diagrams & Manuals
44P777-0412-B1 Engine View Diagrams & Manuals
44P777-0412-E1 Engine View Diagrams & Manuals
44P777-0594-B1 Engine View Diagrams & Manuals
44P777-0594-E1 Engine View Diagrams & Manuals
44P777-0706-B1 Engine View Diagrams & Manuals
44P777-0721-B1 Engine View Diagrams & Manuals
44P777-0765-B1 Engine View Diagrams & Manuals
44P777-0784-B1 Engine View Diagrams & Manuals
44P777-0799-B1 Engine View Diagrams & Manuals
44P777-0884-B1 Engine View Diagrams & Manuals
44P777-0884-E1 Engine View Diagrams & Manuals
44P777-1202-B1 Engine View Diagrams & Manuals
44P777-1273-B1 Engine View Diagrams & Manuals
44P777-1388-B1 Engine View Diagrams & Manuals
44P777-1447-B1 Engine View Diagrams & Manuals
44P777-1448-B1 Engine View Diagrams & Manuals
44P777-1455-B1 Engine View Diagrams & Manuals
44P777-1522-B1 Engine View Diagrams & Manuals
44P777-1526-B1 Engine View Diagrams & Manuals
44P777-1553-G1 Engine View Diagrams & Manuals
44P777-1553-G5 Engine View Diagrams & Manuals
44P777-1573-G5 Engine View Diagrams & Manuals
44P777-1579-G5 Engine View Diagrams & Manuals
44P777-1589-B1 Engine View Diagrams & Manuals
44P777-2156-G1 Engine View Diagrams & Manuals
44P777-2156-G5 Engine View Diagrams & Manuals
44P777-2157-G1 Engine View Diagrams & Manuals
44P777-2157-G5 Engine View Diagrams & Manuals
44P777-2159-G1 Engine View Diagrams & Manuals
44P777-2159-G5 Engine View Diagrams & Manuals
44P777-2162-G1 Engine View Diagrams & Manuals
44P777-2162-G5 Engine View Diagrams & Manuals
44P777-2163-G5 Engine View Diagrams & Manuals
44P777-2167-G1 Engine View Diagrams & Manuals
44P777-2167-G5 Engine View Diagrams & Manuals
44P777-2168-G1 Engine View Diagrams & Manuals
44P777-2168-G5 Engine View Diagrams & Manuals
44P777-2172-G5 Engine View Diagrams & Manuals
44P777-2447-G1 Engine View Diagrams & Manuals
44P777-2447-G5 Engine View Diagrams & Manuals
44P777-2448-G1 Engine View Diagrams & Manuals
44P777-2448-G5 Engine View Diagrams & Manuals
44P777-2784-G1 Engine View Diagrams & Manuals
44P777-2784-G5 Engine View Diagrams & Manuals
44P777-2799-G1 Engine View Diagrams & Manuals
44P777-2799-G5 Engine View Diagrams & Manuals
44P777-4178-G5 Engine View Diagrams & Manuals
44P777-4278-G5 Engine View Diagrams & Manuals
44P777-4448-G5 Engine View Diagrams & Manuals
44P777-5146-B1 Engine View Diagrams & Manuals
44P777-5156-G5 Engine View Diagrams & Manuals
44P777-5157-G5 Engine View Diagrams & Manuals
44P777-5159-G5 Engine View Diagrams & Manuals
44P777-5162-G5 Engine View Diagrams & Manuals
44P777-5163-G5 Engine View Diagrams & Manuals
44P777-5167-B1 Engine View Diagrams & Manuals
44P777-5167-G5 Engine View Diagrams & Manuals
44P777-5168-G5 Engine View Diagrams & Manuals
44P777-5171-B1 Engine View Diagrams & Manuals
44P777-5172-G5 Engine View Diagrams & Manuals
44P777-5174-G5 Engine View Diagrams & Manuals
44P777-5176-G5 Engine View Diagrams & Manuals
44P777-5178-G5 Engine View Diagrams & Manuals
44P777-5278-G5 Engine View Diagrams & Manuals
44P777-5799-B1 Engine View Diagrams & Manuals
44P777-5799-G5 Engine View Diagrams & Manuals
350447-1308-E1 Engine View Diagrams & Manuals
350447-1309-E1 Engine View Diagrams & Manuals
350447-1311-E1 Engine View Diagrams & Manuals
350447-1312-E1 Engine View Diagrams & Manuals
350447-1315-E1 Engine View Diagrams & Manuals
350447-1316-E1 Engine View Diagrams & Manuals
350447-1317-E1 Engine View Diagrams & Manuals
350447-1318-E1 Engine View Diagrams & Manuals
350447-1319-E1 Engine View Diagrams & Manuals
350447-1331-E1 Engine View Diagrams & Manuals
350447-1332-E1 Engine View Diagrams & Manuals
350447-1333-E1 Engine View Diagrams & Manuals
350447-1334-E1 Engine View Diagrams & Manuals
350447-1334-E9 Engine View Diagrams & Manuals
350447-1366-E1 Engine View Diagrams & Manuals
350447-1366-E9 Engine View Diagrams & Manuals
350447-1375-E1 Engine View Diagrams & Manuals
350447-1377-E1 Engine View Diagrams & Manuals
350447-1378-E1 Engine View Diagrams & Manuals
350447-1396-E1 Engine View Diagrams & Manuals
350447-1396-E9 Engine View Diagrams & Manuals
350447-1397-E1 Engine View Diagrams & Manuals
350447-1399-E1 Engine View Diagrams & Manuals
350447-1400-E1 Engine View Diagrams & Manuals
350447-1400-E9 Engine View Diagrams & Manuals
350447-1402-E1 Engine View Diagrams & Manuals
350447-1405-E1 Engine View Diagrams & Manuals
350447-1409-E1 Engine View Diagrams & Manuals
350447-1410-E1 Engine View Diagrams & Manuals
350447-1413-E1 Engine View Diagrams & Manuals
350447-1414-E1 Engine View Diagrams & Manuals
44P977-0110-G5 Engine View Diagrams & Manuals
44P977-0111-G5 Engine View Diagrams & Manuals
44P977-0113-G5 Engine View Diagrams & Manuals
44P977-0114-G5 Engine View Diagrams & Manuals
44Q777-5142-B1 Engine View Diagrams & Manuals
44Q777-5143-B1 Engine View Diagrams & Manuals
44Q777-5143-G5 Engine View Diagrams & Manuals
44Q777-5145-G5 Engine View Diagrams & Manuals
44Q777-5146-G5 Engine View Diagrams & Manuals
44Q777-5147-G5 Engine View Diagrams & Manuals
44Q777-5148-G5 Engine View Diagrams & Manuals
44Q777-5149-G5 Engine View Diagrams & Manuals
44Q777-5583-G5 Engine View Diagrams & Manuals
44Q977-0037-G5 Engine View Diagrams & Manuals
44Q977-0110-G1 Engine View Diagrams & Manuals
44Q977-0110-G5 Engine View Diagrams & Manuals
44Q977-0110-G6 Engine View Diagrams & Manuals
44Q977-0112-G5 Engine View Diagrams & Manuals
44Q977-0113-G5 Engine View Diagrams & Manuals
44Q977-0114-B1 Engine View Diagrams & Manuals
44Q977-0114-B2 Engine View Diagrams & Manuals
44Q977-0115-G5 Engine View Diagrams & Manuals
44Q977-0117-G5 Engine View Diagrams & Manuals
44Q977-0119-G5 Engine View Diagrams & Manuals
44Q977-0120-B1 Engine View Diagrams & Manuals
44Q977-0199-G5 Engine View Diagrams & Manuals
44Q977-0200-G5 Engine View Diagrams & Manuals
44Q977-0275-G1 Engine View Diagrams & Manuals
44Q977-0275-G5 Engine View Diagrams & Manuals
44Q977-0276-G1 Engine View Diagrams & Manuals
44Q977-0276-G5 Engine View Diagrams & Manuals
49L977-0001-G5 Engine View Diagrams & Manuals
49L977-0110-G1 Engine View Diagrams & Manuals
49L977-0110-G5 Engine View Diagrams & Manuals
49L977-0125-G5 Engine View Diagrams & Manuals
49L977-0126-G5 Engine View Diagrams & Manuals
49L977-1635-G5 Engine View Diagrams & Manuals
44Q777-0006-G1 Engine View Diagrams & Manuals
44Q777-0016-G1 Engine View Diagrams & Manuals
44Q777-0025-E1 Engine View Diagrams & Manuals
44Q777-0025-G1 Engine View Diagrams & Manuals
44Q777-0026-E1 Engine View Diagrams & Manuals
44Q777-0026-G1 Engine View Diagrams & Manuals
44Q777-0027-E1 Engine View Diagrams & Manuals
44Q777-0027-G1 Engine View Diagrams & Manuals
44Q777-0035-G1 Engine View Diagrams & Manuals
44Q777-0036-G1 Engine View Diagrams & Manuals
44Q777-0037-G1 Engine View Diagrams & Manuals
44Q777-0046-G1 Engine View Diagrams & Manuals
44Q777-0047-G1 Engine View Diagrams & Manuals
44Q777-0111-B1 Engine View Diagrams & Manuals
44Q777-0111-E1 Engine View Diagrams & Manuals
44Q777-0112-B1 Engine View Diagrams & Manuals
44Q777-0112-E1 Engine View Diagrams & Manuals
44Q777-0120-G1 Engine View Diagrams & Manuals
44Q777-0121-B1 Engine View Diagrams & Manuals
44Q777-0125-G1 Engine View Diagrams & Manuals
44Q777-0126-G1 Engine View Diagrams & Manuals
44Q777-0127-G1 Engine View Diagrams & Manuals
44Q777-0128-B1 Engine View Diagrams & Manuals
44Q777-0129-B1 Engine View Diagrams & Manuals
44Q777-0135-G1 Engine View Diagrams & Manuals
44Q777-0136-G1 Engine View Diagrams & Manuals
44Q777-0137-G1 Engine View Diagrams & Manuals
44Q777-0138-B1 Engine View Diagrams & Manuals
44Q777-0140-B1 Engine View Diagrams & Manuals
44Q777-0141-B1 Engine View Diagrams & Manuals
44Q777-0142-B1 Engine View Diagrams & Manuals
44Q777-0143-B1 Engine View Diagrams & Manuals
44Q777-0145-G1 Engine View Diagrams & Manuals
44Q777-0145-G5 Engine View Diagrams & Manuals
44Q777-0146-G1 Engine View Diagrams & Manuals
44Q777-0146-G5 Engine View Diagrams & Manuals
44Q777-0147-G1 Engine View Diagrams & Manuals
44Q777-0147-G5 Engine View Diagrams & Manuals
44Q777-0148-G1 Engine View Diagrams & Manuals
44Q777-0148-G5 Engine View Diagrams & Manuals
44Q777-0149-G1 Engine View Diagrams & Manuals
44Q777-0149-G5 Engine View Diagrams & Manuals
44Q777-0151-B1 Engine View Diagrams & Manuals
44Q777-0471-B1 Engine View Diagrams & Manuals
44Q777-0505-B1 Engine View Diagrams & Manuals
44Q777-1039-B1 Engine View Diagrams & Manuals
44Q777-1208-B1 Engine View Diagrams & Manuals
44Q777-1272-B1 Engine View Diagrams & Manuals
44Q777-1272-G1 Engine View Diagrams & Manuals
44Q777-1406-B1 Engine View Diagrams & Manuals
44Q777-1406-G1 Engine View Diagrams & Manuals
44Q777-1583-G5 Engine View Diagrams & Manuals
44Q777-1604-G5 Engine View Diagrams & Manuals
44Q777-2138-G5 Engine View Diagrams & Manuals
44Q777-2141-G1 Engine View Diagrams & Manuals
44Q777-2141-G5 Engine View Diagrams & Manuals
44Q777-2143-G5 Engine View Diagrams & Manuals
44Q777-2406-G1 Engine View Diagrams & Manuals
44Q777-2406-G5 Engine View Diagrams & Manuals
44Q777-3047-G5 Engine View Diagrams & Manuals
44Q777-3135-G5 Engine View Diagrams & Manuals
44Q777-3136-G5 Engine View Diagrams & Manuals
44Q777-3137-G5 Engine View Diagrams & Manuals
44Q777-5121-B1 Engine View Diagrams & Manuals
44Q777-5136-G5 Engine View Diagrams & Manuals
44Q777-5137-G5 Engine View Diagrams & Manuals
44Q777-5138-B1 Engine View Diagrams & Manuals
44Q777-5138-G5 Engine View Diagrams & Manuals
44Q777-5141-B1 Engine View Diagrams & Manuals
44Q777-5141-G5 Engine View Diagrams & Manuals
49M777-0110-G1 Engine View Diagrams & Manuals
49M777-0111-G1 Engine View Diagrams & Manuals
49M777-0111-G5 Engine View Diagrams & Manuals
49M777-0116-G1 Engine View Diagrams & Manuals
49M777-0117-G1 Engine View Diagrams & Manuals
49M777-0118-G1 Engine View Diagrams & Manuals
49M777-0119-G1 Engine View Diagrams & Manuals
49M777-0120-G1 Engine View Diagrams & Manuals
49M777-0122-G1 Engine View Diagrams & Manuals
49M777-0122-G5 Engine View Diagrams & Manuals
49M777-0123-G5 Engine View Diagrams & Manuals
49M777-0124-G5 Engine View Diagrams & Manuals
49M777-0177-G5 Engine View Diagrams & Manuals
49M777-0566-G1 Engine View Diagrams & Manuals
49M777-0791-G1 Engine View Diagrams & Manuals
49M777-0853-G1 Engine View Diagrams & Manuals
49M777-0853-G5 Engine View Diagrams & Manuals
49M777-1296-G1 Engine View Diagrams & Manuals
49M777-1321-G1 Engine View Diagrams & Manuals
49M777-1460-G1 Engine View Diagrams & Manuals
49M777-1554-G1 Engine View Diagrams & Manuals
49M777-1554-G5 Engine View Diagrams & Manuals
49M777-2119-G1 Engine View Diagrams & Manuals
49M777-2119-G5 Engine View Diagrams & Manuals
49M777-2460-B1 Engine View Diagrams & Manuals
49M777-4111-G5 Engine View Diagrams & Manuals
49M777-5111-G5 Engine View Diagrams & Manuals
49M777-5122-G5 Engine View Diagrams & Manuals
49M777-5123-G5 Engine View Diagrams & Manuals
49M777-5124-G5 Engine View Diagrams & Manuals
49M777-5460-B1 Engine View Diagrams & Manuals
49M777-5554-G5 Engine View Diagrams & Manuals
49M777-5853-G5 Engine View Diagrams & Manuals
49M877-0001-G5 Engine View Diagrams & Manuals
49M877-0046-G1 Engine View Diagrams & Manuals
49M877-0047-G1 Engine View Diagrams & Manuals
49M877-0110-E1 Engine View Diagrams & Manuals
49M877-0111-G5 Engine View Diagrams & Manuals
49M877-0112-G5 Engine View Diagrams & Manuals
49M877-0114-G5 Engine View Diagrams & Manuals
49M877-1036-G5 Engine View Diagrams & Manuals
49M877-1046-G5 Engine View Diagrams & Manuals
49M877-1047-G5 Engine View Diagrams & Manuals
49M877-1598-G5 Engine View Diagrams & Manuals
49M877-1636-B1 Engine View Diagrams & Manuals
49M877-5047-G5 Engine View Diagrams & Manuals
49M877-5111-G5 Engine View Diagrams & Manuals
49M877-5112-G5 Engine View Diagrams & Manuals
49M877-5598-G5 Engine View Diagrams & Manuals
49M977-0001-G5 Engine View Diagrams & Manuals
49M977-0002-G5 Engine View Diagrams & Manuals
49M977-0036-E1 Engine View Diagrams & Manuals
49M977-0110-E1 Engine View Diagrams & Manuals
49M977-0111-G5 Engine View Diagrams & Manuals
49M977-0112-B1 Engine View Diagrams & Manuals
49M977-0113-G5 Engine View Diagrams & Manuals
49M977-0114-G5 Engine View Diagrams & Manuals
49M977-0116-G5 Engine View Diagrams & Manuals
49M977-0117-G5 Engine View Diagrams & Manuals
49M977-0119-G5 Engine View Diagrams & Manuals
49M977-1036-G5 Engine View Diagrams & Manuals
400417-0119-01 Engine View Diagrams & Manuals
400417-1501-01 Engine View Diagrams & Manuals
400417-1502-01 Engine View Diagrams & Manuals
400437-0015-01 Engine View Diagrams & Manuals
400437-0016-01 Engine View Diagrams & Manuals
400437-0111-01 Engine View Diagrams & Manuals
400437-0112-01 Engine View Diagrams & Manuals
400437-0113-99 Engine View Diagrams & Manuals
400437-0120-01 Engine View Diagrams & Manuals
400437-0121-99 Engine View Diagrams & Manuals
400437-0122-01 Engine View Diagrams & Manuals
400437-1200-01 Engine View Diagrams & Manuals
400437-1202-01 Engine View Diagrams & Manuals
400437-1205-01 Engine View Diagrams & Manuals
400437-4015-01 Engine View Diagrams & Manuals
400437-4016-01 Engine View Diagrams & Manuals
400447-1201-01 Engine View Diagrams & Manuals
400447-1203-01 Engine View Diagrams & Manuals
400447-1206-01 Engine View Diagrams & Manuals
400447-1207-01 Engine View Diagrams & Manuals
400447-4002-01 Engine View Diagrams & Manuals
400707-0010-01 Engine View Diagrams & Manuals
400707-0030-01 Engine View Diagrams & Manuals
400707-0040-99 Engine View Diagrams & Manuals
400707-0041-01 Engine View Diagrams & Manuals
400707-0100-01 Engine View Diagrams & Manuals
400707-0101-01 Engine View Diagrams & Manuals
400707-0102-99 Engine View Diagrams & Manuals
400707-0110-01 Engine View Diagrams & Manuals
400707-0111-01 Engine View Diagrams & Manuals
400707-0111-02 Engine View Diagrams & Manuals
400707-0112-01 Engine View Diagrams & Manuals
400707-0113-01 Engine View Diagrams & Manuals
400707-0114-01 Engine View Diagrams & Manuals
400707-0115-01 Engine View Diagrams & Manuals
400707-0116-01 Engine View Diagrams & Manuals
400707-0117-01 Engine View Diagrams & Manuals
400707-0118-01 Engine View Diagrams & Manuals
400707-0119-01 Engine View Diagrams & Manuals
400707-0120-01 Engine View Diagrams & Manuals
400707-0121-01 Engine View Diagrams & Manuals
400707-0122-01 Engine View Diagrams & Manuals
400707-0123-99 Engine View Diagrams & Manuals
400707-0124-01 Engine View Diagrams & Manuals
400707-0124-02 Engine View Diagrams & Manuals
400707-0125-01 Engine View Diagrams & Manuals
400707-0126-01 Engine View Diagrams & Manuals
400707-0127-01 Engine View Diagrams & Manuals
400707-0128-01 Engine View Diagrams & Manuals
400707-0129-01 Engine View Diagrams & Manuals
400707-0130-01 Engine View Diagrams & Manuals
400707-0131-01 Engine View Diagrams & Manuals
400707-1110-01 Engine View Diagrams & Manuals
400707-1111-01 Engine View Diagrams & Manuals
400707-1200-01 Engine View Diagrams & Manuals
400707-1202-01 Engine View Diagrams & Manuals
400707-1205-01 Engine View Diagrams & Manuals
400707-1205-02 Engine View Diagrams & Manuals
400707-1206-99 Engine View Diagrams & Manuals
400707-1207-99 Engine View Diagrams & Manuals
400707-1208-01 Engine View Diagrams & Manuals
400707-1209-01 Engine View Diagrams & Manuals
400707-1210-01 Engine View Diagrams & Manuals
400707-1211-01 Engine View Diagrams & Manuals
400707-1212-01 Engine View Diagrams & Manuals
400707-1213-01 Engine View Diagrams & Manuals
400707-1213-02 Engine View Diagrams & Manuals
400707-1214-01 Engine View Diagrams & Manuals
400707-1215-01 Engine View Diagrams & Manuals
400707-1216-01 Engine View Diagrams & Manuals
400707-1217-01 Engine View Diagrams & Manuals
400707-1218-01 Engine View Diagrams & Manuals
400707-1220-01 Engine View Diagrams & Manuals
400707-1221-01 Engine View Diagrams & Manuals
400707-1221-02 Engine View Diagrams & Manuals
400707-1222-01 Engine View Diagrams & Manuals
400707-1223-99 Engine View Diagrams & Manuals
400707-1224-01 Engine View Diagrams & Manuals
400707-1234-01 Engine View Diagrams & Manuals
400707-1235-01 Engine View Diagrams & Manuals
400707-1236-99 Engine View Diagrams & Manuals
400707-1237-01 Engine View Diagrams & Manuals
400707-1238-01 Engine View Diagrams & Manuals
400707-1239-01 Engine View Diagrams & Manuals
400707-1400-99 Engine View Diagrams & Manuals
400707-1500-01 Engine View Diagrams & Manuals
400707-1502-01 Engine View Diagrams & Manuals
400707-1505-01 Engine View Diagrams & Manuals
400707-1506-01 Engine View Diagrams & Manuals
400707-1507-01 Engine View Diagrams & Manuals
400707-1508-01 Engine View Diagrams & Manuals
400707-1509-01 Engine View Diagrams & Manuals
400707-1510-01 Engine View Diagrams & Manuals
400707-1510-03 Engine View Diagrams & Manuals
400707-1511-01 Engine View Diagrams & Manuals
400707-1520-01 Engine View Diagrams & Manuals
400707-1520-03 Engine View Diagrams & Manuals
400707-4001-99 Engine View Diagrams & Manuals
400707-4002-01 Engine View Diagrams & Manuals
400707-4003-99 Engine View Diagrams & Manuals
400707-7001-99 Engine View Diagrams & Manuals
400777-1201-01 Engine View Diagrams & Manuals
400777-1203-01 Engine View Diagrams & Manuals
400777-1219-01 Engine View Diagrams & Manuals
350447-1421-E1 Engine View Diagrams & Manuals
401407-0171-99 Engine View Diagrams & Manuals
401411-0143-99 Engine View Diagrams & Manuals
401411-0636-99 Engine View Diagrams & Manuals
401415-0146-99 Engine View Diagrams & Manuals
401415-0148-99 Engine View Diagrams & Manuals
401415-0152-99 Engine View Diagrams & Manuals
401415-0156-99 Engine View Diagrams & Manuals
401415-0168-99 Engine View Diagrams & Manuals
401415-0632-99 Engine View Diagrams & Manuals
401417-0010-99 Engine View Diagrams & Manuals
401417-0011-99 Engine View Diagrams & Manuals
401417-0012-99 Engine View Diagrams & Manuals
401417-0013-99 Engine View Diagrams & Manuals
401417-0070-99 Engine View Diagrams & Manuals
401417-0111-99 Engine View Diagrams & Manuals
401417-0112-99 Engine View Diagrams & Manuals
401417-0113-99 Engine View Diagrams & Manuals
401417-0114-99 Engine View Diagrams & Manuals
401417-0119-99 Engine View Diagrams & Manuals
401417-0126-99 Engine View Diagrams & Manuals
401417-0127-99 Engine View Diagrams & Manuals
401417-0128-99 Engine View Diagrams & Manuals
401417-0129-99 Engine View Diagrams & Manuals
401417-0130-99 Engine View Diagrams & Manuals
401417-0131-99 Engine View Diagrams & Manuals
401417-0132-99 Engine View Diagrams & Manuals
401417-0133-99 Engine View Diagrams & Manuals
401417-0134-99 Engine View Diagrams & Manuals
401417-0135-99 Engine View Diagrams & Manuals
401417-0136-99 Engine View Diagrams & Manuals
401417-0137-99 Engine View Diagrams & Manuals
401417-0138-99 Engine View Diagrams & Manuals
401417-0139-99 Engine View Diagrams & Manuals
401417-0140-99 Engine View Diagrams & Manuals
401417-0141-99 Engine View Diagrams & Manuals
401417-0142-99 Engine View Diagrams & Manuals
401417-0144-99 Engine View Diagrams & Manuals
401417-0145-99 Engine View Diagrams & Manuals
401417-0147-99 Engine View Diagrams & Manuals
401417-0151-99 Engine View Diagrams & Manuals
401417-0153-99 Engine View Diagrams & Manuals
401417-0154-99 Engine View Diagrams & Manuals
401417-0155-99 Engine View Diagrams & Manuals
401417-0156-99 Engine View Diagrams & Manuals
401417-0157-99 Engine View Diagrams & Manuals
401417-0158-99 Engine View Diagrams & Manuals
401417-0159-99 Engine View Diagrams & Manuals
401417-0161-99 Engine View Diagrams & Manuals
401417-0163-99 Engine View Diagrams & Manuals
401417-0165-99 Engine View Diagrams & Manuals
401417-0166-99 Engine View Diagrams & Manuals
401417-0169-99 Engine View Diagrams & Manuals
401417-0170-99 Engine View Diagrams & Manuals
401417-0171-99 Engine View Diagrams & Manuals
401417-0510-99 Engine View Diagrams & Manuals
401417-0511-99 Engine View Diagrams & Manuals
401417-0630-99 Engine View Diagrams & Manuals
401417-0631-99 Engine View Diagrams & Manuals
401417-0633-99 Engine View Diagrams & Manuals
401417-0634-99 Engine View Diagrams & Manuals
401417-0635-99 Engine View Diagrams & Manuals
401417-0637-99 Engine View Diagrams & Manuals
401417-0638-99 Engine View Diagrams & Manuals
401431-0118-99 Engine View Diagrams & Manuals
401431-0121-99 Engine View Diagrams & Manuals
401431-0122-99 Engine View Diagrams & Manuals
401437-0015-99 Engine View Diagrams & Manuals
401437-0020-99 Engine View Diagrams & Manuals
401437-0021-99 Engine View Diagrams & Manuals
401437-0022-99 Engine View Diagrams & Manuals
401437-0116-99 Engine View Diagrams & Manuals
401437-0117-99 Engine View Diagrams & Manuals
401437-0150-99 Engine View Diagrams & Manuals
401437-0153-99 Engine View Diagrams & Manuals
401437-0160-99 Engine View Diagrams & Manuals
401437-0162-99 Engine View Diagrams & Manuals
401437-0164-99 Engine View Diagrams & Manuals
401437-0167-99 Engine View Diagrams & Manuals
401577-0123-B1 Engine View Diagrams & Manuals
401577-0124-B1 Engine View Diagrams & Manuals
401577-0125-B1 Engine View Diagrams & Manuals
401577-0126-B1 Engine View Diagrams & Manuals
401577-0127-B1 Engine View Diagrams & Manuals
401577-0128-B1 Engine View Diagrams & Manuals
401577-0129-B1 Engine View Diagrams & Manuals
401577-0130-B1 Engine View Diagrams & Manuals
401577-0131-B1 Engine View Diagrams & Manuals
401577-0132-B1 Engine View Diagrams & Manuals
401577-0133-B1 Engine View Diagrams & Manuals
401577-0134-B1 Engine View Diagrams & Manuals
401577-0134-B2 Engine View Diagrams & Manuals
401577-0135-B1 Engine View Diagrams & Manuals
401577-0135-B2 Engine View Diagrams & Manuals
401577-0724-E1 Engine View Diagrams & Manuals
401577-0887-B1 Engine View Diagrams & Manuals
401577-0996-B1 Engine View Diagrams & Manuals
401577-1219-B1 Engine View Diagrams & Manuals
401577-2219-B1 Engine View Diagrams & Manuals
401577-3127-B1 Engine View Diagrams & Manuals
401577-3130-B1 Engine View Diagrams & Manuals
401577-3132-B1 Engine View Diagrams & Manuals
401577-3887-B1 Engine View Diagrams & Manuals
401577-5124-B1 Engine View Diagrams & Manuals
401577-5127-B1 Engine View Diagrams & Manuals
401577-5129-B1 Engine View Diagrams & Manuals
401577-5130-B1 Engine View Diagrams & Manuals
401577-5131-B1 Engine View Diagrams & Manuals
401577-5887-B1 Engine View Diagrams & Manuals
350772-0045-01 Engine View Diagrams & Manuals
350772-0045-02 Engine View Diagrams & Manuals
350772-0102-01 Engine View Diagrams & Manuals
350772-1045-A1 Engine View Diagrams & Manuals
350772-1045-A2 Engine View Diagrams & Manuals
350772-1045-E2 Engine View Diagrams & Manuals
350772-1102-A1 Engine View Diagrams & Manuals
350772-1102-E1 Engine View Diagrams & Manuals
350775-0119-01 Engine View Diagrams & Manuals
350776-0046-02 Engine View Diagrams & Manuals
350776-0122-01 Engine View Diagrams & Manuals
350776-1046-A2 Engine View Diagrams & Manuals
350776-1046-E2 Engine View Diagrams & Manuals
350776-1122-A1 Engine View Diagrams & Manuals
350776-1122-E1 Engine View Diagrams & Manuals
350777-0034-01 Engine View Diagrams & Manuals
350777-0034-02 Engine View Diagrams & Manuals
350777-0035-01 Engine View Diagrams & Manuals
350777-0044-01 Engine View Diagrams & Manuals
350777-0044-02 Engine View Diagrams & Manuals
350777-0100-01 Engine View Diagrams & Manuals
401707-0010-99 Engine View Diagrams & Manuals
401707-0011-99 Engine View Diagrams & Manuals
401707-0111-99 Engine View Diagrams & Manuals
401707-0130-99 Engine View Diagrams & Manuals
401707-0131-99 Engine View Diagrams & Manuals
401707-0132-99 Engine View Diagrams & Manuals
401707-0133-99 Engine View Diagrams & Manuals
401707-0134-99 Engine View Diagrams & Manuals
401707-0135-99 Engine View Diagrams & Manuals
401707-0136-99 Engine View Diagrams & Manuals
401707-0137-99 Engine View Diagrams & Manuals
401707-0138-99 Engine View Diagrams & Manuals
401707-0139-99 Engine View Diagrams & Manuals
401707-0140-99 Engine View Diagrams & Manuals
401707-0141-99 Engine View Diagrams & Manuals
401707-0510-99 Engine View Diagrams & Manuals
401707-0611-99 Engine View Diagrams & Manuals
401707-0630-99 Engine View Diagrams & Manuals
401707-0631-99 Engine View Diagrams & Manuals
401707-0632-99 Engine View Diagrams & Manuals
401707-0633-99 Engine View Diagrams & Manuals
350777-0110-01 Engine View Diagrams & Manuals
350777-0113-01 Engine View Diagrams & Manuals
350777-0114-01 Engine View Diagrams & Manuals
350777-0115-01 Engine View Diagrams & Manuals
350777-0116-01 Engine View Diagrams & Manuals
350777-0117-01 Engine View Diagrams & Manuals
350777-0120-01 Engine View Diagrams & Manuals
350777-0123-01 Engine View Diagrams & Manuals
350777-0125-01 Engine View Diagrams & Manuals
350777-0450-01 Engine View Diagrams & Manuals
350777-1034-A1 Engine View Diagrams & Manuals
350777-1034-E1 Engine View Diagrams & Manuals
350777-1034-E3 Engine View Diagrams & Manuals
350777-1035-A1 Engine View Diagrams & Manuals
350777-1035-E1 Engine View Diagrams & Manuals
350777-1044-A1 Engine View Diagrams & Manuals
350777-1044-A2 Engine View Diagrams & Manuals
350777-1044-E2 Engine View Diagrams & Manuals
350777-1048-E2 Engine View Diagrams & Manuals
350777-1077-E1 Engine View Diagrams & Manuals
350777-1100-A1 Engine View Diagrams & Manuals
402415-0682-01 Engine View Diagrams & Manuals
402415-0691-01 Engine View Diagrams & Manuals
402415-0693-01 Engine View Diagrams & Manuals
402415-1506-01 Engine View Diagrams & Manuals
402417-0609-01 Engine View Diagrams & Manuals
402417-0610-01 Engine View Diagrams & Manuals
402417-0640-99 Engine View Diagrams & Manuals
402417-0660-01 Engine View Diagrams & Manuals
402417-0661-01 Engine View Diagrams & Manuals
402417-0662-01 Engine View Diagrams & Manuals
402417-0664-01 Engine View Diagrams & Manuals
402417-0665-01 Engine View Diagrams & Manuals
402417-0671-01 Engine View Diagrams & Manuals
402417-0671-02 Engine View Diagrams & Manuals
402417-0675-01 Engine View Diagrams & Manuals
402417-0676-01 Engine View Diagrams & Manuals
402417-0677-01 Engine View Diagrams & Manuals
402417-0677-02 Engine View Diagrams & Manuals
402417-0678-01 Engine View Diagrams & Manuals
402417-0679-01 Engine View Diagrams & Manuals
402417-0680-01 Engine View Diagrams & Manuals
402417-0681-01 Engine View Diagrams & Manuals
402417-0682-99 Engine View Diagrams & Manuals
402417-0685-01 Engine View Diagrams & Manuals
402417-0687-01 Engine View Diagrams & Manuals
402417-0695-01 Engine View Diagrams & Manuals
350777-1100-E1 Engine View Diagrams & Manuals
350777-1112-A1 Engine View Diagrams & Manuals
350777-1112-E1 Engine View Diagrams & Manuals
350777-1113-A1 Engine View Diagrams & Manuals
350777-1113-E1 Engine View Diagrams & Manuals
350777-1114-A1 Engine View Diagrams & Manuals
350777-1115-A1 Engine View Diagrams & Manuals
350777-1115-E1 Engine View Diagrams & Manuals
350777-1117-A1 Engine View Diagrams & Manuals
350777-1117-E1 Engine View Diagrams & Manuals
350777-1118-A1 Engine View Diagrams & Manuals
350777-1118-E1 Engine View Diagrams & Manuals
350777-1120-A1 Engine View Diagrams & Manuals
350777-1120-E1 Engine View Diagrams & Manuals
350777-1123-A1 Engine View Diagrams & Manuals
350777-1124-A1 Engine View Diagrams & Manuals
350777-1125-A1 Engine View Diagrams & Manuals
350777-1125-E1 Engine View Diagrams & Manuals
350777-1128-A1 Engine View Diagrams & Manuals
350777-1128-E1 Engine View Diagrams & Manuals
350777-1130-A1 Engine View Diagrams & Manuals
402417-0701-01 Engine View Diagrams & Manuals
402417-0702-01 Engine View Diagrams & Manuals
402417-1010-01 Engine View Diagrams & Manuals
402417-1011-01 Engine View Diagrams & Manuals
402417-1011-02 Engine View Diagrams & Manuals
402417-1020-01 Engine View Diagrams & Manuals
402417-1021-01 Engine View Diagrams & Manuals
402417-1501-01 Engine View Diagrams & Manuals
402417-1502-01 Engine View Diagrams & Manuals
402417-1505-01 Engine View Diagrams & Manuals
402417-1506-99 Engine View Diagrams & Manuals
402417-1507-01 Engine View Diagrams & Manuals
402417-4020-01 Engine View Diagrams & Manuals
402417-4021-01 Engine View Diagrams & Manuals
402417-7020-01 Engine View Diagrams & Manuals
402417-7021-99 Engine View Diagrams & Manuals
402431-0131-99 Engine View Diagrams & Manuals
402431-0133-99 Engine View Diagrams & Manuals
402431-0633-01 Engine View Diagrams & Manuals
402431-0636-01 Engine View Diagrams & Manuals
402431-0667-01 Engine View Diagrams & Manuals
402431-0672-01 Engine View Diagrams & Manuals
402431-0711-99 Engine View Diagrams & Manuals
402431-1014-01 Engine View Diagrams & Manuals
402431-1014-02 Engine View Diagrams & Manuals
402431-1211-01 Engine View Diagrams & Manuals
402431-1222-99 Engine View Diagrams & Manuals
402431-1226-01 Engine View Diagrams & Manuals
402435-0134-99 Engine View Diagrams & Manuals
402435-0135-99 Engine View Diagrams & Manuals
402435-0634-01 Engine View Diagrams & Manuals
402435-0635-01 Engine View Diagrams & Manuals
402435-0638-01 Engine View Diagrams & Manuals
402435-0690-01 Engine View Diagrams & Manuals
402437-0015-99 Engine View Diagrams & Manuals
402437-0016-99 Engine View Diagrams & Manuals
402437-0111-99 Engine View Diagrams & Manuals
402437-0112-99 Engine View Diagrams & Manuals
402437-0130-99 Engine View Diagrams & Manuals
402437-0132-99 Engine View Diagrams & Manuals
402437-0133-99 Engine View Diagrams & Manuals
402437-0136-99 Engine View Diagrams & Manuals
402437-0137-99 Engine View Diagrams & Manuals
402437-0138-99 Engine View Diagrams & Manuals
402437-0139-99 Engine View Diagrams & Manuals
402437-0515-01 Engine View Diagrams & Manuals
402437-0516-01 Engine View Diagrams & Manuals
402437-0611-01 Engine View Diagrams & Manuals
402437-0612-01 Engine View Diagrams & Manuals
402437-0630-01 Engine View Diagrams & Manuals
402437-0631-01 Engine View Diagrams & Manuals
402437-0632-01 Engine View Diagrams & Manuals
402437-0633-99 Engine View Diagrams & Manuals
402437-0637-01 Engine View Diagrams & Manuals
402437-0639-01 Engine View Diagrams & Manuals
402437-0666-01 Engine View Diagrams & Manuals
402437-0668-01 Engine View Diagrams & Manuals
402437-0668-02 Engine View Diagrams & Manuals
402437-0669-01 Engine View Diagrams & Manuals
402437-0670-01 Engine View Diagrams & Manuals
402437-0673-01 Engine View Diagrams & Manuals
402437-0674-01 Engine View Diagrams & Manuals
402437-0683-01 Engine View Diagrams & Manuals
402437-0684-01 Engine View Diagrams & Manuals
402437-0685-99 Engine View Diagrams & Manuals
402437-0686-01 Engine View Diagrams & Manuals
402437-0688-01 Engine View Diagrams & Manuals
402437-0689-01 Engine View Diagrams & Manuals
402437-0692-01 Engine View Diagrams & Manuals
402437-0694-01 Engine View Diagrams & Manuals
402437-0696-01 Engine View Diagrams & Manuals
402437-0697-01 Engine View Diagrams & Manuals
402437-0698-01 Engine View Diagrams & Manuals
402437-0699-01 Engine View Diagrams & Manuals
402437-0700-01 Engine View Diagrams & Manuals
402437-0703-01 Engine View Diagrams & Manuals
402437-0704-01 Engine View Diagrams & Manuals
402437-0705-01 Engine View Diagrams & Manuals
402437-0706-01 Engine View Diagrams & Manuals
402437-0707-01 Engine View Diagrams & Manuals
402437-0709-01 Engine View Diagrams & Manuals
402437-0710-01 Engine View Diagrams & Manuals
402437-0712-01 Engine View Diagrams & Manuals
402437-0713-01 Engine View Diagrams & Manuals
402437-0714-01 Engine View Diagrams & Manuals
117436-0242-B1 Engine View Diagrams & Manuals
117436-0242-E1 Engine View Diagrams & Manuals
402437-0721-01 Engine View Diagrams & Manuals
402437-1015-01 Engine View Diagrams & Manuals
402437-1015-02 Engine View Diagrams & Manuals
402437-1016-01 Engine View Diagrams & Manuals
402437-1016-02 Engine View Diagrams & Manuals
402437-1017-01 Engine View Diagrams & Manuals
402437-1017-02 Engine View Diagrams & Manuals
402437-1017-03 Engine View Diagrams & Manuals
402437-1018-01 Engine View Diagrams & Manuals
402437-1025-99 Engine View Diagrams & Manuals
402437-1026-01 Engine View Diagrams & Manuals
402437-1106-01 Engine View Diagrams & Manuals
402437-1107-01 Engine View Diagrams & Manuals
402437-1200-01 Engine View Diagrams & Manuals
402437-1202-01 Engine View Diagrams & Manuals
402437-1205-01 Engine View Diagrams & Manuals
402437-1206-01 Engine View Diagrams & Manuals
402437-1207-01 Engine View Diagrams & Manuals
402437-1209-01 Engine View Diagrams & Manuals
402437-1211-99 Engine View Diagrams & Manuals
402437-1212-01 Engine View Diagrams & Manuals
402437-1213-01 Engine View Diagrams & Manuals
402437-1215-99 Engine View Diagrams & Manuals
402437-1217-01 Engine View Diagrams & Manuals
402437-1221-01 Engine View Diagrams & Manuals
402437-4012-01 Engine View Diagrams & Manuals
402437-4013-99 Engine View Diagrams & Manuals
402445-1208-01 Engine View Diagrams & Manuals
402445-1208-02 Engine View Diagrams & Manuals
402445-1208-03 Engine View Diagrams & Manuals
402447-1115-01 Engine View Diagrams & Manuals
402447-1115-02 Engine View Diagrams & Manuals
402447-1116-01 Engine View Diagrams & Manuals
402447-1116-02 Engine View Diagrams & Manuals
402447-1126-01 Engine View Diagrams & Manuals
402447-1201-01 Engine View Diagrams & Manuals
402447-1203-01 Engine View Diagrams & Manuals
402447-1210-01 Engine View Diagrams & Manuals
402447-1214-01 Engine View Diagrams & Manuals
402447-1216-01 Engine View Diagrams & Manuals
402447-1218-01 Engine View Diagrams & Manuals
402447-1219-01 Engine View Diagrams & Manuals
402447-1220-01 Engine View Diagrams & Manuals
402447-1220-02 Engine View Diagrams & Manuals
402447-1223-01 Engine View Diagrams & Manuals
402447-1224-01 Engine View Diagrams & Manuals
402447-1225-01 Engine View Diagrams & Manuals
402447-4009-01 Engine View Diagrams & Manuals
402447-4010-01 Engine View Diagrams & Manuals
402447-4015-01 Engine View Diagrams & Manuals
402447-4015-02 Engine View Diagrams & Manuals
402447-4016-01 Engine View Diagrams & Manuals
402447-4016-02 Engine View Diagrams & Manuals
402447-4026-01 Engine View Diagrams & Manuals
402451-0691-99 Engine View Diagrams & Manuals
4035A7-0409-E1 Engine View Diagrams & Manuals
402707-1502-01 Engine View Diagrams & Manuals
402707-1505-01 Engine View Diagrams & Manuals
402707-1506-01 Engine View Diagrams & Manuals
402707-1507-01 Engine View Diagrams & Manuals
402707-1508-01 Engine View Diagrams & Manuals
402707-1509-01 Engine View Diagrams & Manuals
402707-1510-99 Engine View Diagrams & Manuals
402707-1511-01 Engine View Diagrams & Manuals
402707-4001-01 Engine View Diagrams & Manuals
402707-4001-02 Engine View Diagrams & Manuals
402707-4002-99 Engine View Diagrams & Manuals
402707-4015-99 Engine View Diagrams & Manuals
402707-7001-99 Engine View Diagrams & Manuals
402707-7017-01 Engine View Diagrams & Manuals
402777-1201-01 Engine View Diagrams & Manuals
402777-1203-01 Engine View Diagrams & Manuals
402777-1221-01 Engine View Diagrams & Manuals
402777-1223-01 Engine View Diagrams & Manuals
402777-1224-01 Engine View Diagrams & Manuals
402777-1232-01 Engine View Diagrams & Manuals
402777-1239-01 Engine View Diagrams & Manuals
402777-1245-01 Engine View Diagrams & Manuals
402777-1272-01 Engine View Diagrams & Manuals
402777-1273-99 Engine View Diagrams & Manuals
402707-0010-01 Engine View Diagrams & Manuals
402707-0010-02 Engine View Diagrams & Manuals
402707-0011-01 Engine View Diagrams & Manuals
402707-0011-02 Engine View Diagrams & Manuals
402707-0015-01 Engine View Diagrams & Manuals
402707-0016-01 Engine View Diagrams & Manuals
402707-0109-01 Engine View Diagrams & Manuals
402707-0111-01 Engine View Diagrams & Manuals
402707-0130-01 Engine View Diagrams & Manuals
402707-0130-02 Engine View Diagrams & Manuals
402707-0130-03 Engine View Diagrams & Manuals
402707-0130-05 Engine View Diagrams & Manuals
402707-0130-06 Engine View Diagrams & Manuals
402707-0130-07 Engine View Diagrams & Manuals
402707-0131-01 Engine View Diagrams & Manuals
402707-0131-02 Engine View Diagrams & Manuals
402707-0132-01 Engine View Diagrams & Manuals
402707-0132-02 Engine View Diagrams & Manuals
402707-0132-03 Engine View Diagrams & Manuals
402707-0132-04 Engine View Diagrams & Manuals
402707-0132-05 Engine View Diagrams & Manuals
402707-0132-06 Engine View Diagrams & Manuals
402707-0132-07 Engine View Diagrams & Manuals
402707-0132-08 Engine View Diagrams & Manuals
402707-0133-01 Engine View Diagrams & Manuals
402707-0134-01 Engine View Diagrams & Manuals
402707-0134-02 Engine View Diagrams & Manuals
402707-0135-01 Engine View Diagrams & Manuals
402707-0136-01 Engine View Diagrams & Manuals
402707-0137-01 Engine View Diagrams & Manuals
402707-0137-02 Engine View Diagrams & Manuals
402707-0138-01 Engine View Diagrams & Manuals
402707-0139-01 Engine View Diagrams & Manuals
402707-0139-02 Engine View Diagrams & Manuals
402707-0140-01 Engine View Diagrams & Manuals
402707-0141-01 Engine View Diagrams & Manuals
402707-0142-01 Engine View Diagrams & Manuals
402707-0142-02 Engine View Diagrams & Manuals
402707-0143-01 Engine View Diagrams & Manuals
402707-0144-01 Engine View Diagrams & Manuals
402707-0145-01 Engine View Diagrams & Manuals
402707-0145-02 Engine View Diagrams & Manuals
402707-0146-01 Engine View Diagrams & Manuals
402707-0146-02 Engine View Diagrams & Manuals
402707-0147-01 Engine View Diagrams & Manuals
402707-0148-01 Engine View Diagrams & Manuals
402707-0148-02 Engine View Diagrams & Manuals
402707-0149-01 Engine View Diagrams & Manuals
402707-0150-01 Engine View Diagrams & Manuals
402707-0151-01 Engine View Diagrams & Manuals
402707-0152-01 Engine View Diagrams & Manuals
402707-0153-01 Engine View Diagrams & Manuals
402707-0154-01 Engine View Diagrams & Manuals
402707-0155-01 Engine View Diagrams & Manuals
402707-0156-01 Engine View Diagrams & Manuals
402707-0157-01 Engine View Diagrams & Manuals
402707-0157-02 Engine View Diagrams & Manuals
402707-0158-01 Engine View Diagrams & Manuals
402707-0158-02 Engine View Diagrams & Manuals
402707-0159-01 Engine View Diagrams & Manuals
402707-0160-01 Engine View Diagrams & Manuals
402707-0160-02 Engine View Diagrams & Manuals
402707-0161-01 Engine View Diagrams & Manuals
402707-0162-01 Engine View Diagrams & Manuals
402707-0163-01 Engine View Diagrams & Manuals
402707-0164-01 Engine View Diagrams & Manuals
402707-0165-01 Engine View Diagrams & Manuals
402707-0166-99 Engine View Diagrams & Manuals
402707-0167-01 Engine View Diagrams & Manuals
402707-0168-01 Engine View Diagrams & Manuals
402707-0169-01 Engine View Diagrams & Manuals
402707-0170-01 Engine View Diagrams & Manuals
402707-0171-01 Engine View Diagrams & Manuals
402707-0172-01 Engine View Diagrams & Manuals
402707-0173-01 Engine View Diagrams & Manuals
402707-0174-01 Engine View Diagrams & Manuals
402707-0177-01 Engine View Diagrams & Manuals
402707-0180-01 Engine View Diagrams & Manuals
402707-0181-01 Engine View Diagrams & Manuals
402707-0182-01 Engine View Diagrams & Manuals
402707-0183-01 Engine View Diagrams & Manuals
402707-0184-01 Engine View Diagrams & Manuals
402707-0185-01 Engine View Diagrams & Manuals
402707-0186-01 Engine View Diagrams & Manuals
402707-0241-01 Engine View Diagrams & Manuals
402707-0243-99 Engine View Diagrams & Manuals
402707-0244-99 Engine View Diagrams & Manuals
402707-0245-99 Engine View Diagrams & Manuals
402707-0248-01 Engine View Diagrams & Manuals
402707-1115-01 Engine View Diagrams & Manuals
402707-1116-01 Engine View Diagrams & Manuals
402707-1117-01 Engine View Diagrams & Manuals
402707-1200-01 Engine View Diagrams & Manuals
402707-1202-01 Engine View Diagrams & Manuals
402707-1205-01 Engine View Diagrams & Manuals
402707-1206-01 Engine View Diagrams & Manuals
402707-1207-01 Engine View Diagrams & Manuals
402707-1208-01 Engine View Diagrams & Manuals
402707-1209-01 Engine View Diagrams & Manuals
402707-1210-01 Engine View Diagrams & Manuals
402707-1210-02 Engine View Diagrams & Manuals
402707-1211-01 Engine View Diagrams & Manuals
402707-1212-01 Engine View Diagrams & Manuals
402707-1213-01 Engine View Diagrams & Manuals
402707-1214-01 Engine View Diagrams & Manuals
402707-1215-01 Engine View Diagrams & Manuals
402707-1216-01 Engine View Diagrams & Manuals
402707-1217-01 Engine View Diagrams & Manuals
402707-1218-01 Engine View Diagrams & Manuals
402707-1219-01 Engine View Diagrams & Manuals
402707-1220-01 Engine View Diagrams & Manuals
402707-1222-01 Engine View Diagrams & Manuals
402707-1225-01 Engine View Diagrams & Manuals
402707-1226-01 Engine View Diagrams & Manuals
402707-1227-01 Engine View Diagrams & Manuals
402707-1228-01 Engine View Diagrams & Manuals
402707-1233-01 Engine View Diagrams & Manuals
402707-1234-99 Engine View Diagrams & Manuals
402707-1235-01 Engine View Diagrams & Manuals
402707-1240-01 Engine View Diagrams & Manuals
402707-1242-01 Engine View Diagrams & Manuals
402707-1244-01 Engine View Diagrams & Manuals
402707-1246-01 Engine View Diagrams & Manuals
402707-1270-01 Engine View Diagrams & Manuals
402707-1271-99 Engine View Diagrams & Manuals
402707-1280-01 Engine View Diagrams & Manuals
402707-1401-01 Engine View Diagrams & Manuals
402707-1500-01 Engine View Diagrams & Manuals
404417-0109-99 Engine View Diagrams & Manuals
404417-1501-01 Engine View Diagrams & Manuals
404417-1502-01 Engine View Diagrams & Manuals
404437-0100-01 Engine View Diagrams & Manuals
404437-0102-01 Engine View Diagrams & Manuals
404437-0103-01 Engine View Diagrams & Manuals
404437-0104-01 Engine View Diagrams & Manuals
404437-0110-01 Engine View Diagrams & Manuals
404437-0111-01 Engine View Diagrams & Manuals
404437-0112-01 Engine View Diagrams & Manuals
404437-0113-01 Engine View Diagrams & Manuals
404437-0114-01 Engine View Diagrams & Manuals
404437-0117-01 Engine View Diagrams & Manuals
404437-0118-01 Engine View Diagrams & Manuals
404437-1200-01 Engine View Diagrams & Manuals
404437-1202-01 Engine View Diagrams & Manuals
404437-1205-01 Engine View Diagrams & Manuals
404437-1206-01 Engine View Diagrams & Manuals
404437-1207-01 Engine View Diagrams & Manuals
404437-1208-01 Engine View Diagrams & Manuals
404437-1209-99 Engine View Diagrams & Manuals
404437-1210-01 Engine View Diagrams & Manuals
404447-1201-01 Engine View Diagrams & Manuals
404447-1203-01 Engine View Diagrams & Manuals
404447-1211-01 Engine View Diagrams & Manuals
404447-4002-01 Engine View Diagrams & Manuals
404447-4005-99 Engine View Diagrams & Manuals
404577-0264-E1 Engine View Diagrams & Manuals
4045A7-0259-E1 Engine View Diagrams & Manuals
4045A7-0285-E1 Engine View Diagrams & Manuals
404707-0100-01 Engine View Diagrams & Manuals
404707-0102-01 Engine View Diagrams & Manuals
404707-0103-01 Engine View Diagrams & Manuals
404707-0104-01 Engine View Diagrams & Manuals
404707-0115-01 Engine View Diagrams & Manuals
404707-0116-99 Engine View Diagrams & Manuals
404707-0117-01 Engine View Diagrams & Manuals
404707-0117-02 Engine View Diagrams & Manuals
404707-0118-01 Engine View Diagrams & Manuals
404707-0119-01 Engine View Diagrams & Manuals
404707-0120-01 Engine View Diagrams & Manuals
404707-0121-01 Engine View Diagrams & Manuals
404707-0122-01 Engine View Diagrams & Manuals
404707-0122-02 Engine View Diagrams & Manuals
404707-0123-01 Engine View Diagrams & Manuals
404707-0124-01 Engine View Diagrams & Manuals
404707-0125-01 Engine View Diagrams & Manuals
404707-0126-01 Engine View Diagrams & Manuals
404707-0127-01 Engine View Diagrams & Manuals
404707-1200-01 Engine View Diagrams & Manuals
404707-1202-01 Engine View Diagrams & Manuals
404707-1205-01 Engine View Diagrams & Manuals
404707-1206-01 Engine View Diagrams & Manuals
404707-1207-01 Engine View Diagrams & Manuals
404707-1208-99 Engine View Diagrams & Manuals
404707-1209-99 Engine View Diagrams & Manuals
404707-1210-99 Engine View Diagrams & Manuals
404707-1211-01 Engine View Diagrams & Manuals
404707-1212-01 Engine View Diagrams & Manuals
404707-1213-01 Engine View Diagrams & Manuals
404707-1214-01 Engine View Diagrams & Manuals
404707-1400-01 Engine View Diagrams & Manuals
404707-1500-01 Engine View Diagrams & Manuals
404707-1502-01 Engine View Diagrams & Manuals
404707-1505-01 Engine View Diagrams & Manuals
404777-1201-01 Engine View Diagrams & Manuals
404777-1203-01 Engine View Diagrams & Manuals
405577-0001-B1 Engine View Diagrams & Manuals
405577-0110-E1 Engine View Diagrams & Manuals
405577-0111-B1 Engine View Diagrams & Manuals
405577-0111-E1 Engine View Diagrams & Manuals
405577-0112-B1 Engine View Diagrams & Manuals
405577-0112-E1 Engine View Diagrams & Manuals
405577-0113-B1 Engine View Diagrams & Manuals
405577-0113-E1 Engine View Diagrams & Manuals
405577-0114-B1 Engine View Diagrams & Manuals
405577-0114-G1 Engine View Diagrams & Manuals
405577-0116-B1 Engine View Diagrams & Manuals
405577-0118-B1 Engine View Diagrams & Manuals
405577-0118-B2 Engine View Diagrams & Manuals
405577-0122-B1 Engine View Diagrams & Manuals
405577-0123-B1 Engine View Diagrams & Manuals
405577-0123-E1 Engine View Diagrams & Manuals
405577-0126-B1 Engine View Diagrams & Manuals
405577-0128-B1 Engine View Diagrams & Manuals
405577-0129-B1 Engine View Diagrams & Manuals
405577-0129-B2 Engine View Diagrams & Manuals
405577-0129-B3 Engine View Diagrams & Manuals
405577-0129-B4 Engine View Diagrams & Manuals
405577-0130-B1 Engine View Diagrams & Manuals
405577-0131-B1 Engine View Diagrams & Manuals
405577-0131-B2 Engine View Diagrams & Manuals
405577-0280-B1 Engine View Diagrams & Manuals
405577-0280-B2 Engine View Diagrams & Manuals
405577-0280-B5 Engine View Diagrams & Manuals
405577-0280-B6 Engine View Diagrams & Manuals
405577-0281-B1 Engine View Diagrams & Manuals
405577-0281-B2 Engine View Diagrams & Manuals
405577-0379-B1 Engine View Diagrams & Manuals
405577-0379-E1 Engine View Diagrams & Manuals
405577-0688-B1 Engine View Diagrams & Manuals
405577-0721-E1 Engine View Diagrams & Manuals
405577-0803-B1 Engine View Diagrams & Manuals
405577-0816-B1 Engine View Diagrams & Manuals
405577-0816-E1 Engine View Diagrams & Manuals
405577-0952-B1 Engine View Diagrams & Manuals
405577-0953-B1 Engine View Diagrams & Manuals
405577-1220-B1 Engine View Diagrams & Manuals
405577-2220-B1 Engine View Diagrams & Manuals
405577-3122-B1 Engine View Diagrams & Manuals
405577-3220-B1 Engine View Diagrams & Manuals
405577-3280-B1 Engine View Diagrams & Manuals
405577-3280-B2 Engine View Diagrams & Manuals
405577-3280-B5 Engine View Diagrams & Manuals
405577-3280-B6 Engine View Diagrams & Manuals
405577-3281-B1 Engine View Diagrams & Manuals
405577-3281-B2 Engine View Diagrams & Manuals
405577-3803-B1 Engine View Diagrams & Manuals
405577-3804-B1 Engine View Diagrams & Manuals
405577-5122-B1 Engine View Diagrams & Manuals
405577-5130-B1 Engine View Diagrams & Manuals
405577-5131-B1 Engine View Diagrams & Manuals
405577-5131-B2 Engine View Diagrams & Manuals
405777-0112-E1 Engine View Diagrams & Manuals
405777-0114-E1 Engine View Diagrams & Manuals
405777-0116-E1 Engine View Diagrams & Manuals
405777-0117-E1 Engine View Diagrams & Manuals
405777-0118-E1 Engine View Diagrams & Manuals
405777-0124-E1 Engine View Diagrams & Manuals
405777-0129-E1 Engine View Diagrams & Manuals
405777-0132-E1 Engine View Diagrams & Manuals
405777-0135-E1 Engine View Diagrams & Manuals
405777-0136-E1 Engine View Diagrams & Manuals
405777-0139-E1 Engine View Diagrams & Manuals
405777-0140-E1 Engine View Diagrams & Manuals
406577-0100-E1 Engine View Diagrams & Manuals
406577-0105-E1 Engine View Diagrams & Manuals
406577-0106-E1 Engine View Diagrams & Manuals
406577-0119-E1 Engine View Diagrams & Manuals
406577-0122-E1 Engine View Diagrams & Manuals
406577-0124-E1 Engine View Diagrams & Manuals
406577-0125-E1 Engine View Diagrams & Manuals
406577-0139-E1 Engine View Diagrams & Manuals
406577-0139-E2 Engine View Diagrams & Manuals
406577-0141-E1 Engine View Diagrams & Manuals
406577-0142-E1 Engine View Diagrams & Manuals
406577-0143-B1 Engine View Diagrams & Manuals
406577-0191-E1 Engine View Diagrams & Manuals
406577-0301-E1 Engine View Diagrams & Manuals
406577-0312-E1 Engine View Diagrams & Manuals
406577-0380-E1 Engine View Diagrams & Manuals
406577-0395-E1 Engine View Diagrams & Manuals
406577-0410-E1 Engine View Diagrams & Manuals
406577-0411-E1 Engine View Diagrams & Manuals
406577-0418-E1 Engine View Diagrams & Manuals
406577-0442-E1 Engine View Diagrams & Manuals
406677-0373-E1 Engine View Diagrams & Manuals
406677-0405-E1 Engine View Diagrams & Manuals
406677-0406-E1 Engine View Diagrams & Manuals
406777-0001-B1 Engine View Diagrams & Manuals
406777-0027-B1 Engine View Diagrams & Manuals
406777-0027-E1 Engine View Diagrams & Manuals
406777-0100-B1 Engine View Diagrams & Manuals
406777-0102-B1 Engine View Diagrams & Manuals
406777-0108-E1 Engine View Diagrams & Manuals
406777-0113-B1 Engine View Diagrams & Manuals
406777-0114-B1 Engine View Diagrams & Manuals
406777-0114-E1 Engine View Diagrams & Manuals
406777-0115-E1 Engine View Diagrams & Manuals
406777-0116-E1 Engine View Diagrams & Manuals
406777-0117-E1 Engine View Diagrams & Manuals
406777-0118-B1 Engine View Diagrams & Manuals
406777-0118-E1 Engine View Diagrams & Manuals
406777-0119-B1 Engine View Diagrams & Manuals
406777-0119-E1 Engine View Diagrams & Manuals
406777-0120-E1 Engine View Diagrams & Manuals
406777-0121-B1 Engine View Diagrams & Manuals
406777-0122-B1 Engine View Diagrams & Manuals
406777-0122-B2 Engine View Diagrams & Manuals
406777-0127-E1 Engine View Diagrams & Manuals
406777-0128-E1 Engine View Diagrams & Manuals
406777-0130-E1 Engine View Diagrams & Manuals
406777-0132-B1 Engine View Diagrams & Manuals
406777-0136-E1 Engine View Diagrams & Manuals
406777-0138-E1 Engine View Diagrams & Manuals
406777-0139-B1 Engine View Diagrams & Manuals
406777-0139-E1 Engine View Diagrams & Manuals
406777-0139-E2 Engine View Diagrams & Manuals
406777-0144-E1 Engine View Diagrams & Manuals
406777-0151-E1 Engine View Diagrams & Manuals
406777-0154-E1 Engine View Diagrams & Manuals
406777-0157-E1 Engine View Diagrams & Manuals
406777-0158-E1 Engine View Diagrams & Manuals
406777-0160-E1 Engine View Diagrams & Manuals
406777-0162-E1 Engine View Diagrams & Manuals
406777-0163-B1 Engine View Diagrams & Manuals
406777-0163-E1 Engine View Diagrams & Manuals
406777-0164-B1 Engine View Diagrams & Manuals
406777-0164-E1 Engine View Diagrams & Manuals
406777-0165-B1 Engine View Diagrams & Manuals
406777-0167-B1 Engine View Diagrams & Manuals
406777-0168-B1 Engine View Diagrams & Manuals
406777-0169-B1 Engine View Diagrams & Manuals
406777-0170-B1 Engine View Diagrams & Manuals
406777-0172-B1 Engine View Diagrams & Manuals
406777-0173-B1 Engine View Diagrams & Manuals
406777-0174-B1 Engine View Diagrams & Manuals
406777-0175-G5 Engine View Diagrams & Manuals
406777-0176-G5 Engine View Diagrams & Manuals
406777-0176-G6 Engine View Diagrams & Manuals
406777-0177-B1 Engine View Diagrams & Manuals
406777-0442-B1 Engine View Diagrams & Manuals
406777-0496-B1 Engine View Diagrams & Manuals
406777-0496-E1 Engine View Diagrams & Manuals
406777-0503-B2 Engine View Diagrams & Manuals
406777-0503-E1 Engine View Diagrams & Manuals
406777-0579-B1 Engine View Diagrams & Manuals
406777-0686-B1 Engine View Diagrams & Manuals
406777-0724-B1 Engine View Diagrams & Manuals
406777-0737-B1 Engine View Diagrams & Manuals
406777-0784-B1 Engine View Diagrams & Manuals
406777-0784-E1 Engine View Diagrams & Manuals
406777-0802-B1 Engine View Diagrams & Manuals
406777-0803-B1 Engine View Diagrams & Manuals
406777-0803-E1 Engine View Diagrams & Manuals
406777-0832-B1 Engine View Diagrams & Manuals
406777-0832-E1 Engine View Diagrams & Manuals
406777-0872-B1 Engine View Diagrams & Manuals
406777-0872-E1 Engine View Diagrams & Manuals
406777-0885-B1 Engine View Diagrams & Manuals
406777-0888-B1 Engine View Diagrams & Manuals
406777-0954-B1 Engine View Diagrams & Manuals
406777-0958-B1 Engine View Diagrams & Manuals
406777-0959-B1 Engine View Diagrams & Manuals
406777-0960-B1 Engine View Diagrams & Manuals
406777-1163-B1 Engine View Diagrams & Manuals
406777-1216-B1 Engine View Diagrams & Manuals
406777-1239-B1 Engine View Diagrams & Manuals
406777-1271-B1 Engine View Diagrams & Manuals
406777-1404-G1 Engine View Diagrams & Manuals
406777-1518-B1 Engine View Diagrams & Manuals
406777-1584-G5 Engine View Diagrams & Manuals
406777-2271-B1 Engine View Diagrams & Manuals
406777-2442-G1 Engine View Diagrams & Manuals
406777-2442-G5 Engine View Diagrams & Manuals
406777-2724-G1 Engine View Diagrams & Manuals
406777-2724-G5 Engine View Diagrams & Manuals
406777-3216-B1 Engine View Diagrams & Manuals
406777-4442-G1 Engine View Diagrams & Manuals
406777-4442-G5 Engine View Diagrams & Manuals
406777-5113-B1 Engine View Diagrams & Manuals
406777-5121-B1 Engine View Diagrams & Manuals
406777-5169-B1 Engine View Diagrams & Manuals
406777-5170-B1 Engine View Diagrams & Manuals
406777-5216-B1 Engine View Diagrams & Manuals
406777-5271-B1 Engine View Diagrams & Manuals
406777-5442-G5 Engine View Diagrams & Manuals
406777-6113-B1 Engine View Diagrams & Manuals
406777-6121-B1 Engine View Diagrams & Manuals
406777-6132-B1 Engine View Diagrams & Manuals
406777-6169-B1 Engine View Diagrams & Manuals
406777-6173-B1 Engine View Diagrams & Manuals
406777-6216-B1 Engine View Diagrams & Manuals
406777-6271-B1 Engine View Diagrams & Manuals
406777-6442-G5 Engine View Diagrams & Manuals
406777-6518-B1 Engine View Diagrams & Manuals
406777-6724-G5 Engine View Diagrams & Manuals
406777-6737-B1 Engine View Diagrams & Manuals
406777-6802-B1 Engine View Diagrams & Manuals
406777-6885-B1 Engine View Diagrams & Manuals
406777-6888-B1 Engine View Diagrams & Manuals
406777-6959-B1 Engine View Diagrams & Manuals
407577-0025-E1 Engine View Diagrams & Manuals
407577-0026-E1 Engine View Diagrams & Manuals
407577-0027-E1 Engine View Diagrams & Manuals
407577-0110-E1 Engine View Diagrams & Manuals
407577-0111-E1 Engine View Diagrams & Manuals
407577-0112-E1 Engine View Diagrams & Manuals
407577-0113-E1 Engine View Diagrams & Manuals
407577-0217-E1 Engine View Diagrams & Manuals
407577-0257-E1 Engine View Diagrams & Manuals
407577-0283-E1 Engine View Diagrams & Manuals
407577-0284-E1 Engine View Diagrams & Manuals
407577-0287-E1 Engine View Diagrams & Manuals
407577-0288-E1 Engine View Diagrams & Manuals
407577-0292-E1 Engine View Diagrams & Manuals
407577-0294-E1 Engine View Diagrams & Manuals
407577-0308-E1 Engine View Diagrams & Manuals
407577-0309-E1 Engine View Diagrams & Manuals
407577-0317-E1 Engine View Diagrams & Manuals
407577-0346-E1 Engine View Diagrams & Manuals
407577-0392-E1 Engine View Diagrams & Manuals
407577-0398-E1 Engine View Diagrams & Manuals
407677-0201-E1 Engine View Diagrams & Manuals
407677-0232-E1 Engine View Diagrams & Manuals
407777-0027-E1 Engine View Diagrams & Manuals
407777-0100-B1 Engine View Diagrams & Manuals
407777-0100-E1 Engine View Diagrams & Manuals
407777-0102-B1 Engine View Diagrams & Manuals
407777-0110-B1 Engine View Diagrams & Manuals
407777-0116-B1 Engine View Diagrams & Manuals
407777-0117-E1 Engine View Diagrams & Manuals
407777-0118-E1 Engine View Diagrams & Manuals
407777-0119-E1 Engine View Diagrams & Manuals
407777-0119-E3 Engine View Diagrams & Manuals
407777-0120-E1 Engine View Diagrams & Manuals
407777-0121-E1 Engine View Diagrams & Manuals
407777-0121-E2 Engine View Diagrams & Manuals
407777-0121-E3 Engine View Diagrams & Manuals
407777-0121-E4 Engine View Diagrams & Manuals
407777-0121-E5 Engine View Diagrams & Manuals
407777-0122-E1 Engine View Diagrams & Manuals
407777-0122-E2 Engine View Diagrams & Manuals
407777-0122-E3 Engine View Diagrams & Manuals
407777-0124-E1 Engine View Diagrams & Manuals
407777-0124-E5 Engine View Diagrams & Manuals
407777-0125-E1 Engine View Diagrams & Manuals
407777-0126-E1 Engine View Diagrams & Manuals
407777-0127-B1 Engine View Diagrams & Manuals
407777-0128-E1 Engine View Diagrams & Manuals
407777-0130-E1 Engine View Diagrams & Manuals
407777-0131-B1 Engine View Diagrams & Manuals
407777-0131-E1 Engine View Diagrams & Manuals
407777-0131-E2 Engine View Diagrams & Manuals
407777-0135-E1 Engine View Diagrams & Manuals
407777-0137-E1 Engine View Diagrams & Manuals
407777-0138-E1 Engine View Diagrams & Manuals
407777-0138-E2 Engine View Diagrams & Manuals
407777-0143-B1 Engine View Diagrams & Manuals
407777-0145-G1 Engine View Diagrams & Manuals
407777-0145-G2 Engine View Diagrams & Manuals
407777-0146-B1 Engine View Diagrams & Manuals
407777-0146-B2 Engine View Diagrams & Manuals
407777-0147-E1 Engine View Diagrams & Manuals
407777-0148-B1 Engine View Diagrams & Manuals
407777-0149-B1 Engine View Diagrams & Manuals
407777-0150-B1 Engine View Diagrams & Manuals
407777-0151-B1 Engine View Diagrams & Manuals
407777-0151-B2 Engine View Diagrams & Manuals
407777-0152-B1 Engine View Diagrams & Manuals
407777-0156-E1 Engine View Diagrams & Manuals
407777-0167-E1 Engine View Diagrams & Manuals
407777-0170-G5 Engine View Diagrams & Manuals
407777-0171-B1 Engine View Diagrams & Manuals
407777-0171-E1 Engine View Diagrams & Manuals
407777-0174-B1 Engine View Diagrams & Manuals
407777-0174-E1 Engine View Diagrams & Manuals
407777-0176-E1 Engine View Diagrams & Manuals
407777-0178-B1 Engine View Diagrams & Manuals
407777-0178-B2 Engine View Diagrams & Manuals
407777-0184-E1 Engine View Diagrams & Manuals
407777-0187-E1 Engine View Diagrams & Manuals
407777-0188-B1 Engine View Diagrams & Manuals
407777-0188-B2 Engine View Diagrams & Manuals
407777-0189-G1 Engine View Diagrams & Manuals
407777-0189-G2 Engine View Diagrams & Manuals
407777-0204-E1 Engine View Diagrams & Manuals
407777-0205-E1 Engine View Diagrams & Manuals
407777-0218-E1 Engine View Diagrams & Manuals
407777-0219-E1 Engine View Diagrams & Manuals
407777-0229-E1 Engine View Diagrams & Manuals
407777-0230-E1 Engine View Diagrams & Manuals
407777-0231-B1 Engine View Diagrams & Manuals
407777-0232-B1 Engine View Diagrams & Manuals
407777-0232-B2 Engine View Diagrams & Manuals
407777-0232-B3 Engine View Diagrams & Manuals
407777-0232-B4 Engine View Diagrams & Manuals
407777-0255-E1 Engine View Diagrams & Manuals
407777-0260-E1 Engine View Diagrams & Manuals
407777-0268-E1 Engine View Diagrams & Manuals
407777-0270-B1 Engine View Diagrams & Manuals
407777-0271-B1 Engine View Diagrams & Manuals
407777-0272-G1 Engine View Diagrams & Manuals
407777-0272-G2 Engine View Diagrams & Manuals
407777-0273-B1 Engine View Diagrams & Manuals
407777-0274-G5 Engine View Diagrams & Manuals
407777-0274-G6 Engine View Diagrams & Manuals
407777-0281-B1 Engine View Diagrams & Manuals
407777-0281-B2 Engine View Diagrams & Manuals
407777-0281-B5 Engine View Diagrams & Manuals
407777-0282-B1 Engine View Diagrams & Manuals
407777-0282-B2 Engine View Diagrams & Manuals
407777-0283-G1 Engine View Diagrams & Manuals
407777-0283-G5 Engine View Diagrams & Manuals
407777-0283-G6 Engine View Diagrams & Manuals
407777-0284-B1 Engine View Diagrams & Manuals
407777-0284-B2 Engine View Diagrams & Manuals
407777-0284-B5 Engine View Diagrams & Manuals
407777-0284-B6 Engine View Diagrams & Manuals
407777-0285-B1 Engine View Diagrams & Manuals
407777-0285-B2 Engine View Diagrams & Manuals
407777-0289-B1 Engine View Diagrams & Manuals
407777-0405-B1 Engine View Diagrams & Manuals
407777-0550-B1 Engine View Diagrams & Manuals
407777-0550-E1 Engine View Diagrams & Manuals
407777-0607-B1 Engine View Diagrams & Manuals
407777-0607-E2 Engine View Diagrams & Manuals
407777-0687-B1 Engine View Diagrams & Manuals
407777-0717-B1 Engine View Diagrams & Manuals
407777-0801-B1 Engine View Diagrams & Manuals
407777-0964-B1 Engine View Diagrams & Manuals
407777-0964-G1 Engine View Diagrams & Manuals
407777-0967-B1 Engine View Diagrams & Manuals
407777-0969-B1 Engine View Diagrams & Manuals
407777-0970-B1 Engine View Diagrams & Manuals
407777-0971-B1 Engine View Diagrams & Manuals
407777-0972-B1 Engine View Diagrams & Manuals
407777-0974-B1 Engine View Diagrams & Manuals
407777-0975-B1 Engine View Diagrams & Manuals
407777-1195-B1 Engine View Diagrams & Manuals
407777-1195-G1 Engine View Diagrams & Manuals
407777-1217-B1 Engine View Diagrams & Manuals
407777-1330-B1 Engine View Diagrams & Manuals
407777-1331-B1 Engine View Diagrams & Manuals
407777-1338-B1 Engine View Diagrams & Manuals
407777-1519-B1 Engine View Diagrams & Manuals
407777-1569-G1 Engine View Diagrams & Manuals
407777-1569-G5 Engine View Diagrams & Manuals
407777-1574-G5 Engine View Diagrams & Manuals
407777-1580-G1 Engine View Diagrams & Manuals
407777-1582-G5 Engine View Diagrams & Manuals
407777-1595-B1 Engine View Diagrams & Manuals
407777-2195-G1 Engine View Diagrams & Manuals
407777-2195-G5 Engine View Diagrams & Manuals
407777-2217-G1 Engine View Diagrams & Manuals
407777-2217-G5 Engine View Diagrams & Manuals
407777-4146-B1 Engine View Diagrams & Manuals
407777-4195-G1 Engine View Diagrams & Manuals
407777-4195-G5 Engine View Diagrams & Manuals
407777-5127-B1 Engine View Diagrams & Manuals
407777-5149-B1 Engine View Diagrams & Manuals
407777-5150-B1 Engine View Diagrams & Manuals
407777-5152-B1 Engine View Diagrams & Manuals
407777-5271-B1 Engine View Diagrams & Manuals
421417-0010-99 Engine View Diagrams & Manuals
421417-0011-99 Engine View Diagrams & Manuals
421417-0012-99 Engine View Diagrams & Manuals
421417-0101-99 Engine View Diagrams & Manuals
421417-0102-99 Engine View Diagrams & Manuals
421417-0130-99 Engine View Diagrams & Manuals
421417-0132-99 Engine View Diagrams & Manuals
421417-0143-99 Engine View Diagrams & Manuals
421417-0146-99 Engine View Diagrams & Manuals
421431-0116-99 Engine View Diagrams & Manuals
421431-0133-99 Engine View Diagrams & Manuals
421437-0015-99 Engine View Diagrams & Manuals
421437-0016-99 Engine View Diagrams & Manuals
421437-0019-99 Engine View Diagrams & Manuals
421437-0020-99 Engine View Diagrams & Manuals
421437-0021-99 Engine View Diagrams & Manuals
421437-0022-99 Engine View Diagrams & Manuals
421437-0114-99 Engine View Diagrams & Manuals
421437-0115-99 Engine View Diagrams & Manuals
421437-0117-99 Engine View Diagrams & Manuals
421437-0118-99 Engine View Diagrams & Manuals
421437-0131-99 Engine View Diagrams & Manuals
421437-0134-99 Engine View Diagrams & Manuals
421437-0135-99 Engine View Diagrams & Manuals
421437-0136-99 Engine View Diagrams & Manuals
421437-0137-99 Engine View Diagrams & Manuals
421437-0138-99 Engine View Diagrams & Manuals
421437-0139-99 Engine View Diagrams & Manuals
421437-0140-99 Engine View Diagrams & Manuals
421437-0141-99 Engine View Diagrams & Manuals
421437-0142-99 Engine View Diagrams & Manuals
421707-0010-99 Engine View Diagrams & Manuals
421707-0011-99 Engine View Diagrams & Manuals
421707-0111-99 Engine View Diagrams & Manuals
421707-0130-99 Engine View Diagrams & Manuals
421707-0131-99 Engine View Diagrams & Manuals
421707-0132-99 Engine View Diagrams & Manuals
421707-0133-99 Engine View Diagrams & Manuals
421707-0134-99 Engine View Diagrams & Manuals
421707-0145-99 Engine View Diagrams & Manuals
421707-0510-99 Engine View Diagrams & Manuals
421707-0511-99 Engine View Diagrams & Manuals
421707-0611-99 Engine View Diagrams & Manuals
421707-0630-99 Engine View Diagrams & Manuals
421707-0631-99 Engine View Diagrams & Manuals
421707-0632-99 Engine View Diagrams & Manuals
422431-0129-99 Engine View Diagrams & Manuals
422431-0140-99 Engine View Diagrams & Manuals
422431-0141-99 Engine View Diagrams & Manuals
422431-0142-99 Engine View Diagrams & Manuals
422431-0147-99 Engine View Diagrams & Manuals
422431-0610-01 Engine View Diagrams & Manuals
422431-0639-01 Engine View Diagrams & Manuals
422431-0646-01 Engine View Diagrams & Manuals
422431-0668-01 Engine View Diagrams & Manuals
422431-0668-02 Engine View Diagrams & Manuals
422431-0685-01 Engine View Diagrams & Manuals
422431-0686-01 Engine View Diagrams & Manuals
422431-0687-01 Engine View Diagrams & Manuals
422431-0692-01 Engine View Diagrams & Manuals
422431-0703-01 Engine View Diagrams & Manuals
422431-0738-99 Engine View Diagrams & Manuals
422432-0623-01 Engine View Diagrams & Manuals
422432-0624-01 Engine View Diagrams & Manuals
422432-0625-01 Engine View Diagrams & Manuals
422432-0640-01 Engine View Diagrams & Manuals
422432-0649-01 Engine View Diagrams & Manuals
422432-0661-01 Engine View Diagrams & Manuals
422432-0669-01 Engine View Diagrams & Manuals
422432-0683-01 Engine View Diagrams & Manuals
422432-0683-02 Engine View Diagrams & Manuals
422432-0688-01 Engine View Diagrams & Manuals
422432-0700-01 Engine View Diagrams & Manuals
422432-0700-02 Engine View Diagrams & Manuals
422432-0730-99 Engine View Diagrams & Manuals
422432-0739-01 Engine View Diagrams & Manuals
422432-0748-99 Engine View Diagrams & Manuals
422432-1010-01 Engine View Diagrams & Manuals
422432-1010-02 Engine View Diagrams & Manuals
422432-1011-01 Engine View Diagrams & Manuals
422432-1011-02 Engine View Diagrams & Manuals
422432-1109-01 Engine View Diagrams & Manuals
422432-1235-01 Engine View Diagrams & Manuals
422432-1237-01 Engine View Diagrams & Manuals
422432-4009-01 Engine View Diagrams & Manuals
422435-0127-99 Engine View Diagrams & Manuals
422435-0135-99 Engine View Diagrams & Manuals
422435-0136-99 Engine View Diagrams & Manuals
422435-0630-01 Engine View Diagrams & Manuals
422435-0636-01 Engine View Diagrams & Manuals
422435-0641-01 Engine View Diagrams & Manuals
422435-0660-01 Engine View Diagrams & Manuals
422435-0662-01 Engine View Diagrams & Manuals
422435-0670-01 Engine View Diagrams & Manuals
422435-0671-01 Engine View Diagrams & Manuals
422435-0699-01 Engine View Diagrams & Manuals
422435-0711-01 Engine View Diagrams & Manuals
422435-0711-02 Engine View Diagrams & Manuals
422435-0757-01 Engine View Diagrams & Manuals
422435-1199-01 Engine View Diagrams & Manuals
422435-1215-01 Engine View Diagrams & Manuals
422435-4098-01 Engine View Diagrams & Manuals
422435-4098-02 Engine View Diagrams & Manuals
422436-0731-01 Engine View Diagrams & Manuals
422436-0740-01 Engine View Diagrams & Manuals
422437-0015-99 Engine View Diagrams & Manuals
422437-0016-99 Engine View Diagrams & Manuals
422437-0019-99 Engine View Diagrams & Manuals
422437-0020-99 Engine View Diagrams & Manuals
422437-0021-99 Engine View Diagrams & Manuals
422437-0022-99 Engine View Diagrams & Manuals
422437-0023-99 Engine View Diagrams & Manuals
422437-0070-99 Engine View Diagrams & Manuals
422437-0111-99 Engine View Diagrams & Manuals
422437-0112-99 Engine View Diagrams & Manuals
422437-0127-99 Engine View Diagrams & Manuals
422437-0128-99 Engine View Diagrams & Manuals
422437-0130-99 Engine View Diagrams & Manuals
422437-0131-99 Engine View Diagrams & Manuals
422437-0132-99 Engine View Diagrams & Manuals
422437-0133-99 Engine View Diagrams & Manuals
422437-0134-99 Engine View Diagrams & Manuals
422437-0135-99 Engine View Diagrams & Manuals
422437-0136-99 Engine View Diagrams & Manuals
422437-0137-99 Engine View Diagrams & Manuals
422437-0138-99 Engine View Diagrams & Manuals
422437-0139-99 Engine View Diagrams & Manuals
422437-0143-99 Engine View Diagrams & Manuals
422437-0144-99 Engine View Diagrams & Manuals
422437-0145-99 Engine View Diagrams & Manuals
422437-0146-99 Engine View Diagrams & Manuals
422437-0148-99 Engine View Diagrams & Manuals
422437-0149-99 Engine View Diagrams & Manuals
422437-0150-99 Engine View Diagrams & Manuals
422437-0515-01 Engine View Diagrams & Manuals
422437-0515-02 Engine View Diagrams & Manuals
422437-0516-01 Engine View Diagrams & Manuals
422437-0519-01 Engine View Diagrams & Manuals
422437-0520-01 Engine View Diagrams & Manuals
422437-0521-01 Engine View Diagrams & Manuals
422437-0521-02 Engine View Diagrams & Manuals
422437-0522-01 Engine View Diagrams & Manuals
422437-0522-02 Engine View Diagrams & Manuals
422437-0523-01 Engine View Diagrams & Manuals
422437-0570-01 Engine View Diagrams & Manuals
422437-0611-01 Engine View Diagrams & Manuals
422437-0612-01 Engine View Diagrams & Manuals
422437-0631-01 Engine View Diagrams & Manuals
422437-0632-01 Engine View Diagrams & Manuals
422437-0633-01 Engine View Diagrams & Manuals
422437-0634-01 Engine View Diagrams & Manuals
422437-0635-01 Engine View Diagrams & Manuals
422437-0637-01 Engine View Diagrams & Manuals
422437-0638-01 Engine View Diagrams & Manuals
422437-0639-99 Engine View Diagrams & Manuals
422437-0642-01 Engine View Diagrams & Manuals
422437-0643-01 Engine View Diagrams & Manuals
422437-0644-01 Engine View Diagrams & Manuals
422437-0645-01 Engine View Diagrams & Manuals
422437-0647-01 Engine View Diagrams & Manuals
422437-0648-01 Engine View Diagrams & Manuals
422437-0651-01 Engine View Diagrams & Manuals
422437-0663-01 Engine View Diagrams & Manuals
422437-0664-01 Engine View Diagrams & Manuals
422437-0664-03 Engine View Diagrams & Manuals
422437-0665-01 Engine View Diagrams & Manuals
422437-0666-01 Engine View Diagrams & Manuals
422437-0667-01 Engine View Diagrams & Manuals
422437-0672-01 Engine View Diagrams & Manuals
422437-0673-01 Engine View Diagrams & Manuals
422437-0674-01 Engine View Diagrams & Manuals
422437-0675-01 Engine View Diagrams & Manuals
422437-0676-01 Engine View Diagrams & Manuals
422437-0677-01 Engine View Diagrams & Manuals
422437-0678-01 Engine View Diagrams & Manuals
422437-0679-01 Engine View Diagrams & Manuals
422437-0679-02 Engine View Diagrams & Manuals
422437-0680-01 Engine View Diagrams & Manuals
422437-0681-01 Engine View Diagrams & Manuals
422437-0681-02 Engine View Diagrams & Manuals
422437-0682-01 Engine View Diagrams & Manuals
422437-0684-01 Engine View Diagrams & Manuals
422437-0689-01 Engine View Diagrams & Manuals
422437-0690-01 Engine View Diagrams & Manuals
422437-0691-01 Engine View Diagrams & Manuals
422437-0693-01 Engine View Diagrams & Manuals
422437-0694-01 Engine View Diagrams & Manuals
422437-0695-01 Engine View Diagrams & Manuals
422437-0696-01 Engine View Diagrams & Manuals
422437-0697-01 Engine View Diagrams & Manuals
422437-0698-01 Engine View Diagrams & Manuals
422437-0701-01 Engine View Diagrams & Manuals
422437-0702-01 Engine View Diagrams & Manuals
422437-0704-01 Engine View Diagrams & Manuals
422437-0705-01 Engine View Diagrams & Manuals
422437-0706-01 Engine View Diagrams & Manuals
422437-0707-01 Engine View Diagrams & Manuals
422437-0708-01 Engine View Diagrams & Manuals
422437-0709-01 Engine View Diagrams & Manuals
422437-0710-01 Engine View Diagrams & Manuals
422437-0712-01 Engine View Diagrams & Manuals
422437-0713-01 Engine View Diagrams & Manuals
422437-0714-01 Engine View Diagrams & Manuals
422437-0715-01 Engine View Diagrams & Manuals
422437-0716-01 Engine View Diagrams & Manuals
422437-0717-01 Engine View Diagrams & Manuals
422437-0718-01 Engine View Diagrams & Manuals
422437-0719-01 Engine View Diagrams & Manuals
422437-0721-01 Engine View Diagrams & Manuals
422437-0721-02 Engine View Diagrams & Manuals
422437-0722-01 Engine View Diagrams & Manuals
422437-0723-01 Engine View Diagrams & Manuals
422437-0724-01 Engine View Diagrams & Manuals
422437-0725-99 Engine View Diagrams & Manuals
422437-0726-01 Engine View Diagrams & Manuals
422437-0727-01 Engine View Diagrams & Manuals
422437-0728-01 Engine View Diagrams & Manuals
422437-0729-01 Engine View Diagrams & Manuals
422437-0732-99 Engine View Diagrams & Manuals
422437-0733-01 Engine View Diagrams & Manuals
422437-0734-01 Engine View Diagrams & Manuals
422437-0735-01 Engine View Diagrams & Manuals
422437-0736-01 Engine View Diagrams & Manuals
422437-0737-01 Engine View Diagrams & Manuals
422437-0741-01 Engine View Diagrams & Manuals
422437-0742-99 Engine View Diagrams & Manuals
422437-0743-01 Engine View Diagrams & Manuals
422437-0744-01 Engine View Diagrams & Manuals
422437-0745-01 Engine View Diagrams & Manuals
422437-0746-01 Engine View Diagrams & Manuals
422437-0747-01 Engine View Diagrams & Manuals
422437-0748-99 Engine View Diagrams & Manuals
422437-0749-01 Engine View Diagrams & Manuals
422437-0750-01 Engine View Diagrams & Manuals
422437-0751-01 Engine View Diagrams & Manuals
422437-0752-01 Engine View Diagrams & Manuals
422437-0753-01 Engine View Diagrams & Manuals
422437-0754-01 Engine View Diagrams & Manuals
422437-0755-01 Engine View Diagrams & Manuals
422437-0756-99 Engine View Diagrams & Manuals
422437-0758-01 Engine View Diagrams & Manuals
422437-0759-01 Engine View Diagrams & Manuals
422437-1015-01 Engine View Diagrams & Manuals
422437-1015-02 Engine View Diagrams & Manuals
422437-1015-03 Engine View Diagrams & Manuals
422437-1016-01 Engine View Diagrams & Manuals
422437-1016-02 Engine View Diagrams & Manuals
422437-1018-01 Engine View Diagrams & Manuals
422437-1018-02 Engine View Diagrams & Manuals
422437-1019-01 Engine View Diagrams & Manuals
422437-1019-02 Engine View Diagrams & Manuals
422437-1020-01 Engine View Diagrams & Manuals
422437-1020-02 Engine View Diagrams & Manuals
422437-1021-01 Engine View Diagrams & Manuals
422437-1021-02 Engine View Diagrams & Manuals
422437-1021-03 Engine View Diagrams & Manuals
422437-1022-01 Engine View Diagrams & Manuals
422437-1022-02 Engine View Diagrams & Manuals
422437-1022-03 Engine View Diagrams & Manuals
422437-1023-01 Engine View Diagrams & Manuals
422437-1023-02 Engine View Diagrams & Manuals
422437-1024-01 Engine View Diagrams & Manuals
422437-1024-02 Engine View Diagrams & Manuals
422437-1025-99 Engine View Diagrams & Manuals
422437-1026-01 Engine View Diagrams & Manuals
422437-1026-02 Engine View Diagrams & Manuals
422437-1030-01 Engine View Diagrams & Manuals
422437-1030-02 Engine View Diagrams & Manuals
422437-1031-01 Engine View Diagrams & Manuals
422437-1031-02 Engine View Diagrams & Manuals
422437-1032-01 Engine View Diagrams & Manuals
422437-1045-01 Engine View Diagrams & Manuals
422437-1045-02 Engine View Diagrams & Manuals
422437-1046-01 Engine View Diagrams & Manuals
422437-1046-02 Engine View Diagrams & Manuals
422437-1046-03 Engine View Diagrams & Manuals
422437-1048-01 Engine View Diagrams & Manuals
422437-1049-01 Engine View Diagrams & Manuals
422437-1049-02 Engine View Diagrams & Manuals
422437-1050-01 Engine View Diagrams & Manuals
422437-1050-02 Engine View Diagrams & Manuals
422437-1051-01 Engine View Diagrams & Manuals
422437-1051-02 Engine View Diagrams & Manuals
422437-1051-03 Engine View Diagrams & Manuals
422437-1052-01 Engine View Diagrams & Manuals
422437-1052-02 Engine View Diagrams & Manuals
422437-1052-03 Engine View Diagrams & Manuals
422437-1052-04 Engine View Diagrams & Manuals
422437-1070-01 Engine View Diagrams & Manuals
422437-1070-02 Engine View Diagrams & Manuals
422437-1125-01 Engine View Diagrams & Manuals
422437-1145-01 Engine View Diagrams & Manuals
422437-1145-02 Engine View Diagrams & Manuals
422437-1146-01 Engine View Diagrams & Manuals
422437-1146-02 Engine View Diagrams & Manuals
422437-1149-01 Engine View Diagrams & Manuals
422437-1149-02 Engine View Diagrams & Manuals
422437-1150-01 Engine View Diagrams & Manuals
422437-1150-02 Engine View Diagrams & Manuals
422437-1151-01 Engine View Diagrams & Manuals
422437-1200-01 Engine View Diagrams & Manuals
422437-1202-01 Engine View Diagrams & Manuals
422437-1205-01 Engine View Diagrams & Manuals
422437-1206-99 Engine View Diagrams & Manuals
422437-1207-01 Engine View Diagrams & Manuals
422437-1208-01 Engine View Diagrams & Manuals
422437-1209-01 Engine View Diagrams & Manuals
422437-1209-02 Engine View Diagrams & Manuals
422437-1210-02 Engine View Diagrams & Manuals
422437-1211-01 Engine View Diagrams & Manuals
422437-1212-01 Engine View Diagrams & Manuals
422437-1213-01 Engine View Diagrams & Manuals
422437-1214-01 Engine View Diagrams & Manuals
422437-1222-01 Engine View Diagrams & Manuals
422437-1223-01 Engine View Diagrams & Manuals
422437-1224-01 Engine View Diagrams & Manuals
422437-1226-01 Engine View Diagrams & Manuals
422437-1227-01 Engine View Diagrams & Manuals
422437-1228-01 Engine View Diagrams & Manuals
422437-1230-01 Engine View Diagrams & Manuals
422437-1231-01 Engine View Diagrams & Manuals
422437-1232-01 Engine View Diagrams & Manuals
422437-1233-01 Engine View Diagrams & Manuals
422437-1233-02 Engine View Diagrams & Manuals
422437-1234-01 Engine View Diagrams & Manuals
422437-1238-01 Engine View Diagrams & Manuals
422437-1239-01 Engine View Diagrams & Manuals
422437-1242-01 Engine View Diagrams & Manuals
422437-1246-01 Engine View Diagrams & Manuals
422437-1248-01 Engine View Diagrams & Manuals
422437-1256-01 Engine View Diagrams & Manuals
422437-1257-01 Engine View Diagrams & Manuals
422437-1261-01 Engine View Diagrams & Manuals
422437-1266-01 Engine View Diagrams & Manuals
422437-1268-01 Engine View Diagrams & Manuals
422437-1271-99 Engine View Diagrams & Manuals
422437-1276-99 Engine View Diagrams & Manuals
422437-1278-01 Engine View Diagrams & Manuals
422437-1279-01 Engine View Diagrams & Manuals
422437-1281-01 Engine View Diagrams & Manuals
422437-1286-01 Engine View Diagrams & Manuals
422437-1288-02 Engine View Diagrams & Manuals
422437-1800-E1 Engine View Diagrams & Manuals
422437-1879-E1 Engine View Diagrams & Manuals
422437-1882-E1 Engine View Diagrams & Manuals
422437-1895-E1 Engine View Diagrams & Manuals
422437-1896-99 Engine View Diagrams & Manuals
422437-1896-E1 Engine View Diagrams & Manuals
422437-1898-E1 Engine View Diagrams & Manuals
422437-1899-E1 Engine View Diagrams & Manuals
422437-4001-01 Engine View Diagrams & Manuals
422437-4002-01 Engine View Diagrams & Manuals
422437-4003-01 Engine View Diagrams & Manuals
422437-4006-01 Engine View Diagrams & Manuals
422437-4006-02 Engine View Diagrams & Manuals
422437-4026-99 Engine View Diagrams & Manuals
422437-4030-01 Engine View Diagrams & Manuals
422437-4045-01 Engine View Diagrams & Manuals
422437-4046-01 Engine View Diagrams & Manuals
422437-4049-01 Engine View Diagrams & Manuals
422437-4050-01 Engine View Diagrams & Manuals
422437-4051-01 Engine View Diagrams & Manuals
422437-4070-01 Engine View Diagrams & Manuals
422437-4111-01 Engine View Diagrams & Manuals
422437-4145-E1 Engine View Diagrams & Manuals
422437-4146-E1 Engine View Diagrams & Manuals
422437-4149-E1 Engine View Diagrams & Manuals
422437-4150-E1 Engine View Diagrams & Manuals
422437-4811-E1 Engine View Diagrams & Manuals
422437-4830-E1 Engine View Diagrams & Manuals
422437-4845-E1 Engine View Diagrams & Manuals
422437-4846-E1 Engine View Diagrams & Manuals
422437-4850-E4 Engine View Diagrams & Manuals
422437-4851-E1 Engine View Diagrams & Manuals
422437-4851-E4 Engine View Diagrams & Manuals
422437-4888-E2 Engine View Diagrams & Manuals
422442-1110-01 Engine View Diagrams & Manuals
422442-1236-01 Engine View Diagrams & Manuals
422442-1243-01 Engine View Diagrams & Manuals
422442-1244-01 Engine View Diagrams & Manuals
422442-4010-01 Engine View Diagrams & Manuals
422442-4020-01 Engine View Diagrams & Manuals
422442-4020-02 Engine View Diagrams & Manuals
422442-4024-01 Engine View Diagrams & Manuals
422442-4024-02 Engine View Diagrams & Manuals
422442-4024-03 Engine View Diagrams & Manuals
422442-4034-01 Engine View Diagrams & Manuals
422442-4034-02 Engine View Diagrams & Manuals
422442-4034-03 Engine View Diagrams & Manuals
422442-4072-01 Engine View Diagrams & Manuals
422445-1290-01 Engine View Diagrams & Manuals
422447-1155-01 Engine View Diagrams & Manuals
422447-1156-01 Engine View Diagrams & Manuals
422447-1156-02 Engine View Diagrams & Manuals
422447-1159-01 Engine View Diagrams & Manuals
422447-1159-02 Engine View Diagrams & Manuals
422447-1160-01 Engine View Diagrams & Manuals
422447-1160-02 Engine View Diagrams & Manuals
422447-1161-01 Engine View Diagrams & Manuals
422447-1162-01 Engine View Diagrams & Manuals
422447-1201-01 Engine View Diagrams & Manuals
422447-1203-01 Engine View Diagrams & Manuals
422447-1216-01 Engine View Diagrams & Manuals
422447-1217-01 Engine View Diagrams & Manuals
422447-1218-01 Engine View Diagrams & Manuals
422447-1219-01 Engine View Diagrams & Manuals
422447-1220-01 Engine View Diagrams & Manuals
422447-1221-01 Engine View Diagrams & Manuals
422447-1225-01 Engine View Diagrams & Manuals
422447-1229-01 Engine View Diagrams & Manuals
422447-1240-01 Engine View Diagrams & Manuals
422447-1245-01 Engine View Diagrams & Manuals
422447-1247-01 Engine View Diagrams & Manuals
422447-1249-01 Engine View Diagrams & Manuals
422447-1250-01 Engine View Diagrams & Manuals
422447-1251-01 Engine View Diagrams & Manuals
422447-1252-01 Engine View Diagrams & Manuals
422447-1253-01 Engine View Diagrams & Manuals
422447-1254-01 Engine View Diagrams & Manuals
422447-1255-01 Engine View Diagrams & Manuals
422447-1259-01 Engine View Diagrams & Manuals
422447-1260-01 Engine View Diagrams & Manuals
422447-1264-01 Engine View Diagrams & Manuals
422447-1267-01 Engine View Diagrams & Manuals
422447-1269-01 Engine View Diagrams & Manuals
422447-1270-01 Engine View Diagrams & Manuals
422447-1277-01 Engine View Diagrams & Manuals
422447-1280-02 Engine View Diagrams & Manuals
422447-1283-01 Engine View Diagrams & Manuals
422447-1284-01 Engine View Diagrams & Manuals
422447-1289-01 Engine View Diagrams & Manuals
422447-1801-E1 Engine View Diagrams & Manuals
422447-1880-E2 Engine View Diagrams & Manuals
422447-1883-E1 Engine View Diagrams & Manuals
422447-1892-E1 Engine View Diagrams & Manuals
422447-1893-E1 Engine View Diagrams & Manuals
422447-1894-E1 Engine View Diagrams & Manuals
422447-1897-E1 Engine View Diagrams & Manuals
422447-4007-01 Engine View Diagrams & Manuals
422447-4007-02 Engine View Diagrams & Manuals
422447-4008-01 Engine View Diagrams & Manuals
422447-4008-02 Engine View Diagrams & Manuals
422447-4013-01 Engine View Diagrams & Manuals
422447-4015-01 Engine View Diagrams & Manuals
422447-4016-01 Engine View Diagrams & Manuals
422447-4017-01 Engine View Diagrams & Manuals
422447-4018-01 Engine View Diagrams & Manuals
422447-4019-01 Engine View Diagrams & Manuals
422447-4023-01 Engine View Diagrams & Manuals
422447-4025-01 Engine View Diagrams & Manuals
422447-4027-01 Engine View Diagrams & Manuals
422447-4028-02 Engine View Diagrams & Manuals
422447-4029-01 Engine View Diagrams & Manuals
422447-4037-01 Engine View Diagrams & Manuals
422447-4038-01 Engine View Diagrams & Manuals
422447-4055-01 Engine View Diagrams & Manuals
422447-4055-03 Engine View Diagrams & Manuals
422447-4056-01 Engine View Diagrams & Manuals
422447-4060-01 Engine View Diagrams & Manuals
422447-4060-02 Engine View Diagrams & Manuals
422447-4062-02 Engine View Diagrams & Manuals
422447-4110-01 Engine View Diagrams & Manuals
422447-4155-E1 Engine View Diagrams & Manuals
422447-4156-E1 Engine View Diagrams & Manuals
422447-4159-E1 Engine View Diagrams & Manuals
422447-4160-E1 Engine View Diagrams & Manuals
422447-4160-E2 Engine View Diagrams & Manuals
422447-4815-E1 Engine View Diagrams & Manuals
422447-4817-E1 Engine View Diagrams & Manuals
422447-4828-E1 Engine View Diagrams & Manuals
422447-4828-E2 Engine View Diagrams & Manuals
422447-4829-E1 Engine View Diagrams & Manuals
422447-4838-E1 Engine View Diagrams & Manuals
422447-4855-E1 Engine View Diagrams & Manuals
422447-4855-E3 Engine View Diagrams & Manuals
422707-0010-01 Engine View Diagrams & Manuals
422707-0010-02 Engine View Diagrams & Manuals
422707-0011-01 Engine View Diagrams & Manuals
422707-0011-02 Engine View Diagrams & Manuals
422707-0015-01 Engine View Diagrams & Manuals
422707-0015-02 Engine View Diagrams & Manuals
422707-0016-01 Engine View Diagrams & Manuals
422707-0030-01 Engine View Diagrams & Manuals
422707-0030-02 Engine View Diagrams & Manuals
422707-0031-01 Engine View Diagrams & Manuals
422707-0109-01 Engine View Diagrams & Manuals
422707-0111-01 Engine View Diagrams & Manuals
422707-0127-99 Engine View Diagrams & Manuals
422707-0131-01 Engine View Diagrams & Manuals
422707-0131-02 Engine View Diagrams & Manuals
422707-0132-01 Engine View Diagrams & Manuals
422707-0132-02 Engine View Diagrams & Manuals
422707-0133-01 Engine View Diagrams & Manuals
422707-0134-01 Engine View Diagrams & Manuals
422707-0135-01 Engine View Diagrams & Manuals
422707-0136-01 Engine View Diagrams & Manuals
422707-0137-01 Engine View Diagrams & Manuals
422707-0138-01 Engine View Diagrams & Manuals
422707-0138-02 Engine View Diagrams & Manuals
422707-0139-01 Engine View Diagrams & Manuals
422707-0140-01 Engine View Diagrams & Manuals
422707-0141-01 Engine View Diagrams & Manuals
422707-0142-01 Engine View Diagrams & Manuals
422707-0143-99 Engine View Diagrams & Manuals
422707-0144-01 Engine View Diagrams & Manuals
422707-0145-01 Engine View Diagrams & Manuals
422707-0146-01 Engine View Diagrams & Manuals
422707-0147-01 Engine View Diagrams & Manuals
422707-0148-01 Engine View Diagrams & Manuals
422707-0149-01 Engine View Diagrams & Manuals
422707-0150-01 Engine View Diagrams & Manuals
422707-0151-01 Engine View Diagrams & Manuals
422707-0152-01 Engine View Diagrams & Manuals
422707-0153-99 Engine View Diagrams & Manuals
422707-0154-01 Engine View Diagrams & Manuals
422707-0155-99 Engine View Diagrams & Manuals
422707-0156-01 Engine View Diagrams & Manuals
422707-0157-01 Engine View Diagrams & Manuals
422707-0159-99 Engine View Diagrams & Manuals
422707-0160-01 Engine View Diagrams & Manuals
422707-0161-01 Engine View Diagrams & Manuals
422707-0162-01 Engine View Diagrams & Manuals
422707-0163-01 Engine View Diagrams & Manuals
422707-0164-01 Engine View Diagrams & Manuals
422707-0165-01 Engine View Diagrams & Manuals
422707-0166-01 Engine View Diagrams & Manuals
422707-0167-99 Engine View Diagrams & Manuals
422707-0179-01 Engine View Diagrams & Manuals
422707-1105-01 Engine View Diagrams & Manuals
422707-1106-01 Engine View Diagrams & Manuals
422707-1107-01 Engine View Diagrams & Manuals
422707-1115-01 Engine View Diagrams & Manuals
422707-1130-01 Engine View Diagrams & Manuals
422707-1131-01 Engine View Diagrams & Manuals
422707-1200-01 Engine View Diagrams & Manuals
422707-1202-01 Engine View Diagrams & Manuals
422707-1205-99 Engine View Diagrams & Manuals
422707-1206-01 Engine View Diagrams & Manuals
422707-1207-01 Engine View Diagrams & Manuals
422707-1207-02 Engine View Diagrams & Manuals
422707-1208-01 Engine View Diagrams & Manuals
422707-1208-02 Engine View Diagrams & Manuals
422707-1209-01 Engine View Diagrams & Manuals
422707-1210-01 Engine View Diagrams & Manuals
422707-1211-01 Engine View Diagrams & Manuals
422707-1212-01 Engine View Diagrams & Manuals
422707-1213-01 Engine View Diagrams & Manuals
422707-1214-01 Engine View Diagrams & Manuals
422707-1216-01 Engine View Diagrams & Manuals
422707-1217-01 Engine View Diagrams & Manuals
422707-1219-01 Engine View Diagrams & Manuals
422707-1222-01 Engine View Diagrams & Manuals
422707-1225-01 Engine View Diagrams & Manuals
422707-1227-01 Engine View Diagrams & Manuals
422707-1228-01 Engine View Diagrams & Manuals
422707-1229-01 Engine View Diagrams & Manuals
422707-1229-02 Engine View Diagrams & Manuals
422707-1232-01 Engine View Diagrams & Manuals
422707-1233-01 Engine View Diagrams & Manuals
422707-1236-01 Engine View Diagrams & Manuals
422707-1236-02 Engine View Diagrams & Manuals
422707-1241-01 Engine View Diagrams & Manuals
422707-1242-01 Engine View Diagrams & Manuals
422707-1243-01 Engine View Diagrams & Manuals
422707-1245-99 Engine View Diagrams & Manuals
422707-1247-99 Engine View Diagrams & Manuals
422707-1251-01 Engine View Diagrams & Manuals
422707-1251-02 Engine View Diagrams & Manuals
422707-1252-99 Engine View Diagrams & Manuals
422707-1253-01 Engine View Diagrams & Manuals
422707-1254-01 Engine View Diagrams & Manuals
422707-1255-99 Engine View Diagrams & Manuals
422707-1256-01 Engine View Diagrams & Manuals
422707-1257-01 Engine View Diagrams & Manuals
422707-1258-01 Engine View Diagrams & Manuals
422707-1260-01 Engine View Diagrams & Manuals
422707-1261-01 Engine View Diagrams & Manuals
422707-1262-99 Engine View Diagrams & Manuals
422707-1263-01 Engine View Diagrams & Manuals
422707-1264-01 Engine View Diagrams & Manuals
422707-1267-01 Engine View Diagrams & Manuals
422707-1275-01 Engine View Diagrams & Manuals
422707-1276-01 Engine View Diagrams & Manuals
422707-1277-01 Engine View Diagrams & Manuals
422707-1500-01 Engine View Diagrams & Manuals
422707-1502-01 Engine View Diagrams & Manuals
422707-1505-01 Engine View Diagrams & Manuals
422707-1506-99 Engine View Diagrams & Manuals
422707-1507-01 Engine View Diagrams & Manuals
422707-1508-01 Engine View Diagrams & Manuals
422707-1509-01 Engine View Diagrams & Manuals
422707-1510-01 Engine View Diagrams & Manuals
422707-1511-01 Engine View Diagrams & Manuals
422707-1512-01 Engine View Diagrams & Manuals
422707-1513-01 Engine View Diagrams & Manuals
422707-1514-99 Engine View Diagrams & Manuals
422707-1515-01 Engine View Diagrams & Manuals
422707-1516-01 Engine View Diagrams & Manuals
422707-1520-99 Engine View Diagrams & Manuals
422707-1521-01 Engine View Diagrams & Manuals
422707-1522-01 Engine View Diagrams & Manuals
422707-1524-01 Engine View Diagrams & Manuals
422707-1525-01 Engine View Diagrams & Manuals
422707-1526-99 Engine View Diagrams & Manuals
422707-1527-01 Engine View Diagrams & Manuals
422707-1529-01 Engine View Diagrams & Manuals
422707-1705-E1 Engine View Diagrams & Manuals
422707-1706-E1 Engine View Diagrams & Manuals
422707-1707-E1 Engine View Diagrams & Manuals
422707-2105-E1 Engine View Diagrams & Manuals
422707-2106-E1 Engine View Diagrams & Manuals
422707-2107-E1 Engine View Diagrams & Manuals
422707-2200-E1 Engine View Diagrams & Manuals
422707-2500-E1 Engine View Diagrams & Manuals
422707-4015-01 Engine View Diagrams & Manuals
422707-4015-02 Engine View Diagrams & Manuals
422707-4030-01 Engine View Diagrams & Manuals
422707-4031-99 Engine View Diagrams & Manuals
422707-4032-99 Engine View Diagrams & Manuals
422707-7001-99 Engine View Diagrams & Manuals
422777-1125-01 Engine View Diagrams & Manuals
422777-1127-01 Engine View Diagrams & Manuals
422777-1201-01 Engine View Diagrams & Manuals
422777-1203-01 Engine View Diagrams & Manuals
422777-1215-01 Engine View Diagrams & Manuals
422777-1218-01 Engine View Diagrams & Manuals
422777-1220-01 Engine View Diagrams & Manuals
422777-1223-01 Engine View Diagrams & Manuals
422777-1224-01 Engine View Diagrams & Manuals
422777-1226-99 Engine View Diagrams & Manuals
422777-1230-01 Engine View Diagrams & Manuals
422777-1231-01 Engine View Diagrams & Manuals
422777-1234-01 Engine View Diagrams & Manuals
422777-1235-01 Engine View Diagrams & Manuals
422777-1237-99 Engine View Diagrams & Manuals
422777-1238-01 Engine View Diagrams & Manuals
422777-1239-01 Engine View Diagrams & Manuals
422777-1240-01 Engine View Diagrams & Manuals
422777-1244-01 Engine View Diagrams & Manuals
422777-1250-99 Engine View Diagrams & Manuals
422777-1259-01 Engine View Diagrams & Manuals
422777-1262-99 Engine View Diagrams & Manuals
422777-1265-01 Engine View Diagrams & Manuals
422777-1266-01 Engine View Diagrams & Manuals
422777-1278-01 Engine View Diagrams & Manuals
422777-1281-01 Engine View Diagrams & Manuals
422777-1725-E1 Engine View Diagrams & Manuals
422777-1727-E1 Engine View Diagrams & Manuals
422777-1881-A1 Engine View Diagrams & Manuals
422777-2125-E1 Engine View Diagrams & Manuals
422777-2127-E1 Engine View Diagrams & Manuals
422777-2201-E1 Engine View Diagrams & Manuals
422777-2281-E1 Engine View Diagrams & Manuals
422777-4022-01 Engine View Diagrams & Manuals
422777-4822-E1 Engine View Diagrams & Manuals
442577-0121-E1 Engine View Diagrams & Manuals
441677-0112-B1 Engine View Diagrams & Manuals
441677-0112-E1 Engine View Diagrams & Manuals
441677-0113-B1 Engine View Diagrams & Manuals
441677-0113-E1 Engine View Diagrams & Manuals
441677-0113-E2 Engine View Diagrams & Manuals
441677-0131-B1 Engine View Diagrams & Manuals
441677-0131-E1 Engine View Diagrams & Manuals
441677-0131-E2 Engine View Diagrams & Manuals
441677-0136-B1 Engine View Diagrams & Manuals
441677-0136-E1 Engine View Diagrams & Manuals
441677-0137-B1 Engine View Diagrams & Manuals
441677-0137-E1 Engine View Diagrams & Manuals
441677-0141-B1 Engine View Diagrams & Manuals
441677-0142-B1 Engine View Diagrams & Manuals
441677-0143-B1 Engine View Diagrams & Manuals
441677-0143-B2 Engine View Diagrams & Manuals
441677-0144-B1 Engine View Diagrams & Manuals
441677-0403-B1 Engine View Diagrams & Manuals
441677-0403-E1 Engine View Diagrams & Manuals
441677-0580-B1 Engine View Diagrams & Manuals
441677-0580-E1 Engine View Diagrams & Manuals
441677-0702-B1 Engine View Diagrams & Manuals
441677-0702-E1 Engine View Diagrams & Manuals
441677-0748-B1 Engine View Diagrams & Manuals
441677-0748-E1 Engine View Diagrams & Manuals
441677-0754-B1 Engine View Diagrams & Manuals
441677-0754-E1 Engine View Diagrams & Manuals
441677-0796-B1 Engine View Diagrams & Manuals
441677-0796-E1 Engine View Diagrams & Manuals
441577-0112-E1 Engine View Diagrams & Manuals
441577-0113-E1 Engine View Diagrams & Manuals
441577-0113-E2 Engine View Diagrams & Manuals
441577-0114-B1 Engine View Diagrams & Manuals
441577-0117-B1 Engine View Diagrams & Manuals
441577-0118-B1 Engine View Diagrams & Manuals
441577-0119-E1 Engine View Diagrams & Manuals
441577-0120-E1 Engine View Diagrams & Manuals
441577-0121-B1 Engine View Diagrams & Manuals
441577-0122-E1 Engine View Diagrams & Manuals
441577-0124-E1 Engine View Diagrams & Manuals
441577-0410-B1 Engine View Diagrams & Manuals
441577-0411-E1 Engine View Diagrams & Manuals
441577-0425-B1 Engine View Diagrams & Manuals
441577-0442-E1 Engine View Diagrams & Manuals
441577-0672-E1 Engine View Diagrams & Manuals
441777-0651-B1 Engine View Diagrams & Manuals
441777-0722-E1 Engine View Diagrams & Manuals
441777-0726-B1 Engine View Diagrams & Manuals
441777-0726-E1 Engine View Diagrams & Manuals
441777-0750-E1 Engine View Diagrams & Manuals
441777-0766-B1 Engine View Diagrams & Manuals
441777-0766-E1 Engine View Diagrams & Manuals
441777-0785-B1 Engine View Diagrams & Manuals
441777-0785-E1 Engine View Diagrams & Manuals
441777-0788-B1 Engine View Diagrams & Manuals
441777-0788-E1 Engine View Diagrams & Manuals
441777-0790-B1 Engine View Diagrams & Manuals
441777-0790-E1 Engine View Diagrams & Manuals
441777-0797-B1 Engine View Diagrams & Manuals
441777-0797-E1 Engine View Diagrams & Manuals
441777-0800-B1 Engine View Diagrams & Manuals
441777-0800-E1 Engine View Diagrams & Manuals
441777-0883-B1 Engine View Diagrams & Manuals
441777-0883-E1 Engine View Diagrams & Manuals
441777-0025-E1 Engine View Diagrams & Manuals
441777-0025-G1 Engine View Diagrams & Manuals
441777-0026-E1 Engine View Diagrams & Manuals
441777-0026-G1 Engine View Diagrams & Manuals
441777-0027-B1 Engine View Diagrams & Manuals
441777-0027-E1 Engine View Diagrams & Manuals
441777-0027-G1 Engine View Diagrams & Manuals
441777-0110-B1 Engine View Diagrams & Manuals
441777-0110-E1 Engine View Diagrams & Manuals
441777-0116-B1 Engine View Diagrams & Manuals
441777-0116-E1 Engine View Diagrams & Manuals
441777-0116-E2 Engine View Diagrams & Manuals
441777-0117-B1 Engine View Diagrams & Manuals
441777-0118-B1 Engine View Diagrams & Manuals
441777-0119-B1 Engine View Diagrams & Manuals
441777-0119-E1 Engine View Diagrams & Manuals
441777-0121-B1 Engine View Diagrams & Manuals
441777-0121-E1 Engine View Diagrams & Manuals
441777-0123-B1 Engine View Diagrams & Manuals
441777-0123-E1 Engine View Diagrams & Manuals
441777-0124-B1 Engine View Diagrams & Manuals
441777-0124-E1 Engine View Diagrams & Manuals
441777-0126-B1 Engine View Diagrams & Manuals
441777-0126-E1 Engine View Diagrams & Manuals
441777-0127-B1 Engine View Diagrams & Manuals
441777-0128-B1 Engine View Diagrams & Manuals
441777-0129-B1 Engine View Diagrams & Manuals
441777-0130-B1 Engine View Diagrams & Manuals
441777-0283-B1 Engine View Diagrams & Manuals
441777-0283-E1 Engine View Diagrams & Manuals
441777-0284-B1 Engine View Diagrams & Manuals
441777-0284-E1 Engine View Diagrams & Manuals
441777-0288-B1 Engine View Diagrams & Manuals
441777-0428-B1 Engine View Diagrams & Manuals
441777-0428-E1 Engine View Diagrams & Manuals
441777-0437-B1 Engine View Diagrams & Manuals
441777-0568-B1 Engine View Diagrams & Manuals
441777-0568-E1 Engine View Diagrams & Manuals
445577-0025-G1 Engine View Diagrams & Manuals
445577-0026-G1 Engine View Diagrams & Manuals
445577-0027-G1 Engine View Diagrams & Manuals
445577-0035-G1 Engine View Diagrams & Manuals
445577-0036-G1 Engine View Diagrams & Manuals
445577-0037-G1 Engine View Diagrams & Manuals
445577-0110-B1 Engine View Diagrams & Manuals
445577-0110-E1 Engine View Diagrams & Manuals
445577-0110-E2 Engine View Diagrams & Manuals
445577-0111-G1 Engine View Diagrams & Manuals
445577-0112-B1 Engine View Diagrams & Manuals
445577-0113-G5 Engine View Diagrams & Manuals
445577-0120-B1 Engine View Diagrams & Manuals
445577-0120-E1 Engine View Diagrams & Manuals
445577-0121-B1 Engine View Diagrams & Manuals
445577-0121-E1 Engine View Diagrams & Manuals
445577-0122-B1 Engine View Diagrams & Manuals
445577-0122-E1 Engine View Diagrams & Manuals
445577-0123-B1 Engine View Diagrams & Manuals
445577-0124-G1 Engine View Diagrams & Manuals
445577-0125-B1 Engine View Diagrams & Manuals
445577-0128-B1 Engine View Diagrams & Manuals
445577-0129-B1 Engine View Diagrams & Manuals
445577-0131-B1 Engine View Diagrams & Manuals
445577-0132-B1 Engine View Diagrams & Manuals
445577-0133-B1 Engine View Diagrams & Manuals
445577-0135-B1 Engine View Diagrams & Manuals
445577-0136-B1 Engine View Diagrams & Manuals
445577-0138-B1 Engine View Diagrams & Manuals
445577-0139-B1 Engine View Diagrams & Manuals
445577-0140-B1 Engine View Diagrams & Manuals
445577-0435-B1 Engine View Diagrams & Manuals
445577-0435-E1 Engine View Diagrams & Manuals
445577-0485-B1 Engine View Diagrams & Manuals
445577-0485-E1 Engine View Diagrams & Manuals
445577-0499-B1 Engine View Diagrams & Manuals
445577-0499-E1 Engine View Diagrams & Manuals
445577-0504-E1 Engine View Diagrams & Manuals
445577-0510-B1 Engine View Diagrams & Manuals
445577-0510-E1 Engine View Diagrams & Manuals
445577-0516-B1 Engine View Diagrams & Manuals
445577-0516-E1 Engine View Diagrams & Manuals
445577-0557-B1 Engine View Diagrams & Manuals
445577-0595-B1 Engine View Diagrams & Manuals
445577-0595-E1 Engine View Diagrams & Manuals
445577-0626-B1 Engine View Diagrams & Manuals
445577-0626-E1 Engine View Diagrams & Manuals
445577-0723-B1 Engine View Diagrams & Manuals
445577-0723-E1 Engine View Diagrams & Manuals
445577-0755-B1 Engine View Diagrams & Manuals
445577-0755-E1 Engine View Diagrams & Manuals
445577-0755-G1 Engine View Diagrams & Manuals
445577-0789-B1 Engine View Diagrams & Manuals
445577-0789-E1 Engine View Diagrams & Manuals
445577-0801-B1 Engine View Diagrams & Manuals
445577-0801-E1 Engine View Diagrams & Manuals
445577-0819-B1 Engine View Diagrams & Manuals
445577-0820-B1 Engine View Diagrams & Manuals
445577-0820-E1 Engine View Diagrams & Manuals
445577-0864-B1 Engine View Diagrams & Manuals
445577-0864-E1 Engine View Diagrams & Manuals
445577-1125-B1 Engine View Diagrams & Manuals
445577-1187-B1 Engine View Diagrams & Manuals
445577-1187-G1 Engine View Diagrams & Manuals
445677-0001-B1 Engine View Diagrams & Manuals
445677-0002-B1 Engine View Diagrams & Manuals
445677-0003-G5 Engine View Diagrams & Manuals
445677-0110-B1 Engine View Diagrams & Manuals
445677-0110-E1 Engine View Diagrams & Manuals
445677-0112-B1 Engine View Diagrams & Manuals
445677-0113-B1 Engine View Diagrams & Manuals
445677-0115-B1 Engine View Diagrams & Manuals
445677-0116-B1 Engine View Diagrams & Manuals
445677-0117-G5 Engine View Diagrams & Manuals
445677-0118-G5 Engine View Diagrams & Manuals
445677-0127-B1 Engine View Diagrams & Manuals
445677-0128-B1 Engine View Diagrams & Manuals
445677-0129-B1 Engine View Diagrams & Manuals
445677-0130-B1 Engine View Diagrams & Manuals
445677-0413-B1 Engine View Diagrams & Manuals
445677-0413-E1 Engine View Diagrams & Manuals
445677-0420-B1 Engine View Diagrams & Manuals
445677-0420-E1 Engine View Diagrams & Manuals
445677-0421-B1 Engine View Diagrams & Manuals
445677-0476-B1 Engine View Diagrams & Manuals
445677-0476-E1 Engine View Diagrams & Manuals
445677-0503-B1 Engine View Diagrams & Manuals
445677-0503-E1 Engine View Diagrams & Manuals
445677-0725-B1 Engine View Diagrams & Manuals
445677-0725-E1 Engine View Diagrams & Manuals
445677-0758-B1 Engine View Diagrams & Manuals
445677-0758-E1 Engine View Diagrams & Manuals
445677-0759-B1 Engine View Diagrams & Manuals
445677-0759-E1 Engine View Diagrams & Manuals
445677-0759-G1 Engine View Diagrams & Manuals
445677-0827-B1 Engine View Diagrams & Manuals
445677-0827-E1 Engine View Diagrams & Manuals
445677-0954-G5 Engine View Diagrams & Manuals
445677-1113-B1 Engine View Diagrams & Manuals
445677-1114-B1 Engine View Diagrams & Manuals
445677-1145-B1 Engine View Diagrams & Manuals
445677-1188-B1 Engine View Diagrams & Manuals
445677-1188-G1 Engine View Diagrams & Manuals
445677-1198-B1 Engine View Diagrams & Manuals
445677-1199-B1 Engine View Diagrams & Manuals
445677-1201-B1 Engine View Diagrams & Manuals
445677-1201-G1 Engine View Diagrams & Manuals
445677-1262-B1 Engine View Diagrams & Manuals
445677-1274-B1 Engine View Diagrams & Manuals
445677-1344-B1 Engine View Diagrams & Manuals
445677-1578-G5 Engine View Diagrams & Manuals
445677-2188-G1 Engine View Diagrams & Manuals
445677-2188-G5 Engine View Diagrams & Manuals
445677-2201-G5 Engine View Diagrams & Manuals
445677-2262-B1 Engine View Diagrams & Manuals
445677-2344-B1 Engine View Diagrams & Manuals
445677-3114-B1 Engine View Diagrams & Manuals
445677-3115-B1 Engine View Diagrams & Manuals
445677-3117-G5 Engine View Diagrams & Manuals
445677-3118-G5 Engine View Diagrams & Manuals
445677-3130-B1 Engine View Diagrams & Manuals
445677-3201-G5 Engine View Diagrams & Manuals
445677-3262-B1 Engine View Diagrams & Manuals
445677-3344-B1 Engine View Diagrams & Manuals
445677-4188-G1 Engine View Diagrams & Manuals
445677-4188-G5 Engine View Diagrams & Manuals
445677-5114-B1 Engine View Diagrams & Manuals
445677-5115-B1 Engine View Diagrams & Manuals
445677-5129-B1 Engine View Diagrams & Manuals
445677-5262-B1 Engine View Diagrams & Manuals
122002-0138-B8 Engine View Diagrams & Manuals
122002-0394-B1 Engine View Diagrams & Manuals
122002-0394-B8 Engine View Diagrams & Manuals
122002-0394-E1 Engine View Diagrams & Manuals
122002-0394-E2 Engine View Diagrams & Manuals
122002-0394-E8 Engine View Diagrams & Manuals
122002-0496-B1 Engine View Diagrams & Manuals
122002-0496-E1 Engine View Diagrams & Manuals
122002-0520-B8 Engine View Diagrams & Manuals
122002-0783-B1 Engine View Diagrams & Manuals
122002-0783-B8 Engine View Diagrams & Manuals
122002-0783-E1 Engine View Diagrams & Manuals
122002-0783-E8 Engine View Diagrams & Manuals
122002-3520-H8 Engine View Diagrams & Manuals
122002-3522-H8 Engine View Diagrams & Manuals
122002-3523-H8 Engine View Diagrams & Manuals
122002-3560-H8 Engine View Diagrams & Manuals
122002-3692-H8 Engine View Diagrams & Manuals
122002-3783-B1 Engine View Diagrams & Manuals
122002-3783-B8 Engine View Diagrams & Manuals
122002-3891-H8 Engine View Diagrams & Manuals
122007-0139-B8 Engine View Diagrams & Manuals
122012-0114-B1 Engine View Diagrams & Manuals
122012-0114-B8 Engine View Diagrams & Manuals
122012-0114-E1 Engine View Diagrams & Manuals
122012-0115-B1 Engine View Diagrams & Manuals
122012-0115-B8 Engine View Diagrams & Manuals
122012-0115-E1 Engine View Diagrams & Manuals
122012-0116-B1 Engine View Diagrams & Manuals
122012-0116-B8 Engine View Diagrams & Manuals
122012-0116-E1 Engine View Diagrams & Manuals
122012-0118-B1 Engine View Diagrams & Manuals
122012-0118-B8 Engine View Diagrams & Manuals
122012-0118-E1 Engine View Diagrams & Manuals
122012-0120-B1 Engine View Diagrams & Manuals
122012-0120-B8 Engine View Diagrams & Manuals
122012-0120-E1 Engine View Diagrams & Manuals
122012-0123-B1 Engine View Diagrams & Manuals
122012-0123-B8 Engine View Diagrams & Manuals
122012-0124-B1 Engine View Diagrams & Manuals
122012-0124-B8 Engine View Diagrams & Manuals
122012-0124-E1 Engine View Diagrams & Manuals
122012-0125-B1 Engine View Diagrams & Manuals
122012-0125-B8 Engine View Diagrams & Manuals
122012-0126-B1 Engine View Diagrams & Manuals
122012-0126-B8 Engine View Diagrams & Manuals
122012-0126-E1 Engine View Diagrams & Manuals
122012-0127-B1 Engine View Diagrams & Manuals
122012-0127-B8 Engine View Diagrams & Manuals
122012-0127-E1 Engine View Diagrams & Manuals
122012-0133-B1 Engine View Diagrams & Manuals
122012-0133-B8 Engine View Diagrams & Manuals
122012-0136-B8 Engine View Diagrams & Manuals
122012-0140-B8 Engine View Diagrams & Manuals
122012-0151-B8 Engine View Diagrams & Manuals
122012-0157-B8 Engine View Diagrams & Manuals
122012-0159-B8 Engine View Diagrams & Manuals
122012-0160-B8 Engine View Diagrams & Manuals
122012-0167-B8 Engine View Diagrams & Manuals
122012-0170-B8 Engine View Diagrams & Manuals
122012-0358-B1 Engine View Diagrams & Manuals
122012-0358-B2 Engine View Diagrams & Manuals
122012-0358-B8 Engine View Diagrams & Manuals
122012-0358-E1 Engine View Diagrams & Manuals
122012-0358-E2 Engine View Diagrams & Manuals
122012-0361-B1 Engine View Diagrams & Manuals
122012-0361-B8 Engine View Diagrams & Manuals
122012-0361-E1 Engine View Diagrams & Manuals
122012-0416-B1 Engine View Diagrams & Manuals
122012-0416-B8 Engine View Diagrams & Manuals
122012-0416-E1 Engine View Diagrams & Manuals
122012-0522-B8 Engine View Diagrams & Manuals
122012-0523-B8 Engine View Diagrams & Manuals
122012-0526-B8 Engine View Diagrams & Manuals
122012-0528-B8 Engine View Diagrams & Manuals
122012-0560-B8 Engine View Diagrams & Manuals
122012-0692-B8 Engine View Diagrams & Manuals
122012-0891-B8 Engine View Diagrams & Manuals
122017-0374-B1 Engine View Diagrams & Manuals
122017-0374-B8 Engine View Diagrams & Manuals
122017-0374-E1 Engine View Diagrams & Manuals
122032-0101-B1 Engine View Diagrams & Manuals
122032-0101-B8 Engine View Diagrams & Manuals
122032-0101-E1 Engine View Diagrams & Manuals
122032-0111-E1 Engine View Diagrams & Manuals
122032-0112-B1 Engine View Diagrams & Manuals
122032-0112-B8 Engine View Diagrams & Manuals
122032-0112-E1 Engine View Diagrams & Manuals
122032-0119-B1 Engine View Diagrams & Manuals
122032-0119-B8 Engine View Diagrams & Manuals
122032-0119-E1 Engine View Diagrams & Manuals
122032-0130-B1 Engine View Diagrams & Manuals
445577-1221-B1 Engine View Diagrams & Manuals
445577-1318-B1 Engine View Diagrams & Manuals
445577-1340-B1 Engine View Diagrams & Manuals
445577-1471-E1 Engine View Diagrams & Manuals
445577-1511-E1 Engine View Diagrams & Manuals
445577-1520-B1 Engine View Diagrams & Manuals
445577-1582-G5 Engine View Diagrams & Manuals
445577-1584-G5 Engine View Diagrams & Manuals
445577-2111-G1 Engine View Diagrams & Manuals
445577-2111-G5 Engine View Diagrams & Manuals
445577-2187-G1 Engine View Diagrams & Manuals
445577-2187-G5 Engine View Diagrams & Manuals
445577-2221-B1 Engine View Diagrams & Manuals
445577-3035-G5 Engine View Diagrams & Manuals
445577-3036-G5 Engine View Diagrams & Manuals
445577-3037-G5 Engine View Diagrams & Manuals
445577-4187-G1 Engine View Diagrams & Manuals
445577-4187-G5 Engine View Diagrams & Manuals
445577-5037-G5 Engine View Diagrams & Manuals
445577-5112-B1 Engine View Diagrams & Manuals
445577-5135-B1 Engine View Diagrams & Manuals
445577-5138-B1 Engine View Diagrams & Manuals
445577-6187-G5 Engine View Diagrams & Manuals
445677-5344-B1 Engine View Diagrams & Manuals
122032-0130-B8 Engine View Diagrams & Manuals
122032-0130-E1 Engine View Diagrams & Manuals
122032-0134-B1 Engine View Diagrams & Manuals
122032-0134-B8 Engine View Diagrams & Manuals
122032-0135-B8 Engine View Diagrams & Manuals
122032-0137-B8 Engine View Diagrams & Manuals
122032-0141-B8 Engine View Diagrams & Manuals
122032-0146-B8 Engine View Diagrams & Manuals
122032-0147-B8 Engine View Diagrams & Manuals
122032-0148-B8 Engine View Diagrams & Manuals
122032-0154-B8 Engine View Diagrams & Manuals
122032-0161-B8 Engine View Diagrams & Manuals
122032-0162-B8 Engine View Diagrams & Manuals
122032-0163-B8 Engine View Diagrams & Manuals
122032-0164-B8 Engine View Diagrams & Manuals
122032-0166-B8 Engine View Diagrams & Manuals
122032-0171-B8 Engine View Diagrams & Manuals
122032-0184-B8 Engine View Diagrams & Manuals
122032-0533-B8 Engine View Diagrams & Manuals
122032-0535-B8 Engine View Diagrams & Manuals
122032-0536-B8 Engine View Diagrams & Manuals
122032-3535-H8 Engine View Diagrams & Manuals
122032-3536-H8 Engine View Diagrams & Manuals
122037-0121-B1 Engine View Diagrams & Manuals
122037-0121-B8 Engine View Diagrams & Manuals
122037-0121-E1 Engine View Diagrams & Manuals
122037-0129-B1 Engine View Diagrams & Manuals
122037-0129-B8 Engine View Diagrams & Manuals
122037-0129-E1 Engine View Diagrams & Manuals
122037-0168-B8 Engine View Diagrams & Manuals
122037-0169-B8 Engine View Diagrams & Manuals
445877-5132-G5 Engine View Diagrams & Manuals
445877-5139-G5 Engine View Diagrams & Manuals
445977-1092-B1 Engine View Diagrams & Manuals
446677-0125-B1 Engine View Diagrams & Manuals
446677-0126-B1 Engine View Diagrams & Manuals
446677-0126-E1 Engine View Diagrams & Manuals
446677-0127-B1 Engine View Diagrams & Manuals
446677-0366-E1 Engine View Diagrams & Manuals
446677-0463-E1 Engine View Diagrams & Manuals
446677-0470-E1 Engine View Diagrams & Manuals
122037-0177-B8 Engine View Diagrams & Manuals
122037-0181-B8 Engine View Diagrams & Manuals
122037-0550-B8 Engine View Diagrams & Manuals
122037-3550-H8 Engine View Diagrams & Manuals
122037-5168-H8 Engine View Diagrams & Manuals
122052-0142-B8 Engine View Diagrams & Manuals
122052-0144-B8 Engine View Diagrams & Manuals
122052-0145-B8 Engine View Diagrams & Manuals
122052-0150-B8 Engine View Diagrams & Manuals
122052-0156-B8 Engine View Diagrams & Manuals
122052-0165-B8 Engine View Diagrams & Manuals
122052-0172-B8 Engine View Diagrams & Manuals
122052-0176-B8 Engine View Diagrams & Manuals
122052-0180-B8 Engine View Diagrams & Manuals
122052-0185-B8 Engine View Diagrams & Manuals
122052-0186-B8 Engine View Diagrams & Manuals
122052-0549-B8 Engine View Diagrams & Manuals
122052-3156-H8 Engine View Diagrams & Manuals
122052-3549-H8 Engine View Diagrams & Manuals
122092-0570-B8 Engine View Diagrams & Manuals
122092-0571-B8 Engine View Diagrams & Manuals
122092-3570-H8 Engine View Diagrams & Manuals
122092-3571-H8 Engine View Diagrams & Manuals
445777-0027-E1 Engine View Diagrams & Manuals
445777-0027-E2 Engine View Diagrams & Manuals
445777-0112-E1 Engine View Diagrams & Manuals
445777-0112-E2 Engine View Diagrams & Manuals
445777-0112-E3 Engine View Diagrams & Manuals
445777-0114-E1 Engine View Diagrams & Manuals
445777-0129-E1 Engine View Diagrams & Manuals
445777-0133-E1 Engine View Diagrams & Manuals
445777-0134-E1 Engine View Diagrams & Manuals
445777-0154-E1 Engine View Diagrams & Manuals
445777-0168-E1 Engine View Diagrams & Manuals
445777-0172-E1 Engine View Diagrams & Manuals
445777-0200-E1 Engine View Diagrams & Manuals
445777-0211-E1 Engine View Diagrams & Manuals
445777-0264-E1 Engine View Diagrams & Manuals
445777-0264-E2 Engine View Diagrams & Manuals
445777-0315-E1 Engine View Diagrams & Manuals
445777-0352-B1 Engine View Diagrams & Manuals
445777-0352-E1 Engine View Diagrams & Manuals
445777-0539-E1 Engine View Diagrams & Manuals
445777-0560-E1 Engine View Diagrams & Manuals
445777-0594-E1 Engine View Diagrams & Manuals
445877-0100-B1 Engine View Diagrams & Manuals
445877-0130-B1 Engine View Diagrams & Manuals
445877-0130-E1 Engine View Diagrams & Manuals
445877-0130-E2 Engine View Diagrams & Manuals
445877-0132-B1 Engine View Diagrams & Manuals
445877-0135-B1 Engine View Diagrams & Manuals
445877-0135-E1 Engine View Diagrams & Manuals
445877-0136-B1 Engine View Diagrams & Manuals
445877-0136-E1 Engine View Diagrams & Manuals
445877-0139-B1 Engine View Diagrams & Manuals
445877-0140-G5 Engine View Diagrams & Manuals
445877-0141-G5 Engine View Diagrams & Manuals
445877-0502-B1 Engine View Diagrams & Manuals
445877-0502-E1 Engine View Diagrams & Manuals
445877-0569-B1 Engine View Diagrams & Manuals
445877-0569-E1 Engine View Diagrams & Manuals
445877-0672-B1 Engine View Diagrams & Manuals
445877-0728-B1 Engine View Diagrams & Manuals
445877-0760-B1 Engine View Diagrams & Manuals
445877-0760-E1 Engine View Diagrams & Manuals
445877-0760-G1 Engine View Diagrams & Manuals
445877-0829-B1 Engine View Diagrams & Manuals
445877-0829-E1 Engine View Diagrams & Manuals
445877-0955-G5 Engine View Diagrams & Manuals
445877-1105-B1 Engine View Diagrams & Manuals
445877-1189-B1 Engine View Diagrams & Manuals
445877-1565-G1 Engine View Diagrams & Manuals
445877-1565-G5 Engine View Diagrams & Manuals
445877-1566-G5 Engine View Diagrams & Manuals
445877-1592-B1 Engine View Diagrams & Manuals
445877-1760-B1 Engine View Diagrams & Manuals
445877-2132-G1 Engine View Diagrams & Manuals
445877-2132-G5 Engine View Diagrams & Manuals
445877-2139-G5 Engine View Diagrams & Manuals
445877-2672-G5 Engine View Diagrams & Manuals
445877-5132-B1 Engine View Diagrams & Manuals
446777-0025-E1 Engine View Diagrams & Manuals
446777-0026-E1 Engine View Diagrams & Manuals
446777-0026-E2 Engine View Diagrams & Manuals
446777-0027-E1 Engine View Diagrams & Manuals
446777-0027-E2 Engine View Diagrams & Manuals
446777-0100-E1 Engine View Diagrams & Manuals
446777-0106-E1 Engine View Diagrams & Manuals
446777-0112-E1 Engine View Diagrams & Manuals
446777-0115-E1 Engine View Diagrams & Manuals
446777-0117-E1 Engine View Diagrams & Manuals
446777-0118-E1 Engine View Diagrams & Manuals
446777-0126-E1 Engine View Diagrams & Manuals
446777-0127-E1 Engine View Diagrams & Manuals
446777-0128-E1 Engine View Diagrams & Manuals
446777-0165-E1 Engine View Diagrams & Manuals
446777-0177-E1 Engine View Diagrams & Manuals
446777-0197-E1 Engine View Diagrams & Manuals
446777-0200-E1 Engine View Diagrams & Manuals
446777-0219-E1 Engine View Diagrams & Manuals
446777-0241-E1 Engine View Diagrams & Manuals
446777-0244-E1 Engine View Diagrams & Manuals
446777-0245-E1 Engine View Diagrams & Manuals
446777-0246-E1 Engine View Diagrams & Manuals
446777-0264-E1 Engine View Diagrams & Manuals
446777-0302-E1 Engine View Diagrams & Manuals
446777-0316-E1 Engine View Diagrams & Manuals
446777-0365-E1 Engine View Diagrams & Manuals
446877-0025-E1 Engine View Diagrams & Manuals
446877-0026-E1 Engine View Diagrams & Manuals
446877-0027-E1 Engine View Diagrams & Manuals
446877-0121-E1 Engine View Diagrams & Manuals
446877-0412-E1 Engine View Diagrams & Manuals
446977-0385-E1 Engine View Diagrams & Manuals
446977-0471-E1 Engine View Diagrams & Manuals
446977-0472-E1 Engine View Diagrams & Manuals
446977-0505-E1 Engine View Diagrams & Manuals
460777-2297-E1 Engine View Diagrams & Manuals
460777-2299-E1 Engine View Diagrams & Manuals
460707-1107-01 Engine View Diagrams & Manuals
460707-1278-01 Engine View Diagrams & Manuals
460707-1600-01 Engine View Diagrams & Manuals
460707-1631-01 Engine View Diagrams & Manuals
460707-1707-E1 Engine View Diagrams & Manuals
460707-2278-E1 Engine View Diagrams & Manuals
460707-2600-E1 Engine View Diagrams & Manuals
460707-2631-E1 Engine View Diagrams & Manuals
460777-1127-01 Engine View Diagrams & Manuals
460777-1201-01 Engine View Diagrams & Manuals
460777-1276-01 Engine View Diagrams & Manuals
460777-1277-01 Engine View Diagrams & Manuals
460777-1279-01 Engine View Diagrams & Manuals
460777-1288-01 Engine View Diagrams & Manuals
460777-1289-01 Engine View Diagrams & Manuals
460777-1297-01 Engine View Diagrams & Manuals
460777-1727-E1 Engine View Diagrams & Manuals
460777-1876-A1 Engine View Diagrams & Manuals
460777-1877-A1 Engine View Diagrams & Manuals
460777-1888-A1 Engine View Diagrams & Manuals
460777-2127-E1 Engine View Diagrams & Manuals
460777-2201-E1 Engine View Diagrams & Manuals
460777-2276-E1 Engine View Diagrams & Manuals
460777-2277-E1 Engine View Diagrams & Manuals
460777-2288-E1 Engine View Diagrams & Manuals
460777-2289-E1 Engine View Diagrams & Manuals
351442-0186-01 Engine View Diagrams & Manuals
351442-1102-A1 Engine View Diagrams & Manuals
351442-1102-E1 Engine View Diagrams & Manuals
351442-1120-A1 Engine View Diagrams & Manuals
351442-1122-A1 Engine View Diagrams & Manuals
351442-1122-E1 Engine View Diagrams & Manuals
351442-1141-A1 Engine View Diagrams & Manuals
351442-1186-A1 Engine View Diagrams & Manuals
351442-1186-E1 Engine View Diagrams & Manuals
351442-1194-A1 Engine View Diagrams & Manuals
351442-1194-E1 Engine View Diagrams & Manuals
351446-1144-E1 Engine View Diagrams & Manuals
351447-0042-01 Engine View Diagrams & Manuals
351447-0046-01 Engine View Diagrams & Manuals
351447-0064-01 Engine View Diagrams & Manuals
351447-0096-01 Engine View Diagrams & Manuals
351447-0100-01 Engine View Diagrams & Manuals
351447-0103-01 Engine View Diagrams & Manuals
351447-0115-01 Engine View Diagrams & Manuals
351447-0180-01 Engine View Diagrams & Manuals
351447-0181-01 Engine View Diagrams & Manuals
351447-0182-01 Engine View Diagrams & Manuals
351447-0415-01 Engine View Diagrams & Manuals
351447-0416-01 Engine View Diagrams & Manuals
351447-0417-01 Engine View Diagrams & Manuals
351447-1023-A1 Engine View Diagrams & Manuals
351447-1023-E1 Engine View Diagrams & Manuals
351447-1024-E1 Engine View Diagrams & Manuals
351447-1042-A1 Engine View Diagrams & Manuals
351447-1042-E1 Engine View Diagrams & Manuals
351447-1043-A1 Engine View Diagrams & Manuals
351447-1043-E1 Engine View Diagrams & Manuals
351447-1045-E1 Engine View Diagrams & Manuals
351447-1046-A1 Engine View Diagrams & Manuals
351447-1046-E1 Engine View Diagrams & Manuals
351447-1048-E1 Engine View Diagrams & Manuals
351447-1048-E2 Engine View Diagrams & Manuals
351447-1064-A1 Engine View Diagrams & Manuals
351447-1064-E1 Engine View Diagrams & Manuals
351447-1074-E1 Engine View Diagrams & Manuals
351447-1075-A1 Engine View Diagrams & Manuals
351447-1075-A2 Engine View Diagrams & Manuals
351447-1075-E1 Engine View Diagrams & Manuals
351447-1075-E2 Engine View Diagrams & Manuals
351447-1076-A2 Engine View Diagrams & Manuals
351447-1076-E2 Engine View Diagrams & Manuals
351447-1077-A1 Engine View Diagrams & Manuals
351447-1077-A2 Engine View Diagrams & Manuals
351447-1077-E1 Engine View Diagrams & Manuals
351447-1078-A1 Engine View Diagrams & Manuals
351447-1078-E1 Engine View Diagrams & Manuals
351447-1079-A1 Engine View Diagrams & Manuals
351447-1079-E1 Engine View Diagrams & Manuals
351447-1096-A1 Engine View Diagrams & Manuals
351447-1096-E1 Engine View Diagrams & Manuals
351447-1100-A1 Engine View Diagrams & Manuals
351447-1100-E1 Engine View Diagrams & Manuals
351447-1103-A1 Engine View Diagrams & Manuals
351447-1115-A1 Engine View Diagrams & Manuals
351447-1117-A1 Engine View Diagrams & Manuals
351447-1117-E1 Engine View Diagrams & Manuals
351447-1118-A1 Engine View Diagrams & Manuals
351447-1118-E1 Engine View Diagrams & Manuals
351447-1119-A1 Engine View Diagrams & Manuals
351447-1123-A1 Engine View Diagrams & Manuals
351447-1126-A1 Engine View Diagrams & Manuals
351447-1130-A1 Engine View Diagrams & Manuals
351447-1130-E1 Engine View Diagrams & Manuals
351447-1131-A1 Engine View Diagrams & Manuals
351447-1131-E1 Engine View Diagrams & Manuals
351447-1138-A1 Engine View Diagrams & Manuals
351447-1139-A1 Engine View Diagrams & Manuals
351447-1140-A1 Engine View Diagrams & Manuals
351447-1170-A1 Engine View Diagrams & Manuals
351447-1170-E1 Engine View Diagrams & Manuals
350777-1130-E1 Engine View Diagrams & Manuals
350777-1131-A1 Engine View Diagrams & Manuals
350777-1132-A1 Engine View Diagrams & Manuals
350777-1132-E1 Engine View Diagrams & Manuals
350777-1134-A2 Engine View Diagrams & Manuals
350777-1134-E2 Engine View Diagrams & Manuals
350777-1135-A1 Engine View Diagrams & Manuals
350777-1135-E1 Engine View Diagrams & Manuals
350777-1136-E2 Engine View Diagrams & Manuals
350777-1137-E1 Engine View Diagrams & Manuals
350777-1137-E2 Engine View Diagrams & Manuals
350777-1138-E1 Engine View Diagrams & Manuals
350777-1140-E1 Engine View Diagrams & Manuals
350777-1141-E1 Engine View Diagrams & Manuals
350777-1142-E1 Engine View Diagrams & Manuals
350777-1143-E1 Engine View Diagrams & Manuals
350777-1144-E1 Engine View Diagrams & Manuals
350777-1147-E1 Engine View Diagrams & Manuals
350777-1149-E1 Engine View Diagrams & Manuals
350777-1150-E1 Engine View Diagrams & Manuals
350777-1151-E1 Engine View Diagrams & Manuals
351447-1171-E1 Engine View Diagrams & Manuals
351447-1172-A1 Engine View Diagrams & Manuals
351447-1173-A1 Engine View Diagrams & Manuals
351447-1176-A1 Engine View Diagrams & Manuals
351447-1180-A1 Engine View Diagrams & Manuals
351447-1180-E1 Engine View Diagrams & Manuals
351447-1181-A1 Engine View Diagrams & Manuals
351447-1181-A2 Engine View Diagrams & Manuals
351447-1181-A3 Engine View Diagrams & Manuals
351447-1181-E1 Engine View Diagrams & Manuals
351447-1181-E2 Engine View Diagrams & Manuals
351447-1181-E3 Engine View Diagrams & Manuals
351447-1182-A1 Engine View Diagrams & Manuals
351447-1183-A1 Engine View Diagrams & Manuals
351447-1190-A1 Engine View Diagrams & Manuals
351447-1192-A1 Engine View Diagrams & Manuals
351447-1192-E1 Engine View Diagrams & Manuals
351447-1193-A1 Engine View Diagrams & Manuals
351447-1193-E1 Engine View Diagrams & Manuals
351447-1195-A1 Engine View Diagrams & Manuals
351447-1195-E1 Engine View Diagrams & Manuals
351447-1196-A1 Engine View Diagrams & Manuals
351447-1196-E1 Engine View Diagrams & Manuals
351447-1197-A1 Engine View Diagrams & Manuals
351447-1197-E1 Engine View Diagrams & Manuals
351447-1203-A1 Engine View Diagrams & Manuals
351447-1203-E1 Engine View Diagrams & Manuals
351447-1221-A1 Engine View Diagrams & Manuals
351447-1221-E1 Engine View Diagrams & Manuals
351447-1228-A1 Engine View Diagrams & Manuals
351447-1228-E1 Engine View Diagrams & Manuals
351447-1229-A1 Engine View Diagrams & Manuals
351447-1229-E1 Engine View Diagrams & Manuals
351447-1233-E1 Engine View Diagrams & Manuals
351447-1234-E1 Engine View Diagrams & Manuals
351447-1235-E1 Engine View Diagrams & Manuals
351447-1236-E1 Engine View Diagrams & Manuals
351447-1237-E1 Engine View Diagrams & Manuals
351447-1238-E1 Engine View Diagrams & Manuals
351447-1239-E1 Engine View Diagrams & Manuals
351447-1244-E1 Engine View Diagrams & Manuals
351447-1245-E1 Engine View Diagrams & Manuals
351447-1245-E2 Engine View Diagrams & Manuals
351447-1246-E1 Engine View Diagrams & Manuals
351447-1248-E1 Engine View Diagrams & Manuals
351447-1249-E1 Engine View Diagrams & Manuals
351447-1250-E1 Engine View Diagrams & Manuals
351447-1251-E1 Engine View Diagrams & Manuals
351447-1252-E1 Engine View Diagrams & Manuals
351447-1253-E1 Engine View Diagrams & Manuals
350777-1152-E1 Engine View Diagrams & Manuals
350777-1155-E1 Engine View Diagrams & Manuals
350777-1156-E1 Engine View Diagrams & Manuals
350777-1157-E1 Engine View Diagrams & Manuals
350777-1158-E1 Engine View Diagrams & Manuals
350777-1162-E1 Engine View Diagrams & Manuals
350777-1163-01 Engine View Diagrams & Manuals
350777-1163-02 Engine View Diagrams & Manuals
350777-1163-E1 Engine View Diagrams & Manuals
350777-1164-E1 Engine View Diagrams & Manuals
350777-1165-E1 Engine View Diagrams & Manuals
350777-1166-E1 Engine View Diagrams & Manuals
350777-1167-E1 Engine View Diagrams & Manuals
350777-1168-01 Engine View Diagrams & Manuals
350777-1169-E1 Engine View Diagrams & Manuals
350777-1170-E1 Engine View Diagrams & Manuals
350777-1171-E1 Engine View Diagrams & Manuals
351447-1254-E1 Engine View Diagrams & Manuals
351447-1255-E1 Engine View Diagrams & Manuals
351447-1256-E1 Engine View Diagrams & Manuals
351777-1130-E1 Series Engine View Diagrams & Manuals
351777-1131-E1 Series Engine View Diagrams & Manuals
351777-1132-E1 Series Engine View Diagrams & Manuals
351777-1134-E1 Series Engine View Diagrams & Manuals
351777-1135-E1 Series Engine View Diagrams & Manuals
351777-1136-E1 Series Engine View Diagrams & Manuals
351777-1137-E1 Series Engine View Diagrams & Manuals
351777-1138-E1 Series Engine View Diagrams & Manuals
351777-1139-E1 Series Engine View Diagrams & Manuals
351777-1140-E1 Series Engine View Diagrams & Manuals
351777-1141-E1 Series Engine View Diagrams & Manuals
351777-1142-E1 Series Engine View Diagrams & Manuals
351777-1143-E1 Series Engine View Diagrams & Manuals
351777-1144-E1 Series Engine View Diagrams & Manuals
351777-1145-E1 Series Engine View Diagrams & Manuals
351777-1148-E1 Series Engine View Diagrams & Manuals
351777-1150-E1 Series Engine View Diagrams & Manuals
351772-0045-01 Engine View Diagrams & Manuals
351772-1045-A1 Engine View Diagrams & Manuals
351772-1045-E1 Engine View Diagrams & Manuals
351772-1102-E1 Engine View Diagrams & Manuals
351776-1146-E1 Engine View Diagrams & Manuals
351777-0036-01 Engine View Diagrams & Manuals
351777-0044-02 Engine View Diagrams & Manuals
351777-0100-01 Engine View Diagrams & Manuals
351777-1036-A1 Engine View Diagrams & Manuals
351777-1036-E1 Engine View Diagrams & Manuals
351777-1044-A2 Engine View Diagrams & Manuals
351777-1044-E2 Engine View Diagrams & Manuals
351777-1044-E3 Engine View Diagrams & Manuals
351777-1047-E1 Engine View Diagrams & Manuals
351777-1100-E1 Engine View Diagrams & Manuals
351777-1114-E1 Engine View Diagrams & Manuals
351777-1116-A1 Engine View Diagrams & Manuals
351777-1117-A1 Engine View Diagrams & Manuals
351777-1121-E1 Engine View Diagrams & Manuals
351777-1123-E1 Engine View Diagrams & Manuals
351777-1124-A1 Engine View Diagrams & Manuals
351777-1124-E1 Engine View Diagrams & Manuals
351777-1125-A1 Engine View Diagrams & Manuals
351777-1125-E1 Engine View Diagrams & Manuals
351777-1126-E1 Engine View Diagrams & Manuals
351777-1128-E1 Engine View Diagrams & Manuals
351777-1129-E1 Engine View Diagrams & Manuals
354445-0424-E1 Engine View Diagrams & Manuals
354445-0424-E2 Engine View Diagrams & Manuals
354447-0030-E1 Engine View Diagrams & Manuals
354447-0042-E1 Engine View Diagrams & Manuals
354447-0044-E1 Engine View Diagrams & Manuals
354447-0110-E1 Engine View Diagrams & Manuals
354447-0116-E1 Engine View Diagrams & Manuals
354447-0119-E1 Engine View Diagrams & Manuals
354447-0120-E1 Engine View Diagrams & Manuals
354447-0122-E1 Engine View Diagrams & Manuals
354447-0300-E1 Engine View Diagrams & Manuals
354447-0330-E1 Engine View Diagrams & Manuals
354447-0421-E1 Engine View Diagrams & Manuals
356442-0065-B1 Engine View Diagrams & Manuals
356442-0065-E1 Engine View Diagrams & Manuals
356442-0065-E9 Engine View Diagrams & Manuals
356442-0119-E1 Engine View Diagrams & Manuals
356442-0119-G1 Engine View Diagrams & Manuals
356442-0126-B1 Engine View Diagrams & Manuals
356442-0126-E1 Engine View Diagrams & Manuals
356442-0126-G1 Engine View Diagrams & Manuals
356442-0127-B1 Engine View Diagrams & Manuals
356442-0127-E1 Engine View Diagrams & Manuals
356442-0127-E9 Engine View Diagrams & Manuals
356442-0127-H1 Engine View Diagrams & Manuals
356442-0128-B1 Engine View Diagrams & Manuals
356442-0128-E1 Engine View Diagrams & Manuals
356442-0128-E9 Engine View Diagrams & Manuals
356442-0128-H1 Engine View Diagrams & Manuals
356442-0186-B1 Engine View Diagrams & Manuals
356442-0186-E1 Engine View Diagrams & Manuals
356442-0186-E9 Engine View Diagrams & Manuals
356442-0224-B1 Engine View Diagrams & Manuals
356442-0224-E9 Engine View Diagrams & Manuals
356442-0229-B1 Engine View Diagrams & Manuals
356442-0229-E9 Engine View Diagrams & Manuals
356442-0248-B1 Engine View Diagrams & Manuals
356442-0257-B1 Engine View Diagrams & Manuals
356442-0287-B1 Engine View Diagrams & Manuals
356442-0298-F1 Engine View Diagrams & Manuals
356442-0326-F1 Engine View Diagrams & Manuals
356442-0354-H1 Engine View Diagrams & Manuals
356442-0363-F1 Engine View Diagrams & Manuals
356442-0369-B1 Engine View Diagrams & Manuals
356442-0370-F1 Engine View Diagrams & Manuals
356442-0384-H1 Engine View Diagrams & Manuals
356442-0565-F1 Engine View Diagrams & Manuals
356442-0600-B1 Engine View Diagrams & Manuals
356442-0600-H1 Engine View Diagrams & Manuals
356442-0601-B1 Engine View Diagrams & Manuals
356442-0601-H1 Engine View Diagrams & Manuals
356442-1287-F8 Engine View Diagrams & Manuals
356445-0173-E1 Engine View Diagrams & Manuals
356445-0208-E1 Engine View Diagrams & Manuals
356445-0208-G1 Engine View Diagrams & Manuals
356445-0365-B1 Engine View Diagrams & Manuals
356445-0378-G1 Engine View Diagrams & Manuals
356446-0385-F1 Engine View Diagrams & Manuals
356447-0001-G1 Engine View Diagrams & Manuals
356447-0001-H7 Engine View Diagrams & Manuals
356447-0004-B1 Engine View Diagrams & Manuals
356447-0005-E1 Engine View Diagrams & Manuals
356447-0005-G1 Engine View Diagrams & Manuals
356447-0006-G1 Engine View Diagrams & Manuals
356447-0007-F1 Engine View Diagrams & Manuals
356447-0009-B1 Engine View Diagrams & Manuals
356447-0066-B1 Engine View Diagrams & Manuals
356447-0066-E1 Engine View Diagrams & Manuals
356447-0066-E9 Engine View Diagrams & Manuals
356447-0075-E1 Engine View Diagrams & Manuals
356447-0075-G1 Engine View Diagrams & Manuals
356447-0077-G1 Engine View Diagrams & Manuals
356447-0078-E1 Engine View Diagrams & Manuals
356447-0078-G1 Engine View Diagrams & Manuals
356447-0079-E1 Engine View Diagrams & Manuals
356447-0079-G1 Engine View Diagrams & Manuals
356447-0087-G1 Engine View Diagrams & Manuals
356447-0096-B1 Engine View Diagrams & Manuals
356447-0096-E1 Engine View Diagrams & Manuals
356447-0096-E9 Engine View Diagrams & Manuals
356447-0114-E1 Engine View Diagrams & Manuals
356447-0114-G1 Engine View Diagrams & Manuals
356447-0115-E1 Engine View Diagrams & Manuals
356447-0115-G1 Engine View Diagrams & Manuals
356447-0117-E1 Engine View Diagrams & Manuals
356447-0117-G1 Engine View Diagrams & Manuals
356447-0118-E1 Engine View Diagrams & Manuals
356447-0118-G1 Engine View Diagrams & Manuals
356447-0121-B1 Engine View Diagrams & Manuals
356447-0121-E1 Engine View Diagrams & Manuals
356447-0121-G1 Engine View Diagrams & Manuals
356447-0122-B1 Engine View Diagrams & Manuals
356447-0122-E1 Engine View Diagrams & Manuals
356447-0122-E9 Engine View Diagrams & Manuals
356447-0122-H1 Engine View Diagrams & Manuals
356447-0127-E9 Engine View Diagrams & Manuals
356447-0133-E1 Engine View Diagrams & Manuals
356447-0133-G1 Engine View Diagrams & Manuals
356447-0135-E1 Engine View Diagrams & Manuals
356447-0135-G1 Engine View Diagrams & Manuals
356447-0139-B1 Engine View Diagrams & Manuals
356447-0139-E1 Engine View Diagrams & Manuals
356447-0139-G1 Engine View Diagrams & Manuals
356447-0140-E1 Engine View Diagrams & Manuals
356447-0140-E2 Engine View Diagrams & Manuals
356447-0140-G1 Engine View Diagrams & Manuals
356447-0140-G2 Engine View Diagrams & Manuals
356447-0141-E1 Engine View Diagrams & Manuals
356447-0141-G1 Engine View Diagrams & Manuals
356447-0142-E1 Engine View Diagrams & Manuals
356447-0142-G1 Engine View Diagrams & Manuals
356447-0147-B1 Engine View Diagrams & Manuals
356447-0147-E1 Engine View Diagrams & Manuals
356447-0147-E9 Engine View Diagrams & Manuals
356447-0147-H1 Engine View Diagrams & Manuals
356447-0149-E1 Engine View Diagrams & Manuals
356447-0149-G1 Engine View Diagrams & Manuals
356447-0150-E1 Engine View Diagrams & Manuals
356447-0150-G1 Engine View Diagrams & Manuals
356447-0152-E1 Engine View Diagrams & Manuals
356447-0154-E1 Engine View Diagrams & Manuals
356447-0154-G1 Engine View Diagrams & Manuals
356447-0155-E1 Engine View Diagrams & Manuals
356447-0155-G1 Engine View Diagrams & Manuals
356447-0156-E1 Engine View Diagrams & Manuals
356447-0157-B1 Engine View Diagrams & Manuals
356447-0157-E1 Engine View Diagrams & Manuals
356447-0157-G1 Engine View Diagrams & Manuals
356447-0158-B1 Engine View Diagrams & Manuals
356447-0158-E1 Engine View Diagrams & Manuals
356447-0158-G1 Engine View Diagrams & Manuals
356447-0159-B1 Engine View Diagrams & Manuals
356447-0159-E1 Engine View Diagrams & Manuals
356447-0159-G1 Engine View Diagrams & Manuals
356447-0160-B1 Engine View Diagrams & Manuals
356447-0160-E1 Engine View Diagrams & Manuals
356447-0160-E9 Engine View Diagrams & Manuals
356447-0160-H1 Engine View Diagrams & Manuals
356447-0161-B1 Engine View Diagrams & Manuals
356447-0161-E1 Engine View Diagrams & Manuals
356447-0161-G1 Engine View Diagrams & Manuals
356447-0162-E1 Engine View Diagrams & Manuals
356447-0162-G1 Engine View Diagrams & Manuals
356447-0163-E1 Engine View Diagrams & Manuals
356447-0163-G1 Engine View Diagrams & Manuals
356447-0164-E1 Engine View Diagrams & Manuals
356447-0164-G1 Engine View Diagrams & Manuals
356447-0168-B1 Engine View Diagrams & Manuals
356447-0168-E1 Engine View Diagrams & Manuals
356447-0168-E9 Engine View Diagrams & Manuals
356447-0168-H1 Engine View Diagrams & Manuals
356447-0169-E1 Engine View Diagrams & Manuals
356447-0169-G1 Engine View Diagrams & Manuals
356447-0171-E1 Engine View Diagrams & Manuals
356447-0171-G1 Engine View Diagrams & Manuals
356447-0172-B1 Engine View Diagrams & Manuals
356447-0172-E1 Engine View Diagrams & Manuals
356447-0172-G1 Engine View Diagrams & Manuals
356447-0174-E1 Engine View Diagrams & Manuals
356447-0174-G1 Engine View Diagrams & Manuals
356447-0178-E1 Engine View Diagrams & Manuals
356447-0178-G1 Engine View Diagrams & Manuals
356447-0179-E1 Engine View Diagrams & Manuals
356447-0179-G1 Engine View Diagrams & Manuals
356447-0179-G2 Engine View Diagrams & Manuals
356447-0180-B1 Engine View Diagrams & Manuals
356447-0180-E1 Engine View Diagrams & Manuals
356447-0180-E9 Engine View Diagrams & Manuals
356447-0181-E1 Engine View Diagrams & Manuals
356447-0181-G1 Engine View Diagrams & Manuals
356447-0183-B1 Engine View Diagrams & Manuals
356447-0183-E1 Engine View Diagrams & Manuals
356447-0183-E9 Engine View Diagrams & Manuals
356447-0183-H1 Engine View Diagrams & Manuals
356447-0189-E1 Engine View Diagrams & Manuals
356447-0189-G1 Engine View Diagrams & Manuals
356447-0191-B1 Engine View Diagrams & Manuals
356447-0191-E1 Engine View Diagrams & Manuals
356447-0191-E9 Engine View Diagrams & Manuals
356447-0194-E1 Engine View Diagrams & Manuals
356447-0194-G1 Engine View Diagrams & Manuals
356447-0195-E1 Engine View Diagrams & Manuals
356447-0195-G1 Engine View Diagrams & Manuals
356447-0197-E1 Engine View Diagrams & Manuals
356447-0197-G1 Engine View Diagrams & Manuals
356447-0199-E1 Engine View Diagrams & Manuals
356447-0199-G1 Engine View Diagrams & Manuals
356447-0200-E1 Engine View Diagrams & Manuals
356447-0200-G1 Engine View Diagrams & Manuals
356447-0200-G2 Engine View Diagrams & Manuals
356447-0201-E1 Engine View Diagrams & Manuals
356447-0201-G1 Engine View Diagrams & Manuals
356447-0202-E1 Engine View Diagrams & Manuals
356447-0202-G1 Engine View Diagrams & Manuals
356447-0203-E1 Engine View Diagrams & Manuals
356447-0203-G1 Engine View Diagrams & Manuals
356447-0205-E1 Engine View Diagrams & Manuals
356447-0205-G1 Engine View Diagrams & Manuals
356447-0206-E1 Engine View Diagrams & Manuals
356447-0206-E9 Engine View Diagrams & Manuals
356447-0209-E1 Engine View Diagrams & Manuals
356447-0209-G1 Engine View Diagrams & Manuals
356447-0214-B1 Engine View Diagrams & Manuals
356447-0214-E1 Engine View Diagrams & Manuals
356447-0214-G1 Engine View Diagrams & Manuals
356447-0214-H7 Engine View Diagrams & Manuals
356447-0215-E1 Engine View Diagrams & Manuals
356447-0215-G1 Engine View Diagrams & Manuals
12H132-0110-B8 Engine View Diagrams & Manuals
12H132-0111-B8 Engine View Diagrams & Manuals
12H132-0114-B8 Engine View Diagrams & Manuals
12H132-0115-B8 Engine View Diagrams & Manuals
12H132-0116-B8 Engine View Diagrams & Manuals
12H132-0118-B8 Engine View Diagrams & Manuals
12H132-0152-B8 Engine View Diagrams & Manuals
12H137-0123-B8 Engine View Diagrams & Manuals
12H137-0125-B8 Engine View Diagrams & Manuals
12H137-0153-B8 Engine View Diagrams & Manuals
12H337-0156-B8 Engine View Diagrams & Manuals
12H337-0159-B8 Engine View Diagrams & Manuals
12H352-0139-B8 Engine View Diagrams & Manuals
12H362-0123-B8 Engine View Diagrams & Manuals
356447-0279-B1 Engine View Diagrams & Manuals
356447-0280-G1 Engine View Diagrams & Manuals
356447-0280-G2 Engine View Diagrams & Manuals
356447-0283-G1 Engine View Diagrams & Manuals
356447-0286-G1 Engine View Diagrams & Manuals
356447-0286-G2 Engine View Diagrams & Manuals
356447-0288-B1 Engine View Diagrams & Manuals
356447-0290-B1 Engine View Diagrams & Manuals
356447-0295-G1 Engine View Diagrams & Manuals
356447-0299-F1 Engine View Diagrams & Manuals
356447-0303-G1 Engine View Diagrams & Manuals
356447-0304-G1 Engine View Diagrams & Manuals
356447-0304-G2 Engine View Diagrams & Manuals
356447-0305-G1 Engine View Diagrams & Manuals
356447-0307-G1 Engine View Diagrams & Manuals
356447-0307-G2 Engine View Diagrams & Manuals
356447-0308-G1 Engine View Diagrams & Manuals
356447-0310-B1 Engine View Diagrams & Manuals
12H332-0113-B8 Engine View Diagrams & Manuals
12H332-0114-B8 Engine View Diagrams & Manuals
12H332-0115-B8 Engine View Diagrams & Manuals
12H332-0116-B8 Engine View Diagrams & Manuals
12H332-0117-B8 Engine View Diagrams & Manuals
12H332-0118-B8 Engine View Diagrams & Manuals
12H332-0119-B8 Engine View Diagrams & Manuals
12H332-0120-B8 Engine View Diagrams & Manuals
12H332-0121-B8 Engine View Diagrams & Manuals
12H332-0122-B8 Engine View Diagrams & Manuals
12H332-0124-B8 Engine View Diagrams & Manuals
12H332-0125-B8 Engine View Diagrams & Manuals
12H332-0126-B8 Engine View Diagrams & Manuals
12H332-0128-B8 Engine View Diagrams & Manuals
12H332-0129-B8 Engine View Diagrams & Manuals
12H332-0130-B8 Engine View Diagrams & Manuals
12H332-0131-B8 Engine View Diagrams & Manuals
12H332-0137-B8 Engine View Diagrams & Manuals
12H332-0138-B8 Engine View Diagrams & Manuals
12H332-0140-B8 Engine View Diagrams & Manuals
12H332-0141-B8 Engine View Diagrams & Manuals
12H332-0142-B8 Engine View Diagrams & Manuals
12H332-0143-B8 Engine View Diagrams & Manuals
12H332-0144-B8 Engine View Diagrams & Manuals
12H332-0149-B8 Engine View Diagrams & Manuals
12H332-0150-B8 Engine View Diagrams & Manuals
12H332-0151-B8 Engine View Diagrams & Manuals
12H332-0160-B8 Engine View Diagrams & Manuals
12H332-0161-B8 Engine View Diagrams & Manuals
12H337-0110-B8 Engine View Diagrams & Manuals
12H337-0134-B8 Engine View Diagrams & Manuals
356447-0314-G1 Engine View Diagrams & Manuals
356447-0316-G1 Engine View Diagrams & Manuals
356447-0317-F1 Engine View Diagrams & Manuals
356447-0319-G1 Engine View Diagrams & Manuals
356447-0322-B1 Engine View Diagrams & Manuals
356447-0322-H7 Engine View Diagrams & Manuals
356447-0324-B1 Engine View Diagrams & Manuals
356447-0331-E1 Engine View Diagrams & Manuals
356447-0345-G1 Engine View Diagrams & Manuals
356447-0346-F1 Engine View Diagrams & Manuals
356447-0348-G1 Engine View Diagrams & Manuals
356447-0360-G1 Engine View Diagrams & Manuals
356447-0360-G2 Engine View Diagrams & Manuals
356447-0361-F1 Engine View Diagrams & Manuals
356447-0362-B1 Engine View Diagrams & Manuals
356447-0364-G1 Engine View Diagrams & Manuals
356447-0367-B1 Engine View Diagrams & Manuals
356447-0367-H7 Engine View Diagrams & Manuals
356447-0368-G1 Engine View Diagrams & Manuals
356447-0375-B1 Engine View Diagrams & Manuals
356447-0375-H7 Engine View Diagrams & Manuals
356447-0377-F1 Engine View Diagrams & Manuals
356447-0380-G1 Engine View Diagrams & Manuals
356447-0381-F1 Engine View Diagrams & Manuals
356447-0383-G1 Engine View Diagrams & Manuals
356447-0386-B1 Engine View Diagrams & Manuals
356447-0389-F1 Engine View Diagrams & Manuals
356447-0395-G1 Engine View Diagrams & Manuals
356447-0402-G1 Engine View Diagrams & Manuals
356447-0404-01 Engine View Diagrams & Manuals
356447-0405-H1 Engine View Diagrams & Manuals
356447-0596-F1 Engine View Diagrams & Manuals
356447-0606-B1 Engine View Diagrams & Manuals
356447-0607-B1 Engine View Diagrams & Manuals
356447-0609-G1 Engine View Diagrams & Manuals
356447-1154-B1 Engine View Diagrams & Manuals
356447-1155-G1 Engine View Diagrams & Manuals
356447-1270-G1 Engine View Diagrams & Manuals
356447-1279-F8 Engine View Diagrams & Manuals
356447-2308-G1 Engine View Diagrams & Manuals
356447-3077-G1 Engine View Diagrams & Manuals
356447-3079-G1 Engine View Diagrams & Manuals
356447-3087-G1 Engine View Diagrams & Manuals
356447-3285-G1 Engine View Diagrams & Manuals
35644A-0116-E1 Engine View Diagrams & Manuals
35644A-0166-E1 Engine View Diagrams & Manuals
35644A-0167-E1 Engine View Diagrams & Manuals
35644A-0167-E9 Engine View Diagrams & Manuals
35644A-0175-E1 Engine View Diagrams & Manuals
356777-0034-E1 Engine View Diagrams & Manuals
356777-0034-G1 Engine View Diagrams & Manuals
356777-0100-E1 Engine View Diagrams & Manuals
356777-0100-G1 Engine View Diagrams & Manuals
356777-0113-E1 Engine View Diagrams & Manuals
356777-0113-G1 Engine View Diagrams & Manuals
356777-0115-E1 Engine View Diagrams & Manuals
356777-0115-G1 Engine View Diagrams & Manuals
356777-0116-E1 Engine View Diagrams & Manuals
356777-0116-G1 Engine View Diagrams & Manuals
356777-0117-E1 Engine View Diagrams & Manuals
356777-0118-E1 Engine View Diagrams & Manuals
356777-0118-G1 Engine View Diagrams & Manuals
356777-0119-E1 Engine View Diagrams & Manuals
356777-0119-G1 Engine View Diagrams & Manuals
356777-0120-E1 Engine View Diagrams & Manuals
356777-0120-G1 Engine View Diagrams & Manuals
356777-0121-E1 Engine View Diagrams & Manuals
356777-0121-G1 Engine View Diagrams & Manuals
356777-0130-E1 Engine View Diagrams & Manuals
356777-0130-G1 Engine View Diagrams & Manuals
356777-0131-E1 Engine View Diagrams & Manuals
356777-0131-G1 Engine View Diagrams & Manuals
356777-0133-E1 Engine View Diagrams & Manuals
356777-0133-G1 Engine View Diagrams & Manuals
358777-0126-B1 Engine View Diagrams & Manuals
358777-0128-B1 Engine View Diagrams & Manuals
358777-0181-G1 Engine View Diagrams & Manuals
358777-0280-E1 Engine View Diagrams & Manuals
358777-0280-G1 Engine View Diagrams & Manuals
358777-0281-B1 Engine View Diagrams & Manuals
358777-0281-G1 Engine View Diagrams & Manuals
358777-1124-G1 Engine View Diagrams & Manuals
358777-3036-G1 Engine View Diagrams & Manuals
359447-0044-E1 Engine View Diagrams & Manuals
359447-0110-E1 Engine View Diagrams & Manuals
359447-0112-E1 Engine View Diagrams & Manuals
359447-0113-E1 Engine View Diagrams & Manuals
359447-0114-E1 Engine View Diagrams & Manuals
359447-0115-E1 Engine View Diagrams & Manuals
359447-0117-E1 Engine View Diagrams & Manuals
380447-0177-01 Engine View Diagrams & Manuals
380447-0217-E1 Engine View Diagrams & Manuals
380447-0218-E1 Engine View Diagrams & Manuals
358772-0045-G1 Engine View Diagrams & Manuals
358772-3045-G1 Engine View Diagrams & Manuals
358777-0036-E1 Engine View Diagrams & Manuals
358777-0036-G1 Engine View Diagrams & Manuals
358777-0100-E1 Engine View Diagrams & Manuals
358777-0100-G1 Engine View Diagrams & Manuals
358777-0110-E1 Engine View Diagrams & Manuals
358777-0112-B1 Engine View Diagrams & Manuals
358777-0112-E1 Engine View Diagrams & Manuals
358777-0112-G1 Engine View Diagrams & Manuals
358777-0113-B1 Engine View Diagrams & Manuals
358777-0113-E1 Engine View Diagrams & Manuals
358777-0113-G1 Engine View Diagrams & Manuals
358777-0114-E1 Engine View Diagrams & Manuals
358777-0114-G1 Engine View Diagrams & Manuals
358777-0116-G1 Engine View Diagrams & Manuals
358777-0117-E1 Engine View Diagrams & Manuals
358777-0117-G1 Engine View Diagrams & Manuals
358777-0118-B1 Engine View Diagrams & Manuals
358777-0118-G1 Engine View Diagrams & Manuals
358777-0120-G1 Engine View Diagrams & Manuals
358777-0121-G1 Engine View Diagrams & Manuals
358777-0122-B1 Engine View Diagrams & Manuals
358777-0122-G1 Engine View Diagrams & Manuals
358777-0124-G1 Engine View Diagrams & Manuals
380442-0102-E1 Engine View Diagrams & Manuals
380442-0130-E1 Engine View Diagrams & Manuals
380447-0024-E1 Engine View Diagrams & Manuals
380447-0042-E1 Engine View Diagrams & Manuals
380447-0048-E1 Engine View Diagrams & Manuals
380447-0065-E1 Engine View Diagrams & Manuals
380447-0075-E1 Engine View Diagrams & Manuals
380447-0076-E1 Engine View Diagrams & Manuals
380447-0077-E1 Engine View Diagrams & Manuals
380447-0078-E1 Engine View Diagrams & Manuals
380447-0079-E1 Engine View Diagrams & Manuals
380447-0079-E2 Engine View Diagrams & Manuals
380447-0100-E1 Engine View Diagrams & Manuals
380447-0101-E1 Engine View Diagrams & Manuals
380447-0112-E1 Engine View Diagrams & Manuals
380447-0112-E2 Engine View Diagrams & Manuals
380447-0115-E1 Engine View Diagrams & Manuals
380447-0116-E1 Engine View Diagrams & Manuals
380447-0118-E1 Engine View Diagrams & Manuals
380447-0119-E1 Engine View Diagrams & Manuals
380447-0125-E1 Engine View Diagrams & Manuals
380447-0126-E1 Engine View Diagrams & Manuals
380447-0127-E1 Engine View Diagrams & Manuals
380447-0128-E1 Engine View Diagrams & Manuals
380447-0129-E1 Engine View Diagrams & Manuals
380447-0131-E1 Engine View Diagrams & Manuals
380447-0132-E1 Engine View Diagrams & Manuals
380447-0133-E1 Engine View Diagrams & Manuals
380447-0134-E1 Engine View Diagrams & Manuals
380447-0135-E1 Engine View Diagrams & Manuals
380447-0136-E1 Engine View Diagrams & Manuals
380447-0137-E1 Engine View Diagrams & Manuals
380447-0139-E1 Engine View Diagrams & Manuals
380447-0141-E1 Engine View Diagrams & Manuals
380447-0142-E1 Engine View Diagrams & Manuals
380447-0143-E1 Engine View Diagrams & Manuals
380447-0144-E1 Engine View Diagrams & Manuals
380447-0146-E1 Engine View Diagrams & Manuals
380447-0150-E1 Engine View Diagrams & Manuals
380447-0151-E1 Engine View Diagrams & Manuals
380447-0152-E1 Engine View Diagrams & Manuals
380447-0153-E1 Engine View Diagrams & Manuals
380447-0154-E1 Engine View Diagrams & Manuals
380447-0155-E1 Engine View Diagrams & Manuals
380447-0158-01 Engine View Diagrams & Manuals
380447-0163-E1 Engine View Diagrams & Manuals
380447-0164-01 Engine View Diagrams & Manuals
380447-0165-E1 Engine View Diagrams & Manuals
380447-0166-E1 Engine View Diagrams & Manuals
380447-0171-E1 Engine View Diagrams & Manuals
380447-0171-E2 Engine View Diagrams & Manuals
380447-0173-E1 Engine View Diagrams & Manuals
380447-0175-E1 Engine View Diagrams & Manuals
380772-0102-E1 Engine View Diagrams & Manuals
380777-0024-E1 Engine View Diagrams & Manuals
380777-0025-E1 Engine View Diagrams & Manuals
380777-0036-E1 Engine View Diagrams & Manuals
380777-0100-E1 Engine View Diagrams & Manuals
380777-0131-E1 Engine View Diagrams & Manuals
380777-0131-E2 Engine View Diagrams & Manuals
380777-0135-E1 Engine View Diagrams & Manuals
380777-0138-E1 Engine View Diagrams & Manuals
380777-0139-E1 Engine View Diagrams & Manuals
380777-0140-E1 Engine View Diagrams & Manuals
380777-0142-E1 Engine View Diagrams & Manuals
380777-0143-E1 Engine View Diagrams & Manuals
381442-0102-E1 Engine View Diagrams & Manuals
381442-0194-E1 Engine View Diagrams & Manuals
381442-0256-E1 Engine View Diagrams & Manuals
381446-0155-E1 Engine View Diagrams & Manuals
381446-0252-E1 Engine View Diagrams & Manuals
381446-0259-E1 Engine View Diagrams & Manuals
381447-0023-E1 Engine View Diagrams & Manuals
381447-0024-E1 Engine View Diagrams & Manuals
381447-0048-E2 Engine View Diagrams & Manuals
381447-0064-E1 Engine View Diagrams & Manuals
381447-0074-E1 Engine View Diagrams & Manuals
381447-0075-E1 Engine View Diagrams & Manuals
381447-0075-E2 Engine View Diagrams & Manuals
381447-0077-E1 Engine View Diagrams & Manuals
381447-0079-E1 Engine View Diagrams & Manuals
381447-0096-E1 Engine View Diagrams & Manuals
381447-0111-E1 Engine View Diagrams & Manuals
381447-0114-E1 Engine View Diagrams & Manuals
381447-0116-E1 Engine View Diagrams & Manuals
381447-0117-E1 Engine View Diagrams & Manuals
381447-0118-E1 Engine View Diagrams & Manuals
381447-0119-E1 Engine View Diagrams & Manuals
381447-0130-E1 Engine View Diagrams & Manuals
381447-0134-E1 Engine View Diagrams & Manuals
381447-0135-E1 Engine View Diagrams & Manuals
381447-0136-E1 Engine View Diagrams & Manuals
381447-0137-E1 Engine View Diagrams & Manuals
381447-0140-E1 Engine View Diagrams & Manuals
381447-0143-E1 Engine View Diagrams & Manuals
381447-0144-E1 Engine View Diagrams & Manuals
381447-0144-E2 Engine View Diagrams & Manuals
381447-0145-E1 Engine View Diagrams & Manuals
381447-0146-E1 Engine View Diagrams & Manuals
381447-0148-E1 Engine View Diagrams & Manuals
381447-0149-E1 Engine View Diagrams & Manuals
381447-0150-E1 Engine View Diagrams & Manuals
381447-0151-E1 Engine View Diagrams & Manuals
381447-0152-E1 Engine View Diagrams & Manuals
381447-0154-E1 Engine View Diagrams & Manuals
381447-0154-E2 Engine View Diagrams & Manuals
381447-0156-E1 Engine View Diagrams & Manuals
381447-0158-E1 Engine View Diagrams & Manuals
381447-0171-E1 Engine View Diagrams & Manuals
381447-0178-E1 Engine View Diagrams & Manuals
381447-0181-E1 Engine View Diagrams & Manuals
381447-0181-E2 Engine View Diagrams & Manuals
381447-0193-E1 Engine View Diagrams & Manuals
381447-0196-E1 Engine View Diagrams & Manuals
381447-0221-E1 Engine View Diagrams & Manuals
381447-0228-E1 Engine View Diagrams & Manuals
381447-0233-E1 Engine View Diagrams & Manuals
381447-0235-E1 Engine View Diagrams & Manuals
381447-0245-E1 Engine View Diagrams & Manuals
381447-0245-E2 Engine View Diagrams & Manuals
381447-0246-E1 Engine View Diagrams & Manuals
381447-0247-E1 Engine View Diagrams & Manuals
381447-0248-E1 Engine View Diagrams & Manuals
381447-0249-E1 Engine View Diagrams & Manuals
381447-0250-E1 Engine View Diagrams & Manuals
381447-0251-E1 Engine View Diagrams & Manuals
381447-0253-E1 Engine View Diagrams & Manuals
381447-0254-E1 Engine View Diagrams & Manuals
381447-0255-E1 Engine View Diagrams & Manuals
381447-0257-E1 Engine View Diagrams & Manuals
381447-0258-E1 Engine View Diagrams & Manuals
381447-0258-E2 Engine View Diagrams & Manuals
381447-0261-E1 Engine View Diagrams & Manuals
381447-0266-E1 Engine View Diagrams & Manuals
381447-0268-E1 Engine View Diagrams & Manuals
381447-0268-E2 Engine View Diagrams & Manuals
381447-0270-E1 Engine View Diagrams & Manuals
381447-0271-E1 Engine View Diagrams & Manuals
381447-0273-E1 Engine View Diagrams & Manuals
381447-0274-E1 Engine View Diagrams & Manuals
381447-0275-E1 Engine View Diagrams & Manuals
381447-0277-E1 Engine View Diagrams & Manuals
381447-0279-E1 Engine View Diagrams & Manuals
381447-0280-E1 Engine View Diagrams & Manuals
381447-0306-E1 Engine View Diagrams & Manuals
122437-0251-B8 Engine View Diagrams & Manuals
122466-0232-01 Engine View Diagrams & Manuals
381772-0102-E1 Engine View Diagrams & Manuals
381777-0030-E1 Engine View Diagrams & Manuals
381777-0110-E1 Engine View Diagrams & Manuals
381777-0111-E1 Engine View Diagrams & Manuals
381777-0112-E1 Engine View Diagrams & Manuals
381777-0115-E1 Engine View Diagrams & Manuals
384445-0112-E1 Engine View Diagrams & Manuals
384445-0112-E2 Engine View Diagrams & Manuals
384447-0100-E1 Engine View Diagrams & Manuals
384447-0111-E1 Engine View Diagrams & Manuals
384447-0113-E1 Engine View Diagrams & Manuals
385447-0148-E1 Engine View Diagrams & Manuals
385447-0152-E1 Engine View Diagrams & Manuals
385447-0157-E1 Engine View Diagrams & Manuals
385447-0158-E1 Engine View Diagrams & Manuals
385777-0108-E1 Engine View Diagrams & Manuals
385777-0110-E1 Engine View Diagrams & Manuals
385777-0111-E1 Engine View Diagrams & Manuals
385777-0112-E1 Engine View Diagrams & Manuals
385777-0114-E1 Engine View Diagrams & Manuals
385777-0115-E1 Engine View Diagrams & Manuals
385777-0116-E1 Engine View Diagrams & Manuals
385777-0117-E1 Engine View Diagrams & Manuals
385777-0118-E1 Engine View Diagrams & Manuals
385777-0119-E1 Engine View Diagrams & Manuals
385777-0123-E1 Engine View Diagrams & Manuals
385777-0349-E1 Engine View Diagrams & Manuals
385777-1211-G1 Engine View Diagrams & Manuals
122467-0229-01 Engine View Diagrams & Manuals
122467-0248-B8 Engine View Diagrams & Manuals
385877-0001-B1 Engine View Diagrams & Manuals
385442-0113-E1 Engine View Diagrams & Manuals
385446-0125-E1 Engine View Diagrams & Manuals
385446-0155-E1 Engine View Diagrams & Manuals
385447-0075-E1 Engine View Diagrams & Manuals
385447-0075-E3 Engine View Diagrams & Manuals
385447-0111-E1 Engine View Diagrams & Manuals
385447-0115-E1 Engine View Diagrams & Manuals
385447-0116-E1 Engine View Diagrams & Manuals
385447-0118-E1 Engine View Diagrams & Manuals
385447-0118-E2 Engine View Diagrams & Manuals
385447-0121-E1 Engine View Diagrams & Manuals
385447-0123-E1 Engine View Diagrams & Manuals
385447-0127-E1 Engine View Diagrams & Manuals
385447-0130-E1 Engine View Diagrams & Manuals
385447-0131-E1 Engine View Diagrams & Manuals
385447-0132-E1 Engine View Diagrams & Manuals
385447-0134-E1 Engine View Diagrams & Manuals
385447-0135-E1 Engine View Diagrams & Manuals
385447-0137-E1 Engine View Diagrams & Manuals
385447-0138-E1 Engine View Diagrams & Manuals
385447-0139-E1 Engine View Diagrams & Manuals
385447-0142-E1 Engine View Diagrams & Manuals
385447-0143-E1 Engine View Diagrams & Manuals
385447-0145-E1 Engine View Diagrams & Manuals
385447-0146-E1 Engine View Diagrams & Manuals
386442-0115-E1 Engine View Diagrams & Manuals
386442-0115-G1 Engine View Diagrams & Manuals
386446-0193-G1 Engine View Diagrams & Manuals
386447-0004-G1 Engine View Diagrams & Manuals
386447-0006-B1 Engine View Diagrams & Manuals
386447-0047-G1 Engine View Diagrams & Manuals
386447-0048-G1 Engine View Diagrams & Manuals
386447-0065-E1 Engine View Diagrams & Manuals
386447-0065-E2 Engine View Diagrams & Manuals
386447-0065-G1 Engine View Diagrams & Manuals
386447-0065-G2 Engine View Diagrams & Manuals
386447-0077-E1 Engine View Diagrams & Manuals
386447-0077-G1 Engine View Diagrams & Manuals
386447-0079-E1 Engine View Diagrams & Manuals
386447-0079-G1 Engine View Diagrams & Manuals
386447-0100-E1 Engine View Diagrams & Manuals
386447-0112-B1 Engine View Diagrams & Manuals
386447-0112-E1 Engine View Diagrams & Manuals
386447-0112-G1 Engine View Diagrams & Manuals
386447-0116-E1 Engine View Diagrams & Manuals
386447-0116-G1 Engine View Diagrams & Manuals
386447-0119-B1 Engine View Diagrams & Manuals
386447-0119-E1 Engine View Diagrams & Manuals
386447-0119-G1 Engine View Diagrams & Manuals
386447-0121-E1 Engine View Diagrams & Manuals
386447-0121-G1 Engine View Diagrams & Manuals
386447-0122-E1 Engine View Diagrams & Manuals
386447-0122-E2 Engine View Diagrams & Manuals
386447-0122-G2 Engine View Diagrams & Manuals
386447-0125-B1 Engine View Diagrams & Manuals
386447-0125-E1 Engine View Diagrams & Manuals
386447-0125-G1 Engine View Diagrams & Manuals
386447-0127-E1 Engine View Diagrams & Manuals
386447-0127-G1 Engine View Diagrams & Manuals
386447-0131-E1 Engine View Diagrams & Manuals
386447-0131-G1 Engine View Diagrams & Manuals
386447-0132-01 Engine View Diagrams & Manuals
386447-0133-B1 Engine View Diagrams & Manuals
386447-0133-E1 Engine View Diagrams & Manuals
386447-0133-G1 Engine View Diagrams & Manuals
386447-0134-01 Engine View Diagrams & Manuals
386447-0135-B1 Engine View Diagrams & Manuals
386447-0135-E1 Engine View Diagrams & Manuals
386447-0135-G1 Engine View Diagrams & Manuals
386447-0136-E1 Engine View Diagrams & Manuals
386447-0136-G1 Engine View Diagrams & Manuals
386447-0138-E1 Engine View Diagrams & Manuals
386447-0138-G1 Engine View Diagrams & Manuals
386447-0139-E1 Engine View Diagrams & Manuals
386447-0139-G1 Engine View Diagrams & Manuals
386447-0140-E1 Engine View Diagrams & Manuals
386447-0140-G1 Engine View Diagrams & Manuals
386447-0142-E1 Engine View Diagrams & Manuals
386447-0142-G1 Engine View Diagrams & Manuals
386447-0148-G1 Engine View Diagrams & Manuals
386447-0149-E1 Engine View Diagrams & Manuals
386447-0149-G1 Engine View Diagrams & Manuals
386447-0150-B1 Engine View Diagrams & Manuals
386447-0150-E1 Engine View Diagrams & Manuals
386447-0150-G1 Engine View Diagrams & Manuals
386447-0150-H7 Engine View Diagrams & Manuals
386447-0151-E1 Engine View Diagrams & Manuals
386447-0151-G1 Engine View Diagrams & Manuals
386447-0152-B1 Engine View Diagrams & Manuals
386447-0152-E1 Engine View Diagrams & Manuals
386447-0152-G1 Engine View Diagrams & Manuals
386447-0153-G1 Engine View Diagrams & Manuals
386447-0154-B1 Engine View Diagrams & Manuals
386447-0154-G1 Engine View Diagrams & Manuals
386447-0155-G1 Engine View Diagrams & Manuals
386447-0157-B1 Engine View Diagrams & Manuals
386447-0157-G1 Engine View Diagrams & Manuals
386447-0159-G1 Engine View Diagrams & Manuals
386447-0160-G1 Engine View Diagrams & Manuals
386447-0162-G1 Engine View Diagrams & Manuals
386447-0165-B1 Engine View Diagrams & Manuals
386447-0165-H7 Engine View Diagrams & Manuals
386447-0166-B1 Engine View Diagrams & Manuals
386447-0171-E1 Engine View Diagrams & Manuals
386447-0171-G1 Engine View Diagrams & Manuals
386447-0172-B1 Engine View Diagrams & Manuals
386447-0172-E1 Engine View Diagrams & Manuals
386447-0172-G1 Engine View Diagrams & Manuals
386447-0176-E1 Engine View Diagrams & Manuals
386447-0176-G1 Engine View Diagrams & Manuals
386447-0177-E1 Engine View Diagrams & Manuals
386447-0177-G1 Engine View Diagrams & Manuals
386447-0179-G1 Engine View Diagrams & Manuals
386447-0180-E1 Engine View Diagrams & Manuals
386447-0182-B1 Engine View Diagrams & Manuals
386447-0182-E1 Engine View Diagrams & Manuals
386447-0182-G1 Engine View Diagrams & Manuals
386447-0183-E1 Engine View Diagrams & Manuals
386447-0183-G1 Engine View Diagrams & Manuals
386447-0185-E1 Engine View Diagrams & Manuals
386447-0185-G1 Engine View Diagrams & Manuals
386447-0187-G1 Engine View Diagrams & Manuals
386447-0190-G1 Engine View Diagrams & Manuals
386447-0192-G1 Engine View Diagrams & Manuals
386447-0196-G1 Engine View Diagrams & Manuals
386447-0198-B1 Engine View Diagrams & Manuals
386447-0198-G1 Engine View Diagrams & Manuals
386447-0199-B1 Engine View Diagrams & Manuals
386447-0199-G1 Engine View Diagrams & Manuals
386447-0201-G1 Engine View Diagrams & Manuals
386447-0203-B1 Engine View Diagrams & Manuals
386447-0203-G1 Engine View Diagrams & Manuals
386447-0204-G1 Engine View Diagrams & Manuals
386447-0206-G1 Engine View Diagrams & Manuals
386447-0209-G1 Engine View Diagrams & Manuals
386447-0211-G1 Engine View Diagrams & Manuals
386447-0212-G1 Engine View Diagrams & Manuals
386447-0213-G1 Engine View Diagrams & Manuals
386447-0214-B1 Engine View Diagrams & Manuals
386447-0215-G1 Engine View Diagrams & Manuals
386447-0215-H7 Engine View Diagrams & Manuals
386447-0218-B1 Engine View Diagrams & Manuals
386447-0218-H7 Engine View Diagrams & Manuals
386447-0219-G1 Engine View Diagrams & Manuals
386447-0220-G1 Engine View Diagrams & Manuals
386447-0222-G1 Engine View Diagrams & Manuals
386447-0223-G1 Engine View Diagrams & Manuals
386447-0224-B1 Engine View Diagrams & Manuals
386447-0227-B1 Engine View Diagrams & Manuals
386447-0228-B1 Engine View Diagrams & Manuals
386447-0398-G1 Engine View Diagrams & Manuals
386447-1138-G1 Engine View Diagrams & Manuals
386447-1160-G1 Engine View Diagrams & Manuals
386447-1177-G1 Engine View Diagrams & Manuals
386447-1179-G1 Engine View Diagrams & Manuals
386447-1204-G1 Engine View Diagrams & Manuals
386447-2121-G1 Engine View Diagrams & Manuals
386447-2131-G1 Engine View Diagrams & Manuals
386447-2148-G1 Engine View Diagrams & Manuals
386447-2185-G1 Engine View Diagrams & Manuals
386447-2190-G1 Engine View Diagrams & Manuals
386447-2196-G1 Engine View Diagrams & Manuals
386447-3047-G1 Engine View Diagrams & Manuals
386447-3048-G1 Engine View Diagrams & Manuals
386447-3065-G1 Engine View Diagrams & Manuals
386447-3077-G1 Engine View Diagrams & Manuals
386447-3078-G1 Engine View Diagrams & Manuals
386447-3079-G1 Engine View Diagrams & Manuals
386777-0024-E1 Engine View Diagrams & Manuals
386777-0024-G1 Engine View Diagrams & Manuals
386777-0025-E1 Engine View Diagrams & Manuals
386777-0025-G1 Engine View Diagrams & Manuals
386777-0026-E1 Engine View Diagrams & Manuals
386777-0026-G1 Engine View Diagrams & Manuals
386777-0036-E1 Engine View Diagrams & Manuals
386777-0036-G1 Engine View Diagrams & Manuals
386777-0100-G1 Engine View Diagrams & Manuals
386777-0110-E1 Engine View Diagrams & Manuals
386777-0110-G1 Engine View Diagrams & Manuals
386777-0111-E1 Engine View Diagrams & Manuals
386777-0111-G1 Engine View Diagrams & Manuals
386777-0112-B1 Engine View Diagrams & Manuals
386777-0112-E1 Engine View Diagrams & Manuals
386777-0112-G1 Engine View Diagrams & Manuals
386777-0113-E1 Engine View Diagrams & Manuals
386777-0113-G1 Engine View Diagrams & Manuals
386777-0114-E1 Engine View Diagrams & Manuals
386777-0114-G1 Engine View Diagrams & Manuals
386777-0116-E1 Engine View Diagrams & Manuals
386777-0116-G1 Engine View Diagrams & Manuals
386777-0117-E1 Engine View Diagrams & Manuals
386777-0117-G1 Engine View Diagrams & Manuals
386777-0118-E1 Engine View Diagrams & Manuals
386777-0118-G1 Engine View Diagrams & Manuals
386777-0119-E1 Engine View Diagrams & Manuals
386777-0119-G1 Engine View Diagrams & Manuals
386777-0120-E1 Engine View Diagrams & Manuals
386777-0120-G1 Engine View Diagrams & Manuals
386777-0122-E1 Engine View Diagrams & Manuals
386777-0123-E1 Engine View Diagrams & Manuals
386777-0123-G1 Engine View Diagrams & Manuals
386777-0126-G1 Engine View Diagrams & Manuals
386777-0127-G1 Engine View Diagrams & Manuals
386777-0128-G1 Engine View Diagrams & Manuals
386777-0131-G1 Engine View Diagrams & Manuals
386777-0134-G1 Engine View Diagrams & Manuals
386777-0135-B1 Engine View Diagrams & Manuals
386777-1021-E1 Engine View Diagrams & Manuals
386777-1021-G1 Engine View Diagrams & Manuals
386777-1119-G1 Engine View Diagrams & Manuals
386777-1127-G1 Engine View Diagrams & Manuals
386777-1131-G1 Engine View Diagrams & Manuals
386777-1292-G1 Engine View Diagrams & Manuals
386777-1293-G1 Engine View Diagrams & Manuals
386777-3024-G1 Engine View Diagrams & Manuals
386777-3025-G1 Engine View Diagrams & Manuals
386777-3026-G1 Engine View Diagrams & Manuals
386777-3036-G1 Engine View Diagrams & Manuals
389445-0114-01 Engine View Diagrams & Manuals
389445-0114-E1 Engine View Diagrams & Manuals
389445-0114-E2 Engine View Diagrams & Manuals
389445-0114-G2 Engine View Diagrams & Manuals
389445-0115-E1 Engine View Diagrams & Manuals
389447-0100-E1 Engine View Diagrams & Manuals
389447-0110-E1 Engine View Diagrams & Manuals
389447-0111-E1 Engine View Diagrams & Manuals
389447-0113-E1 Engine View Diagrams & Manuals
389447-0116-E1 Engine View Diagrams & Manuals
389447-0117-E1 Engine View Diagrams & Manuals
389447-0118-E1 Engine View Diagrams & Manuals
389447-0119-01 Engine View Diagrams & Manuals
123332-0035-B1 Engine View Diagrams & Manuals
123332-0035-E1 Engine View Diagrams & Manuals
123332-0036-B1 Engine View Diagrams & Manuals
123332-0036-E1 Engine View Diagrams & Manuals
123332-0118-B1 Engine View Diagrams & Manuals
123332-0118-E1 Engine View Diagrams & Manuals
123332-0122-B1 Engine View Diagrams & Manuals
123332-0122-B8 Engine View Diagrams & Manuals
123332-0122-E1 Engine View Diagrams & Manuals
123332-0122-E8 Engine View Diagrams & Manuals
123332-0123-B1 Engine View Diagrams & Manuals
123332-0135-B1 Engine View Diagrams & Manuals
123332-0135-E1 Engine View Diagrams & Manuals
123332-0136-B1 Engine View Diagrams & Manuals
123332-0136-E1 Engine View Diagrams & Manuals
123332-0140-B1 Engine View Diagrams & Manuals
123332-0140-B8 Engine View Diagrams & Manuals
123332-0140-E1 Engine View Diagrams & Manuals
123332-0140-E8 Engine View Diagrams & Manuals
123332-0141-B1 Engine View Diagrams & Manuals
123332-0141-B8 Engine View Diagrams & Manuals
123332-0141-E1 Engine View Diagrams & Manuals
123332-0141-E8 Engine View Diagrams & Manuals
123332-0144-B1 Engine View Diagrams & Manuals
123332-0144-E1 Engine View Diagrams & Manuals
123332-0145-B1 Engine View Diagrams & Manuals
123332-0145-E1 Engine View Diagrams & Manuals
123332-0147-B1 Engine View Diagrams & Manuals
123332-0153-E8 Engine View Diagrams & Manuals
123332-0179-B1 Engine View Diagrams & Manuals
123332-0179-E1 Engine View Diagrams & Manuals
123332-0235-B1 Engine View Diagrams & Manuals
123332-0235-E1 Engine View Diagrams & Manuals
123332-0236-B1 Engine View Diagrams & Manuals
123332-0236-E1 Engine View Diagrams & Manuals
123332-0267-B1 Engine View Diagrams & Manuals
123332-0267-B2 Engine View Diagrams & Manuals
123332-0267-E1 Engine View Diagrams & Manuals
123332-0267-E2 Engine View Diagrams & Manuals
123332-0268-B1 Engine View Diagrams & Manuals
123332-0268-E1 Engine View Diagrams & Manuals
123332-0301-B1 Engine View Diagrams & Manuals
123332-0301-E1 Engine View Diagrams & Manuals
123332-0302-B1 Engine View Diagrams & Manuals
123332-0302-E1 Engine View Diagrams & Manuals
123332-0305-B8 Engine View Diagrams & Manuals
123332-0306-B8 Engine View Diagrams & Manuals
123332-0307-B8 Engine View Diagrams & Manuals
123337-0050-B1 Engine View Diagrams & Manuals
123337-0050-E1 Engine View Diagrams & Manuals
123337-0119-B1 Engine View Diagrams & Manuals
123337-0119-E1 Engine View Diagrams & Manuals
123337-0121-B1 Engine View Diagrams & Manuals
123337-0121-B8 Engine View Diagrams & Manuals
123337-0121-E1 Engine View Diagrams & Manuals
123337-0121-E8 Engine View Diagrams & Manuals
123337-0138-E1 Engine View Diagrams & Manuals
123337-0151-B1 Engine View Diagrams & Manuals
123337-0151-E1 Engine View Diagrams & Manuals
123337-0170-B1 Engine View Diagrams & Manuals
123337-0170-B8 Engine View Diagrams & Manuals
123337-0170-E1 Engine View Diagrams & Manuals
123337-0170-E8 Engine View Diagrams & Manuals
123337-0172-01 Engine View Diagrams & Manuals
123337-0176-B1 Engine View Diagrams & Manuals
123337-0176-E1 Engine View Diagrams & Manuals
123337-0178-B1 Engine View Diagrams & Manuals
123337-0178-E1 Engine View Diagrams & Manuals
123337-0181-B1 Engine View Diagrams & Manuals
123337-0184-B8 Engine View Diagrams & Manuals
123337-0185-B8 Engine View Diagrams & Manuals
123337-0250-B1 Engine View Diagrams & Manuals
123337-0250-E1 Engine View Diagrams & Manuals
123337-0300-E1 Engine View Diagrams & Manuals
123352-0049-B1 Engine View Diagrams & Manuals
123352-0049-B2 Engine View Diagrams & Manuals
123352-0049-B3 Engine View Diagrams & Manuals
123352-0049-E1 Engine View Diagrams & Manuals
123352-0049-E2 Engine View Diagrams & Manuals
123352-0049-E3 Engine View Diagrams & Manuals
123352-0120-B1 Engine View Diagrams & Manuals
123352-0120-E1 Engine View Diagrams & Manuals
123352-0249-B1 Engine View Diagrams & Manuals
123352-0249-E1 Engine View Diagrams & Manuals
123352-0303-B1 Engine View Diagrams & Manuals
123352-0303-E1 Engine View Diagrams & Manuals
196702-0102-01 Engine View Diagrams & Manuals
196702-0105-01 Engine View Diagrams & Manuals
196702-0113-01 Engine View Diagrams & Manuals
196702-0117-01 Engine View Diagrams & Manuals
196702-0125-01 Engine View Diagrams & Manuals
196702-0125-02 Engine View Diagrams & Manuals
196702-0126-01 Engine View Diagrams & Manuals
196702-0127-01 Engine View Diagrams & Manuals
196702-0130-01 Engine View Diagrams & Manuals
196702-0131-01 Engine View Diagrams & Manuals
196702-0136-01 Engine View Diagrams & Manuals
196702-0137-01 Engine View Diagrams & Manuals
196702-0139-01 Engine View Diagrams & Manuals
196702-0142-01 Engine View Diagrams & Manuals
196702-0143-01 Engine View Diagrams & Manuals
196702-0145-01 Engine View Diagrams & Manuals
196702-0146-01 Engine View Diagrams & Manuals
196702-0149-01 Engine View Diagrams & Manuals
196702-0154-01 Engine View Diagrams & Manuals
196702-0159-01 Engine View Diagrams & Manuals
196702-0162-01 Engine View Diagrams & Manuals
196702-0164-01 Engine View Diagrams & Manuals
196702-0171-01 Engine View Diagrams & Manuals
196702-0173-01 Engine View Diagrams & Manuals
196702-0189-01 Engine View Diagrams & Manuals
196702-0191-01 Engine View Diagrams & Manuals
196702-0192-01 Engine View Diagrams & Manuals
196702-0194-01 Engine View Diagrams & Manuals
196702-0201-01 Engine View Diagrams & Manuals
196702-0202-01 Engine View Diagrams & Manuals
196702-0204-01 Engine View Diagrams & Manuals
196702-0439-E1 Engine View Diagrams & Manuals
196702-0471-E1 Engine View Diagrams & Manuals
196702-0496-E1 Engine View Diagrams & Manuals
196702-4004-01 Engine View Diagrams & Manuals
196702-4004-02 Engine View Diagrams & Manuals
196702-4011-01 Engine View Diagrams & Manuals
196702-4015-01 Engine View Diagrams & Manuals
196702-4015-04 Engine View Diagrams & Manuals
196702-4016-01 Engine View Diagrams & Manuals
196702-4016-02 Engine View Diagrams & Manuals
196702-4017-01 Engine View Diagrams & Manuals
196702-4018-02 Engine View Diagrams & Manuals
196702-4019-01 Engine View Diagrams & Manuals
196702-4031-01 Engine View Diagrams & Manuals
196702-4515-A1 Engine View Diagrams & Manuals
196702-4515-E1 Engine View Diagrams & Manuals
196702-4516-A2 Engine View Diagrams & Manuals
196702-4516-E2 Engine View Diagrams & Manuals
196702-4517-A1 Engine View Diagrams & Manuals
196702-4519-A1 Engine View Diagrams & Manuals
196702-4519-E1 Engine View Diagrams & Manuals
196706-0140-01 Engine View Diagrams & Manuals
196706-0147-01 Engine View Diagrams & Manuals
196706-0156-01 Engine View Diagrams & Manuals
196707-0101-01 Engine View Diagrams & Manuals
196707-0114-01 Engine View Diagrams & Manuals
196707-0116-01 Engine View Diagrams & Manuals
196707-0118-01 Engine View Diagrams & Manuals
196707-0119-01 Engine View Diagrams & Manuals
196707-0121-01 Engine View Diagrams & Manuals
196707-0123-01 Engine View Diagrams & Manuals
196707-0129-01 Engine View Diagrams & Manuals
196707-0132-01 Engine View Diagrams & Manuals
196707-0133-01 Engine View Diagrams & Manuals
196707-0134-01 Engine View Diagrams & Manuals
196707-0135-01 Engine View Diagrams & Manuals
196707-0138-01 Engine View Diagrams & Manuals
196707-0141-01 Engine View Diagrams & Manuals
196707-0144-01 Engine View Diagrams & Manuals
196707-0148-01 Engine View Diagrams & Manuals
196707-0150-01 Engine View Diagrams & Manuals
196707-0151-01 Engine View Diagrams & Manuals
196707-0153-01 Engine View Diagrams & Manuals
196707-0155-01 Engine View Diagrams & Manuals
196707-0157-01 Engine View Diagrams & Manuals
196707-0157-02 Engine View Diagrams & Manuals
196707-0163-01 Engine View Diagrams & Manuals
196707-0165-01 Engine View Diagrams & Manuals
196707-0166-01 Engine View Diagrams & Manuals
196707-0168-01 Engine View Diagrams & Manuals
196707-0170-01 Engine View Diagrams & Manuals
196707-0174-01 Engine View Diagrams & Manuals
196707-0188-01 Engine View Diagrams & Manuals
196707-0190-01 Engine View Diagrams & Manuals
196707-0195-01 Engine View Diagrams & Manuals
196707-0197-01 Engine View Diagrams & Manuals
196707-0198-01 Engine View Diagrams & Manuals
196707-0205-01 Engine View Diagrams & Manuals
196707-0450-E1 Engine View Diagrams & Manuals
219977-3130-G5 Engine View Diagrams & Manuals
138437-0140-B1 Engine View Diagrams & Manuals
138437-0140-E1 Engine View Diagrams & Manuals
138437-0284-B1 Engine View Diagrams & Manuals
138437-0284-E1 Engine View Diagrams & Manuals
138467-0169-E1 Engine View Diagrams & Manuals
161430-0199-01 Engine View Diagrams & Manuals
161430-0199-02 Engine View Diagrams & Manuals
161432-0010-01 Engine View Diagrams & Manuals
161432-0010-02 Engine View Diagrams & Manuals
161432-0011-01 Engine View Diagrams & Manuals
161432-0011-02 Engine View Diagrams & Manuals
161432-0011-03 Engine View Diagrams & Manuals
161432-0011-04 Engine View Diagrams & Manuals
161432-0011-05 Engine View Diagrams & Manuals
161432-0014-01 Engine View Diagrams & Manuals
161432-0014-02 Engine View Diagrams & Manuals
161432-0016-01 Engine View Diagrams & Manuals
161432-0016-02 Engine View Diagrams & Manuals
161432-0016-03 Engine View Diagrams & Manuals
161432-0016-04 Engine View Diagrams & Manuals
161432-0020-01 Engine View Diagrams & Manuals
161432-0020-02 Engine View Diagrams & Manuals
161432-0021-01 Engine View Diagrams & Manuals
161432-0021-02 Engine View Diagrams & Manuals
161432-0023-01 Engine View Diagrams & Manuals
161432-0023-03 Engine View Diagrams & Manuals
161432-0023-04 Engine View Diagrams & Manuals
161432-0024-01 Engine View Diagrams & Manuals
161432-0024-02 Engine View Diagrams & Manuals
161432-0026-01 Engine View Diagrams & Manuals
161432-0026-02 Engine View Diagrams & Manuals
161432-0029-01 Engine View Diagrams & Manuals
161432-0029-02 Engine View Diagrams & Manuals
161432-0029-03 Engine View Diagrams & Manuals
161432-0030-99 Engine View Diagrams & Manuals
161432-0031-01 Engine View Diagrams & Manuals
161432-0032-01 Engine View Diagrams & Manuals
161432-0034-01 Engine View Diagrams & Manuals
161432-0035-01 Engine View Diagrams & Manuals
161432-0035-02 Engine View Diagrams & Manuals
161432-0035-04 Engine View Diagrams & Manuals
161432-0036-01 Engine View Diagrams & Manuals
161432-0036-02 Engine View Diagrams & Manuals
161432-0047-01 Engine View Diagrams & Manuals
161432-0047-03 Engine View Diagrams & Manuals
161432-0051-99 Engine View Diagrams & Manuals
161432-0070-01 Engine View Diagrams & Manuals
161432-0070-03 Engine View Diagrams & Manuals
161432-0070-05 Engine View Diagrams & Manuals
161432-0070-06 Engine View Diagrams & Manuals
161432-0070-07 Engine View Diagrams & Manuals
161432-0071-01 Engine View Diagrams & Manuals
161432-0072-99 Engine View Diagrams & Manuals
161432-0077-99 Engine View Diagrams & Manuals
161432-0079-01 Engine View Diagrams & Manuals
161432-0080-01 Engine View Diagrams & Manuals
161432-0101-01 Engine View Diagrams & Manuals
161432-0111-01 Engine View Diagrams & Manuals
161432-0113-01 Engine View Diagrams & Manuals
161432-0114-01 Engine View Diagrams & Manuals
161432-0115-01 Engine View Diagrams & Manuals
161432-0118-01 Engine View Diagrams & Manuals
161432-0119-99 Engine View Diagrams & Manuals
161432-0121-01 Engine View Diagrams & Manuals
161432-0122-99 Engine View Diagrams & Manuals
161432-0124-01 Engine View Diagrams & Manuals
161432-0125-99 Engine View Diagrams & Manuals
161432-0126-99 Engine View Diagrams & Manuals
161432-0127-01 Engine View Diagrams & Manuals
161432-0128-99 Engine View Diagrams & Manuals
161432-0133-01 Engine View Diagrams & Manuals
161432-0134-01 Engine View Diagrams & Manuals
161432-0135-01 Engine View Diagrams & Manuals
161436-0027-01 Engine View Diagrams & Manuals
161436-0112-01 Engine View Diagrams & Manuals
161436-0116-99 Engine View Diagrams & Manuals
161436-0117-01 Engine View Diagrams & Manuals
161436-0120-01 Engine View Diagrams & Manuals
161436-0131-01 Engine View Diagrams & Manuals
161437-0012-01 Engine View Diagrams & Manuals
161437-0012-02 Engine View Diagrams & Manuals
161437-0018-01 Engine View Diagrams & Manuals
161437-0018-02 Engine View Diagrams & Manuals
161437-0019-01 Engine View Diagrams & Manuals
161437-0019-02 Engine View Diagrams & Manuals
161437-0019-03 Engine View Diagrams & Manuals
161437-0019-05 Engine View Diagrams & Manuals
161437-0019-06 Engine View Diagrams & Manuals
161437-0025-01 Engine View Diagrams & Manuals
161437-0025-02 Engine View Diagrams & Manuals
161437-0039-99 Engine View Diagrams & Manuals
161437-0040-01 Engine View Diagrams & Manuals
161437-0041-01 Engine View Diagrams & Manuals
161437-0041-02 Engine View Diagrams & Manuals
161437-0041-03 Engine View Diagrams & Manuals
161437-0042-99 Engine View Diagrams & Manuals
161437-0043-99 Engine View Diagrams & Manuals
161437-0073-01 Engine View Diagrams & Manuals
161437-0081-01 Engine View Diagrams & Manuals
161437-0082-01 Engine View Diagrams & Manuals
161437-0083-01 Engine View Diagrams & Manuals
161437-0084-01 Engine View Diagrams & Manuals
161437-0085-01 Engine View Diagrams & Manuals
161437-0090-01 Engine View Diagrams & Manuals
161437-0110-01 Engine View Diagrams & Manuals
161437-0123-01 Engine View Diagrams & Manuals
161437-0123-02 Engine View Diagrams & Manuals
161437-0129-01 Engine View Diagrams & Manuals
161437-0130-01 Engine View Diagrams & Manuals
161437-0132-01 Engine View Diagrams & Manuals
161437-0136-99 Engine View Diagrams & Manuals
161437-0137-99 Engine View Diagrams & Manuals
161452-0015-01 Engine View Diagrams & Manuals
161452-0015-02 Engine View Diagrams & Manuals
161452-0015-03 Engine View Diagrams & Manuals
161452-0015-04 Engine View Diagrams & Manuals
161452-0022-99 Engine View Diagrams & Manuals
161452-0049-01 Engine View Diagrams & Manuals
161452-0049-02 Engine View Diagrams & Manuals
161452-0049-03 Engine View Diagrams & Manuals
161452-0049-04 Engine View Diagrams & Manuals
161452-0049-17 Engine View Diagrams & Manuals
161452-0051-01 Engine View Diagrams & Manuals
161452-0051-03 Engine View Diagrams & Manuals
161457-0050-01 Engine View Diagrams & Manuals
170400-0640-99 Engine View Diagrams & Manuals
170401-0610-99 Engine View Diagrams & Manuals
170401-0665-99 Engine View Diagrams & Manuals
170401-0681-99 Engine View Diagrams & Manuals
170401-0694-99 Engine View Diagrams & Manuals
170401-0704-99 Engine View Diagrams & Manuals
170401-1019-99 Engine View Diagrams & Manuals
170401-1110-99 Engine View Diagrams & Manuals
170401-1161-99 Engine View Diagrams & Manuals
170401-1180-99 Engine View Diagrams & Manuals
170401-1205-99 Engine View Diagrams & Manuals
170401-1209-99 Engine View Diagrams & Manuals
170401-1237-99 Engine View Diagrams & Manuals
170401-1320-99 Engine View Diagrams & Manuals
170401-1355-99 Engine View Diagrams & Manuals
170401-1519-99 Engine View Diagrams & Manuals
170401-1610-99 Engine View Diagrams & Manuals
170401-1799-99 Engine View Diagrams & Manuals
170401-2110-01 Engine View Diagrams & Manuals
170401-2301-01 Engine View Diagrams & Manuals
170402-0515-99 Engine View Diagrams & Manuals
170402-0516-99 Engine View Diagrams & Manuals
170402-0611-99 Engine View Diagrams & Manuals
170402-0614-99 Engine View Diagrams & Manuals
170402-0630-99 Engine View Diagrams & Manuals
170402-0635-99 Engine View Diagrams & Manuals
170402-0638-99 Engine View Diagrams & Manuals
170402-0642-99 Engine View Diagrams & Manuals
170402-0643-99 Engine View Diagrams & Manuals
170402-0644-99 Engine View Diagrams & Manuals
170402-0645-99 Engine View Diagrams & Manuals
170402-0646-99 Engine View Diagrams & Manuals
170402-0647-99 Engine View Diagrams & Manuals
170402-0648-99 Engine View Diagrams & Manuals
170402-0653-99 Engine View Diagrams & Manuals
170402-0655-99 Engine View Diagrams & Manuals
170402-0657-99 Engine View Diagrams & Manuals
170402-0663-99 Engine View Diagrams & Manuals
170402-0664-99 Engine View Diagrams & Manuals
170402-0666-99 Engine View Diagrams & Manuals
170402-0667-99 Engine View Diagrams & Manuals
170402-0668-99 Engine View Diagrams & Manuals
170402-0671-99 Engine View Diagrams & Manuals
170402-0679-99 Engine View Diagrams & Manuals
170402-0682-99 Engine View Diagrams & Manuals
170402-0683-99 Engine View Diagrams & Manuals
170402-0692-99 Engine View Diagrams & Manuals
170402-0695-99 Engine View Diagrams & Manuals
170402-0697-99 Engine View Diagrams & Manuals
170402-0698-99 Engine View Diagrams & Manuals
170402-0709-99 Engine View Diagrams & Manuals
170402-0711-99 Engine View Diagrams & Manuals
170402-0714-99 Engine View Diagrams & Manuals
170402-0720-99 Engine View Diagrams & Manuals
170402-0722-99 Engine View Diagrams & Manuals
170402-0723-99 Engine View Diagrams & Manuals
170402-1015-99 Engine View Diagrams & Manuals
170402-1016-99 Engine View Diagrams & Manuals
170402-1020-99 Engine View Diagrams & Manuals
170402-1111-99 Engine View Diagrams & Manuals
170402-1114-99 Engine View Diagrams & Manuals
170402-1122-99 Engine View Diagrams & Manuals
170402-1130-99 Engine View Diagrams & Manuals
170402-1131-99 Engine View Diagrams & Manuals
170402-1132-99 Engine View Diagrams & Manuals
170402-1135-99 Engine View Diagrams & Manuals
170402-1143-99 Engine View Diagrams & Manuals
170402-1144-99 Engine View Diagrams & Manuals
170402-1150-99 Engine View Diagrams & Manuals
170402-1151-99 Engine View Diagrams & Manuals
170402-1156-99 Engine View Diagrams & Manuals
170402-1158-99 Engine View Diagrams & Manuals
170402-1162-99 Engine View Diagrams & Manuals
170402-1168-99 Engine View Diagrams & Manuals
170402-1170-99 Engine View Diagrams & Manuals
170402-1171-99 Engine View Diagrams & Manuals
170402-1175-99 Engine View Diagrams & Manuals
170402-1176-99 Engine View Diagrams & Manuals
170402-1184-99 Engine View Diagrams & Manuals
170402-1185-99 Engine View Diagrams & Manuals
170402-1187-99 Engine View Diagrams & Manuals
170402-1192-99 Engine View Diagrams & Manuals
170402-1212-99 Engine View Diagrams & Manuals
170402-1213-99 Engine View Diagrams & Manuals
170402-1214-99 Engine View Diagrams & Manuals
170402-1215-99 Engine View Diagrams & Manuals
170402-1219-99 Engine View Diagrams & Manuals
170402-1222-99 Engine View Diagrams & Manuals
170402-1224-99 Engine View Diagrams & Manuals
170402-1227-99 Engine View Diagrams & Manuals
170402-1229-99 Engine View Diagrams & Manuals
170402-1230-99 Engine View Diagrams & Manuals
170402-1239-99 Engine View Diagrams & Manuals
170402-1244-99 Engine View Diagrams & Manuals
170402-1249-99 Engine View Diagrams & Manuals
170402-1250-99 Engine View Diagrams & Manuals
170402-1253-99 Engine View Diagrams & Manuals
170402-1260-99 Engine View Diagrams & Manuals
170402-1261-99 Engine View Diagrams & Manuals
170402-1267-99 Engine View Diagrams & Manuals
170402-1268-99 Engine View Diagrams & Manuals
170402-1271-99 Engine View Diagrams & Manuals
170402-1282-99 Engine View Diagrams & Manuals
170402-1286-99 Engine View Diagrams & Manuals
170402-1292-99 Engine View Diagrams & Manuals
170402-1294-99 Engine View Diagrams & Manuals
170402-1296-99 Engine View Diagrams & Manuals
170402-1301-99 Engine View Diagrams & Manuals
170402-1302-99 Engine View Diagrams & Manuals
170402-1304-99 Engine View Diagrams & Manuals
170402-1308-99 Engine View Diagrams & Manuals
170402-1321-99 Engine View Diagrams & Manuals
170402-1322-99 Engine View Diagrams & Manuals
170402-1323-99 Engine View Diagrams & Manuals
170402-1327-99 Engine View Diagrams & Manuals
170402-1329-99 Engine View Diagrams & Manuals
170402-1332-99 Engine View Diagrams & Manuals
170402-1336-99 Engine View Diagrams & Manuals
170402-1339-99 Engine View Diagrams & Manuals
170402-1344-99 Engine View Diagrams & Manuals
170402-1348-99 Engine View Diagrams & Manuals
170402-1353-99 Engine View Diagrams & Manuals
170402-1362-99 Engine View Diagrams & Manuals
170402-1365-99 Engine View Diagrams & Manuals
170402-1369-99 Engine View Diagrams & Manuals
170402-1386-99 Engine View Diagrams & Manuals
170402-1397-99 Engine View Diagrams & Manuals
170402-1401-99 Engine View Diagrams & Manuals
170402-1406-99 Engine View Diagrams & Manuals
170402-1515-99 Engine View Diagrams & Manuals
170402-1520-99 Engine View Diagrams & Manuals
170402-1611-99 Engine View Diagrams & Manuals
170402-1614-99 Engine View Diagrams & Manuals
170402-1642-99 Engine View Diagrams & Manuals
170402-1643-99 Engine View Diagrams & Manuals
170402-1644-99 Engine View Diagrams & Manuals
170402-1646-99 Engine View Diagrams & Manuals
170402-1649-99 Engine View Diagrams & Manuals
170402-1650-99 Engine View Diagrams & Manuals
170402-1655-99 Engine View Diagrams & Manuals
170402-1658-99 Engine View Diagrams & Manuals
170402-1659-99 Engine View Diagrams & Manuals
170402-1661-99 Engine View Diagrams & Manuals
170402-1666-99 Engine View Diagrams & Manuals
170402-1676-99 Engine View Diagrams & Manuals
170402-1677-99 Engine View Diagrams & Manuals
170402-1679-99 Engine View Diagrams & Manuals
170402-1681-99 Engine View Diagrams & Manuals
170402-1688-99 Engine View Diagrams & Manuals
170402-1690-99 Engine View Diagrams & Manuals
170402-1691-99 Engine View Diagrams & Manuals
170402-1694-99 Engine View Diagrams & Manuals
170402-1695-99 Engine View Diagrams & Manuals
170402-1701-99 Engine View Diagrams & Manuals
170402-1703-99 Engine View Diagrams & Manuals
170402-1710-99 Engine View Diagrams & Manuals
170402-1714-99 Engine View Diagrams & Manuals
170402-1718-99 Engine View Diagrams & Manuals
170402-1725-99 Engine View Diagrams & Manuals
170402-1730-99 Engine View Diagrams & Manuals
170402-1731-99 Engine View Diagrams & Manuals
170402-1732-99 Engine View Diagrams & Manuals
170402-1749-99 Engine View Diagrams & Manuals
170402-1753-99 Engine View Diagrams & Manuals
170402-1758-99 Engine View Diagrams & Manuals
170402-1760-99 Engine View Diagrams & Manuals
170402-1765-99 Engine View Diagrams & Manuals
170402-1769-99 Engine View Diagrams & Manuals
170402-1774-99 Engine View Diagrams & Manuals
170402-1790-99 Engine View Diagrams & Manuals
170402-1792-99 Engine View Diagrams & Manuals
170402-1796-99 Engine View Diagrams & Manuals
170402-1797-99 Engine View Diagrams & Manuals
170402-1801-99 Engine View Diagrams & Manuals
170402-2015-01 Engine View Diagrams & Manuals
170402-2015-02 Engine View Diagrams & Manuals
170402-2015-03 Engine View Diagrams & Manuals
170402-2020-01 Engine View Diagrams & Manuals
170402-2101-01 Engine View Diagrams & Manuals
170402-2102-01 Engine View Diagrams & Manuals
170402-2111-01 Engine View Diagrams & Manuals
170402-2133-01 Engine View Diagrams & Manuals
170402-2136-01 Engine View Diagrams & Manuals
170402-2139-01 Engine View Diagrams & Manuals
170402-2143-01 Engine View Diagrams & Manuals
170402-2146-01 Engine View Diagrams & Manuals
170402-2149-01 Engine View Diagrams & Manuals
170402-2151-01 Engine View Diagrams & Manuals
170402-2155-01 Engine View Diagrams & Manuals
170402-2159-01 Engine View Diagrams & Manuals
170402-2163-01 Engine View Diagrams & Manuals
170402-2166-99 Engine View Diagrams & Manuals
170402-2215-01 Engine View Diagrams & Manuals
170402-2215-02 Engine View Diagrams & Manuals
170402-2215-03 Engine View Diagrams & Manuals
170402-2215-04 Engine View Diagrams & Manuals
170402-2220-01 Engine View Diagrams & Manuals
170402-2300-01 Engine View Diagrams & Manuals
170402-2308-01 Engine View Diagrams & Manuals
170402-2310-01 Engine View Diagrams & Manuals
170402-2324-01 Engine View Diagrams & Manuals
170402-2328-01 Engine View Diagrams & Manuals
170402-2330-01 Engine View Diagrams & Manuals
170402-2334-01 Engine View Diagrams & Manuals
170402-2335-01 Engine View Diagrams & Manuals
170402-2336-01 Engine View Diagrams & Manuals
170402-2346-01 Engine View Diagrams & Manuals
170402-2349-01 Engine View Diagrams & Manuals
170402-2352-01 Engine View Diagrams & Manuals
170402-2356-99 Engine View Diagrams & Manuals
170402-4003-01 Engine View Diagrams & Manuals
170402-4003-02 Engine View Diagrams & Manuals
170402-4015-01 Engine View Diagrams & Manuals
170402-4020-01 Engine View Diagrams & Manuals
170403-0612-99 Engine View Diagrams & Manuals
170403-0669-99 Engine View Diagrams & Manuals
170403-0690-99 Engine View Diagrams & Manuals
170403-0699-99 Engine View Diagrams & Manuals
170403-1112-99 Engine View Diagrams & Manuals
170403-1612-99 Engine View Diagrams & Manuals
170403-2311-01 Engine View Diagrams & Manuals
170404-0613-99 Engine View Diagrams & Manuals
170404-0639-99 Engine View Diagrams & Manuals
170404-0710-99 Engine View Diagrams & Manuals
170404-0719-99 Engine View Diagrams & Manuals
170404-1113-99 Engine View Diagrams & Manuals
170404-1139-99 Engine View Diagrams & Manuals
170404-1345-99 Engine View Diagrams & Manuals
170404-1374-99 Engine View Diagrams & Manuals
170404-1395-99 Engine View Diagrams & Manuals
170404-1651-99 Engine View Diagrams & Manuals
170404-1717-99 Engine View Diagrams & Manuals
170405-1196-99 Engine View Diagrams & Manuals
170405-1216-99 Engine View Diagrams & Manuals
170405-1711-99 Engine View Diagrams & Manuals
170407-0623-99 Engine View Diagrams & Manuals
170407-0689-99 Engine View Diagrams & Manuals
170407-1123-99 Engine View Diagrams & Manuals
170407-1225-99 Engine View Diagrams & Manuals
170407-1623-99 Engine View Diagrams & Manuals
170407-2123-01 Engine View Diagrams & Manuals
170407-2306-01 Engine View Diagrams & Manuals
170407-2353-01 Engine View Diagrams & Manuals
170407-2355-99 Engine View Diagrams & Manuals
170407-4002-01 Engine View Diagrams & Manuals
170411-1241-99 Engine View Diagrams & Manuals
170412-0677-99 Engine View Diagrams & Manuals
170412-0685-99 Engine View Diagrams & Manuals
170412-0688-99 Engine View Diagrams & Manuals
170412-1025-99 Engine View Diagrams & Manuals
170412-1027-99 Engine View Diagrams & Manuals
170412-1133-99 Engine View Diagrams & Manuals
170412-1191-99 Engine View Diagrams & Manuals
170412-1193-99 Engine View Diagrams & Manuals
170412-1368-99 Engine View Diagrams & Manuals
170412-1405-99 Engine View Diagrams & Manuals
170412-1525-99 Engine View Diagrams & Manuals
170412-1527-99 Engine View Diagrams & Manuals
170412-1639-99 Engine View Diagrams & Manuals
170412-1692-99 Engine View Diagrams & Manuals
170412-1698-99 Engine View Diagrams & Manuals
170412-1723-99 Engine View Diagrams & Manuals
170412-1734-99 Engine View Diagrams & Manuals
170412-1746-99 Engine View Diagrams & Manuals
170412-1787-99 Engine View Diagrams & Manuals
170412-1789-99 Engine View Diagrams & Manuals
170412-1791-99 Engine View Diagrams & Manuals
170412-1802-99 Engine View Diagrams & Manuals
170412-2025-01 Engine View Diagrams & Manuals
170412-2135-01 Engine View Diagrams & Manuals
170412-2144-01 Engine View Diagrams & Manuals
170412-2148-01 Engine View Diagrams & Manuals
170412-2158-99 Engine View Diagrams & Manuals
170412-2161-01 Engine View Diagrams & Manuals
170412-2225-01 Engine View Diagrams & Manuals
170412-2329-01 Engine View Diagrams & Manuals
170412-5525-01 Engine View Diagrams & Manuals
170414-0686-99 Engine View Diagrams & Manuals
170417-1735-99 Engine View Diagrams & Manuals
170417-4001-01 Engine View Diagrams & Manuals
170431-0615-99 Engine View Diagrams & Manuals
170431-0632-99 Engine View Diagrams & Manuals
170431-0633-99 Engine View Diagrams & Manuals
170431-0634-99 Engine View Diagrams & Manuals
170431-0651-99 Engine View Diagrams & Manuals
170431-0661-99 Engine View Diagrams & Manuals
170431-0662-99 Engine View Diagrams & Manuals
170431-0673-99 Engine View Diagrams & Manuals
170431-0684-99 Engine View Diagrams & Manuals
170431-0687-99 Engine View Diagrams & Manuals
170431-0696-99 Engine View Diagrams & Manuals
170431-0706-99 Engine View Diagrams & Manuals
170431-1115-99 Engine View Diagrams & Manuals
170431-1134-99 Engine View Diagrams & Manuals
170431-1140-99 Engine View Diagrams & Manuals
170431-1142-99 Engine View Diagrams & Manuals
170431-1148-99 Engine View Diagrams & Manuals
170431-1153-99 Engine View Diagrams & Manuals
170431-1154-99 Engine View Diagrams & Manuals
170431-1164-99 Engine View Diagrams & Manuals
170431-1194-99 Engine View Diagrams & Manuals
170431-1198-99 Engine View Diagrams & Manuals
170431-1200-99 Engine View Diagrams & Manuals
170431-1204-99 Engine View Diagrams & Manuals
170431-1206-99 Engine View Diagrams & Manuals
170431-1231-99 Engine View Diagrams & Manuals
170431-1233-99 Engine View Diagrams & Manuals
170431-1234-99 Engine View Diagrams & Manuals
170431-1242-99 Engine View Diagrams & Manuals
170431-1243-99 Engine View Diagrams & Manuals
170431-1247-99 Engine View Diagrams & Manuals
170431-1248-99 Engine View Diagrams & Manuals
170431-1254-99 Engine View Diagrams & Manuals
170431-1256-99 Engine View Diagrams & Manuals
170431-1258-99 Engine View Diagrams & Manuals
170431-1270-99 Engine View Diagrams & Manuals
170431-1284-99 Engine View Diagrams & Manuals
170431-1285-99 Engine View Diagrams & Manuals
170431-1287-99 Engine View Diagrams & Manuals
170431-1288-99 Engine View Diagrams & Manuals
170431-1293-99 Engine View Diagrams & Manuals
170431-1310-99 Engine View Diagrams & Manuals
170431-1311-99 Engine View Diagrams & Manuals
170431-1315-99 Engine View Diagrams & Manuals
170431-1319-99 Engine View Diagrams & Manuals
170431-1333-99 Engine View Diagrams & Manuals
170431-1338-99 Engine View Diagrams & Manuals
170431-1343-99 Engine View Diagrams & Manuals
170431-1346-99 Engine View Diagrams & Manuals
170431-1352-99 Engine View Diagrams & Manuals
170431-1372-99 Engine View Diagrams & Manuals
170431-1382-99 Engine View Diagrams & Manuals
170431-1383-99 Engine View Diagrams & Manuals
170431-1384-99 Engine View Diagrams & Manuals
170431-1385-99 Engine View Diagrams & Manuals
170431-1389-99 Engine View Diagrams & Manuals
170431-1393-99 Engine View Diagrams & Manuals
170431-1399-99 Engine View Diagrams & Manuals
170431-1402-99 Engine View Diagrams & Manuals
170431-1615-99 Engine View Diagrams & Manuals
170431-1618-99 Engine View Diagrams & Manuals
170431-1632-99 Engine View Diagrams & Manuals
170431-1633-99 Engine View Diagrams & Manuals
170431-1634-99 Engine View Diagrams & Manuals
170431-1638-99 Engine View Diagrams & Manuals
170431-1648-99 Engine View Diagrams & Manuals
170431-1662-99 Engine View Diagrams & Manuals
170431-1674-99 Engine View Diagrams & Manuals
170431-1684-99 Engine View Diagrams & Manuals
170431-1686-99 Engine View Diagrams & Manuals
170431-1699-99 Engine View Diagrams & Manuals
170431-1712-99 Engine View Diagrams & Manuals
170431-1720-99 Engine View Diagrams & Manuals
170431-1722-99 Engine View Diagrams & Manuals
170431-1738-99 Engine View Diagrams & Manuals
170431-1741-99 Engine View Diagrams & Manuals
170431-1744-99 Engine View Diagrams & Manuals
170431-1750-99 Engine View Diagrams & Manuals
170431-1751-99 Engine View Diagrams & Manuals
170431-1761-99 Engine View Diagrams & Manuals
170431-1770-99 Engine View Diagrams & Manuals
170431-1773-99 Engine View Diagrams & Manuals
170431-1795-99 Engine View Diagrams & Manuals
170431-2118-01 Engine View Diagrams & Manuals
170431-2138-01 Engine View Diagrams & Manuals
170431-2140-01 Engine View Diagrams & Manuals
170431-2140-02 Engine View Diagrams & Manuals
170431-2140-03 Engine View Diagrams & Manuals
170431-2140-04 Engine View Diagrams & Manuals
170431-2140-05 Engine View Diagrams & Manuals
170431-2141-01 Engine View Diagrams & Manuals
170431-2141-02 Engine View Diagrams & Manuals
170431-2142-01 Engine View Diagrams & Manuals
170431-2145-01 Engine View Diagrams & Manuals
170431-2303-01 Engine View Diagrams & Manuals
170431-2320-01 Engine View Diagrams & Manuals
170431-2325-01 Engine View Diagrams & Manuals
170431-2327-01 Engine View Diagrams & Manuals
170431-2343-01 Engine View Diagrams & Manuals
170432-0535-99 Engine View Diagrams & Manuals
170432-0536-99 Engine View Diagrams & Manuals
170432-0537-99 Engine View Diagrams & Manuals
170432-0570-99 Engine View Diagrams & Manuals
170432-0616-99 Engine View Diagrams & Manuals
170432-0617-99 Engine View Diagrams & Manuals
170432-0618-99 Engine View Diagrams & Manuals
170432-0619-99 Engine View Diagrams & Manuals
170432-0631-99 Engine View Diagrams & Manuals
170432-0636-99 Engine View Diagrams & Manuals
170432-0641-99 Engine View Diagrams & Manuals
170432-0649-99 Engine View Diagrams & Manuals
170432-0650-99 Engine View Diagrams & Manuals
170432-0654-99 Engine View Diagrams & Manuals
170432-0656-99 Engine View Diagrams & Manuals
170432-0658-99 Engine View Diagrams & Manuals
170432-0659-99 Engine View Diagrams & Manuals
170432-0660-99 Engine View Diagrams & Manuals
170432-0670-99 Engine View Diagrams & Manuals
170432-0672-99 Engine View Diagrams & Manuals
170432-0674-99 Engine View Diagrams & Manuals
170432-0675-99 Engine View Diagrams & Manuals
170432-0676-99 Engine View Diagrams & Manuals
170432-0680-99 Engine View Diagrams & Manuals
170432-0691-99 Engine View Diagrams & Manuals
170432-0693-99 Engine View Diagrams & Manuals
170432-0700-99 Engine View Diagrams & Manuals
170432-0701-99 Engine View Diagrams & Manuals
170432-0702-99 Engine View Diagrams & Manuals
170432-0703-99 Engine View Diagrams & Manuals
170432-0705-99 Engine View Diagrams & Manuals
170432-0707-99 Engine View Diagrams & Manuals
170432-0713-99 Engine View Diagrams & Manuals
170432-0715-99 Engine View Diagrams & Manuals
170432-0721-99 Engine View Diagrams & Manuals
170432-1035-99 Engine View Diagrams & Manuals
170432-1036-99 Engine View Diagrams & Manuals
170432-1037-99 Engine View Diagrams & Manuals
170432-1038-99 Engine View Diagrams & Manuals
170432-1070-99 Engine View Diagrams & Manuals
170432-1116-99 Engine View Diagrams & Manuals
170432-1117-99 Engine View Diagrams & Manuals
170432-1118-99 Engine View Diagrams & Manuals
170432-1119-99 Engine View Diagrams & Manuals
170432-1136-99 Engine View Diagrams & Manuals
170432-1137-99 Engine View Diagrams & Manuals
170432-1141-99 Engine View Diagrams & Manuals
170432-1145-99 Engine View Diagrams & Manuals
170432-1146-99 Engine View Diagrams & Manuals
170432-1147-99 Engine View Diagrams & Manuals
170432-1149-99 Engine View Diagrams & Manuals
170432-1155-99 Engine View Diagrams & Manuals
170432-1157-99 Engine View Diagrams & Manuals
170432-1159-99 Engine View Diagrams & Manuals
170432-1163-99 Engine View Diagrams & Manuals
170432-1165-99 Engine View Diagrams & Manuals
170432-1166-99 Engine View Diagrams & Manuals
170432-1167-99 Engine View Diagrams & Manuals
170432-1169-99 Engine View Diagrams & Manuals
170432-1177-99 Engine View Diagrams & Manuals
170432-1178-99 Engine View Diagrams & Manuals
170432-1182-99 Engine View Diagrams & Manuals
170432-1188-99 Engine View Diagrams & Manuals
170432-1195-99 Engine View Diagrams & Manuals
170432-1197-99 Engine View Diagrams & Manuals
170432-1203-99 Engine View Diagrams & Manuals
170432-1208-99 Engine View Diagrams & Manuals
170432-1218-99 Engine View Diagrams & Manuals
170432-1221-99 Engine View Diagrams & Manuals
170432-1226-99 Engine View Diagrams & Manuals
170432-1235-99 Engine View Diagrams & Manuals
170432-1236-99 Engine View Diagrams & Manuals
170432-1238-99 Engine View Diagrams & Manuals
170432-1245-99 Engine View Diagrams & Manuals
170432-1246-99 Engine View Diagrams & Manuals
170432-1255-99 Engine View Diagrams & Manuals
170432-1264-99 Engine View Diagrams & Manuals
170432-1265-99 Engine View Diagrams & Manuals
170432-1266-99 Engine View Diagrams & Manuals
170432-1272-99 Engine View Diagrams & Manuals
170432-1274-99 Engine View Diagrams & Manuals
170432-1276-99 Engine View Diagrams & Manuals
170432-1278-99 Engine View Diagrams & Manuals
170432-1281-99 Engine View Diagrams & Manuals
170432-1289-99 Engine View Diagrams & Manuals
170432-1290-99 Engine View Diagrams & Manuals
170432-1291-99 Engine View Diagrams & Manuals
170432-1295-99 Engine View Diagrams & Manuals
170432-1297-99 Engine View Diagrams & Manuals
170432-1298-99 Engine View Diagrams & Manuals
170432-1303-99 Engine View Diagrams & Manuals
170432-1305-99 Engine View Diagrams & Manuals
170432-1306-99 Engine View Diagrams & Manuals
170432-1309-99 Engine View Diagrams & Manuals
170432-1314-99 Engine View Diagrams & Manuals
170432-1316-99 Engine View Diagrams & Manuals
170432-1318-99 Engine View Diagrams & Manuals
170432-1324-99 Engine View Diagrams & Manuals
170432-1325-99 Engine View Diagrams & Manuals
170432-1326-99 Engine View Diagrams & Manuals
170432-1330-99 Engine View Diagrams & Manuals
170432-1331-99 Engine View Diagrams & Manuals
170432-1334-99 Engine View Diagrams & Manuals
170432-1335-99 Engine View Diagrams & Manuals
170432-1337-99 Engine View Diagrams & Manuals
170432-1341-99 Engine View Diagrams & Manuals
170432-1342-99 Engine View Diagrams & Manuals
170432-1349-99 Engine View Diagrams & Manuals
170432-1350-99 Engine View Diagrams & Manuals
170432-1351-99 Engine View Diagrams & Manuals
170432-1354-99 Engine View Diagrams & Manuals
170432-1356-99 Engine View Diagrams & Manuals
170432-1357-99 Engine View Diagrams & Manuals
170432-1359-99 Engine View Diagrams & Manuals
170432-1363-99 Engine View Diagrams & Manuals
170432-1364-99 Engine View Diagrams & Manuals
170432-1366-99 Engine View Diagrams & Manuals
170432-1367-99 Engine View Diagrams & Manuals
170432-1370-99 Engine View Diagrams & Manuals
170432-1371-99 Engine View Diagrams & Manuals
170432-1373-99 Engine View Diagrams & Manuals
170432-1376-99 Engine View Diagrams & Manuals
170432-1379-99 Engine View Diagrams & Manuals
170432-1380-99 Engine View Diagrams & Manuals
170432-1381-99 Engine View Diagrams & Manuals
170432-1387-99 Engine View Diagrams & Manuals
170432-1392-99 Engine View Diagrams & Manuals
170432-1400-99 Engine View Diagrams & Manuals
170432-1535-99 Engine View Diagrams & Manuals
170432-1536-99 Engine View Diagrams & Manuals
170432-1537-99 Engine View Diagrams & Manuals
170432-1538-99 Engine View Diagrams & Manuals
170432-1547-99 Engine View Diagrams & Manuals
170432-1570-99 Engine View Diagrams & Manuals
170432-1616-99 Engine View Diagrams & Manuals
170432-1617-99 Engine View Diagrams & Manuals
170432-1619-99 Engine View Diagrams & Manuals
170432-1629-99 Engine View Diagrams & Manuals
170432-1631-99 Engine View Diagrams & Manuals
170432-1635-99 Engine View Diagrams & Manuals
170432-1636-99 Engine View Diagrams & Manuals
170432-1637-99 Engine View Diagrams & Manuals
170432-1640-99 Engine View Diagrams & Manuals
170432-1641-99 Engine View Diagrams & Manuals
170432-1647-99 Engine View Diagrams & Manuals
170432-1652-99 Engine View Diagrams & Manuals
170432-1653-99 Engine View Diagrams & Manuals
170432-1656-99 Engine View Diagrams & Manuals
170432-1660-99 Engine View Diagrams & Manuals
170432-1663-99 Engine View Diagrams & Manuals
170432-1665-99 Engine View Diagrams & Manuals
170432-1667-99 Engine View Diagrams & Manuals
170432-1668-99 Engine View Diagrams & Manuals
170432-1669-99 Engine View Diagrams & Manuals
170432-1670-99 Engine View Diagrams & Manuals
170432-1671-99 Engine View Diagrams & Manuals
170432-1672-99 Engine View Diagrams & Manuals
170432-1673-99 Engine View Diagrams & Manuals
170432-1675-99 Engine View Diagrams & Manuals
170432-1680-99 Engine View Diagrams & Manuals
170432-1682-99 Engine View Diagrams & Manuals
170432-1683-99 Engine View Diagrams & Manuals
170432-1685-99 Engine View Diagrams & Manuals
170432-1693-99 Engine View Diagrams & Manuals
170432-1700-99 Engine View Diagrams & Manuals
170432-1705-99 Engine View Diagrams & Manuals
170432-1707-99 Engine View Diagrams & Manuals
170432-1708-99 Engine View Diagrams & Manuals
170432-1713-99 Engine View Diagrams & Manuals
170432-1715-99 Engine View Diagrams & Manuals
170432-1719-99 Engine View Diagrams & Manuals
170432-1721-99 Engine View Diagrams & Manuals
170432-1726-99 Engine View Diagrams & Manuals
170432-1727-99 Engine View Diagrams & Manuals
170432-1728-99 Engine View Diagrams & Manuals
170432-1736-99 Engine View Diagrams & Manuals
170432-1737-99 Engine View Diagrams & Manuals
170432-1740-99 Engine View Diagrams & Manuals
170432-1742-99 Engine View Diagrams & Manuals
170432-1743-99 Engine View Diagrams & Manuals
170432-1747-99 Engine View Diagrams & Manuals
170432-1748-99 Engine View Diagrams & Manuals
170432-1752-99 Engine View Diagrams & Manuals
170432-1754-99 Engine View Diagrams & Manuals
170432-1755-99 Engine View Diagrams & Manuals
170432-1756-99 Engine View Diagrams & Manuals
170432-1757-99 Engine View Diagrams & Manuals
170432-1759-99 Engine View Diagrams & Manuals
170432-1762-99 Engine View Diagrams & Manuals
170432-1763-99 Engine View Diagrams & Manuals
170432-1764-99 Engine View Diagrams & Manuals
170432-1766-99 Engine View Diagrams & Manuals
170432-1767-99 Engine View Diagrams & Manuals
170432-1768-99 Engine View Diagrams & Manuals
170432-1771-99 Engine View Diagrams & Manuals
170432-1775-99 Engine View Diagrams & Manuals
170432-1776-99 Engine View Diagrams & Manuals
170432-1778-99 Engine View Diagrams & Manuals
170432-1780-99 Engine View Diagrams & Manuals
170432-1781-99 Engine View Diagrams & Manuals
170432-1782-99 Engine View Diagrams & Manuals
170432-1783-99 Engine View Diagrams & Manuals
170432-1784-99 Engine View Diagrams & Manuals
170432-1785-99 Engine View Diagrams & Manuals
170432-1786-99 Engine View Diagrams & Manuals
170432-1788-99 Engine View Diagrams & Manuals
170432-1793-99 Engine View Diagrams & Manuals
170432-1794-99 Engine View Diagrams & Manuals
170432-1798-99 Engine View Diagrams & Manuals
170432-1800-99 Engine View Diagrams & Manuals
170432-2035-01 Engine View Diagrams & Manuals
170432-2036-01 Engine View Diagrams & Manuals
170432-2036-02 Engine View Diagrams & Manuals
170432-2037-01 Engine View Diagrams & Manuals
170432-2037-02 Engine View Diagrams & Manuals
170432-2038-01 Engine View Diagrams & Manuals
170432-2047-01 Engine View Diagrams & Manuals
170432-2047-02 Engine View Diagrams & Manuals
170432-2070-01 Engine View Diagrams & Manuals
170432-2070-02 Engine View Diagrams & Manuals
170432-2070-03 Engine View Diagrams & Manuals
170432-2117-01 Engine View Diagrams & Manuals
170432-2119-01 Engine View Diagrams & Manuals
170432-2130-01 Engine View Diagrams & Manuals
170432-2131-01 Engine View Diagrams & Manuals
170432-2132-01 Engine View Diagrams & Manuals
170432-2132-02 Engine View Diagrams & Manuals
170432-2134-01 Engine View Diagrams & Manuals
170432-2137-01 Engine View Diagrams & Manuals
170432-2147-01 Engine View Diagrams & Manuals
170432-2152-01 Engine View Diagrams & Manuals
170432-2153-01 Engine View Diagrams & Manuals
170432-2154-01 Engine View Diagrams & Manuals
170432-2156-01 Engine View Diagrams & Manuals
170432-2160-01 Engine View Diagrams & Manuals
170432-2162-01 Engine View Diagrams & Manuals
170432-2164-01 Engine View Diagrams & Manuals
170432-2165-01 Engine View Diagrams & Manuals
170432-2235-01 Engine View Diagrams & Manuals
170432-2235-02 Engine View Diagrams & Manuals
170432-2236-01 Engine View Diagrams & Manuals
170432-2236-02 Engine View Diagrams & Manuals
170432-2238-01 Engine View Diagrams & Manuals
170432-2238-02 Engine View Diagrams & Manuals
170432-2247-01 Engine View Diagrams & Manuals
170432-2270-01 Engine View Diagrams & Manuals
170432-2270-02 Engine View Diagrams & Manuals
170432-2302-01 Engine View Diagrams & Manuals
170432-2303-99 Engine View Diagrams & Manuals
170432-2304-01 Engine View Diagrams & Manuals
170432-2321-01 Engine View Diagrams & Manuals
170432-2322-01 Engine View Diagrams & Manuals
170432-2323-01 Engine View Diagrams & Manuals
170432-2326-01 Engine View Diagrams & Manuals
170432-2331-01 Engine View Diagrams & Manuals
170432-2332-01 Engine View Diagrams & Manuals
170432-2333-01 Engine View Diagrams & Manuals
170432-2337-01 Engine View Diagrams & Manuals
170432-2338-01 Engine View Diagrams & Manuals
170432-2340-99 Engine View Diagrams & Manuals
170432-2341-01 Engine View Diagrams & Manuals
170432-2342-99 Engine View Diagrams & Manuals
170432-2344-01 Engine View Diagrams & Manuals
170432-2345-01 Engine View Diagrams & Manuals
170432-2347-01 Engine View Diagrams & Manuals
170432-2348-01 Engine View Diagrams & Manuals
170432-2350-99 Engine View Diagrams & Manuals
170432-2354-01 Engine View Diagrams & Manuals
170432-5135-01 Engine View Diagrams & Manuals
170432-5136-01 Engine View Diagrams & Manuals
170432-5137-01 Engine View Diagrams & Manuals
170432-5137-02 Engine View Diagrams & Manuals
170432-5138-01 Engine View Diagrams & Manuals
170432-5139-01 Engine View Diagrams & Manuals
170432-5501-01 Engine View Diagrams & Manuals
170432-5502-01 Engine View Diagrams & Manuals
170432-5504-01 Engine View Diagrams & Manuals
170432-5535-01 Engine View Diagrams & Manuals
170432-5570-01 Engine View Diagrams & Manuals
170432-5575-01 Engine View Diagrams & Manuals
170434-0540-99 Engine View Diagrams & Manuals
170434-1040-99 Engine View Diagrams & Manuals
170434-1183-99 Engine View Diagrams & Manuals
170434-1207-99 Engine View Diagrams & Manuals
170434-1313-99 Engine View Diagrams & Manuals
170434-1358-99 Engine View Diagrams & Manuals
170434-1540-99 Engine View Diagrams & Manuals
170435-1223-99 Engine View Diagrams & Manuals
170435-1300-99 Engine View Diagrams & Manuals
170435-1377-99 Engine View Diagrams & Manuals
170435-1704-99 Engine View Diagrams & Manuals
170435-1716-99 Engine View Diagrams & Manuals
170435-2342-01 Engine View Diagrams & Manuals
170436-1307-99 Engine View Diagrams & Manuals
170437-0624-99 Engine View Diagrams & Manuals
170437-1124-99 Engine View Diagrams & Manuals
170437-1211-99 Engine View Diagrams & Manuals
170437-1299-99 Engine View Diagrams & Manuals
170437-1375-99 Engine View Diagrams & Manuals
170437-1396-99 Engine View Diagrams & Manuals
170437-1624-99 Engine View Diagrams & Manuals
170437-1654-99 Engine View Diagrams & Manuals
170437-1696-99 Engine View Diagrams & Manuals
170437-1709-99 Engine View Diagrams & Manuals
170437-5140-01 Engine View Diagrams & Manuals
170437-5503-01 Engine View Diagrams & Manuals
170451-0620-99 Engine View Diagrams & Manuals
170451-0678-99 Engine View Diagrams & Manuals
170451-0708-99 Engine View Diagrams & Manuals
170451-0712-99 Engine View Diagrams & Manuals
170451-0716-99 Engine View Diagrams & Manuals
170451-1120-99 Engine View Diagrams & Manuals
170451-1138-99 Engine View Diagrams & Manuals
170451-1152-99 Engine View Diagrams & Manuals
170451-1172-99 Engine View Diagrams & Manuals
170451-1173-99 Engine View Diagrams & Manuals
170451-1174-99 Engine View Diagrams & Manuals
170451-1179-99 Engine View Diagrams & Manuals
170451-1181-99 Engine View Diagrams & Manuals
170451-1189-99 Engine View Diagrams & Manuals
170451-1190-99 Engine View Diagrams & Manuals
170451-1202-99 Engine View Diagrams & Manuals
170451-1210-99 Engine View Diagrams & Manuals
170451-1220-99 Engine View Diagrams & Manuals
170451-1228-99 Engine View Diagrams & Manuals
170451-1240-99 Engine View Diagrams & Manuals
170451-1257-99 Engine View Diagrams & Manuals
170451-1312-99 Engine View Diagrams & Manuals
170451-1347-99 Engine View Diagrams & Manuals
170451-1360-99 Engine View Diagrams & Manuals
170451-1390-99 Engine View Diagrams & Manuals
170451-1620-99 Engine View Diagrams & Manuals
170451-1630-99 Engine View Diagrams & Manuals
170451-1678-99 Engine View Diagrams & Manuals
170451-1687-99 Engine View Diagrams & Manuals
170451-1689-99 Engine View Diagrams & Manuals
170451-1697-99 Engine View Diagrams & Manuals
170451-1745-99 Engine View Diagrams & Manuals
170451-1772-99 Engine View Diagrams & Manuals
170451-1779-99 Engine View Diagrams & Manuals
170452-0549-99 Engine View Diagrams & Manuals
170452-0621-99 Engine View Diagrams & Manuals
170452-0637-99 Engine View Diagrams & Manuals
170452-0652-99 Engine View Diagrams & Manuals
170452-0717-99 Engine View Diagrams & Manuals
170452-0718-99 Engine View Diagrams & Manuals
170452-1049-99 Engine View Diagrams & Manuals
170452-1121-99 Engine View Diagrams & Manuals
170452-1160-99 Engine View Diagrams & Manuals
170452-1186-99 Engine View Diagrams & Manuals
170452-1199-99 Engine View Diagrams & Manuals
170452-1217-99 Engine View Diagrams & Manuals
170452-1232-99 Engine View Diagrams & Manuals
170452-1251-99 Engine View Diagrams & Manuals
170452-1252-99 Engine View Diagrams & Manuals
170452-1259-99 Engine View Diagrams & Manuals
170452-1262-99 Engine View Diagrams & Manuals
170452-1269-99 Engine View Diagrams & Manuals
170452-1273-99 Engine View Diagrams & Manuals
170452-1275-99 Engine View Diagrams & Manuals
170452-1277-99 Engine View Diagrams & Manuals
170452-1279-99 Engine View Diagrams & Manuals
170452-1280-99 Engine View Diagrams & Manuals
170452-1283-99 Engine View Diagrams & Manuals
170452-1317-99 Engine View Diagrams & Manuals
170452-1328-99 Engine View Diagrams & Manuals
170452-1340-99 Engine View Diagrams & Manuals
170452-1361-99 Engine View Diagrams & Manuals
170452-1378-99 Engine View Diagrams & Manuals
170452-1388-99 Engine View Diagrams & Manuals
170452-1391-99 Engine View Diagrams & Manuals
170452-1394-99 Engine View Diagrams & Manuals
170452-1398-99 Engine View Diagrams & Manuals
170452-1403-99 Engine View Diagrams & Manuals
170452-1404-99 Engine View Diagrams & Manuals
170452-1549-99 Engine View Diagrams & Manuals
170452-1621-99 Engine View Diagrams & Manuals
170452-1645-99 Engine View Diagrams & Manuals
170452-1657-99 Engine View Diagrams & Manuals
170452-1664-99 Engine View Diagrams & Manuals
170452-1702-99 Engine View Diagrams & Manuals
170452-1729-99 Engine View Diagrams & Manuals
170452-1733-99 Engine View Diagrams & Manuals
170452-1739-99 Engine View Diagrams & Manuals
170452-1777-99 Engine View Diagrams & Manuals
170452-2049-01 Engine View Diagrams & Manuals
170452-2049-02 Engine View Diagrams & Manuals
170452-2049-03 Engine View Diagrams & Manuals
170452-2049-04 Engine View Diagrams & Manuals
170452-2121-01 Engine View Diagrams & Manuals
170452-2150-01 Engine View Diagrams & Manuals
170452-2157-01 Engine View Diagrams & Manuals
170452-2249-01 Engine View Diagrams & Manuals
170452-2249-02 Engine View Diagrams & Manuals
170452-2249-03 Engine View Diagrams & Manuals
170452-2249-04 Engine View Diagrams & Manuals
170452-2305-01 Engine View Diagrams & Manuals
170452-2351-01 Engine View Diagrams & Manuals
170452-5549-01 Engine View Diagrams & Manuals
170452-5549-02 Engine View Diagrams & Manuals
170452-5549-03 Engine View Diagrams & Manuals
170452-5549-04 Engine View Diagrams & Manuals
170457-0625-99 Engine View Diagrams & Manuals
170457-1125-99 Engine View Diagrams & Manuals
170457-1625-99 Engine View Diagrams & Manuals
170457-1724-99 Engine View Diagrams & Manuals
170457-2125-01 Engine View Diagrams & Manuals
170457-2307-01 Engine View Diagrams & Manuals
170701-0110-99 Engine View Diagrams & Manuals
170701-0122-99 Engine View Diagrams & Manuals
170701-0149-99 Engine View Diagrams & Manuals
170701-0158-99 Engine View Diagrams & Manuals
170701-0510-99 Engine View Diagrams & Manuals
170701-0610-99 Engine View Diagrams & Manuals
170701-0628-99 Engine View Diagrams & Manuals
170701-0632-99 Engine View Diagrams & Manuals
170701-0661-99 Engine View Diagrams & Manuals
170701-0685-99 Engine View Diagrams & Manuals
170701-0687-99 Engine View Diagrams & Manuals
170701-0721-99 Engine View Diagrams & Manuals
170701-1010-99 Engine View Diagrams & Manuals
170701-1110-99 Engine View Diagrams & Manuals
170701-1169-99 Engine View Diagrams & Manuals
170701-1212-99 Engine View Diagrams & Manuals
170701-1510-99 Engine View Diagrams & Manuals
170701-1610-99 Engine View Diagrams & Manuals
170702-0015-99 Engine View Diagrams & Manuals
170702-0016-99 Engine View Diagrams & Manuals
170702-0017-99 Engine View Diagrams & Manuals
170702-0111-99 Engine View Diagrams & Manuals
170702-0114-99 Engine View Diagrams & Manuals
170702-0120-99 Engine View Diagrams & Manuals
170702-0121-99 Engine View Diagrams & Manuals
170702-0123-99 Engine View Diagrams & Manuals
170702-0124-99 Engine View Diagrams & Manuals
170702-0125-99 Engine View Diagrams & Manuals
170702-0127-99 Engine View Diagrams & Manuals
170702-0128-99 Engine View Diagrams & Manuals
170702-0129-99 Engine View Diagrams & Manuals
170702-0131-99 Engine View Diagrams & Manuals
170702-0132-99 Engine View Diagrams & Manuals
170702-0135-99 Engine View Diagrams & Manuals
170702-0138-99 Engine View Diagrams & Manuals
170702-0139-99 Engine View Diagrams & Manuals
170702-0140-99 Engine View Diagrams & Manuals
170702-0142-99 Engine View Diagrams & Manuals
170702-0143-99 Engine View Diagrams & Manuals
170702-0144-99 Engine View Diagrams & Manuals
170702-0146-99 Engine View Diagrams & Manuals
170702-0147-99 Engine View Diagrams & Manuals
170702-0148-99 Engine View Diagrams & Manuals
170702-0151-99 Engine View Diagrams & Manuals
170702-0152-99 Engine View Diagrams & Manuals
170702-0153-99 Engine View Diagrams & Manuals
170702-0154-99 Engine View Diagrams & Manuals
170702-0155-99 Engine View Diagrams & Manuals
170702-0156-99 Engine View Diagrams & Manuals
170702-0157-99 Engine View Diagrams & Manuals
170702-0159-99 Engine View Diagrams & Manuals
170702-0161-99 Engine View Diagrams & Manuals
170702-0515-99 Engine View Diagrams & Manuals
170702-0516-99 Engine View Diagrams & Manuals
170702-0517-99 Engine View Diagrams & Manuals
170702-0518-99 Engine View Diagrams & Manuals
170702-0611-99 Engine View Diagrams & Manuals
170702-0620-99 Engine View Diagrams & Manuals
170702-0621-99 Engine View Diagrams & Manuals
170702-0622-99 Engine View Diagrams & Manuals
170702-0623-99 Engine View Diagrams & Manuals
170702-0624-99 Engine View Diagrams & Manuals
170702-0626-99 Engine View Diagrams & Manuals
170702-0627-99 Engine View Diagrams & Manuals
170702-0629-99 Engine View Diagrams & Manuals
170702-0630-99 Engine View Diagrams & Manuals
170702-0631-99 Engine View Diagrams & Manuals
170702-0633-99 Engine View Diagrams & Manuals
170702-0634-99 Engine View Diagrams & Manuals
170702-0636-99 Engine View Diagrams & Manuals
170702-0638-99 Engine View Diagrams & Manuals
170702-0639-99 Engine View Diagrams & Manuals
170702-0640-99 Engine View Diagrams & Manuals
170702-0641-99 Engine View Diagrams & Manuals
170702-0643-99 Engine View Diagrams & Manuals
170702-0644-99 Engine View Diagrams & Manuals
170702-0645-99 Engine View Diagrams & Manuals
170702-0646-99 Engine View Diagrams & Manuals
170702-0647-99 Engine View Diagrams & Manuals
170702-0649-99 Engine View Diagrams & Manuals
170702-0650-99 Engine View Diagrams & Manuals
170702-0652-99 Engine View Diagrams & Manuals
170702-0653-99 Engine View Diagrams & Manuals
170702-0654-99 Engine View Diagrams & Manuals
170702-0655-99 Engine View Diagrams & Manuals
170702-0656-99 Engine View Diagrams & Manuals
170702-0657-99 Engine View Diagrams & Manuals
170702-0658-99 Engine View Diagrams & Manuals
170702-0659-99 Engine View Diagrams & Manuals
170702-0662-99 Engine View Diagrams & Manuals
170702-0663-99 Engine View Diagrams & Manuals
170702-0664-99 Engine View Diagrams & Manuals
170702-0667-99 Engine View Diagrams & Manuals
170702-0668-99 Engine View Diagrams & Manuals
170702-0669-99 Engine View Diagrams & Manuals
170702-0670-99 Engine View Diagrams & Manuals
170702-0672-99 Engine View Diagrams & Manuals
170702-0674-99 Engine View Diagrams & Manuals
170702-0682-99 Engine View Diagrams & Manuals
170702-0686-99 Engine View Diagrams & Manuals
170702-0689-99 Engine View Diagrams & Manuals
170702-0690-99 Engine View Diagrams & Manuals
170702-0691-99 Engine View Diagrams & Manuals
170702-0692-99 Engine View Diagrams & Manuals
170702-0693-99 Engine View Diagrams & Manuals
170702-0694-99 Engine View Diagrams & Manuals
170702-0696-99 Engine View Diagrams & Manuals
170702-0697-99 Engine View Diagrams & Manuals
170702-0698-99 Engine View Diagrams & Manuals
170702-0701-99 Engine View Diagrams & Manuals
170702-0703-99 Engine View Diagrams & Manuals
170702-0710-99 Engine View Diagrams & Manuals
170702-0711-99 Engine View Diagrams & Manuals
170702-0712-99 Engine View Diagrams & Manuals
170702-0715-99 Engine View Diagrams & Manuals
170702-0717-99 Engine View Diagrams & Manuals
170702-0718-99 Engine View Diagrams & Manuals
170702-0720-99 Engine View Diagrams & Manuals
170702-0722-99 Engine View Diagrams & Manuals
170702-0723-99 Engine View Diagrams & Manuals
170702-0725-99 Engine View Diagrams & Manuals
170702-0726-99 Engine View Diagrams & Manuals
170702-0728-99 Engine View Diagrams & Manuals
170702-0729-99 Engine View Diagrams & Manuals
170702-0730-99 Engine View Diagrams & Manuals
170702-0732-99 Engine View Diagrams & Manuals
170702-1015-99 Engine View Diagrams & Manuals
170702-1016-99 Engine View Diagrams & Manuals
170702-1017-99 Engine View Diagrams & Manuals
170702-1018-99 Engine View Diagrams & Manuals
170702-1019-99 Engine View Diagrams & Manuals
170702-1111-99 Engine View Diagrams & Manuals
170702-1112-99 Engine View Diagrams & Manuals
170702-1125-99 Engine View Diagrams & Manuals
170702-1126-99 Engine View Diagrams & Manuals
170702-1127-99 Engine View Diagrams & Manuals
170702-1129-99 Engine View Diagrams & Manuals
170702-1131-99 Engine View Diagrams & Manuals
170702-1133-99 Engine View Diagrams & Manuals
170702-1134-99 Engine View Diagrams & Manuals
170702-1135-99 Engine View Diagrams & Manuals
170702-1137-99 Engine View Diagrams & Manuals
170702-1139-99 Engine View Diagrams & Manuals
170702-1141-99 Engine View Diagrams & Manuals
170702-1142-99 Engine View Diagrams & Manuals
170702-1143-99 Engine View Diagrams & Manuals
170702-1144-99 Engine View Diagrams & Manuals
170702-1147-99 Engine View Diagrams & Manuals
170702-1148-99 Engine View Diagrams & Manuals
170702-1149-99 Engine View Diagrams & Manuals
170702-1150-99 Engine View Diagrams & Manuals
170702-1151-99 Engine View Diagrams & Manuals
170702-1154-99 Engine View Diagrams & Manuals
170702-1155-99 Engine View Diagrams & Manuals
170702-1156-99 Engine View Diagrams & Manuals
170702-1157-99 Engine View Diagrams & Manuals
170702-1159-99 Engine View Diagrams & Manuals
170702-1160-99 Engine View Diagrams & Manuals
170702-1161-99 Engine View Diagrams & Manuals
170702-1162-99 Engine View Diagrams & Manuals
170702-1163-99 Engine View Diagrams & Manuals
170702-1166-99 Engine View Diagrams & Manuals
170702-1167-99 Engine View Diagrams & Manuals
170702-1170-99 Engine View Diagrams & Manuals
170702-1171-99 Engine View Diagrams & Manuals
170702-1172-99 Engine View Diagrams & Manuals
170702-1174-99 Engine View Diagrams & Manuals
170702-1176-99 Engine View Diagrams & Manuals
170702-1178-99 Engine View Diagrams & Manuals
170702-1179-99 Engine View Diagrams & Manuals
170702-1180-99 Engine View Diagrams & Manuals
170702-1181-99 Engine View Diagrams & Manuals
170702-1182-99 Engine View Diagrams & Manuals
170702-1183-99 Engine View Diagrams & Manuals
170702-1184-99 Engine View Diagrams & Manuals
170702-1188-99 Engine View Diagrams & Manuals
170702-1191-99 Engine View Diagrams & Manuals
170702-1193-99 Engine View Diagrams & Manuals
170702-1194-99 Engine View Diagrams & Manuals
170702-1196-99 Engine View Diagrams & Manuals
170702-1197-99 Engine View Diagrams & Manuals
170702-1200-99 Engine View Diagrams & Manuals
170702-1201-99 Engine View Diagrams & Manuals
170702-1203-99 Engine View Diagrams & Manuals
170702-1204-99 Engine View Diagrams & Manuals
170702-1207-99 Engine View Diagrams & Manuals
170702-1209-99 Engine View Diagrams & Manuals
170702-1210-99 Engine View Diagrams & Manuals
170702-1211-99 Engine View Diagrams & Manuals
170702-1215-99 Engine View Diagrams & Manuals
170702-1217-99 Engine View Diagrams & Manuals
170702-1218-99 Engine View Diagrams & Manuals
170702-1219-99 Engine View Diagrams & Manuals
170702-1220-99 Engine View Diagrams & Manuals
170702-1222-99 Engine View Diagrams & Manuals
170702-1223-99 Engine View Diagrams & Manuals
170702-1224-99 Engine View Diagrams & Manuals
170702-1225-99 Engine View Diagrams & Manuals
170702-1226-99 Engine View Diagrams & Manuals
170702-1227-99 Engine View Diagrams & Manuals
170702-1228-99 Engine View Diagrams & Manuals
170702-1230-99 Engine View Diagrams & Manuals
170702-1232-99 Engine View Diagrams & Manuals
170702-1233-99 Engine View Diagrams & Manuals
170702-1234-99 Engine View Diagrams & Manuals
170702-1235-99 Engine View Diagrams & Manuals
170702-1236-99 Engine View Diagrams & Manuals
170702-1237-99 Engine View Diagrams & Manuals
170702-1239-99 Engine View Diagrams & Manuals
170702-1241-99 Engine View Diagrams & Manuals
170702-1242-99 Engine View Diagrams & Manuals
170702-1244-99 Engine View Diagrams & Manuals
170702-1245-99 Engine View Diagrams & Manuals
170702-1247-99 Engine View Diagrams & Manuals
170702-1248-99 Engine View Diagrams & Manuals
170702-1249-99 Engine View Diagrams & Manuals
170702-1250-99 Engine View Diagrams & Manuals
170702-1252-99 Engine View Diagrams & Manuals
170702-1253-99 Engine View Diagrams & Manuals
170702-1254-99 Engine View Diagrams & Manuals
170702-1255-99 Engine View Diagrams & Manuals
170702-1256-99 Engine View Diagrams & Manuals
170702-1257-99 Engine View Diagrams & Manuals
170702-1258-99 Engine View Diagrams & Manuals
170702-1260-99 Engine View Diagrams & Manuals
170702-1261-99 Engine View Diagrams & Manuals
170702-1263-99 Engine View Diagrams & Manuals
170702-1264-99 Engine View Diagrams & Manuals
170702-1266-99 Engine View Diagrams & Manuals
170702-1267-99 Engine View Diagrams & Manuals
170702-1268-99 Engine View Diagrams & Manuals
170702-1269-99 Engine View Diagrams & Manuals
170702-1270-99 Engine View Diagrams & Manuals
170702-1271-99 Engine View Diagrams & Manuals
170702-1515-99 Engine View Diagrams & Manuals
170702-1516-99 Engine View Diagrams & Manuals
170702-1517-99 Engine View Diagrams & Manuals
170702-1519-99 Engine View Diagrams & Manuals
170702-1611-99 Engine View Diagrams & Manuals
170702-1612-99 Engine View Diagrams & Manuals
170702-1625-99 Engine View Diagrams & Manuals
170702-1626-99 Engine View Diagrams & Manuals
170702-1627-99 Engine View Diagrams & Manuals
170702-1628-99 Engine View Diagrams & Manuals
170702-1629-99 Engine View Diagrams & Manuals
170702-1631-99 Engine View Diagrams & Manuals
170702-1632-99 Engine View Diagrams & Manuals
170702-1633-99 Engine View Diagrams & Manuals
170702-1634-99 Engine View Diagrams & Manuals
170702-1635-99 Engine View Diagrams & Manuals
170702-1637-99 Engine View Diagrams & Manuals
170702-1639-99 Engine View Diagrams & Manuals
170702-1640-99 Engine View Diagrams & Manuals
170702-1641-99 Engine View Diagrams & Manuals
170702-1642-99 Engine View Diagrams & Manuals
170702-1643-99 Engine View Diagrams & Manuals
170702-1644-99 Engine View Diagrams & Manuals
170702-1645-99 Engine View Diagrams & Manuals
170702-1646-99 Engine View Diagrams & Manuals
170702-1647-99 Engine View Diagrams & Manuals
170702-1649-99 Engine View Diagrams & Manuals
170702-1650-99 Engine View Diagrams & Manuals
170702-1652-99 Engine View Diagrams & Manuals
170702-1653-99 Engine View Diagrams & Manuals
170702-1654-99 Engine View Diagrams & Manuals
170702-1655-99 Engine View Diagrams & Manuals
170702-1656-99 Engine View Diagrams & Manuals
170702-1657-99 Engine View Diagrams & Manuals
170702-1658-99 Engine View Diagrams & Manuals
170702-1659-99 Engine View Diagrams & Manuals
170702-1660-99 Engine View Diagrams & Manuals
170702-1661-99 Engine View Diagrams & Manuals
170702-5015-99 Engine View Diagrams & Manuals
170702-5020-99 Engine View Diagrams & Manuals
170702-5125-99 Engine View Diagrams & Manuals
170702-5127-99 Engine View Diagrams & Manuals
170702-5129-99 Engine View Diagrams & Manuals
170702-5130-99 Engine View Diagrams & Manuals
170702-5131-99 Engine View Diagrams & Manuals
170702-5137-99 Engine View Diagrams & Manuals
170702-5139-99 Engine View Diagrams & Manuals
170702-5140-99 Engine View Diagrams & Manuals
170702-5142-99 Engine View Diagrams & Manuals
170702-5515-99 Engine View Diagrams & Manuals
170702-5520-99 Engine View Diagrams & Manuals
170702-5629-99 Engine View Diagrams & Manuals
170702-5632-99 Engine View Diagrams & Manuals
170702-5633-99 Engine View Diagrams & Manuals
170702-5634-99 Engine View Diagrams & Manuals
170702-5638-99 Engine View Diagrams & Manuals
170702-5639-99 Engine View Diagrams & Manuals
170702-5640-99 Engine View Diagrams & Manuals
170703-0112-99 Engine View Diagrams & Manuals
170703-0130-99 Engine View Diagrams & Manuals
170703-0133-99 Engine View Diagrams & Manuals
170703-0141-99 Engine View Diagrams & Manuals
170703-0145-99 Engine View Diagrams & Manuals
170703-0612-99 Engine View Diagrams & Manuals
170703-0625-99 Engine View Diagrams & Manuals
170703-0635-99 Engine View Diagrams & Manuals
170703-0651-99 Engine View Diagrams & Manuals
170703-0700-99 Engine View Diagrams & Manuals
170703-1112-99 Engine View Diagrams & Manuals
170704-0113-99 Engine View Diagrams & Manuals
170704-0613-99 Engine View Diagrams & Manuals
170704-0642-99 Engine View Diagrams & Manuals
170704-0648-99 Engine View Diagrams & Manuals
170704-0660-99 Engine View Diagrams & Manuals
170704-0665-99 Engine View Diagrams & Manuals
170704-0666-99 Engine View Diagrams & Manuals
170704-0671-99 Engine View Diagrams & Manuals
170704-0681-99 Engine View Diagrams & Manuals
170704-0684-99 Engine View Diagrams & Manuals
170704-0695-99 Engine View Diagrams & Manuals
170704-1113-99 Engine View Diagrams & Manuals
170705-0150-99 Engine View Diagrams & Manuals
170705-0160-99 Engine View Diagrams & Manuals
170705-0614-99 Engine View Diagrams & Manuals
170705-0637-99 Engine View Diagrams & Manuals
170705-0673-99 Engine View Diagrams & Manuals
170705-0675-99 Engine View Diagrams & Manuals
170705-0678-99 Engine View Diagrams & Manuals
170705-0680-99 Engine View Diagrams & Manuals
170705-0683-99 Engine View Diagrams & Manuals
170705-0688-99 Engine View Diagrams & Manuals
170705-0706-99 Engine View Diagrams & Manuals
170705-0708-99 Engine View Diagrams & Manuals
170705-0709-99 Engine View Diagrams & Manuals
170705-0714-99 Engine View Diagrams & Manuals
170705-0716-99 Engine View Diagrams & Manuals
170705-0724-99 Engine View Diagrams & Manuals
170705-0727-99 Engine View Diagrams & Manuals
170705-1114-99 Engine View Diagrams & Manuals
170705-1130-99 Engine View Diagrams & Manuals
170705-1136-99 Engine View Diagrams & Manuals
170705-1145-99 Engine View Diagrams & Manuals
170705-1146-99 Engine View Diagrams & Manuals
170705-1152-99 Engine View Diagrams & Manuals
170705-1164-99 Engine View Diagrams & Manuals
170705-1168-99 Engine View Diagrams & Manuals
170705-1177-99 Engine View Diagrams & Manuals
170705-1189-99 Engine View Diagrams & Manuals
170705-1202-99 Engine View Diagrams & Manuals
170705-1208-99 Engine View Diagrams & Manuals
170705-1213-99 Engine View Diagrams & Manuals
170705-1214-99 Engine View Diagrams & Manuals
170705-1216-99 Engine View Diagrams & Manuals
170705-1221-99 Engine View Diagrams & Manuals
170705-1240-99 Engine View Diagrams & Manuals
170705-1262-99 Engine View Diagrams & Manuals
170705-1614-99 Engine View Diagrams & Manuals
170705-1648-99 Engine View Diagrams & Manuals
170705-5135-99 Engine View Diagrams & Manuals
170705-5138-99 Engine View Diagrams & Manuals
170705-5141-99 Engine View Diagrams & Manuals
170705-5626-99 Engine View Diagrams & Manuals
170705-5628-99 Engine View Diagrams & Manuals
170707-0615-99 Engine View Diagrams & Manuals
170707-0699-99 Engine View Diagrams & Manuals
170707-0702-99 Engine View Diagrams & Manuals
170707-0704-99 Engine View Diagrams & Manuals
170707-0705-99 Engine View Diagrams & Manuals
170707-0707-99 Engine View Diagrams & Manuals
170707-0713-99 Engine View Diagrams & Manuals
170707-0719-99 Engine View Diagrams & Manuals
170707-0731-99 Engine View Diagrams & Manuals
170707-1025-99 Engine View Diagrams & Manuals
170707-1026-99 Engine View Diagrams & Manuals
170707-1115-99 Engine View Diagrams & Manuals
170707-1128-99 Engine View Diagrams & Manuals
170707-1132-99 Engine View Diagrams & Manuals
170707-1138-99 Engine View Diagrams & Manuals
170707-1140-99 Engine View Diagrams & Manuals
170707-1153-99 Engine View Diagrams & Manuals
170707-1158-99 Engine View Diagrams & Manuals
170707-1165-99 Engine View Diagrams & Manuals
170707-1173-99 Engine View Diagrams & Manuals
170707-1175-99 Engine View Diagrams & Manuals
170707-1185-99 Engine View Diagrams & Manuals
170707-1186-99 Engine View Diagrams & Manuals
170707-1187-99 Engine View Diagrams & Manuals
170707-1190-99 Engine View Diagrams & Manuals
170707-1192-99 Engine View Diagrams & Manuals
170707-1195-99 Engine View Diagrams & Manuals
170707-1198-99 Engine View Diagrams & Manuals
170707-1199-99 Engine View Diagrams & Manuals
170707-1205-99 Engine View Diagrams & Manuals
170707-1206-99 Engine View Diagrams & Manuals
170707-1229-99 Engine View Diagrams & Manuals
170707-1231-99 Engine View Diagrams & Manuals
170707-1238-99 Engine View Diagrams & Manuals
170707-1243-99 Engine View Diagrams & Manuals
170707-1246-99 Engine View Diagrams & Manuals
170707-1251-99 Engine View Diagrams & Manuals
170707-1259-99 Engine View Diagrams & Manuals
170707-1265-99 Engine View Diagrams & Manuals
170707-1525-99 Engine View Diagrams & Manuals
170707-1526-99 Engine View Diagrams & Manuals
170707-1615-99 Engine View Diagrams & Manuals
170707-1630-99 Engine View Diagrams & Manuals
170707-1636-99 Engine View Diagrams & Manuals
170707-1638-99 Engine View Diagrams & Manuals
170707-1651-99 Engine View Diagrams & Manuals
170707-5025-99 Engine View Diagrams & Manuals
170707-5026-99 Engine View Diagrams & Manuals
170707-5027-99 Engine View Diagrams & Manuals
170707-5126-99 Engine View Diagrams & Manuals
170707-5128-99 Engine View Diagrams & Manuals
170707-5132-99 Engine View Diagrams & Manuals
170707-5133-99 Engine View Diagrams & Manuals
170707-5134-99 Engine View Diagrams & Manuals
170707-5136-99 Engine View Diagrams & Manuals
170707-5525-99 Engine View Diagrams & Manuals
170707-5526-99 Engine View Diagrams & Manuals
170707-5527-99 Engine View Diagrams & Manuals
170707-5625-99 Engine View Diagrams & Manuals
170707-5627-99 Engine View Diagrams & Manuals
170707-5630-99 Engine View Diagrams & Manuals
170707-5631-99 Engine View Diagrams & Manuals
170707-5635-99 Engine View Diagrams & Manuals
170707-5636-99 Engine View Diagrams & Manuals
170707-5637-99 Engine View Diagrams & Manuals
185436-0145-01 Engine View Diagrams & Manuals
185436-0545-A1 Engine View Diagrams & Manuals
185437-0039-01 Engine View Diagrams & Manuals
185437-0059-01 Engine View Diagrams & Manuals
185437-0084-01 Engine View Diagrams & Manuals
185437-0130-01 Engine View Diagrams & Manuals
185437-0165-E1 Engine View Diagrams & Manuals
185437-0165-E9 Engine View Diagrams & Manuals
185437-0259-E1 Engine View Diagrams & Manuals
185437-0259-E9 Engine View Diagrams & Manuals
185437-0284-A1 Engine View Diagrams & Manuals
185437-0284-E1 Engine View Diagrams & Manuals
185437-0284-E9 Engine View Diagrams & Manuals
185437-0554-E1 Engine View Diagrams & Manuals
185437-0562-E1 Engine View Diagrams & Manuals
185437-0562-E9 Engine View Diagrams & Manuals
190401-1610-99 Engine View Diagrams & Manuals
190401-1669-99 Engine View Diagrams & Manuals
190401-1700-99 Engine View Diagrams & Manuals
190401-2504-01 Engine View Diagrams & Manuals
190401-2610-01 Engine View Diagrams & Manuals
190401-2804-01 Engine View Diagrams & Manuals
190401-2901-01 Engine View Diagrams & Manuals
190401-4009-01 Engine View Diagrams & Manuals
190401-6009-99 Engine View Diagrams & Manuals
190402-1515-99 Engine View Diagrams & Manuals
190402-1520-99 Engine View Diagrams & Manuals
190402-1580-99 Engine View Diagrams & Manuals
190402-1611-99 Engine View Diagrams & Manuals
190402-1614-99 Engine View Diagrams & Manuals
190402-1639-99 Engine View Diagrams & Manuals
190402-1642-99 Engine View Diagrams & Manuals
190402-1647-99 Engine View Diagrams & Manuals
190402-1650-99 Engine View Diagrams & Manuals
190402-1654-99 Engine View Diagrams & Manuals
190402-1661-99 Engine View Diagrams & Manuals
190402-1662-99 Engine View Diagrams & Manuals
190402-1664-99 Engine View Diagrams & Manuals
190402-1666-99 Engine View Diagrams & Manuals
190402-1674-99 Engine View Diagrams & Manuals
190402-1676-99 Engine View Diagrams & Manuals
190402-1679-99 Engine View Diagrams & Manuals
190402-1680-99 Engine View Diagrams & Manuals
190402-1683-99 Engine View Diagrams & Manuals
190402-1687-99 Engine View Diagrams & Manuals
190402-1690-99 Engine View Diagrams & Manuals
190402-1691-99 Engine View Diagrams & Manuals
190402-1697-99 Engine View Diagrams & Manuals
190402-1703-99 Engine View Diagrams & Manuals
190402-1705-99 Engine View Diagrams & Manuals
190402-1706-99 Engine View Diagrams & Manuals
190402-1723-99 Engine View Diagrams & Manuals
190402-1726-99 Engine View Diagrams & Manuals
190402-1743-99 Engine View Diagrams & Manuals
190402-1745-99 Engine View Diagrams & Manuals
190402-1748-99 Engine View Diagrams & Manuals
190402-1758-99 Engine View Diagrams & Manuals
190402-1763-99 Engine View Diagrams & Manuals
190402-1764-99 Engine View Diagrams & Manuals
190402-1769-99 Engine View Diagrams & Manuals
190402-1770-99 Engine View Diagrams & Manuals
190402-1782-99 Engine View Diagrams & Manuals
190402-1791-99 Engine View Diagrams & Manuals
190402-1794-99 Engine View Diagrams & Manuals
190402-1802-99 Engine View Diagrams & Manuals
190402-1805-99 Engine View Diagrams & Manuals
190402-1806-99 Engine View Diagrams & Manuals
190402-1808-99 Engine View Diagrams & Manuals
190402-1809-99 Engine View Diagrams & Manuals
190402-1817-99 Engine View Diagrams & Manuals
190402-1833-99 Engine View Diagrams & Manuals
190402-1834-99 Engine View Diagrams & Manuals
190402-1835-99 Engine View Diagrams & Manuals
190402-1838-99 Engine View Diagrams & Manuals
190402-1840-99 Engine View Diagrams & Manuals
190402-1849-99 Engine View Diagrams & Manuals
190402-1853-99 Engine View Diagrams & Manuals
190402-1854-99 Engine View Diagrams & Manuals
190402-1858-99 Engine View Diagrams & Manuals
190402-1859-99 Engine View Diagrams & Manuals
190402-1866-99 Engine View Diagrams & Manuals
190402-1880-99 Engine View Diagrams & Manuals
190402-1885-99 Engine View Diagrams & Manuals
190402-1897-99 Engine View Diagrams & Manuals
190402-1898-99 Engine View Diagrams & Manuals
190402-1901-99 Engine View Diagrams & Manuals
190402-1908-99 Engine View Diagrams & Manuals
190402-1909-99 Engine View Diagrams & Manuals
190402-1910-99 Engine View Diagrams & Manuals
190402-1912-99 Engine View Diagrams & Manuals
190402-1915-99 Engine View Diagrams & Manuals
190402-1918-99 Engine View Diagrams & Manuals
190402-1922-99 Engine View Diagrams & Manuals
190402-1932-99 Engine View Diagrams & Manuals
190402-1933-99 Engine View Diagrams & Manuals
190402-1934-99 Engine View Diagrams & Manuals
190402-1938-99 Engine View Diagrams & Manuals
190402-1948-99 Engine View Diagrams & Manuals
190402-1949-99 Engine View Diagrams & Manuals
190402-1950-99 Engine View Diagrams & Manuals
190402-1951-99 Engine View Diagrams & Manuals
190402-2015-99 Engine View Diagrams & Manuals
190402-2515-01 Engine View Diagrams & Manuals
190402-2515-02 Engine View Diagrams & Manuals
190402-2515-03 Engine View Diagrams & Manuals
190402-2517-01 Engine View Diagrams & Manuals
190402-2519-01 Engine View Diagrams & Manuals
190402-2520-01 Engine View Diagrams & Manuals
190402-2580-01 Engine View Diagrams & Manuals
190402-2601-01 Engine View Diagrams & Manuals
190402-2602-01 Engine View Diagrams & Manuals
190402-2611-01 Engine View Diagrams & Manuals
190402-2640-01 Engine View Diagrams & Manuals
190402-2643-01 Engine View Diagrams & Manuals
190402-2648-01 Engine View Diagrams & Manuals
190402-2649-01 Engine View Diagrams & Manuals
190402-2652-01 Engine View Diagrams & Manuals
190402-2653-01 Engine View Diagrams & Manuals
190402-2655-01 Engine View Diagrams & Manuals
190402-2662-01 Engine View Diagrams & Manuals
190402-2662-02 Engine View Diagrams & Manuals
190402-2664-01 Engine View Diagrams & Manuals
190402-2675-01 Engine View Diagrams & Manuals
190402-2676-01 Engine View Diagrams & Manuals
190402-2676-02 Engine View Diagrams & Manuals
190402-2676-03 Engine View Diagrams & Manuals
190402-2677-01 Engine View Diagrams & Manuals
190402-2682-01 Engine View Diagrams & Manuals
190402-2684-01 Engine View Diagrams & Manuals
190402-2686-01 Engine View Diagrams & Manuals
190402-2693-01 Engine View Diagrams & Manuals
190402-2693-02 Engine View Diagrams & Manuals
190402-2693-03 Engine View Diagrams & Manuals
190402-2695-01 Engine View Diagrams & Manuals
190402-2697-01 Engine View Diagrams & Manuals
190402-2702-01 Engine View Diagrams & Manuals
190402-2704-01 Engine View Diagrams & Manuals
190402-2706-01 Engine View Diagrams & Manuals
190402-2708-01 Engine View Diagrams & Manuals
190402-2710-01 Engine View Diagrams & Manuals
190402-2711-01 Engine View Diagrams & Manuals
190402-2712-01 Engine View Diagrams & Manuals
190402-2713-01 Engine View Diagrams & Manuals
190402-2720-01 Engine View Diagrams & Manuals
190402-2721-01 Engine View Diagrams & Manuals
190402-2725-01 Engine View Diagrams & Manuals
190402-2728-01 Engine View Diagrams & Manuals
190402-2731-01 Engine View Diagrams & Manuals
190402-2736-01 Engine View Diagrams & Manuals
190402-2739-01 Engine View Diagrams & Manuals
190402-2741-01 Engine View Diagrams & Manuals
190402-2743-01 Engine View Diagrams & Manuals
190402-2745-01 Engine View Diagrams & Manuals
190402-2753-01 Engine View Diagrams & Manuals
190402-2760-01 Engine View Diagrams & Manuals
190402-2768-99 Engine View Diagrams & Manuals
190402-2815-01 Engine View Diagrams & Manuals
190402-2815-02 Engine View Diagrams & Manuals
190402-2815-03 Engine View Diagrams & Manuals
190402-2819-01 Engine View Diagrams & Manuals
190402-2820-01 Engine View Diagrams & Manuals
190402-2829-01 Engine View Diagrams & Manuals
190402-2880-99 Engine View Diagrams & Manuals
190402-2900-01 Engine View Diagrams & Manuals
190402-2908-01 Engine View Diagrams & Manuals
190402-2910-01 Engine View Diagrams & Manuals
190402-2912-01 Engine View Diagrams & Manuals
190402-2921-01 Engine View Diagrams & Manuals
190402-2927-01 Engine View Diagrams & Manuals
190402-2932-01 Engine View Diagrams & Manuals
190402-2937-01 Engine View Diagrams & Manuals
190402-2938-01 Engine View Diagrams & Manuals
190402-2943-01 Engine View Diagrams & Manuals
190402-2948-01 Engine View Diagrams & Manuals
190402-2950-01 Engine View Diagrams & Manuals
190402-2954-01 Engine View Diagrams & Manuals
190402-2954-02 Engine View Diagrams & Manuals
190402-2955-01 Engine View Diagrams & Manuals
190402-2957-01 Engine View Diagrams & Manuals
190402-2958-01 Engine View Diagrams & Manuals
190402-2961-01 Engine View Diagrams & Manuals
190402-2962-01 Engine View Diagrams & Manuals
190402-2966-01 Engine View Diagrams & Manuals
190402-2966-02 Engine View Diagrams & Manuals
190402-2976-01 Engine View Diagrams & Manuals
190402-2978-01 Engine View Diagrams & Manuals
190402-2978-02 Engine View Diagrams & Manuals
190402-2979-01 Engine View Diagrams & Manuals
190402-2979-02 Engine View Diagrams & Manuals
190402-2981-01 Engine View Diagrams & Manuals
190402-2985-01 Engine View Diagrams & Manuals
190402-2988-01 Engine View Diagrams & Manuals
190402-2989-01 Engine View Diagrams & Manuals
190402-2993-01 Engine View Diagrams & Manuals
190402-2997-01 Engine View Diagrams & Manuals
190402-2998-01 Engine View Diagrams & Manuals
190402-3005-01 Engine View Diagrams & Manuals
190402-3006-01 Engine View Diagrams & Manuals
190402-3013-01 Engine View Diagrams & Manuals
190402-3018-01 Engine View Diagrams & Manuals
190402-3032-01 Engine View Diagrams & Manuals
190402-3034-01 Engine View Diagrams & Manuals
190402-3034-02 Engine View Diagrams & Manuals
190402-3038-01 Engine View Diagrams & Manuals
190402-3042-99 Engine View Diagrams & Manuals
190402-3043-01 Engine View Diagrams & Manuals
190402-3043-02 Engine View Diagrams & Manuals
190402-3060-01 Engine View Diagrams & Manuals
190402-3061-99 Engine View Diagrams & Manuals
190402-3064-01 Engine View Diagrams & Manuals
190402-3065-01 Engine View Diagrams & Manuals
190402-3069-99 Engine View Diagrams & Manuals
190402-3071-01 Engine View Diagrams & Manuals
190402-3071-02 Engine View Diagrams & Manuals
190402-3088-99 Engine View Diagrams & Manuals
190402-3091-01 Engine View Diagrams & Manuals
190402-3092-01 Engine View Diagrams & Manuals
190402-3120-01 Engine View Diagrams & Manuals
190402-3126-01 Engine View Diagrams & Manuals
190402-3132-01 Engine View Diagrams & Manuals
190402-3138-01 Engine View Diagrams & Manuals
190402-3144-01 Engine View Diagrams & Manuals
190402-3151-01 Engine View Diagrams & Manuals
190402-3158-01 Engine View Diagrams & Manuals
190402-4002-01 Engine View Diagrams & Manuals
190402-4007-01 Engine View Diagrams & Manuals
190402-4010-01 Engine View Diagrams & Manuals
190402-4015-01 Engine View Diagrams & Manuals
190402-4020-01 Engine View Diagrams & Manuals
190402-6015-01 Engine View Diagrams & Manuals
190402-6020-01 Engine View Diagrams & Manuals
190402-6029-01 Engine View Diagrams & Manuals
190402-6102-01 Engine View Diagrams & Manuals
190402-6116-01 Engine View Diagrams & Manuals
190402-6120-01 Engine View Diagrams & Manuals
190402-6121-01 Engine View Diagrams & Manuals
190402-6131-01 Engine View Diagrams & Manuals
190402-6132-01 Engine View Diagrams & Manuals
190402-6134-99 Engine View Diagrams & Manuals
190402-6138-01 Engine View Diagrams & Manuals
190402-6144-01 Engine View Diagrams & Manuals
190402-6151-01 Engine View Diagrams & Manuals
190402-6164-99 Engine View Diagrams & Manuals
190402-6165-01 Engine View Diagrams & Manuals
190402-6166-01 Engine View Diagrams & Manuals
190403-1612-99 Engine View Diagrams & Manuals
190403-2638-01 Engine View Diagrams & Manuals
190403-2639-01 Engine View Diagrams & Manuals
190403-2742-01 Engine View Diagrams & Manuals
190403-2911-01 Engine View Diagrams & Manuals
190403-2994-01 Engine View Diagrams & Manuals
190403-3043-01 Engine View Diagrams & Manuals
190403-3044-01 Engine View Diagrams & Manuals
190403-3044-02 Engine View Diagrams & Manuals
190403-3082-01 Engine View Diagrams & Manuals
190403-3133-01 Engine View Diagrams & Manuals
190403-6157-99 Engine View Diagrams & Manuals
190406-1634-99 Engine View Diagrams & Manuals
190406-1754-99 Engine View Diagrams & Manuals
190406-1781-99 Engine View Diagrams & Manuals
190406-2641-01 Engine View Diagrams & Manuals
190406-2740-01 Engine View Diagrams & Manuals
190406-2763-01 Engine View Diagrams & Manuals
190406-2765-01 Engine View Diagrams & Manuals
190406-2947-99 Engine View Diagrams & Manuals
190406-2983-01 Engine View Diagrams & Manuals
190406-2999-01 Engine View Diagrams & Manuals
190406-3014-01 Engine View Diagrams & Manuals
190406-3045-01 Engine View Diagrams & Manuals
190406-3046-99 Engine View Diagrams & Manuals
190406-3047-01 Engine View Diagrams & Manuals
190406-3054-01 Engine View Diagrams & Manuals
190406-3061-01 Engine View Diagrams & Manuals
190406-3061-02 Engine View Diagrams & Manuals
190406-3069-01 Engine View Diagrams & Manuals
190406-3083-01 Engine View Diagrams & Manuals
190406-3086-01 Engine View Diagrams & Manuals
190406-3088-01 Engine View Diagrams & Manuals
190406-3104-01 Engine View Diagrams & Manuals
190406-3113-01 Engine View Diagrams & Manuals
190406-3119-01 Engine View Diagrams & Manuals
190406-3134-01 Engine View Diagrams & Manuals
190406-3135-01 Engine View Diagrams & Manuals
190406-6142-01 Engine View Diagrams & Manuals
190406-6142-02 Engine View Diagrams & Manuals
190407-1525-99 Engine View Diagrams & Manuals
190407-1581-99 Engine View Diagrams & Manuals
190407-1582-99 Engine View Diagrams & Manuals
190407-1623-99 Engine View Diagrams & Manuals
190407-1682-99 Engine View Diagrams & Manuals
190407-1684-99 Engine View Diagrams & Manuals
190407-1725-99 Engine View Diagrams & Manuals
190407-1773-99 Engine View Diagrams & Manuals
190407-1814-99 Engine View Diagrams & Manuals
190407-1836-99 Engine View Diagrams & Manuals
190407-1862-99 Engine View Diagrams & Manuals
190407-1895-99 Engine View Diagrams & Manuals
190407-2525-01 Engine View Diagrams & Manuals
190407-2525-02 Engine View Diagrams & Manuals
190407-2581-01 Engine View Diagrams & Manuals
190407-2582-01 Engine View Diagrams & Manuals
190407-2623-01 Engine View Diagrams & Manuals
190407-2668-01 Engine View Diagrams & Manuals
190407-2749-01 Engine View Diagrams & Manuals
190407-2825-01 Engine View Diagrams & Manuals
190407-2881-99 Engine View Diagrams & Manuals
190407-2882-01 Engine View Diagrams & Manuals
190407-2906-01 Engine View Diagrams & Manuals
190407-2922-01 Engine View Diagrams & Manuals
190407-3111-99 Engine View Diagrams & Manuals
190407-3125-01 Engine View Diagrams & Manuals
190407-4006-01 Engine View Diagrams & Manuals
190407-4008-01 Engine View Diagrams & Manuals
190407-4025-01 Engine View Diagrams & Manuals
190407-6025-01 Engine View Diagrams & Manuals
190407-6122-01 Engine View Diagrams & Manuals
190407-6179-99 Engine View Diagrams & Manuals
190412-1630-99 Engine View Diagrams & Manuals
190412-1633-99 Engine View Diagrams & Manuals
190412-1641-99 Engine View Diagrams & Manuals
190412-1648-99 Engine View Diagrams & Manuals
190412-1656-99 Engine View Diagrams & Manuals
190412-1663-99 Engine View Diagrams & Manuals
190412-1685-99 Engine View Diagrams & Manuals
190412-1688-99 Engine View Diagrams & Manuals
190412-1709-99 Engine View Diagrams & Manuals
190412-1713-99 Engine View Diagrams & Manuals
190412-1722-99 Engine View Diagrams & Manuals
190412-1741-99 Engine View Diagrams & Manuals
190412-1774-99 Engine View Diagrams & Manuals
190412-1786-99 Engine View Diagrams & Manuals
190412-1787-99 Engine View Diagrams & Manuals
190412-1821-99 Engine View Diagrams & Manuals
190412-1823-99 Engine View Diagrams & Manuals
190412-1843-99 Engine View Diagrams & Manuals
190412-1852-99 Engine View Diagrams & Manuals
190412-1873-99 Engine View Diagrams & Manuals
190412-1892-99 Engine View Diagrams & Manuals
190412-1902-99 Engine View Diagrams & Manuals
190412-1904-99 Engine View Diagrams & Manuals
190412-1911-99 Engine View Diagrams & Manuals
190412-1920-99 Engine View Diagrams & Manuals
190412-1925-99 Engine View Diagrams & Manuals
190412-1937-99 Engine View Diagrams & Manuals
190412-1940-99 Engine View Diagrams & Manuals
190412-1942-99 Engine View Diagrams & Manuals
190412-1946-99 Engine View Diagrams & Manuals
190412-1947-99 Engine View Diagrams & Manuals
190412-2518-01 Engine View Diagrams & Manuals
190412-2524-01 Engine View Diagrams & Manuals
190412-2630-01 Engine View Diagrams & Manuals
190412-2644-01 Engine View Diagrams & Manuals
190412-2646-01 Engine View Diagrams & Manuals
190412-2650-01 Engine View Diagrams & Manuals
190412-2650-02 Engine View Diagrams & Manuals
190412-2654-01 Engine View Diagrams & Manuals
190412-2658-01 Engine View Diagrams & Manuals
190412-2672-01 Engine View Diagrams & Manuals
190412-2678-01 Engine View Diagrams & Manuals
190412-2687-01 Engine View Diagrams & Manuals
190412-2688-01 Engine View Diagrams & Manuals
190412-2688-02 Engine View Diagrams & Manuals
190412-2689-01 Engine View Diagrams & Manuals
190412-2694-01 Engine View Diagrams & Manuals
190412-2699-01 Engine View Diagrams & Manuals
190412-2700-01 Engine View Diagrams & Manuals
190412-2705-01 Engine View Diagrams & Manuals
190412-2717-01 Engine View Diagrams & Manuals
190412-2719-01 Engine View Diagrams & Manuals
190412-2732-01 Engine View Diagrams & Manuals
190412-2738-01 Engine View Diagrams & Manuals
190412-2744-01 Engine View Diagrams & Manuals
190412-2744-02 Engine View Diagrams & Manuals
190412-2747-01 Engine View Diagrams & Manuals
190412-2750-01 Engine View Diagrams & Manuals
190412-2920-01 Engine View Diagrams & Manuals
190412-2925-01 Engine View Diagrams & Manuals
190412-2933-01 Engine View Diagrams & Manuals
190412-2933-02 Engine View Diagrams & Manuals
190412-2934-01 Engine View Diagrams & Manuals
190412-2939-01 Engine View Diagrams & Manuals
190412-2940-01 Engine View Diagrams & Manuals
190412-2941-01 Engine View Diagrams & Manuals
190412-2941-02 Engine View Diagrams & Manuals
190412-2946-01 Engine View Diagrams & Manuals
190412-2960-01 Engine View Diagrams & Manuals
190412-2960-02 Engine View Diagrams & Manuals
190412-2965-01 Engine View Diagrams & Manuals
190412-2996-99 Engine View Diagrams & Manuals
190412-3002-01 Engine View Diagrams & Manuals
190412-3003-01 Engine View Diagrams & Manuals
190412-3004-01 Engine View Diagrams & Manuals
190412-3020-01 Engine View Diagrams & Manuals
190412-3020-02 Engine View Diagrams & Manuals
190412-3020-03 Engine View Diagrams & Manuals
190412-3021-01 Engine View Diagrams & Manuals
190412-3028-01 Engine View Diagrams & Manuals
190412-3029-01 Engine View Diagrams & Manuals
190412-3030-01 Engine View Diagrams & Manuals
190412-3053-01 Engine View Diagrams & Manuals
190412-3057-01 Engine View Diagrams & Manuals
190412-3057-02 Engine View Diagrams & Manuals
190412-3058-01 Engine View Diagrams & Manuals
190412-3077-01 Engine View Diagrams & Manuals
190412-3094-01 Engine View Diagrams & Manuals
190412-3097-01 Engine View Diagrams & Manuals
190412-3098-01 Engine View Diagrams & Manuals
190412-3098-02 Engine View Diagrams & Manuals
190412-3107-01 Engine View Diagrams & Manuals
190412-3107-02 Engine View Diagrams & Manuals
190412-3116-01 Engine View Diagrams & Manuals
190412-3118-01 Engine View Diagrams & Manuals
190412-3122-01 Engine View Diagrams & Manuals
190412-3123-01 Engine View Diagrams & Manuals
190412-3127-01 Engine View Diagrams & Manuals
190412-3129-01 Engine View Diagrams & Manuals
190412-3130-99 Engine View Diagrams & Manuals
190412-3140-01 Engine View Diagrams & Manuals
190412-3140-02 Engine View Diagrams & Manuals
190412-3143-01 Engine View Diagrams & Manuals
190412-3145-99 Engine View Diagrams & Manuals
190412-3146-99 Engine View Diagrams & Manuals
190412-3152-01 Engine View Diagrams & Manuals
190412-3154-01 Engine View Diagrams & Manuals
190412-3156-01 Engine View Diagrams & Manuals
190412-3157-01 Engine View Diagrams & Manuals
190412-3213-01 Engine View Diagrams & Manuals
190412-3214-01 Engine View Diagrams & Manuals
190412-3215-01 Engine View Diagrams & Manuals
190412-4003-99 Engine View Diagrams & Manuals
190412-4004-01 Engine View Diagrams & Manuals
190412-4004-02 Engine View Diagrams & Manuals
190412-4004-03 Engine View Diagrams & Manuals
190412-4005-01 Engine View Diagrams & Manuals
190412-4011-01 Engine View Diagrams & Manuals
190412-4012-01 Engine View Diagrams & Manuals
190412-4012-02 Engine View Diagrams & Manuals
190412-4013-01 Engine View Diagrams & Manuals
190412-4016-99 Engine View Diagrams & Manuals
190412-6004-01 Engine View Diagrams & Manuals
190412-6005-01 Engine View Diagrams & Manuals
190412-6012-99 Engine View Diagrams & Manuals
190412-6023-01 Engine View Diagrams & Manuals
190412-6111-01 Engine View Diagrams & Manuals
190412-6112-01 Engine View Diagrams & Manuals
190412-6114-01 Engine View Diagrams & Manuals
190412-6123-01 Engine View Diagrams & Manuals
190412-6124-01 Engine View Diagrams & Manuals
190412-6125-01 Engine View Diagrams & Manuals
190412-6126-01 Engine View Diagrams & Manuals
190412-6128-01 Engine View Diagrams & Manuals
190412-6130-99 Engine View Diagrams & Manuals
190412-6140-01 Engine View Diagrams & Manuals
190412-6141-99 Engine View Diagrams & Manuals
190412-6143-01 Engine View Diagrams & Manuals
190412-6146-99 Engine View Diagrams & Manuals
190412-6150-99 Engine View Diagrams & Manuals
190412-6153-01 Engine View Diagrams & Manuals
190412-6154-01 Engine View Diagrams & Manuals
190412-6159-01 Engine View Diagrams & Manuals
190412-6160-01 Engine View Diagrams & Manuals
190412-6160-02 Engine View Diagrams & Manuals
190412-6214-01 Engine View Diagrams & Manuals
190415-1657-99 Engine View Diagrams & Manuals
190415-1729-99 Engine View Diagrams & Manuals
190415-1826-99 Engine View Diagrams & Manuals
190415-1935-99 Engine View Diagrams & Manuals
190415-2722-01 Engine View Diagrams & Manuals
190415-2761-01 Engine View Diagrams & Manuals
190415-2972-01 Engine View Diagrams & Manuals
190415-3068-01 Engine View Diagrams & Manuals
190415-3076-01 Engine View Diagrams & Manuals
190415-3128-01 Engine View Diagrams & Manuals
190415-3131-01 Engine View Diagrams & Manuals
190415-3147-99 Engine View Diagrams & Manuals
190415-6149-01 Engine View Diagrams & Manuals
190416-2756-01 Engine View Diagrams & Manuals
190416-2996-01 Engine View Diagrams & Manuals
190416-3048-01 Engine View Diagrams & Manuals
190417-1658-99 Engine View Diagrams & Manuals
190417-1714-99 Engine View Diagrams & Manuals
190417-1731-99 Engine View Diagrams & Manuals
190417-1797-99 Engine View Diagrams & Manuals
190417-1825-99 Engine View Diagrams & Manuals
190417-1874-99 Engine View Diagrams & Manuals
190417-1893-99 Engine View Diagrams & Manuals
190417-1923-99 Engine View Diagrams & Manuals
190417-2762-01 Engine View Diagrams & Manuals
190417-3009-01 Engine View Diagrams & Manuals
190417-3024-01 Engine View Diagrams & Manuals
190417-3027-99 Engine View Diagrams & Manuals
190417-3033-01 Engine View Diagrams & Manuals
190417-3033-02 Engine View Diagrams & Manuals
190417-3036-01 Engine View Diagrams & Manuals
190417-3056-01 Engine View Diagrams & Manuals
190417-3085-01 Engine View Diagrams & Manuals
190417-3093-01 Engine View Diagrams & Manuals
190417-3099-01 Engine View Diagrams & Manuals
190417-3105-01 Engine View Diagrams & Manuals
190417-3115-01 Engine View Diagrams & Manuals
190417-3124-01 Engine View Diagrams & Manuals
190417-3139-01 Engine View Diagrams & Manuals
190417-3155-01 Engine View Diagrams & Manuals
190417-4001-01 Engine View Diagrams & Manuals
190417-6001-01 Engine View Diagrams & Manuals
190417-6113-01 Engine View Diagrams & Manuals
190417-6139-99 Engine View Diagrams & Manuals
190417-6163-01 Engine View Diagrams & Manuals
190417-6213-01 Engine View Diagrams & Manuals
190431-1615-99 Engine View Diagrams & Manuals
190431-1669-99 Engine View Diagrams & Manuals
190431-1673-99 Engine View Diagrams & Manuals
190431-1699-99 Engine View Diagrams & Manuals
190431-1734-99 Engine View Diagrams & Manuals
190431-1739-99 Engine View Diagrams & Manuals
190431-1747-99 Engine View Diagrams & Manuals
190431-1752-99 Engine View Diagrams & Manuals
190431-1761-99 Engine View Diagrams & Manuals
190431-1767-99 Engine View Diagrams & Manuals
190431-1776-99 Engine View Diagrams & Manuals
190431-1780-99 Engine View Diagrams & Manuals
190431-1790-99 Engine View Diagrams & Manuals
190431-1804-99 Engine View Diagrams & Manuals
190431-1818-99 Engine View Diagrams & Manuals
190431-1831-99 Engine View Diagrams & Manuals
190431-1837-99 Engine View Diagrams & Manuals
190431-1842-99 Engine View Diagrams & Manuals
190431-1846-99 Engine View Diagrams & Manuals
190431-1884-99 Engine View Diagrams & Manuals
190431-1889-99 Engine View Diagrams & Manuals
190431-1903-99 Engine View Diagrams & Manuals
190431-1916-99 Engine View Diagrams & Manuals
190431-1936-99 Engine View Diagrams & Manuals
190431-1945-99 Engine View Diagrams & Manuals
190431-2680-01 Engine View Diagrams & Manuals
190431-2698-01 Engine View Diagrams & Manuals
190431-2729-01 Engine View Diagrams & Manuals
190431-2924-01 Engine View Diagrams & Manuals
190431-2964-01 Engine View Diagrams & Manuals
190431-2964-02 Engine View Diagrams & Manuals
190431-2969-01 Engine View Diagrams & Manuals
190431-2969-02 Engine View Diagrams & Manuals
190431-2980-01 Engine View Diagrams & Manuals
190431-3019-01 Engine View Diagrams & Manuals
190432-1027-99 Engine View Diagrams & Manuals
190432-1028-99 Engine View Diagrams & Manuals
190432-1535-99 Engine View Diagrams & Manuals
190432-1536-99 Engine View Diagrams & Manuals
190432-1537-99 Engine View Diagrams & Manuals
190432-1547-99 Engine View Diagrams & Manuals
190432-1570-99 Engine View Diagrams & Manuals
190432-1613-99 Engine View Diagrams & Manuals
190432-1616-99 Engine View Diagrams & Manuals
190432-1617-99 Engine View Diagrams & Manuals
190432-1629-99 Engine View Diagrams & Manuals
190432-1631-99 Engine View Diagrams & Manuals
190432-1632-99 Engine View Diagrams & Manuals
190432-1635-99 Engine View Diagrams & Manuals
190432-1636-99 Engine View Diagrams & Manuals
190432-1637-99 Engine View Diagrams & Manuals
190432-1638-99 Engine View Diagrams & Manuals
190432-1640-99 Engine View Diagrams & Manuals
190432-1644-99 Engine View Diagrams & Manuals
190432-1645-99 Engine View Diagrams & Manuals
190432-1646-99 Engine View Diagrams & Manuals
190432-1649-99 Engine View Diagrams & Manuals
190432-1652-99 Engine View Diagrams & Manuals
190432-1653-99 Engine View Diagrams & Manuals
190432-1655-99 Engine View Diagrams & Manuals
190432-1659-99 Engine View Diagrams & Manuals
190432-1667-99 Engine View Diagrams & Manuals
190432-1668-99 Engine View Diagrams & Manuals
190432-1670-99 Engine View Diagrams & Manuals
190432-1671-99 Engine View Diagrams & Manuals
190432-1672-99 Engine View Diagrams & Manuals
190432-1675-99 Engine View Diagrams & Manuals
190432-1678-99 Engine View Diagrams & Manuals
190432-1681-99 Engine View Diagrams & Manuals
190432-1689-99 Engine View Diagrams & Manuals
190432-1692-99 Engine View Diagrams & Manuals
190432-1695-99 Engine View Diagrams & Manuals
190432-1696-99 Engine View Diagrams & Manuals
190432-1701-99 Engine View Diagrams & Manuals
190432-1702-99 Engine View Diagrams & Manuals
190432-1710-99 Engine View Diagrams & Manuals
190432-1711-99 Engine View Diagrams & Manuals
190432-1712-99 Engine View Diagrams & Manuals
190432-1716-99 Engine View Diagrams & Manuals
190432-1719-99 Engine View Diagrams & Manuals
190432-1720-99 Engine View Diagrams & Manuals
190432-1721-99 Engine View Diagrams & Manuals
190432-1724-99 Engine View Diagrams & Manuals
190432-1727-99 Engine View Diagrams & Manuals
190432-1730-99 Engine View Diagrams & Manuals
190432-1732-99 Engine View Diagrams & Manuals
190432-1733-99 Engine View Diagrams & Manuals
190432-1737-99 Engine View Diagrams & Manuals
190432-1738-99 Engine View Diagrams & Manuals
190432-1740-99 Engine View Diagrams & Manuals
190432-1744-99 Engine View Diagrams & Manuals
190432-1746-99 Engine View Diagrams & Manuals
190432-1749-99 Engine View Diagrams & Manuals
190432-1750-99 Engine View Diagrams & Manuals
190432-1751-99 Engine View Diagrams & Manuals
190432-1755-99 Engine View Diagrams & Manuals
190432-1756-99 Engine View Diagrams & Manuals
190432-1757-99 Engine View Diagrams & Manuals
190432-1759-99 Engine View Diagrams & Manuals
190432-1762-99 Engine View Diagrams & Manuals
190432-1765-99 Engine View Diagrams & Manuals
190432-1777-99 Engine View Diagrams & Manuals
190432-1778-99 Engine View Diagrams & Manuals
190432-1779-99 Engine View Diagrams & Manuals
190432-1783-99 Engine View Diagrams & Manuals
190432-1784-99 Engine View Diagrams & Manuals
190432-1789-99 Engine View Diagrams & Manuals
190432-1792-99 Engine View Diagrams & Manuals
190432-1793-99 Engine View Diagrams & Manuals
190432-1795-99 Engine View Diagrams & Manuals
190432-1798-99 Engine View Diagrams & Manuals
190432-1799-99 Engine View Diagrams & Manuals
190432-1800-99 Engine View Diagrams & Manuals
190432-1801-99 Engine View Diagrams & Manuals
190432-1803-99 Engine View Diagrams & Manuals
190432-1804-99 Engine View Diagrams & Manuals
190432-1807-99 Engine View Diagrams & Manuals
190432-1812-99 Engine View Diagrams & Manuals
190432-1813-99 Engine View Diagrams & Manuals
190432-1815-99 Engine View Diagrams & Manuals
190432-1816-99 Engine View Diagrams & Manuals
190432-1820-99 Engine View Diagrams & Manuals
190432-1827-99 Engine View Diagrams & Manuals
190432-1828-99 Engine View Diagrams & Manuals
190432-1839-99 Engine View Diagrams & Manuals
190432-1841-99 Engine View Diagrams & Manuals
190432-1844-99 Engine View Diagrams & Manuals
190432-1848-99 Engine View Diagrams & Manuals
190432-1850-99 Engine View Diagrams & Manuals
190432-1855-99 Engine View Diagrams & Manuals
190432-1857-99 Engine View Diagrams & Manuals
190432-1860-99 Engine View Diagrams & Manuals
190432-1861-99 Engine View Diagrams & Manuals
190432-1863-99 Engine View Diagrams & Manuals
190432-1864-99 Engine View Diagrams & Manuals
190432-1865-99 Engine View Diagrams & Manuals
190432-1867-99 Engine View Diagrams & Manuals
190432-1868-99 Engine View Diagrams & Manuals
190432-1870-99 Engine View Diagrams & Manuals
190432-1871-99 Engine View Diagrams & Manuals
190432-1875-99 Engine View Diagrams & Manuals
190432-1877-99 Engine View Diagrams & Manuals
190432-1878-99 Engine View Diagrams & Manuals
190432-1879-99 Engine View Diagrams & Manuals
190432-1881-99 Engine View Diagrams & Manuals
190432-1883-99 Engine View Diagrams & Manuals
190432-1886-99 Engine View Diagrams & Manuals
190432-1888-99 Engine View Diagrams & Manuals
190432-1890-99 Engine View Diagrams & Manuals
190432-1891-99 Engine View Diagrams & Manuals
190432-1896-99 Engine View Diagrams & Manuals
190432-1899-99 Engine View Diagrams & Manuals
190432-1900-99 Engine View Diagrams & Manuals
190432-1905-99 Engine View Diagrams & Manuals
190432-1906-99 Engine View Diagrams & Manuals
190432-1907-99 Engine View Diagrams & Manuals
190432-1913-99 Engine View Diagrams & Manuals
190432-1917-99 Engine View Diagrams & Manuals
190432-1919-99 Engine View Diagrams & Manuals
190432-1924-99 Engine View Diagrams & Manuals
190432-1927-99 Engine View Diagrams & Manuals
190432-1928-99 Engine View Diagrams & Manuals
190432-1929-99 Engine View Diagrams & Manuals
190432-1930-99 Engine View Diagrams & Manuals
190432-1931-99 Engine View Diagrams & Manuals
190432-1939-99 Engine View Diagrams & Manuals
190432-1941-99 Engine View Diagrams & Manuals
190432-1943-99 Engine View Diagrams & Manuals
190432-1944-99 Engine View Diagrams & Manuals
190432-1952-99 Engine View Diagrams & Manuals
190432-2035-99 Engine View Diagrams & Manuals
190432-2070-99 Engine View Diagrams & Manuals
190432-2535-01 Engine View Diagrams & Manuals
190432-2535-02 Engine View Diagrams & Manuals
190432-2535-03 Engine View Diagrams & Manuals
190432-2535-04 Engine View Diagrams & Manuals
190432-2536-01 Engine View Diagrams & Manuals
190432-2536-02 Engine View Diagrams & Manuals
190432-2537-01 Engine View Diagrams & Manuals
190432-2537-02 Engine View Diagrams & Manuals
190432-2547-01 Engine View Diagrams & Manuals
190432-2547-02 Engine View Diagrams & Manuals
190432-2547-03 Engine View Diagrams & Manuals
190432-2570-01 Engine View Diagrams & Manuals
190432-2570-02 Engine View Diagrams & Manuals
190432-2570-03 Engine View Diagrams & Manuals
190432-2570-04 Engine View Diagrams & Manuals
190432-2613-01 Engine View Diagrams & Manuals
190432-2617-01 Engine View Diagrams & Manuals
190432-2631-01 Engine View Diagrams & Manuals
190432-2633-01 Engine View Diagrams & Manuals
190432-2637-01 Engine View Diagrams & Manuals
190432-2659-01 Engine View Diagrams & Manuals
190432-2660-01 Engine View Diagrams & Manuals
190432-2661-01 Engine View Diagrams & Manuals
190432-2663-01 Engine View Diagrams & Manuals
190432-2663-02 Engine View Diagrams & Manuals
190432-2665-01 Engine View Diagrams & Manuals
190432-2665-02 Engine View Diagrams & Manuals
190432-2665-03 Engine View Diagrams & Manuals
190432-2665-04 Engine View Diagrams & Manuals
190432-2666-01 Engine View Diagrams & Manuals
190432-2667-01 Engine View Diagrams & Manuals
190432-2669-01 Engine View Diagrams & Manuals
190432-2670-01 Engine View Diagrams & Manuals
190432-2670-02 Engine View Diagrams & Manuals
190432-2671-01 Engine View Diagrams & Manuals
190432-2673-99 Engine View Diagrams & Manuals
190432-2674-01 Engine View Diagrams & Manuals
190432-2679-01 Engine View Diagrams & Manuals
190432-2681-01 Engine View Diagrams & Manuals
190432-2683-01 Engine View Diagrams & Manuals
190432-2685-01 Engine View Diagrams & Manuals
190432-2690-01 Engine View Diagrams & Manuals
190432-2691-01 Engine View Diagrams & Manuals
190432-2692-01 Engine View Diagrams & Manuals
190432-2696-01 Engine View Diagrams & Manuals
190432-2703-01 Engine View Diagrams & Manuals
190432-2707-01 Engine View Diagrams & Manuals
190432-2709-01 Engine View Diagrams & Manuals
190432-2714-01 Engine View Diagrams & Manuals
190432-2715-01 Engine View Diagrams & Manuals
190432-2716-01 Engine View Diagrams & Manuals
190432-2718-01 Engine View Diagrams & Manuals
190432-2723-01 Engine View Diagrams & Manuals
190432-2724-01 Engine View Diagrams & Manuals
190432-2726-99 Engine View Diagrams & Manuals
190432-2727-01 Engine View Diagrams & Manuals
190432-2733-01 Engine View Diagrams & Manuals
190432-2737-01 Engine View Diagrams & Manuals
190432-2746-01 Engine View Diagrams & Manuals
190432-2748-01 Engine View Diagrams & Manuals
190432-2752-01 Engine View Diagrams & Manuals
190432-2755-01 Engine View Diagrams & Manuals
190432-2758-01 Engine View Diagrams & Manuals
190432-2766-01 Engine View Diagrams & Manuals
190432-2835-01 Engine View Diagrams & Manuals
190432-2835-02 Engine View Diagrams & Manuals
190432-2835-03 Engine View Diagrams & Manuals
190432-2835-04 Engine View Diagrams & Manuals
190432-2836-01 Engine View Diagrams & Manuals
190432-2847-01 Engine View Diagrams & Manuals
190432-2847-02 Engine View Diagrams & Manuals
190432-2847-03 Engine View Diagrams & Manuals
190432-2870-01 Engine View Diagrams & Manuals
190432-2870-02 Engine View Diagrams & Manuals
190432-2870-04 Engine View Diagrams & Manuals
190432-2902-01 Engine View Diagrams & Manuals
190432-2903-01 Engine View Diagrams & Manuals
190432-2913-01 Engine View Diagrams & Manuals
190432-2923-01 Engine View Diagrams & Manuals
190432-2926-01 Engine View Diagrams & Manuals
190432-2928-01 Engine View Diagrams & Manuals
190432-2928-02 Engine View Diagrams & Manuals
190432-2928-03 Engine View Diagrams & Manuals
190432-2928-04 Engine View Diagrams & Manuals
190432-2928-05 Engine View Diagrams & Manuals
190432-2929-01 Engine View Diagrams & Manuals
190432-2930-01 Engine View Diagrams & Manuals
190432-2930-02 Engine View Diagrams & Manuals
190432-2931-01 Engine View Diagrams & Manuals
190432-2935-01 Engine View Diagrams & Manuals
190432-2936-01 Engine View Diagrams & Manuals
190432-2942-01 Engine View Diagrams & Manuals
190432-2944-01 Engine View Diagrams & Manuals
190432-2945-01 Engine View Diagrams & Manuals
190432-2949-01 Engine View Diagrams & Manuals
190432-2951-01 Engine View Diagrams & Manuals
190432-2953-01 Engine View Diagrams & Manuals
190432-2956-01 Engine View Diagrams & Manuals
190432-2963-01 Engine View Diagrams & Manuals
190432-2968-99 Engine View Diagrams & Manuals
190432-2974-99 Engine View Diagrams & Manuals
190432-2975-01 Engine View Diagrams & Manuals
190432-2977-01 Engine View Diagrams & Manuals
190432-2982-01 Engine View Diagrams & Manuals
190432-2984-01 Engine View Diagrams & Manuals
190432-2986-01 Engine View Diagrams & Manuals
190432-2990-01 Engine View Diagrams & Manuals
190432-2990-02 Engine View Diagrams & Manuals
190432-2995-01 Engine View Diagrams & Manuals
190432-3001-01 Engine View Diagrams & Manuals
190432-3007-99 Engine View Diagrams & Manuals
190432-3008-99 Engine View Diagrams & Manuals
190432-3012-99 Engine View Diagrams & Manuals
190432-3015-01 Engine View Diagrams & Manuals
190432-3016-01 Engine View Diagrams & Manuals
190432-3017-01 Engine View Diagrams & Manuals
190432-3017-02 Engine View Diagrams & Manuals
190432-3022-01 Engine View Diagrams & Manuals
190432-3025-01 Engine View Diagrams & Manuals
190432-3026-01 Engine View Diagrams & Manuals
190432-3035-01 Engine View Diagrams & Manuals
190432-3035-02 Engine View Diagrams & Manuals
190432-3039-01 Engine View Diagrams & Manuals
190432-3040-01 Engine View Diagrams & Manuals
190432-3041-01 Engine View Diagrams & Manuals
190432-3066-01 Engine View Diagrams & Manuals
190432-3067-01 Engine View Diagrams & Manuals
190432-3070-01 Engine View Diagrams & Manuals
190432-3074-01 Engine View Diagrams & Manuals
190432-3075-01 Engine View Diagrams & Manuals
190432-3079-01 Engine View Diagrams & Manuals
190432-3080-01 Engine View Diagrams & Manuals
190432-3081-01 Engine View Diagrams & Manuals
190432-3087-01 Engine View Diagrams & Manuals
190432-3089-01 Engine View Diagrams & Manuals
190432-3090-01 Engine View Diagrams & Manuals
190432-3095-01 Engine View Diagrams & Manuals
190432-3100-01 Engine View Diagrams & Manuals
190432-3103-01 Engine View Diagrams & Manuals
190432-3106-99 Engine View Diagrams & Manuals
190432-3109-01 Engine View Diagrams & Manuals
190432-3110-99 Engine View Diagrams & Manuals
190432-3121-01 Engine View Diagrams & Manuals
190432-3141-99 Engine View Diagrams & Manuals
190432-3142-01 Engine View Diagrams & Manuals
190432-3153-01 Engine View Diagrams & Manuals
190432-3219-01 Engine View Diagrams & Manuals
190432-4014-99 Engine View Diagrams & Manuals
190432-5130-01 Engine View Diagrams & Manuals
190432-5130-03 Engine View Diagrams & Manuals
190432-5130-04 Engine View Diagrams & Manuals
190432-5132-99 Engine View Diagrams & Manuals
190432-5133-01 Engine View Diagrams & Manuals
190432-5134-01 Engine View Diagrams & Manuals
190432-5135-01 Engine View Diagrams & Manuals
190432-5136-01 Engine View Diagrams & Manuals
190432-5137-01 Engine View Diagrams & Manuals
190432-5138-01 Engine View Diagrams & Manuals
190432-5140-01 Engine View Diagrams & Manuals
190432-5141-01 Engine View Diagrams & Manuals
190432-5141-02 Engine View Diagrams & Manuals
190432-5141-03 Engine View Diagrams & Manuals
190432-5142-01 Engine View Diagrams & Manuals
190432-5145-01 Engine View Diagrams & Manuals
190432-5146-01 Engine View Diagrams & Manuals
190432-5146-02 Engine View Diagrams & Manuals
190432-5147-01 Engine View Diagrams & Manuals
190432-5148-01 Engine View Diagrams & Manuals
190432-5149-01 Engine View Diagrams & Manuals
190432-5150-01 Engine View Diagrams & Manuals
190432-5153-01 Engine View Diagrams & Manuals
190432-5154-01 Engine View Diagrams & Manuals
190432-5155-01 Engine View Diagrams & Manuals
190432-5156-01 Engine View Diagrams & Manuals
190432-5156-02 Engine View Diagrams & Manuals
190432-5157-01 Engine View Diagrams & Manuals
190432-5158-01 Engine View Diagrams & Manuals
190432-5160-01 Engine View Diagrams & Manuals
190432-5163-01 Engine View Diagrams & Manuals
190432-5164-99 Engine View Diagrams & Manuals
190432-5166-01 Engine View Diagrams & Manuals
190432-5167-99 Engine View Diagrams & Manuals
190432-5168-01 Engine View Diagrams & Manuals
190432-5169-01 Engine View Diagrams & Manuals
190432-5170-99 Engine View Diagrams & Manuals
190432-5171-01 Engine View Diagrams & Manuals
190432-5172-01 Engine View Diagrams & Manuals
190432-5173-01 Engine View Diagrams & Manuals
190432-5174-01 Engine View Diagrams & Manuals
190432-5175-01 Engine View Diagrams & Manuals
190432-5176-99 Engine View Diagrams & Manuals
190432-5177-01 Engine View Diagrams & Manuals
190432-5178-01 Engine View Diagrams & Manuals
190432-5179-99 Engine View Diagrams & Manuals
190432-5180-01 Engine View Diagrams & Manuals
190432-5181-01 Engine View Diagrams & Manuals
190432-5182-01 Engine View Diagrams & Manuals
190432-5183-01 Engine View Diagrams & Manuals
190432-5184-01 Engine View Diagrams & Manuals
190432-5185-01 Engine View Diagrams & Manuals
190432-5186-01 Engine View Diagrams & Manuals
190432-5187-01 Engine View Diagrams & Manuals
190432-5501-01 Engine View Diagrams & Manuals
190432-5502-01 Engine View Diagrams & Manuals
190432-5504-99 Engine View Diagrams & Manuals
190432-5508-01 Engine View Diagrams & Manuals
190432-5508-02 Engine View Diagrams & Manuals
190432-5509-01 Engine View Diagrams & Manuals
190432-5509-02 Engine View Diagrams & Manuals
190432-5509-03 Engine View Diagrams & Manuals
190432-5509-04 Engine View Diagrams & Manuals
190432-5509-05 Engine View Diagrams & Manuals
190432-5510-01 Engine View Diagrams & Manuals
190432-5511-01 Engine View Diagrams & Manuals
190432-5513-01 Engine View Diagrams & Manuals
190432-5513-02 Engine View Diagrams & Manuals
190432-5514-01 Engine View Diagrams & Manuals
190432-5535-01 Engine View Diagrams & Manuals
190432-5535-02 Engine View Diagrams & Manuals
190432-5535-03 Engine View Diagrams & Manuals
190432-5535-04 Engine View Diagrams & Manuals
190432-5536-99 Engine View Diagrams & Manuals
190432-5537-01 Engine View Diagrams & Manuals
190432-5547-01 Engine View Diagrams & Manuals
190432-5547-02 Engine View Diagrams & Manuals
190432-5551-01 Engine View Diagrams & Manuals
190432-5570-01 Engine View Diagrams & Manuals
190432-5570-02 Engine View Diagrams & Manuals
190432-5576-99 Engine View Diagrams & Manuals
190432-5578-99 Engine View Diagrams & Manuals
190432-5580-01 Engine View Diagrams & Manuals
190432-5580-02 Engine View Diagrams & Manuals
190432-5583-01 Engine View Diagrams & Manuals
190432-6002-99 Engine View Diagrams & Manuals
190432-6011-01 Engine View Diagrams & Manuals
190432-6013-01 Engine View Diagrams & Manuals
190432-6035-01 Engine View Diagrams & Manuals
190432-6047-01 Engine View Diagrams & Manuals
190432-6059-01 Engine View Diagrams & Manuals
190432-6070-01 Engine View Diagrams & Manuals
190432-6080-99 Engine View Diagrams & Manuals
190432-6083-01 Engine View Diagrams & Manuals
190432-6103-01 Engine View Diagrams & Manuals
190432-6110-01 Engine View Diagrams & Manuals
190432-6115-01 Engine View Diagrams & Manuals
190432-6115-02 Engine View Diagrams & Manuals
190432-6117-01 Engine View Diagrams & Manuals
190432-6117-02 Engine View Diagrams & Manuals
190432-6118-01 Engine View Diagrams & Manuals
190432-6119-01 Engine View Diagrams & Manuals
190432-6127-01 Engine View Diagrams & Manuals
190432-6129-99 Engine View Diagrams & Manuals
190432-6133-01 Engine View Diagrams & Manuals
190432-6133-02 Engine View Diagrams & Manuals
190432-6135-01 Engine View Diagrams & Manuals
190432-6136-01 Engine View Diagrams & Manuals
190432-6137-01 Engine View Diagrams & Manuals
190432-6141-01 Engine View Diagrams & Manuals
190432-6145-01 Engine View Diagrams & Manuals
190432-6147-01 Engine View Diagrams & Manuals
190432-6147-02 Engine View Diagrams & Manuals
190432-6148-01 Engine View Diagrams & Manuals
190432-6152-99 Engine View Diagrams & Manuals
190432-6155-01 Engine View Diagrams & Manuals
190432-6156-01 Engine View Diagrams & Manuals
190432-6161-01 Engine View Diagrams & Manuals
190432-6162-01 Engine View Diagrams & Manuals
190432-6167-01 Engine View Diagrams & Manuals
190432-6180-01 Engine View Diagrams & Manuals
190434-1540-99 Engine View Diagrams & Manuals
190435-1693-99 Engine View Diagrams & Manuals
190435-1698-99 Engine View Diagrams & Manuals
190435-1707-99 Engine View Diagrams & Manuals
190435-1775-99 Engine View Diagrams & Manuals
190435-1829-99 Engine View Diagrams & Manuals
190435-1830-99 Engine View Diagrams & Manuals
190435-2673-01 Engine View Diagrams & Manuals
190435-5143-01 Engine View Diagrams & Manuals
190436-2642-01 Engine View Diagrams & Manuals
190436-2726-01 Engine View Diagrams & Manuals
190436-2735-01 Engine View Diagrams & Manuals
190436-3007-01 Engine View Diagrams & Manuals
190436-3037-01 Engine View Diagrams & Manuals
190436-3051-01 Engine View Diagrams & Manuals
190436-3059-01 Engine View Diagrams & Manuals
190436-3062-01 Engine View Diagrams & Manuals
190436-3084-01 Engine View Diagrams & Manuals
190436-3106-01 Engine View Diagrams & Manuals
190436-3108-01 Engine View Diagrams & Manuals
190436-5144-01 Engine View Diagrams & Manuals
190436-5151-01 Engine View Diagrams & Manuals
190436-5162-01 Engine View Diagrams & Manuals
190436-5503-01 Engine View Diagrams & Manuals
190436-5503-02 Engine View Diagrams & Manuals
190436-6158-01 Engine View Diagrams & Manuals
190437-1541-99 Engine View Diagrams & Manuals
190437-1571-99 Engine View Diagrams & Manuals
190437-1572-99 Engine View Diagrams & Manuals
190437-1624-99 Engine View Diagrams & Manuals
190437-1715-99 Engine View Diagrams & Manuals
190437-1735-99 Engine View Diagrams & Manuals
190437-1736-99 Engine View Diagrams & Manuals
190437-1768-99 Engine View Diagrams & Manuals
190437-1785-99 Engine View Diagrams & Manuals
190437-1819-99 Engine View Diagrams & Manuals
190437-1845-99 Engine View Diagrams & Manuals
190437-1856-99 Engine View Diagrams & Manuals
190437-1872-99 Engine View Diagrams & Manuals
190437-1876-99 Engine View Diagrams & Manuals
190437-1882-99 Engine View Diagrams & Manuals
190437-1887-99 Engine View Diagrams & Manuals
190437-2541-01 Engine View Diagrams & Manuals
190437-2571-01 Engine View Diagrams & Manuals
190437-2571-02 Engine View Diagrams & Manuals
190437-2572-01 Engine View Diagrams & Manuals
190437-2635-01 Engine View Diagrams & Manuals
190437-2636-01 Engine View Diagrams & Manuals
190437-2647-01 Engine View Diagrams & Manuals
190437-2734-01 Engine View Diagrams & Manuals
190437-2751-01 Engine View Diagrams & Manuals
190437-2751-02 Engine View Diagrams & Manuals
190437-2757-01 Engine View Diagrams & Manuals
190437-2759-01 Engine View Diagrams & Manuals
190437-2841-01 Engine View Diagrams & Manuals
190437-2871-01 Engine View Diagrams & Manuals
190437-2871-02 Engine View Diagrams & Manuals
190437-2872-01 Engine View Diagrams & Manuals
190437-2952-01 Engine View Diagrams & Manuals
190437-2967-01 Engine View Diagrams & Manuals
190437-2967-02 Engine View Diagrams & Manuals
190437-2967-03 Engine View Diagrams & Manuals
190437-2967-04 Engine View Diagrams & Manuals
190437-3008-01 Engine View Diagrams & Manuals
190437-3023-99 Engine View Diagrams & Manuals
190437-3031-01 Engine View Diagrams & Manuals
190437-3052-01 Engine View Diagrams & Manuals
190437-3055-01 Engine View Diagrams & Manuals
190437-3072-01 Engine View Diagrams & Manuals
190437-3073-01 Engine View Diagrams & Manuals
190437-3078-01 Engine View Diagrams & Manuals
190437-3078-02 Engine View Diagrams & Manuals
190437-3096-01 Engine View Diagrams & Manuals
190437-3101-01 Engine View Diagrams & Manuals
190437-3102-99 Engine View Diagrams & Manuals
190437-3112-01 Engine View Diagrams & Manuals
190437-3114-99 Engine View Diagrams & Manuals
190437-3117-01 Engine View Diagrams & Manuals
190437-5131-01 Engine View Diagrams & Manuals
190437-5131-02 Engine View Diagrams & Manuals
190437-5131-03 Engine View Diagrams & Manuals
190437-5131-04 Engine View Diagrams & Manuals
190437-5139-01 Engine View Diagrams & Manuals
190437-5152-01 Engine View Diagrams & Manuals
190437-5159-01 Engine View Diagrams & Manuals
190437-5161-99 Engine View Diagrams & Manuals
190437-5165-01 Engine View Diagrams & Manuals
190437-5179-01 Engine View Diagrams & Manuals
190437-5504-01 Engine View Diagrams & Manuals
190437-5504-02 Engine View Diagrams & Manuals
190437-5506-01 Engine View Diagrams & Manuals
190437-5512-99 Engine View Diagrams & Manuals
190437-5515-01 Engine View Diagrams & Manuals
190437-5515-02 Engine View Diagrams & Manuals
190437-5541-01 Engine View Diagrams & Manuals
190437-5572-01 Engine View Diagrams & Manuals
190437-6002-01 Engine View Diagrams & Manuals
190437-6006-01 Engine View Diagrams & Manuals
190437-6041-01 Engine View Diagrams & Manuals
190437-6072-01 Engine View Diagrams & Manuals
190437-6130-01 Engine View Diagrams & Manuals
190451-1620-99 Engine View Diagrams & Manuals
190451-1677-99 Engine View Diagrams & Manuals
190451-1753-99 Engine View Diagrams & Manuals
190451-1760-99 Engine View Diagrams & Manuals
190451-1796-99 Engine View Diagrams & Manuals
190451-1822-99 Engine View Diagrams & Manuals
190451-1824-99 Engine View Diagrams & Manuals
190451-1869-99 Engine View Diagrams & Manuals
190451-1914-99 Engine View Diagrams & Manuals
190451-2620-01 Engine View Diagrams & Manuals
190451-2701-01 Engine View Diagrams & Manuals
190451-2904-01 Engine View Diagrams & Manuals
190451-2971-01 Engine View Diagrams & Manuals
190451-2973-01 Engine View Diagrams & Manuals
190452-1549-99 Engine View Diagrams & Manuals
190452-1621-99 Engine View Diagrams & Manuals
190452-1622-99 Engine View Diagrams & Manuals
190452-1651-99 Engine View Diagrams & Manuals
190452-1660-99 Engine View Diagrams & Manuals
190452-1686-99 Engine View Diagrams & Manuals
190452-1694-99 Engine View Diagrams & Manuals
190452-1704-99 Engine View Diagrams & Manuals
190452-1708-99 Engine View Diagrams & Manuals
190452-1717-99 Engine View Diagrams & Manuals
190452-1728-99 Engine View Diagrams & Manuals
190452-1766-99 Engine View Diagrams & Manuals
190452-1771-99 Engine View Diagrams & Manuals
190452-1772-99 Engine View Diagrams & Manuals
190452-1788-99 Engine View Diagrams & Manuals
190452-1810-99 Engine View Diagrams & Manuals
190452-1811-99 Engine View Diagrams & Manuals
190452-1832-99 Engine View Diagrams & Manuals
190452-1847-99 Engine View Diagrams & Manuals
190452-1851-99 Engine View Diagrams & Manuals
190452-1894-99 Engine View Diagrams & Manuals
190452-2049-99 Engine View Diagrams & Manuals
190452-2549-01 Engine View Diagrams & Manuals
190452-2549-02 Engine View Diagrams & Manuals
190452-2549-03 Engine View Diagrams & Manuals
190452-2549-04 Engine View Diagrams & Manuals
190452-2621-01 Engine View Diagrams & Manuals
190452-2632-01 Engine View Diagrams & Manuals
190452-2645-01 Engine View Diagrams & Manuals
190452-2849-01 Engine View Diagrams & Manuals
190452-2849-02 Engine View Diagrams & Manuals
190452-2849-03 Engine View Diagrams & Manuals
190452-2905-01 Engine View Diagrams & Manuals
190452-2914-01 Engine View Diagrams & Manuals
190452-2959-01 Engine View Diagrams & Manuals
190452-2970-01 Engine View Diagrams & Manuals
190452-2992-01 Engine View Diagrams & Manuals
190452-5549-01 Engine View Diagrams & Manuals
190452-5549-02 Engine View Diagrams & Manuals
190452-5549-03 Engine View Diagrams & Manuals
190452-5549-04 Engine View Diagrams & Manuals
190452-6049-01 Engine View Diagrams & Manuals
190452-6049-03 Engine View Diagrams & Manuals
190452-6104-01 Engine View Diagrams & Manuals
190457-1625-99 Engine View Diagrams & Manuals
190457-2625-01 Engine View Diagrams & Manuals
190457-2907-01 Engine View Diagrams & Manuals
190492-1643-99 Engine View Diagrams & Manuals
190492-1665-99 Engine View Diagrams & Manuals
190492-1926-99 Engine View Diagrams & Manuals
190492-2634-01 Engine View Diagrams & Manuals
190492-2634-02 Engine View Diagrams & Manuals
190492-2651-01 Engine View Diagrams & Manuals
190492-2730-01 Engine View Diagrams & Manuals
190492-2730-02 Engine View Diagrams & Manuals
190492-2754-01 Engine View Diagrams & Manuals
190492-2764-01 Engine View Diagrams & Manuals
190492-2764-02 Engine View Diagrams & Manuals
190492-3000-99 Engine View Diagrams & Manuals
190492-3011-01 Engine View Diagrams & Manuals
190492-3011-02 Engine View Diagrams & Manuals
190492-3049-01 Engine View Diagrams & Manuals
190492-3049-02 Engine View Diagrams & Manuals
190493-2987-99 Engine View Diagrams & Manuals
190493-3010-01 Engine View Diagrams & Manuals
190493-3050-99 Engine View Diagrams & Manuals
190496-2657-01 Engine View Diagrams & Manuals
190496-2767-01 Engine View Diagrams & Manuals
190496-3063-01 Engine View Diagrams & Manuals
190496-3136-01 Engine View Diagrams & Manuals
190496-3137-01 Engine View Diagrams & Manuals
190497-2656-01 Engine View Diagrams & Manuals
190700-0719-99 Engine View Diagrams & Manuals
190701-0110-99 Engine View Diagrams & Manuals
190701-0127-99 Engine View Diagrams & Manuals
190701-0157-99 Engine View Diagrams & Manuals
190701-0172-99 Engine View Diagrams & Manuals
190701-0173-99 Engine View Diagrams & Manuals
190701-0610-99 Engine View Diagrams & Manuals
190701-0682-99 Engine View Diagrams & Manuals
190701-0689-99 Engine View Diagrams & Manuals
190701-0880-99 Engine View Diagrams & Manuals
190701-1110-99 Engine View Diagrams & Manuals
190701-5134-99 Engine View Diagrams & Manuals
190702-0015-99 Engine View Diagrams & Manuals
190702-0016-99 Engine View Diagrams & Manuals
190702-0017-99 Engine View Diagrams & Manuals
190702-0111-99 Engine View Diagrams & Manuals
190702-0120-99 Engine View Diagrams & Manuals
190702-0123-99 Engine View Diagrams & Manuals
190702-0124-99 Engine View Diagrams & Manuals
190702-0125-99 Engine View Diagrams & Manuals
190702-0126-99 Engine View Diagrams & Manuals
190702-0131-99 Engine View Diagrams & Manuals
190702-0133-99 Engine View Diagrams & Manuals
190702-0134-99 Engine View Diagrams & Manuals
190702-0135-99 Engine View Diagrams & Manuals
190702-0138-99 Engine View Diagrams & Manuals
190702-0141-99 Engine View Diagrams & Manuals
190702-0143-99 Engine View Diagrams & Manuals
190702-0147-99 Engine View Diagrams & Manuals
190702-0149-99 Engine View Diagrams & Manuals
190702-0152-99 Engine View Diagrams & Manuals
190702-0153-99 Engine View Diagrams & Manuals
190702-0160-99 Engine View Diagrams & Manuals
190702-0161-99 Engine View Diagrams & Manuals
190702-0163-99 Engine View Diagrams & Manuals
190702-0165-99 Engine View Diagrams & Manuals
190702-0171-99 Engine View Diagrams & Manuals
190702-0174-99 Engine View Diagrams & Manuals
190702-0179-99 Engine View Diagrams & Manuals
190702-0180-99 Engine View Diagrams & Manuals
190702-0183-99 Engine View Diagrams & Manuals
190702-0184-99 Engine View Diagrams & Manuals
190702-0186-99 Engine View Diagrams & Manuals
190702-0187-99 Engine View Diagrams & Manuals
190702-0189-99 Engine View Diagrams & Manuals
190702-0515-99 Engine View Diagrams & Manuals
190702-0516-99 Engine View Diagrams & Manuals
190702-0517-99 Engine View Diagrams & Manuals
190702-0518-99 Engine View Diagrams & Manuals
190702-0611-99 Engine View Diagrams & Manuals
190702-0625-99 Engine View Diagrams & Manuals
190702-0627-99 Engine View Diagrams & Manuals
190702-0628-99 Engine View Diagrams & Manuals
190702-0629-99 Engine View Diagrams & Manuals
190702-0632-99 Engine View Diagrams & Manuals
190702-0634-99 Engine View Diagrams & Manuals
190702-0636-99 Engine View Diagrams & Manuals
190702-0639-99 Engine View Diagrams & Manuals
190702-0640-99 Engine View Diagrams & Manuals
190702-0641-99 Engine View Diagrams & Manuals
190702-0644-99 Engine View Diagrams & Manuals
190702-0646-99 Engine View Diagrams & Manuals
190702-0648-99 Engine View Diagrams & Manuals
190702-0649-99 Engine View Diagrams & Manuals
190702-0650-99 Engine View Diagrams & Manuals
190702-0652-99 Engine View Diagrams & Manuals
190702-0655-99 Engine View Diagrams & Manuals
190702-0656-99 Engine View Diagrams & Manuals
190702-0661-99 Engine View Diagrams & Manuals
190702-0663-99 Engine View Diagrams & Manuals
190702-0664-99 Engine View Diagrams & Manuals
190702-0667-99 Engine View Diagrams & Manuals
190702-0669-99 Engine View Diagrams & Manuals
190702-0672-99 Engine View Diagrams & Manuals
190702-0673-99 Engine View Diagrams & Manuals
190702-0674-99 Engine View Diagrams & Manuals
190702-0683-99 Engine View Diagrams & Manuals
190702-0684-99 Engine View Diagrams & Manuals
190702-0686-99 Engine View Diagrams & Manuals
190702-0687-99 Engine View Diagrams & Manuals
190702-0689-99 Engine View Diagrams & Manuals
190702-0690-99 Engine View Diagrams & Manuals
190702-0694-99 Engine View Diagrams & Manuals
190702-0696-99 Engine View Diagrams & Manuals
190702-0697-99 Engine View Diagrams & Manuals
190702-0699-99 Engine View Diagrams & Manuals
190702-0700-99 Engine View Diagrams & Manuals
190702-0701-99 Engine View Diagrams & Manuals
190702-0703-99 Engine View Diagrams & Manuals
190702-0704-99 Engine View Diagrams & Manuals
190702-0706-99 Engine View Diagrams & Manuals
190702-0707-99 Engine View Diagrams & Manuals
190702-0708-99 Engine View Diagrams & Manuals
190702-0709-99 Engine View Diagrams & Manuals
190702-0713-99 Engine View Diagrams & Manuals
190702-0720-99 Engine View Diagrams & Manuals
190702-0721-99 Engine View Diagrams & Manuals
190702-0722-99 Engine View Diagrams & Manuals
190702-0723-99 Engine View Diagrams & Manuals
190702-0726-99 Engine View Diagrams & Manuals
190702-0729-99 Engine View Diagrams & Manuals
190702-0730-99 Engine View Diagrams & Manuals
190702-0731-99 Engine View Diagrams & Manuals
190702-0732-99 Engine View Diagrams & Manuals
190702-0735-99 Engine View Diagrams & Manuals
190702-0737-99 Engine View Diagrams & Manuals
190702-0741-99 Engine View Diagrams & Manuals
190702-0743-99 Engine View Diagrams & Manuals
190702-0745-99 Engine View Diagrams & Manuals
190702-0748-99 Engine View Diagrams & Manuals
190702-0750-99 Engine View Diagrams & Manuals
190702-0751-99 Engine View Diagrams & Manuals
190702-0755-99 Engine View Diagrams & Manuals
190702-0757-99 Engine View Diagrams & Manuals
190702-0759-99 Engine View Diagrams & Manuals
190702-0761-99 Engine View Diagrams & Manuals
190702-0762-99 Engine View Diagrams & Manuals
190702-0764-99 Engine View Diagrams & Manuals
190702-0766-99 Engine View Diagrams & Manuals
190702-0769-99 Engine View Diagrams & Manuals
190702-0771-99 Engine View Diagrams & Manuals
190702-0773-99 Engine View Diagrams & Manuals
190702-0774-99 Engine View Diagrams & Manuals
190702-0776-99 Engine View Diagrams & Manuals
190702-0778-99 Engine View Diagrams & Manuals
190702-0781-99 Engine View Diagrams & Manuals
190702-0782-99 Engine View Diagrams & Manuals
190702-0784-99 Engine View Diagrams & Manuals
190702-0785-99 Engine View Diagrams & Manuals
190702-0787-99 Engine View Diagrams & Manuals
190702-0789-99 Engine View Diagrams & Manuals
190702-0791-99 Engine View Diagrams & Manuals
190702-0794-99 Engine View Diagrams & Manuals
190702-0795-99 Engine View Diagrams & Manuals
190702-0797-99 Engine View Diagrams & Manuals
190702-0800-99 Engine View Diagrams & Manuals
190702-0801-99 Engine View Diagrams & Manuals
190702-0803-99 Engine View Diagrams & Manuals
190702-0805-99 Engine View Diagrams & Manuals
190702-0807-99 Engine View Diagrams & Manuals
190702-0810-99 Engine View Diagrams & Manuals
190702-0812-99 Engine View Diagrams & Manuals
190702-0816-99 Engine View Diagrams & Manuals
190702-0818-99 Engine View Diagrams & Manuals
190702-0821-99 Engine View Diagrams & Manuals
190702-0826-99 Engine View Diagrams & Manuals
190702-0827-99 Engine View Diagrams & Manuals
190702-0829-99 Engine View Diagrams & Manuals
190702-0831-99 Engine View Diagrams & Manuals
190702-0835-99 Engine View Diagrams & Manuals
190702-0838-99 Engine View Diagrams & Manuals
190702-0840-99 Engine View Diagrams & Manuals
190702-0842-99 Engine View Diagrams & Manuals
190702-0845-99 Engine View Diagrams & Manuals
190702-0848-99 Engine View Diagrams & Manuals
190702-0850-99 Engine View Diagrams & Manuals
190702-0853-99 Engine View Diagrams & Manuals
190702-0854-99 Engine View Diagrams & Manuals
190702-0855-99 Engine View Diagrams & Manuals
190702-0857-99 Engine View Diagrams & Manuals
190702-0858-99 Engine View Diagrams & Manuals
190702-0859-99 Engine View Diagrams & Manuals
190702-0860-99 Engine View Diagrams & Manuals
190702-0862-99 Engine View Diagrams & Manuals
190702-0864-99 Engine View Diagrams & Manuals
190702-0865-99 Engine View Diagrams & Manuals
190702-0867-99 Engine View Diagrams & Manuals
190702-0868-99 Engine View Diagrams & Manuals
190702-0869-99 Engine View Diagrams & Manuals
190702-0872-99 Engine View Diagrams & Manuals
190702-0873-99 Engine View Diagrams & Manuals
190702-0875-99 Engine View Diagrams & Manuals
190702-0878-99 Engine View Diagrams & Manuals
190702-0881-99 Engine View Diagrams & Manuals
190702-0882-99 Engine View Diagrams & Manuals
190702-0884-99 Engine View Diagrams & Manuals
190702-0885-99 Engine View Diagrams & Manuals
190702-0888-99 Engine View Diagrams & Manuals
190702-0890-99 Engine View Diagrams & Manuals
190702-0891-99 Engine View Diagrams & Manuals
190702-0892-99 Engine View Diagrams & Manuals
190702-0894-99 Engine View Diagrams & Manuals
190702-0895-99 Engine View Diagrams & Manuals
190702-0896-99 Engine View Diagrams & Manuals
190702-0898-99 Engine View Diagrams & Manuals
190702-0900-99 Engine View Diagrams & Manuals
190702-0902-99 Engine View Diagrams & Manuals
190702-0904-99 Engine View Diagrams & Manuals
190702-0905-99 Engine View Diagrams & Manuals
190702-0906-99 Engine View Diagrams & Manuals
190702-0907-99 Engine View Diagrams & Manuals
190702-0908-99 Engine View Diagrams & Manuals
190702-0909-99 Engine View Diagrams & Manuals
190702-0911-99 Engine View Diagrams & Manuals
190702-0914-99 Engine View Diagrams & Manuals
190702-0918-99 Engine View Diagrams & Manuals
190702-0919-99 Engine View Diagrams & Manuals
190702-0924-99 Engine View Diagrams & Manuals
190702-0925-99 Engine View Diagrams & Manuals
190702-0926-99 Engine View Diagrams & Manuals
190702-0927-99 Engine View Diagrams & Manuals
190702-1015-99 Engine View Diagrams & Manuals
190702-1016-99 Engine View Diagrams & Manuals
190702-1017-99 Engine View Diagrams & Manuals
190702-1018-99 Engine View Diagrams & Manuals
190702-1111-99 Engine View Diagrams & Manuals
190702-1125-99 Engine View Diagrams & Manuals
190702-1126-99 Engine View Diagrams & Manuals
190702-1130-99 Engine View Diagrams & Manuals
190702-1132-99 Engine View Diagrams & Manuals
190702-1135-99 Engine View Diagrams & Manuals
190702-1136-99 Engine View Diagrams & Manuals
190702-1138-99 Engine View Diagrams & Manuals
190702-1139-99 Engine View Diagrams & Manuals
190702-1143-99 Engine View Diagrams & Manuals
190702-1146-99 Engine View Diagrams & Manuals
190702-1149-99 Engine View Diagrams & Manuals
190702-1150-99 Engine View Diagrams & Manuals
190702-1152-99 Engine View Diagrams & Manuals
190702-1153-99 Engine View Diagrams & Manuals
190702-1155-99 Engine View Diagrams & Manuals
190702-1156-99 Engine View Diagrams & Manuals
190702-1157-99 Engine View Diagrams & Manuals
190702-1158-99 Engine View Diagrams & Manuals
190702-1160-99 Engine View Diagrams & Manuals
190702-1161-99 Engine View Diagrams & Manuals
190702-1162-99 Engine View Diagrams & Manuals
190702-1163-99 Engine View Diagrams & Manuals
190702-1164-99 Engine View Diagrams & Manuals
190702-1165-99 Engine View Diagrams & Manuals
190702-1167-99 Engine View Diagrams & Manuals
190702-1169-99 Engine View Diagrams & Manuals
190702-1170-99 Engine View Diagrams & Manuals
190702-1172-99 Engine View Diagrams & Manuals
190702-1174-99 Engine View Diagrams & Manuals
190702-1175-99 Engine View Diagrams & Manuals
190702-1176-99 Engine View Diagrams & Manuals
190702-1177-99 Engine View Diagrams & Manuals
190702-1180-99 Engine View Diagrams & Manuals
190702-1183-99 Engine View Diagrams & Manuals
190702-1188-99 Engine View Diagrams & Manuals
190702-1195-99 Engine View Diagrams & Manuals
190702-1198-99 Engine View Diagrams & Manuals
190702-1201-99 Engine View Diagrams & Manuals
190702-1202-99 Engine View Diagrams & Manuals
190702-1203-99 Engine View Diagrams & Manuals
190702-1204-99 Engine View Diagrams & Manuals
190702-1205-99 Engine View Diagrams & Manuals
190702-1210-99 Engine View Diagrams & Manuals
190702-1212-99 Engine View Diagrams & Manuals
190702-1214-99 Engine View Diagrams & Manuals
190702-5015-99 Engine View Diagrams & Manuals
190702-5016-99 Engine View Diagrams & Manuals
190702-5017-99 Engine View Diagrams & Manuals
190702-5018-99 Engine View Diagrams & Manuals
190702-5019-99 Engine View Diagrams & Manuals
190702-5125-99 Engine View Diagrams & Manuals
190702-5128-99 Engine View Diagrams & Manuals
190702-5129-99 Engine View Diagrams & Manuals
190702-5132-99 Engine View Diagrams & Manuals
190702-5136-99 Engine View Diagrams & Manuals
190702-5140-99 Engine View Diagrams & Manuals
190702-5144-99 Engine View Diagrams & Manuals
190702-5146-99 Engine View Diagrams & Manuals
190702-5150-99 Engine View Diagrams & Manuals
190702-5151-99 Engine View Diagrams & Manuals
190702-5155-99 Engine View Diagrams & Manuals
190702-5515-99 Engine View Diagrams & Manuals
190702-5516-99 Engine View Diagrams & Manuals
190702-5517-99 Engine View Diagrams & Manuals
190702-5518-99 Engine View Diagrams & Manuals
190702-5519-99 Engine View Diagrams & Manuals
190702-5630-99 Engine View Diagrams & Manuals
190702-5633-99 Engine View Diagrams & Manuals
190702-5640-99 Engine View Diagrams & Manuals
190702-5642-99 Engine View Diagrams & Manuals
190702-5644-99 Engine View Diagrams & Manuals
190702-5647-99 Engine View Diagrams & Manuals
190702-5652-99 Engine View Diagrams & Manuals
190702-5653-99 Engine View Diagrams & Manuals
190702-5656-99 Engine View Diagrams & Manuals
190702-5658-99 Engine View Diagrams & Manuals
190703-0112-99 Engine View Diagrams & Manuals
190703-0188-99 Engine View Diagrams & Manuals
190703-0612-99 Engine View Diagrams & Manuals
190704-0113-99 Engine View Diagrams & Manuals
190704-0128-99 Engine View Diagrams & Manuals
190704-0156-99 Engine View Diagrams & Manuals
190704-0613-99 Engine View Diagrams & Manuals
190705-0114-99 Engine View Diagrams & Manuals
190705-0129-99 Engine View Diagrams & Manuals
190705-0137-99 Engine View Diagrams & Manuals
190705-0139-99 Engine View Diagrams & Manuals
190705-0140-99 Engine View Diagrams & Manuals
190705-0154-99 Engine View Diagrams & Manuals
190705-0175-99 Engine View Diagrams & Manuals
190705-0614-99 Engine View Diagrams & Manuals
190705-0633-99 Engine View Diagrams & Manuals
190705-0637-99 Engine View Diagrams & Manuals
190705-0647-99 Engine View Diagrams & Manuals
190705-0659-99 Engine View Diagrams & Manuals
190705-0665-99 Engine View Diagrams & Manuals
190705-0666-99 Engine View Diagrams & Manuals
190705-0676-99 Engine View Diagrams & Manuals
190705-0677-99 Engine View Diagrams & Manuals
190705-0678-99 Engine View Diagrams & Manuals
190705-0679-99 Engine View Diagrams & Manuals
190705-0693-99 Engine View Diagrams & Manuals
190705-0711-99 Engine View Diagrams & Manuals
190705-0714-99 Engine View Diagrams & Manuals
190705-0727-99 Engine View Diagrams & Manuals
190705-0733-99 Engine View Diagrams & Manuals
190705-0740-99 Engine View Diagrams & Manuals
190705-0749-99 Engine View Diagrams & Manuals
190705-0758-99 Engine View Diagrams & Manuals
190705-0760-99 Engine View Diagrams & Manuals
190705-0763-99 Engine View Diagrams & Manuals
190705-0780-99 Engine View Diagrams & Manuals
190705-0788-99 Engine View Diagrams & Manuals
190705-0792-99 Engine View Diagrams & Manuals
190705-0796-99 Engine View Diagrams & Manuals
190705-0804-99 Engine View Diagrams & Manuals
190705-0813-99 Engine View Diagrams & Manuals
190705-0820-99 Engine View Diagrams & Manuals
190705-0822-99 Engine View Diagrams & Manuals
190705-0823-99 Engine View Diagrams & Manuals
190705-0824-99 Engine View Diagrams & Manuals
190705-0836-99 Engine View Diagrams & Manuals
190705-0837-99 Engine View Diagrams & Manuals
190705-0841-99 Engine View Diagrams & Manuals
190705-0847-99 Engine View Diagrams & Manuals
190705-0886-99 Engine View Diagrams & Manuals
190705-0889-99 Engine View Diagrams & Manuals
190705-0893-99 Engine View Diagrams & Manuals
190705-0903-99 Engine View Diagrams & Manuals
190705-0917-99 Engine View Diagrams & Manuals
190705-0920-99 Engine View Diagrams & Manuals
190705-0928-99 Engine View Diagrams & Manuals
190705-1114-99 Engine View Diagrams & Manuals
190705-1129-99 Engine View Diagrams & Manuals
190705-1131-99 Engine View Diagrams & Manuals
190705-1133-99 Engine View Diagrams & Manuals
190705-1137-99 Engine View Diagrams & Manuals
190705-1151-99 Engine View Diagrams & Manuals
190705-1154-99 Engine View Diagrams & Manuals
190705-1173-99 Engine View Diagrams & Manuals
190705-5126-99 Engine View Diagrams & Manuals
190705-5138-99 Engine View Diagrams & Manuals
190705-5156-99 Engine View Diagrams & Manuals
190705-5625-99 Engine View Diagrams & Manuals
190705-5626-99 Engine View Diagrams & Manuals
190705-5636-99 Engine View Diagrams & Manuals
190705-5639-99 Engine View Diagrams & Manuals
190705-5649-99 Engine View Diagrams & Manuals
190705-5650-99 Engine View Diagrams & Manuals
190707-0115-99 Engine View Diagrams & Manuals
190707-0121-99 Engine View Diagrams & Manuals
190707-0122-99 Engine View Diagrams & Manuals
190707-0130-99 Engine View Diagrams & Manuals
190707-0132-99 Engine View Diagrams & Manuals
190707-0136-99 Engine View Diagrams & Manuals
190707-0142-99 Engine View Diagrams & Manuals
190707-0144-99 Engine View Diagrams & Manuals
190707-0145-99 Engine View Diagrams & Manuals
190707-0146-99 Engine View Diagrams & Manuals
190707-0148-99 Engine View Diagrams & Manuals
190707-0150-99 Engine View Diagrams & Manuals
190707-0151-99 Engine View Diagrams & Manuals
190707-0155-99 Engine View Diagrams & Manuals
190707-0158-99 Engine View Diagrams & Manuals
190707-0159-99 Engine View Diagrams & Manuals
190707-0162-99 Engine View Diagrams & Manuals
190707-0164-99 Engine View Diagrams & Manuals
190707-0166-99 Engine View Diagrams & Manuals
190707-0167-99 Engine View Diagrams & Manuals
190707-0168-99 Engine View Diagrams & Manuals
190707-0169-99 Engine View Diagrams & Manuals
190707-0170-99 Engine View Diagrams & Manuals
190707-0176-99 Engine View Diagrams & Manuals
190707-0177-99 Engine View Diagrams & Manuals
190707-0178-99 Engine View Diagrams & Manuals
190707-0181-99 Engine View Diagrams & Manuals
190707-0182-99 Engine View Diagrams & Manuals
190707-0185-99 Engine View Diagrams & Manuals
190707-0190-99 Engine View Diagrams & Manuals
190707-0525-99 Engine View Diagrams & Manuals
190707-0526-99 Engine View Diagrams & Manuals
190707-0615-99 Engine View Diagrams & Manuals
190707-0626-99 Engine View Diagrams & Manuals
190707-0630-99 Engine View Diagrams & Manuals
190707-0631-99 Engine View Diagrams & Manuals
190707-0635-99 Engine View Diagrams & Manuals
190707-0638-99 Engine View Diagrams & Manuals
190707-0640-99 Engine View Diagrams & Manuals
190707-0642-99 Engine View Diagrams & Manuals
190707-0643-99 Engine View Diagrams & Manuals
190707-0645-99 Engine View Diagrams & Manuals
190707-0651-99 Engine View Diagrams & Manuals
190707-0653-99 Engine View Diagrams & Manuals
190707-0654-99 Engine View Diagrams & Manuals
190707-0657-99 Engine View Diagrams & Manuals
190707-0658-99 Engine View Diagrams & Manuals
190707-0660-99 Engine View Diagrams & Manuals
190707-0662-99 Engine View Diagrams & Manuals
190707-0668-99 Engine View Diagrams & Manuals
190707-0670-99 Engine View Diagrams & Manuals
190707-0671-99 Engine View Diagrams & Manuals
190707-0675-99 Engine View Diagrams & Manuals
190707-0680-99 Engine View Diagrams & Manuals
190707-0681-99 Engine View Diagrams & Manuals
190707-0685-99 Engine View Diagrams & Manuals
190707-0688-99 Engine View Diagrams & Manuals
190707-0691-99 Engine View Diagrams & Manuals
190707-0692-99 Engine View Diagrams & Manuals
190707-0695-99 Engine View Diagrams & Manuals
190707-0698-99 Engine View Diagrams & Manuals
190707-0702-99 Engine View Diagrams & Manuals
190707-0705-99 Engine View Diagrams & Manuals
190707-0710-99 Engine View Diagrams & Manuals
190707-0712-99 Engine View Diagrams & Manuals
190707-0715-99 Engine View Diagrams & Manuals
190707-0716-99 Engine View Diagrams & Manuals
190707-0717-99 Engine View Diagrams & Manuals
190707-0718-99 Engine View Diagrams & Manuals
190707-0724-99 Engine View Diagrams & Manuals
190707-0725-99 Engine View Diagrams & Manuals
190707-0728-99 Engine View Diagrams & Manuals
190707-0734-99 Engine View Diagrams & Manuals
190707-0736-99 Engine View Diagrams & Manuals
190707-0738-99 Engine View Diagrams & Manuals
190707-0739-99 Engine View Diagrams & Manuals
190707-0742-99 Engine View Diagrams & Manuals
190707-0744-99 Engine View Diagrams & Manuals
190707-0746-99 Engine View Diagrams & Manuals
190707-0747-99 Engine View Diagrams & Manuals
190707-0752-99 Engine View Diagrams & Manuals
190707-0753-99 Engine View Diagrams & Manuals
190707-0754-99 Engine View Diagrams & Manuals
190707-0756-99 Engine View Diagrams & Manuals
190707-0765-99 Engine View Diagrams & Manuals
190707-0767-99 Engine View Diagrams & Manuals
190707-0768-99 Engine View Diagrams & Manuals
190707-0770-99 Engine View Diagrams & Manuals
190707-0772-99 Engine View Diagrams & Manuals
190707-0775-99 Engine View Diagrams & Manuals
190707-0777-99 Engine View Diagrams & Manuals
190707-0779-99 Engine View Diagrams & Manuals
190707-0783-99 Engine View Diagrams & Manuals
190707-0786-99 Engine View Diagrams & Manuals
190707-0790-99 Engine View Diagrams & Manuals
190707-0793-99 Engine View Diagrams & Manuals
190707-0798-99 Engine View Diagrams & Manuals
190707-0799-99 Engine View Diagrams & Manuals
190707-0802-99 Engine View Diagrams & Manuals
190707-0806-99 Engine View Diagrams & Manuals
190707-0808-99 Engine View Diagrams & Manuals
190707-0809-99 Engine View Diagrams & Manuals
190707-0811-99 Engine View Diagrams & Manuals
190707-0814-99 Engine View Diagrams & Manuals
190707-0815-99 Engine View Diagrams & Manuals
190707-0817-99 Engine View Diagrams & Manuals
190707-0819-99 Engine View Diagrams & Manuals
190707-0825-99 Engine View Diagrams & Manuals
190707-0828-99 Engine View Diagrams & Manuals
190707-0830-99 Engine View Diagrams & Manuals
190707-0832-99 Engine View Diagrams & Manuals
190707-0833-99 Engine View Diagrams & Manuals
190707-0834-99 Engine View Diagrams & Manuals
190707-0839-99 Engine View Diagrams & Manuals
190707-0843-99 Engine View Diagrams & Manuals
190707-0844-99 Engine View Diagrams & Manuals
190707-0846-99 Engine View Diagrams & Manuals
190707-0849-99 Engine View Diagrams & Manuals
190707-0851-99 Engine View Diagrams & Manuals
190707-0852-99 Engine View Diagrams & Manuals
190707-0856-99 Engine View Diagrams & Manuals
190707-0861-99 Engine View Diagrams & Manuals
190707-0863-99 Engine View Diagrams & Manuals
190707-0866-99 Engine View Diagrams & Manuals
190707-0870-99 Engine View Diagrams & Manuals
190707-0871-99 Engine View Diagrams & Manuals
190707-0874-99 Engine View Diagrams & Manuals
190707-0876-99 Engine View Diagrams & Manuals
190707-0877-99 Engine View Diagrams & Manuals
190707-0879-99 Engine View Diagrams & Manuals
190707-0883-99 Engine View Diagrams & Manuals
190707-0887-99 Engine View Diagrams & Manuals
190707-0897-99 Engine View Diagrams & Manuals
190707-0899-99 Engine View Diagrams & Manuals
190707-0901-99 Engine View Diagrams & Manuals
190707-0910-99 Engine View Diagrams & Manuals
190707-0912-99 Engine View Diagrams & Manuals
190707-0913-99 Engine View Diagrams & Manuals
190707-0915-99 Engine View Diagrams & Manuals
190707-0916-99 Engine View Diagrams & Manuals
190707-0921-99 Engine View Diagrams & Manuals
190707-0922-99 Engine View Diagrams & Manuals
190707-0923-99 Engine View Diagrams & Manuals
190707-1025-99 Engine View Diagrams & Manuals
190707-1026-99 Engine View Diagrams & Manuals
190707-1115-99 Engine View Diagrams & Manuals
190707-1127-99 Engine View Diagrams & Manuals
190707-1128-99 Engine View Diagrams & Manuals
190707-1134-99 Engine View Diagrams & Manuals
190707-1140-99 Engine View Diagrams & Manuals
190707-1141-99 Engine View Diagrams & Manuals
190707-1142-99 Engine View Diagrams & Manuals
190707-1144-99 Engine View Diagrams & Manuals
190707-1145-99 Engine View Diagrams & Manuals
190707-1147-99 Engine View Diagrams & Manuals
190707-1148-99 Engine View Diagrams & Manuals
190707-1158-99 Engine View Diagrams & Manuals
190707-1159-99 Engine View Diagrams & Manuals
190707-1166-99 Engine View Diagrams & Manuals
190707-1168-99 Engine View Diagrams & Manuals
190707-1171-99 Engine View Diagrams & Manuals
190707-1178-99 Engine View Diagrams & Manuals
190707-1179-99 Engine View Diagrams & Manuals
190707-1181-99 Engine View Diagrams & Manuals
190707-1182-99 Engine View Diagrams & Manuals
190707-1184-99 Engine View Diagrams & Manuals
190707-1185-99 Engine View Diagrams & Manuals
190707-1186-99 Engine View Diagrams & Manuals
190707-1187-99 Engine View Diagrams & Manuals
190707-1189-99 Engine View Diagrams & Manuals
190707-1190-99 Engine View Diagrams & Manuals
190707-1191-99 Engine View Diagrams & Manuals
190707-1192-99 Engine View Diagrams & Manuals
190707-1193-99 Engine View Diagrams & Manuals
190707-1194-99 Engine View Diagrams & Manuals
190707-1196-99 Engine View Diagrams & Manuals
190707-1197-99 Engine View Diagrams & Manuals
190707-1198-99 Engine View Diagrams & Manuals
190707-1199-99 Engine View Diagrams & Manuals
190707-1200-99 Engine View Diagrams & Manuals
190707-1206-99 Engine View Diagrams & Manuals
190707-1207-99 Engine View Diagrams & Manuals
190707-1208-99 Engine View Diagrams & Manuals
190707-1209-99 Engine View Diagrams & Manuals
190707-1211-99 Engine View Diagrams & Manuals
190707-1213-99 Engine View Diagrams & Manuals
190707-5025-99 Engine View Diagrams & Manuals
190707-5026-99 Engine View Diagrams & Manuals
190707-5027-99 Engine View Diagrams & Manuals
190707-5028-99 Engine View Diagrams & Manuals
190707-5127-99 Engine View Diagrams & Manuals
190707-5130-99 Engine View Diagrams & Manuals
190707-5131-99 Engine View Diagrams & Manuals
190707-5133-99 Engine View Diagrams & Manuals
190707-5135-99 Engine View Diagrams & Manuals
190707-5137-99 Engine View Diagrams & Manuals
190707-5139-99 Engine View Diagrams & Manuals
190707-5141-99 Engine View Diagrams & Manuals
190707-5142-99 Engine View Diagrams & Manuals
190707-5143-99 Engine View Diagrams & Manuals
190707-5145-99 Engine View Diagrams & Manuals
190707-5147-99 Engine View Diagrams & Manuals
190707-5148-99 Engine View Diagrams & Manuals
190707-5149-99 Engine View Diagrams & Manuals
190707-5152-99 Engine View Diagrams & Manuals
190707-5153-99 Engine View Diagrams & Manuals
190707-5154-99 Engine View Diagrams & Manuals
190707-5525-99 Engine View Diagrams & Manuals
190707-5526-99 Engine View Diagrams & Manuals
190707-5527-99 Engine View Diagrams & Manuals
190707-5528-99 Engine View Diagrams & Manuals
190707-5627-99 Engine View Diagrams & Manuals
190707-5628-99 Engine View Diagrams & Manuals
190707-5629-99 Engine View Diagrams & Manuals
190707-5631-99 Engine View Diagrams & Manuals
190707-5632-99 Engine View Diagrams & Manuals
190707-5634-99 Engine View Diagrams & Manuals
190707-5635-99 Engine View Diagrams & Manuals
190707-5637-99 Engine View Diagrams & Manuals
190707-5638-99 Engine View Diagrams & Manuals
190707-5641-99 Engine View Diagrams & Manuals
190707-5643-99 Engine View Diagrams & Manuals
190707-5645-99 Engine View Diagrams & Manuals
190707-5646-99 Engine View Diagrams & Manuals
190707-5648-99 Engine View Diagrams & Manuals
190707-5649-99 Engine View Diagrams & Manuals
190707-5651-99 Engine View Diagrams & Manuals
190707-5654-99 Engine View Diagrams & Manuals
190707-5655-99 Engine View Diagrams & Manuals
190707-5657-99 Engine View Diagrams & Manuals
191700-0638-99 Engine View Diagrams & Manuals
191700-1140-99 Engine View Diagrams & Manuals
191700-2040-01 Engine View Diagrams & Manuals
191701-0110-99 Engine View Diagrams & Manuals
191701-0121-99 Engine View Diagrams & Manuals
191701-0122-99 Engine View Diagrams & Manuals
191701-0128-99 Engine View Diagrams & Manuals
191701-0610-99 Engine View Diagrams & Manuals
191701-0625-99 Engine View Diagrams & Manuals
191701-0630-99 Engine View Diagrams & Manuals
191701-5125-99 Engine View Diagrams & Manuals
191702-0016-99 Engine View Diagrams & Manuals
191702-0111-99 Engine View Diagrams & Manuals
191702-0129-99 Engine View Diagrams & Manuals
191702-0516-99 Engine View Diagrams & Manuals
191702-0611-99 Engine View Diagrams & Manuals
191702-0627-99 Engine View Diagrams & Manuals
191702-0633-99 Engine View Diagrams & Manuals
191702-0634-99 Engine View Diagrams & Manuals
191702-0643-99 Engine View Diagrams & Manuals
191702-0650-99 Engine View Diagrams & Manuals
191702-0652-99 Engine View Diagrams & Manuals
191702-0656-99 Engine View Diagrams & Manuals
191702-0660-99 Engine View Diagrams & Manuals
191702-0662-99 Engine View Diagrams & Manuals
191702-0664-99 Engine View Diagrams & Manuals
191702-0665-99 Engine View Diagrams & Manuals
191702-0666-99 Engine View Diagrams & Manuals
191702-0669-99 Engine View Diagrams & Manuals
191702-0671-99 Engine View Diagrams & Manuals
191702-0672-99 Engine View Diagrams & Manuals
191702-0673-99 Engine View Diagrams & Manuals
191702-0676-99 Engine View Diagrams & Manuals
191702-0677-99 Engine View Diagrams & Manuals
191702-0678-99 Engine View Diagrams & Manuals
191702-0680-99 Engine View Diagrams & Manuals
191702-0682-99 Engine View Diagrams & Manuals
191702-0683-99 Engine View Diagrams & Manuals
191702-0684-99 Engine View Diagrams & Manuals
191702-0687-99 Engine View Diagrams & Manuals
191702-0688-99 Engine View Diagrams & Manuals
191702-0689-99 Engine View Diagrams & Manuals
191702-0690-99 Engine View Diagrams & Manuals
191702-0691-99 Engine View Diagrams & Manuals
191702-0693-99 Engine View Diagrams & Manuals
191702-0697-99 Engine View Diagrams & Manuals
191702-0698-99 Engine View Diagrams & Manuals
191702-0699-99 Engine View Diagrams & Manuals
191702-0701-99 Engine View Diagrams & Manuals
191702-0702-99 Engine View Diagrams & Manuals
191702-1016-99 Engine View Diagrams & Manuals
191702-1111-99 Engine View Diagrams & Manuals
191702-1126-99 Engine View Diagrams & Manuals
191702-1128-99 Engine View Diagrams & Manuals
191702-1131-99 Engine View Diagrams & Manuals
191702-1137-99 Engine View Diagrams & Manuals
191702-1138-99 Engine View Diagrams & Manuals
191702-1141-99 Engine View Diagrams & Manuals
191702-1142-99 Engine View Diagrams & Manuals
191702-1145-99 Engine View Diagrams & Manuals
191702-1146-99 Engine View Diagrams & Manuals
191702-1147-99 Engine View Diagrams & Manuals
191702-1149-99 Engine View Diagrams & Manuals
191702-1150-99 Engine View Diagrams & Manuals
191702-1151-99 Engine View Diagrams & Manuals
191702-1152-99 Engine View Diagrams & Manuals
191702-1156-99 Engine View Diagrams & Manuals
191702-1158-99 Engine View Diagrams & Manuals
191702-1159-99 Engine View Diagrams & Manuals
191702-1161-99 Engine View Diagrams & Manuals
191702-1163-99 Engine View Diagrams & Manuals
191702-1165-99 Engine View Diagrams & Manuals
191702-2016-01 Engine View Diagrams & Manuals
191702-2111-01 Engine View Diagrams & Manuals
191702-2130-01 Engine View Diagrams & Manuals
191702-2133-01 Engine View Diagrams & Manuals
191702-2134-01 Engine View Diagrams & Manuals
191702-2139-01 Engine View Diagrams & Manuals
191702-2141-01 Engine View Diagrams & Manuals
191702-2143-01 Engine View Diagrams & Manuals
191702-2144-01 Engine View Diagrams & Manuals
191702-2145-01 Engine View Diagrams & Manuals
191702-2148-01 Engine View Diagrams & Manuals
191702-2149-01 Engine View Diagrams & Manuals
191702-2156-01 Engine View Diagrams & Manuals
191702-2158-01 Engine View Diagrams & Manuals
191702-2160-01 Engine View Diagrams & Manuals
191702-2165-01 Engine View Diagrams & Manuals
191702-2169-01 Engine View Diagrams & Manuals
191702-2169-02 Engine View Diagrams & Manuals
191702-2174-01 Engine View Diagrams & Manuals
191702-2180-01 Engine View Diagrams & Manuals
191702-2180-02 Engine View Diagrams & Manuals
191702-2182-99 Engine View Diagrams & Manuals
191702-5015-99 Engine View Diagrams & Manuals
191702-5016-99 Engine View Diagrams & Manuals
191702-5017-99 Engine View Diagrams & Manuals
191702-5126-99 Engine View Diagrams & Manuals
191702-5130-99 Engine View Diagrams & Manuals
191702-5133-99 Engine View Diagrams & Manuals
191702-5135-99 Engine View Diagrams & Manuals
191702-5137-99 Engine View Diagrams & Manuals
191702-5140-99 Engine View Diagrams & Manuals
191702-5141-99 Engine View Diagrams & Manuals
191702-5143-99 Engine View Diagrams & Manuals
191702-5148-99 Engine View Diagrams & Manuals
191702-5151-99 Engine View Diagrams & Manuals
191702-5152-99 Engine View Diagrams & Manuals
191702-5515-99 Engine View Diagrams & Manuals
191702-5516-99 Engine View Diagrams & Manuals
191702-5517-99 Engine View Diagrams & Manuals
191702-5624-99 Engine View Diagrams & Manuals
191702-5626-99 Engine View Diagrams & Manuals
191702-5628-99 Engine View Diagrams & Manuals
191702-5629-99 Engine View Diagrams & Manuals
191702-5630-99 Engine View Diagrams & Manuals
191702-5632-99 Engine View Diagrams & Manuals
191702-5635-99 Engine View Diagrams & Manuals
191702-5636-99 Engine View Diagrams & Manuals
191702-5643-99 Engine View Diagrams & Manuals
191702-5644-99 Engine View Diagrams & Manuals
191702-5648-99 Engine View Diagrams & Manuals
191702-5649-99 Engine View Diagrams & Manuals
191702-5650-99 Engine View Diagrams & Manuals
191702-5652-99 Engine View Diagrams & Manuals
191702-5653-99 Engine View Diagrams & Manuals
191702-5658-99 Engine View Diagrams & Manuals
191702-5659-99 Engine View Diagrams & Manuals
191702-5660-99 Engine View Diagrams & Manuals
191702-5665-99 Engine View Diagrams & Manuals
191702-5667-99 Engine View Diagrams & Manuals
191702-5670-99 Engine View Diagrams & Manuals
191702-5671-99 Engine View Diagrams & Manuals
191702-5672-99 Engine View Diagrams & Manuals
191702-5715-01 Engine View Diagrams & Manuals
191702-5716-01 Engine View Diagrams & Manuals
191702-5717-01 Engine View Diagrams & Manuals
191702-5814-01 Engine View Diagrams & Manuals
191702-5819-01 Engine View Diagrams & Manuals
191702-5822-01 Engine View Diagrams & Manuals
191702-5828-01 Engine View Diagrams & Manuals
191702-5828-02 Engine View Diagrams & Manuals
191702-5834-01 Engine View Diagrams & Manuals
191702-5835-01 Engine View Diagrams & Manuals
191702-5836-01 Engine View Diagrams & Manuals
191702-5837-01 Engine View Diagrams & Manuals
191702-5838-01 Engine View Diagrams & Manuals
191702-5840-01 Engine View Diagrams & Manuals
191702-5842-01 Engine View Diagrams & Manuals
191702-5848-01 Engine View Diagrams & Manuals
191702-5849-01 Engine View Diagrams & Manuals
191702-5851-01 Engine View Diagrams & Manuals
191702-5854-99 Engine View Diagrams & Manuals
191702-5856-01 Engine View Diagrams & Manuals
191703-0112-99 Engine View Diagrams & Manuals
191703-0612-99 Engine View Diagrams & Manuals
191703-5656-99 Engine View Diagrams & Manuals
191703-5669-99 Engine View Diagrams & Manuals
191703-5833-01 Engine View Diagrams & Manuals
191704-0113-99 Engine View Diagrams & Manuals
191704-0613-99 Engine View Diagrams & Manuals
191705-0114-99 Engine View Diagrams & Manuals
191705-0614-99 Engine View Diagrams & Manuals
191705-1114-99 Engine View Diagrams & Manuals
191705-2114-01 Engine View Diagrams & Manuals
191705-5131-99 Engine View Diagrams & Manuals
191705-5139-99 Engine View Diagrams & Manuals
191705-5647-99 Engine View Diagrams & Manuals
191706-5839-01 Engine View Diagrams & Manuals
191707-0115-99 Engine View Diagrams & Manuals
191707-0118-99 Engine View Diagrams & Manuals
191707-0119-99 Engine View Diagrams & Manuals
191707-0120-99 Engine View Diagrams & Manuals
191707-0123-99 Engine View Diagrams & Manuals
191707-0124-99 Engine View Diagrams & Manuals
191707-0125-99 Engine View Diagrams & Manuals
191707-0126-99 Engine View Diagrams & Manuals
191707-0127-99 Engine View Diagrams & Manuals
191707-0525-99 Engine View Diagrams & Manuals
191707-0526-99 Engine View Diagrams & Manuals
191707-0615-99 Engine View Diagrams & Manuals
191707-0626-99 Engine View Diagrams & Manuals
191707-0628-99 Engine View Diagrams & Manuals
191707-0629-99 Engine View Diagrams & Manuals
191707-0631-99 Engine View Diagrams & Manuals
191707-0632-99 Engine View Diagrams & Manuals
191707-0635-99 Engine View Diagrams & Manuals
191707-0636-99 Engine View Diagrams & Manuals
191707-0637-99 Engine View Diagrams & Manuals
191707-0639-99 Engine View Diagrams & Manuals
191707-0640-99 Engine View Diagrams & Manuals
191707-0641-99 Engine View Diagrams & Manuals
191707-0642-99 Engine View Diagrams & Manuals
191707-0644-99 Engine View Diagrams & Manuals
191707-0645-99 Engine View Diagrams & Manuals
191707-0646-99 Engine View Diagrams & Manuals
191707-0647-99 Engine View Diagrams & Manuals
191707-0648-99 Engine View Diagrams & Manuals
191707-0649-99 Engine View Diagrams & Manuals
191707-0651-99 Engine View Diagrams & Manuals
191707-0653-99 Engine View Diagrams & Manuals
191707-0654-99 Engine View Diagrams & Manuals
191707-0655-99 Engine View Diagrams & Manuals
191707-0657-99 Engine View Diagrams & Manuals
191707-0658-99 Engine View Diagrams & Manuals
191707-0659-99 Engine View Diagrams & Manuals
191707-0661-99 Engine View Diagrams & Manuals
191707-0663-99 Engine View Diagrams & Manuals
191707-0667-99 Engine View Diagrams & Manuals
191707-0668-99 Engine View Diagrams & Manuals
191707-0670-99 Engine View Diagrams & Manuals
191707-0674-99 Engine View Diagrams & Manuals
191707-0675-99 Engine View Diagrams & Manuals
191707-0679-99 Engine View Diagrams & Manuals
191707-0681-99 Engine View Diagrams & Manuals
191707-0685-99 Engine View Diagrams & Manuals
191707-0686-99 Engine View Diagrams & Manuals
191707-0692-99 Engine View Diagrams & Manuals
191707-0694-99 Engine View Diagrams & Manuals
191707-0695-99 Engine View Diagrams & Manuals
191707-0696-99 Engine View Diagrams & Manuals
191707-0700-99 Engine View Diagrams & Manuals
191707-0703-99 Engine View Diagrams & Manuals
191707-0704-99 Engine View Diagrams & Manuals
191707-0705-99 Engine View Diagrams & Manuals
191707-0706-99 Engine View Diagrams & Manuals
191707-1025-99 Engine View Diagrams & Manuals
191707-1026-99 Engine View Diagrams & Manuals
191707-1115-99 Engine View Diagrams & Manuals
191707-1125-99 Engine View Diagrams & Manuals
191707-1127-99 Engine View Diagrams & Manuals
191707-1129-99 Engine View Diagrams & Manuals
191707-1130-99 Engine View Diagrams & Manuals
191707-1132-99 Engine View Diagrams & Manuals
191707-1133-99 Engine View Diagrams & Manuals
191707-1134-99 Engine View Diagrams & Manuals
191707-1135-99 Engine View Diagrams & Manuals
191707-1136-99 Engine View Diagrams & Manuals
191707-1139-99 Engine View Diagrams & Manuals
191707-1143-99 Engine View Diagrams & Manuals
191707-1144-99 Engine View Diagrams & Manuals
191707-1148-99 Engine View Diagrams & Manuals
191707-1153-99 Engine View Diagrams & Manuals
191707-1154-99 Engine View Diagrams & Manuals
191707-1155-99 Engine View Diagrams & Manuals
191707-1157-99 Engine View Diagrams & Manuals
191707-1160-99 Engine View Diagrams & Manuals
191707-1162-99 Engine View Diagrams & Manuals
191707-1164-99 Engine View Diagrams & Manuals
191707-1165-99 Engine View Diagrams & Manuals
191707-1166-99 Engine View Diagrams & Manuals
191707-2025-01 Engine View Diagrams & Manuals
191707-2026-01 Engine View Diagrams & Manuals
191707-2039-01 Engine View Diagrams & Manuals
191707-2115-01 Engine View Diagrams & Manuals
191707-2131-01 Engine View Diagrams & Manuals
191707-2132-01 Engine View Diagrams & Manuals
191707-2135-01 Engine View Diagrams & Manuals
191707-2136-01 Engine View Diagrams & Manuals
191707-2137-01 Engine View Diagrams & Manuals
191707-2138-01 Engine View Diagrams & Manuals
191707-2140-01 Engine View Diagrams & Manuals
191707-2142-01 Engine View Diagrams & Manuals
191707-2146-01 Engine View Diagrams & Manuals
191707-2147-01 Engine View Diagrams & Manuals
191707-2150-01 Engine View Diagrams & Manuals
191707-2151-01 Engine View Diagrams & Manuals
191707-2152-01 Engine View Diagrams & Manuals
191707-2153-01 Engine View Diagrams & Manuals
191707-2154-01 Engine View Diagrams & Manuals
191707-2155-01 Engine View Diagrams & Manuals
191707-2157-01 Engine View Diagrams & Manuals
191707-2159-01 Engine View Diagrams & Manuals
191707-2161-01 Engine View Diagrams & Manuals
191707-2162-01 Engine View Diagrams & Manuals
191707-2163-01 Engine View Diagrams & Manuals
191707-2164-01 Engine View Diagrams & Manuals
191707-2166-01 Engine View Diagrams & Manuals
191707-2167-01 Engine View Diagrams & Manuals
191707-2168-01 Engine View Diagrams & Manuals
191707-2170-01 Engine View Diagrams & Manuals
191707-2171-01 Engine View Diagrams & Manuals
191707-2172-01 Engine View Diagrams & Manuals
191707-2173-01 Engine View Diagrams & Manuals
191707-2174-99 Engine View Diagrams & Manuals
191707-2175-01 Engine View Diagrams & Manuals
191707-2176-01 Engine View Diagrams & Manuals
191707-2177-01 Engine View Diagrams & Manuals
191707-2178-01 Engine View Diagrams & Manuals
191707-2179-01 Engine View Diagrams & Manuals
191707-2181-01 Engine View Diagrams & Manuals
191707-2181-02 Engine View Diagrams & Manuals
191707-2183-99 Engine View Diagrams & Manuals
191707-2184-01 Engine View Diagrams & Manuals
191707-2525-99 Engine View Diagrams & Manuals
191707-2537-99 Engine View Diagrams & Manuals
191707-5025-99 Engine View Diagrams & Manuals
191707-5026-99 Engine View Diagrams & Manuals
191707-5027-99 Engine View Diagrams & Manuals
191707-5127-99 Engine View Diagrams & Manuals
191707-5128-99 Engine View Diagrams & Manuals
191707-5129-99 Engine View Diagrams & Manuals
191707-5132-99 Engine View Diagrams & Manuals
191707-5134-99 Engine View Diagrams & Manuals
191707-5136-99 Engine View Diagrams & Manuals
191707-5138-99 Engine View Diagrams & Manuals
191707-5142-99 Engine View Diagrams & Manuals
191707-5144-99 Engine View Diagrams & Manuals
191707-5145-99 Engine View Diagrams & Manuals
191707-5146-99 Engine View Diagrams & Manuals
191707-5147-99 Engine View Diagrams & Manuals
191707-5149-99 Engine View Diagrams & Manuals
191707-5150-99 Engine View Diagrams & Manuals
191707-5153-99 Engine View Diagrams & Manuals
191707-5525-99 Engine View Diagrams & Manuals
191707-5526-99 Engine View Diagrams & Manuals
191707-5527-99 Engine View Diagrams & Manuals
191707-5625-99 Engine View Diagrams & Manuals
191707-5626-99 Engine View Diagrams & Manuals
191707-5627-99 Engine View Diagrams & Manuals
191707-5631-99 Engine View Diagrams & Manuals
191707-5633-99 Engine View Diagrams & Manuals
191707-5634-99 Engine View Diagrams & Manuals
191707-5635-99 Engine View Diagrams & Manuals
191707-5636-99 Engine View Diagrams & Manuals
191707-5637-99 Engine View Diagrams & Manuals
191707-5638-99 Engine View Diagrams & Manuals
191707-5639-99 Engine View Diagrams & Manuals
191707-5640-99 Engine View Diagrams & Manuals
191707-5641-99 Engine View Diagrams & Manuals
191707-5642-99 Engine View Diagrams & Manuals
191707-5645-99 Engine View Diagrams & Manuals
191707-5646-99 Engine View Diagrams & Manuals
191707-5651-99 Engine View Diagrams & Manuals
191707-5654-99 Engine View Diagrams & Manuals
191707-5655-99 Engine View Diagrams & Manuals
191707-5657-99 Engine View Diagrams & Manuals
191707-5661-99 Engine View Diagrams & Manuals
191707-5662-99 Engine View Diagrams & Manuals
191707-5663-99 Engine View Diagrams & Manuals
191707-5664-99 Engine View Diagrams & Manuals
191707-5665-99 Engine View Diagrams & Manuals
191707-5666-99 Engine View Diagrams & Manuals
191707-5668-99 Engine View Diagrams & Manuals
191707-5673-99 Engine View Diagrams & Manuals
191707-5674-99 Engine View Diagrams & Manuals
191707-5675-99 Engine View Diagrams & Manuals
191707-5676-99 Engine View Diagrams & Manuals
191707-5677-99 Engine View Diagrams & Manuals
191707-5678-99 Engine View Diagrams & Manuals
191707-5679-99 Engine View Diagrams & Manuals
191707-5725-01 Engine View Diagrams & Manuals
191707-5726-01 Engine View Diagrams & Manuals
191707-5727-01 Engine View Diagrams & Manuals
191707-5812-01 Engine View Diagrams & Manuals
191707-5813-01 Engine View Diagrams & Manuals
191707-5815-01 Engine View Diagrams & Manuals
191707-5816-01 Engine View Diagrams & Manuals
191707-5817-01 Engine View Diagrams & Manuals
191707-5818-01 Engine View Diagrams & Manuals
191707-5818-02 Engine View Diagrams & Manuals
191707-5820-01 Engine View Diagrams & Manuals
191707-5821-01 Engine View Diagrams & Manuals
191707-5822-99 Engine View Diagrams & Manuals
191707-5823-01 Engine View Diagrams & Manuals
191707-5824-01 Engine View Diagrams & Manuals
191707-5825-01 Engine View Diagrams & Manuals
191707-5825-02 Engine View Diagrams & Manuals
191707-5826-01 Engine View Diagrams & Manuals
191707-5827-01 Engine View Diagrams & Manuals
191707-5829-01 Engine View Diagrams & Manuals
191707-5829-02 Engine View Diagrams & Manuals
191707-5830-01 Engine View Diagrams & Manuals
191707-5831-01 Engine View Diagrams & Manuals
191707-5832-01 Engine View Diagrams & Manuals
191707-5841-01 Engine View Diagrams & Manuals
191707-5843-01 Engine View Diagrams & Manuals
191707-5844-01 Engine View Diagrams & Manuals
191707-5845-01 Engine View Diagrams & Manuals
191707-5846-01 Engine View Diagrams & Manuals
191707-5847-01 Engine View Diagrams & Manuals
191707-5850-01 Engine View Diagrams & Manuals
191707-5852-01 Engine View Diagrams & Manuals
191707-5852-02 Engine View Diagrams & Manuals
191707-5853-99 Engine View Diagrams & Manuals
191707-5854-01 Engine View Diagrams & Manuals
191707-5855-01 Engine View Diagrams & Manuals
191707-5857-01 Engine View Diagrams & Manuals
191707-6038-99 Engine View Diagrams & Manuals
191707-6041-99 Engine View Diagrams & Manuals
191707-6043-99 Engine View Diagrams & Manuals
191792-0119-99 Engine View Diagrams & Manuals
191792-0619-99 Engine View Diagrams & Manuals
192402-0015-01 Engine View Diagrams & Manuals
192402-0100-01 Engine View Diagrams & Manuals
192402-0127-01 Engine View Diagrams & Manuals
192402-0132-01 Engine View Diagrams & Manuals
192402-0145-02 Engine View Diagrams & Manuals
192402-0515-A1 Engine View Diagrams & Manuals
192402-0645-A1 Engine View Diagrams & Manuals
192402-0645-A2 Engine View Diagrams & Manuals
192402-1015-E1 Engine View Diagrams & Manuals
192402-1100-E1 Engine View Diagrams & Manuals
192402-1127-E1 Engine View Diagrams & Manuals
192402-1132-E1 Engine View Diagrams & Manuals
192402-1145-E2 Engine View Diagrams & Manuals
192402-1196-E1 Engine View Diagrams & Manuals
192402-1197-E1 Engine View Diagrams & Manuals
192402-1200-E1 Engine View Diagrams & Manuals
192402-1205-E1 Engine View Diagrams & Manuals
192402-1209-E1 Engine View Diagrams & Manuals
192402-1211-E1 Engine View Diagrams & Manuals
192407-0025-01 Engine View Diagrams & Manuals
192407-0131-01 Engine View Diagrams & Manuals
192407-0525-A1 Engine View Diagrams & Manuals
192407-1025-E1 Engine View Diagrams & Manuals
192407-1131-E1 Engine View Diagrams & Manuals
192407-1221-E1 Engine View Diagrams & Manuals
192412-0005-01 Engine View Diagrams & Manuals
192412-0007-01 Engine View Diagrams & Manuals
192412-0023-01 Engine View Diagrams & Manuals
192412-0116-01 Engine View Diagrams & Manuals
192412-0123-01 Engine View Diagrams & Manuals
192412-0128-01 Engine View Diagrams & Manuals
192412-0134-01 Engine View Diagrams & Manuals
192412-0137-01 Engine View Diagrams & Manuals
192412-0140-01 Engine View Diagrams & Manuals
192412-0143-01 Engine View Diagrams & Manuals
192412-0152-01 Engine View Diagrams & Manuals
192412-0160-01 Engine View Diagrams & Manuals
192412-0167-01 Engine View Diagrams & Manuals
192412-0168-01 Engine View Diagrams & Manuals
192412-0177-01 Engine View Diagrams & Manuals
192412-0180-01 Engine View Diagrams & Manuals
192412-0185-01 Engine View Diagrams & Manuals
192412-0186-01 Engine View Diagrams & Manuals
192412-0190-01 Engine View Diagrams & Manuals
192412-0192-01 Engine View Diagrams & Manuals
192412-0505-A1 Engine View Diagrams & Manuals
192412-0523-A1 Engine View Diagrams & Manuals
192412-0616-A1 Engine View Diagrams & Manuals
192412-0623-A1 Engine View Diagrams & Manuals
192412-0626-A1 Engine View Diagrams & Manuals
192412-0643-A1 Engine View Diagrams & Manuals
192412-0667-A1 Engine View Diagrams & Manuals
192412-0668-A1 Engine View Diagrams & Manuals
192412-0672-A1 Engine View Diagrams & Manuals
192412-0702-A1 Engine View Diagrams & Manuals
192412-1005-E1 Engine View Diagrams & Manuals
192412-1023-E1 Engine View Diagrams & Manuals
192412-1116-E1 Engine View Diagrams & Manuals
192412-1128-E1 Engine View Diagrams & Manuals
192412-1143-E1 Engine View Diagrams & Manuals
192412-1167-E1 Engine View Diagrams & Manuals
192412-1168-E1 Engine View Diagrams & Manuals
192412-1186-E1 Engine View Diagrams & Manuals
192412-1198-E1 Engine View Diagrams & Manuals
192412-1198-E2 Engine View Diagrams & Manuals
192412-1216-E1 Engine View Diagrams & Manuals
192412-1217-E1 Engine View Diagrams & Manuals
192412-1220-E1 Engine View Diagrams & Manuals
192417-0001-01 Engine View Diagrams & Manuals
192417-0115-01 Engine View Diagrams & Manuals
192417-0141-01 Engine View Diagrams & Manuals
192417-0171-01 Engine View Diagrams & Manuals
192417-0191-01 Engine View Diagrams & Manuals
192417-0673-A1 Engine View Diagrams & Manuals
192417-0691-A1 Engine View Diagrams & Manuals
192417-0694-A1 Engine View Diagrams & Manuals
192417-1115-E1 Engine View Diagrams & Manuals
192417-1137-E1 Engine View Diagrams & Manuals
192417-1144-E1 Engine View Diagrams & Manuals
192417-1191-E1 Engine View Diagrams & Manuals
192417-1194-E1 Engine View Diagrams & Manuals
192417-1203-E1 Engine View Diagrams & Manuals
192432-0008-01 Engine View Diagrams & Manuals
192432-0011-01 Engine View Diagrams & Manuals
192432-0035-01 Engine View Diagrams & Manuals
192432-0047-01 Engine View Diagrams & Manuals
192432-0065-01 Engine View Diagrams & Manuals
192432-0070-01 Engine View Diagrams & Manuals
192432-0102-01 Engine View Diagrams & Manuals
192432-0122-01 Engine View Diagrams & Manuals
192432-0122-02 Engine View Diagrams & Manuals
192432-0126-01 Engine View Diagrams & Manuals
192432-0133-02 Engine View Diagrams & Manuals
192432-0135-01 Engine View Diagrams & Manuals
192432-0156-01 Engine View Diagrams & Manuals
192432-0159-01 Engine View Diagrams & Manuals
192432-0163-01 Engine View Diagrams & Manuals
192432-0166-01 Engine View Diagrams & Manuals
192432-0170-01 Engine View Diagrams & Manuals
192432-0172-01 Engine View Diagrams & Manuals
192432-0173-01 Engine View Diagrams & Manuals
192432-0173-02 Engine View Diagrams & Manuals
192432-0175-02 Engine View Diagrams & Manuals
192432-0176-01 Engine View Diagrams & Manuals
192432-0187-01 Engine View Diagrams & Manuals
192432-0189-01 Engine View Diagrams & Manuals
192432-0193-01 Engine View Diagrams & Manuals
192432-0195-01 Engine View Diagrams & Manuals
192432-0535-A1 Engine View Diagrams & Manuals
192432-0547-A1 Engine View Diagrams & Manuals
192432-0565-A1 Engine View Diagrams & Manuals
192432-0570-A1 Engine View Diagrams & Manuals
192432-0622-A1 Engine View Diagrams & Manuals
192432-0636-A1 Engine View Diagrams & Manuals
192432-0656-A1 Engine View Diagrams & Manuals
192432-0669-A1 Engine View Diagrams & Manuals
192432-0671-A1 Engine View Diagrams & Manuals
192432-1008-E1 Engine View Diagrams & Manuals
192432-1011-E1 Engine View Diagrams & Manuals
192432-1035-E1 Engine View Diagrams & Manuals
192432-1047-E1 Engine View Diagrams & Manuals
192432-1063-E1 Engine View Diagrams & Manuals
192432-1065-E1 Engine View Diagrams & Manuals
192432-1070-E1 Engine View Diagrams & Manuals
192432-1102-E1 Engine View Diagrams & Manuals
192432-1122-E1 Engine View Diagrams & Manuals
192432-1126-E1 Engine View Diagrams & Manuals
192432-1136-E1 Engine View Diagrams & Manuals
192432-1147-E1 Engine View Diagrams & Manuals
192432-1159-E1 Engine View Diagrams & Manuals
192432-1173-E2 Engine View Diagrams & Manuals
192432-1175-E2 Engine View Diagrams & Manuals
192432-1181-E1 Engine View Diagrams & Manuals
192432-1189-E1 Engine View Diagrams & Manuals
192432-1193-E1 Engine View Diagrams & Manuals
192432-1195-E1 Engine View Diagrams & Manuals
192432-1204-E1 Engine View Diagrams & Manuals
192432-1206-E1 Engine View Diagrams & Manuals
192432-1213-E1 Engine View Diagrams & Manuals
192432-1219-E1 Engine View Diagrams & Manuals
192432-6167-01 Engine View Diagrams & Manuals
192432-6167-E1 Engine View Diagrams & Manuals
192436-1129-E1 Engine View Diagrams & Manuals
192436-1222-E1 Engine View Diagrams & Manuals
192437-0006-01 Engine View Diagrams & Manuals
192437-0041-01 Engine View Diagrams & Manuals
192437-0125-01 Engine View Diagrams & Manuals
192437-0161-01 Engine View Diagrams & Manuals
192437-0541-A1 Engine View Diagrams & Manuals
192437-0625-A1 Engine View Diagrams & Manuals
192437-0654-A1 Engine View Diagrams & Manuals
192437-0670-A1 Engine View Diagrams & Manuals
192437-1041-E1 Engine View Diagrams & Manuals
192437-1125-E1 Engine View Diagrams & Manuals
192437-1148-E1 Engine View Diagrams & Manuals
192437-1161-E1 Engine View Diagrams & Manuals
192437-1212-E1 Engine View Diagrams & Manuals
192437-1218-E1 Engine View Diagrams & Manuals
192452-0049-01 Engine View Diagrams & Manuals
192452-0049-02 Engine View Diagrams & Manuals
192452-0103-01 Engine View Diagrams & Manuals
192452-0549-A1 Engine View Diagrams & Manuals
192452-1049-E1 Engine View Diagrams & Manuals
192452-1049-E2 Engine View Diagrams & Manuals
193702-0163-99 Engine View Diagrams & Manuals
193702-0164-99 Engine View Diagrams & Manuals
193702-0215-01 Engine View Diagrams & Manuals
193702-0215-02 Engine View Diagrams & Manuals
193702-0215-03 Engine View Diagrams & Manuals
193702-0216-01 Engine View Diagrams & Manuals
193702-0217-01 Engine View Diagrams & Manuals
193702-0300-01 Engine View Diagrams & Manuals
193702-0301-01 Engine View Diagrams & Manuals
193702-0308-01 Engine View Diagrams & Manuals
193702-0309-01 Engine View Diagrams & Manuals
193702-0317-01 Engine View Diagrams & Manuals
193702-0318-01 Engine View Diagrams & Manuals
193702-0320-01 Engine View Diagrams & Manuals
193702-0322-01 Engine View Diagrams & Manuals
193702-0324-01 Engine View Diagrams & Manuals
193702-0325-01 Engine View Diagrams & Manuals
193702-0326-01 Engine View Diagrams & Manuals
193702-0327-01 Engine View Diagrams & Manuals
193702-0329-01 Engine View Diagrams & Manuals
193702-0330-01 Engine View Diagrams & Manuals
193702-0332-01 Engine View Diagrams & Manuals
193702-0333-01 Engine View Diagrams & Manuals
193702-0334-01 Engine View Diagrams & Manuals
193702-0336-01 Engine View Diagrams & Manuals
193702-0338-01 Engine View Diagrams & Manuals
193702-0338-02 Engine View Diagrams & Manuals
193702-0339-01 Engine View Diagrams & Manuals
193702-0341-01 Engine View Diagrams & Manuals
193702-0342-01 Engine View Diagrams & Manuals
193702-0345-01 Engine View Diagrams & Manuals
193702-0346-01 Engine View Diagrams & Manuals
193702-0347-01 Engine View Diagrams & Manuals
193702-0350-01 Engine View Diagrams & Manuals
193702-0354-01 Engine View Diagrams & Manuals
193702-0355-01 Engine View Diagrams & Manuals
193702-0358-01 Engine View Diagrams & Manuals
193702-0359-01 Engine View Diagrams & Manuals
193702-0361-01 Engine View Diagrams & Manuals
193702-0362-01 Engine View Diagrams & Manuals
193702-0368-99 Engine View Diagrams & Manuals
193702-0371-01 Engine View Diagrams & Manuals
193702-0372-01 Engine View Diagrams & Manuals
193702-0373-01 Engine View Diagrams & Manuals
193702-4001-01 Engine View Diagrams & Manuals
193702-4002-01 Engine View Diagrams & Manuals
193702-4003-01 Engine View Diagrams & Manuals
193702-4004-01 Engine View Diagrams & Manuals
193702-4004-02 Engine View Diagrams & Manuals
193702-4005-01 Engine View Diagrams & Manuals
193702-4006-01 Engine View Diagrams & Manuals
193702-4011-01 Engine View Diagrams & Manuals
193702-4015-01 Engine View Diagrams & Manuals
193702-4015-02 Engine View Diagrams & Manuals
193702-4015-03 Engine View Diagrams & Manuals
193702-4016-01 Engine View Diagrams & Manuals
193705-0352-01 Engine View Diagrams & Manuals
193706-0323-01 Engine View Diagrams & Manuals
193706-0363-01 Engine View Diagrams & Manuals
193707-0165-99 Engine View Diagrams & Manuals
193707-0166-99 Engine View Diagrams & Manuals
193707-0225-01 Engine View Diagrams & Manuals
193707-0227-01 Engine View Diagrams & Manuals
193707-0249-99 Engine View Diagrams & Manuals
193707-0302-01 Engine View Diagrams & Manuals
193707-0305-01 Engine View Diagrams & Manuals
193707-0306-01 Engine View Diagrams & Manuals
193707-0307-01 Engine View Diagrams & Manuals
193707-0310-01 Engine View Diagrams & Manuals
193707-0311-01 Engine View Diagrams & Manuals
193707-0312-01 Engine View Diagrams & Manuals
193707-0313-01 Engine View Diagrams & Manuals
193707-0314-01 Engine View Diagrams & Manuals
193707-0315-01 Engine View Diagrams & Manuals
193707-0316-01 Engine View Diagrams & Manuals
193707-0319-01 Engine View Diagrams & Manuals
193707-0321-01 Engine View Diagrams & Manuals
193707-0328-01 Engine View Diagrams & Manuals
193707-0331-01 Engine View Diagrams & Manuals
193707-0335-01 Engine View Diagrams & Manuals
193707-0337-01 Engine View Diagrams & Manuals
193707-0338-99 Engine View Diagrams & Manuals
193707-0340-01 Engine View Diagrams & Manuals
193707-0343-01 Engine View Diagrams & Manuals
193707-0344-01 Engine View Diagrams & Manuals
193707-0348-01 Engine View Diagrams & Manuals
193707-0349-01 Engine View Diagrams & Manuals
193707-0351-01 Engine View Diagrams & Manuals
193707-0352-99 Engine View Diagrams & Manuals
193707-0353-01 Engine View Diagrams & Manuals
193707-0353-02 Engine View Diagrams & Manuals
193707-0356-01 Engine View Diagrams & Manuals
193707-0356-02 Engine View Diagrams & Manuals
193707-0357-01 Engine View Diagrams & Manuals
193707-0360-99 Engine View Diagrams & Manuals
193707-0364-01 Engine View Diagrams & Manuals
193707-0365-01 Engine View Diagrams & Manuals
193707-0366-01 Engine View Diagrams & Manuals
193707-0367-01 Engine View Diagrams & Manuals
193707-0369-01 Engine View Diagrams & Manuals
193707-0370-01 Engine View Diagrams & Manuals
193707-0374-01 Engine View Diagrams & Manuals
193707-4007-01 Engine View Diagrams & Manuals
193707-4008-99 Engine View Diagrams & Manuals
193707-4009-01 Engine View Diagrams & Manuals
193707-4010-01 Engine View Diagrams & Manuals
193707-4011-99 Engine View Diagrams & Manuals
193707-4012-01 Engine View Diagrams & Manuals
193707-4025-01 Engine View Diagrams & Manuals
193707-4025-02 Engine View Diagrams & Manuals
193707-4027-01 Engine View Diagrams & Manuals
193707-4028-01 Engine View Diagrams & Manuals
195412-0899-01 Engine View Diagrams & Manuals
195412-1024-01 Engine View Diagrams & Manuals
195412-1137-01 Engine View Diagrams & Manuals
195412-1137-02 Engine View Diagrams & Manuals
195412-1138-01 Engine View Diagrams & Manuals
195412-1162-01 Engine View Diagrams & Manuals
195412-2024-01 Engine View Diagrams & Manuals
195412-2124-01 Engine View Diagrams & Manuals
195412-2224-01 Engine View Diagrams & Manuals
195412-4024-01 Engine View Diagrams & Manuals
195415-1149-01 Engine View Diagrams & Manuals
195422-0688-01 Engine View Diagrams & Manuals
195422-0722-01 Engine View Diagrams & Manuals
195422-0751-01 Engine View Diagrams & Manuals
195422-0760-01 Engine View Diagrams & Manuals
195422-0769-01 Engine View Diagrams & Manuals
195422-0778-01 Engine View Diagrams & Manuals
195422-0816-01 Engine View Diagrams & Manuals
195422-0829-01 Engine View Diagrams & Manuals
195422-0848-01 Engine View Diagrams & Manuals
195422-0852-01 Engine View Diagrams & Manuals
195422-0866-01 Engine View Diagrams & Manuals
195422-0872-01 Engine View Diagrams & Manuals
195422-0900-01 Engine View Diagrams & Manuals
195422-1004-01 Engine View Diagrams & Manuals
195422-1022-01 Engine View Diagrams & Manuals
195422-1022-02 Engine View Diagrams & Manuals
195422-1128-01 Engine View Diagrams & Manuals
195422-1128-02 Engine View Diagrams & Manuals
195422-1132-01 Engine View Diagrams & Manuals
195422-1136-01 Engine View Diagrams & Manuals
195422-1138-99 Engine View Diagrams & Manuals
195422-1168-01 Engine View Diagrams & Manuals
195422-1169-01 Engine View Diagrams & Manuals
195422-4004-01 Engine View Diagrams & Manuals
195422-4004-02 Engine View Diagrams & Manuals
195422-4022-01 Engine View Diagrams & Manuals
195422-4022-02 Engine View Diagrams & Manuals
195423-0880-01 Engine View Diagrams & Manuals
195423-1158-99 Engine View Diagrams & Manuals
195431-0110-01 Engine View Diagrams & Manuals
195431-0110-02 Engine View Diagrams & Manuals
195431-0141-01 Engine View Diagrams & Manuals
195431-0142-01 Engine View Diagrams & Manuals
195431-0143-01 Engine View Diagrams & Manuals
195431-0143-02 Engine View Diagrams & Manuals
195431-0153-01 Engine View Diagrams & Manuals
195431-0156-01 Engine View Diagrams & Manuals
195431-0160-01 Engine View Diagrams & Manuals
195431-0160-02 Engine View Diagrams & Manuals
195431-0160-03 Engine View Diagrams & Manuals
195431-0174-01 Engine View Diagrams & Manuals
195431-0185-01 Engine View Diagrams & Manuals
195431-0185-02 Engine View Diagrams & Manuals
195431-0187-01 Engine View Diagrams & Manuals
195431-0187-02 Engine View Diagrams & Manuals
195431-0198-01 Engine View Diagrams & Manuals
195431-0206-01 Engine View Diagrams & Manuals
195431-0210-01 Engine View Diagrams & Manuals
195431-0210-02 Engine View Diagrams & Manuals
195431-0210-03 Engine View Diagrams & Manuals
195431-0210-04 Engine View Diagrams & Manuals
195431-0210-05 Engine View Diagrams & Manuals
195431-0210-06 Engine View Diagrams & Manuals
195431-0230-01 Engine View Diagrams & Manuals
195431-0237-01 Engine View Diagrams & Manuals
195431-0241-01 Engine View Diagrams & Manuals
195431-0245-01 Engine View Diagrams & Manuals
195431-0267-01 Engine View Diagrams & Manuals
195431-0287-01 Engine View Diagrams & Manuals
195431-0303-01 Engine View Diagrams & Manuals
195431-0303-02 Engine View Diagrams & Manuals
195431-0601-01 Engine View Diagrams & Manuals
195431-0621-01 Engine View Diagrams & Manuals
195431-0622-99 Engine View Diagrams & Manuals
195431-0642-99 Engine View Diagrams & Manuals
195431-0667-01 Engine View Diagrams & Manuals
195431-0670-01 Engine View Diagrams & Manuals
195431-0701-99 Engine View Diagrams & Manuals
195431-0734-01 Engine View Diagrams & Manuals
195431-0734-02 Engine View Diagrams & Manuals
195431-0734-03 Engine View Diagrams & Manuals
195431-0741-01 Engine View Diagrams & Manuals
195431-0741-02 Engine View Diagrams & Manuals
195431-0743-01 Engine View Diagrams & Manuals
195431-0754-01 Engine View Diagrams & Manuals
195431-0796-01 Engine View Diagrams & Manuals
195431-0820-01 Engine View Diagrams & Manuals
195431-0821-01 Engine View Diagrams & Manuals
195431-0832-01 Engine View Diagrams & Manuals
195431-0863-01 Engine View Diagrams & Manuals
195431-0876-01 Engine View Diagrams & Manuals
195431-0897-01 Engine View Diagrams & Manuals
195431-0901-01 Engine View Diagrams & Manuals
195431-1141-01 Engine View Diagrams & Manuals
195431-2034-01 Engine View Diagrams & Manuals
195431-2034-02 Engine View Diagrams & Manuals
195431-2134-01 Engine View Diagrams & Manuals
195431-2234-99 Engine View Diagrams & Manuals
195432-0111-01 Engine View Diagrams & Manuals
195432-0112-01 Engine View Diagrams & Manuals
195432-0112-02 Engine View Diagrams & Manuals
195432-0112-03 Engine View Diagrams & Manuals
195432-0113-01 Engine View Diagrams & Manuals
195432-0130-01 Engine View Diagrams & Manuals
195432-0131-01 Engine View Diagrams & Manuals
195432-0132-01 Engine View Diagrams & Manuals
195432-0132-02 Engine View Diagrams & Manuals
195432-0133-01 Engine View Diagrams & Manuals
195432-0135-01 Engine View Diagrams & Manuals
195432-0135-02 Engine View Diagrams & Manuals
195432-0135-03 Engine View Diagrams & Manuals
195432-0135-04 Engine View Diagrams & Manuals
195432-0135-05 Engine View Diagrams & Manuals
195432-0135-06 Engine View Diagrams & Manuals
195432-0135-07 Engine View Diagrams & Manuals
195432-0136-01 Engine View Diagrams & Manuals
195432-0137-01 Engine View Diagrams & Manuals
195432-0138-01 Engine View Diagrams & Manuals
195432-0139-01 Engine View Diagrams & Manuals
195432-0140-01 Engine View Diagrams & Manuals
195432-0144-01 Engine View Diagrams & Manuals
195432-0145-01 Engine View Diagrams & Manuals
195432-0146-01 Engine View Diagrams & Manuals
195432-0147-01 Engine View Diagrams & Manuals
195432-0147-02 Engine View Diagrams & Manuals
195432-0148-01 Engine View Diagrams & Manuals
195432-0149-01 Engine View Diagrams & Manuals
195432-0149-02 Engine View Diagrams & Manuals
195432-0151-01 Engine View Diagrams & Manuals
195432-0152-01 Engine View Diagrams & Manuals
195432-0154-01 Engine View Diagrams & Manuals
195432-0155-01 Engine View Diagrams & Manuals
195432-0157-01 Engine View Diagrams & Manuals
195432-0158-01 Engine View Diagrams & Manuals
195432-0159-01 Engine View Diagrams & Manuals
195432-0161-01 Engine View Diagrams & Manuals
195432-0161-02 Engine View Diagrams & Manuals
195432-0162-01 Engine View Diagrams & Manuals
195432-0166-01 Engine View Diagrams & Manuals
195432-0167-01 Engine View Diagrams & Manuals
195432-0168-01 Engine View Diagrams & Manuals
195432-0169-01 Engine View Diagrams & Manuals
195432-0169-02 Engine View Diagrams & Manuals
195432-0170-01 Engine View Diagrams & Manuals
195432-0170-02 Engine View Diagrams & Manuals
195432-0170-03 Engine View Diagrams & Manuals
195432-0171-01 Engine View Diagrams & Manuals
195432-0175-01 Engine View Diagrams & Manuals
195432-0176-01 Engine View Diagrams & Manuals
195432-0177-01 Engine View Diagrams & Manuals
195432-0178-01 Engine View Diagrams & Manuals
195432-0179-01 Engine View Diagrams & Manuals
195432-0181-01 Engine View Diagrams & Manuals
195432-0182-01 Engine View Diagrams & Manuals
195432-0183-01 Engine View Diagrams & Manuals
195432-0188-01 Engine View Diagrams & Manuals
195432-0190-01 Engine View Diagrams & Manuals
195432-0191-99 Engine View Diagrams & Manuals
195432-0192-01 Engine View Diagrams & Manuals
195432-0193-01 Engine View Diagrams & Manuals
195432-0194-01 Engine View Diagrams & Manuals
195432-0196-01 Engine View Diagrams & Manuals
195432-0197-01 Engine View Diagrams & Manuals
195432-0200-01 Engine View Diagrams & Manuals
195432-0200-02 Engine View Diagrams & Manuals
195432-0201-01 Engine View Diagrams & Manuals
195432-0203-01 Engine View Diagrams & Manuals
195432-0204-01 Engine View Diagrams & Manuals
195432-0205-01 Engine View Diagrams & Manuals
195432-0207-01 Engine View Diagrams & Manuals
195432-0209-01 Engine View Diagrams & Manuals
195432-0211-01 Engine View Diagrams & Manuals
195432-0212-01 Engine View Diagrams & Manuals
195432-0213-01 Engine View Diagrams & Manuals
195432-0214-01 Engine View Diagrams & Manuals
195432-0216-01 Engine View Diagrams & Manuals
195432-0216-02 Engine View Diagrams & Manuals
195432-0216-03 Engine View Diagrams & Manuals
195432-0217-01 Engine View Diagrams & Manuals
195432-0218-01 Engine View Diagrams & Manuals
195432-0219-01 Engine View Diagrams & Manuals
195432-0221-01 Engine View Diagrams & Manuals
195432-0222-01 Engine View Diagrams & Manuals
195432-0224-01 Engine View Diagrams & Manuals
195432-0228-01 Engine View Diagrams & Manuals
195432-0228-02 Engine View Diagrams & Manuals
195432-0229-01 Engine View Diagrams & Manuals
195432-0233-01 Engine View Diagrams & Manuals
195432-0234-01 Engine View Diagrams & Manuals
195432-0235-01 Engine View Diagrams & Manuals
195432-0238-01 Engine View Diagrams & Manuals
195432-0242-01 Engine View Diagrams & Manuals
195432-0243-01 Engine View Diagrams & Manuals
195432-0246-01 Engine View Diagrams & Manuals
195432-0247-01 Engine View Diagrams & Manuals
195432-0248-01 Engine View Diagrams & Manuals
195432-0249-01 Engine View Diagrams & Manuals
195432-0251-01 Engine View Diagrams & Manuals
195432-0253-01 Engine View Diagrams & Manuals
195432-0254-01 Engine View Diagrams & Manuals
195432-0255-01 Engine View Diagrams & Manuals
195432-0257-01 Engine View Diagrams & Manuals
195432-0257-02 Engine View Diagrams & Manuals
195432-0258-01 Engine View Diagrams & Manuals
195432-0260-01 Engine View Diagrams & Manuals
195432-0261-01 Engine View Diagrams & Manuals
195432-0262-99 Engine View Diagrams & Manuals
195432-0263-01 Engine View Diagrams & Manuals
195432-0264-01 Engine View Diagrams & Manuals
195432-0265-01 Engine View Diagrams & Manuals
195432-0266-01 Engine View Diagrams & Manuals
195432-0270-01 Engine View Diagrams & Manuals
195432-0271-01 Engine View Diagrams & Manuals
195432-0272-01 Engine View Diagrams & Manuals
195432-0272-02 Engine View Diagrams & Manuals
195432-0273-01 Engine View Diagrams & Manuals
195432-0275-01 Engine View Diagrams & Manuals
195432-0277-01 Engine View Diagrams & Manuals
195432-0278-01 Engine View Diagrams & Manuals
195432-0279-01 Engine View Diagrams & Manuals
195432-0280-01 Engine View Diagrams & Manuals
195432-0283-01 Engine View Diagrams & Manuals
195432-0284-01 Engine View Diagrams & Manuals
195432-0285-01 Engine View Diagrams & Manuals
195432-0286-01 Engine View Diagrams & Manuals
195432-0288-01 Engine View Diagrams & Manuals
195432-0290-01 Engine View Diagrams & Manuals
195432-0291-01 Engine View Diagrams & Manuals
195432-0291-02 Engine View Diagrams & Manuals
195432-0291-03 Engine View Diagrams & Manuals
195432-0293-01 Engine View Diagrams & Manuals
195432-0294-01 Engine View Diagrams & Manuals
195432-0295-01 Engine View Diagrams & Manuals
195432-0297-01 Engine View Diagrams & Manuals
195432-0298-01 Engine View Diagrams & Manuals
195432-0299-01 Engine View Diagrams & Manuals
195432-0300-01 Engine View Diagrams & Manuals
195432-0301-01 Engine View Diagrams & Manuals
195432-0304-01 Engine View Diagrams & Manuals
195432-0305-01 Engine View Diagrams & Manuals
195432-0306-01 Engine View Diagrams & Manuals
195432-0307-01 Engine View Diagrams & Manuals
195432-0309-01 Engine View Diagrams & Manuals
195432-0310-01 Engine View Diagrams & Manuals
195432-0311-01 Engine View Diagrams & Manuals
195432-0313-01 Engine View Diagrams & Manuals
195432-0316-01 Engine View Diagrams & Manuals
195432-0600-01 Engine View Diagrams & Manuals
195432-0602-01 Engine View Diagrams & Manuals
195432-0603-01 Engine View Diagrams & Manuals
195432-0620-01 Engine View Diagrams & Manuals
195432-0623-01 Engine View Diagrams & Manuals
195432-0624-01 Engine View Diagrams & Manuals
195432-0625-01 Engine View Diagrams & Manuals
195432-0626-01 Engine View Diagrams & Manuals
195432-0627-01 Engine View Diagrams & Manuals
195432-0628-01 Engine View Diagrams & Manuals
195432-0630-01 Engine View Diagrams & Manuals
195432-0631-01 Engine View Diagrams & Manuals
195432-0632-01 Engine View Diagrams & Manuals
195432-0633-01 Engine View Diagrams & Manuals
195432-0636-01 Engine View Diagrams & Manuals
195432-0637-01 Engine View Diagrams & Manuals
195432-0638-01 Engine View Diagrams & Manuals
195432-0638-02 Engine View Diagrams & Manuals
195432-0638-03 Engine View Diagrams & Manuals
195432-0641-01 Engine View Diagrams & Manuals
195432-0643-01 Engine View Diagrams & Manuals
195432-0645-01 Engine View Diagrams & Manuals
195432-0646-01 Engine View Diagrams & Manuals
195432-0646-02 Engine View Diagrams & Manuals
195432-0647-01 Engine View Diagrams & Manuals
195432-0649-01 Engine View Diagrams & Manuals
195432-0651-01 Engine View Diagrams & Manuals
195432-0653-01 Engine View Diagrams & Manuals
195432-0654-01 Engine View Diagrams & Manuals
195432-0655-01 Engine View Diagrams & Manuals
195432-0656-01 Engine View Diagrams & Manuals
195432-0659-01 Engine View Diagrams & Manuals
195432-0660-01 Engine View Diagrams & Manuals
195432-0661-01 Engine View Diagrams & Manuals
195432-0662-01 Engine View Diagrams & Manuals
195432-0664-01 Engine View Diagrams & Manuals
195432-0665-01 Engine View Diagrams & Manuals
195432-0666-01 Engine View Diagrams & Manuals
195432-0667-99 Engine View Diagrams & Manuals
195432-0669-01 Engine View Diagrams & Manuals
195432-0672-99 Engine View Diagrams & Manuals
195432-0675-01 Engine View Diagrams & Manuals
195432-0678-01 Engine View Diagrams & Manuals
195432-0680-01 Engine View Diagrams & Manuals
195432-0685-01 Engine View Diagrams & Manuals
195432-0686-99 Engine View Diagrams & Manuals
195432-0687-01 Engine View Diagrams & Manuals
195432-0689-99 Engine View Diagrams & Manuals
195432-0691-01 Engine View Diagrams & Manuals
195432-0692-01 Engine View Diagrams & Manuals
195432-0694-99 Engine View Diagrams & Manuals
195432-0700-01 Engine View Diagrams & Manuals
195432-0702-01 Engine View Diagrams & Manuals
195432-0720-01 Engine View Diagrams & Manuals
195432-0721-01 Engine View Diagrams & Manuals
195432-0723-01 Engine View Diagrams & Manuals
195432-0724-01 Engine View Diagrams & Manuals
195432-0725-01 Engine View Diagrams & Manuals
195432-0726-01 Engine View Diagrams & Manuals
195432-0727-01 Engine View Diagrams & Manuals
195432-0729-01 Engine View Diagrams & Manuals
195432-0730-99 Engine View Diagrams & Manuals
195432-0732-01 Engine View Diagrams & Manuals
195432-0733-01 Engine View Diagrams & Manuals
195432-0735-01 Engine View Diagrams & Manuals
195432-0736-01 Engine View Diagrams & Manuals
195432-0737-01 Engine View Diagrams & Manuals
195432-0768-01 Engine View Diagrams & Manuals
195432-0771-01 Engine View Diagrams & Manuals
195432-0773-01 Engine View Diagrams & Manuals
195432-0774-01 Engine View Diagrams & Manuals
195432-0775-01 Engine View Diagrams & Manuals
195432-0776-01 Engine View Diagrams & Manuals
195432-0779-01 Engine View Diagrams & Manuals
195432-0779-02 Engine View Diagrams & Manuals
195432-0782-01 Engine View Diagrams & Manuals
195432-0784-01 Engine View Diagrams & Manuals
195432-0787-01 Engine View Diagrams & Manuals
195432-0788-01 Engine View Diagrams & Manuals
195432-0789-99 Engine View Diagrams & Manuals
195432-0790-01 Engine View Diagrams & Manuals
195432-0792-01 Engine View Diagrams & Manuals
195432-0793-01 Engine View Diagrams & Manuals
195432-0794-01 Engine View Diagrams & Manuals
195432-0795-99 Engine View Diagrams & Manuals
195432-0797-01 Engine View Diagrams & Manuals
195432-0799-01 Engine View Diagrams & Manuals
195432-0800-01 Engine View Diagrams & Manuals
195432-0805-01 Engine View Diagrams & Manuals
195432-0807-01 Engine View Diagrams & Manuals
195432-0808-01 Engine View Diagrams & Manuals
195432-0809-01 Engine View Diagrams & Manuals
195432-0811-01 Engine View Diagrams & Manuals
195432-0812-01 Engine View Diagrams & Manuals
195432-0815-01 Engine View Diagrams & Manuals
195432-0819-01 Engine View Diagrams & Manuals
195432-0819-02 Engine View Diagrams & Manuals
195432-0823-01 Engine View Diagrams & Manuals
195432-0824-01 Engine View Diagrams & Manuals
195432-0826-01 Engine View Diagrams & Manuals
195432-0827-01 Engine View Diagrams & Manuals
195432-0827-02 Engine View Diagrams & Manuals
195432-0828-01 Engine View Diagrams & Manuals
195432-0830-99 Engine View Diagrams & Manuals
195432-0831-01 Engine View Diagrams & Manuals
195432-0832-99 Engine View Diagrams & Manuals
195432-0834-01 Engine View Diagrams & Manuals
195432-0835-01 Engine View Diagrams & Manuals
195432-0836-01 Engine View Diagrams & Manuals
195432-0838-01 Engine View Diagrams & Manuals
195432-0840-01 Engine View Diagrams & Manuals
195432-0842-01 Engine View Diagrams & Manuals
195432-0843-01 Engine View Diagrams & Manuals
195432-0843-02 Engine View Diagrams & Manuals
195432-0846-01 Engine View Diagrams & Manuals
195432-0847-01 Engine View Diagrams & Manuals
195432-0849-01 Engine View Diagrams & Manuals
195432-0850-01 Engine View Diagrams & Manuals
195432-0850-02 Engine View Diagrams & Manuals
195432-0851-01 Engine View Diagrams & Manuals
195432-0853-99 Engine View Diagrams & Manuals
195432-0854-99 Engine View Diagrams & Manuals
195432-0855-01 Engine View Diagrams & Manuals
195432-0857-01 Engine View Diagrams & Manuals
195432-0859-99 Engine View Diagrams & Manuals
195432-0860-01 Engine View Diagrams & Manuals
195432-0864-01 Engine View Diagrams & Manuals
195432-0867-01 Engine View Diagrams & Manuals
195432-0867-02 Engine View Diagrams & Manuals
195432-0867-03 Engine View Diagrams & Manuals
195432-0868-01 Engine View Diagrams & Manuals
195432-0869-01 Engine View Diagrams & Manuals
195432-0871-01 Engine View Diagrams & Manuals
195432-0873-01 Engine View Diagrams & Manuals
195432-0874-01 Engine View Diagrams & Manuals
195432-0875-01 Engine View Diagrams & Manuals
195432-0878-01 Engine View Diagrams & Manuals
195432-0879-01 Engine View Diagrams & Manuals
195432-0881-01 Engine View Diagrams & Manuals
195432-0882-01 Engine View Diagrams & Manuals
195432-0885-01 Engine View Diagrams & Manuals
195432-0886-01 Engine View Diagrams & Manuals
195432-0887-01 Engine View Diagrams & Manuals
195432-0888-01 Engine View Diagrams & Manuals
195432-0889-01 Engine View Diagrams & Manuals
195432-0890-01 Engine View Diagrams & Manuals
195432-0891-99 Engine View Diagrams & Manuals
195432-0892-01 Engine View Diagrams & Manuals
195432-0893-01 Engine View Diagrams & Manuals
195432-0893-02 Engine View Diagrams & Manuals
195432-0894-01 Engine View Diagrams & Manuals
195432-0895-01 Engine View Diagrams & Manuals
195432-0896-01 Engine View Diagrams & Manuals
195432-0902-01 Engine View Diagrams & Manuals
195432-0903-99 Engine View Diagrams & Manuals
195432-0904-01 Engine View Diagrams & Manuals
195432-0908-01 Engine View Diagrams & Manuals
195432-0909-01 Engine View Diagrams & Manuals
195432-0911-01 Engine View Diagrams & Manuals
195432-1001-01 Engine View Diagrams & Manuals
195432-1001-04 Engine View Diagrams & Manuals
195432-1002-02 Engine View Diagrams & Manuals
195432-1002-05 Engine View Diagrams & Manuals
195432-1002-07 Engine View Diagrams & Manuals
195432-1002-08 Engine View Diagrams & Manuals
195432-1006-01 Engine View Diagrams & Manuals
195432-1007-01 Engine View Diagrams & Manuals
195432-1007-04 Engine View Diagrams & Manuals
195432-1013-01 Engine View Diagrams & Manuals
195432-1013-02 Engine View Diagrams & Manuals
195432-1035-01 Engine View Diagrams & Manuals
195432-1035-02 Engine View Diagrams & Manuals
195432-1035-10 Engine View Diagrams & Manuals
195432-1035-11 Engine View Diagrams & Manuals
195432-1035-12 Engine View Diagrams & Manuals
195432-1038-01 Engine View Diagrams & Manuals
195432-1047-01 Engine View Diagrams & Manuals
195432-1047-02 Engine View Diagrams & Manuals
195432-1047-03 Engine View Diagrams & Manuals
195432-1047-04 Engine View Diagrams & Manuals
195432-1070-01 Engine View Diagrams & Manuals
195432-1070-02 Engine View Diagrams & Manuals
195432-1070-03 Engine View Diagrams & Manuals
195432-1070-07 Engine View Diagrams & Manuals
195432-1070-10 Engine View Diagrams & Manuals
195432-1070-13 Engine View Diagrams & Manuals
195432-1070-17 Engine View Diagrams & Manuals
195432-1073-01 Engine View Diagrams & Manuals
195432-1073-02 Engine View Diagrams & Manuals
195432-1073-03 Engine View Diagrams & Manuals
195432-1090-01 Engine View Diagrams & Manuals
195432-1091-01 Engine View Diagrams & Manuals
195432-1100-01 Engine View Diagrams & Manuals
195432-1110-01 Engine View Diagrams & Manuals
195432-1111-01 Engine View Diagrams & Manuals
195432-1112-99 Engine View Diagrams & Manuals
195432-1113-01 Engine View Diagrams & Manuals
195432-1114-01 Engine View Diagrams & Manuals
195432-1114-02 Engine View Diagrams & Manuals
195432-1115-01 Engine View Diagrams & Manuals
195432-1116-01 Engine View Diagrams & Manuals
195432-1117-02 Engine View Diagrams & Manuals
195432-1118-01 Engine View Diagrams & Manuals
195432-1119-01 Engine View Diagrams & Manuals
195432-1120-99 Engine View Diagrams & Manuals
195432-1122-01 Engine View Diagrams & Manuals
195432-1123-01 Engine View Diagrams & Manuals
195432-1124-01 Engine View Diagrams & Manuals
195432-1126-01 Engine View Diagrams & Manuals
195432-1127-01 Engine View Diagrams & Manuals
195432-1127-02 Engine View Diagrams & Manuals
195432-1129-01 Engine View Diagrams & Manuals
195432-1131-01 Engine View Diagrams & Manuals
195432-1133-01 Engine View Diagrams & Manuals
195432-1134-01 Engine View Diagrams & Manuals
195432-1135-99 Engine View Diagrams & Manuals
195432-1140-01 Engine View Diagrams & Manuals
195432-1142-01 Engine View Diagrams & Manuals
195432-1143-01 Engine View Diagrams & Manuals
195432-1146-01 Engine View Diagrams & Manuals
195432-1147-01 Engine View Diagrams & Manuals
195432-1148-99 Engine View Diagrams & Manuals
195432-1150-01 Engine View Diagrams & Manuals
195432-1152-01 Engine View Diagrams & Manuals
195432-1153-01 Engine View Diagrams & Manuals
195432-1154-01 Engine View Diagrams & Manuals
195432-1155-01 Engine View Diagrams & Manuals
195432-1156-01 Engine View Diagrams & Manuals
195432-1157-99 Engine View Diagrams & Manuals
195432-1159-01 Engine View Diagrams & Manuals
195432-1160-01 Engine View Diagrams & Manuals
195432-1161-99 Engine View Diagrams & Manuals
195432-1167-01 Engine View Diagrams & Manuals
195432-1167-02 Engine View Diagrams & Manuals
195432-1214-01 Engine View Diagrams & Manuals
195432-2035-01 Engine View Diagrams & Manuals
195432-2035-02 Engine View Diagrams & Manuals
195432-2035-03 Engine View Diagrams & Manuals
195432-2035-04 Engine View Diagrams & Manuals
195432-2035-05 Engine View Diagrams & Manuals
195432-2036-01 Engine View Diagrams & Manuals
195432-2036-02 Engine View Diagrams & Manuals
195432-2037-01 Engine View Diagrams & Manuals
195432-2037-02 Engine View Diagrams & Manuals
195432-2037-03 Engine View Diagrams & Manuals
195432-2037-04 Engine View Diagrams & Manuals
195432-2047-01 Engine View Diagrams & Manuals
195432-2047-02 Engine View Diagrams & Manuals
195432-2047-03 Engine View Diagrams & Manuals
195432-2070-01 Engine View Diagrams & Manuals
195432-2070-02 Engine View Diagrams & Manuals
195432-2070-03 Engine View Diagrams & Manuals
195432-2135-01 Engine View Diagrams & Manuals
195432-2135-02 Engine View Diagrams & Manuals
195432-2135-03 Engine View Diagrams & Manuals
195432-2135-04 Engine View Diagrams & Manuals
195432-2135-06 Engine View Diagrams & Manuals
195432-2136-01 Engine View Diagrams & Manuals
195432-2136-03 Engine View Diagrams & Manuals
195432-2137-01 Engine View Diagrams & Manuals
195432-2147-01 Engine View Diagrams & Manuals
195432-2147-02 Engine View Diagrams & Manuals
195432-2147-03 Engine View Diagrams & Manuals
195432-2170-01 Engine View Diagrams & Manuals
195432-2170-02 Engine View Diagrams & Manuals
195432-2170-03 Engine View Diagrams & Manuals
195432-2235-01 Engine View Diagrams & Manuals
195432-2235-02 Engine View Diagrams & Manuals
195432-2235-04 Engine View Diagrams & Manuals
195432-2235-07 Engine View Diagrams & Manuals
195432-2236-99 Engine View Diagrams & Manuals
195432-2237-01 Engine View Diagrams & Manuals
195432-2238-01 Engine View Diagrams & Manuals
195432-2245-01 Engine View Diagrams & Manuals
195432-2247-01 Engine View Diagrams & Manuals
195432-2247-02 Engine View Diagrams & Manuals
195432-2247-03 Engine View Diagrams & Manuals
195432-2250-01 Engine View Diagrams & Manuals
195432-2250-02 Engine View Diagrams & Manuals
195432-2270-01 Engine View Diagrams & Manuals
195432-2270-02 Engine View Diagrams & Manuals
195432-2270-03 Engine View Diagrams & Manuals
195432-2270-04 Engine View Diagrams & Manuals
195432-2271-01 Engine View Diagrams & Manuals
195432-2271-02 Engine View Diagrams & Manuals
195432-4001-01 Engine View Diagrams & Manuals
195432-4001-02 Engine View Diagrams & Manuals
195432-4001-03 Engine View Diagrams & Manuals
195432-4001-04 Engine View Diagrams & Manuals
195432-4002-01 Engine View Diagrams & Manuals
195432-4002-02 Engine View Diagrams & Manuals
195432-4002-03 Engine View Diagrams & Manuals
195432-4002-04 Engine View Diagrams & Manuals
195432-4002-05 Engine View Diagrams & Manuals
195432-4002-06 Engine View Diagrams & Manuals
195432-4002-07 Engine View Diagrams & Manuals
195432-4002-08 Engine View Diagrams & Manuals
195432-4003-99 Engine View Diagrams & Manuals
195432-4004-99 Engine View Diagrams & Manuals
195432-4006-01 Engine View Diagrams & Manuals
195432-4006-02 Engine View Diagrams & Manuals
195432-4007-01 Engine View Diagrams & Manuals
195432-4007-02 Engine View Diagrams & Manuals
195432-4007-03 Engine View Diagrams & Manuals
195432-4007-04 Engine View Diagrams & Manuals
195432-4013-01 Engine View Diagrams & Manuals
195432-4014-01 Engine View Diagrams & Manuals
195432-4015-01 Engine View Diagrams & Manuals
195432-4015-02 Engine View Diagrams & Manuals
195432-4025-01 Engine View Diagrams & Manuals
195432-4025-02 Engine View Diagrams & Manuals
195432-4035-01 Engine View Diagrams & Manuals
195432-4035-02 Engine View Diagrams & Manuals
195432-4035-03 Engine View Diagrams & Manuals
195432-4035-04 Engine View Diagrams & Manuals
195432-4035-07 Engine View Diagrams & Manuals
195432-4035-08 Engine View Diagrams & Manuals
195432-4035-10 Engine View Diagrams & Manuals
195432-4035-11 Engine View Diagrams & Manuals
195432-4036-99 Engine View Diagrams & Manuals
195432-4047-01 Engine View Diagrams & Manuals
195432-4047-02 Engine View Diagrams & Manuals
195432-4047-03 Engine View Diagrams & Manuals
195432-4047-04 Engine View Diagrams & Manuals
195432-4070-01 Engine View Diagrams & Manuals
195432-4070-02 Engine View Diagrams & Manuals
195432-4070-03 Engine View Diagrams & Manuals
195432-4070-05 Engine View Diagrams & Manuals
195432-4070-06 Engine View Diagrams & Manuals
195432-4070-07 Engine View Diagrams & Manuals
195432-4070-08 Engine View Diagrams & Manuals
195432-4070-09 Engine View Diagrams & Manuals
195432-4070-10 Engine View Diagrams & Manuals
195432-4070-11 Engine View Diagrams & Manuals
195432-4070-12 Engine View Diagrams & Manuals
195432-4070-13 Engine View Diagrams & Manuals
195432-4070-14 Engine View Diagrams & Manuals
195432-4070-17 Engine View Diagrams & Manuals
195432-4071-01 Engine View Diagrams & Manuals
195432-4073-01 Engine View Diagrams & Manuals
195432-4073-02 Engine View Diagrams & Manuals
195432-4073-03 Engine View Diagrams & Manuals
195432-4073-04 Engine View Diagrams & Manuals
195432-4073-05 Engine View Diagrams & Manuals
195432-4090-01 Engine View Diagrams & Manuals
195432-4091-01 Engine View Diagrams & Manuals
195433-0817-01 Engine View Diagrams & Manuals
195435-0208-01 Engine View Diagrams & Manuals
195435-0215-01 Engine View Diagrams & Manuals
195435-0250-01 Engine View Diagrams & Manuals
195435-0673-01 Engine View Diagrams & Manuals
195435-0674-01 Engine View Diagrams & Manuals
195435-0690-01 Engine View Diagrams & Manuals
195435-0755-01 Engine View Diagrams & Manuals
195435-0813-01 Engine View Diagrams & Manuals
195435-0814-01 Engine View Diagrams & Manuals
195435-0818-01 Engine View Diagrams & Manuals
195435-1145-01 Engine View Diagrams & Manuals
195436-0232-01 Engine View Diagrams & Manuals
195436-0256-01 Engine View Diagrams & Manuals
195436-0276-01 Engine View Diagrams & Manuals
195436-0289-01 Engine View Diagrams & Manuals
195436-0296-01 Engine View Diagrams & Manuals
195436-0302-01 Engine View Diagrams & Manuals
195436-0648-01 Engine View Diagrams & Manuals
195436-0657-01 Engine View Diagrams & Manuals
195436-0731-01 Engine View Diagrams & Manuals
195436-0742-01 Engine View Diagrams & Manuals
195436-0780-01 Engine View Diagrams & Manuals
195436-0781-01 Engine View Diagrams & Manuals
195436-0786-01 Engine View Diagrams & Manuals
195436-0795-01 Engine View Diagrams & Manuals
195436-0898-01 Engine View Diagrams & Manuals
195436-0906-01 Engine View Diagrams & Manuals
195436-1139-01 Engine View Diagrams & Manuals
195436-1144-99 Engine View Diagrams & Manuals
195436-1163-01 Engine View Diagrams & Manuals
195436-4016-01 Engine View Diagrams & Manuals
195436-4016-02 Engine View Diagrams & Manuals
195437-0120-01 Engine View Diagrams & Manuals
195437-0134-01 Engine View Diagrams & Manuals
195437-0150-01 Engine View Diagrams & Manuals
195437-0150-02 Engine View Diagrams & Manuals
195437-0164-01 Engine View Diagrams & Manuals
195437-0165-01 Engine View Diagrams & Manuals
195437-0172-01 Engine View Diagrams & Manuals
195437-0184-01 Engine View Diagrams & Manuals
195437-0226-01 Engine View Diagrams & Manuals
195437-0227-01 Engine View Diagrams & Manuals
195437-0240-01 Engine View Diagrams & Manuals
195437-0244-01 Engine View Diagrams & Manuals
195437-0252-01 Engine View Diagrams & Manuals
195437-0268-01 Engine View Diagrams & Manuals
195437-0281-01 Engine View Diagrams & Manuals
195437-0282-01 Engine View Diagrams & Manuals
195437-0292-01 Engine View Diagrams & Manuals
195437-0292-02 Engine View Diagrams & Manuals
195437-0315-01 Engine View Diagrams & Manuals
195437-0605-01 Engine View Diagrams & Manuals
195437-0629-01 Engine View Diagrams & Manuals
195437-0634-01 Engine View Diagrams & Manuals
195437-0639-01 Engine View Diagrams & Manuals
195437-0639-02 Engine View Diagrams & Manuals
195437-0644-01 Engine View Diagrams & Manuals
195437-0650-01 Engine View Diagrams & Manuals
195437-0652-01 Engine View Diagrams & Manuals
195437-0652-04 Engine View Diagrams & Manuals
195437-0663-01 Engine View Diagrams & Manuals
195437-0668-01 Engine View Diagrams & Manuals
195437-0671-01 Engine View Diagrams & Manuals
195437-0705-01 Engine View Diagrams & Manuals
195437-0728-01 Engine View Diagrams & Manuals
195437-0745-01 Engine View Diagrams & Manuals
195437-0748-01 Engine View Diagrams & Manuals
195437-0757-01 Engine View Diagrams & Manuals
195437-0763-01 Engine View Diagrams & Manuals
195437-0772-01 Engine View Diagrams & Manuals
195437-0783-01 Engine View Diagrams & Manuals
195437-0801-01 Engine View Diagrams & Manuals
195437-0802-01 Engine View Diagrams & Manuals
195437-0806-01 Engine View Diagrams & Manuals
195437-0810-01 Engine View Diagrams & Manuals
195437-0822-01 Engine View Diagrams & Manuals
195437-0825-01 Engine View Diagrams & Manuals
195437-0825-02 Engine View Diagrams & Manuals
195437-0830-01 Engine View Diagrams & Manuals
195437-0837-01 Engine View Diagrams & Manuals
195437-0841-01 Engine View Diagrams & Manuals
195437-0844-01 Engine View Diagrams & Manuals
195437-0845-99 Engine View Diagrams & Manuals
195437-0854-99 Engine View Diagrams & Manuals
195437-0856-01 Engine View Diagrams & Manuals
195437-0858-01 Engine View Diagrams & Manuals
195437-0861-99 Engine View Diagrams & Manuals
195437-0862-01 Engine View Diagrams & Manuals
195437-0862-02 Engine View Diagrams & Manuals
195437-0865-01 Engine View Diagrams & Manuals
195437-0870-01 Engine View Diagrams & Manuals
195437-0877-01 Engine View Diagrams & Manuals
195437-0883-01 Engine View Diagrams & Manuals
195437-0884-01 Engine View Diagrams & Manuals
195437-0891-01 Engine View Diagrams & Manuals
195437-0892-99 Engine View Diagrams & Manuals
195437-0905-01 Engine View Diagrams & Manuals
195437-0910-01 Engine View Diagrams & Manuals
195437-1008-01 Engine View Diagrams & Manuals
195437-1008-02 Engine View Diagrams & Manuals
195437-1009-01 Engine View Diagrams & Manuals
195437-1017-01 Engine View Diagrams & Manuals
195437-1017-03 Engine View Diagrams & Manuals
195437-1023-01 Engine View Diagrams & Manuals
195437-1039-01 Engine View Diagrams & Manuals
195437-1041-01 Engine View Diagrams & Manuals
195437-1041-02 Engine View Diagrams & Manuals
195437-1041-03 Engine View Diagrams & Manuals
195437-1042-01 Engine View Diagrams & Manuals
195437-1042-02 Engine View Diagrams & Manuals
195437-1042-03 Engine View Diagrams & Manuals
195437-1121-01 Engine View Diagrams & Manuals
195437-1125-01 Engine View Diagrams & Manuals
195437-1130-01 Engine View Diagrams & Manuals
195437-1157-01 Engine View Diagrams & Manuals
195437-1165-01 Engine View Diagrams & Manuals
195437-1166-01 Engine View Diagrams & Manuals
195437-1166-02 Engine View Diagrams & Manuals
195437-2025-01 Engine View Diagrams & Manuals
195437-2025-02 Engine View Diagrams & Manuals
195437-2041-01 Engine View Diagrams & Manuals
195437-2041-02 Engine View Diagrams & Manuals
195437-2125-01 Engine View Diagrams & Manuals
195437-2125-02 Engine View Diagrams & Manuals
195437-2141-01 Engine View Diagrams & Manuals
195437-2225-01 Engine View Diagrams & Manuals
195437-2225-02 Engine View Diagrams & Manuals
195437-2239-01 Engine View Diagrams & Manuals
195437-2241-01 Engine View Diagrams & Manuals
195437-2241-02 Engine View Diagrams & Manuals
195437-2242-01 Engine View Diagrams & Manuals
195437-2243-01 Engine View Diagrams & Manuals
195437-4008-01 Engine View Diagrams & Manuals
195437-4009-01 Engine View Diagrams & Manuals
195437-4010-99 Engine View Diagrams & Manuals
195437-4017-01 Engine View Diagrams & Manuals
195437-4017-02 Engine View Diagrams & Manuals
195437-4020-01 Engine View Diagrams & Manuals
195437-4023-01 Engine View Diagrams & Manuals
195437-4041-01 Engine View Diagrams & Manuals
195437-4041-02 Engine View Diagrams & Manuals
195437-4041-03 Engine View Diagrams & Manuals
195437-4042-01 Engine View Diagrams & Manuals
195437-4042-02 Engine View Diagrams & Manuals
195437-5130-99 Engine View Diagrams & Manuals
195451-0195-01 Engine View Diagrams & Manuals
195451-0202-01 Engine View Diagrams & Manuals
195451-0236-01 Engine View Diagrams & Manuals
195451-0239-01 Engine View Diagrams & Manuals
195451-0239-02 Engine View Diagrams & Manuals
195451-0839-01 Engine View Diagrams & Manuals
195452-0114-01 Engine View Diagrams & Manuals
195452-0163-01 Engine View Diagrams & Manuals
195452-0173-01 Engine View Diagrams & Manuals
195452-0180-01 Engine View Diagrams & Manuals
195452-0186-01 Engine View Diagrams & Manuals
195452-0191-01 Engine View Diagrams & Manuals
195452-0191-02 Engine View Diagrams & Manuals
195452-0220-01 Engine View Diagrams & Manuals
195452-0223-01 Engine View Diagrams & Manuals
195452-0225-01 Engine View Diagrams & Manuals
195452-0231-01 Engine View Diagrams & Manuals
195452-0262-01 Engine View Diagrams & Manuals
195452-0274-01 Engine View Diagrams & Manuals
195452-0308-01 Engine View Diagrams & Manuals
195452-0312-01 Engine View Diagrams & Manuals
195452-0314-01 Engine View Diagrams & Manuals
195452-0604-01 Engine View Diagrams & Manuals
195452-0635-01 Engine View Diagrams & Manuals
195452-0640-01 Engine View Diagrams & Manuals
195452-0658-99 Engine View Diagrams & Manuals
195452-0676-01 Engine View Diagrams & Manuals
195452-0677-01 Engine View Diagrams & Manuals
195452-0679-01 Engine View Diagrams & Manuals
195452-0693-01 Engine View Diagrams & Manuals
195452-0704-01 Engine View Diagrams & Manuals
195452-0749-01 Engine View Diagrams & Manuals
195452-0759-01 Engine View Diagrams & Manuals
195452-0764-01 Engine View Diagrams & Manuals
195452-0766-01 Engine View Diagrams & Manuals
195452-0770-01 Engine View Diagrams & Manuals
195452-0777-01 Engine View Diagrams & Manuals
195452-0785-01 Engine View Diagrams & Manuals
195452-0791-99 Engine View Diagrams & Manuals
195452-0798-01 Engine View Diagrams & Manuals
195452-0803-01 Engine View Diagrams & Manuals
195452-0804-01 Engine View Diagrams & Manuals
195452-0833-01 Engine View Diagrams & Manuals
195452-1026-02 Engine View Diagrams & Manuals
195452-1049-01 Engine View Diagrams & Manuals
195452-1049-02 Engine View Diagrams & Manuals
195452-1049-03 Engine View Diagrams & Manuals
195452-1049-13 Engine View Diagrams & Manuals
195452-1104-01 Engine View Diagrams & Manuals
195452-1164-01 Engine View Diagrams & Manuals
195452-2049-01 Engine View Diagrams & Manuals
195452-2049-02 Engine View Diagrams & Manuals
195452-2049-03 Engine View Diagrams & Manuals
195452-2049-04 Engine View Diagrams & Manuals
195452-2049-05 Engine View Diagrams & Manuals
195452-2049-06 Engine View Diagrams & Manuals
195452-2049-07 Engine View Diagrams & Manuals
195452-2049-08 Engine View Diagrams & Manuals
195452-2149-01 Engine View Diagrams & Manuals
195452-2149-03 Engine View Diagrams & Manuals
195452-2149-07 Engine View Diagrams & Manuals
195452-2249-01 Engine View Diagrams & Manuals
195452-2249-02 Engine View Diagrams & Manuals
195452-2249-03 Engine View Diagrams & Manuals
195452-2249-05 Engine View Diagrams & Manuals
195452-2249-07 Engine View Diagrams & Manuals
195452-2251-01 Engine View Diagrams & Manuals
195452-4026-01 Engine View Diagrams & Manuals
195452-4026-02 Engine View Diagrams & Manuals
195452-4049-01 Engine View Diagrams & Manuals
195452-4049-02 Engine View Diagrams & Manuals
195452-4049-03 Engine View Diagrams & Manuals
195452-4049-04 Engine View Diagrams & Manuals
195452-4049-05 Engine View Diagrams & Manuals
195452-4049-09 Engine View Diagrams & Manuals
195452-4049-13 Engine View Diagrams & Manuals
195456-0189-01 Engine View Diagrams & Manuals
195456-0269-01 Engine View Diagrams & Manuals
195457-1048-01 Engine View Diagrams & Manuals
195457-2048-01 Engine View Diagrams & Manuals
195457-2048-02 Engine View Diagrams & Manuals
195457-2048-03 Engine View Diagrams & Manuals
195457-2048-04 Engine View Diagrams & Manuals
195457-2048-05 Engine View Diagrams & Manuals
195457-2048-06 Engine View Diagrams & Manuals
195457-2048-07 Engine View Diagrams & Manuals
195457-2048-08 Engine View Diagrams & Manuals
195457-2148-01 Engine View Diagrams & Manuals
195457-2248-01 Engine View Diagrams & Manuals
195457-2248-02 Engine View Diagrams & Manuals
195457-4048-01 Engine View Diagrams & Manuals
195457-4048-02 Engine View Diagrams & Manuals
195457-4048-05 Engine View Diagrams & Manuals
195702-0102-01 Engine View Diagrams & Manuals
195702-0122-01 Engine View Diagrams & Manuals
195702-0126-01 Engine View Diagrams & Manuals
195702-0128-01 Engine View Diagrams & Manuals
195702-0129-01 Engine View Diagrams & Manuals
195702-0132-01 Engine View Diagrams & Manuals
195702-0134-01 Engine View Diagrams & Manuals
195702-0135-01 Engine View Diagrams & Manuals
195702-0136-01 Engine View Diagrams & Manuals
195702-0142-01 Engine View Diagrams & Manuals
195702-0144-01 Engine View Diagrams & Manuals
195702-0146-01 Engine View Diagrams & Manuals
195702-0149-01 Engine View Diagrams & Manuals
195702-0150-01 Engine View Diagrams & Manuals
195702-0151-01 Engine View Diagrams & Manuals
195702-0152-01 Engine View Diagrams & Manuals
195702-0155-01 Engine View Diagrams & Manuals
195702-0157-01 Engine View Diagrams & Manuals
195702-0160-01 Engine View Diagrams & Manuals
195702-0402-E1 Engine View Diagrams & Manuals
195702-0426-E1 Engine View Diagrams & Manuals
195702-0429-E1 Engine View Diagrams & Manuals
195702-0436-A1 Engine View Diagrams & Manuals
195702-0442-E1 Engine View Diagrams & Manuals
195702-0449-A1 Engine View Diagrams & Manuals
195702-0449-E1 Engine View Diagrams & Manuals
195702-0450-A1 Engine View Diagrams & Manuals
195702-0450-E1 Engine View Diagrams & Manuals
195702-0452-A1 Engine View Diagrams & Manuals
195702-0457-E1 Engine View Diagrams & Manuals
195702-0465-E1 Engine View Diagrams & Manuals
195702-0467-E1 Engine View Diagrams & Manuals
195702-4002-01 Engine View Diagrams & Manuals
195702-4015-01 Engine View Diagrams & Manuals
195702-4016-01 Engine View Diagrams & Manuals
195702-4016-02 Engine View Diagrams & Manuals
195702-4018-01 Engine View Diagrams & Manuals
195702-4020-01 Engine View Diagrams & Manuals
195702-4502-E1 Engine View Diagrams & Manuals
195702-4515-A1 Engine View Diagrams & Manuals
195702-4515-E1 Engine View Diagrams & Manuals
195702-4516-A1 Engine View Diagrams & Manuals
195702-4516-E1 Engine View Diagrams & Manuals
195702-4518-A1 Engine View Diagrams & Manuals
195702-4518-E1 Engine View Diagrams & Manuals
195702-4520-A1 Engine View Diagrams & Manuals
195702-4520-E1 Engine View Diagrams & Manuals
195703-0131-01 Engine View Diagrams & Manuals
195706-0148-01 Engine View Diagrams & Manuals
195707-0101-01 Engine View Diagrams & Manuals
195707-0111-01 Engine View Diagrams & Manuals
195707-0112-01 Engine View Diagrams & Manuals
195707-0113-01 Engine View Diagrams & Manuals
195707-0114-01 Engine View Diagrams & Manuals
195707-0117-01 Engine View Diagrams & Manuals
195707-0118-01 Engine View Diagrams & Manuals
195707-0119-01 Engine View Diagrams & Manuals
195707-0119-02 Engine View Diagrams & Manuals
195707-0120-01 Engine View Diagrams & Manuals
195707-0121-01 Engine View Diagrams & Manuals
195707-0124-01 Engine View Diagrams & Manuals
195707-0125-01 Engine View Diagrams & Manuals
195707-0127-01 Engine View Diagrams & Manuals
195707-0130-01 Engine View Diagrams & Manuals
195707-0133-01 Engine View Diagrams & Manuals
195707-0137-01 Engine View Diagrams & Manuals
195707-0139-01 Engine View Diagrams & Manuals
195707-0141-01 Engine View Diagrams & Manuals
195707-0143-01 Engine View Diagrams & Manuals
195707-0145-01 Engine View Diagrams & Manuals
195707-0147-01 Engine View Diagrams & Manuals
195707-0153-01 Engine View Diagrams & Manuals
195707-0161-01 Engine View Diagrams & Manuals
195707-0162-01 Engine View Diagrams & Manuals
195707-0189-01 Engine View Diagrams & Manuals
195707-0401-E1 Engine View Diagrams & Manuals
195707-0412-E1 Engine View Diagrams & Manuals
195707-0413-A1 Engine View Diagrams & Manuals
195707-0414-E1 Engine View Diagrams & Manuals
195707-0421-A1 Engine View Diagrams & Manuals
195707-0421-E1 Engine View Diagrams & Manuals
195707-0430-E1 Engine View Diagrams & Manuals
195707-0432-E1 Engine View Diagrams & Manuals
195707-0443-E1 Engine View Diagrams & Manuals
195707-0453-A1 Engine View Diagrams & Manuals
195707-0461-E1 Engine View Diagrams & Manuals
195707-0462-E1 Engine View Diagrams & Manuals
195707-0466-E1 Engine View Diagrams & Manuals
195707-0468-E1 Engine View Diagrams & Manuals
195707-0490-E1 Engine View Diagrams & Manuals
195707-0492-E1 Engine View Diagrams & Manuals
195707-4019-01 Engine View Diagrams & Manuals
195707-4025-01 Engine View Diagrams & Manuals
195707-4025-02 Engine View Diagrams & Manuals
195707-4025-03 Engine View Diagrams & Manuals
195707-4026-01 Engine View Diagrams & Manuals
195707-4027-01 Engine View Diagrams & Manuals
195707-4519-A1 Engine View Diagrams & Manuals
195707-4519-E1 Engine View Diagrams & Manuals
195707-4525-A1 Engine View Diagrams & Manuals
195707-4525-E1 Engine View Diagrams & Manuals
195707-4526-A1 Engine View Diagrams & Manuals
195707-4526-E1 Engine View Diagrams & Manuals
195707-4527-A1 Engine View Diagrams & Manuals
195707-4527-E1 Engine View Diagrams & Manuals
196402-0022-01 Engine View Diagrams & Manuals
196402-0165-01 Engine View Diagrams & Manuals
196402-0522-A1 Engine View Diagrams & Manuals
196402-1022-E1 Engine View Diagrams & Manuals
196402-1105-E1 Engine View Diagrams & Manuals
196402-1123-E1 Engine View Diagrams & Manuals
196402-1165-E1 Engine View Diagrams & Manuals
196402-1231-E1 Engine View Diagrams & Manuals
196402-1236-E1 Engine View Diagrams & Manuals
196402-1244-E1 Engine View Diagrams & Manuals
196412-0117-01 Engine View Diagrams & Manuals
196412-0171-01 Engine View Diagrams & Manuals
196412-0171-02 Engine View Diagrams & Manuals
196412-0668-A1 Engine View Diagrams & Manuals
196412-0671-A1 Engine View Diagrams & Manuals
196412-0671-A2 Engine View Diagrams & Manuals
196412-0703-A1 Engine View Diagrams & Manuals
196412-1024-E1 Engine View Diagrams & Manuals
196412-1171-E1 Engine View Diagrams & Manuals
196412-1171-E2 Engine View Diagrams & Manuals
196417-0172-01 Engine View Diagrams & Manuals
196417-1172-E1 Engine View Diagrams & Manuals
196422-0004-01 Engine View Diagrams & Manuals
196422-0022-99 Engine View Diagrams & Manuals
196422-0162-01 Engine View Diagrams & Manuals
196422-1004-E1 Engine View Diagrams & Manuals
196422-1162-E1 Engine View Diagrams & Manuals
196427-0149-01 Engine View Diagrams & Manuals
196427-1149-E1 Engine View Diagrams & Manuals
196432-0005-01 Engine View Diagrams & Manuals
196432-0006-01 Engine View Diagrams & Manuals
196432-0007-01 Engine View Diagrams & Manuals
196432-0009-01 Engine View Diagrams & Manuals
196432-0009-02 Engine View Diagrams & Manuals
196432-0009-09 Engine View Diagrams & Manuals
196432-0033-01 Engine View Diagrams & Manuals
196432-0033-02 Engine View Diagrams & Manuals
196432-0035-01 Engine View Diagrams & Manuals
196432-0035-02 Engine View Diagrams & Manuals
196432-0035-03 Engine View Diagrams & Manuals
196432-0035-04 Engine View Diagrams & Manuals
196432-0041-99 Engine View Diagrams & Manuals
196432-0047-01 Engine View Diagrams & Manuals
196432-0047-02 Engine View Diagrams & Manuals
196432-0047-03 Engine View Diagrams & Manuals
196432-0050-02 Engine View Diagrams & Manuals
196432-0050-03 Engine View Diagrams & Manuals
196432-0065-01 Engine View Diagrams & Manuals
196432-0070-01 Engine View Diagrams & Manuals
196432-0070-02 Engine View Diagrams & Manuals
196432-0070-03 Engine View Diagrams & Manuals
196432-0073-01 Engine View Diagrams & Manuals
196432-0101-01 Engine View Diagrams & Manuals
196432-0112-01 Engine View Diagrams & Manuals
196432-0113-02 Engine View Diagrams & Manuals
196432-0114-02 Engine View Diagrams & Manuals
196432-0115-01 Engine View Diagrams & Manuals
196432-0116-01 Engine View Diagrams & Manuals
196432-0116-02 Engine View Diagrams & Manuals
196432-0120-01 Engine View Diagrams & Manuals
196432-0121-01 Engine View Diagrams & Manuals
196432-0129-01 Engine View Diagrams & Manuals
196432-0132-01 Engine View Diagrams & Manuals
196432-0135-01 Engine View Diagrams & Manuals
196432-0138-01 Engine View Diagrams & Manuals
196432-0143-01 Engine View Diagrams & Manuals
196432-0144-01 Engine View Diagrams & Manuals
196432-0145-01 Engine View Diagrams & Manuals
196432-0146-01 Engine View Diagrams & Manuals
196432-0147-01 Engine View Diagrams & Manuals
196432-0150-01 Engine View Diagrams & Manuals
196432-0151-01 Engine View Diagrams & Manuals
196432-0152-01 Engine View Diagrams & Manuals
196432-0160-01 Engine View Diagrams & Manuals
196432-0161-01 Engine View Diagrams & Manuals
196432-0163-01 Engine View Diagrams & Manuals
196432-0163-03 Engine View Diagrams & Manuals
196432-0167-01 Engine View Diagrams & Manuals
196432-0174-01 Engine View Diagrams & Manuals
196432-0175-01 Engine View Diagrams & Manuals
196432-0180-01 Engine View Diagrams & Manuals
196432-0181-01 Engine View Diagrams & Manuals
196432-0182-01 Engine View Diagrams & Manuals
196432-0197-01 Engine View Diagrams & Manuals
196432-0198-01 Engine View Diagrams & Manuals
196432-0223-01 Engine View Diagrams & Manuals
196432-0225-A1 Engine View Diagrams & Manuals
196432-0506-A1 Engine View Diagrams & Manuals
196432-0513-A1 Engine View Diagrams & Manuals
196432-0533-A1 Engine View Diagrams & Manuals
196432-0535-A1 Engine View Diagrams & Manuals
196432-0547-A1 Engine View Diagrams & Manuals
196432-0565-A1 Engine View Diagrams & Manuals
196432-0570-A1 Engine View Diagrams & Manuals
196432-0570-A2 Engine View Diagrams & Manuals
196432-0615-A1 Engine View Diagrams & Manuals
196432-0621-A1 Engine View Diagrams & Manuals
196432-0624-A1 Engine View Diagrams & Manuals
196432-0630-A1 Engine View Diagrams & Manuals
196432-0635-A1 Engine View Diagrams & Manuals
196432-0646-A1 Engine View Diagrams & Manuals
196432-0650-A1 Engine View Diagrams & Manuals
196432-0653-A1 Engine View Diagrams & Manuals
196432-0663-A1 Engine View Diagrams & Manuals
196432-0663-A2 Engine View Diagrams & Manuals
196432-0666-A1 Engine View Diagrams & Manuals
196432-0674-A1 Engine View Diagrams & Manuals
196432-0685-A1 Engine View Diagrams & Manuals
196432-0690-A1 Engine View Diagrams & Manuals
196432-0702-A1 Engine View Diagrams & Manuals
196432-1005-E1 Engine View Diagrams & Manuals
196432-1006-E1 Engine View Diagrams & Manuals
196432-1007-E1 Engine View Diagrams & Manuals
196432-1009-E1 Engine View Diagrams & Manuals
196432-1013-E1 Engine View Diagrams & Manuals
196432-1016-E2 Engine View Diagrams & Manuals
196432-1033-E1 Engine View Diagrams & Manuals
196432-1033-E2 Engine View Diagrams & Manuals
196432-1035-E1 Engine View Diagrams & Manuals
196432-1035-E4 Engine View Diagrams & Manuals
196432-1036-E1 Engine View Diagrams & Manuals
196432-1047-E1 Engine View Diagrams & Manuals
196432-1047-E2 Engine View Diagrams & Manuals
196432-1050-E2 Engine View Diagrams & Manuals
196432-1063-E2 Engine View Diagrams & Manuals
196432-1065-E1 Engine View Diagrams & Manuals
196432-1070-E1 Engine View Diagrams & Manuals
196432-1070-E2 Engine View Diagrams & Manuals
196432-1073-E1 Engine View Diagrams & Manuals
196432-1101-E1 Engine View Diagrams & Manuals
196432-1113-E2 Engine View Diagrams & Manuals
196432-1114-E2 Engine View Diagrams & Manuals
196432-1115-E1 Engine View Diagrams & Manuals
196432-1116-E1 Engine View Diagrams & Manuals
196432-1121-E1 Engine View Diagrams & Manuals
196432-1124-E1 Engine View Diagrams & Manuals
196432-1126-E1 Engine View Diagrams & Manuals
196432-1129-E1 Engine View Diagrams & Manuals
196432-1130-E1 Engine View Diagrams & Manuals
196432-1132-E1 Engine View Diagrams & Manuals
196432-1135-E1 Engine View Diagrams & Manuals
196432-1143-E1 Engine View Diagrams & Manuals
196432-1144-E1 Engine View Diagrams & Manuals
196432-1145-E1 Engine View Diagrams & Manuals
196432-1146-E1 Engine View Diagrams & Manuals
196432-1150-E1 Engine View Diagrams & Manuals
196432-1151-E1 Engine View Diagrams & Manuals
196432-1152-E1 Engine View Diagrams & Manuals
196432-1153-E1 Engine View Diagrams & Manuals
196432-1155-E1 Engine View Diagrams & Manuals
196432-1163-E1 Engine View Diagrams & Manuals
196432-1163-E2 Engine View Diagrams & Manuals
196432-1163-E3 Engine View Diagrams & Manuals
196432-1166-E1 Engine View Diagrams & Manuals
196432-1175-E1 Engine View Diagrams & Manuals
196432-1181-E1 Engine View Diagrams & Manuals
196432-1183-E1 Engine View Diagrams & Manuals
196432-1197-E1 Engine View Diagrams & Manuals
196432-1198-E1 Engine View Diagrams & Manuals
196432-1202-E1 Engine View Diagrams & Manuals
196432-1205-99 Engine View Diagrams & Manuals
196432-1215-E1 Engine View Diagrams & Manuals
196432-1215-E2 Engine View Diagrams & Manuals
196432-1223-E1 Engine View Diagrams & Manuals
196432-1227-E1 Engine View Diagrams & Manuals
196432-1229-E1 Engine View Diagrams & Manuals
196432-1230-E1 Engine View Diagrams & Manuals
196432-1233-E1 Engine View Diagrams & Manuals
196432-1235-E1 Engine View Diagrams & Manuals
196432-1241-E1 Engine View Diagrams & Manuals
196432-1242-99 Engine View Diagrams & Manuals
196432-1243-E1 Engine View Diagrams & Manuals
196432-1247-E1 Engine View Diagrams & Manuals
196436-0140-01 Engine View Diagrams & Manuals
196436-1240-E1 Engine View Diagrams & Manuals
196437-0008-01 Engine View Diagrams & Manuals
196437-0010-01 Engine View Diagrams & Manuals
196437-0030-01 Engine View Diagrams & Manuals
196437-0039-01 Engine View Diagrams & Manuals
196437-0041-01 Engine View Diagrams & Manuals
196437-0041-02 Engine View Diagrams & Manuals
196437-0042-01 Engine View Diagrams & Manuals
196437-0042-02 Engine View Diagrams & Manuals
196437-0042-03 Engine View Diagrams & Manuals
196437-0057-01 Engine View Diagrams & Manuals
196437-0127-01 Engine View Diagrams & Manuals
196437-0133-02 Engine View Diagrams & Manuals
196437-0134-01 Engine View Diagrams & Manuals
196437-0134-03 Engine View Diagrams & Manuals
196437-0148-01 Engine View Diagrams & Manuals
196437-0164-01 Engine View Diagrams & Manuals
196437-0166-01 Engine View Diagrams & Manuals
196437-0170-01 Engine View Diagrams & Manuals
196437-0176-01 Engine View Diagrams & Manuals
196437-0541-A1 Engine View Diagrams & Manuals
196437-0542-A2 Engine View Diagrams & Manuals
196437-0627-A1 Engine View Diagrams & Manuals
196437-0634-A1 Engine View Diagrams & Manuals
196437-0634-A2 Engine View Diagrams & Manuals
196437-0665-99 Engine View Diagrams & Manuals
196437-0667-A1 Engine View Diagrams & Manuals
196437-0675-A1 Engine View Diagrams & Manuals
196437-1008-E1 Engine View Diagrams & Manuals
196437-1010-E1 Engine View Diagrams & Manuals
196437-1030-E1 Engine View Diagrams & Manuals
196437-1033-E2 Engine View Diagrams & Manuals
196437-1039-E1 Engine View Diagrams & Manuals
196437-1041-E1 Engine View Diagrams & Manuals
196437-1042-E1 Engine View Diagrams & Manuals
196437-1042-E2 Engine View Diagrams & Manuals
196437-1057-E1 Engine View Diagrams & Manuals
196437-1080-E1 Engine View Diagrams & Manuals
196437-1133-E2 Engine View Diagrams & Manuals
196437-1134-E1 Engine View Diagrams & Manuals
196437-1164-E1 Engine View Diagrams & Manuals
196437-1167-E1 Engine View Diagrams & Manuals
196437-1184-E1 Engine View Diagrams & Manuals
196437-1226-E1 Engine View Diagrams & Manuals
196437-1232-E1 Engine View Diagrams & Manuals
196437-1234-E1 Engine View Diagrams & Manuals
196437-1237-E1 Engine View Diagrams & Manuals
196437-1238-E1 Engine View Diagrams & Manuals
196452-0011-01 Engine View Diagrams & Manuals
196452-0049-01 Engine View Diagrams & Manuals
196452-0049-02 Engine View Diagrams & Manuals
196452-0051-01 Engine View Diagrams & Manuals
196452-0103-01 Engine View Diagrams & Manuals
196452-0549-A1 Engine View Diagrams & Manuals
196452-0559-A1 Engine View Diagrams & Manuals
196452-1011-E1 Engine View Diagrams & Manuals
196452-1049-E1 Engine View Diagrams & Manuals
196452-1049-E3 Engine View Diagrams & Manuals
196452-1059-E1 Engine View Diagrams & Manuals
196452-1061-E1 Engine View Diagrams & Manuals
196457-0048-01 Engine View Diagrams & Manuals
196457-0048-02 Engine View Diagrams & Manuals
196457-1048-E1 Engine View Diagrams & Manuals
196457-1136-E1 Engine View Diagrams & Manuals
303447-1379-E1 Engine View Diagrams & Manuals
303447-1272-E1 Engine View Diagrams & Manuals
303447-1249-E1 Engine View Diagrams & Manuals
303447-1442-E1 Engine View Diagrams & Manuals
303447-1075-E2 Engine View Diagrams & Manuals
303447-1311-E1 Engine View Diagrams & Manuals
303447-1180-E1 Engine View Diagrams & Manuals
1191-0 10,000 Exl Generator View Diagrams & Manuals
13L132-0111-F8 Engine View Diagrams & Manuals
13L132-0112-F8 Engine View Diagrams & Manuals
13L132-0115-F8 Engine View Diagrams & Manuals
13L132-0129-F8 Engine View Diagrams & Manuals
13L132-0310-F8 Engine View Diagrams & Manuals
13L132-1117-F8 Engine View Diagrams & Manuals
13L132-1118-F8 Engine View Diagrams & Manuals
13L132-1123-F8 Engine View Diagrams & Manuals
13L152-0125-F8 Engine View Diagrams & Manuals
13L152-0311-F8 Engine View Diagrams & Manuals
13L152-0316-F8 Engine View Diagrams & Manuals
13L152-1116-F8 Engine View Diagrams & Manuals
13L157-1115-F8 Engine View Diagrams & Manuals
13L332-0001-F8 Engine View Diagrams & Manuals
13L332-0003-F8 Engine View Diagrams & Manuals
13L332-0008-F8 Engine View Diagrams & Manuals
13L332-0009-F8 Engine View Diagrams & Manuals
13L332-0036-F8 Engine View Diagrams & Manuals
13L332-0112-F8 Engine View Diagrams & Manuals
13L332-0114-F8 Engine View Diagrams & Manuals
13L332-0116-F8 Engine View Diagrams & Manuals
13L332-0117-F8 Engine View Diagrams & Manuals
13L332-0119-F8 Engine View Diagrams & Manuals
13L332-0120-F8 Engine View Diagrams & Manuals
13L332-0121-F8 Engine View Diagrams & Manuals
13L332-0122-F8 Engine View Diagrams & Manuals
13L332-0123-F8 Engine View Diagrams & Manuals
13L332-0124-F8 Engine View Diagrams & Manuals
13L332-0127-F8 Engine View Diagrams & Manuals
13L332-0129-F8 Engine View Diagrams & Manuals
13L332-0133-F8 Engine View Diagrams & Manuals
13L332-0311-F8 Engine View Diagrams & Manuals
13L332-0312-F8 Engine View Diagrams & Manuals
13L332-0316-F8 Engine View Diagrams & Manuals
13L332-0325-F8 Engine View Diagrams & Manuals
13L332-1036-F8 Engine View Diagrams & Manuals
13L332-1125-F8 Engine View Diagrams & Manuals
13L332-1126-F8 Engine View Diagrams & Manuals
13L332-1127-F8 Engine View Diagrams & Manuals
13L332-1130-F8 Engine View Diagrams & Manuals
13L332-1139-F8 Engine View Diagrams & Manuals
13L332-1140-F8 Engine View Diagrams & Manuals
13L332-1159-F8 Engine View Diagrams & Manuals
13L332-1172-F8 Engine View Diagrams & Manuals
13L336-0110-F8 Engine View Diagrams & Manuals
13L336-0115-F8 Engine View Diagrams & Manuals
13L337-0002-F8 Engine View Diagrams & Manuals
13L337-0004-F8 Engine View Diagrams & Manuals
13L337-0005-F8 Engine View Diagrams & Manuals
13L337-0007-F8 Engine View Diagrams & Manuals
13L337-0111-F8 Engine View Diagrams & Manuals
13L337-0113-F8 Engine View Diagrams & Manuals
13L337-0128-F8 Engine View Diagrams & Manuals
13L337-0318-F8 Engine View Diagrams & Manuals
13L337-0326-F8 Engine View Diagrams & Manuals
13L337-0327-F8 Engine View Diagrams & Manuals
13L337-1128-F8 Engine View Diagrams & Manuals
13L337-1181-F8 Engine View Diagrams & Manuals
13L352-0049-F8 Engine View Diagrams & Manuals
13L352-0319-F8 Engine View Diagrams & Manuals
13L356-0006-F8 Engine View Diagrams & Manuals
13L362-0050-F8 Engine View Diagrams & Manuals
13L362-0125-F8 Engine View Diagrams & Manuals
19J137-0011-F1 Engine View Diagrams & Manuals
19J137-0012-F1 Engine View Diagrams & Manuals
19L237-0056-F1 Engine View Diagrams & Manuals
19N132-0002-H7 Engine View Diagrams & Manuals
19N132-0003-H7 Engine View Diagrams & Manuals
19N132-0004-H7 Engine View Diagrams & Manuals
19N132-0006-H7 Engine View Diagrams & Manuals
19N132-0008-H1 Engine View Diagrams & Manuals
19N132-0010-H1 Engine View Diagrams & Manuals
19N132-0013-G1 Engine View Diagrams & Manuals
19N132-0014-G1 Engine View Diagrams & Manuals
19N132-0015-B1 Engine View Diagrams & Manuals
19N132-0018-H1 Engine View Diagrams & Manuals
19N132-0019-F1 Engine View Diagrams & Manuals
19N132-0020-H1 Engine View Diagrams & Manuals
19N132-0021-H1 Engine View Diagrams & Manuals
19N132-0022-H1 Engine View Diagrams & Manuals
19N132-0024-H1 Engine View Diagrams & Manuals
19N132-0025-H1 Engine View Diagrams & Manuals
19N132-0028-H1 Engine View Diagrams & Manuals
19N132-0029-H1 Engine View Diagrams & Manuals
19N132-0031-F1 Engine View Diagrams & Manuals
19N132-0033-F1 Engine View Diagrams & Manuals
19N132-0034-H1 Engine View Diagrams & Manuals
19N132-0035-F1 Engine View Diagrams & Manuals
19N132-0037-F1 Engine View Diagrams & Manuals
19N132-0039-F1 Engine View Diagrams & Manuals
19N132-0045-G1 Engine View Diagrams & Manuals
19N132-0047-01 Engine View Diagrams & Manuals
19N132-0048-01 Engine View Diagrams & Manuals
19N132-0051-F1 Engine View Diagrams & Manuals
19N132-0055-F1 Engine View Diagrams & Manuals
19N132-0059-F1 Engine View Diagrams & Manuals
19N132-0063-F1 Engine View Diagrams & Manuals
19N132-0064-H1 Engine View Diagrams & Manuals
19N132-0067-G1 Engine View Diagrams & Manuals
19N132-0068-H1 Engine View Diagrams & Manuals
19N132-0071-F1 Engine View Diagrams & Manuals
19N132-0079-F1 Engine View Diagrams & Manuals
19N132-0080-H1 Engine View Diagrams & Manuals
19N132-0083-F1 Engine View Diagrams & Manuals
19N132-0085-F1 Engine View Diagrams & Manuals
19N132-0088-G1 Engine View Diagrams & Manuals
19N132-0089-H7 Engine View Diagrams & Manuals
19N132-0090-F1 Engine View Diagrams & Manuals
19N132-0092-H1 Engine View Diagrams & Manuals
19N132-0097-F1 Engine View Diagrams & Manuals
19N132-0098-H1 Engine View Diagrams & Manuals
19N132-0099-F1 Engine View Diagrams & Manuals
19N132-0102-H1 Engine View Diagrams & Manuals
19N132-0103-H1 Engine View Diagrams & Manuals
19N132-0218-01 Engine View Diagrams & Manuals
19N132-0221-01 Engine View Diagrams & Manuals
19N132-0222-01 Engine View Diagrams & Manuals
19N135-0042-H1 Engine View Diagrams & Manuals
19N135-0049-H1 Engine View Diagrams & Manuals
19N137-0009-H1 Engine View Diagrams & Manuals
19N137-0027-H1 Engine View Diagrams & Manuals
19N137-0030-H1 Engine View Diagrams & Manuals
19N137-0032-F1 Engine View Diagrams & Manuals
19N137-0036-H1 Engine View Diagrams & Manuals
19N137-0044-H1 Engine View Diagrams & Manuals
19N137-0050-01 Engine View Diagrams & Manuals
19N137-0052-F1 Engine View Diagrams & Manuals
19N137-0053-F1 Engine View Diagrams & Manuals
19N137-0058-H7 Engine View Diagrams & Manuals
19N137-0060-F1 Engine View Diagrams & Manuals
19N137-0062-H1 Engine View Diagrams & Manuals
19N137-0065-F1 Engine View Diagrams & Manuals
19N137-0066-H1 Engine View Diagrams & Manuals
19N137-0070-H1 Engine View Diagrams & Manuals
19N137-0072-F1 Engine View Diagrams & Manuals
19N137-0075-01 Engine View Diagrams & Manuals
19N137-0076-F1 Engine View Diagrams & Manuals
19N137-0077-F1 Engine View Diagrams & Manuals
19N137-0082-H7 Engine View Diagrams & Manuals
19N137-0084-F1 Engine View Diagrams & Manuals
19N137-0087-H1 Engine View Diagrams & Manuals
19N137-0091-F1 Engine View Diagrams & Manuals
19N137-0094-H1 Engine View Diagrams & Manuals
19N137-0095-H1 Engine View Diagrams & Manuals
19N137-0104-H1 Engine View Diagrams & Manuals
19T132-0002-H1 Engine View Diagrams & Manuals
19T132-0006-H1 Engine View Diagrams & Manuals
19T132-0009-H1 Engine View Diagrams & Manuals
19T132-0016-H1 Engine View Diagrams & Manuals
19T135-0010-H1 Engine View Diagrams & Manuals
19T137-0005-H1 Engine View Diagrams & Manuals
19T137-0007-H1 Engine View Diagrams & Manuals
19T137-0011-H1 Engine View Diagrams & Manuals
19T137-0012-H1 Engine View Diagrams & Manuals
205312-0217-B1 Engine View Diagrams & Manuals
205312-0217-E1 Engine View Diagrams & Manuals
215802-0005-F1 Engine View Diagrams & Manuals
215807-0001-F1 Engine View Diagrams & Manuals
215807-0003-B1 Engine View Diagrams & Manuals
215807-0175-H7 Engine View Diagrams & Manuals
215807-0189-F1 Engine View Diagrams & Manuals
215807-0193-F1 Engine View Diagrams & Manuals
215807-0194-B1 Engine View Diagrams & Manuals
219802-0004-H1 Engine View Diagrams & Manuals
219807-0001-G5 Engine View Diagrams & Manuals
219807-0002-H1 Engine View Diagrams & Manuals
219807-0173-H7 Engine View Diagrams & Manuals
219807-0179-B1 Engine View Diagrams & Manuals
219977-0001-G5 Engine View Diagrams & Manuals
219977-0003-F1 Engine View Diagrams & Manuals
219977-0104-H7 Engine View Diagrams & Manuals
219977-0106-G1 Engine View Diagrams & Manuals
219977-0159-F1 Engine View Diagrams & Manuals
219977-0160-B1 Engine View Diagrams & Manuals
21B976-4194-H1 Engine View Diagrams & Manuals
21B977-0002-H1 Engine View Diagrams & Manuals
21B977-0162-H1 Engine View Diagrams & Manuals
21B977-0168-H1 Engine View Diagrams & Manuals
21B977-0215-H1 Engine View Diagrams & Manuals
21B977-0218-H1 Engine View Diagrams & Manuals
21B977-0843-H1 Engine View Diagrams & Manuals
21B977-4155-H1 Engine View Diagrams & Manuals
21B977-4156-H1 Engine View Diagrams & Manuals
21B977-4195-H1 Engine View Diagrams & Manuals
21B977-4198-H1 Engine View Diagrams & Manuals
21R707-0050-F1 Engine View Diagrams & Manuals
21R707-0079-F1 Engine View Diagrams & Manuals
21R777-0037-F1 Engine View Diagrams & Manuals
21R777-0053-G1 Engine View Diagrams & Manuals
21R777-0058-G1 Engine View Diagrams & Manuals
21R777-0102-G1 Engine View Diagrams & Manuals
21R877-0004-G1 Engine View Diagrams & Manuals
25D137-0007-H1 Engine View Diagrams & Manuals
25M137-0001-F1 Engine View Diagrams & Manuals
25M137-0021-F1 Engine View Diagrams & Manuals
25N132-0001-G1 Engine View Diagrams & Manuals
25N132-0002-G1 Engine View Diagrams & Manuals
25N132-0003-G1 Engine View Diagrams & Manuals
25N132-0004-G1 Engine View Diagrams & Manuals
25N132-0006-F1 Engine View Diagrams & Manuals
25N132-0009-F1 Engine View Diagrams & Manuals
25N132-0012-F1 Engine View Diagrams & Manuals
25N137-0005-F1 Engine View Diagrams & Manuals
25N137-0007-F1 Engine View Diagrams & Manuals
25N137-0008-F1 Engine View Diagrams & Manuals
25N137-0010-F1 Engine View Diagrams & Manuals
25N137-0011-F1 Engine View Diagrams & Manuals
25N137-0013-F1 Engine View Diagrams & Manuals
25N137-0014-F1 Engine View Diagrams & Manuals
25N137-0015-F1 Engine View Diagrams & Manuals
25T232-0024-H7 Engine View Diagrams & Manuals
25T232-0026-H1 Engine View Diagrams & Manuals
25T232-0027-F1 Engine View Diagrams & Manuals
25T232-0028-H7 Engine View Diagrams & Manuals
25T232-0029-H1 Engine View Diagrams & Manuals
25T232-0032-H1 Engine View Diagrams & Manuals
25T232-0033-F1 Engine View Diagrams & Manuals
25T232-0043-H1 Engine View Diagrams & Manuals
25T232-0044-B1 Engine View Diagrams & Manuals
25T232-0047-H7 Engine View Diagrams & Manuals
25T232-0051-F1 Engine View Diagrams & Manuals
25T232-0058-H1 Engine View Diagrams & Manuals
25T232-0059-F1 Engine View Diagrams & Manuals
25T232-0061-H1 Engine View Diagrams & Manuals
25T232-0063-H7 Engine View Diagrams & Manuals
25T232-0067-H7 Engine View Diagrams & Manuals
25T232-0068-F1 Engine View Diagrams & Manuals
25T232-0070-H7 Engine View Diagrams & Manuals
25T232-0072-H1 Engine View Diagrams & Manuals
25T232-0074-F1 Engine View Diagrams & Manuals
25T232-0076-F1 Engine View Diagrams & Manuals
25T232-0078-F1 Engine View Diagrams & Manuals
25T232-0079-F1 Engine View Diagrams & Manuals
25T232-0081-F1 Engine View Diagrams & Manuals
25T232-0088-H1 Engine View Diagrams & Manuals
25T232-0091-01 Engine View Diagrams & Manuals
25T232-0096-H7 Engine View Diagrams & Manuals
25T232-0108-F1 Engine View Diagrams & Manuals
25T232-0159-H1 Engine View Diagrams & Manuals
25T232-0173-F1 Engine View Diagrams & Manuals
25T232-0174-H1 Engine View Diagrams & Manuals
25T232-0176-H7 Engine View Diagrams & Manuals
25T232-0177-H1 Engine View Diagrams & Manuals
25T232-0178-H7 Engine View Diagrams & Manuals
25T232-0180-H7 Engine View Diagrams & Manuals
25T232-0181-H7 Engine View Diagrams & Manuals
25T232-0222-01 Engine View Diagrams & Manuals
25T232-0232-01 Engine View Diagrams & Manuals
25T232-0238-01 Engine View Diagrams & Manuals
25T232-0259-01 Engine View Diagrams & Manuals
25T232-0268-H1 Engine View Diagrams & Manuals
25T232-0273-H1 Engine View Diagrams & Manuals
25T232-0275-H1 Engine View Diagrams & Manuals
25T232-0283-F1 Engine View Diagrams & Manuals
25T232-0285-H1 Engine View Diagrams & Manuals
25T235-0015-G1 Engine View Diagrams & Manuals
25T235-0016-G1 Engine View Diagrams & Manuals
25T235-0035-G1 Engine View Diagrams & Manuals
25T235-0039-B1 Engine View Diagrams & Manuals
25T235-0040-B1 Engine View Diagrams & Manuals
25T235-0048-H7 Engine View Diagrams & Manuals
25T235-0267-H1 Engine View Diagrams & Manuals
25T236-0082-H7 Engine View Diagrams & Manuals
25T236-0083-H7 Engine View Diagrams & Manuals
25T237-0025-H7 Engine View Diagrams & Manuals
25T237-0036-H1 Engine View Diagrams & Manuals
25T237-0041-F1 Engine View Diagrams & Manuals
25T237-0042-H1 Engine View Diagrams & Manuals
25T237-0045-F1 Engine View Diagrams & Manuals
25T237-0053-H1 Engine View Diagrams & Manuals
25T237-0054-G1 Engine View Diagrams & Manuals
25T237-0056-01 Engine View Diagrams & Manuals
25T237-0060-H1 Engine View Diagrams & Manuals
25T237-0062-01 Engine View Diagrams & Manuals
25T237-0065-H1 Engine View Diagrams & Manuals
25T237-0066-H7 Engine View Diagrams & Manuals
25T237-0069-H7 Engine View Diagrams & Manuals
25T237-0071-01 Engine View Diagrams & Manuals
25T237-0073-H7 Engine View Diagrams & Manuals
25T237-0077-H1 Engine View Diagrams & Manuals
25T237-0084-H7 Engine View Diagrams & Manuals
25T237-0085-F1 Engine View Diagrams & Manuals
25T237-0087-F1 Engine View Diagrams & Manuals
25T237-0092-H7 Engine View Diagrams & Manuals
25T237-0093-H7 Engine View Diagrams & Manuals
25T237-0094-F1 Engine View Diagrams & Manuals
25T237-0109-F1 Engine View Diagrams & Manuals
25T237-0168-G1 Engine View Diagrams & Manuals
25T237-0175-H1 Engine View Diagrams & Manuals
25T237-0179-F1 Engine View Diagrams & Manuals
25T237-0202-01 Engine View Diagrams & Manuals
25T237-0248-01 Engine View Diagrams & Manuals
25T237-0269-H1 Engine View Diagrams & Manuals
25T237-0274-H1 Engine View Diagrams & Manuals
25T237-0276-F1 Engine View Diagrams & Manuals
25T237-0281-G1 Engine View Diagrams & Manuals
25T237-0282-F1 Engine View Diagrams & Manuals
25T237-0287-H7 Engine View Diagrams & Manuals
25T237-0290-H1 Engine View Diagrams & Manuals
25T237-0293-H1 Engine View Diagrams & Manuals
295342-0013-F1 Engine View Diagrams & Manuals
295347-0007-G1 Engine View Diagrams & Manuals
295347-0011-G1 Engine View Diagrams & Manuals
295347-0015-F1 Engine View Diagrams & Manuals
295347-0184-F1 Engine View Diagrams & Manuals
295347-0206-G1 Engine View Diagrams & Manuals
295440-0158-G1 Engine View Diagrams & Manuals
295440-0168-G1 Engine View Diagrams & Manuals
295440-0168-G2 Engine View Diagrams & Manuals
295442-0112-B1 Engine View Diagrams & Manuals
295442-0112-G1 Engine View Diagrams & Manuals
295442-0113-B1 Engine View Diagrams & Manuals
295442-0113-H1 Engine View Diagrams & Manuals
295442-0134-B1 Engine View Diagrams & Manuals
295442-0140-G1 Engine View Diagrams & Manuals
295442-0145-G1 Engine View Diagrams & Manuals
295442-0147-B1 Engine View Diagrams & Manuals
295442-0154-B1 Engine View Diagrams & Manuals
295442-0160-B1 Engine View Diagrams & Manuals
295442-0166-B1 Engine View Diagrams & Manuals
295442-0180-01 Engine View Diagrams & Manuals
295442-0185-H1 Engine View Diagrams & Manuals
295442-0187-F1 Engine View Diagrams & Manuals
295442-0188-B1 Engine View Diagrams & Manuals
295446-0119-B1 Engine View Diagrams & Manuals
295446-0119-G1 Engine View Diagrams & Manuals
295446-0139-B1 Engine View Diagrams & Manuals
295446-0150-B1 Engine View Diagrams & Manuals
295446-0150-H1 Engine View Diagrams & Manuals
295447-0110-B1 Engine View Diagrams & Manuals
295447-0110-H1 Engine View Diagrams & Manuals
295447-0111-B1 Engine View Diagrams & Manuals
295447-0111-G1 Engine View Diagrams & Manuals
295447-0116-B1 Engine View Diagrams & Manuals
295447-0117-B1 Engine View Diagrams & Manuals
295447-0117-G1 Engine View Diagrams & Manuals
295447-0118-G1 Engine View Diagrams & Manuals
295447-0123-G1 Engine View Diagrams & Manuals
295447-0126-G1 Engine View Diagrams & Manuals
295447-0126-G2 Engine View Diagrams & Manuals
295447-0128-B1 Engine View Diagrams & Manuals
295447-0129-G1 Engine View Diagrams & Manuals
295447-0132-G1 Engine View Diagrams & Manuals
295447-0138-B1 Engine View Diagrams & Manuals
295447-0149-E1 Engine View Diagrams & Manuals
295447-0149-G1 Engine View Diagrams & Manuals
295447-0151-G1 Engine View Diagrams & Manuals
295447-0164-G2 Engine View Diagrams & Manuals
295447-0167-B1 Engine View Diagrams & Manuals
295447-0179-F1 Engine View Diagrams & Manuals
295447-0182-F1 Engine View Diagrams & Manuals
295447-0186-H1 Engine View Diagrams & Manuals
295447-0190-B1 Engine View Diagrams & Manuals
295447-0191-G1 Engine View Diagrams & Manuals
295447-0191-H1 Engine View Diagrams & Manuals
295447-0196-F1 Engine View Diagrams & Manuals
295447-1174-G1 Engine View Diagrams & Manuals
296447-0003-H1 Engine View Diagrams & Manuals
296447-0004-H1 Engine View Diagrams & Manuals
297347-0159-G1 Engine View Diagrams & Manuals
297347-0159-G2 Engine View Diagrams & Manuals
303447-1068-A2 Engine View Diagrams & Manuals
303447-1068-E1 Engine View Diagrams & Manuals
303447-1068-E2 Engine View Diagrams & Manuals
303447-1093-A2 Engine View Diagrams & Manuals
303447-1093-E2 Engine View Diagrams & Manuals
303447-1100-E1 Engine View Diagrams & Manuals
303447-1131-E1 Engine View Diagrams & Manuals
303447-1188-A1 Engine View Diagrams & Manuals
303447-1188-E1 Engine View Diagrams & Manuals
303447-1282-E1 Engine View Diagrams & Manuals
303447-1283-E1 Engine View Diagrams & Manuals
303447-1294-E1 Engine View Diagrams & Manuals
303447-1440-E1 Engine View Diagrams & Manuals
303447-1440-E9 Engine View Diagrams & Manuals
303447-1441-E1 Engine View Diagrams & Manuals
305440-0033-G1 Engine View Diagrams & Manuals
305440-0033-G2 Engine View Diagrams & Manuals
305442-0089-F1 Engine View Diagrams & Manuals
305446-0019-H1 Engine View Diagrams & Manuals
305446-0575-F1 Engine View Diagrams & Manuals
305447-0004-B1 Engine View Diagrams & Manuals
305447-0012-G1 Engine View Diagrams & Manuals
305447-0014-G1 Engine View Diagrams & Manuals
305447-0015-F1 Engine View Diagrams & Manuals
305447-0016-G1 Engine View Diagrams & Manuals
305447-0017-G1 Engine View Diagrams & Manuals
305447-0018-F1 Engine View Diagrams & Manuals
305447-0024-F1 Engine View Diagrams & Manuals
305447-0029-F1 Engine View Diagrams & Manuals
305447-0030-G1 Engine View Diagrams & Manuals
305447-0030-G2 Engine View Diagrams & Manuals
305447-0031-F1 Engine View Diagrams & Manuals
305447-0080-F1 Engine View Diagrams & Manuals
305447-0081-H7 Engine View Diagrams & Manuals
305447-0088-B1 Engine View Diagrams & Manuals
305447-0332-H7 Engine View Diagrams & Manuals
305447-0333-F1 Engine View Diagrams & Manuals
305447-0574-H7 Engine View Diagrams & Manuals
305447-3089-F1 Engine View Diagrams & Manuals
305447-3091-B1 Engine View Diagrams & Manuals
305772-0001-B1 Engine View Diagrams & Manuals
305772-0004-G1 Engine View Diagrams & Manuals
305777-0033-G1 Engine View Diagrams & Manuals
305777-0135-B1 Engine View Diagrams & Manuals
305777-0150-B1 Engine View Diagrams & Manuals
305777-0152-B1 Engine View Diagrams & Manuals
305777-3033-G1 Engine View Diagrams & Manuals
309440-0115-01 Engine View Diagrams & Manuals
309447-0100-E1 Engine View Diagrams & Manuals
309447-0112-E1 Engine View Diagrams & Manuals
309447-0113-E1 Engine View Diagrams & Manuals
309447-0114-01 Engine View Diagrams & Manuals
31A607-0037-B1 Engine View Diagrams & Manuals
31C707-0985-G5 Engine View Diagrams & Manuals
31E677-0149-B1 Engine View Diagrams & Manuals
31E677-0150-G5 Engine View Diagrams & Manuals
31G777-0176-B1 Engine View Diagrams & Manuals
31G777-0205-B1 Engine View Diagrams & Manuals
31G777-0205-B2 Engine View Diagrams & Manuals
31G777-0306-G5 Engine View Diagrams & Manuals
31G777-0306-G6 Engine View Diagrams & Manuals
31L777-0020-B1 Engine View Diagrams & Manuals
31N707-4374-G5 Engine View Diagrams & Manuals
31P707-0157-B1 Engine View Diagrams & Manuals
31P707-0157-B2 Engine View Diagrams & Manuals
31P707-0373-B1 Engine View Diagrams & Manuals
31P707-0373-B2 Engine View Diagrams & Manuals
31P777-0001-B1 Engine View Diagrams & Manuals
31P777-0002-G6 Engine View Diagrams & Manuals
31Q507-0001-H1 Engine View Diagrams & Manuals
31R507-0022-B1 Engine View Diagrams & Manuals
31R707-0028-B1 Engine View Diagrams & Manuals
31R907-0049-G1 Engine View Diagrams & Manuals
31R907-0055-G1 Engine View Diagrams & Manuals
31S977-0001-B1 Engine View Diagrams & Manuals
31S977-0002-G1 Engine View Diagrams & Manuals
31S977-0003-B1 Engine View Diagrams & Manuals
31S977-0004-B1 Engine View Diagrams & Manuals
31S977-0005-G1 Engine View Diagrams & Manuals
31S977-0006-G1 Engine View Diagrams & Manuals
31S977-0007-G1 Engine View Diagrams & Manuals
31S977-0008-B1 Engine View Diagrams & Manuals
31S977-0009-G1 Engine View Diagrams & Manuals
31S977-0010-G1 Engine View Diagrams & Manuals
31S977-0011-G1 Engine View Diagrams & Manuals
31S977-0012-B1 Engine View Diagrams & Manuals
31S977-0013-B1 Engine View Diagrams & Manuals
31S977-0014-B1 Engine View Diagrams & Manuals
31S977-0015-G1 Engine View Diagrams & Manuals
31S977-0016-G1 Engine View Diagrams & Manuals
31S977-0017-G1 Engine View Diagrams & Manuals
33M977-0010-G1 Engine View Diagrams & Manuals
33S877-0001-G1 Engine View Diagrams & Manuals
33S877-0002-G1 Engine View Diagrams & Manuals
33S877-0003-G1 Engine View Diagrams & Manuals
33S877-0004-B1 Engine View Diagrams & Manuals
33S877-0005-B1 Engine View Diagrams & Manuals
33S877-0006-G1 Engine View Diagrams & Manuals
33S877-0007-G1 Engine View Diagrams & Manuals
33S877-0008-G1 Engine View Diagrams & Manuals
33S877-0009-G1 Engine View Diagrams & Manuals
33S877-0010-G1 Engine View Diagrams & Manuals
33S877-0011-G1 Engine View Diagrams & Manuals
33S877-0012-B1 Engine View Diagrams & Manuals
33S877-0013-G1 Engine View Diagrams & Manuals
33S877-0014-G1 Engine View Diagrams & Manuals
33S877-0015-G1 Engine View Diagrams & Manuals
33S877-0016-G1 Engine View Diagrams & Manuals
33S877-0017-G1 Engine View Diagrams & Manuals
33S877-0018-G1 Engine View Diagrams & Manuals
356442-0028-F1 Engine View Diagrams & Manuals
356442-0045-H7 Engine View Diagrams & Manuals
356442-0371-F1 Engine View Diagrams & Manuals
356445-0031-G1 Engine View Diagrams & Manuals
356445-0032-B1 Engine View Diagrams & Manuals
356447-0002-B1 Engine View Diagrams & Manuals
356447-0010-F1 Engine View Diagrams & Manuals
356447-0011-F1 Engine View Diagrams & Manuals
356447-0013-B1 Engine View Diagrams & Manuals
356447-0016-B1 Engine View Diagrams & Manuals
356447-0020-H1 Engine View Diagrams & Manuals
356447-0021-H7 Engine View Diagrams & Manuals
356447-0022-B1 Engine View Diagrams & Manuals
356447-0023-G1 Engine View Diagrams & Manuals
356447-0026-G1 Engine View Diagrams & Manuals
356447-0033-B1 Engine View Diagrams & Manuals
356447-0042-H7 Engine View Diagrams & Manuals
356447-0043-B1 Engine View Diagrams & Manuals
356447-0046-G1 Engine View Diagrams & Manuals
356447-0067-F1 Engine View Diagrams & Manuals
356447-0068-G1 Engine View Diagrams & Manuals
356447-0069-F1 Engine View Diagrams & Manuals
356447-0088-H7 Engine View Diagrams & Manuals
356447-0097-G1 Engine View Diagrams & Manuals
356447-0206-B1 Engine View Diagrams & Manuals
356447-0211-E1 Engine View Diagrams & Manuals
356447-0211-G1 Engine View Diagrams & Manuals
356447-0215-B1 Engine View Diagrams & Manuals
356447-0219-B1 Engine View Diagrams & Manuals
356447-0219-E1 Engine View Diagrams & Manuals
356447-0219-G1 Engine View Diagrams & Manuals
356447-0220-E1 Engine View Diagrams & Manuals
356447-0220-G1 Engine View Diagrams & Manuals
356447-0222-E1 Engine View Diagrams & Manuals
356447-0222-G1 Engine View Diagrams & Manuals
356447-0223-E1 Engine View Diagrams & Manuals
356447-0223-G1 Engine View Diagrams & Manuals
356447-0225-E1 Engine View Diagrams & Manuals
356447-0225-G1 Engine View Diagrams & Manuals
356447-0226-B1 Engine View Diagrams & Manuals
356447-0226-E9 Engine View Diagrams & Manuals
356447-0228-E1 Engine View Diagrams & Manuals
356447-0228-G1 Engine View Diagrams & Manuals
356447-0232-E1 Engine View Diagrams & Manuals
356447-0232-G1 Engine View Diagrams & Manuals
356447-0236-E1 Engine View Diagrams & Manuals
356447-0236-G1 Engine View Diagrams & Manuals
356447-0237-E1 Engine View Diagrams & Manuals
356447-0237-G1 Engine View Diagrams & Manuals
356447-0238-B1 Engine View Diagrams & Manuals
356447-0238-E9 Engine View Diagrams & Manuals
356447-0240-01 Engine View Diagrams & Manuals
356447-0243-E1 Engine View Diagrams & Manuals
356447-0243-G1 Engine View Diagrams & Manuals
356447-0247-B1 Engine View Diagrams & Manuals
356447-0247-H1 Engine View Diagrams & Manuals
356447-0247-H7 Engine View Diagrams & Manuals
356447-0250-B1 Engine View Diagrams & Manuals
356447-0252-G1 Engine View Diagrams & Manuals
356447-0253-B1 Engine View Diagrams & Manuals
356447-0253-H1 Engine View Diagrams & Manuals
356447-0261-G1 Engine View Diagrams & Manuals
356447-0263-G1 Engine View Diagrams & Manuals
356447-0267-B1 Engine View Diagrams & Manuals
356447-0268-G1 Engine View Diagrams & Manuals
356447-0269-G1 Engine View Diagrams & Manuals
356447-0272-G1 Engine View Diagrams & Manuals
356447-0275-G1 Engine View Diagrams & Manuals
356447-0284-B1 Engine View Diagrams & Manuals
356447-0285-G1 Engine View Diagrams & Manuals
356447-0293-B1 Engine View Diagrams & Manuals
356447-0297-F1 Engine View Diagrams & Manuals
356447-0300-G1 Engine View Diagrams & Manuals
356447-0320-G1 Engine View Diagrams & Manuals
356447-0321-F1 Engine View Diagrams & Manuals
356447-0328-B1 Engine View Diagrams & Manuals
356447-0331-B1 Engine View Diagrams & Manuals
356447-0331-G1 Engine View Diagrams & Manuals
356447-0332-E1 Engine View Diagrams & Manuals
356447-0332-G1 Engine View Diagrams & Manuals
356447-0337-B1 Engine View Diagrams & Manuals
356447-0338-G1 Engine View Diagrams & Manuals
356447-0338-G2 Engine View Diagrams & Manuals
356447-0340-B1 Engine View Diagrams & Manuals
356447-0340-H1 Engine View Diagrams & Manuals
356447-0344-G1 Engine View Diagrams & Manuals
356447-0351-B1 Engine View Diagrams & Manuals
356447-0352-B1 Engine View Diagrams & Manuals
356447-0356-G1 Engine View Diagrams & Manuals
356447-0359-G1 Engine View Diagrams & Manuals
356447-0372-F1 Engine View Diagrams & Manuals
356447-0394-G1 Engine View Diagrams & Manuals
356447-0396-F1 Engine View Diagrams & Manuals
356447-0397-B1 Engine View Diagrams & Manuals
356447-0403-F1 Engine View Diagrams & Manuals
356447-0406-B1 Engine View Diagrams & Manuals
356447-0407-B1 Engine View Diagrams & Manuals
356447-0408-H7 Engine View Diagrams & Manuals
356447-0409-B1 Engine View Diagrams & Manuals
356447-0411-G1 Engine View Diagrams & Manuals
356447-0415-G1 Engine View Diagrams & Manuals
356447-0566-F1 Engine View Diagrams & Manuals
356447-0602-G1 Engine View Diagrams & Manuals
356447-0603-B1 Engine View Diagrams & Manuals
356447-0604-B1 Engine View Diagrams & Manuals
356447-0610-F1 Engine View Diagrams & Manuals
356447-0614-G1 Engine View Diagrams & Manuals
356447-1140-G1 Engine View Diagrams & Manuals
356447-1169-G1 Engine View Diagrams & Manuals
356447-1189-G1 Engine View Diagrams & Manuals
356447-1211-G1 Engine View Diagrams & Manuals
356447-1226-F8 Engine View Diagrams & Manuals
356447-1338-G1 Engine View Diagrams & Manuals
356447-2133-G1 Engine View Diagrams & Manuals
356447-2243-G1 Engine View Diagrams & Manuals
356447-3005-G1 Engine View Diagrams & Manuals
356447-3038-G1 Engine View Diagrams & Manuals
356447-3075-G1 Engine View Diagrams & Manuals
356447-3078-G1 Engine View Diagrams & Manuals
356447-3079-H7 Engine View Diagrams & Manuals
356447-3419-H7 Engine View Diagrams & Manuals
356776-3046-G1 Engine View Diagrams & Manuals
356777-0002-G1 Engine View Diagrams & Manuals
356777-0003-G1 Engine View Diagrams & Manuals
356777-0004-B1 Engine View Diagrams & Manuals
356777-0007-G1 Engine View Diagrams & Manuals
356777-0012-G1 Engine View Diagrams & Manuals
356777-0047-B1 Engine View Diagrams & Manuals
356777-0118-B1 Engine View Diagrams & Manuals
356777-0123-G1 Engine View Diagrams & Manuals
356777-0124-B1 Engine View Diagrams & Manuals
356777-0134-G1 Engine View Diagrams & Manuals
356777-0135-G1 Engine View Diagrams & Manuals
356777-0140-G1 Engine View Diagrams & Manuals
356777-0141-G1 Engine View Diagrams & Manuals
356777-0142-B1 Engine View Diagrams & Manuals
356777-0143-B1 Engine View Diagrams & Manuals
356777-1113-G1 Engine View Diagrams & Manuals
356777-1137-G1 Engine View Diagrams & Manuals
356777-3034-G1 Engine View Diagrams & Manuals
356777-3137-G1 Engine View Diagrams & Manuals
359447-0001-E1 Engine View Diagrams & Manuals
359447-0002-E1 Engine View Diagrams & Manuals
385442-0113-G1 Engine View Diagrams & Manuals
385442-0255-G1 Engine View Diagrams & Manuals
385446-0125-B1 Engine View Diagrams & Manuals
385446-0125-G1 Engine View Diagrams & Manuals
385446-0155-B1 Engine View Diagrams & Manuals
385446-0155-G1 Engine View Diagrams & Manuals
385447-0002-G1 Engine View Diagrams & Manuals
385447-0006-H7 Engine View Diagrams & Manuals
385447-0021-B1 Engine View Diagrams & Manuals
385447-0022-H7 Engine View Diagrams & Manuals
385447-0075-G1 Engine View Diagrams & Manuals
385447-0075-G2 Engine View Diagrams & Manuals
385447-0075-G3 Engine View Diagrams & Manuals
385447-0077-H1 Engine View Diagrams & Manuals
385447-0111-B1 Engine View Diagrams & Manuals
385447-0111-G1 Engine View Diagrams & Manuals
385447-0115-G1 Engine View Diagrams & Manuals
385447-0116-G1 Engine View Diagrams & Manuals
385447-0118-B1 Engine View Diagrams & Manuals
385447-0118-G1 Engine View Diagrams & Manuals
385447-0118-G2 Engine View Diagrams & Manuals
385447-0123-G1 Engine View Diagrams & Manuals
385447-0127-B1 Engine View Diagrams & Manuals
385447-0127-G1 Engine View Diagrams & Manuals
385447-0128-G1 Engine View Diagrams & Manuals
385447-0130-G1 Engine View Diagrams & Manuals
385447-0131-G1 Engine View Diagrams & Manuals
385447-0132-G1 Engine View Diagrams & Manuals
385447-0134-B1 Engine View Diagrams & Manuals
385447-0134-G1 Engine View Diagrams & Manuals
385447-0135-G1 Engine View Diagrams & Manuals
385447-0137-B1 Engine View Diagrams & Manuals
385447-0137-G1 Engine View Diagrams & Manuals
385447-0138-G1 Engine View Diagrams & Manuals
385447-0139-B1 Engine View Diagrams & Manuals
385447-0139-G1 Engine View Diagrams & Manuals
385447-0142-G1 Engine View Diagrams & Manuals
385447-0143-G1 Engine View Diagrams & Manuals
385447-0145-B1 Engine View Diagrams & Manuals
385447-0145-G1 Engine View Diagrams & Manuals
385447-0145-H7 Engine View Diagrams & Manuals
385447-0146-G1 Engine View Diagrams & Manuals
385447-0148-B1 Engine View Diagrams & Manuals
385447-0148-G1 Engine View Diagrams & Manuals
385447-0152-B1 Engine View Diagrams & Manuals
385447-0152-G1 Engine View Diagrams & Manuals
385447-0157-G1 Engine View Diagrams & Manuals
385447-0158-G1 Engine View Diagrams & Manuals
385447-0160-E1 Engine View Diagrams & Manuals
385447-0160-G1 Engine View Diagrams & Manuals
385447-0166-E1 Engine View Diagrams & Manuals
385447-0166-G1 Engine View Diagrams & Manuals
385447-0166-H7 Engine View Diagrams & Manuals
385447-0172-G1 Engine View Diagrams & Manuals
385447-0173-G1 Engine View Diagrams & Manuals
385447-0175-G1 Engine View Diagrams & Manuals
385447-0176-G1 Engine View Diagrams & Manuals
385447-0176-H7 Engine View Diagrams & Manuals
385447-0178-G1 Engine View Diagrams & Manuals
385447-0181-G1 Engine View Diagrams & Manuals
385447-0182-G1 Engine View Diagrams & Manuals
385447-0186-B1 Engine View Diagrams & Manuals
385447-0186-G1 Engine View Diagrams & Manuals
385447-0187-G1 Engine View Diagrams & Manuals
385447-0187-H7 Engine View Diagrams & Manuals
385447-0190-G1 Engine View Diagrams & Manuals
385447-0190-H7 Engine View Diagrams & Manuals
385447-0192-B1 Engine View Diagrams & Manuals
385447-0192-G1 Engine View Diagrams & Manuals
385447-0193-G1 Engine View Diagrams & Manuals
385447-0196-G1 Engine View Diagrams & Manuals
385447-0197-G1 Engine View Diagrams & Manuals
385447-0198-B1 Engine View Diagrams & Manuals
385447-0198-G1 Engine View Diagrams & Manuals
385447-0199-B1 Engine View Diagrams & Manuals
385447-0199-G1 Engine View Diagrams & Manuals
385447-0199-H7 Engine View Diagrams & Manuals
385447-0204-B1 Engine View Diagrams & Manuals
385447-0205-B1 Engine View Diagrams & Manuals
385447-0206-B1 Engine View Diagrams & Manuals
385447-0207-B1 Engine View Diagrams & Manuals
385447-0209-G1 Engine View Diagrams & Manuals
385447-0212-B1 Engine View Diagrams & Manuals
385447-0213-B1 Engine View Diagrams & Manuals
385447-0256-H7 Engine View Diagrams & Manuals
385447-0334-B1 Engine View Diagrams & Manuals
385447-0337-H7 Engine View Diagrams & Manuals
385447-0339-B1 Engine View Diagrams & Manuals
385447-2132-G1 Engine View Diagrams & Manuals
385447-2173-G1 Engine View Diagrams & Manuals
385447-3075-G1 Engine View Diagrams & Manuals
385777-0001-G1 Engine View Diagrams & Manuals
385777-0003-B1 Engine View Diagrams & Manuals
385777-0005-B1 Engine View Diagrams & Manuals
385777-0007-G1 Engine View Diagrams & Manuals
385777-0100-G1 Engine View Diagrams & Manuals
385777-0108-G1 Engine View Diagrams & Manuals
385777-0110-G1 Engine View Diagrams & Manuals
385777-0112-G1 Engine View Diagrams & Manuals
385777-0114-G1 Engine View Diagrams & Manuals
385777-0115-G1 Engine View Diagrams & Manuals
385777-0116-G1 Engine View Diagrams & Manuals
385777-0117-B1 Engine View Diagrams & Manuals
385777-0117-G1 Engine View Diagrams & Manuals
385777-0118-G1 Engine View Diagrams & Manuals
385777-0119-G1 Engine View Diagrams & Manuals
385777-0123-G1 Engine View Diagrams & Manuals
385777-0131-G1 Engine View Diagrams & Manuals
385777-0133-B1 Engine View Diagrams & Manuals
385777-0135-B1 Engine View Diagrams & Manuals
385777-0138-B1 Engine View Diagrams & Manuals
385777-1113-G1 Engine View Diagrams & Manuals
385777-1114-G1 Engine View Diagrams & Manuals
385777-1119-G1 Engine View Diagrams & Manuals
385777-1127-B1 Engine View Diagrams & Manuals
385777-1284-G1 Engine View Diagrams & Manuals
385777-2211-G1 Engine View Diagrams & Manuals
386447-0005-B1 Engine View Diagrams & Manuals
386447-0011-G1 Engine View Diagrams & Manuals
386447-0012-G1 Engine View Diagrams & Manuals
386447-0014-B1 Engine View Diagrams & Manuals
386447-0017-H7 Engine View Diagrams & Manuals
386447-0022-B1 Engine View Diagrams & Manuals
386447-0024-G1 Engine View Diagrams & Manuals
386447-0025-G1 Engine View Diagrams & Manuals
386447-0027-B1 Engine View Diagrams & Manuals
386447-0029-G1 Engine View Diagrams & Manuals
386447-0030-G1 Engine View Diagrams & Manuals
386447-0031-G1 Engine View Diagrams & Manuals
386447-0043-G1 Engine View Diagrams & Manuals
386447-0044-B1 Engine View Diagrams & Manuals
386447-0049-B1 Engine View Diagrams & Manuals
386447-0051-G1 Engine View Diagrams & Manuals
386447-0052-G1 Engine View Diagrams & Manuals
386447-0054-H7 Engine View Diagrams & Manuals
386447-0055-F1 Engine View Diagrams & Manuals
386447-0056-G1 Engine View Diagrams & Manuals
386447-0067-G1 Engine View Diagrams & Manuals
386447-0068-G1 Engine View Diagrams & Manuals
386447-0069-H7 Engine View Diagrams & Manuals
386447-0081-F1 Engine View Diagrams & Manuals
386447-0085-H7 Engine View Diagrams & Manuals
386447-0087-B1 Engine View Diagrams & Manuals
386447-0229-H1 Engine View Diagrams & Manuals
386447-0231-H7 Engine View Diagrams & Manuals
386447-0237-H1 Engine View Diagrams & Manuals
386447-0238-F1 Engine View Diagrams & Manuals
386447-0240-B1 Engine View Diagrams & Manuals
386447-0399-F1 Engine View Diagrams & Manuals
386447-0401-F1 Engine View Diagrams & Manuals
386447-0403-G1 Engine View Diagrams & Manuals
386447-3201-G1 Engine View Diagrams & Manuals
386447-3202-B1 Engine View Diagrams & Manuals
386447-3204-F1 Engine View Diagrams & Manuals
386447-3206-B1 Engine View Diagrams & Manuals
386447-3210-G1 Engine View Diagrams & Manuals
386777-0002-B1 Engine View Diagrams & Manuals
386777-0003-G1 Engine View Diagrams & Manuals
386777-0004-B1 Engine View Diagrams & Manuals
386777-0007-G1 Engine View Diagrams & Manuals
386777-0008-G1 Engine View Diagrams & Manuals
386777-0009-G1 Engine View Diagrams & Manuals
386777-0010-B1 Engine View Diagrams & Manuals
386777-0037-B1 Engine View Diagrams & Manuals
386777-3037-G1 Engine View Diagrams & Manuals
407777-0004-B1 Engine View Diagrams & Manuals
407777-3149-B1 Engine View Diagrams & Manuals
407777-3217-G5 Engine View Diagrams & Manuals
407777-3271-B1 Engine View Diagrams & Manuals
407777-3569-G5 Engine View Diagrams & Manuals
40G777-0001-G5 Engine View Diagrams & Manuals
40G777-0003-B1 Engine View Diagrams & Manuals
40G777-0191-B1 Engine View Diagrams & Manuals
445577-0865-G5 Engine View Diagrams & Manuals
445577-5187-G5 Engine View Diagrams & Manuals
445577-6111-G5 Engine View Diagrams & Manuals
445577-6135-B1 Engine View Diagrams & Manuals
445577-6139-B1 Engine View Diagrams & Manuals
49T777-0001-G1 Engine View Diagrams & Manuals
49T777-0002-G1 Engine View Diagrams & Manuals
49T777-0003-G1 Engine View Diagrams & Manuals
49T777-0004-G1 Engine View Diagrams & Manuals
Toro
38116 (9000001-9999999)(1989) Snowthrower View Diagrams & Manuals
71286 (250000001-250999999)(2005) Lawn Tractor View Diagrams & Manuals
71286 (260000001-260999999)(2006) Lawn Tractor View Diagrams & Manuals
71286 (270000001-270999999)(2007) Lawn Tractor View Diagrams & Manuals
71427 (250000001-250999999)(2005) Lawn Tractor View Diagrams & Manuals
71429 (250000001-250999999)(2005) Lawn Tractor View Diagrams & Manuals
30108 (4000001-4999999)(1984) Lawn Mower View Diagrams & Manuals
30111 (4000001-4999999)(1984) Lawn Mower View Diagrams & Manuals
74301 (230000001-230999999)(2003) Lawn Tractor View Diagrams & Manuals
74301 (240000001-240000893)(2004) Lawn Tractor View Diagrams & Manuals
74301 (240000894-240999999)(2004) Lawn Tractor View Diagrams & Manuals
74301 (250000001-250999999)(2005) Lawn Tractor View Diagrams & Manuals
74325 (230000001-230999999)(2003) Lawn Tractor View Diagrams & Manuals
74325 (240000001-240999999)(2004) Lawn Tractor View Diagrams & Manuals
74325 (250000001-250999999)(2005) Lawn Tractor View Diagrams & Manuals
74327 (260000001-260019999)(2006) Lawn Tractor View Diagrams & Manuals
74327 (260020000-260999999)(2006) Lawn Tractor View Diagrams & Manuals
74330 (230000001-230999999)(2003) Lawn Tractor View Diagrams & Manuals
74330 (240000001-240001179)(2004) Lawn Tractor View Diagrams & Manuals
74330 (240001180-240999999)(2004) Lawn Tractor View Diagrams & Manuals
74330 (250000001-250999999)(2005) Lawn Tractor View Diagrams & Manuals
74350 (230000001-230999999)(2003) Lawn Tractor View Diagrams & Manuals
74350 (240000001-240000178)(2004) Lawn Tractor View Diagrams & Manuals
74350 (240000179-240999999)(2004) Lawn Tractor View Diagrams & Manuals
74351 (240000001-240999999)(2004) Lawn Tractor View Diagrams & Manuals
74352 (250000001-250999999)(2005) Lawn Tractor View Diagrams & Manuals
74353 (260000001-260999999)(2006) Lawn Tractor View Diagrams & Manuals
74402 (230000001-230999999)(2003) Lawn Tractor View Diagrams & Manuals
74402 (240000001-240999999)(2004) Lawn Tractor View Diagrams & Manuals
74402 (250000001-250999999)(2005) Lawn Tractor View Diagrams & Manuals
74402 (260000001-260999999)(2006) Lawn Tractor View Diagrams & Manuals
74403 (230000001-230999999)(2003) Lawn Tractor View Diagrams & Manuals
74403 (240000001-240999999)(2004) Lawn Tractor View Diagrams & Manuals
74403 (250000001-250999999)(2005) Lawn Tractor View Diagrams & Manuals
74403 (260000001-260999999)(2006) Lawn Tractor View Diagrams & Manuals
S2-12B502 (1000001-1999999)(1991) Lawn Tractor View Diagrams & Manuals
74433 (280000001-280999999)(2008) Lawn Tractor View Diagrams & Manuals
74433 (290000001-290999999)(2009) Lawn Tractor View Diagrams & Manuals
74501 (210000001-210999999)(2001) Lawn Tractor View Diagrams & Manuals
74501 (220000001-220999999)(2002) Lawn Tractor View Diagrams & Manuals
74502 (230000001-230999999)(2003) Lawn Tractor View Diagrams & Manuals
74502 (220000001-220999999)(2002) Lawn Tractor View Diagrams & Manuals
74602 (240000001-240999999)(2004) Lawn Tractor View Diagrams & Manuals
74704 (250000001-250999999)(2005) Lawn Tractor View Diagrams & Manuals
74704 (260000001-260999999)(2006) Lawn Tractor View Diagrams & Manuals
74812 (270000001-270999999)(2007) Lawn Tractor View Diagrams & Manuals
74812 (280000001-280999999)(2008) Lawn Tractor View Diagrams & Manuals
74814 (270000001-270999999)(2007) Lawn Tractor View Diagrams & Manuals
32-12O5A1 (1000001-1999999)(1991) Lawn Tractor View Diagrams & Manuals
32-12OEA1 (1000001-1999999)(1991) Lawn Tractor View Diagrams & Manuals
71246 (250000001-250999999)(2005) Lawn Tractor View Diagrams & Manuals
71246 (260000001-260999999)(2006) Lawn Tractor View Diagrams & Manuals
71246 (270000001-270999999)(2007) Lawn Tractor View Diagrams & Manuals
71253 (280000001-280999999)(2008) Lawn Tractor View Diagrams & Manuals
71253 (290000001-290999999)(2009) Lawn Tractor View Diagrams & Manuals
71253 (310000001-310999999)(2010) Lawn Tractor View Diagrams & Manuals
71285 (240000001-240999999)(2004) Lawn Tractor View Diagrams & Manuals
Vanguard - Briggs & Stratton
13H337-0201-H7 Engine View Diagrams & Manuals
305442-0112-B5 Engine View Diagrams & Manuals
305446-0196-B5 Engine View Diagrams & Manuals
305446-0204-B5 Engine View Diagrams & Manuals
305446-0581-B1 Engine View Diagrams & Manuals
305446-0581-B5 Engine View Diagrams & Manuals
305447-0002-H5 Engine View Diagrams & Manuals
305447-0004-B5 Engine View Diagrams & Manuals
305447-0088-B5 Engine View Diagrams & Manuals
305447-0115-H5 Engine View Diagrams & Manuals
305447-0116-B5 Engine View Diagrams & Manuals
305447-0126-H5 Engine View Diagrams & Manuals
305447-0146-B5 Engine View Diagrams & Manuals
305447-0150-B5 Engine View Diagrams & Manuals
305447-0151-B5 Engine View Diagrams & Manuals
305447-0152-B5 Engine View Diagrams & Manuals
305447-0153-B5 Engine View Diagrams & Manuals
305447-0154-B5 Engine View Diagrams & Manuals
305447-0165-B5 Engine View Diagrams & Manuals
305447-0172-H5 Engine View Diagrams & Manuals
305447-0173-B5 Engine View Diagrams & Manuals
305447-0175-B5 Engine View Diagrams & Manuals
305447-0191-B5 Engine View Diagrams & Manuals
305447-0193-B5 Engine View Diagrams & Manuals
305447-0571-H1 Engine View Diagrams & Manuals
305447-0574-B1 Engine View Diagrams & Manuals
305447-0574-B5 Engine View Diagrams & Manuals
305447-0577-G1 Engine View Diagrams & Manuals
305447-0582-H1 Engine View Diagrams & Manuals
305447-0582-H5 Engine View Diagrams & Manuals
305447-0586-G1 Engine View Diagrams & Manuals
356442-0126-B5 Engine View Diagrams & Manuals
356442-0369-B5 Engine View Diagrams & Manuals
356447-0013-B5 Engine View Diagrams & Manuals
356447-0016-B5 Engine View Diagrams & Manuals
356447-0043-B5 Engine View Diagrams & Manuals
356447-0054-F1 Engine View Diagrams & Manuals
356447-0080-G1 Engine View Diagrams & Manuals
356447-0121-B5 Engine View Diagrams & Manuals
356447-0139-B5 Engine View Diagrams & Manuals
356447-0157-B5 Engine View Diagrams & Manuals
356447-0158-B5 Engine View Diagrams & Manuals
356447-0159-B5 Engine View Diagrams & Manuals
356447-0160-H5 Engine View Diagrams & Manuals
356447-0168-H5 Engine View Diagrams & Manuals
356447-0172-B5 Engine View Diagrams & Manuals
356447-0215-B5 Engine View Diagrams & Manuals
356447-0324-B5 Engine View Diagrams & Manuals
356447-0328-B5 Engine View Diagrams & Manuals
356447-0331-B5 Engine View Diagrams & Manuals
356447-0340-H5 Engine View Diagrams & Manuals
356447-0352-B5 Engine View Diagrams & Manuals
356447-0397-B5 Engine View Diagrams & Manuals
356447-0405-H5 Engine View Diagrams & Manuals
356447-0407-B5 Engine View Diagrams & Manuals
356447-0409-B5 Engine View Diagrams & Manuals
356447-0416-G1 Engine View Diagrams & Manuals
356447-0606-B5 Engine View Diagrams & Manuals
356447-0611-H1 Engine View Diagrams & Manuals
356447-0611-H5 Engine View Diagrams & Manuals
356447-0612-H1 Engine View Diagrams & Manuals
356447-0612-H5 Engine View Diagrams & Manuals
356447-0613-B1 Engine View Diagrams & Manuals
356447-0618-B1 Engine View Diagrams & Manuals
356447-0619-G1 Engine View Diagrams & Manuals
356447-0622-H7 Engine View Diagrams & Manuals
356447-0623-F1 Engine View Diagrams & Manuals
356447-0625-F1 Engine View Diagrams & Manuals
356447-0628-B1 Engine View Diagrams & Manuals
356447-0628-B5 Engine View Diagrams & Manuals
356447-0629-B5 Engine View Diagrams & Manuals
356447-0631-B1 Engine View Diagrams & Manuals
356447-0631-B5 Engine View Diagrams & Manuals
356447-0632-G1 Engine View Diagrams & Manuals
356777-0004-B5 Engine View Diagrams & Manuals
356777-0118-B5 Engine View Diagrams & Manuals
356777-0124-B5 Engine View Diagrams & Manuals
356777-0144-B1 Engine View Diagrams & Manuals
356777-0144-B5 Engine View Diagrams & Manuals
385447-0341-B5 Engine View Diagrams & Manuals
386447-0006-B5 Engine View Diagrams & Manuals
Show More Compatible Models
This item works with the following types of products:
- Generator Parts
- Snowblower Parts
- Lawn Tractor Parts
- Lawn Mower Parts
- Engine Parts
This part replaces obsolete part #: 393374, 797375, 394890 (10, 13, or 16 Amp, Depending on Size of Flywheel Magnets), 691185, 394890
Questions & Answers ?
Our customer Service team is at the ready daily to answer your part and product questions.

Ask our Team
We have a dedicated staff with decades of collective experience in helping customers just like you purchase parts to repair their products.
Does this fit my product?Questions & Answers for Regulator
No questions have been asked yet
Customer Repair Instructions ?
All our customer repair instructions are solicited directly from other customers just like you who have purchased and replaced this exact part.
Battery not charging new battery
Simon - July 27, 2016
👍 86 of 88 people found this instruction helpful
Tool Type
Lawn Mower
Difficulty
Medium
Time
15-30 minutes
Tools Used
Nutdriver, Multimeter
Parts Used
On briggs and stratton twin cylinder engine, start engine up, put engine full throttle, set multimeter to dc volts, check batter voltage. Should be greater than 12 volts. If not find the voltage regulator with 2 yellow and 1 red wire coming from it. With engine still running unplug yellow wires and switch multimeter to AC volts. The yellow wires coming from under the flywheel (the thing on top that is spinning) insert test leads into that plug. Should be somewhere around 20-30 volts. If that checks out fine, plug yellow wires back together. With engine still running at high idle, unplug the red wire from the regulator. Set multimeter to dc volts. Insert one probe in red wire from regulator and the other to the frame or a good ground. Should be greater than 12 volts. If not its the voltage regulator. Remove, unplug, plug new one in bolt in place. Run mower at high idle, check voltage at battery, should be greater than 12 volts. If batter was low to begin with let mower run at high idle for 10-15 mins and recheck.
Did you find this story helpful?
Thanks for voting and helping fellow customers!
Not charging enough to keep electric clutch engaged tractor would also stop running
james - March 30, 2016
👍 20 of 21 people found this instruction helpful
Tool Type
Lawn Tractor
Difficulty
Easy
Time
Less than 15 minutes
Tools Used
Screwdriver, Socket set
Parts Used
Take two bolts out of regulator disconnect wires. Replace bad one with new one
Did you find this story helpful?
Thanks for voting and helping fellow customers!
Lights were dim
James - December 2, 2015
👍 6 of 7 people found this instruction helpful
Tool Type
Lawn Tractor
Difficulty
Easy
Time
Less than 15 minutes
Tools Used
Pliers, Nutdriver, A 12 PACK LOL
Parts Used
Removed the two screws securing the worn regulator, Unplugged terminals, attached new regulator and attached terminals. Bright lights again.
Did you find this story helpful?
Thanks for voting and helping fellow customers!
Battery not charging
Carl - May 24, 2018
👍 1 of 1 people found this instruction helpful
Tool Type
Lawn Mower
Difficulty
Easy
Time
15-30 minutes
Tools Used
Socket set, Electrical connectors and crimp tool - digital voltmeter
Parts Used
1) Checked battery voltage prior to replacement of regulator
2) Checked alternator output - good
3) Removed old regulator and temporarily connected new regulator to alternator and battery through starter switch connection.
4) Checked charging voltage at battery and it was good.
5) Replaced connectors on both alternator output and and new voltage regulator input to match
6) Reconnected new regulator
7) Checked output voltage at battery and battery was charging.
Did you find this story helpful?
Thanks for voting and helping fellow customers!
Engine hardstarting after sitting for a week and newbattery went below voltage which made PTO quit
Roger - June 29, 2021
Tool Type
Lawn Tractor
Difficulty
Easy
Time
15-30 minutes
Tools Used
Pliers, Socket set, Ohm meter aka voltage meter
Parts Used
The fuel pump bolted to the side of engine 2 screws and 3 hoses to remove very easy fix.
The voltage regulator also bolted to engine with 2 bolts a 2 yellow wire connector to the
Alternator and a Single red wire connector to the battery.
After making repairs I cranked the engine with choke engaged as usual
And within 5 seconds the engine fired up it sounded so good to hear run again
Then I used my ohm meter to check the voltage at the battery it read 13.87 volts.
Now engine cranks over much faster and starts every time
So whether you order parts on line knowing the parts that you ordered
Or call customer service, they have a very knowledgeable staff they will ship you the parts you need
Also the correct and original parts at the best price around these guys ROCK
I for one am a very satisfied customer
I'm sure they can satisfy your needs as well
Till next time
Did you find this story helpful?
Thanks for voting and helping fellow customers!
Battery Would not charge while motor was running.
Daniel - June 1, 2020
Tool Type
Lawn Tractor
Difficulty
Easy
Time
15-30 minutes
Tools Used
Socket set
Parts Used
Removed and replaced voltage regulator.
Did you find this story helpful?
Thanks for voting and helping fellow customers!
Bad regulator
Edward - April 26, 2018
Tool Type
Lawn Tractor
Difficulty
Easy
Time
Less than 15 minutes
Tools Used
Socket set
Parts Used
Removed 1 10mm screw and loosened the 2nd. Unplugged the old regulator and plugged in the new one. Replaced the removed screw and tightened both.
Did you find this story helpful?
Thanks for voting and helping fellow customers!
Battery would not charge.
Melvin - May 22, 2017
👍 2 of 4 people found this instruction helpful
Tool Type
Lawn Tractor
Difficulty
Easy
Time
Less than 15 minutes
Tools Used
Screwdriver
Parts Used
Plugged in the part and remounted it.
Did you find this story helpful?
Thanks for voting and helping fellow customers!
OEM stands for Original Equipment Manufacturer and means the part you’re buying is sourced directly from the manufacturer who made your product. At eReplacementParts, we sell only genuine OEM parts, guaranteeing the part you’re purchasing is of better design and of higher quality than aftermarket parts.
Our product descriptions are a combination of data sourced directly from the manufacturers who made your product as well as content researched and curated by our content & customer service teams. This content is edited and reviewed internally before being made public to customers.
Our customer service team are at the ready daily to answer your part and product questions. We have a dedicated staff with decades of collective experience in helping customers just like you purchase parts to repair their products.
All our part reviews are solicited directly from other customers who have purchased this exact part. While we moderate these reviews for profanity, offensive language or personally identifiable information, these reviews are posted exactly as submitted and no alterations are made by our team.
All our customer repair instructions are solicited directly from other customers just like you who have purchased and replaced this exact part. While we moderate these reviews for profanity, offensive language or personally identifiable information, these reviews are posted exactly as submitted and no alterations are made by our team.
Based on data from past customer purchasing behaviors, these parts are most commonly purchased together along with the part you are viewing. These parts may be necessary or helpful to replace to complete your current repair.
All our installation videos are created and produced in collaboration with our in-house repair technician, Mark Sodja, who has helped millions of eReplacementParts customers over the last 13 years repair their products. Mark has years of experience in selling and repairing both commercial and residential products with a specialty in gas-powered equipment.
This data is collected from customers who submitted a repair instruction after replacing this exact part. Customers can rate how easy the repair was to complete and how long it took. We aggregate this data to provide a repair rating that allows customers to quickly determine the difficulty and time needed to perform their own repair.