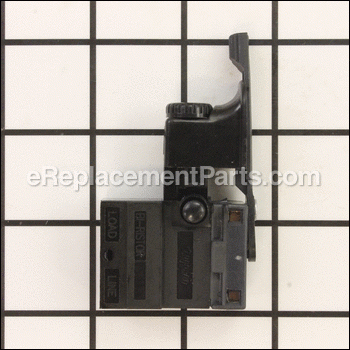
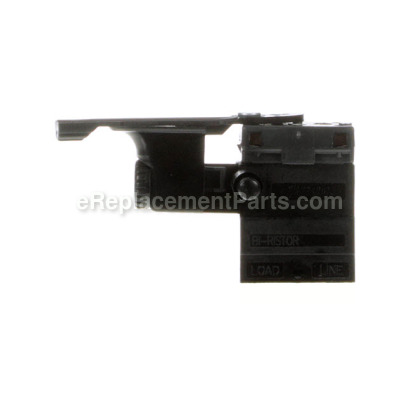
This is a genuine manufacturer-approved replacement switch which is specially designed for Makita drills. It is the part of the tool handling on/off operations, unfortunately, over time components will wear out and may begin to fail eventually requiring a replacement. Keep in mind this high-quality switch has a durable plastic body and is sold individually. Please make sure to refer to the appropriate diagrams of your model for the correct location and application of this part.
Switch 651868-3
OEM part for: Makita
Part Number: 651868-3
Jump To:
Frequently Purchased Together ?
Compatibility
This item works with the following types of products:
- Drill Parts
This part replaces obsolete part #: 651815-4
Customer Part Reviews ?
- 1
Questions & Answers ?
Our customer Service team is at the ready daily to answer your part and product questions.

Ask our Team
We have a dedicated staff with decades of collective experience in helping customers just like you purchase parts to repair their products.
Does this fit my product?Questions & Answers for Switch
Customer Repair Instructions ?
All our customer repair instructions are solicited directly from other customers just like you who have purchased and replaced this exact part.
Trigger switch was defective, after 15 years of use. It was easier to get a new power cord rather than try to get the old one to work.
Tool Type
Electric Drill
Difficulty
Medium
Time
15-30 minutes
Tools Used
Screwdriver, wire strippers
Parts Used
Switch broke
Tool Type
Electric Drill
Difficulty
Easy
Time
30-60 minutes
Tools Used
Screwdriver, wire strippers
Parts Used
Drill switch variable speed not working.
Tool Type
Electric Drill
Difficulty
Easy
Time
15-30 minutes
Tools Used
Screwdriver
Parts Used
2. Disconnected the wiring.
3. Removed the switch.
4. Connected the wiring to the new switch verifying the proper connections using a diagram.
5. Lubed the bearings.
6. Assembled the case.
7. Tested. Ready for service.
The friction connection between the power chord and the switch failed.
Tool Type
Electric Drill
Difficulty
Hard
Time
1-2 hours
Tools Used
Screwdriver, Pliers, SOLDERING IRON, WIRE STRIPPERS, EPOXY, EXACTO KNIFE
2. The power chord supplied by your company did not include the required strain relief.
3. I modified the new power chord by cutting off the strain relief from the old chord set and installing it on the new chord set. (24 hour cure time for the epoxy used to attach the strain relief.)
4. I removed the defective switch and chord set.
5. Since no instructions were included, I contacted your customer service to obtain a schematic of my drill.
6. No schematic was available from your company, but I was given the phone number of MAKITA customer service who supplied the required documentation.
7. The compression connectors on the switch required several attempts to attach the power chord and additional internal wiring to the switch. (There was little tolerance to insert each wire into the mounting holes on the switch utilizing a jeweler's screw driver.)
8. I reassemble the components on the drill body including the new switch dust cover. (A slot was not provided on the dust cover to allow the rotation direction control to protrude.)
9. I then successfully tested the drill.
The drill would not power on.
Tool Type
Electric Drill
Difficulty
Medium
Time
30-60 minutes
Tools Used
Screwdriver
Parts Used
switch was bad
Tool Type
Electric Drill
Difficulty
Easy
Time
Less than 15 minutes
Tools Used
Screwdriver, Pliers
Parts Used
drill had no power and cord cover was frayed
Tool Type
Electric Drill
Difficulty
Easy
Time
30-60 minutes
Tools Used
Screwdriver, wire cutter and crimper
separated drill case
disconnected switch
connected new switch
installed new brushes
connected new cord
put drill case back together
Worn switch and cord
Tool Type
Electric Drill
Difficulty
Easy
Time
Less than 15 minutes
Tools Used
Screwdriver, Pliers
2-Disconnected wires from old switch & cord. Small screwdriver was needed to disconnect wires.
3-Replaced switch , dust cover and cord.
4-Reassembled drill halves.
By taking photos of switch and cord connections before disconnecting wires helped with reassembly.
Drill stopped working.
Tool Type
Electric Drill
Difficulty
Easy
Time
15-30 minutes
Tools Used
Screwdriver, Pliers
Parts Used
Difficult to disconnect 6 different wires from the old switch and reconnect to new switch
Tool Type
Electric Drill
Difficulty
Medium
Time
30-60 minutes
Tools Used
Screwdriver, Paper clip for stiff wire
Parts Used
Here is a video on these types of switches.
https://www.youtube.com/watch?v=HFVGyf6uODM
OEM stands for Original Equipment Manufacturer and means the part you’re buying is sourced directly from the manufacturer who made your product. At eReplacementParts, we sell only genuine OEM parts, guaranteeing the part you’re purchasing is of better design and of higher quality than aftermarket parts.
Our product descriptions are a combination of data sourced directly from the manufacturers who made your product as well as content researched and curated by our content & customer service teams. This content is edited and reviewed internally before being made public to customers.
Our customer service team are at the ready daily to answer your part and product questions. We have a dedicated staff with decades of collective experience in helping customers just like you purchase parts to repair their products.
All our part reviews are solicited directly from other customers who have purchased this exact part. While we moderate these reviews for profanity, offensive language or personally identifiable information, these reviews are posted exactly as submitted and no alterations are made by our team.
All our customer repair instructions are solicited directly from other customers just like you who have purchased and replaced this exact part. While we moderate these reviews for profanity, offensive language or personally identifiable information, these reviews are posted exactly as submitted and no alterations are made by our team.
Based on data from past customer purchasing behaviors, these parts are most commonly purchased together along with the part you are viewing. These parts may be necessary or helpful to replace to complete your current repair.
All our installation videos are created and produced in collaboration with our in-house repair technician, Mark Sodja, who has helped millions of eReplacementParts customers over the last 13 years repair their products. Mark has years of experience in selling and repairing both commercial and residential products with a specialty in gas-powered equipment.
This data is collected from customers who submitted a repair instruction after replacing this exact part. Customers can rate how easy the repair was to complete and how long it took. We aggregate this data to provide a repair rating that allows customers to quickly determine the difficulty and time needed to perform their own repair.


