
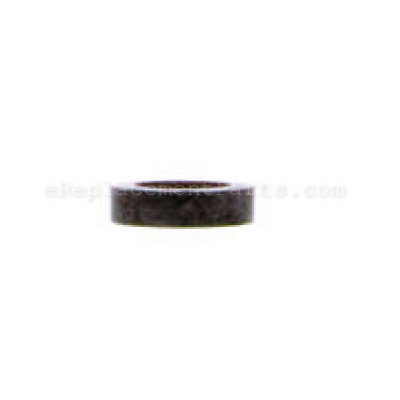


Genuine OEM power tool replacement part designed for Hitachi Nailers. If your trigger is leaking when you depress it, then this part may need to be replaced. This item is made out of Rubber Material and it is Sold Individually.
Valve Packing 888151
OEM part for: Metabo HPT (Hitachi)
Part Number: 888151
$4.99
In Stock
Jump To:
Frequently Purchased Together ?


Compatibility
This Valve Packing will fit the following 61 machines. Confirm this part works with your model, and view the detailed model diagrams and repair help we have to offer.
Metabo HPT (Hitachi)
Show More Compatible ModelsThis item works with the following types of products:
- Nailer Parts
- Stapler Parts
This part replaces obsolete part #: 878734, 878-734, 875637
Questions & Answers ?
Our customer Service team is at the ready daily to answer your part and product questions.

Ask our Team
We have a dedicated staff with decades of collective experience in helping customers just like you purchase parts to repair their products.
Does this fit my product?Questions & Answers for Valve Packing
No questions have been asked yet
Customer Repair Instructions ?
All our customer repair instructions are solicited directly from other customers just like you who have purchased and replaced this exact part.
Air leak, seal failed
JERRY - April 29, 2016
👍 3 of 4 people found this instruction helpful
Tool Type
Nailer
Difficulty
Easy
Time
Less than 15 minutes
Tools Used
, SPANER WRENCH
Parts Used
Knock out roll pin for trigger & unscrew valve to replace seal & ball
Did you find this story helpful?
Thanks for voting and helping fellow customers!
The nailer leaking air at the trigger.
Matthew - August 15, 2017
👍 1 of 1 people found this instruction helpful
Tool Type
Nailer
Difficulty
Medium
Time
30-60 minutes
Tools Used
Screwdriver, Hex wrench
Parts Used
1. Remove the trigger from the air nailer.
2. Remove and clean the valves behind the trigger.
3. Replace the worn parts.
4. Grease and reassemble.
2. Remove and clean the valves behind the trigger.
3. Replace the worn parts.
4. Grease and reassemble.
Did you find this story helpful?
Thanks for voting and helping fellow customers!
The valve packing disintegrated
David - April 5, 2023
Tool Type
Nailer
Difficulty
Easy
Time
1-2 hours
Tools Used
Screwdriver, None
Parts Used
Replaced every O-ring in the Gun ordered the valve packing. Replaced it and everything works great.
Did you find this story helpful?
Thanks for voting and helping fellow customers!
framing nailer was leaking air when connected to air hose
Roger - December 28, 2021
Tool Type
Nailer
Difficulty
Medium
Time
1-2 hours
Tools Used
, allen wrench set, O ring pic, 8mm wrench, hammer, punch.
Dismantled entire gun piston bumper was breaking into small pieces causing air leak. I use my nail guns daily therefore when something like this happens I always do a complete rebuild, in this case the front bumper was also bad. I always allow a few hours thoroughly clean, inspect and rebuild everything properly to extend the time between rebuilds. recommendations: Take your time be patient, drink a beer if necessary and make it like brand new.
P.S. DO NOT REUSE OLD PARTS SUCH AS GASKETS, ROLLED PINS, ETC. CHEERS AND HAVE FUN!
P.S. DO NOT REUSE OLD PARTS SUCH AS GASKETS, ROLLED PINS, ETC. CHEERS AND HAVE FUN!
Did you find this story helpful?
Thanks for voting and helping fellow customers!
air leak at trigger
Bruce - July 15, 2020
Tool Type
Nailer
Difficulty
Medium
Time
30-60 minutes
Tools Used
Screwdriver, punch and small hammer for roll pin
Punched out roll pin holding trigger. Not the right tool but used a hammer and screwdriver to remove the threaded piece holding the trigger apparatus. Replaced the valve packing and both o-rings and reassembled. Be careful no to lose the ball.
Did you find this story helpful?
Thanks for voting and helping fellow customers!
The O ring on the plunger broke
Russell - May 23, 2020
Tool Type
Nailer
Difficulty
Hard
Time
30-60 minutes
Tools Used
Screwdriver, Wrench Set, Adjustable Wrench
Parts Used
I removed the trigger and the plunger came out and then I unscrewed the piece that the plunger rides in and out came the ball and the packing. All told could be a ten minute job. The O ring is a TIGHT fit on the plunger and it took about ten minutes to get it on the first stage and then I broke it trying to get it over the hump and into the seat groove. I had purchased two O rings so I had a second to install. After a good night sleep and much thought I soaked the O ring in boiling water and it went on the first stage ok. I soaked the plunger with the O ring in the first place and then it rolled into the groove pretty easy and the whole thing went back together in a few minutes.
Did you find this story helpful?
Thanks for voting and helping fellow customers!
Air was leaking from the trigger.
Calvin - March 16, 2019
Tool Type
Nailer
Difficulty
Easy
Time
30-60 minutes
Tools Used
Screwdriver, Pliers
I removed the trigger assembly and replaced broken parts
Replaced o rings.
Replaced o rings.
Did you find this story helpful?
Thanks for voting and helping fellow customers!
Packing was missing
LEON - March 10, 2018
Tool Type
Nailer
Difficulty
Easy
Time
15-30 minutes
Tools Used
Screwdriver, Pliers, Light hammer , allen wrench
Parts Used
Removed head
Removed roll pins
Removed safety trigger
Removed valve body
Installed packing
Assembled in reverse order
Removed roll pins
Removed safety trigger
Removed valve body
Installed packing
Assembled in reverse order
Did you find this story helpful?
Thanks for voting and helping fellow customers!
Air leaked from trigger
Michael - August 11, 2017
Tool Type
Nailer
Difficulty
Medium
Time
30-60 minutes
Tools Used
, Allen wrenches, small punch to remove trigger drift pin
1) Drove trigger pin out.
2) Remove trigger assy.
3) Replaced valve packing and urethane ball and plunger o-ring
2) Remove trigger assy.
3) Replaced valve packing and urethane ball and plunger o-ring
Did you find this story helpful?
Thanks for voting and helping fellow customers!
Leaky trigger
louis - August 2, 2017
Tool Type
Nailer
Difficulty
Medium
Time
15-30 minutes
Tools Used
, 3/32 roll pin punch
Parts Used
Use punch too remove roll pin from trigger . Slotted screwdriver too remove cylinder. Clean old packing out of housing. Replace with new , and repeat all steps in reverse
Did you find this story helpful?
Thanks for voting and helping fellow customers!
Load More Install Stories
OEM stands for Original Equipment Manufacturer and means the part you’re buying is sourced directly from the manufacturer who made your product. At eReplacementParts, we sell only genuine OEM parts, guaranteeing the part you’re purchasing is of better design and of higher quality than aftermarket parts.
Our product descriptions are a combination of data sourced directly from the manufacturers who made your product as well as content researched and curated by our content & customer service teams. This content is edited and reviewed internally before being made public to customers.
Our customer service team are at the ready daily to answer your part and product questions. We have a dedicated staff with decades of collective experience in helping customers just like you purchase parts to repair their products.
All our part reviews are solicited directly from other customers who have purchased this exact part. While we moderate these reviews for profanity, offensive language or personally identifiable information, these reviews are posted exactly as submitted and no alterations are made by our team.
All our customer repair instructions are solicited directly from other customers just like you who have purchased and replaced this exact part. While we moderate these reviews for profanity, offensive language or personally identifiable information, these reviews are posted exactly as submitted and no alterations are made by our team.
Based on data from past customer purchasing behaviors, these parts are most commonly purchased together along with the part you are viewing. These parts may be necessary or helpful to replace to complete your current repair.
All our installation videos are created and produced in collaboration with our in-house repair technician, Mark Sodja, who has helped millions of eReplacementParts customers over the last 13 years repair their products. Mark has years of experience in selling and repairing both commercial and residential products with a specialty in gas-powered equipment.
This data is collected from customers who submitted a repair instruction after replacing this exact part. Customers can rate how easy the repair was to complete and how long it took. We aggregate this data to provide a repair rating that allows customers to quickly determine the difficulty and time needed to perform their own repair.