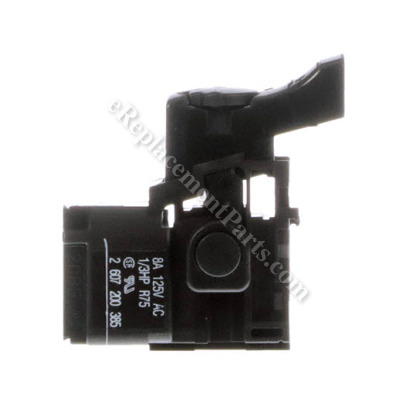


This is a trigger switch with a settings dial. It has a locking mechanism for the switch and internal terminals. This authentic Bosch replacement part is sold individually.
Switches are commonly replaced parts in power tools, handling all on/off and variable speed operations. They also have a role in electric breaking; they can momentarily reverse electrical polarity. Because switches use mechanical internals, they will degrade and wear out over time, eventually requiring replacement. Some common signs of a broken or failing switch are:
Switch (wire Connection Screws 2607200385
OEM part for: Bosch, Skil
Part Number: 2607200385
$44.66
Usually ships in 7 - 12 business days
7 - 12 business days
Jump To:
Product Description ?
- Classification: Part
- Weight: 0.05 lbs.
- Shipping: Ships Worldwide
Frequently Purchased Together ?
Compatibility
This part will fit the following 7 machines
Bosch
1274DVS (0601274739) 3" x 21" Belt Sander View Diagrams & Manuals
B7350 (0603270735) Belt Sander View Diagrams & Manuals
3270DVS (0603270739) Belt Sander View Diagrams & Manuals
1274DVS (0601274771) Belt Sander View Diagrams & Manuals
PBS75AE (0603270635) Belt Sander View Diagrams & Manuals
PBS75AE (0603270639) Belt Sander View Diagrams & Manuals
Skil
PBS 75 AE (0603270656) Belt Sander View Diagrams & Manuals
Show More Compatible Models
This item works with the following types of products:
- Sander Parts
This part replaces obsolete part #: 2607200321
Customer Part Reviews ?
Average Rating (out of 5):
Click to filter by ratings:
5 stars
1
4 stars
0
3 stars
0
2 stars
0
1 stars
0
< PREV
- 1
quick and easy
Webpage: clear and easy to navigate. Online purchase: smooth, uncomplicated. Service: part shipped and received very quickly.
Guest -
June 15, 2022
Verified Purchase
t
t
t -
t days ago
Verified Purchase
eReplacementParts Team
t
Questions & Answers ?
Our customer Service team is at the ready daily to answer your part and product questions.

Ask our Team
We have a dedicated staff with decades of collective experience in helping customers just like you purchase parts to repair their products.
Does this fit my product?Questions & Answers for Switch (wire Connection Screws
No questions have been asked yet
Customer Repair Instructions ?
All our customer repair instructions are solicited directly from other customers just like you who have purchased and replaced this exact part.
Switch failure caused sander to be "always on" at full speed when plugged in.
John - June 2, 2017
👍 2 of 2 people found this instruction helpful
Tool Type
Sander
Difficulty
Easy
Time
Less than 15 minutes
Tools Used
Screwdriver, T20 screwdriver, lg and sm precision flat bladed screwdriver
Parts Used
Bosch 1274DVS Switch and Sliding Plate Replacements
Remove upper handle casing w/ T20 (2 screws). Screws are recessed in wells that require a narrow shafted screwdriver...the T20 in my interchangeable bit set was not long enough.
Using lg precision screwdriver, remove 2 silver screws holding black and white power input conductors. (Save and reuse screws as they are not included w/ new switch).
Insert small precision screwdriver blade tip into flat sockets on top of 2 white output wire male blade terminals to allow them to be slid out of the switch.
Install 2 silver screws into new switch (do not fully tighten).
Remove old switch and insert new switch into handle housing (do not seat it down fully yet).
Insert and tighten power input conductors and tighten silver screws.
Push male blade terminals into switch receptacles.
Route wires along switch and seat switch down into handle housing.
Replace upper handle housing and tighten T20 screws.
...also replaced sliding plate pad on belt shoe using standard, flat bladed screwdriver.
Notes: a photograph of the switch and wire positions prior to disassembly is helpful for reference. The repair process is simple but requires the correct tools. In my case, I was sent an incorrect part (switch), and had to return and reorder, adding to the cost and time. This tool had given me 9 years of good service before needing repairs. I expect to have it for many years to come.
Did you find this story helpful?
Thanks for voting and helping fellow customers!
Switch was broken
Robert - July 16, 2016
👍 1 of 1 people found this instruction helpful
Tool Type
Sander
Difficulty
Medium
Time
30-60 minutes
Tools Used
Screwdriver, Pliers
Split the sander handle apart, removed broken switch and installed new switch
Did you find this story helpful?
Thanks for voting and helping fellow customers!
belt sander switch broke, sliding plate worn
Paul - February 4, 2021
Tool Type
Sander
Difficulty
Medium
Time
Less than 15 minutes
Tools Used
Screwdriver
1. remove 2 torx screws in handle to uncover switch
2. pull two outgoing power wires out of friction connectors.
3. loosen two set screws with mini screw driver to remove incoming power wires.
4. reverse above with new switch
5. reinstall cover
1. remove two screws holding slider plate
2. replace
2. pull two outgoing power wires out of friction connectors.
3. loosen two set screws with mini screw driver to remove incoming power wires.
4. reverse above with new switch
5. reinstall cover
1. remove two screws holding slider plate
2. replace
Did you find this story helpful?
Thanks for voting and helping fellow customers!
The new switch fit perfectly but the connection were located in a different spot which required an extension to one of the lead wires
Leonard - January 26, 2018
Tool Type
Sander
Difficulty
Medium
Time
30-60 minutes
Tools Used
Screwdriver, Pliers, Soldering iron
Parts Used
Your web site was very helpful in identifying the potential reason for my sander not working. 75% of the time it was due to a faulty switch. I tested the switch with my voltage meter and found that electricity was delivered to the switch properly but then the switch was not delivering the current to the motor. I ordered the new switch, received it in 3 days and completed the fix. A happy success story for my favorite belt sander.
Did you find this story helpful?
Thanks for voting and helping fellow customers!
Switch did not work
Mark - February 2, 2017
Tool Type
Sander
Difficulty
Medium
Time
15-30 minutes
Tools Used
Screwdriver
1. Removed the upper switch housing.
2. Removed the power to the switch wires.
3. Lifted the switch out of its mount.
4. Removed the two wires to the motor.
5. Reversed the whole procedure for installing the new switch.
6. Remove the motor brush housing.
7. Lifted each motor brush assembly out.
8. Removed old carbon brush.
9. Inserted new carbon brush.
10. Reinstalled plastic housing.
Did you find this story helpful?
Thanks for voting and helping fellow customers!
OEM stands for Original Equipment Manufacturer and means the part you’re buying is sourced directly from the manufacturer who made your product. At eReplacementParts, we sell only genuine OEM parts, guaranteeing the part you’re purchasing is of better design and of higher quality than aftermarket parts.
Our product descriptions are a combination of data sourced directly from the manufacturers who made your product as well as content researched and curated by our content & customer service teams. This content is edited and reviewed internally before being made public to customers.
Our customer service team are at the ready daily to answer your part and product questions. We have a dedicated staff with decades of collective experience in helping customers just like you purchase parts to repair their products.
All our part reviews are solicited directly from other customers who have purchased this exact part. While we moderate these reviews for profanity, offensive language or personally identifiable information, these reviews are posted exactly as submitted and no alterations are made by our team.
All our customer repair instructions are solicited directly from other customers just like you who have purchased and replaced this exact part. While we moderate these reviews for profanity, offensive language or personally identifiable information, these reviews are posted exactly as submitted and no alterations are made by our team.
Based on data from past customer purchasing behaviors, these parts are most commonly purchased together along with the part you are viewing. These parts may be necessary or helpful to replace to complete your current repair.
All our installation videos are created and produced in collaboration with our in-house repair technician, Mark Sodja, who has helped millions of eReplacementParts customers over the last 13 years repair their products. Mark has years of experience in selling and repairing both commercial and residential products with a specialty in gas-powered equipment.
This data is collected from customers who submitted a repair instruction after replacing this exact part. Customers can rate how easy the repair was to complete and how long it took. We aggregate this data to provide a repair rating that allows customers to quickly determine the difficulty and time needed to perform their own repair.