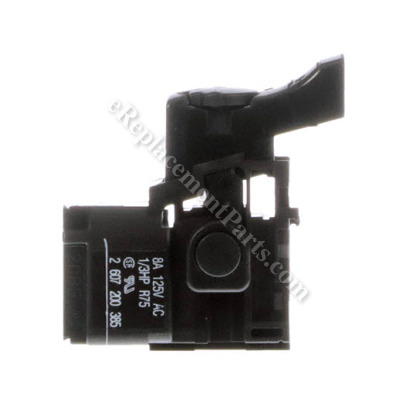


Switch (wire Connection Screws 2607200385
Part Number: 2607200385

Order within the next 9 hours
and your part ships today!
and your part ships today!
*This part replaces obsolete part #: 2607200321.
Product Information
Description:
| This is a trigger switch with a settings dial. It has a locking mechanism for the switch and internal terminals. This authentic Bosch replacement part is sold individually. Switches are commonly replaced parts in power tools, handling all on/off and variable speed operations. They also have a role in electric breaking; they can momentarily reverse electrical polarity. Because switches use mechanical internals, they will degrade and wear out over time, eventually requiring replacement. Some common signs of a broken or failing switch are: |
Frequently Purchased With
Compatibility
Products Compatibility
This item works with the following types of products:
- • Sander
Questions & Answers for Switch (wire Connection Screws
No questions have been asked yet
Repair Instructions: Submitted by Customers Like You
2 of 2 people found this instruction helpful
Tool Type:
Sander
Parts Used:
Repair Difficulty:
Easy
Time Spent Repairing:
Less than 15 minutes
Tools Used:
Screwdriver, T20 screwdriver, lg and sm precision flat bladed screwdriver
Switch failure caused sander to be "always on" at full speed when plugged in.
Bosch 1274DVS Switch and Sliding Plate Replacements
Remove upper handle casing w/ T20 (2 screws). Screws are recessed in wells that require a narrow shafted screwdriver...the T20 in my interchangeable bit set was not long enough.
Using lg precision screwdriver, remove 2 silver screws holding black and white power input conductors. (Save and reuse screws as they are not included w/ new switch).
Insert small precision screwdriver blade tip into flat sockets on top of 2 white output wire male blade terminals to allow them to be slid out of the switch.
Install 2 silver screws into new switch (do not fully tighten).
Remove old switch and insert new switch into handle housing (do not seat it down fully yet).
Insert and tighten power input conductors and tighten silver screws.
Push male blade terminals into switch receptacles.
Route wires along switch and seat switch down into handle housing.
Replace upper handle housing and tighten T20 screws.
...also replaced sliding plate pad on belt shoe using standard, flat bladed screwdriver.
Notes: a photograph of the switch and wire positions prior to disassembly is helpful for reference. The repair process is simple but requires the correct tools. In my case, I was sent an incorrect part (switch), and had to return and reorder, adding to the cost and time. This tool had given me 9 years of good service before needing repairs. I expect to have it for many years to come.
Did you find this story helpful?
Thanks for voting and helping fellow customers!
1 of 1 people found this instruction helpful
Tool Type:
Sander
Repair Difficulty:
Medium
Time Spent Repairing:
30-60 minutes
Tools Used:
Screwdriver, Pliers
Switch was broken
Split the sander handle apart, removed broken switch and installed new switch
Did you find this story helpful?
Thanks for voting and helping fellow customers!
Tool Type:
Sander
Repair Difficulty:
Medium
Time Spent Repairing:
Less than 15 minutes
Tools Used:
Screwdriver
belt sander switch broke, sliding plate worn
1. remove 2 torx screws in handle to uncover switch
2. pull two outgoing power wires out of friction connectors.
3. loosen two set screws with mini screw driver to remove incoming power wires.
4. reverse above with new switch
5. reinstall cover
1. remove two screws holding slider plate
2. replace
2. pull two outgoing power wires out of friction connectors.
3. loosen two set screws with mini screw driver to remove incoming power wires.
4. reverse above with new switch
5. reinstall cover
1. remove two screws holding slider plate
2. replace
Did you find this story helpful?
Thanks for voting and helping fellow customers!
Tool Type:
Sander
Parts Used:
Repair Difficulty:
Medium
Time Spent Repairing:
30-60 minutes
Tools Used:
Screwdriver, Pliers, Soldering iron
The new switch fit perfectly but the connection were located in a different spot which required an extension to one of the lead wires
Your web site was very helpful in identifying the potential reason for my sander not working. 75% of the time it was due to a faulty switch. I tested the switch with my voltage meter and found that electricity was delivered to the switch properly but then the switch was not delivering the current to the motor. I ordered the new switch, received it in 3 days and completed the fix. A happy success story for my favorite belt sander.
Did you find this story helpful?
Thanks for voting and helping fellow customers!
Tool Type:
Sander
Repair Difficulty:
Medium
Time Spent Repairing:
15-30 minutes
Tools Used:
Screwdriver
Switch did not work
1. Removed the upper switch housing.
2. Removed the power to the switch wires.
3. Lifted the switch out of its mount.
4. Removed the two wires to the motor.
5. Reversed the whole procedure for installing the new switch.
6. Remove the motor brush housing.
7. Lifted each motor brush assembly out.
8. Removed old carbon brush.
9. Inserted new carbon brush.
10. Reinstalled plastic housing.
Did you find this story helpful?
Thanks for voting and helping fellow customers!
Reviews
1 Reviews
Average Rating (out of 5):
Click to filter by ratings:
5 stars
1
4 stars
0
3 stars
0
2 stars
0
1 stars
0
< PREV
- 1
quick and easy
Webpage: clear and easy to navigate. Online purchase: smooth, uncomplicated. Service: part shipped and received very quickly.
Guest -
June 15, 2022
Verified Purchase
Verified Purchase
eReplacementParts Team
< PREV
- 1
Product Information