eReplacementParts.com
877-346-4815
Delta Parts
Repair Parts Home
  
Power Tool Parts
  
Delta Parts
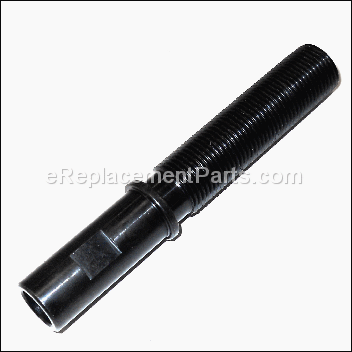
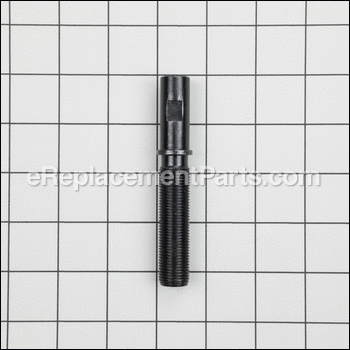
  5140059-58 Lead Screw

Lead Screw 5140059-58

OEM part for: Delta

Part Number: 5140059-58


Install
Videos!
Lead Screw - 5140059-58:Delta 360 View
Lead Screw - 5140059-58:DeltaLead Screw - 5140059-58:DeltaLead Screw - 5140059-58:DeltaLead Screw - 5140059-58:Delta 360 View
In Stock
Ships within 1 business day
Easy 15-30 minutes (6 rated repairs)?
OEM: Original Equipment Manufacturer ?
Delta
Does this d-block d-md-none fit my product?

Product Description ?

  • Classification: Part
  • Weight: 0.16 lbs.
  • Shipping: Ships Worldwide

Frequently Purchased Together ?

Compatibility

This part will fit the following 2 machines

Delta

46-460 (Type 1) Variable Speed Midi Lathe View Diagrams & Manuals
46-455 (Type 1) 5- Speed Midi Lathe View Diagrams & Manuals
Don't see yours? Try searching our site for :

This item works with the following types of products:

  • Lathe Parts

Customer Part Reviews ?

5
Average Rating (out of 5):
3 Reviews
Click to filter by ratings:
5 stars
3
4 stars
0
3 stars
0
2 stars
0
1 stars
0
  • Highest Rating
  • Most Recent
< PREV
  • 1
NEXT >
  • Worked fine
    I had initially ordered the wrong part, but discovered the error before that part shipped so had it cancelled. This part fits well and is exactly what I needed. In both cases the agents I spoke to were very knowledgeable, courteous, and friendly. I will definitely return to eReplacementParts for future parts needs.
    Donald - November 17, 2022 Verified Purchase
    Easy Repair, perfect part
    I have a Delta lathe which I use often to create small projects such as pens, bowls, and other creations such as ornaments. My lathe was damaged in transit by a moving company. I thought I was done. However, refusing to purchase another lathe,I tried to figure out where the problem was. The tailstock appeared to be frozen. So I took it apart. After discovering what was damaged, I looked up the drawings on eReplacements. The drawings were very easy to see and understand exactly what I needed. I put in an order and received the replacement part in 3 days!! I carefully re-installed the piece and my lathe is back to operation like a if brand new!!! I will turn to eReplacement Parts again with no doubt!!
    Ricky - March 26, 2022 Verified Purchase
    worked as expected
    Received very quickly and worked immediately.
    Cindy - November 24, 2020 Verified Purchase
    t
    t
    t - t days ago Verified Purchase
    eReplacementParts Team
    t

    Questions & Answers ?

    Our customer Service team is at the ready daily to answer your part and product questions.

    photo of team member
    Ask our Team

    We have a dedicated staff with decades of collective experience in helping customers just like you purchase parts to repair their products.

    Does this fit my product?

    Questions & Answers for Lead Screw


    No questions have been asked yet

    Customer Repair Instructions ?

    All our customer repair instructions are solicited directly from other customers just like you who have purchased and replaced this exact part.

    Easy 15-30 minutes (6 rated repairs)?

    The quill in the tail of the Delta Mid sized lathe would not advance completely

    James - March 20, 2016
    👍 1 of 1 people found this instruction helpful
    Tool Type

    Lathe

    Difficulty

    Easy

    Time

    Less than 15 minutes

    Tools Used

    , Allen Wrench

    Removed the handle from the lead screw and pulled the quill and lead screw out the front. Assembled the new quill and lead screw, lubed it lightly and inserted into tail. Reattached handle. It works now. Still trying to figure out the problem with the old unit. Maybe some threading problems. I hear it happens when the lathe is used as a drill press using large Forstener bits.
    Did you find this story helpful?
    Thanks for voting and helping fellow customers!

    The lead screw would not turn in the quill the full length.

    James - May 22, 2023
    Tool Type

    Lathe

    Difficulty

    Easy

    Time

    Less than 15 minutes

    Tools Used

    , Allen Wrench

    Removed the hand wheel by removing the screw using an Allen wrench. Removed the quill with the lead screw stuck in it. Screwed the new lead screw into the new quill and inserted it into the tail housing. Reattached the hand wheel with the Allen wrench screw aligned with the groove cut into the lead screw. Good to go after that.
    Did you find this story helpful?
    Thanks for voting and helping fellow customers!

    Original lead screw stripped out

    Donald - November 19, 2022
    Tool Type

    Lathe

    Difficulty

    Easy

    Time

    Less than 15 minutes

    Tools Used

    Wrench Set

    After hearing back from Delta as to which piece I actually needed (only after ordering the wrong one but managing into cancel that order) I ordered the lead screw. It came in a timely manner so I removed the old one and replaced it with the new one. Now I can turn wood again. Yay!
    Did you find this story helpful?
    Thanks for voting and helping fellow customers!

    Threads were stripped

    Mike - June 3, 2021
    Tool Type

    Lathe

    Difficulty

    Easy

    Time

    Less than 15 minutes

    Tools Used

    , allen key

    Replaced the lead screw
    Did you find this story helpful?
    Thanks for voting and helping fellow customers!

    should there be a washer that fits over the lead screw to keep it from going through the tail stock???

    LAWRENCE - February 6, 2019
    Tool Type

    Lathe

    Difficulty

    Hard

    Time

    More than 2 hours

    Tools Used

    Power Drill, vice, allen wrench

    I had to go to Fastenal to get a hardened washer, drill it out to fit over the lead screw...
    Did you find this story helpful?
    Thanks for voting and helping fellow customers!

    Shoulder screw broke on the tail piece and also the quill would not extend completely

    James - February 13, 2018
    Tool Type

    Lathe

    Difficulty

    Easy

    Time

    15-30 minutes

    Tools Used

    , Allen Wrench

    1. Removed the broken shoulder screw with a reverse drill bit and installed the new one in the handle.
    2. Backed out the lead screw from the quill and removed them from the tail.
    3. Installed the new quill and lead screw in the tail.
    Did you find this story helpful?
    Thanks for voting and helping fellow customers!

    OEM stands for Original Equipment Manufacturer and means the part you’re buying is sourced directly from the manufacturer who made your product. At eReplacementParts, we sell only genuine OEM parts, guaranteeing the part you’re purchasing is of better design and of higher quality than aftermarket parts.

    Our product descriptions are a combination of data sourced directly from the manufacturers who made your product as well as content researched and curated by our content & customer service teams. This content is edited and reviewed internally before being made public to customers.

    Our customer service team are at the ready daily to answer your part and product questions. We have a dedicated staff with decades of collective experience in helping customers just like you purchase parts to repair their products.

    All our part reviews are solicited directly from other customers who have purchased this exact part. While we moderate these reviews for profanity, offensive language or personally identifiable information, these reviews are posted exactly as submitted and no alterations are made by our team.

    All our customer repair instructions are solicited directly from other customers just like you who have purchased and replaced this exact part. While we moderate these reviews for profanity, offensive language or personally identifiable information, these reviews are posted exactly as submitted and no alterations are made by our team.

    Based on data from past customer purchasing behaviors, these parts are most commonly purchased together along with the part you are viewing. These parts may be necessary or helpful to replace to complete your current repair.

    All our installation videos are created and produced in collaboration with our in-house repair technician, Mark Sodja, who has helped millions of eReplacementParts customers over the last 13 years repair their products. Mark has years of experience in selling and repairing both commercial and residential products with a specialty in gas-powered equipment.

    This data is collected from customers who submitted a repair instruction after replacing this exact part. Customers can rate how easy the repair was to complete and how long it took. We aggregate this data to provide a repair rating that allows customers to quickly determine the difficulty and time needed to perform their own repair.

    eReplacementParts.com
    7174 South 400 West
    Suite 5
    Midvale, UT 84047
    visa mastercard discover american express PayPal