Trigger Valve Kit TVA6 - OEM Bostitch - eReplacementParts.com
eReplacementParts.com
877-346-4815
Bostitch Parts

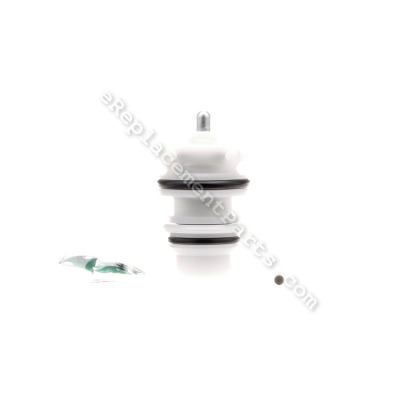
Trigger Valve Kit TVA6

OEM part for: Bostitch, DeWALT, Porter Cable

Part Number: TVA6


Install
Videos!
Trigger Valve Kit - TVA6:Bostitch 360 View
Trigger Valve Kit - TVA6:BostitchTrigger Valve Kit - TVA6:BostitchTrigger Valve Kit - TVA6:BostitchTrigger Valve Kit - TVA6:Bostitch 360 ViewTrigger Valve Kit - TVA6:Bostitch
In Stock
Ships within 1 business day
Easy 15-30 minutes (68 rated repairs)?
OEM: Original Equipment Manufacturer ?
BostitchDeWALTPorter Cable
Does this fit my product?

Product Description ?

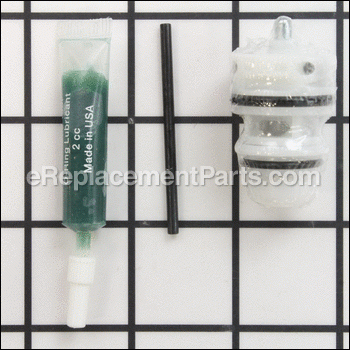
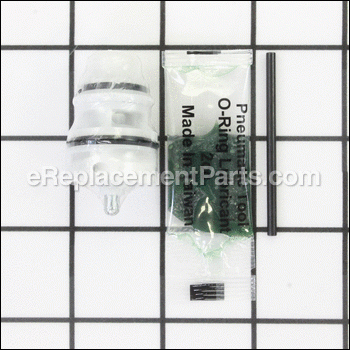
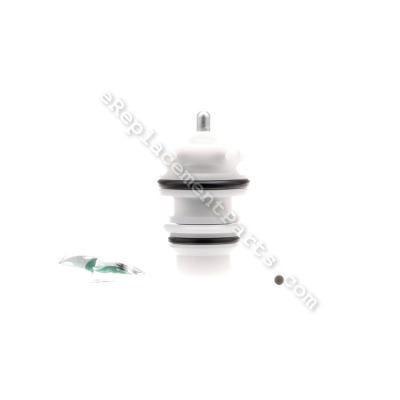
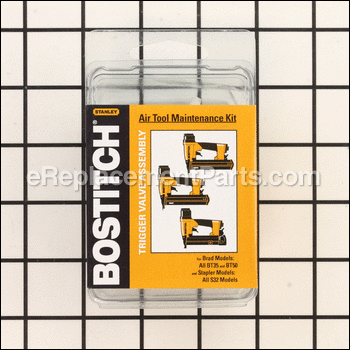
This is a genuine Bostitch replacement part that fits all BT brad nailers and all S32 staplers. If trigger leaks air or if tool misfires often, try replacing trigger valve. This kit contains one (1) each of: valve assembly (including both O-rings), lubricant, spring pin punch, and repair instructions. Please note that two (2) O-rings are included but can also be purchased separately as parts # 106967 and # 86459. O-rings are easily damaged and worn out, causing tool issues, so it\\\'s a good idea to have a backup or two on hand. Only a hammer is needed for this repair.

  • Classification: Part
  • Weight: 0.03 lbs.
  • Shipping: Ships Worldwide

Frequently Purchased Together ?

Compatibility

This Trigger Valve Kit will fit the following 158 machines. Confirm this part works with your model, and view the detailed model diagrams and repair help we have to offer.

Bostitch

DeWALT

Porter Cable

Show More Compatible Models
Don't see yours? Try searching our site for :

This item works with the following types of products:

  • Stapler Parts
  • Nailer Parts

This part replaces obsolete part #: TVA5, TVA6-1, TVA1

Customer Part Reviews ?

4.6
Average Rating (out of 5):
31 Reviews
Click to filter by ratings:
5 stars
26
4 stars
2
3 stars
1
2 stars
1
1 stars
1
  • Highest Rating
  • Most Recent
< PREV
  • 1
  • 2
  • 3
NEXT >
  • Perfect
    The part worked as described... The best part was that the item was recommended based on the problem....
    Guest - April 14, 2023 Verified Purchase
    The part is exactly what is displayed and excellent quality
    Order the part the representative guaranteed the fit and it worked perfect cured the problem back in business thank you to everyone involved
    Guest - February 3, 2023 Verified Purchase
    Great part
    My nail gun is now working like new again.
    Guest - October 25, 2022 Verified Purchase
    Valve kit for Bosch roofing nailer
    I received the valve 2 days sooner than I thought. My only complaint would be a lack of instructions. Thank heavens for YouTube. The replacement of the old valve with the new valve took about 10 minutes and the air leak at the trigger was fixed. Finished installing 5 squares of shingles and the valve worked like it was supposed to. Thanks.
    Guest - September 29, 2022 Verified Purchase
    Easy checkout Fast Delivery
    Part came in as described and arrived 2 weeks a head of schedule
    iGlobal - June 10, 2022 Verified Purchase
    Parts
    Both parts I bought worked perfectly and installed in minutes. I’m back to using my equipment
    Guest - September 9, 2021 Verified Purchase
    Five Minute Repair, and Works Great!
    I'm thankful this part was available for my ancient nailgun! Haha! The gun works like new.
    Guest - August 16, 2021 Verified Purchase
    Fast, easy repair!
    The part arrived quickly. Instructions were clear & concise making installation a snap! My pneumatic nailer works like new.
    Guest - November 17, 2020 Verified Purchase
    Quick and easy, perfect part!
    The kit arrived quickly. Good quality, it has everything that you need to replace the defective part. Took around 10 minutes!
    Mike - November 8, 2020 Verified Purchase
    Easy Repair
    Part fit and tool is back operational.
    Lee - October 23, 2020 Verified Purchase

    Questions & Answers ?

    Our customer Service team is at the ready daily to answer your part and product questions.

    photo of team member
    Ask our Team

    We have a dedicated staff with decades of collective experience in helping customers just like you purchase parts to repair their products.

    Does this fit my product?

    Questions & Answers for Trigger Valve Kit


    What about the hole in my trigger valve stem? Not in replacement?
    Brian for model number T50S4 asked on 2023-03-03
    Hi Brian, Thank you for your question. From reviewing your model number, this would be the correct trigger valve kit for your nailer It has replaced previous versions of this part. If you would like to place an order for it, please call our customer service line and anyone will be happy to assist you. We look forward to hearing from you!
    eReplacementParts Team March 03, 2023
    My old valve stem has a hole through it , why don't I see a hole in your replacement part ?
    Lloyd for model number T50S4 asked on 2022-04-27
    Hello Lloyd, thank you for your question. This is a genuine Bostitch replacement part that fits all BT brad nailers and all S32 staplers. We hope this helps. If you need help placing an order, our customer service is open 7 days a week. Please feel free to give us a call. We look forward to hearing from you!
    eReplacementParts Team April 27, 2022

    Customer Repair Instructions ?

    All our customer repair instructions are solicited directly from other customers just like you who have purchased and replaced this exact part.

    Easy 15-30 minutes (68 rated repairs)?

    Trigger valve air leak and dirty nail gun

    Matthew - March 20, 2016
    👍 118 of 120 people found this instruction helpful
    Tool Type

    Nailer

    Difficulty

    Medium

    Time

    1-2 hours

    Tools Used

    , punches, air compressor, various cleaners, good lighting,...

    First thoroughly clean your nail gun [ I use various little brushes, compressed air, carb. cleaner, rags and then air tool oil ]. Set up an area with good lighting and work over a surface where you will not lose any small parts. "Cradle" the nail gun on some rags and carefully use a hammer and a small straight punch of the correct size to remove the roll pin that holds the trigger and its spring in place, next do the same to remove the roll pin that holds the valve assembly, make a bag full of rags as a "catchers mitt" - put this around the trigger valve location,put on safety glasses or face shield , briefly attach the air hose at less than 90 p.s.i. !!! [ start at a lower p.s.i. ], this should pop out the old valve assembly into your "catchers mitt". Inspect that the nailer is clean inside this opening, lightly oil this area, Apply a uniform thin layer of grease to the valve assembly then make absolutely sure that the new valve goes in "square" / straight to the opening and that the retaining pin hole lines up with where the roll pin must go back [ USE THE SUPPLIED ALIGNMENT PIN TOOL ! ]. Gently reinstall the roll pin, make sure the trigger and its spring are clean and reinstall these and the retaining roll pin that hold them. Of course visually inspect everything along the way : that new valve assembly is complete [ o=rings in place, no housing cracks in gun frame, no debris inside gun, etc... ]. *** using too high of air pressure to pop out valve during repair can hurt you or others - as it will fly out like a bullet or shatter plastic parts ***
    Did you find this story helpful?
    Thanks for voting and helping fellow customers!

    Bad trigger valve

    Keith - November 12, 2015
    👍 35 of 37 people found this instruction helpful
    Tool Type

    Nailer

    Difficulty

    Easy

    Time

    Less than 15 minutes

    Tools Used

    , Air chuck, punch, and hammer

    Use punch to push trigger pin out. Remove trigger. Hold rag over trigger valve, connect air for brief second which pops valve out. Oil new valve liberally, replace in pocket careful to line up correctly. Replace trigger and pin. Done
    Did you find this story helpful?
    Thanks for voting and helping fellow customers!

    Gun leaking air around trigger.

    Claude - October 12, 2016
    👍 27 of 29 people found this instruction helpful
    Tool Type

    Nailer

    Difficulty

    Easy

    Time

    15-30 minutes

    Tools Used

    , Pin punch/Small hammer

    1.Took pin punch and removed pin that holds trigger and spring in place.
    2.Removed trigger and spring.
    3.With pin punch removed pin that held trigger valve in place. Didn't drive either pin completely out but drove out just far enough to remove trigger and trigger valve.
    4.Removed trigger valve by using a small awl to force out. Instruction say to hold rag over it and hook up to air and let it force it out but it came out without any problem using awl. I wasn't worried about damaging valve since I was going to be replacing it anyway.
    5.Lubed new valve assembly, cleaned trigger housing and checked for burrs, and reassembled
    in reverse order.
    6.Works like a new gun. Complete repair including tear down took less than 30 minutes.

    Did you find this story helpful?
    Thanks for voting and helping fellow customers!

    Air leak at the trigger.

    Michael - April 25, 2016
    👍 19 of 20 people found this instruction helpful
    Tool Type

    Nailer

    Difficulty

    Easy

    Time

    15-30 minutes

    Tools Used

    Pliers, small ball peen hammer

    Using a small hammer & a flat bottom punch, removed the roll pin holding the trigger in place. Using the punch again I removed the roll pin retaining the trigger valve,& covering the old trigger valve with a rag I hooked up the nail gun to the air supply & it popped out the old trigger valve into the rag. Using the supplied grease I lubed the o - rings on the new trigger valve & installed it into the gun, & then reinstalled the roll pin retaining the new trigger valve.
    Did you find this story helpful?
    Thanks for voting and helping fellow customers!

    Trigger was leaking air

    AL - November 2, 2016
    👍 7 of 7 people found this instruction helpful
    Tool Type

    Nailer

    Difficulty

    Easy

    Time

    Less than 15 minutes

    Tools Used

    , Small punch, hammer

    I followed the instructions that were included with the kit. The repair was completed in no time.
    Thank you for the quick delivery.
    Did you find this story helpful?
    Thanks for voting and helping fellow customers!

    Air would leak passed the trigger assy and the plunger would not reset/return to original position.

    Andrew - November 1, 2016
    👍 6 of 6 people found this instruction helpful
    Tool Type

    Nailer

    Difficulty

    Easy

    Time

    Less than 15 minutes

    Tools Used

    , Hammer

    I opened the package, followed the step by step instructions, used the long pin provided to push out the pins holding my trigger assy (I also used a hammer to drive/push the long pin - the instructions didn't suggest this.), used (some of) the packet of grease supplied, reassembled the tool with the new part and now everything works like a dream. Things took me longer because I'm a bonehead and took the trigger apart. Do NOT take the trigger apart - it has small parts that are assembled by people with 6 hands - a total PITA.
    I will definitely use ereplacementparts again.
    Did you find this story helpful?
    Thanks for voting and helping fellow customers!

    The trigger on my Bostitch nailer began leaking air continuously

    Nathaniel - October 23, 2017
    👍 2 of 2 people found this instruction helpful
    Tool Type

    Nailer

    Difficulty

    Easy

    Time

    Less than 15 minutes

    Tools Used

    Pliers, Small hammer

    1. Drove out the pins holding the trigger and the trigger valve with the enclosed pin driver.
    2. Pulled the trigger valve out gently with the pliers.
    3. Made sure all of the "O" rings were lubricated properly.
    4. Slid the new trigger valve into place.
    5. Reinstalled the pins holding the trigger valve and the trigger.
    6. Went back to work using the Nailer.
    Did you find this story helpful?
    Thanks for voting and helping fellow customers!

    Air was leaking from head and trigger

    Richaqrd - October 5, 2016
    👍 2 of 2 people found this instruction helpful
    Tool Type

    Nailer

    Difficulty

    Easy

    Time

    15-30 minutes

    Tools Used

    , Allen wrench

    Had to dismantle the trigger assembly, it came with instructions. Clean and then replace all o-ring lube up and then reassemble.
    Did you find this story helpful?
    Thanks for voting and helping fellow customers!

    Nailer leaked air at the trigger

    RAY - September 6, 2016
    👍 2 of 2 people found this instruction helpful
    Tool Type

    Nailer

    Difficulty

    Easy

    Time

    15-30 minutes

    Tools Used

    Pliers, HAMMER PUNCH

    Followed the installation instructions that were included with the trigger kit.
    Did you find this story helpful?
    Thanks for voting and helping fellow customers!

    Nail gun developed an air leak at the trigger.

    Lyle - September 26, 2018
    Tool Type

    Nailer

    Difficulty

    Easy

    Time

    Less than 15 minutes

    Tools Used

    , Hammer

    1. Use the included punch to remove the roll pin holding the trigger.
    2. Remove the trigger and spring and set aside.
    3. Remove the roll pin holding the trigger valve in place, pay close attention to the position of the trigger valve.
    4. Carefully attach the air hose to blow the trigger valve from the gun.
    5. Lube the o-rings of the new trigger valve with the included lubricant.
    6. Insert the new trigger valve, paying attention to the roll pin location.
    7. Tap the roll pin for the trigger valve back into place.
    8. Position the trigger and spring and replace the roll pin, to complete the repair.
    Did you find this story helpful?
    Thanks for voting and helping fellow customers!

    OEM stands for Original Equipment Manufacturer and means the part you’re buying is sourced directly from the manufacturer who made your product. At eReplacementParts, we sell only genuine OEM parts, guaranteeing the part you’re purchasing is of better design and of higher quality than aftermarket parts.

    Our product descriptions are a combination of data sourced directly from the manufacturers who made your product as well as content researched and curated by our content & customer service teams. This content is edited and reviewed internally before being made public to customers.

    Our customer service team are at the ready daily to answer your part and product questions. We have a dedicated staff with decades of collective experience in helping customers just like you purchase parts to repair their products.

    All our part reviews are solicited directly from other customers who have purchased this exact part. While we moderate these reviews for profanity, offensive language or personally identifiable information, these reviews are posted exactly as submitted and no alterations are made by our team.

    All our customer repair instructions are solicited directly from other customers just like you who have purchased and replaced this exact part. While we moderate these reviews for profanity, offensive language or personally identifiable information, these reviews are posted exactly as submitted and no alterations are made by our team.

    Based on data from past customer purchasing behaviors, these parts are most commonly purchased together along with the part you are viewing. These parts may be necessary or helpful to replace to complete your current repair.

    All our installation videos are created and produced in collaboration with our in-house repair technician, Mark Sodja, who has helped millions of eReplacementParts customers over the last 13 years repair their products. Mark has years of experience in selling and repairing both commercial and residential products with a specialty in gas-powered equipment.

    This data is collected from customers who submitted a repair instruction after replacing this exact part. Customers can rate how easy the repair was to complete and how long it took. We aggregate this data to provide a repair rating that allows customers to quickly determine the difficulty and time needed to perform their own repair.

    eReplacementParts.com
    7174 South 400 West
    Suite 5
    Midvale, UT 84047
    visa mastercard discover american express PayPal