
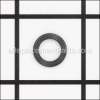
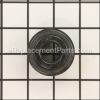
Genuine OEM replacement part used on some Bostitch Nailers. This part is made out of Plastic and it is Sold Individually. This item helps to provide an Air Tight Seal for the Piston Driver. If this item is worn or damaged gun would leak air and not function as intended.
Piston Head Valve 174054
OEM part for: Bostitch, DeWALT
Part Number: 174054
$5.90
In Stock
Jump To:
Frequently Purchased Together ?


Compatibility
This part will fit the following 19 machines
Bostitch
CF15 Corrugated Tool View Diagrams & Manuals
MCN250S Metal Connector Nailer View Diagrams & Manuals
MCN250 Metal Connector Nailer View Diagrams & Manuals
MCN150 Metal Connector Nailer View Diagrams & Manuals
N75C Coil-Fed Pneumatic Sheathing Nailer View Diagrams & Manuals
N66C Coil-Fed Pneumatic Nailer View Diagrams & Manuals
N66BC Cap Nailer View Diagrams & Manuals
N66BC-1 (Type 0) Cap Nailer View Diagrams & Manuals
N75C-1 Type 0 Coil Sheathing/Siding Nailer View Diagrams & Manuals
N66C-1 (72400000) 15 Degrees Coil Siding Nailer View Diagrams & Manuals
MCN150 (Type 0) Nailer Power Tool View Diagrams & Manuals
MCN250 (Type 0) Met Conn Nailer Power Tool View Diagrams & Manuals
MCN250S (Type 0) Met Conn Nailer Power Tool View Diagrams & Manuals
N66C-1 (072400000 and Higher) Nailer Power Tool View Diagrams & Manuals
N66C-1 (17300 000 and Higher) Nailer Power Tool View Diagrams & Manuals
N66C-1 (62860000 and Higher) Nailer Power Tool View Diagrams & Manuals
DeWALT
DWMC150 (Type 1) 1.5 Metal Conec Nail View Diagrams & Manuals
DW66C-1 (Type 0) 15 Deg Coi Side Nail View Diagrams & Manuals
DW66C-1 (17300 000 and Higher) 15 Deg Coi Side Nail Power Tool View Diagrams & Manuals
Show More Compatible Models
This item works with the following types of products:
- Nailer Parts
This part replaces obsolete part #: P2320000700
Repair Videos ?
Watch the Repair Video for
Piston Head Valve

Customer Part Reviews ?
Average Rating (out of 5):
Click to filter by ratings:
5 stars
9
4 stars
0
3 stars
0
2 stars
0
1 stars
0
< PREV
- 1
Great Parts Availability, Great Delivery
Great place for parts, great parts availability, great parts delivery.
My Bostich Siding and fence nailer is back in business.
Guest -
August 8, 2022
Verified Purchase
Superfast Shipping!!!
Fit like a glove, gun is back in action!
Guest -
January 6, 2022
Verified Purchase
Easy and efficient
Had just what I needed with quick delivery.
Guest -
December 27, 2021
Verified Purchase
Fast shipping the right product
Tried to get this part from a website named after a River, and they sent the wrong one, even though I gave them all the info. These guys sent the right part and in a faster time frAme. Will go here first from now on.
Guest -
December 23, 2021
Verified Purchase
Up and running
The head valve,for the Bostitch coil siding nailer,worked perfectly. Cleaned out the debris from the old one that had dried out and blown, put it back together and worked perfectly again. Now if I could only find the head collar seal for my Porter cable coil 200 , I'd be happy. Thanks
Guest -
July 15, 2021
Verified Purchase
Returning customer.
I have purchased from ereplacement many times, both at home and for my place of employment. The parts diagrams make it very easy. I recommend them to whoever asks me for repair advice. Love them.
Guest -
November 29, 2020
Verified Purchase
Easy repair- perfect fit
Nail gun is back in use. Thanks
Guest -
May 15, 2020
Verified Purchase
Great Part
Quick shipping, exact part. Thank You!
Guest -
October 21, 2019
Verified Purchase
Went right in and works so far.
Fits perfectly
Guest -
September 10, 2019
Verified Purchase
t
t
t -
t days ago
Verified Purchase
eReplacementParts Team
t
Questions & Answers ?
Our customer Service team is at the ready daily to answer your part and product questions.

Ask our Team
We have a dedicated staff with decades of collective experience in helping customers just like you purchase parts to repair their products.
Does this fit my product?Questions & Answers for Piston Head Valve
will this part fit my air nailer bostitch 18 ga?
ronald
for model number SB21N1
asked on 2023-01-17
Hello Ronald, Thank you for your inquiry. We have researched the model you have provided and do not show this part as compatible. The compatible part number is 180450-S. Good luck with your repair.
eReplacementParts Team January 17, 2023
Customer Repair Instructions ?
All our customer repair instructions are solicited directly from other customers just like you who have purchased and replaced this exact part.
Piston head valve was broke, center of the valve broken out.
James - August 22, 2017
👍 5 of 5 people found this instruction helpful
Tool Type
Nailer
Difficulty
Easy
Time
Less than 15 minutes
Tools Used
Wrench Set, Allen wrenches, 90 degree pic.
I removed gun head and saw the problem. Removed piston with a 90 degree pic through center of piston. I then prepped new piston by installing new o-ring, piston spring, and lube. I then pressed piston assembly into gun head, installed gun head with four screws. Test fired worked perfect.
Did you find this story helpful?
Thanks for voting and helping fellow customers!
Piston valve came apart
David - April 8, 2017
👍 6 of 7 people found this instruction helpful
Tool Type
Nailer
Difficulty
Easy
Time
Less than 15 minutes
Tools Used
, allen wrench
Parts Used
1. Removed the exhaust valve cover (four cap screws)
2. Removed damaged piston valve
3. Removed two o-rings and spring from damaged valve
4. Lubricated replacement part, spring and o-rings and inserted in piston body
5. Replaced exhaust cover and secured with the four cap screws
6. Pressured up coil nailer and fired off five nails.
2. Removed damaged piston valve
3. Removed two o-rings and spring from damaged valve
4. Lubricated replacement part, spring and o-rings and inserted in piston body
5. Replaced exhaust cover and secured with the four cap screws
6. Pressured up coil nailer and fired off five nails.
Did you find this story helpful?
Thanks for voting and helping fellow customers!
Plastic piston head was cracked. Air just blew by.
Art - December 22, 2016
👍 5 of 5 people found this instruction helpful
Tool Type
Nailer
Difficulty
Easy
Time
Less than 15 minutes
Tools Used
, Allen wrench
Parts Used
Remove the top cap of the piston head. Four allen head cap screws. Plastic piston head valve comes right out. I reused the two o-rings as they were fine. Just cleaned and lubed them. Reinstalled the new piston head in the same fashion as the old one came out. Re install the top aluminum cap with the four allen screws and tested.
Did you find this story helpful?
Thanks for voting and helping fellow customers!
Piston head valve disintegrated
Thomas - March 3, 2018
👍 3 of 3 people found this instruction helpful
Tool Type
Nailer
Difficulty
Easy
Time
30-60 minutes
Tools Used
Screwdriver, Allen wrench
Parts Used
Remove the top of nailer. Replace the disintegrated head valve. Reassemble the nailer.
At the above is how it should have gone. However, in trying to discover the problem I completely disassembled the nailer. It was something like doing a hundred piece jigsaw puzzle to get it back together. Look when I finished the nailer works like new. The exploded view of all the parts on the website we're most helpful in reassembling the unit
At the above is how it should have gone. However, in trying to discover the problem I completely disassembled the nailer. It was something like doing a hundred piece jigsaw puzzle to get it back together. Look when I finished the nailer works like new. The exploded view of all the parts on the website we're most helpful in reassembling the unit
Did you find this story helpful?
Thanks for voting and helping fellow customers!
Nail gun Piston would not fire a nail and then retract
Douglas - June 3, 2019
👍 1 of 1 people found this instruction helpful
Tool Type
Nailer
Difficulty
Easy
Time
15-30 minutes
Tools Used
, Metric Allen Set
Parts Used
1. Removed exhaust cover
2. Removed nailer head
3. Removed broken pistion valve
4. Removed and retained, cleaned and greased O-Rings
5. Re-assembled and Tested.
2. Removed nailer head
3. Removed broken pistion valve
4. Removed and retained, cleaned and greased O-Rings
5. Re-assembled and Tested.
Did you find this story helpful?
Thanks for voting and helping fellow customers!
Piston Was cracked, leaking air
scott - March 30, 2023
Tool Type
Nailer
Difficulty
Easy
Time
Less than 15 minutes
Tools Used
, Allen head tool
Parts Used
Removed nailer head with Allen wrenches.
Removed old, piston head valve and O-rings.
Put O-rings on new piston head valve and installed into nailer head.
Checked gasket and replaced nailer head on to gun.
Removed old, piston head valve and O-rings.
Put O-rings on new piston head valve and installed into nailer head.
Checked gasket and replaced nailer head on to gun.
Did you find this story helpful?
Thanks for voting and helping fellow customers!
deflectoer valve cracked
Greg - February 23, 2023
Tool Type
Nailer
Difficulty
Medium
Time
15-30 minutes
Tools Used
Wrench Set, allen and torx head wrenches
remove top end parts and replaced them on nail gun
Did you find this story helpful?
Thanks for voting and helping fellow customers!
Piston Head cracked
Joseph - November 9, 2022
Tool Type
Nailer
Difficulty
Easy
Time
Less than 15 minutes
Tools Used
, Allen wrenches
Parts Used
followed instructions that came with part
Did you find this story helpful?
Thanks for voting and helping fellow customers!
Leaking air from the top therefore not nailing
Donald - November 2, 2022
Tool Type
Nailer
Difficulty
Easy
Time
Less than 15 minutes
Tools Used
, Allen wrench
Remove top of nailer, there are 4 Allen screws. Once removed in top piece that was removed there is one more small Allen screw to remove on the outside. Once removed the piston head valve comes out…clean the are, install new piston head valve and o rings, reassemble.
Did you find this story helpful?
Thanks for voting and helping fellow customers!
Mail gun was blowing air and wouldn’t fire
Brian - October 30, 2022
Tool Type
Nailer
Difficulty
Medium
Time
15-30 minutes
Tools Used
Wrench Set, Nutdriver, Allen wrenches
Ordered O ring kit, removed top, piston head was cracked, replaced all o rings, ordered piston head, replaced head, reinstalled top.
* Instructions are non existent with O ring kit, they did send a diagram of gun.
* pay close attention to how the piston is once apart.
* Instructions are non existent with O ring kit, they did send a diagram of gun.
* pay close attention to how the piston is once apart.
Did you find this story helpful?
Thanks for voting and helping fellow customers!
Load More Install Stories
OEM stands for Original Equipment Manufacturer and means the part you’re buying is sourced directly from the manufacturer who made your product. At eReplacementParts, we sell only genuine OEM parts, guaranteeing the part you’re purchasing is of better design and of higher quality than aftermarket parts.
Our product descriptions are a combination of data sourced directly from the manufacturers who made your product as well as content researched and curated by our content & customer service teams. This content is edited and reviewed internally before being made public to customers.
Our customer service team are at the ready daily to answer your part and product questions. We have a dedicated staff with decades of collective experience in helping customers just like you purchase parts to repair their products.
All our part reviews are solicited directly from other customers who have purchased this exact part. While we moderate these reviews for profanity, offensive language or personally identifiable information, these reviews are posted exactly as submitted and no alterations are made by our team.
All our customer repair instructions are solicited directly from other customers just like you who have purchased and replaced this exact part. While we moderate these reviews for profanity, offensive language or personally identifiable information, these reviews are posted exactly as submitted and no alterations are made by our team.
Based on data from past customer purchasing behaviors, these parts are most commonly purchased together along with the part you are viewing. These parts may be necessary or helpful to replace to complete your current repair.
All our installation videos are created and produced in collaboration with our in-house repair technician, Mark Sodja, who has helped millions of eReplacementParts customers over the last 13 years repair their products. Mark has years of experience in selling and repairing both commercial and residential products with a specialty in gas-powered equipment.
This data is collected from customers who submitted a repair instruction after replacing this exact part. Customers can rate how easy the repair was to complete and how long it took. We aggregate this data to provide a repair rating that allows customers to quickly determine the difficulty and time needed to perform their own repair.