
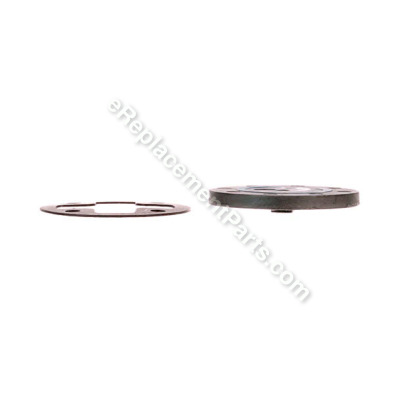


It is a genuine OEM supplied item that is made for use with Senco air compressors. This is an identical replacement for damaged or a missing component that was installed on a new unit. Check the diagrams for your model to ensure the correct repair procedure. Keep in mind this high-quality exhaust valve assembly is made of durable materials and is sold as an individual item. A properly sized Allen wrench will be needed to replace this component.
Exhaust Valve Assembly 3B11DC02A
OEM part for: Senco
Part Number: 3B11DC02A
$16.94
In Stock
Jump To:
Frequently Purchased Together ?


Compatibility
This part will fit the following 2 machines
Senco
PC1010 1/2 HP Electric Air Compressor View Diagrams & Manuals
PC1010N 1 Gallon Finish And Trim Air View Diagrams & Manuals
This item works with the following types of products:
- Compressor Parts
Customer Part Reviews ?
Average Rating (out of 5):
Click to filter by ratings:
5 stars
2
4 stars
0
3 stars
0
2 stars
1
1 stars
0
< PREV
- 1
Made my day
Part arrived on time, replacing the exhaust valve assembly (reed valve) in my Senco 1010 was simple, and well worth the time. A large print, exploded view diagram would have been helpful. Not all of us have enough reliable bandwidth for online help!
Guest -
March 11, 2023
Verified Purchase
Fit and worked just like the original.
New condition. Very quickly delivered. My air compressor runs like new!
Guest -
October 4, 2019
Verified Purchase
SENCO PC-1010
I read the diagnostics that suggested replacement parts for certain symptoms. It sounded like what I needed was an exhaust valve assembly. This did not solve the problem. I'm not going to guess again.
Guest -
May 1, 2019
Verified Purchase
t
t
t -
t days ago
Verified Purchase
eReplacementParts Team
t
Questions & Answers ?
Our customer Service team is at the ready daily to answer your part and product questions.

Ask our Team
We have a dedicated staff with decades of collective experience in helping customers just like you purchase parts to repair their products.
Does this fit my product?Questions & Answers for Exhaust Valve Assembly
No questions have been asked yet
Customer Repair Instructions ?
All our customer repair instructions are solicited directly from other customers just like you who have purchased and replaced this exact part.
Would run but not fill with air.
Andreas - January 26, 2017
👍 4 of 5 people found this instruction helpful
Tool Type
Compressor
Difficulty
Easy
Time
15-30 minutes
Tools Used
Screwdriver, Allen wrench
Parts Used
Pulled off the head and replaced the part.
Did you find this story helpful?
Thanks for voting and helping fellow customers!
Compressor ran continuously but never reached more than 70 psi
Chad - January 8, 2016
👍 4 of 5 people found this instruction helpful
Tool Type
Compressor
Difficulty
Easy
Time
15-30 minutes
Tools Used
Screwdriver, Adjustable Wrench, allen wrench
Parts Used
Simply remove the four screws holding the plastic shroud. Then loosen and remove the copper line from the exhaust valve assembly along with the four allen bolts which secure the assembly. Remove old assembly and replace with new assembly being careful to keep the same orientation. Simply assemble in reverse order and you are finished.
Did you find this story helpful?
Thanks for voting and helping fellow customers!
Reed valve went bad
Ken - January 6, 2016
👍 3 of 3 people found this instruction helpful
Tool Type
Compressor
Difficulty
Easy
Time
15-30 minutes
Tools Used
Wrench Set, Adjustable Wrench, Allen wrench
Parts Used
Very easy repair. Remove 4 Allen bolts, remove the filler line, pull off the head, remove defective reed valve, and replace with new one. Reverse removal order. Plug in, test.
Did you find this story helpful?
Thanks for voting and helping fellow customers!
Cylinder head gasket was leaking air
RICHARD - October 17, 2020
Tool Type
Compressor
Difficulty
Easy
Time
30-60 minutes
Tools Used
Screwdriver, Wrench Set
Parts Used
Took off protective rubber cover around on the cylinder head. Remove 4 screws holding head. Remove copper lines to cylinder head. Change gasket and reinstall. Started and check for air leaks.
Did you find this story helpful?
Thanks for voting and helping fellow customers!
Wouldnt build pressure
James - March 20, 2019
Tool Type
Compressor
Difficulty
Easy
Time
Less than 15 minutes
Tools Used
Wrench Set, allen wrench
Parts Used
Removed discharge line from pump
Used appropriate Allen key to remove exhaust cover
Removed old filter, replaced with new
And replaced exhaust reed valve section
While the repair was relatively easy, and to my eye somewhat necessary, I am saddened to confirm that this didn't fix the problem. It still won't build pressure.
Used appropriate Allen key to remove exhaust cover
Removed old filter, replaced with new
And replaced exhaust reed valve section
While the repair was relatively easy, and to my eye somewhat necessary, I am saddened to confirm that this didn't fix the problem. It still won't build pressure.
Did you find this story helpful?
Thanks for voting and helping fellow customers!
No air pressure to tank
Robert - December 27, 2018
Tool Type
Compressor
Difficulty
Easy
Time
15-30 minutes
Tools Used
Screwdriver, Wrench Set
Parts Used
Replaced exhaust valve assembly did not correct problem
Did you find this story helpful?
Thanks for voting and helping fellow customers!
Not pumping up to pressure
J. - July 3, 2017
👍 0 of 1 people found this instruction helpful
Tool Type
Compressor
Difficulty
Easy
Time
15-30 minutes
Tools Used
Screwdriver, Allen wrenches
Parts Used
Removed the cylinder head.
Removed the old exhaust valve
Installed the new exhaust valve
Screwed the cylinder head back on
Removed the old exhaust valve
Installed the new exhaust valve
Screwed the cylinder head back on
Did you find this story helpful?
Thanks for voting and helping fellow customers!
Wouldn't build pressure
Ed - March 1, 2017
👍 0 of 1 people found this instruction helpful
Tool Type
Compressor
Difficulty
Easy
Time
15-30 minutes
Tools Used
Screwdriver, Pliers, Allen wrench
Remove plastic cover
Remove head , valve, gasket
Pull off cylinder
Loosen rod from crankshaft and remove
Replace with new rod assembly
Replace cylinder
Position valve, gasket on top of cylinder
Install head
Install plastic cover
Remove head , valve, gasket
Pull off cylinder
Loosen rod from crankshaft and remove
Replace with new rod assembly
Replace cylinder
Position valve, gasket on top of cylinder
Install head
Install plastic cover
Did you find this story helpful?
Thanks for voting and helping fellow customers!
OEM stands for Original Equipment Manufacturer and means the part you’re buying is sourced directly from the manufacturer who made your product. At eReplacementParts, we sell only genuine OEM parts, guaranteeing the part you’re purchasing is of better design and of higher quality than aftermarket parts.
Our product descriptions are a combination of data sourced directly from the manufacturers who made your product as well as content researched and curated by our content & customer service teams. This content is edited and reviewed internally before being made public to customers.
Our customer service team are at the ready daily to answer your part and product questions. We have a dedicated staff with decades of collective experience in helping customers just like you purchase parts to repair their products.
All our part reviews are solicited directly from other customers who have purchased this exact part. While we moderate these reviews for profanity, offensive language or personally identifiable information, these reviews are posted exactly as submitted and no alterations are made by our team.
All our customer repair instructions are solicited directly from other customers just like you who have purchased and replaced this exact part. While we moderate these reviews for profanity, offensive language or personally identifiable information, these reviews are posted exactly as submitted and no alterations are made by our team.
Based on data from past customer purchasing behaviors, these parts are most commonly purchased together along with the part you are viewing. These parts may be necessary or helpful to replace to complete your current repair.
All our installation videos are created and produced in collaboration with our in-house repair technician, Mark Sodja, who has helped millions of eReplacementParts customers over the last 13 years repair their products. Mark has years of experience in selling and repairing both commercial and residential products with a specialty in gas-powered equipment.
This data is collected from customers who submitted a repair instruction after replacing this exact part. Customers can rate how easy the repair was to complete and how long it took. We aggregate this data to provide a repair rating that allows customers to quickly determine the difficulty and time needed to perform their own repair.