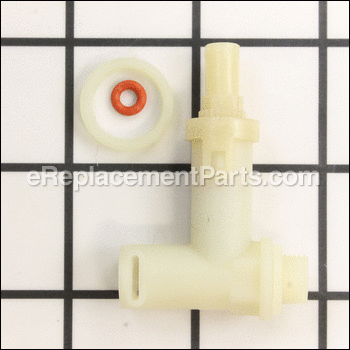
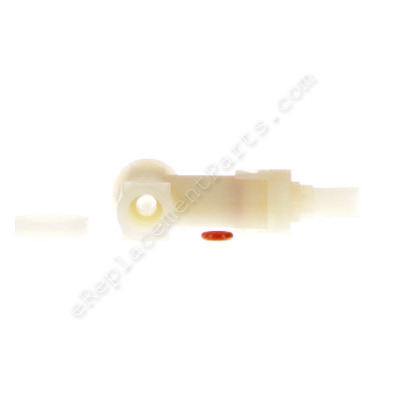
Coffee Valve Safety Kit SP0001676
OEM part for: Breville
Part Number: SP0001676
7 - 12 business days
Compatibility
This part will fit the following 1 machine
Breville
This item works with the following types of products:
- Espresso Parts
This part replaces obsolete part #: SP0013838, BES900XL/06.6, BES900XL06.6, BES980XL/09.6
Questions & Answers ?
Our customer Service team is at the ready daily to answer your part and product questions.

Ask our Team
We have a dedicated staff with decades of collective experience in helping customers just like you purchase parts to repair their products.
Does this fit my product?Questions & Answers for Coffee Valve Safety Kit
Customer Repair Instructions ?
All our customer repair instructions are solicited directly from other customers just like you who have purchased and replaced this exact part.
Very low pump pressure and volume and grinding noise from the start solenoid
Tool Type
Espresso
Difficulty
Easy
Time
30-60 minutes
Tools Used
Screwdriver, Torx bit wrench
Parts Used
The back covers are held on by phillips screws. Remove them and the two covers. This gives you access to the 4 phillips screws which hold the rubber vibration dampers that the pump sits in. Remove the two wires that plug into the pump (be sure to mark which is which) and also you'll need to desolder or cut the wire from the Thermal fuse. You can solder it back later. Disconnect the tube at the top of the pump by pulling the clip out. Be sure that the little o-ring and flat washer are not lost in the process of pulling the tube out. Check to see which order they are in the safety valve head.
I decided not to replace the entire pump since it would have required detaching the thermal fuse which is glued on the housing. I figured the problem was with the plastic pumping mechanism, not the electromagnet that drives it. It was a simple operation to take the plastic pump out of the electromagnet and swap in the new one. Once that was done, I just reversed the order and soldered the thermo fuse wire, ensuring I used a little heat clip on the wire to avoid over heating the insulation. I slid a heat shrink over it before soldering to insulate the joint.
The solenoid was easy to take out and replace. Just unplug the tube and remove the 4 phillips screws. Be careful not to damage the silicone gasket that is under the solenoid. I removed it and found quite a bit of corrosion under it. Seems they didn't do a good job of installing it in the factory and you could tell it leaked a bit and corroded the surface. I used fine emery paper to make it smooth. Also, be very careful not to drop the little metal tubes that fit into the solenoid behind the two small silicone disks. Install them, put the silicone gasket on the solenoid to keep them from dropping out then carefully put the part back and screw it down. Install the feed and overflow tubes and the wires and install the rear panels and top. Keep the rear panel screws loose until the top is placed on so that the lip of the top fits behind the top rear panel. Then tighten all the screws. After this operation, the machine worked like new. In fact, better than new. I put the pump in clean mode and it pulled 13 pounds in the cleaning cycle. The new solenoid works great. No more grinding sound when the button is pushed.
The Breville BES900 was making a loud pulsing noise when the espresso was pouring. The pressure gauge was also shuddering.
Tool Type
Espresso
Difficulty
Medium
Time
Less than 15 minutes
Tools Used
Pliers
Parts Used
2) Detached both tubes from the uppermost safety valve . You need pliers to detach the clips.
3) Unclip the left-hand plastic cap and unscrew the threaded tube. Its in about 6 turns, which sets the pressure release. Set these aside, now the whole part can turn anti-clockwise.
4) Replace it with a new one, put it back together and reconnect the tubes.
5) Reassemble.
6) Make a coffee !
Insufficient pressure to make espresso
Tool Type
Espresso
Difficulty
Medium
Time
30-60 minutes
Tools Used
Screwdriver, Pliers
Parts Used
2. Remove 2 screws from back of the unit and 2 recessed screws from under the front lip. Lift top cover off. It may be tethered with a ground strap. Set it to the side of the machine. Loosen 2 captive screws from the back of the unit and set the rear cover to the side.
3. Remove retainer clip from top of safety valve and disconnect outlet tube. If o-ring remains in pressure relief valve, pick it out with a small pick or jeweler's screwdriver and save.
4. Remove clamp from side of safety valve and disconnect pressure relief tube.
5. Unscrew safety valve and remove. Set old valve aside.
6. Screw replacement safety valve onto pump outlet. Continue to turn clockwise to orient pressure relief outlet toward pressure relief tube.
7. Re-attach pressure relief tube and secure clamp.
8. If o-ring was removed from old pressure relief valve in step 2, place it on outlet tube. Insert outlet tube into top of pressure relief valve and secure with retainer clip.
9. Test machine for function. If pressure is still inadequate, pump motor may need to be cleaned, rebuilt, or replaced.
10. Replace rear and top covers.
OEM stands for Original Equipment Manufacturer and means the part you’re buying is sourced directly from the manufacturer who made your product. At eReplacementParts, we sell only genuine OEM parts, guaranteeing the part you’re purchasing is of better design and of higher quality than aftermarket parts.
Our product descriptions are a combination of data sourced directly from the manufacturers who made your product as well as content researched and curated by our content & customer service teams. This content is edited and reviewed internally before being made public to customers.
Our customer service team are at the ready daily to answer your part and product questions. We have a dedicated staff with decades of collective experience in helping customers just like you purchase parts to repair their products.
All our part reviews are solicited directly from other customers who have purchased this exact part. While we moderate these reviews for profanity, offensive language or personally identifiable information, these reviews are posted exactly as submitted and no alterations are made by our team.
All our customer repair instructions are solicited directly from other customers just like you who have purchased and replaced this exact part. While we moderate these reviews for profanity, offensive language or personally identifiable information, these reviews are posted exactly as submitted and no alterations are made by our team.
Based on data from past customer purchasing behaviors, these parts are most commonly purchased together along with the part you are viewing. These parts may be necessary or helpful to replace to complete your current repair.
All our installation videos are created and produced in collaboration with our in-house repair technician, Mark Sodja, who has helped millions of eReplacementParts customers over the last 13 years repair their products. Mark has years of experience in selling and repairing both commercial and residential products with a specialty in gas-powered equipment.
This data is collected from customers who submitted a repair instruction after replacing this exact part. Customers can rate how easy the repair was to complete and how long it took. We aggregate this data to provide a repair rating that allows customers to quickly determine the difficulty and time needed to perform their own repair.


