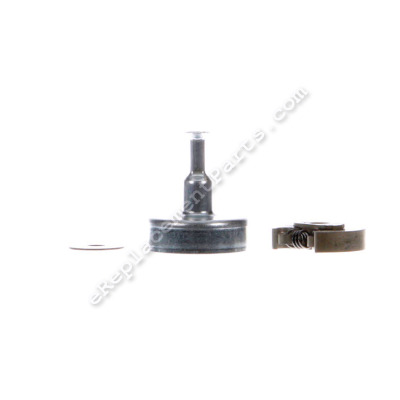


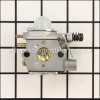
Genuine OEM replacement kit used on Gas Trimmers and Tillers. This part includes: Clutch Drum, Clutch, Clutch Washer and the Screw which has a left-handed thread. A centrifugal clutch is a part that uses centrifugal force to connect two concentric shafts, with the driving shaft nested inside the driven shaft. Today’s centrifugal clutches will function even when they shouldn’t, far beyond the point of when they need to be replaced. Keeping an eye on equipment performance will determine when the centrifugal clutch requires attention.
Clutch Asm Small 753-05860
OEM part for: MTD, Ryobi, Troy-Bilt, Bolens, Yard Man, Craftsman, Cub Cadet, Husky, Murray, Yard Machines
Part Number: 753-05860
$25.92
In Stock
Jump To:
Frequently Purchased Together ?


Compatibility
This Clutch Asm Small will fit the following 448 machines. Confirm this part works with your model, and view the detailed model diagrams and repair help we have to offer.
Ryobi
Troy-Bilt
Bolens
Yard Man
MTD
Craftsman
Cub Cadet
Husky
Murray
Yard Machines
Show More Compatible ModelsThis item works with the following types of products:
- Cultivator Parts
- Edger Parts
- Trimmer Parts
This part replaces obsolete part #: 753-08114, 791-181073, 791-182369
Repair Videos ?
Watch the Repair Video for
Clutch Asm Small

Customer Part Reviews ?
Average Rating (out of 5):
Click to filter by ratings:
5 stars
24
4 stars
1
3 stars
1
2 stars
0
1 stars
0
< PREV
- 1
- 2
- 3
Easy fix
Part fit perfectly and was easy to install
Guest -
July 1, 2023
Verified Purchase
Right part for the problem
Have used ereplacementparts multiple times and have been pleased with part and delivery each time. Especially appreciative of Mark’s video presentations for repairing problems. Recommend this company very highly.
Ronald -
May 24, 2023
Verified Purchase
Parts were delivered on time and good condition
Part were OEM repaired tools with no problems
Malcolm Ancrum -
April 18, 2023
Verified Purchase
Just as described.
Part is as described and arrived early.
Guest -
September 18, 2022
Verified Purchase
Good job
Everything went well
Guest -
April 1, 2022
Verified Purchase
good returns process
I had to return this assembly because it is the wrong size. However, the customer service group at ereplacementparts is always super helpful and I've been really impressed with the several times I've had to engage their assistance.
Walter -
August 12, 2021
Verified Purchase
worked as i expected
The part was exactly what i needed to make my weed whacker work like new. I received the part quickly and the installation was a breeze. W
The part was exactly what i needed to make my weed whacker work like brand new again. Received the part quickly and the installation was a breeze. Will buy all my parts from them.
Pat -
July 30, 2021
Verified Purchase
Just what I needed
Ordered part on Monday received it on Saturday. Put it in about 10 minutes, and I was back to trimming. Thanks for having the exact part and having an easy website to navigate to locate what I needed
Guest -
June 16, 2021
Verified Purchase
Easiest repair wver
The part was exactly what I needed. I am not mechanically inclined but easy to switch out and didn't have to go buy a new one. Literally save d me probably about $200.
Guest -
June 14, 2021
Verified Purchase
great product,great fast shipping
everything great,product,shipping
John -
October 9, 2020
Verified Purchase
Questions & Answers ?
Our customer Service team is at the ready daily to answer your part and product questions.

Ask our Team
We have a dedicated staff with decades of collective experience in helping customers just like you purchase parts to repair their products.
Does this fit my product?Questions & Answers for Clutch Asm Small
My weed eater cord will not pull allowing me to start the weed eater. Will this part fix my problem or do I need a new pull cord?
Velinda
for model number 316794470
asked on 2023-03-29
Hi Velinda,
Thank you for your question. If your cord will not pull/retract, the small clutch assembly may resolve the issue, but we would also recommend checking the starter spring, rope and pulley. These parts are part of the starter assembly for your model. We have included a link from our website that you may reference on how to check these parts, https://www.ereplacementparts.com/repair-center/lawn-equipment/trimmer/starter-rope-won't-retract/. Once you have determined the part you need, please call customer service. We look forward to hearing from you!
eReplacementParts Team March 29, 2023
Customer Repair Instructions ?
All our customer repair instructions are solicited directly from other customers just like you who have purchased and replaced this exact part.
Broken clutch springs
Mason - March 31, 2016
👍 48 of 56 people found this instruction helpful
Tool Type
Trimmer
Difficulty
Medium
Time
30-60 minutes
Tools Used
Screwdriver, Pliers, Socket set
Parts Used
There was a handy repair video on YouTube that explained every step of the process. I think it was from this website (90% positive). It answered the question of how to lock down the motor so you can remove the clutch. (spoiler-shove a short piece of rope into the spark plug hole). And then tap the clutch off with a screwdriver and hammer.
Did you find this story helpful?
Thanks for voting and helping fellow customers!
Clutch drum worn
Michael - May 24, 2016
👍 22 of 24 people found this instruction helpful
Tool Type
Trimmer
Difficulty
Medium
Time
30-60 minutes
Tools Used
Screwdriver, Torx Bits, hammer
Parts Used
Remove the clutch cover. remove the spark plug and place a section of rope into the cylinder with some remaining out side of the cylinder, this is to stop the engine from rotating. Remove the the clutch drum by removing the screw inside of it. Remove the clutch by striking the edge of it with a screwdriver and hammer. Install the new clutch and screw the clutch drum back on. Then screw the clutch cover back on. Remove the rope from the cylinder and replace the spark plug.
Did you find this story helpful?
Thanks for voting and helping fellow customers!
Locked up due to clutch coming apart
Alicia - July 2, 2016
👍 11 of 12 people found this instruction helpful
Tool Type
Trimmer
Difficulty
Easy
Time
15-30 minutes
Tools Used
Screwdriver, Adjustable Wrench, Allen wrench
Parts Used
1. Removed covers
2. Removed clutch piece wedged under housing
3. Removed housing with allen wrench
4. Watched your video took out spark plug and put rope in to stop piston;
5.used adjustable wrench to remove middle of clutch; 6. installed new clutch
7 put spark plug back in
8 put shafts back on motor
9 put housing back on
10. Started right up
Thank you for your prompt service and how to videos
Did you find this story helpful?
Thanks for voting and helping fellow customers!
Clutch assembly springs broke and came apart.
alfred - August 16, 2016
👍 8 of 8 people found this instruction helpful
Tool Type
Trimmer
Difficulty
Easy
Time
Less than 15 minutes
Tools Used
Screwdriver
1. Removed trimmer shaft.
2. Removed clutch cover.
3. Removed spark plug and inserted rope into cylinder to keep crank from spinning.
4. Removed old clutch and replaced with new.
5. Reversed steps 3,2,1.
Easy Peasy
2. Removed clutch cover.
3. Removed spark plug and inserted rope into cylinder to keep crank from spinning.
4. Removed old clutch and replaced with new.
5. Reversed steps 3,2,1.
Easy Peasy
Did you find this story helpful?
Thanks for voting and helping fellow customers!
Clutch assembly springs snapped internally
Kevin - June 8, 2017
👍 3 of 3 people found this instruction helpful
Tool Type
Trimmer
Difficulty
Easy
Time
15-30 minutes
Tools Used
Screwdriver, Adjustable Wrench, Allen wrench
1. Remove lower string assemble curved arm for easier positioning on work bench
2. Remove 1 set screw holding upper shaft to black clutch cover, loosen bolt and nut holding upper shaft to clutch cover, slowly pull shaft from black clutch cover.
3. Remove 3 screws securing the black outer cover and gently remove cover.Use care, wires and throttle cable remain attached.
4. Using Allen wrench,remove recessed screw holding clutch cover (silver in color) and pull off.
5. Clutch is screwed onto the shaft, left to loosen, right to tighten. I use a large Crescent wrench and a small screwdriver inserted in to the pull rope assembly to prevent the shaft from turning while loosening.
5. Reassemble in reverse order.
Note: When reinstalling the black outer clutch cover, look at the position of the wires and throttle cable, make sure they don't interfere with throttle handle, squeeze the throttle handle several times to insure smooth operation.
Did you find this story helpful?
Thanks for voting and helping fellow customers!
Bad clutch
jeffrey - September 15, 2016
👍 3 of 4 people found this instruction helpful
Tool Type
Trimmer
Difficulty
Medium
Time
30-60 minutes
Tools Used
Screwdriver, Hex Allen wrench
Parts Used
Removed trimmer head extension and replaced clutch assembly.
Did you find this story helpful?
Thanks for voting and helping fellow customers!
Clutch had wore out and come from together.
Kelly - July 18, 2016
👍 2 of 2 people found this instruction helpful
Tool Type
Trimmer
Difficulty
Medium
Time
15-30 minutes
Tools Used
Pliers, Torx bit driver.
Parts Used
Removed outer housing cover exposing the clutch assembly. Took t-20 torx to undo screw holding clutch cover in place. After exposing clutch took two pair of channel lock pliers to remove clutch that is threaded on. Removed threaded new clutch on and tightened put new clutch housing on and tightened screw to hold in place. Put cover back on tightened screws to hold in place and just like new.
Did you find this story helpful?
Thanks for voting and helping fellow customers!
Troy TB32EC Trimmer won't trim
Carlos - April 30, 2017
👍 2 of 3 people found this instruction helpful
Tool Type
Trimmer
Difficulty
Easy
Time
Less than 15 minutes
Tools Used
Screwdriver, Pliers, Piston stopper/spark remover/hex-screw driver/ pliers
Parts Used
1. Remove gas and spark plug
2. Use a piston stopper or use a small rope the size of the starter pull rope and insert into the
spark plug hole to stop piston from turning.
leave a long peace outside of the plug to pull it out when finish.
3. Remove 4 hex screws from the plastic outer clutch cover.
4. Unscrew hex screw from the center of clutch cap, cap comes off with screw
5. Use adjustable pliers to unscrew clutch..
6. Replace new parts in the reverse order, washer goes between clutch and clutch cover.
7. Remove rope and insert spark plug and add gas.
8. Prime it and started trimming.
Did you find this story helpful?
Thanks for voting and helping fellow customers!
Plastic on the pulley wore down.
alfred - June 29, 2016
👍 1 of 1 people found this instruction helpful
Tool Type
Cultivator
Difficulty
Hard
Time
30-60 minutes
Tools Used
Screwdriver, Pliers
I removed rear cover, removed the carburetor, unhooked throttle cable. Took off the clutch by binding the piston with a piece of rope. I took of starter, disconnected the wire. I let the starter rope feed back into the pulley to release the tension in the spring, then removed the tabs that hold the pulley in. Re-tension the spring, then put everything back together. The I removed the old clutch and reinstalled the new one.
I found out you don't need to take off the carb, if you just remove the throttle cable.
I found out you don't need to take off the carb, if you just remove the throttle cable.
Did you find this story helpful?
Thanks for voting and helping fellow customers!
Clutch was broken
Aaron - June 16, 2022
Tool Type
Trimmer
Difficulty
Easy
Time
15-30 minutes
Tools Used
Screwdriver
Parts Used
Easy
Did you find this story helpful?
Thanks for voting and helping fellow customers!
Load More Install Stories
OEM stands for Original Equipment Manufacturer and means the part you’re buying is sourced directly from the manufacturer who made your product. At eReplacementParts, we sell only genuine OEM parts, guaranteeing the part you’re purchasing is of better design and of higher quality than aftermarket parts.
Our product descriptions are a combination of data sourced directly from the manufacturers who made your product as well as content researched and curated by our content & customer service teams. This content is edited and reviewed internally before being made public to customers.
Our customer service team are at the ready daily to answer your part and product questions. We have a dedicated staff with decades of collective experience in helping customers just like you purchase parts to repair their products.
All our part reviews are solicited directly from other customers who have purchased this exact part. While we moderate these reviews for profanity, offensive language or personally identifiable information, these reviews are posted exactly as submitted and no alterations are made by our team.
All our customer repair instructions are solicited directly from other customers just like you who have purchased and replaced this exact part. While we moderate these reviews for profanity, offensive language or personally identifiable information, these reviews are posted exactly as submitted and no alterations are made by our team.
Based on data from past customer purchasing behaviors, these parts are most commonly purchased together along with the part you are viewing. These parts may be necessary or helpful to replace to complete your current repair.
All our installation videos are created and produced in collaboration with our in-house repair technician, Mark Sodja, who has helped millions of eReplacementParts customers over the last 13 years repair their products. Mark has years of experience in selling and repairing both commercial and residential products with a specialty in gas-powered equipment.
This data is collected from customers who submitted a repair instruction after replacing this exact part. Customers can rate how easy the repair was to complete and how long it took. We aggregate this data to provide a repair rating that allows customers to quickly determine the difficulty and time needed to perform their own repair.