
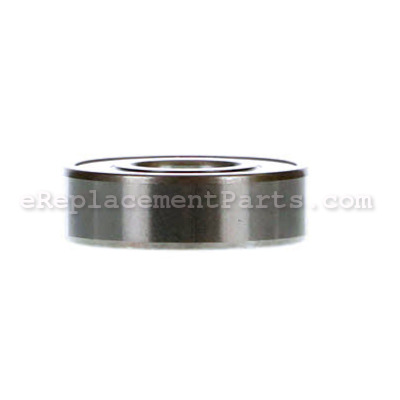


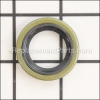
This is an authentic OEM part made by original manufacturer. It is compatible with various Skil and Bosch saws. Ball bearings serve as a buffer between metal parts. They also stabilize for proper positioning/direction of moving parts. Ball bearings need frequent replacement because of their high-wear function. This steel ball bearing is sold individually. Seals, o-rings, etc. are sold separately.
Ball Bearing 5700058006
OEM part for: Skil, Bosch
Part Number: 5700058006
$4.99
In Stock
Jump To:
Frequently Purchased Together ?


Compatibility
This Ball Bearing will fit the following 71 machines. Confirm this part works with your model, and view the detailed model diagrams and repair help we have to offer.
Skil
Bosch
Show More Compatible ModelsThis item works with the following types of products:
- Drill Parts
- Drill Press Parts
- Saw Parts
- Electric Drill Parts
- Circular Saw Parts
- Sander Parts
- Grinder Parts
Repair Videos ?
Watch the Repair Video for
Ball Bearing

Questions & Answers ?
Our customer Service team is at the ready daily to answer your part and product questions.

Ask our Team
We have a dedicated staff with decades of collective experience in helping customers just like you purchase parts to repair their products.
Does this fit my product?Questions & Answers for Ball Bearing
No questions have been asked yet
Customer Repair Instructions ?
All our customer repair instructions are solicited directly from other customers just like you who have purchased and replaced this exact part.
No grease, worn out worm gear.
Gary - January 23, 2018
👍 1 of 1 people found this instruction helpful
Tool Type
Circular Saw
Difficulty
Medium
Time
1-2 hours
Tools Used
Screwdriver, Pliers, Socket set, Wrench Set, Torx bits
Took it apart and put it back together. Your parts diagrams really helped out a lot.
Did you find this story helpful?
Thanks for voting and helping fellow customers!
Skilsaw would pop circuit breaker just hitting the switch
Scott - July 11, 2020
Tool Type
Circular Saw
Difficulty
Medium
Time
30-60 minutes
Tools Used
Screwdriver, Pliers, Socket set, Hammer
Found a youtube video. Someone else miss diagnosed the problem with the saw for it had a new trigger switch. The armature was bad as it had continuity from the winding bars to the shaft. Should be electrically isolated from each other. Replaced the armature but the saw would still trip the breaker. No schematic for the saw so back to youtube. found that the switch was miss wired. When you pull the trigger the switch makes contact side to side through the switch instead of front to back. Made the correction and saw works great.
Did you find this story helpful?
Thanks for voting and helping fellow customers!
someone let the oil run out on a worm drive saw which destroyed the gear set and welded the bearings
Rich - February 1, 2017
Tool Type
Circular Saw
Difficulty
Easy
Time
1-2 hours
Tools Used
Screwdriver, Socket set, Torx set
I completely disassembled the saw ,all except the field . identified the parts I needed to replace and ordered online. then I cleaned the gear housing making sure to get all the gear debris out. sand blasted the gear housing the field housing the saw guards and powder coated everything .cleaned and polished the armature contacts .as soon as the parts showed up reassembled it .PUT OIL IN IT and was good to go just like new
Did you find this story helpful?
Thanks for voting and helping fellow customers!
Armature commutator damaged by abrasive grit, have also done the replacement when the cooling fan shears off the armature
Thoms - September 8, 2016
Tool Type
Circular Saw
Difficulty
Hard
Time
1-2 hours
Tools Used
Screwdriver, Socket set, Wrench Set, Nutdriver, Adjustable Wrench, Bearing driver, armature jig (homemade), small impact driver
1. Drain oil from gearbox
2. Remove brushes
3. Remove guide plate
4. Remove large plastic plug from rear of saw
5. Remove nut behind plastic plug with impact driver while holding down while holding down saw blade stop..
6. Remove saw guide plate and front housing.
6. Press or drive armature out of gearbox brearing.
7. Install new bearing on commutator side of new armature using a simple jig to hold the armature.
8. Slide new armature into the gearbox housing.
9. Reinstall nut and carefully tighten with impact driver. This will pull the armature through the gearbox until it stops when the armature shoulder contacts the inner bearing race on the armature side of the gearbox. Take your time with this.
10. Reassemble saw.
11. Refill gearbox with oil.
12. Replace brushes.
Note: I've done this type of replacement a number of times on Skil circular saws without replacing the bearings on the gearbox side and not had any long term problems. But it is likely that Skil recommends replacing the two gearbox bearings as part of the procedure.
Did you find this story helpful?
Thanks for voting and helping fellow customers!
OEM stands for Original Equipment Manufacturer and means the part you’re buying is sourced directly from the manufacturer who made your product. At eReplacementParts, we sell only genuine OEM parts, guaranteeing the part you’re purchasing is of better design and of higher quality than aftermarket parts.
Our product descriptions are a combination of data sourced directly from the manufacturers who made your product as well as content researched and curated by our content & customer service teams. This content is edited and reviewed internally before being made public to customers.
Our customer service team are at the ready daily to answer your part and product questions. We have a dedicated staff with decades of collective experience in helping customers just like you purchase parts to repair their products.
All our part reviews are solicited directly from other customers who have purchased this exact part. While we moderate these reviews for profanity, offensive language or personally identifiable information, these reviews are posted exactly as submitted and no alterations are made by our team.
All our customer repair instructions are solicited directly from other customers just like you who have purchased and replaced this exact part. While we moderate these reviews for profanity, offensive language or personally identifiable information, these reviews are posted exactly as submitted and no alterations are made by our team.
Based on data from past customer purchasing behaviors, these parts are most commonly purchased together along with the part you are viewing. These parts may be necessary or helpful to replace to complete your current repair.
All our installation videos are created and produced in collaboration with our in-house repair technician, Mark Sodja, who has helped millions of eReplacementParts customers over the last 13 years repair their products. Mark has years of experience in selling and repairing both commercial and residential products with a specialty in gas-powered equipment.
This data is collected from customers who submitted a repair instruction after replacing this exact part. Customers can rate how easy the repair was to complete and how long it took. We aggregate this data to provide a repair rating that allows customers to quickly determine the difficulty and time needed to perform their own repair.