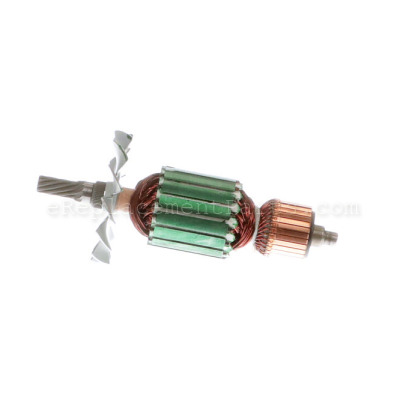
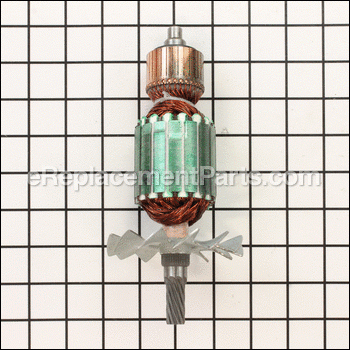
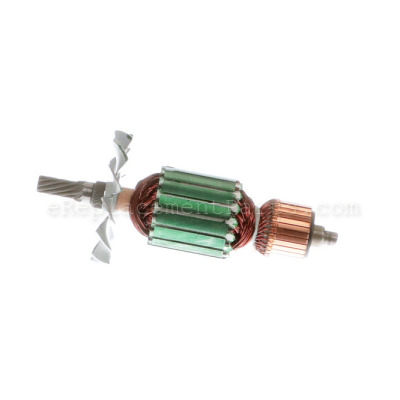
This replacement armature assembly is a genuine Bosch part, not an aftermarket alternative. It is specially manufactured table saw electric motors. Armature is one of the key components of an electric motor. Over time it will wear out and will need to be replaced. If you notice smoke or sparks coming from the vents on the back of your tool, most likely the tool was overloaded at some point. It is advised to replace both carbon brushes when replacing an armature, this will help to keep extend the life of the new assembly. This assembly includes the armature and the fan. Please note, the bearings and other parts are all sold separately.
To complete this repair you will need a screwdriver.
Armature 1619PA5591
OEM part for: Bosch
Part Number: 1619PA5591
Jump To:
Product Description ?
- Classification: Part
- Weight: 2.50 lbs.
- Shipping: Ships Worldwide
Frequently Purchased Together ?
Compatibility
This part will fit the following 12 machines
Bosch
This item works with the following types of products:
- Saw Parts
- Table Saw Parts
This part replaces obsolete part #: 2610996866, 1619P03279
Customer Part Reviews ?
- 1
Questions & Answers ?
Our customer Service team is at the ready daily to answer your part and product questions.

Ask our Team
We have a dedicated staff with decades of collective experience in helping customers just like you purchase parts to repair their products.
Does this fit my product?Questions & Answers for Armature
Customer Repair Instructions ?
All our customer repair instructions are solicited directly from other customers just like you who have purchased and replaced this exact part.
Loud noise, not sure which part fixed it, but didn't want to put it together twice
Tool Type
Table Saw
Difficulty
Medium
Time
30-60 minutes
Tools Used
Pliers, Nutdriver, Bering puller
Parts Used
Table saw lost power and sparks were coming out of the motor
Tool Type
Table Saw
Difficulty
Medium
Time
1-2 hours
Tools Used
Screwdriver, Pliers, Socket set
Bearing at back of motor had overheated and fused to the armature
Tool Type
Table Saw
Difficulty
Hard
Time
1-2 hours
Tools Used
Screwdriver, Pliers, Press, Allen Wrench and hammer
2. Removed saw blade arbor, Arber lock and Spur gear.
3. Removed motor brushes, housing and armature
4. Pressed new bearing on armature and slid rubber boot over bearing.
5. Assembled in reverse order of disassembly.
Rear bearing on armature froze up.
Tool Type
Table Saw
Difficulty
Medium
Time
1-2 hours
Tools Used
Screwdriver, Pliers, Socket set, Roto Zip
Replaced motor housing, armature, bearing, ball bearing, rubber ring, and carbon brushes.
Installed new motor onto saw.
Motor had very little torque, no cutting power. I had already replaced speed control and field windings.
Tool Type
Table Saw
Difficulty
Medium
Time
1-2 hours
Tools Used
Screwdriver, Allen wrench, vise, bearing puller
Parts Used
The vise and the bearing puller came in very handy for getting the bearings off old armature, without harming them with a hammer or vise grips.
You will be well served to record where the various sized screws came from, and have a magnetic bowl.
Saw ran at real slow rpm , no way it would cut anything
Tool Type
Table Saw
Difficulty
Medium
Time
More than 2 hours
Tools Used
Screwdriver, Pliers, Nutdriver
OEM stands for Original Equipment Manufacturer and means the part you’re buying is sourced directly from the manufacturer who made your product. At eReplacementParts, we sell only genuine OEM parts, guaranteeing the part you’re purchasing is of better design and of higher quality than aftermarket parts.
Our product descriptions are a combination of data sourced directly from the manufacturers who made your product as well as content researched and curated by our content & customer service teams. This content is edited and reviewed internally before being made public to customers.
Our customer service team are at the ready daily to answer your part and product questions. We have a dedicated staff with decades of collective experience in helping customers just like you purchase parts to repair their products.
All our part reviews are solicited directly from other customers who have purchased this exact part. While we moderate these reviews for profanity, offensive language or personally identifiable information, these reviews are posted exactly as submitted and no alterations are made by our team.
All our customer repair instructions are solicited directly from other customers just like you who have purchased and replaced this exact part. While we moderate these reviews for profanity, offensive language or personally identifiable information, these reviews are posted exactly as submitted and no alterations are made by our team.
Based on data from past customer purchasing behaviors, these parts are most commonly purchased together along with the part you are viewing. These parts may be necessary or helpful to replace to complete your current repair.
All our installation videos are created and produced in collaboration with our in-house repair technician, Mark Sodja, who has helped millions of eReplacementParts customers over the last 13 years repair their products. Mark has years of experience in selling and repairing both commercial and residential products with a specialty in gas-powered equipment.
This data is collected from customers who submitted a repair instruction after replacing this exact part. Customers can rate how easy the repair was to complete and how long it took. We aggregate this data to provide a repair rating that allows customers to quickly determine the difficulty and time needed to perform their own repair.

