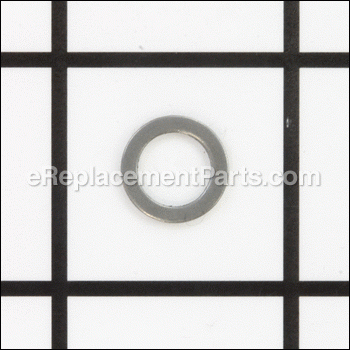
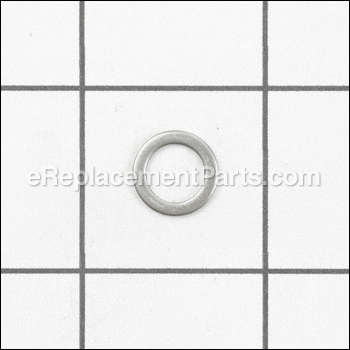
This is an OEM part sourced directly from the manufacturer. The plain washer is commonly found in power tools from Black & Decker, such as drills, hedge trimmers, and blower vacs. This part is made of metal, and may be found in various locations in the machine, depending on model. Please be aware that there are different washers used in the machine. Refer to the parts diagram to be sure of ordering the correct part. You may require a screwdriver, wrench, or pliers when replacing this item. The plain washer is available as an individual replacement part.
Washer,plain 148902-00
OEM part for: DeWALT, Black and Decker
Part Number: 148902-00
Jump To:
Frequently Purchased Together ?
Compatibility
This Washer,plain will fit the following 158 machines. Confirm this part works with your model, and view the detailed model diagrams and repair help we have to offer.
Black and Decker
Show More Compatible ModelsThis item works with the following types of products:
- Drill Parts
- Blower Parts
- Hedge Trimmer Parts
- Trimmer Parts
- Hammer Drill Parts
- Saw Parts
- Sander Parts
This part replaces obsolete part #: 609340-00
Questions & Answers ?
Our customer Service team is at the ready daily to answer your part and product questions.

Ask our Team
We have a dedicated staff with decades of collective experience in helping customers just like you purchase parts to repair their products.
Does this fit my product?Questions & Answers for Washer,plain
Customer Repair Instructions ?
All our customer repair instructions are solicited directly from other customers just like you who have purchased and replaced this exact part.
Blower fan badly chewed up.
Tool Type
Blower
Difficulty
Easy
Time
Less than 15 minutes
Tools Used
Socket set
Hedge trimmer blade stopped oscillating.
Tool Type
Hedge Trimmer
Difficulty
Easy
Time
30-60 minutes
Tools Used
Screwdriver, Latex gloves and zip lock bag
2. Remove all screws. Screw has star and blade slot.
3. Separate two halves.
4. Use latex gloves.
5. Remove all parts from the motor to the blade gear.
6. Remove the grease that is contaminated with iron fillings from the stripped gear.
7. Add half the tube of new grease.
8. Starting at motor, assemble the new parts, slide them into place.
9. Add the remaining grease.
10. At this point, I replaced the switch lock.
11. Assemble the halves and replaces the screws.
The screws are self threading. Turn the screw to the left to feel a little click. Tighten screw.
12. Replace the blade guard and handle.
13. Clean the blade and lubricate it.
14. Test to verify the Hedge Trimmer is running properly.
The plastic clamshell housing cracked and a hole formed, allowing leaves, rocks, sticks, etc. to fly out instead of going into the vac bag.
Tool Type
Blower
Difficulty
Easy
Time
15-30 minutes
Tools Used
Screwdriver, Socket set, Required a Torx T15 long-shaft screwdriver
2. Removed the hard plastic "fan" that shreds the leaves, etc. This required removing the plastic nut that holds it on, which I did using my socket set.
3. Put the new fan on after recycling the old one, screwing on a new plastic nut with my socket wrench.
4. Fit the old vacuum tube, which was not damaged, into the new clamshell housing and reassembled the clamshell using the original screws, which were all in excellent condition.
5. Cleaned off the old clamshell housing and put it into the recycling bin.
6. All done, literally as good as new, in about 20 minutes.
twine wrapped aroung fan
Tool Type
Blower
Difficulty
Easy
Time
15-30 minutes
Tools Used
Wrench Set
Parts Used
Leaf vac suction was poor.
Tool Type
Blower
Difficulty
Medium
Time
Less than 15 minutes
Tools Used
Screwdriver, Socket set
2. Removed the nut - THIS IS A REVERSE THREAD NUT!
3. Removed the fan.
4. Replaced the fan.
5. Replaced the nut - I STRIPPED THREAD ON OLD NUT BY TRYING TO TURN COUNTER CLOCKWISE ON REMOVAL
6. Replaced the shroud.
OEM stands for Original Equipment Manufacturer and means the part you’re buying is sourced directly from the manufacturer who made your product. At eReplacementParts, we sell only genuine OEM parts, guaranteeing the part you’re purchasing is of better design and of higher quality than aftermarket parts.
Our product descriptions are a combination of data sourced directly from the manufacturers who made your product as well as content researched and curated by our content & customer service teams. This content is edited and reviewed internally before being made public to customers.
Our customer service team are at the ready daily to answer your part and product questions. We have a dedicated staff with decades of collective experience in helping customers just like you purchase parts to repair their products.
All our part reviews are solicited directly from other customers who have purchased this exact part. While we moderate these reviews for profanity, offensive language or personally identifiable information, these reviews are posted exactly as submitted and no alterations are made by our team.
All our customer repair instructions are solicited directly from other customers just like you who have purchased and replaced this exact part. While we moderate these reviews for profanity, offensive language or personally identifiable information, these reviews are posted exactly as submitted and no alterations are made by our team.
Based on data from past customer purchasing behaviors, these parts are most commonly purchased together along with the part you are viewing. These parts may be necessary or helpful to replace to complete your current repair.
All our installation videos are created and produced in collaboration with our in-house repair technician, Mark Sodja, who has helped millions of eReplacementParts customers over the last 13 years repair their products. Mark has years of experience in selling and repairing both commercial and residential products with a specialty in gas-powered equipment.
This data is collected from customers who submitted a repair instruction after replacing this exact part. Customers can rate how easy the repair was to complete and how long it took. We aggregate this data to provide a repair rating that allows customers to quickly determine the difficulty and time needed to perform their own repair.


